Brian does Ridders flame eater

Home Model Engine Machinist Forum

Help Support Home Model Engine Machinist Forum:

This site may earn a commission from merchant affiliate links, including eBay, Amazon, and others.

Brian Rupnow

Design Engineer
Project of the Month Winner
Joined
May 23, 2008
Messages
15,249
Reaction score
8,525
Location
Barrie, Ontario, Canada
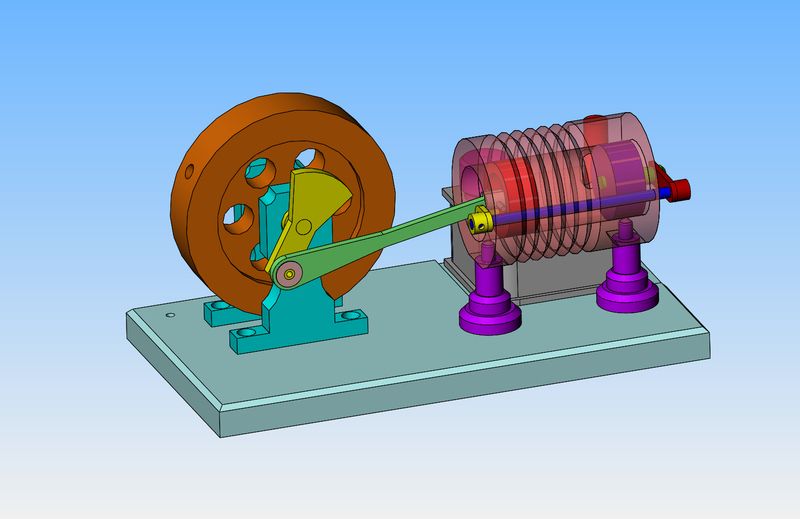
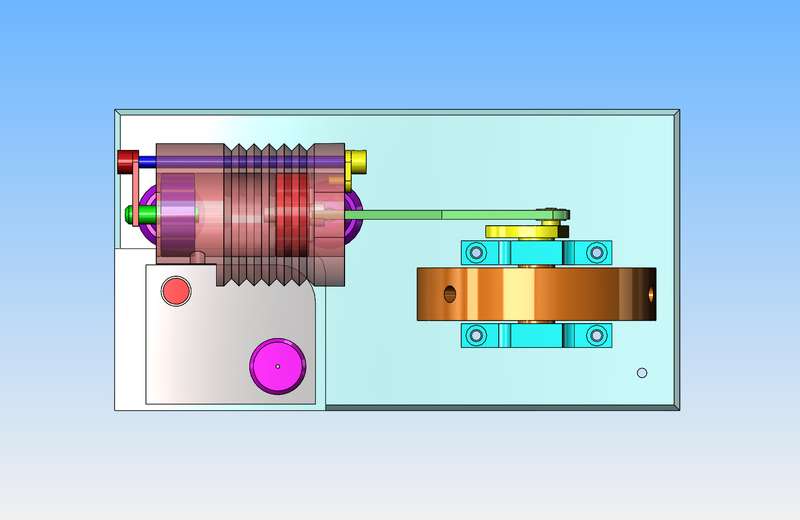
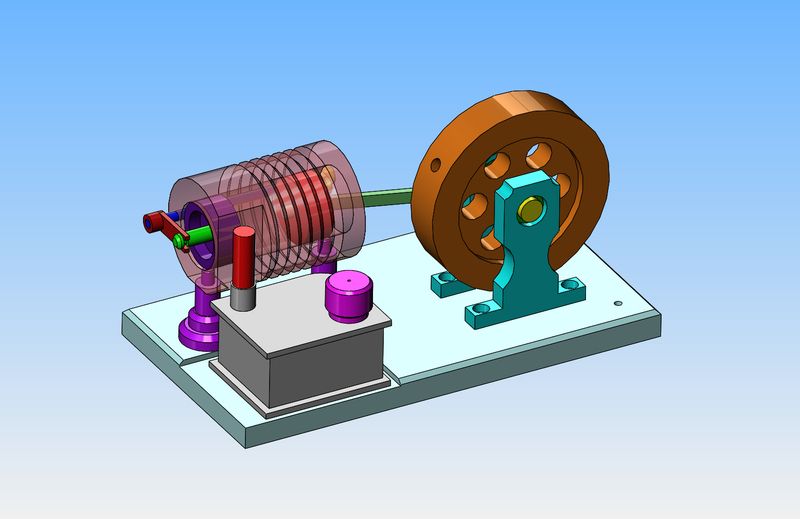
I ordered up the newest Jan Ridder flame-eater design, and have modeled it all this morning. I have changed metric plate and shaft sizes to the nearest imperial (inch") size that is available and commonly used. This involved juggling a few parts around to compensate for minor differences in dimensions. This is the new design using a stainless cylinder and graphite piston and internal valve. These flame eater engines are notoriously dirty due to soot in the flame being sucked into the cylinder and resulting condensation. I am not in any great hurry to make this engine, but I know how that has worked out in the past. The amount of time I spend in my machine shop is in direct proportion to how much "real" work I have in any given week. ---Brian
Z6hub4.jpg

C5MGlt.jpg
 
Oh come on Brian. You'll have this thing done in no time. When you start a project, you tackle it like a fly on stink. ;)

...Ved.
 
Brian, I did one of these a few years ago. It works but was very tempremental to get going. If I can do it I'm sure yours will be up and running in no time. Good luck with the build. My effort ***HERE*** a rather poor video I'm afraid...
John
 
Last edited:
Brian, I did one of these a few years ago. It works but was very tempremental to get going. If I can do it I'm sure yours will be up and running in no time. Good luck with the build. My effort ***HERE*** a rather poor video I'm afraid...
John

John, I see you used brass for the internal valve. What material for the piston?

Brian... same question.

Russ
 
Started off with cast iron for both valve and piston but with all the condensation it quickly rusted/gummed up. Changed both the valve and piston to brass which is an improvement. Jan reccomends graphite but I never tried this. The cylinder is stainless (no idea what grade I happened to have a bit the right size!) machined quite well though, I managed to make the flame hole too long, confused end and centre measurements, probably another reason for it being tempremental. This is the early version, the later one has a larger bore.
John
 
One surprising thing about this engine is how few parts it actually has. I have never worked with machineable graphite, in fact right at the moment I don't even know where to get it, but like everything else, I will find out as I go along.
ed75Il.jpg
 
One surprising thing about this engine is how few parts it actually has. I have never worked with machineable graphite, in fact right at the moment I don't even know where to get it, but like everything else, I will find out as I go along.
ed75Il.jpg
For what it's worth, I just ordered a 1.250 X 12 inch bar of JC3 graphite from this outfit: http://beckergraphite.com/stock-graphite-rods/
$16.00 plus shipping... You have to place order by phone.
Russ
 
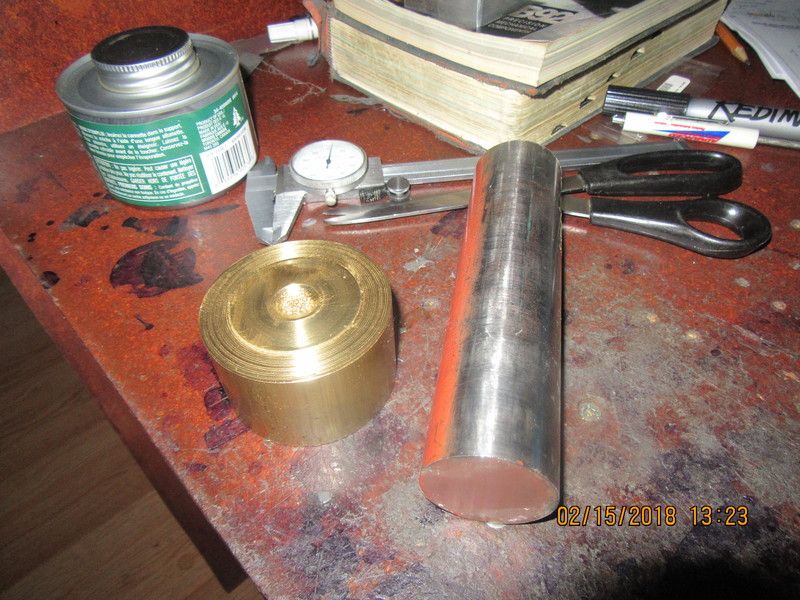
I have enough brass left over from the power cylinder on the Stirling engine to make a flywheel for the flame eater engine. I picked up 6" of 1 1/2" 316 s.s. for $14 this morning. I also picked up some "real" work today, so now I get to do the great balancing act.
ONaSyC.jpg
 
Thanks guys--Remember, I am in Ontario, Canada and if I shop out of USA I pay killer shipping charges and dollar differential.
 
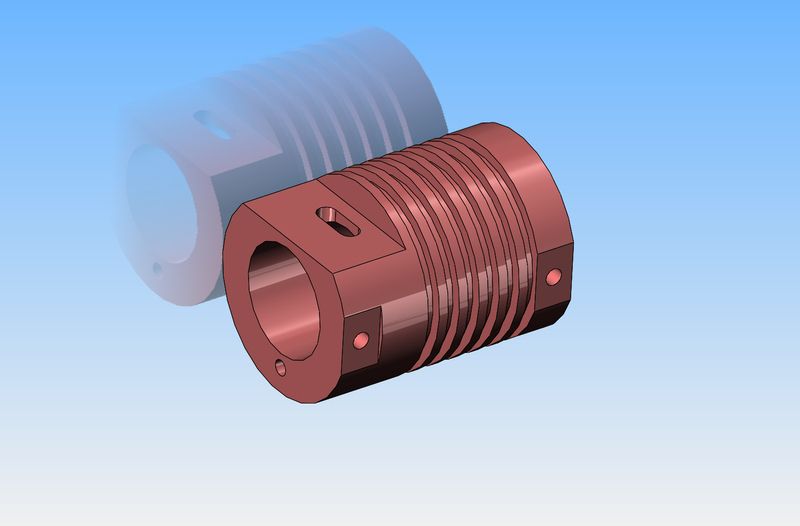
I called my bearing supplier today to check and make sure that the metric bearings were available. They were, so I ordered them--there is about a 5 day delivery because of heading into the long weekend here. I also changed the exterior shape of the cylinder. The way Jan had it shown would require a form tool to make the V shaped cooling fins, so I changed them to conventional cooling fins that can be made with a parting off tool. I have my lump of flywheel brass up in the lathe, and will probably finish the flywheel tomorrow.
OamhKg.jpg
 
I have a couple of thoughts from when I built this engine if you want them Brian - no charge at all. Now bear in mind this was my first ever engine so I might have created my own problems, but the 3mm valve rod hole gave me fits. I didn't have a long enough bit to do the whole length of the hole at once so I had to come in from each end, resulting in a bit of misalignment and lots of hassle getting the rod to move smoothly. Perhaps now, even with access to longer bits, I'd think about drilling the hole a little larger and bushing each end to reduce dreaded friction.

The other thing I thought about was the travel of the valve. If you let it move down the bore any further than what it needs to achieve a seal, you're wasting precious vacuum, plus power to drive it back open. If I was making it again I'd make sure the valve moved the absolute minimum amount to achieve seal for maximum power.

I could write a whole story about machining the graphite but I'm thinking most of the issues there were lack of experience which won't be a problem for you. Good luck with the build, I'm sure you'll have less problem with it than I did.
 
... the 3mm valve rod hole gave me fits. I didn't have a long enough bit to do the whole length of the hole at once so I had to come in from each end, resulting in a bit of misalignment and lots of hassle getting the rod to move smoothly. Perhaps now, even with access to longer bits, I'd think about drilling the hole a little larger and bushing each end to reduce dreaded friction...

I had similar problem, on mine the hole had to go through all the fins and drifted off-line. I made the hole larger and did indeed put a small brass bush at either end, much less friction.

John
 
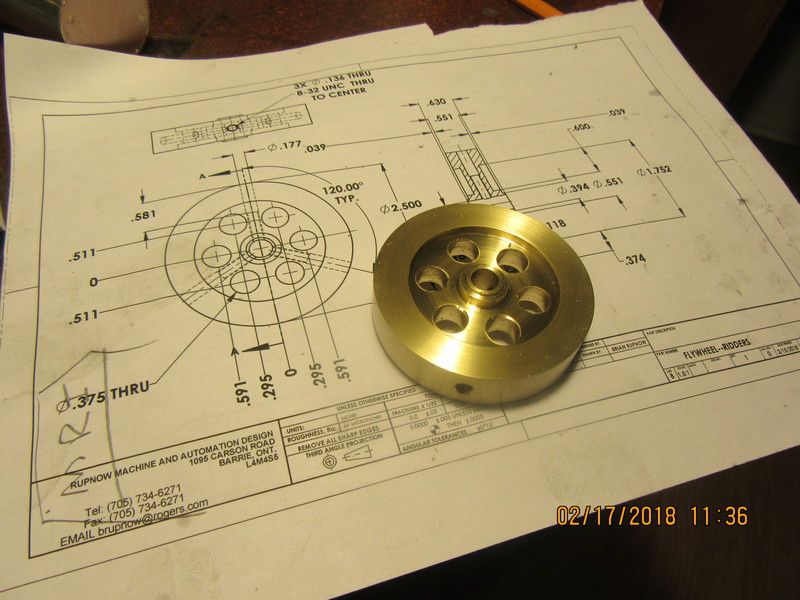
This mornings work yields a pretty little brass flywheel. The best thing about it was that the material was "left over" from the Stirling engine. I try and salvage every little short left over piece of material that I can.
WJ3iPw.jpg
 

Latest posts

Back
Top