Brian builds a Corliss

Home Model Engine Machinist Forum

Help Support Home Model Engine Machinist Forum:

This site may earn a commission from merchant affiliate links, including eBay, Amazon, and others.

Brian Rupnow

Design Engineer
Project of the Month Winner
Joined
May 23, 2008
Messages
15,250
Reaction score
8,532
Location
Barrie, Ontario, Canada
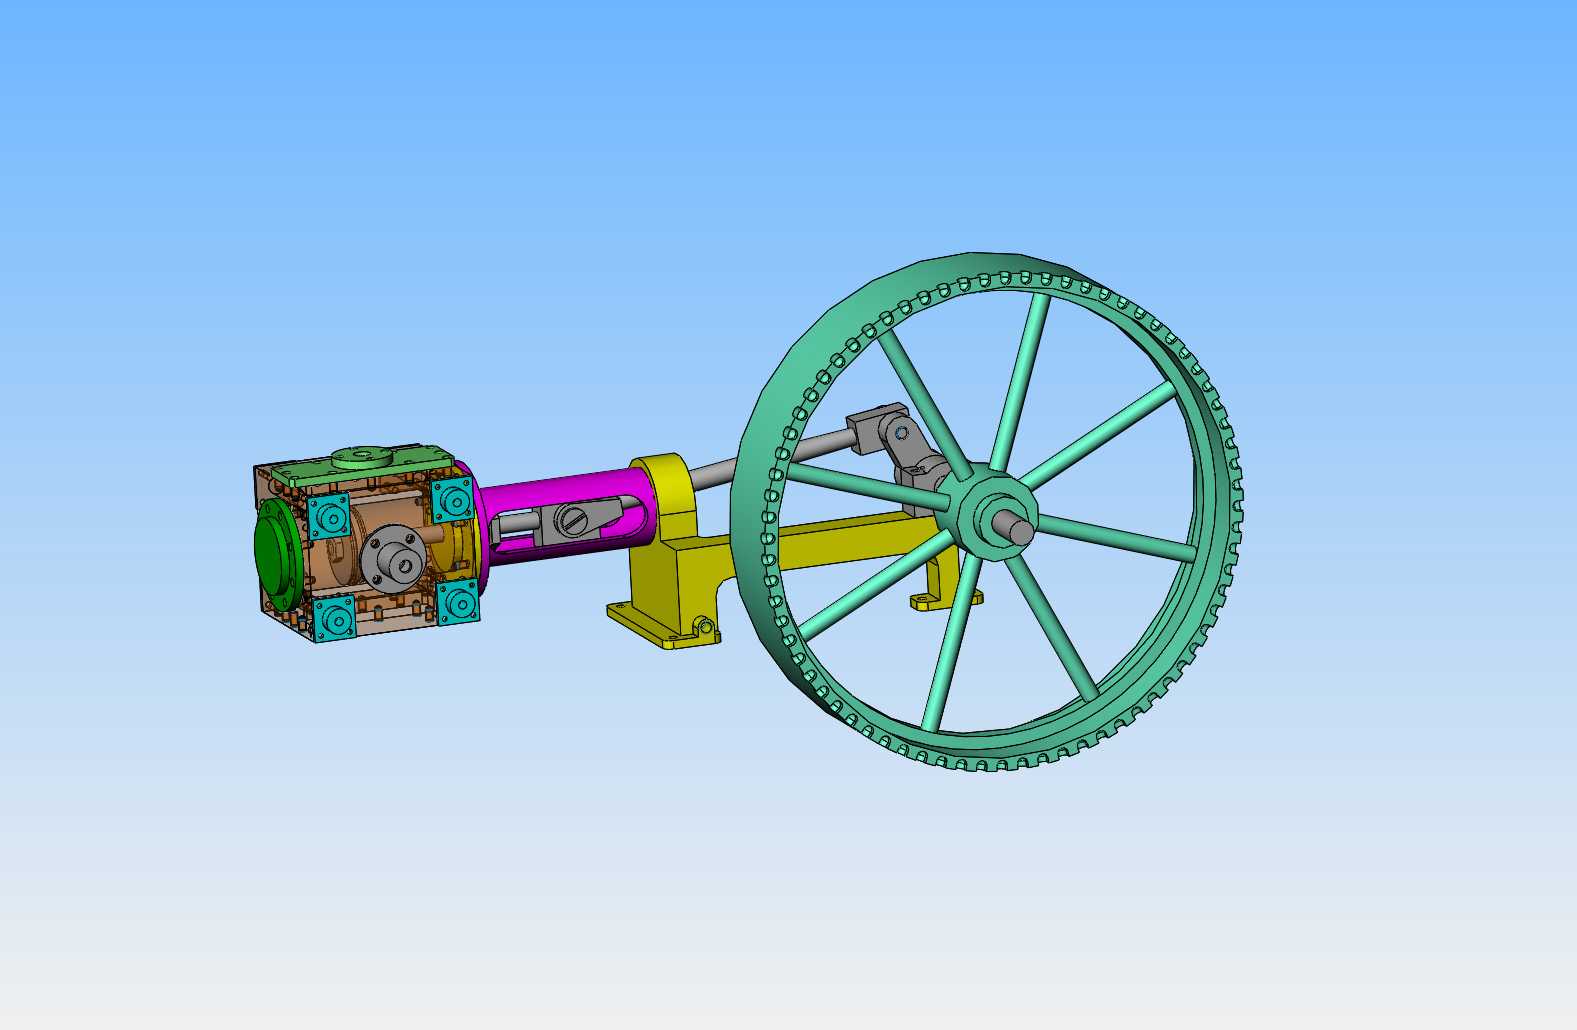
We're half-way thru February and I need to build something. The Corliss steam engine is a very interesting design, and it seems that there are two designs available on the net. One is as per the original full size Corliss engine, with two auxiliary "dashpot" cylinders to aid in closing (or maybe opening) the intake valves. The intake valve mechanisms have a complex design, incorporating a two piece rotationally slotted mechanism which works with these "dashpot" cylinders.---Then there is the simplified version, which does not have the dashpot cylinders nor the complex mechanism on the intake valve apparatus. Instead, it has two adjustable links driving the intake valving and two adjustable links driving the exhaust valve mechanism. I will be building the second simplified version. A gentleman was kind enough to send me a 3D assembly of the second type of Corliss engine and I will be revising the design to suit my own fancy. This is the engine as it was sent to me. The first obvious change I see is that all 4 of the bearings for the valve shafts are using 1/16" diameter hex head bolts. These will be upgraded to #4 socket head capscrews. I like the look of socket head capscrews better, and I seriously doubt that I could drill and tap sixteen 1/16" diameter threaded holes without breaking off the tap. Stay tuned---it should be an interesting journey.---Brian
F8I43a.jpg
 
Last edited:
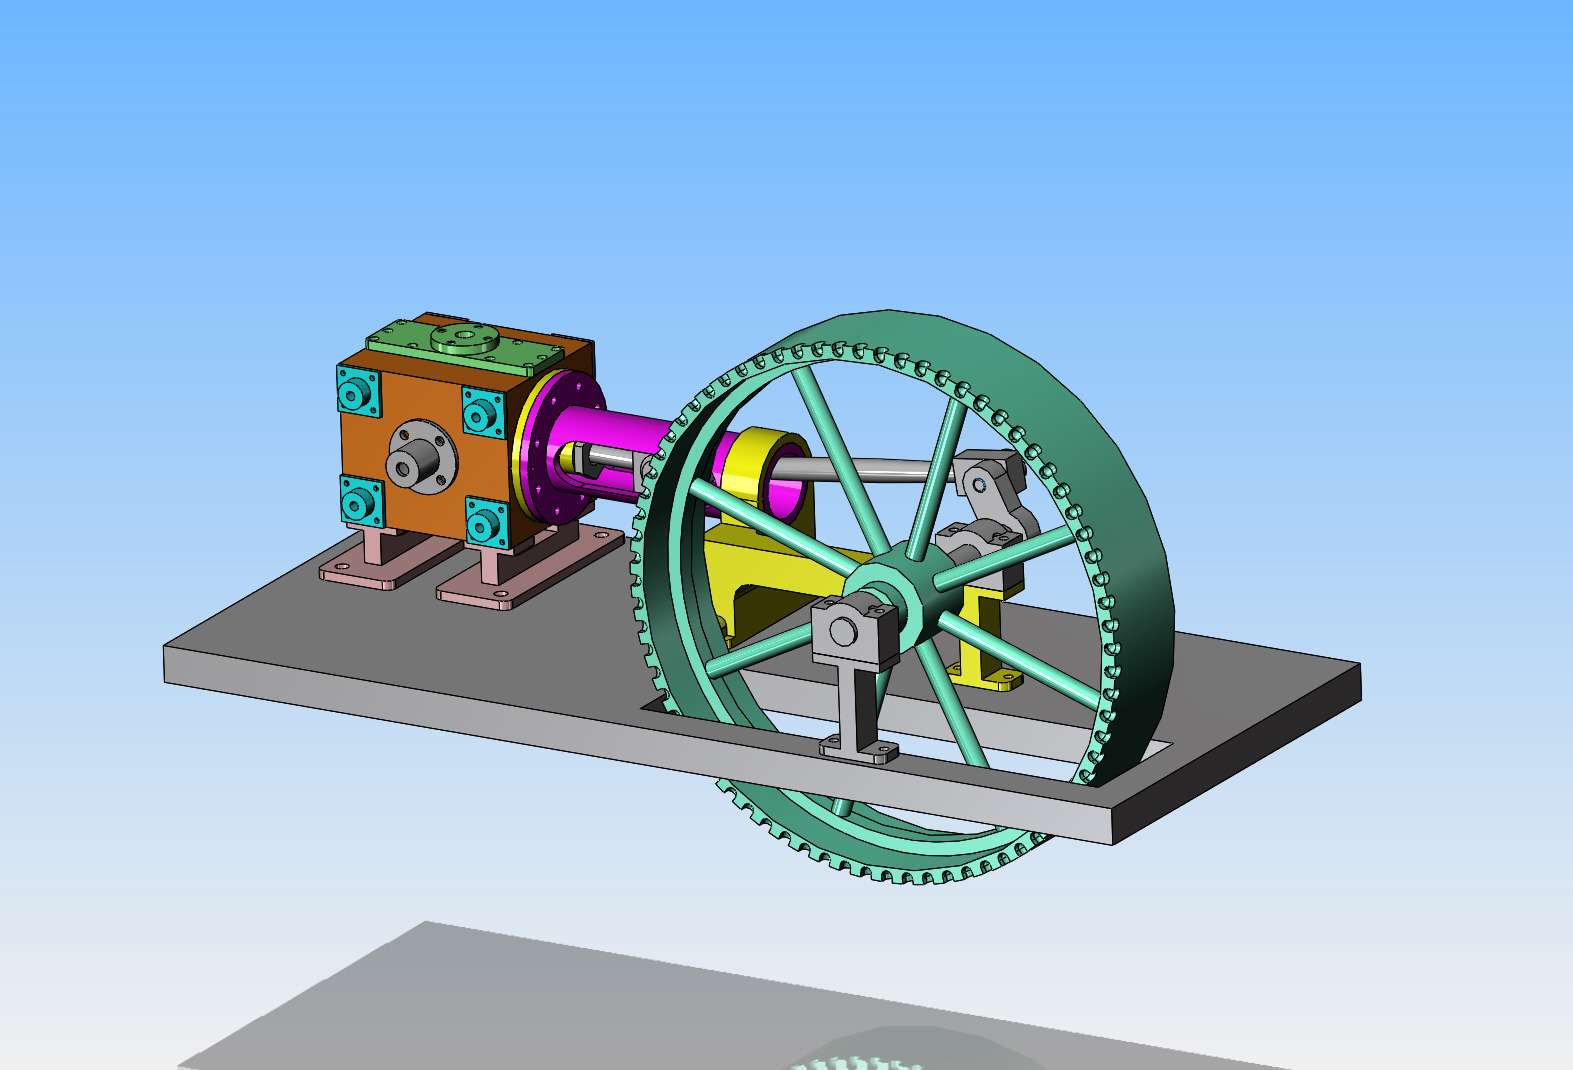
I have built quite a few steam engines, but they all had the more conventional slide valve on the cylinder. This one will be something totally new for me. When I import a model that was made in some other software than mine, every individual component has to be fixed in place, as none of the mates that position the parts in relationship to one and other get imported. And since this is something totally new to me and was never built by the man who sent me the design, I have to basically recreate the entire engine from parts to which I add all of the mates. This lets me rotate the flywheel and see the piston move thru the correct stroke to make sure that everything is correctly positioned. As I recreate the parts, I will also make any changes I want as I model them.
 
At this point in time I have opened a lot of the individual components and saved them into a new assembly file, adding proper "mates" as the parts were added. This shows me that as the flywheel and crankshaft rotate thru 360 degrees that the piston will travel correctly and remain centered in the cylinder. That is a GOOD thing. Tomorrow I will start changing the things I want to change, and add them into the assembly as I build it.
VFAvp5.jpg
 
Brian. Have you seen the Modelenginemaker.Com Corliss design and drawings? It is a good design and has been built a few times, it may be at least a help in figuring out bits of your design. There are also the Julius der Wall drawings at Agnes.... 1/16 Scale Pollit & Wigzell Tandem Compound Condensing Engine.
I am thinking about building a Corliss but would like to do the Uk version which uses two eccentrics one driving the inlets the other the exhausts but I am not sure I am up to the design challenges!
 
The flywheel shown on the original model is 7 1/4" diameter. The largest piece of pipe I have is only 6" diameter. Before I do any actual "building" I will call my steel suppliers tomorrow and see if anyone has a short length of larger diameter pipe. I don't care for the 2" thick baseplate on this existing model, but I have to decide on the flywheel diameter before I start changing anything.
 
The cylinder block is 2 1/8" square. I have a chunk of round aluminum here that is 3 1/2" diameter x 3" long, which would allow me to cut a 2 1/8" square out of it. I don't want to make the cylinder from aluminum because it has a high coefficient of friction, but I also have some 1 1/2" diameter cast iron from which I can make a thin walled sleeve and epoxy it into place as a liner. I have to look thru all the build threads on this. I seem to recall reading about someone who did the same thing.
 
Hi Brian. Thanks for starting a new project!
I suggest the cast iron sleeve is preset into the aluminium before boring. A drop of loctite makes good lubrication while fitting and will be a reet sod to dismantle. And cylinder ends should prevent the liner from moving anyway. Don't worry bout differential expansion, as the liner will be hot (steam) while the aluminium will be cooler.
K2
 
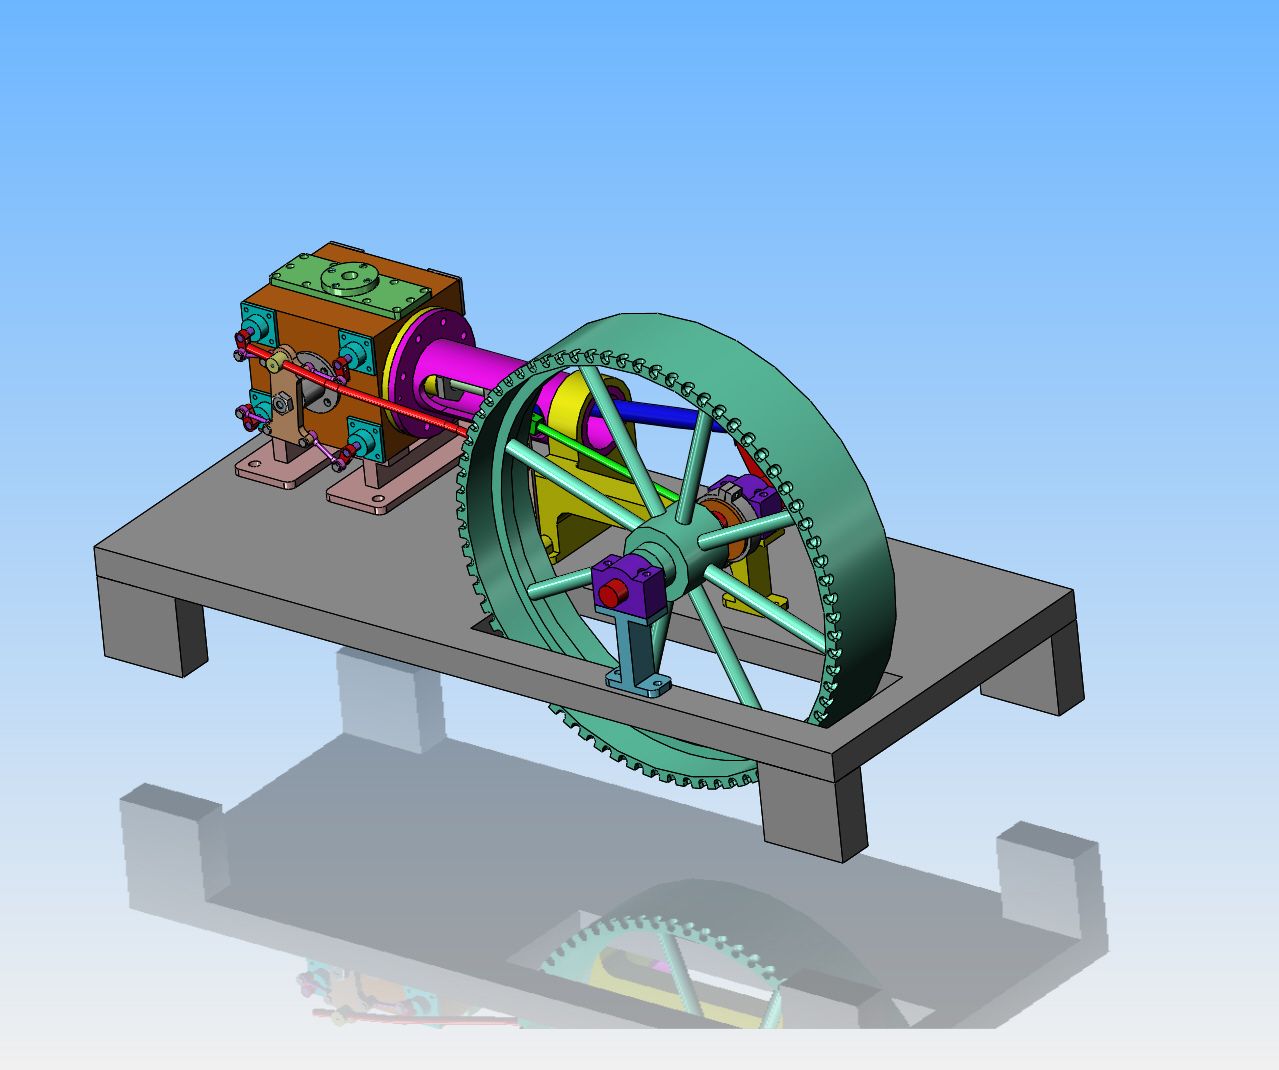
Probably I will go with a 1/2" thick baseplate supported by four legs (which I haven't shown yet). This will let me keep most of the mechanical components the same as originally designed on the MEM website.
zAq8os.jpg
 
Just for info, the complicated arrangement that allows variable and rapid closure of the inlet valves, is called 'trip gear'.
The valve is (usually) closed by a spring, and the dashpot arrests the motion so that the valve does not slam against the stop.

Some videos showing different configurations in operation:


Last edited:
Another thought, Brian: you probably don't want to run the Corliss valves in an aluminium cylinder block either. Lining the valves, and the intersections between the liners, would be a horrible proposition. May I recommend you to invest in a chunk of continuously cast square iron bar? Lovely stuff.
 
Yes Charles, I agree. I will have to call my suppliers Tuesday and see what a proper piece of iron would cost.
The Improved Greene is like a Corliss but has a different mechanism for the exhaust valves. I would like to find plans for it, but cannot find any. I have seen a coulple builds but that is all.
 
Brian,

I'm ready to watch this one. I like the way you keep adding skills and adding new projects that stress your abilities.

FYI, Perhaps you could get the stock for the flywheel rim from a large industrial caster. Some of the vendors for those even have downloadable CAD files of their products.

--ShopShoe
 
Good idea Shopshoe--We are in the middle of a long weekend here (family day) so all of my material sources are closed. Thank you for the idea. ---Brian
 
minh-thanh--One thing about building such a popular engine---There are lots of good build threads to study from other people who have built this engine before me. I won't be aiming for speed on this build, but I know that once I get going it is hard for me to slow down.---Brian
 
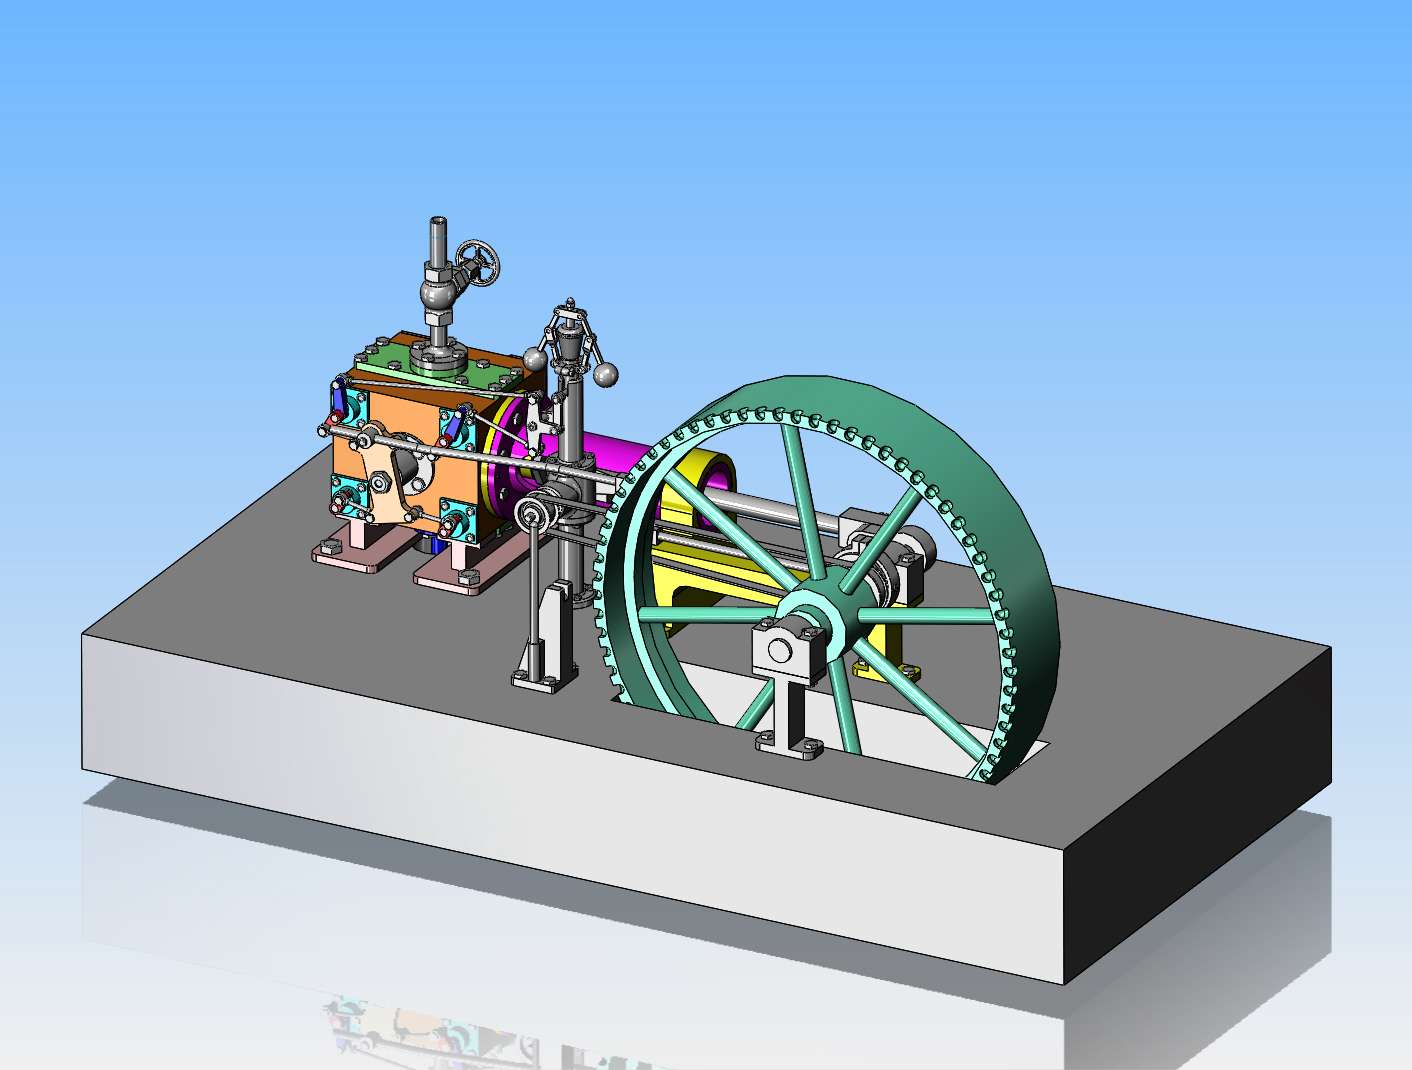
I have went thru all of the solid models and mated them correctly, and I must say, they are done very good. I haven't found any errors and everything fits where it should. I don't think I'm going to bother with the governor, and I will stick as closely as I can to what has already been done. Some of the smaller connecting pins may be different, but as for all the large components, I see no reason to change them.
m7fbkV.jpg
On the Ray/Coles Corliss, the governor is the most complicated part with lots of pikky little work. The next most difficult is not so bad at all: the system of the steam valves which is pretty picky also. The rest is pretty straight forward. One thing I likes about the valves is that you can time them separately with a locked lever. The valves themselves, all four, are somewhat picky as you must get the angles for the slots/holes nice and precise. The steam throttle has some nasty threading but otherwise OK. I'm still wondering about that "Improved Greene" engine. It looks like a better engine than a Corliss to me.
 

Latest posts

Back
Top