Wyvernish Build

Home Model Engine Machinist Forum

Help Support Home Model Engine Machinist Forum:

This site may earn a commission from merchant affiliate links, including eBay, Amazon, and others.
Hi Gus.
Good to see you back on the Wyvern build, I have the No 70 jet size on my engine and the needle just needs to be opened very slightly but I suppose the needle taper may have something to do with that, but the engine tends to run rich and I am beginning to think it needs more air through the carb, or a bit more lift on the fuel valve, something for future fiddling temperamental these little engines.

I would say a tapered keyway slot in the flywheel hub and fit the key to match the taper.

Mike.
 
Ya just can't beat an annealed copper gasket for heat transfer and seal as it will swell at a different rate than ali or cast iron and is reusable if it is re-annealed, just my 2 bob's worth.;D
 
Hi Mike,
I keep looking toward the carb as a part of the problem.
It was a fussy little thing to build, and I can't help but wonder about the lift valve, it must be working to some extent.
The needle and jet are quite replaceable, and need be I'll go smaller yet.

Gabby, You have a good point there and it will be much easier than
o-rings. I'll poke around and see what I have for copper sheet.

Gus

Hi Gus from another Gus(Gus Teng)

When you it up and runnin ,please post video.

Meanwhile Gus is trying to fix his lazybones to get cracking and building engines!!!:wall::wall::wall:
Market is flying,trying to make a wee bitty more.Its time to sell all and get out.:D:D:D. Planning/budgetting to buy a Proxxon PD400 Lathe.

Regards,

Gus Teng from faraway Singapore.
 
Gus
Sometimes you have to put the fishing pole away and get back to work:);)

Video, you bet, but it may be a while yet. It's almost summer.

GUS
 
Gus
Sometimes you have to put the fishing pole away and get back to work:);)

Video, you bet, but it may be a while yet. It's almost summer.

GUS


Bill of Material(BOM) for Webster Engine about done.
Material list will be emailed to a local supplier.

Will need your help with the ignition system. Plan to go old fashion contact point. Later will go into the Japanese Robin Engine Electronic Ignition. Would also consider going with Briggs & Stratton System.

Spending too much time watching the screen following stock prices and busy making $$$$.Kitty is about full. Time to stop.Come end May ,will hang up and go into machine shop again.

Been following your engine thread.

Fishing is Sat'd & Sun'd affair.

Bye, Take care.

Gus Teng.
 
Gus
Sometimes you have to put the fishing pole away and get back to work:);)

Video, you bet, but it may be a while yet. It's almost summer.

GUS


Hi GUS,

All righty. Material on order .Will collect this Friday. Time to unwind.

As I earlier said, Gus Teng will need your kind help with the ignition system,cylinder honing,piston ring machining/fitting/honing etc. Promise----" Take time to go from piece to piece with precision and quality in mind. Gus was not trained as a Tool Room Lathe Machinist. Two years or trade school and 32 years in the Air Compressors not best training.
My last honing excersise was a great failure.Impatience won the day,Gus was the vanquished.

Best Regards,

Gus Teng from faraway,hot & sunny Singapore.
 
Gus, good luck on the new engine, I'm hoping you'll post the build.

As predicated, my progress on the Wyvern has slowed dramatically, but not stopped.

I’ve been trying to catch up and FINISH a project I started over a year ago, which I have been posting on the Smokstak site.
http://www.smokstak.com/forum/showthread.php?t=119264

It’s a good thing that I documented it because from memory I was a little slow trying to pick up where I left off. Not good to stop in midstream.
Which I have begun to do with the Wyvern.

Keeping with that thought, I decided to go ahead and tackle the tapered inserts for the flywheels.
It makes me somewhat nervous to put the flywheels under the knife, but if I screw up I guess I can always buy new castings.

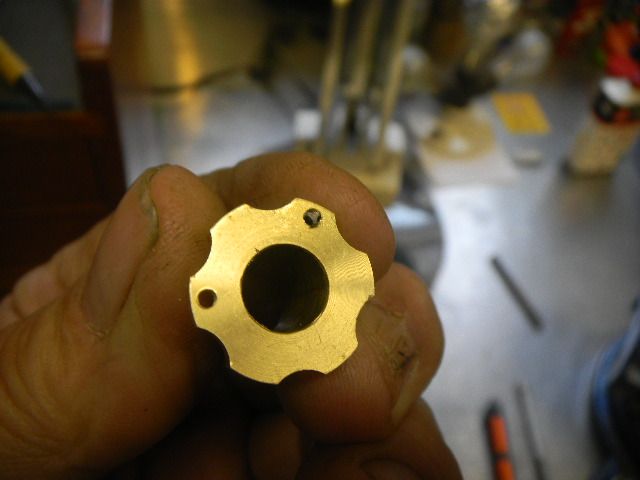
Because I don’t necessarily like the threaded nut on the flywheel as designed by Mr. Westbury, I decided to model these inserts similar to the QD type that are made for pulleys.
http://www.mcmaster.com/#quick-disconnect-bushings/=mvyn5a
I just happen to have one to model from.

My choice of material is brass, perhaps steel or SS would be better, but I think the brass should work and also be easier to machine.

Mine will not be quite as stubby and the angle of taper will be slightly more (I measured 2 deg. on the model but increased mine to 3). Don’t rightly know why, just me being me.
The Wyvern drawings call for 10 deg inclusive which deciphers to 5deg, so I just compromised a little.

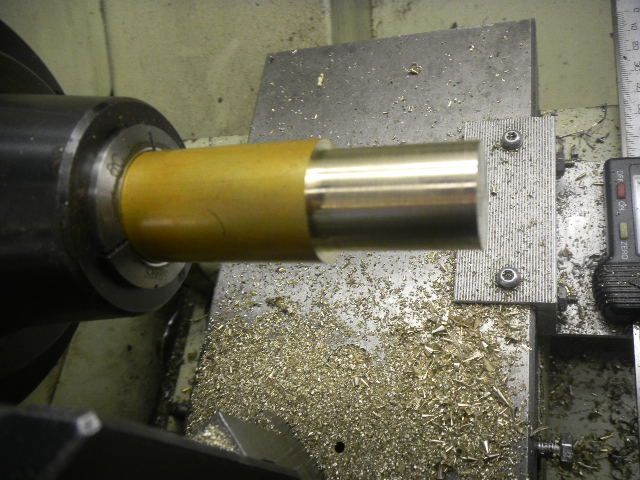
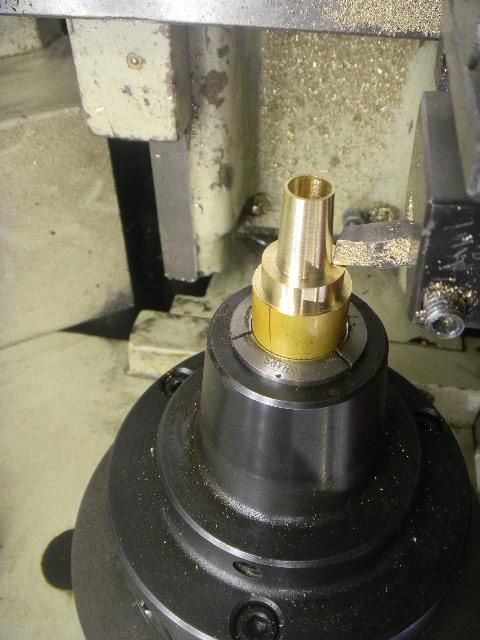
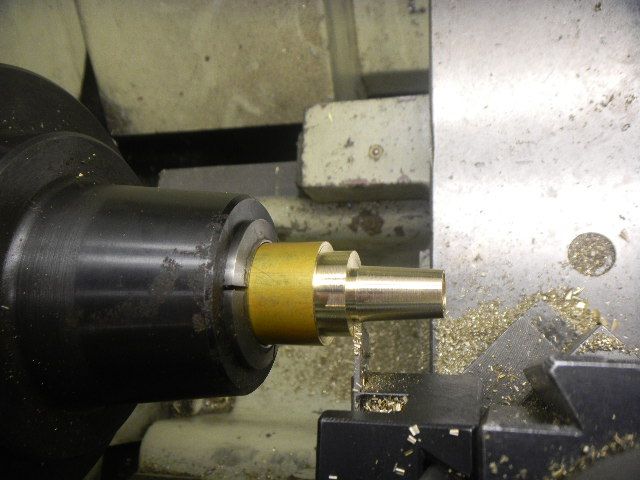
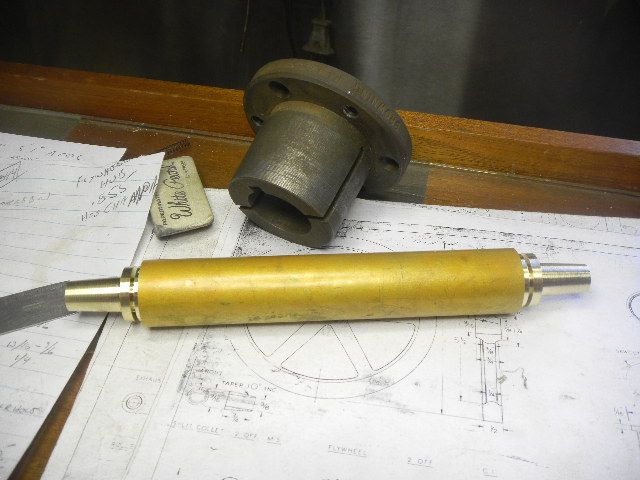
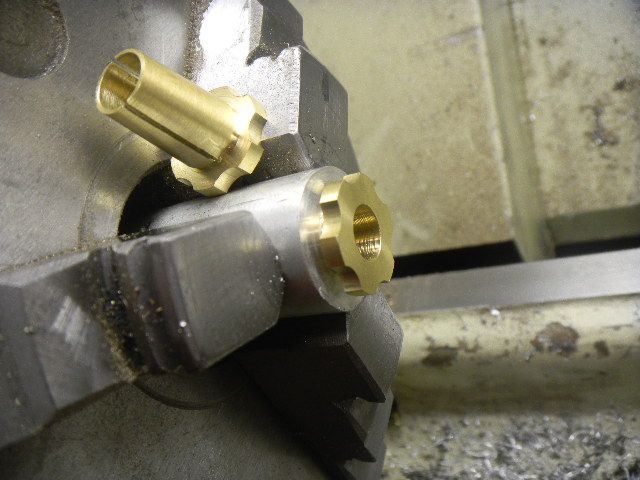
With a piece of the 1” dia glass door pull in the collet chuck, I cut the OD some longer than needed to accommodate the parting tool, then cut the ID straight, also bored and reamed for the 3/8” crankshaft. Then reset the compound for the angle and went at it.
Also a recess was cut with the parting tool just under the rim and the partially parted off.


The bar the turned around in the collet and the same cuts made on the other end.


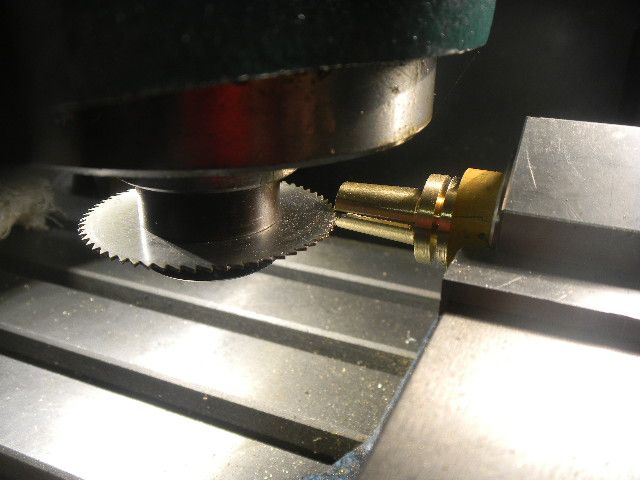
In a square collet block and on to the mill for slitting. Before parting the pieces off I decided to switch to a hex collet block and cut some decorative work with a ball end mill.


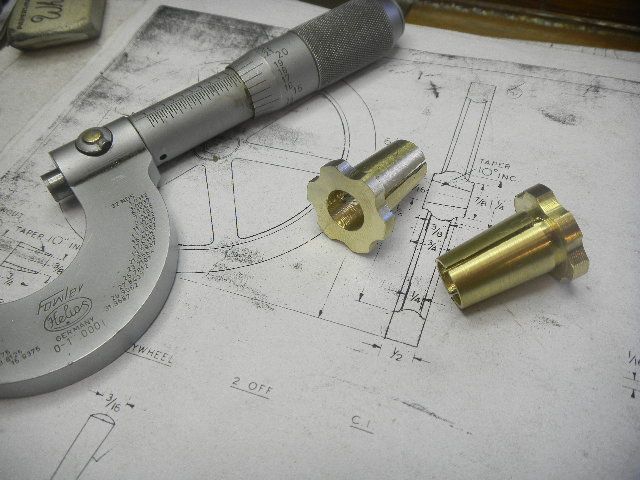
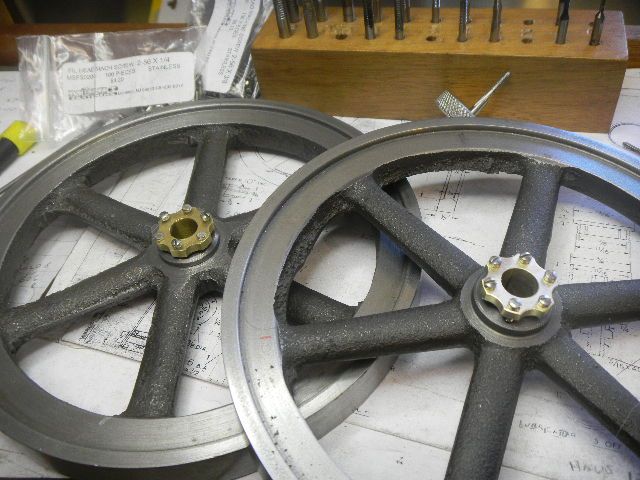
The cutoffs were done and they are starting to look like some pretty fancy hubcaps.


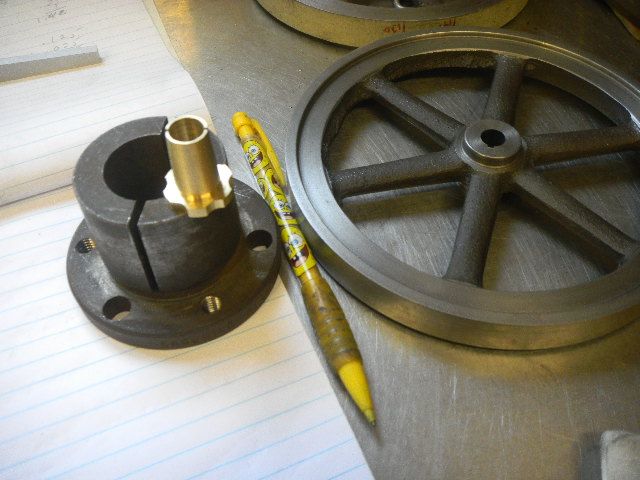
Just for practice and as a holder for facing the pieces I decided to make a practice piece of the tapered bore before I went at the flywheels.
Gently tapped into the bore, they held perfectly while facing.


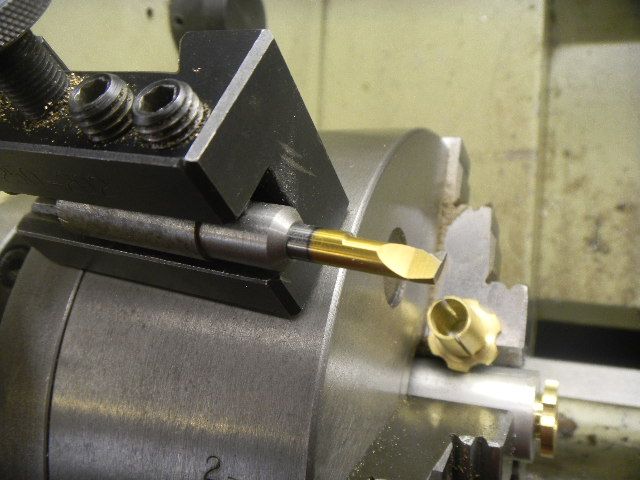
This is my mini boring tool, a solid carbide cutter (Cabin Fever purchase).
The guy told me they were CNC tooling but would probably work for boring(“they“, I bought two of them for $4). With a homemade holder, it worked nicely. I’ll have to check the angle on the cutting tip, they might also be good for threading.


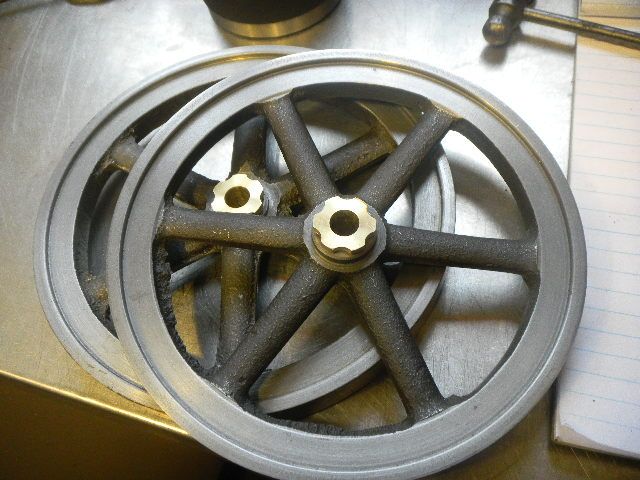
Boring the flywheels, which I was a tad nervous about, went without a hitch. I wasn’t sure if the interrupted cut from the keyway would cause problems.


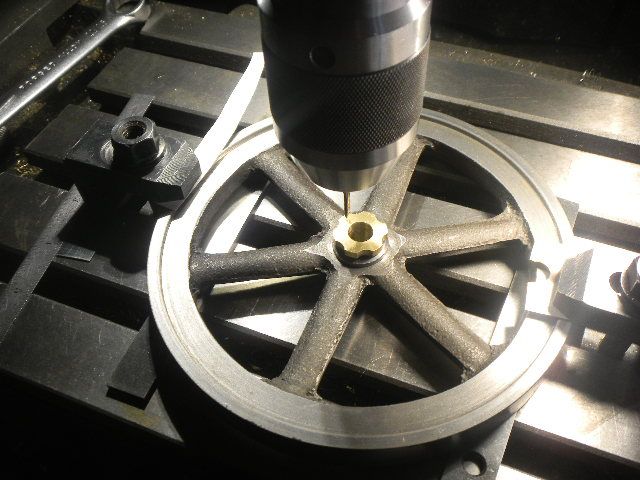
Then on to the mill with my calculated bolt circle coordinates, to drill and tap all the holes in the hub and flywheel all in one setup, to help keep things concentric.
I did, however, tap couple index marks with a small punch to make sure they went on the correct flywheel and in the proper orientation.


I encountered a small problem when I accidentally released the quill lock and pulled the bushing out of the hole and snapped the tap on the second hole. The tap was in far enough that I could loosen it from the back with a needle nose pliers and back it out from the front. Fortunately I bought some individual replacement tap and drill sets recently(guess where?), yeah Cabin Fever.


Three clearance holes and three 2-56 tapped holes in each bushing and three 2-56 hole in the flywheel.
These are not the permanent fasteners, I have something else in mind.


Whoa!! Something just flew past my head.:eek:


Holy Mackerel Andy!! It can't be, but yes it is!!:eek:

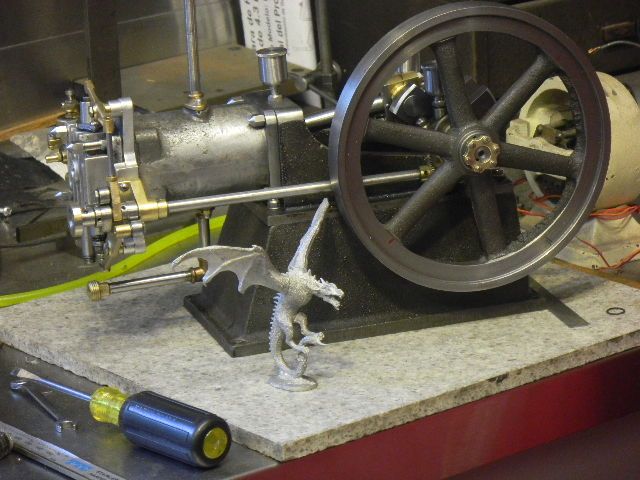
A baby Wyvern. Astonishing;D


I hope it doesn't bite.
More to follow

GUS, just having fun here in NE PA
 
Last edited:
LMFAO - nice one :D

Good to see it coming on again, and nice work on those tapered collets.
 
This has been quite a hiatus. Almost a year.
Time really flies when your having fun. When I get stumped I usually stop work and try to figure things out. But nothing was coming to mind and I got distracted by summer. So I just let summer happen, and the Wyvernish project came to an abrupt halt.
My apologies if I left anybody hanging.


I took my models and a few antique engines along with me as my wife and I wandered around the state visiting our usual antique engine shows. Campfires and good friends, add some cold beer.. Life was good.


Then as all good things seem to do, summer ended, which for me encompasses May thru October.
Back to the doldrums of winter weather. It's not all bad, there's nothing quite as beautiful as a fresh snowfall, before you realize you have to deal with the reality of going out in the cold and dealing with the mess Ma Nature dumped on your doorstep.
Then the heating bills start coming, more snow then severe cold, and the sound of the furnace cycling is enough to cause sever depression.
So now spring is trying to arrive and old man winter ain't giving up yet.
We just got another 5" of snow last night.:p


Thank God for inventing the work shop and nice warm fire in the wood stove. It really helps to keep your sanity in check. So back to work.
Around Christmas I decided to try few fixes on the Wyvern, which ran but not well enough. I brought it out from it's corner and dusted off. I started to make a list of the things that I just didn't think where right.

The two piece, tapered thread spark plug I made had a problem, as well as the cams, which due to my amateurish touch, were a tad off center. Maybe causing problems with the timing.
The threaded valve keepers kept loosening and that would also need to be dealt with.
And then the carburetor, which I suspected was the real culprit.

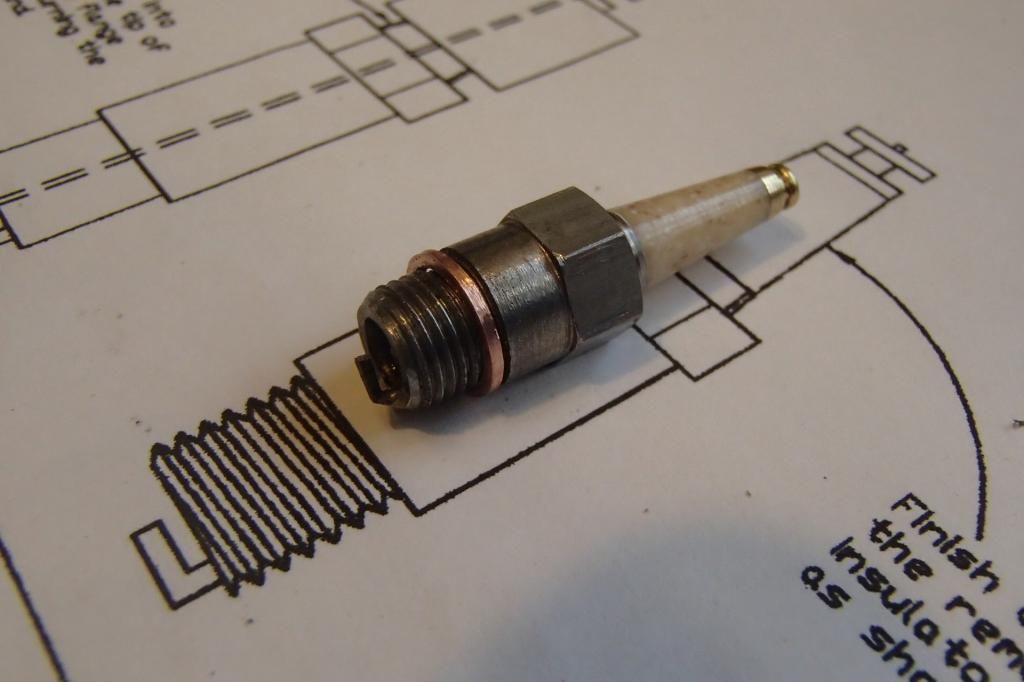
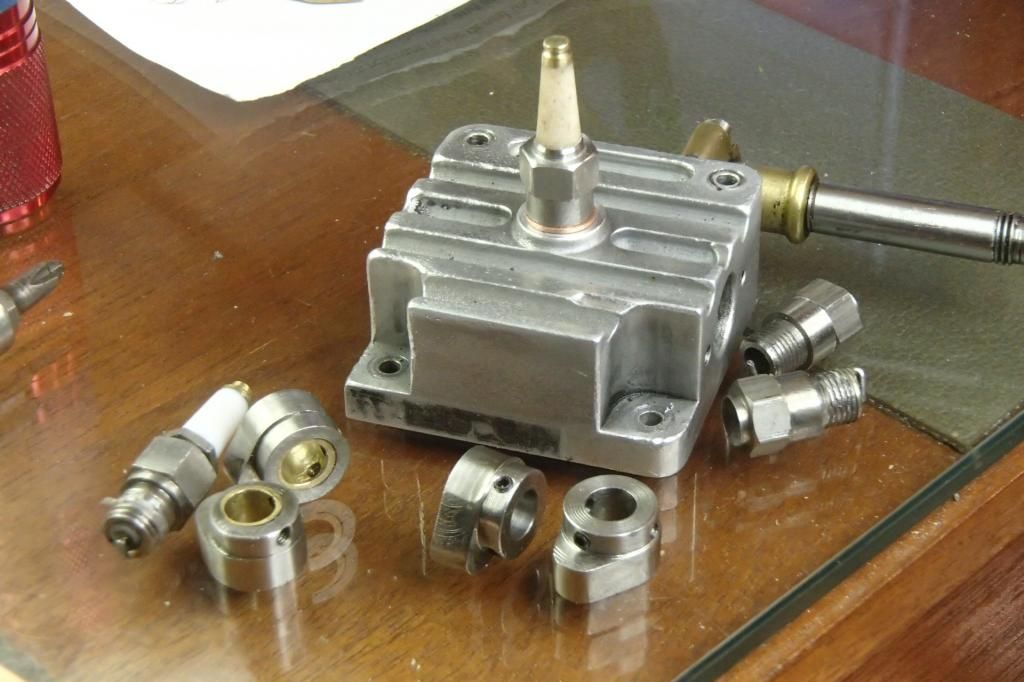
The spark plug was first in line. I”ve made a number of plugs at this point and always use George Britnell's method, except for the the two piece. That plug was not the original I used in this engine, but was an after thought, which didn't work out as the end of the plug interfered with the valves. I shortened the end to miss the valves, but it was now seeping.
I was thinking I would have to drill and plug the old 1/16 pipe taper I used for the plug, but found that a 5/16-32 straight thread would be just fine, after re-drilling and tapping.
I used the bold look of Corian this time. The Corian is way stiffer and seems to insulate OK. The copper washer was cut from 3/8” tubing on the lathe with a really narrow cutoff tool and using a 5/16” rod for support.


The old cams, I figured out quite a while later, were not centered very well because I used my RT horizontally on my mill. That would have worked out fine, but the column on my mill was not square to the table. The mill tram was fairly acceptable when using the quill only for work, but work pieces would be off center if I centered at one col. height and did the machining at another. I got that straightened out after spending half a day shimming the base of the column. I can finally say my mill is trammed within a couple thou.
The new cams were made with the RT vertical on the mill.
Old and new parts along with a couple of failed lower pieces for the new spark plug.


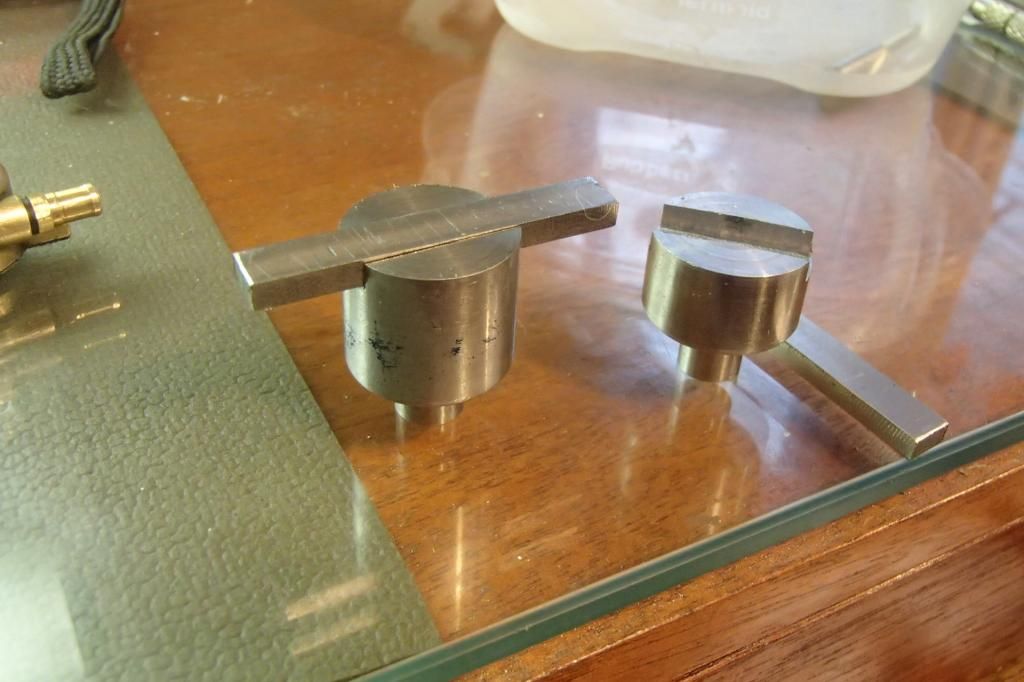
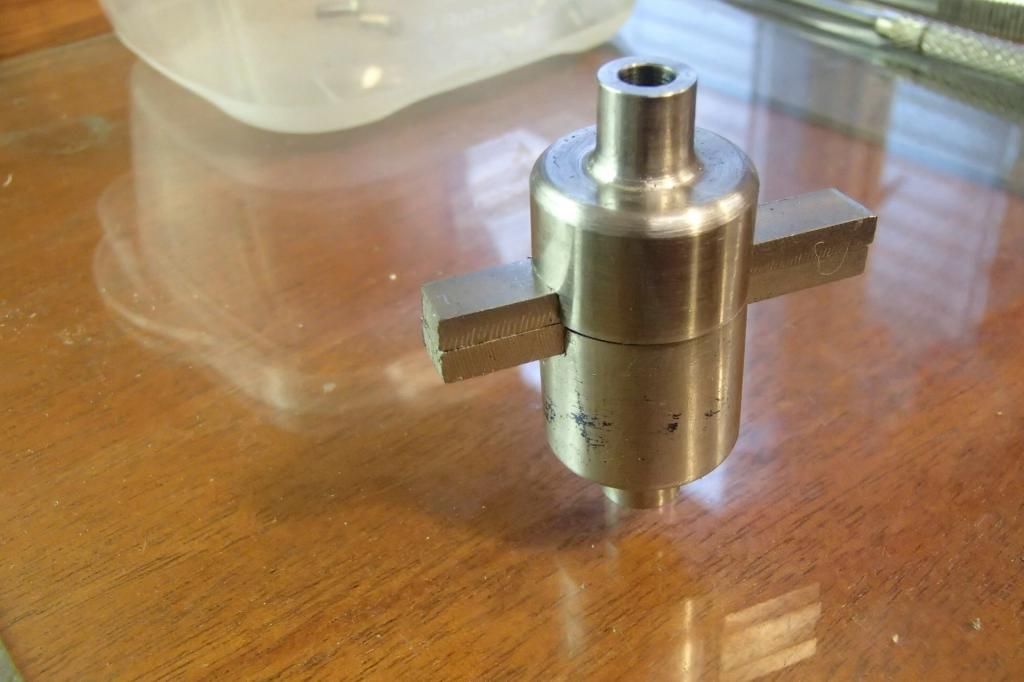
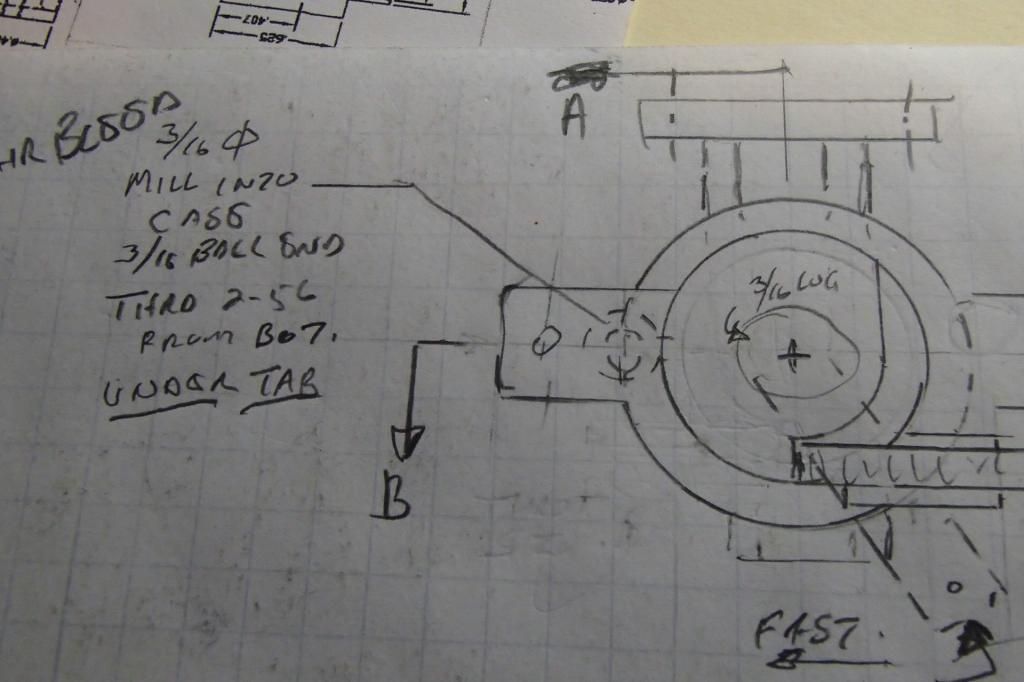
Those easier parts done, now the more difficult carb. I fell back on George Britnell's experience again, using his air bleed carb design. The build would have been much simpler if I used his plan as drawn, but I would complicate that by disguising it to look pretty much like the original Wyvern design.
Again using a silver soldered assembly, but this time using stainless steel in lieu of brass as I did on the first one. The stainless is way less prone to melting at the high temps of soldering, and I prefer the look.
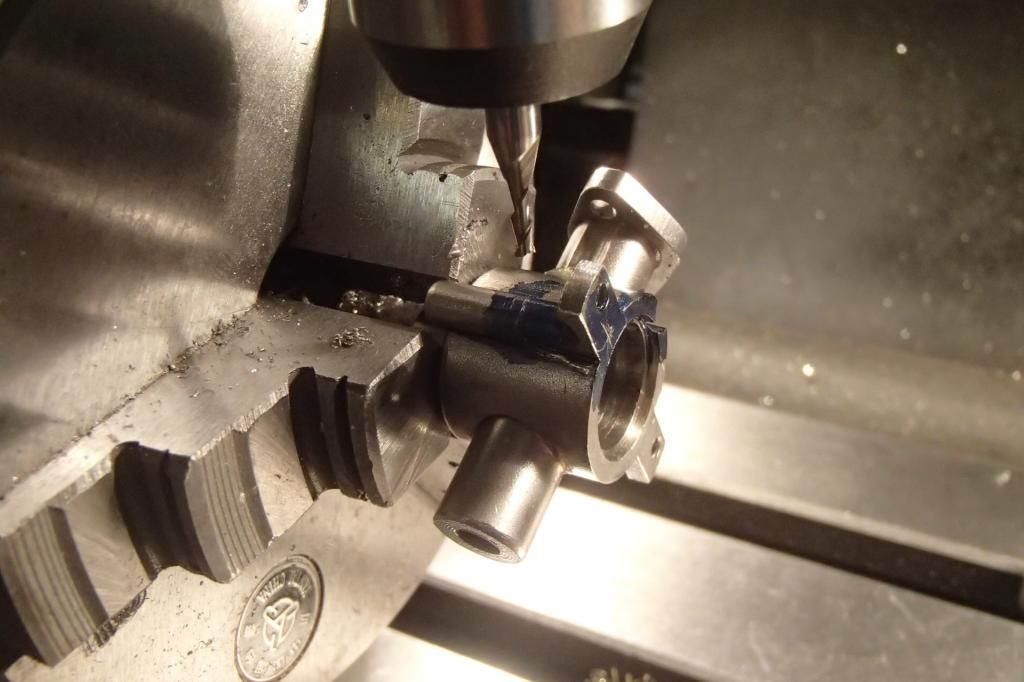
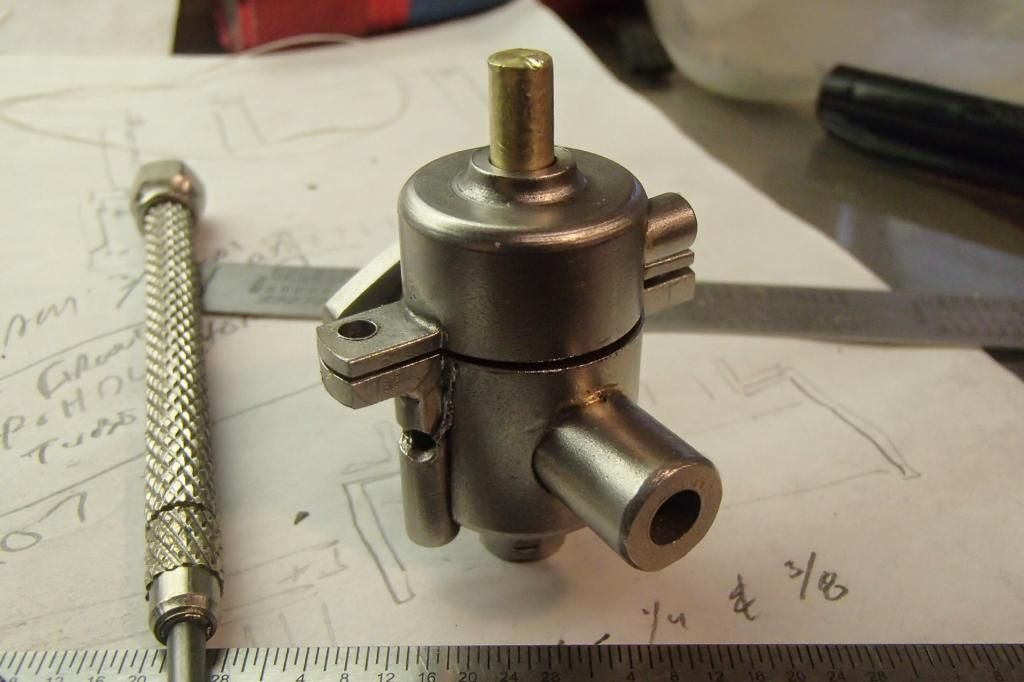
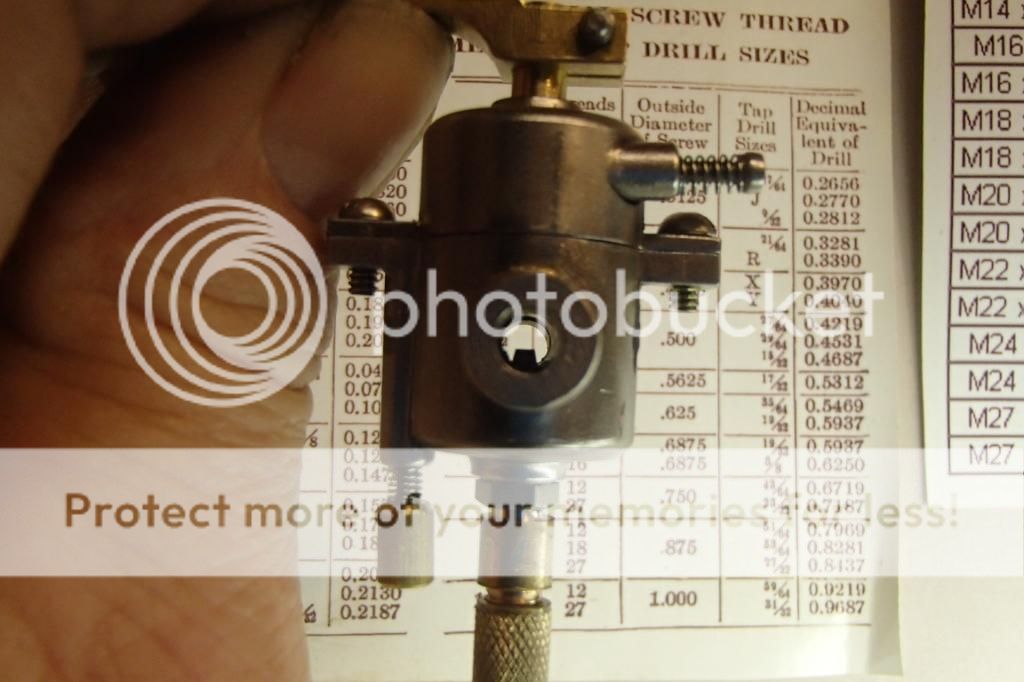
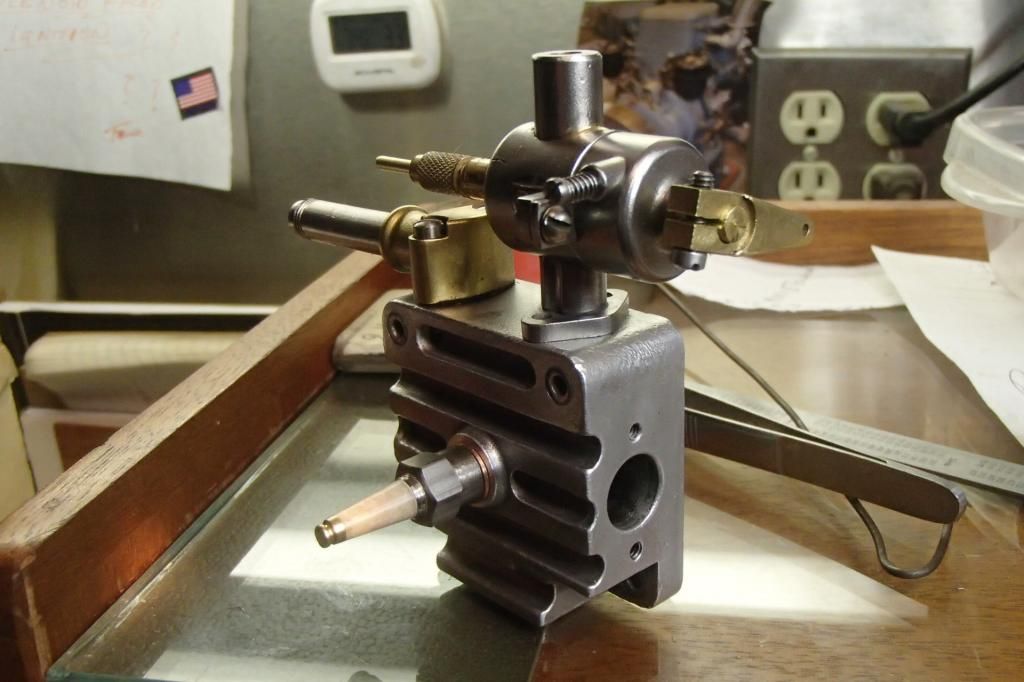


The engine assembled and was trial run. I would like to say it started and ran well. It started easily and ran fairly well, but too fast and was now overheating. I couldn't find the happy spot where it would run at a lower speed. The pot muffler actually charred the new/permanent wooden base it was on.
To make matters worse, the magnet wheel for the Hall ignition worked loose and the engine fired way to early and came to an immediate and damaging halt. It spun one side end of the Loctite and pinned crank shaft.


A cloud of gloom and despair hung over my shop for rest of that day and, again, the Wyvern was vanquished to the far end of my workbench. My enthusiasm was dashed and I just didn't want to look at it for a while.


So of all things, I went and started another engine build, while the poor Wyvern was weeping in the corner, lacking my affection.


More to follow, and finally, a happy ending.
 
Gus,
Bad news on the Wyvern, but eventually patience wins.

When I bent my intake valve I briefly thought it was all over. But as you know a little time after what seems to be a major disaster seems to give proper perspective.

Cheers,
Phil
 
Maybe during Summer you will have another look at it. I hope so.

Vince
 
Hi Gus,

Plan to make my own spark plugs too. Please mail drawings. Have always been amazed by spark plugs as a kid and wandering how its made. Thanks.

Regards,

Singapore Gus aka auGUStine.
 
Singapore Gus,
George Britnell's spark plug drawings are here somewhere, can't remember now exactly where. I'll find it and show you where. I do mine a bit different, but the result is basically George's sparkplug

Vince,
You don't have to wait, at the bottom of this post is the new Youtube url.

Phil. you will see it in person at CF.


I hit a bit of a stand still with the new project I started and was bumping the shop for a bit when I decided I really must have some closure with at least one of the 5 or 6 open ended projects I've been neglecting, and piling up in my shop.


I made a quick evaluation, five full size engines, an antique model engine and at the top of the list was my Wyvern.
Trying to figure out why it wasn't running right starting to get the best of me. I've played with a lot of engines over the years, and almost without exception have been able to get them right, except those that I deemed that the cost, whether it was time involved or physical cash outlay, where not worth the effort.


In my eyes, being that I had taken months to create it, the Wyvern must be right.
It was again brought out of the shadows.


The times I had it running, it always seemed to be hitting too hard when it fired. The valve timing and cam duration was according to the plans. I tried different timing settings and lots of different carburetor settings on two different carbs, and compression is excellent.
I got to thinking that maybe I had over compensated the extra head gasket when I made the piston longer than specified and made the compression ratio higher than it needed to be.


I posted in “Questions and Answers”, “Reducing engine compression”. http://www.homemodelenginemachinist.com/f26/reducing-engine-compression-ratio-22762/
I knew shortening the piston to spec should get things back where they should be, but sometimes other opinions can be helpful.


I couldn't shorten the piston as the top o-ring was to close to the top of the piston so I dished it out about a 1” dia x 1/16” deep.
I could take more but I tried that first.


I also took the advice that Rustkolector ( Jeff), gave me an the last few posts on that link.
The valve timing was adjusted as suggested.
The intake was narrowed by making an insert and the electrode on the spark plug clipped to make a larger spark gap.


I attached the ignition leads and apprehensively flipped the flywheel a couple times with no results, until I put me finger over the intake to coax the fuel in. The engine fired right up and with a couple of tweaks on the needle valve, this was the result.


I would call that fairly acceptable. The bumping sound I found to be one of the flywheel hubs was a bit loose and the noise stopped after tightening.


After some more tweaking I got it to run consistently in the low to medium 400 rpm range, and, not surprising, the needle must be adjusted richer as the fuel level drops.
I ran an entire tank of fuel in one 4 hour run, never missed a beat unless I fooled with it.
The throttle is very responsive if I keep the revs around 500, it will only stall if I try at lower speeds. I will experiment further on that.


I'm a happy camper, now matter how long it took.
Come to think of it, my other two engines took quite a while to get running to my satisfaction


As threatened, a video is in order. The url will have to do for now until I figure out how to embed Youtube.

https://www.youtube.com/watch?feature=player_detailpage&v=i9Dg-9ez2_k

The engine seems happy at speeds in the 450- 500 range, although I can fiddle it down in the high 300s it will not sustain that speed.


I'm calling this a finished project although I still have a couple of smallish items I'd like to attend to.
I was thinking on adding a flyball governor, but I'm not sure what that will accomplish as I'm pretty much running it at idle.
Painting engines is not something I want to do, I like the look of naked cast iron. The copper tanks are going to be left to go to there more natural brown patina.

I got kind of caught up in the Wyvern dragon itself, hence the Gothic bling I added here and there.

Happy Wyvern builder GUS
 
Nice going Gus. I'll look for it at CF

Cheers,
Phil
 
WOW Gus. That is really a strong runner. Very well done.

Vince
 
Nice work Gus!

Congratulations on getting it running and then tweaking it until you were happy with it.

Dave
 

Latest posts

Back
Top