What Are You Working On Today?

Home Model Engine Machinist Forum

Help Support Home Model Engine Machinist Forum:

This site may earn a commission from merchant affiliate links, including eBay, Amazon, and others.
Oh! ye of little faith.
I'm sure that if a one handed old fart like me can get one running, you lot should have no trouble.
Perseverence and patience is the cure.
May your gaps be little ones.

John
 
Bogster...
You're a black hearted soul, but I got the "small gap" comment....LOL. I worked on this engine all night , while I slept. The problem became a bit more apparent at about 5:00 am during the 1051st iteration of the same dream....(yawn)... but at least I have a direction to go now. There are still a number of things to try.

Don...
I'll have to admit your experience with this engine does make me feel a little less pain....LOL. Neat little hand powered version you have there. I'm told that Auto Zone sells a hand tool accessory that is based on the same design.

Steve
 
Hi Steve,
I wasn't trying to be blackhearted at all (well, maybe just a little bit).
If I could do it for you I would, the problem is that not having it in my hands it is very difficult to give a prognosis. I can only tell you what I did to get mine running, and that has already been mentioned before. All I can tell you it will be just one tiny thing stopping it running, if it turns ok by hand it should go, unless of course the port timing is out.

John
 
Looking good, all the other ones I have seen have a proper crank, yours looks a lot easier to get a good working model, good work.
I am looking for little projects like this for the kiddies when I put on a display, so if anyone has any other little ideas for kids engines that won't take too long to make, all ideas gratefully accepted.

John
 
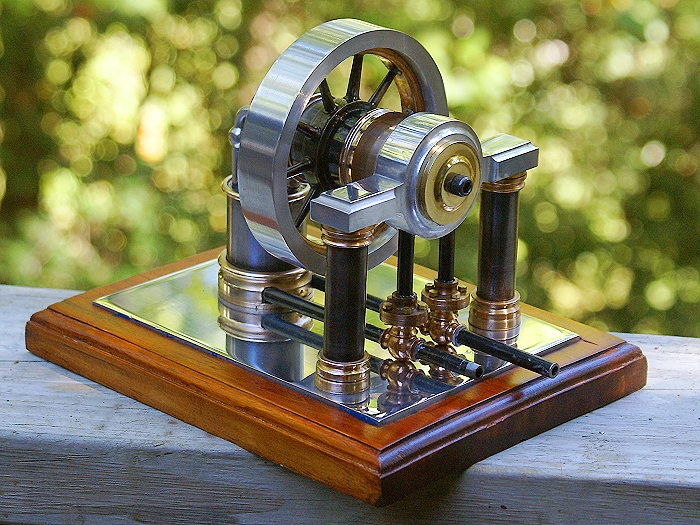
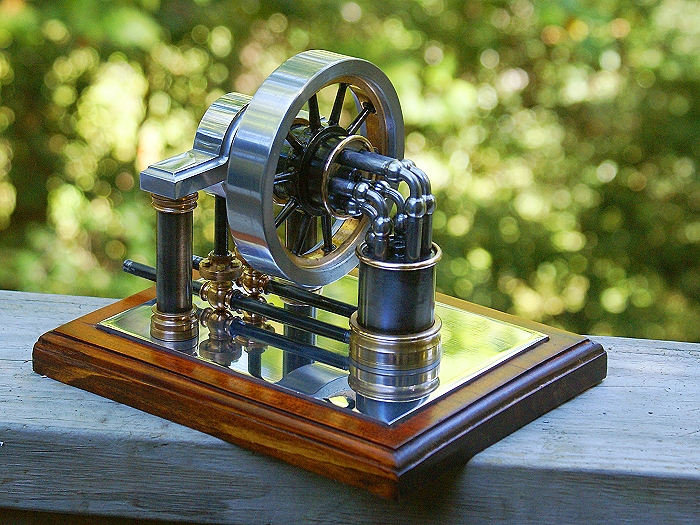
Being on parole, I'm shooting for a pardon for good behavior...LOL. Thank you all for the encouragement. Here is the final version of the infamous Elbow engine. After application of a bit of elbow grease and some hand rubbed wood work, she's all polished and cleaned up enough to join the rest of the collection.

I'll be running her again, once I've gotten a larger air compressor, but for now that fun will have to wait. By then, maybe I can come up with a means to capture some video of the event, so I won't have to jump bail....(grin).

Steve

elbow-post-polish.jpg


elbow-post-polish-1.jpg
 
Unfortunately my main concern is the third quarter GST return. This is one of those government things that we all have to take care of regardless of which side of the border you live on. The only difference is the name of the tax.

Ed
 
I spent my shop time this weekend making an oiler and grease cups (3) for the engine I'm building. No pictures yet, hope I can get some on this evening.
I think it really is the last 10% of the project that takes 90% of the time.
 
Steve,
Now its finished cosmetically, it looks absolutely great, very 'Victorian' in it's looks.
Hope you don't mind, just one slight criticism, the only thing that looks out of place is what looks like a cap screw holding the brass cover disc in place, other than that, perfect.

Well done

John
 
John
I don't mind the input one bit. I gotta agree with you on that screw. It's bothered me from the time it was added, but I'm not quite sure how to get around it, yet. I've even considered a ring of small hex heads on the outer rim but that doesn't feel right either.

I could stretch the ball idea a wee bit and make a disguised screw with a spherical head, but I fear it would look like a badly executed afterthought. Still scratching me head over a viable solution here. Any ideas?

Steve
 
Hi Steve,
Is it a primary construction screw or just holding the plate on?
Maybe a five or six pointed star shaped head (about half the thickness of the hex head on the bolt) slightly convex to give strength, and blacked to give contrast. This would then allow you to make a basic little peg wrench to tighten it. The Victorians had this sort of embellishment on a lot of their machinery.
Just a suggestion, the final choice is yours. It would take a couple of hours to make but the final result would be worth it. Just machine the hole off the cap bolt and reshape the remainder to whatever you want.

John
 
It is now a month since I spoke to Steve about that damned ugly screw spoiling his perfect elbow engine, and I don't suppose he has put it right.
This is the sort of thing I was on about.

bolthead.jpg


This is a 3mm home made decorative bolt. When you look at it normally it looks like polished chrome, but blown up like this it looks awful.
So come on Steve, get rid of that 'orrible cap screw.
:lol:
John
 
That bolt gets me excited.

This is what I got done so far on the Rotary-Valve engines.


100_3163.jpg


Kenny
 
Lookin' good Kenny, are those the original shape to the columns or are you starting to 'bling 'em up' with a few of your own ideas.

John
 
Great, that means that your engines will be totally unique to you, different from all the other thousands made.
Keep it up.

John
 
Well I couldn't bring myself to start a new project today so I tinkered with an old one, and just added a little bling.

Twinwobbler001.jpg
[/img]
 
Ralph that engine looks great. How long did it take to do the engine turning?

I'm trying to work on my Upshur Horizontal farm engine, but a stupid bent drill (yes, it was bent when I got it!) has stopped construction.
 
Jones, how rar are you with your Upshure engine? I've been building one also, but have kind of put it aside for a while and working on other things. Hell my wife has me building stained glass bird houses for her garden club raffle right now.
Mel
 
Hi Jones,
After disassembly it only took about an hour to do the whole engine. Funny thing is, it seems to run better now that its all dressed up. Or at least its easier to watch. Thanks for the compliment.
 
Mel,
I have done the frame, the cylinder liner, most of the rest of the cylinder, the piston, the gudgeon pin (lots of work there ;) ), and I made a crankshaft but it ended up bent so I have to make another one.

How far along are you?
 

Latest posts

Back
Top