What Are You Up To Today?

Home Model Engine Machinist Forum

Help Support Home Model Engine Machinist Forum:

This site may earn a commission from merchant affiliate links, including eBay, Amazon, and others.
The kid is on spring break so we spent the day at the BMX track and the skate park.

I took a video of my friend doing a jump.

[ame]http://www.youtube.com/watch?v=tSWsr-IKN90[/ame]
 
Today? Had to work yesterday so today I've been up since 5 AM surfin' the world of metal on the web and finally drifted out into the shop now that the little heater has knocked the chill off.

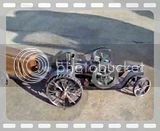
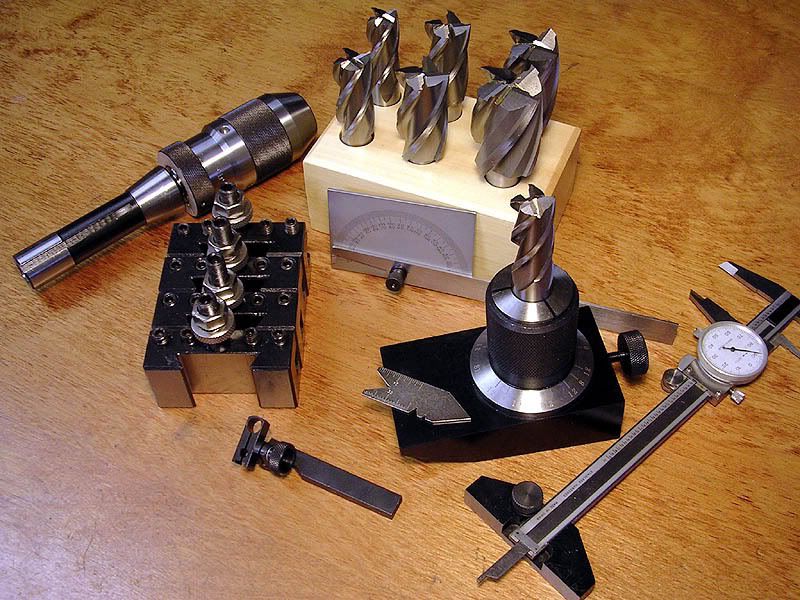
Cleaned the shop up a little and finally got a chance to properly ooh & ahh over the stuff I got in from CDCO a few days ago. I post this not as a gloat but as a report on the bargains that are available to us right now. What you see here cost a grand total of $229.00 including $22.00 shipping and arrived 6 days after I put the money order in the mailbox. That seems incredible to me.

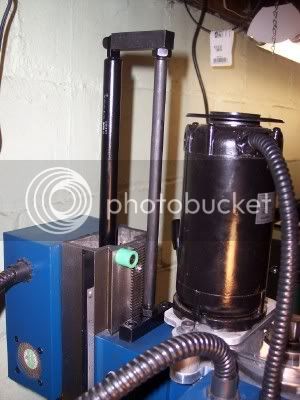
I just chucked up the R8 1/32"-1/2" keyless chuck in the mill and checked it with a D.T.I. and the runout on a 3/8" ground pin is less than the .0005" mark on the clock. Approx .0003". It fits the spindle much better than the POS chuck/arbor that came with my X3 and the finely ground finish is amazing...$32.00!

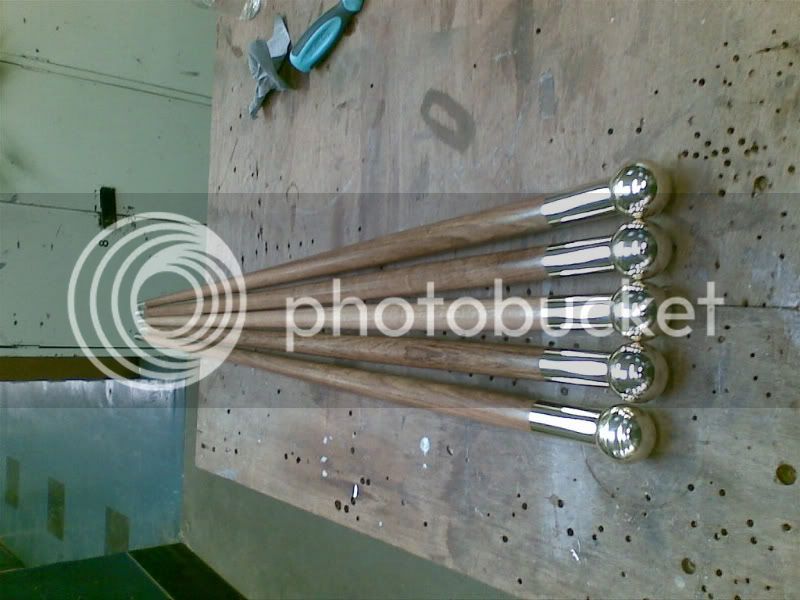
The 6, 4 flute endmills (3/4" - 1.5" by 1/8's) came with a nice wooden stand and are sharp and nicely finished. Time will tell if they're made from crap steel but I don't think so....$74.00!

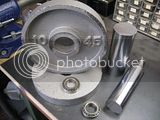
The 5C endmill sharpening jig is finished nicely all over, the collet fits great, locks down easily with the included spanner and the indexing works smoothly....$32.00!

The 4, AXA clone boring, turning & facing QC tool holders fit my Phase II toolpost perfectly, the ground finish and black finish is excellent and the supplied hardware is much better than the last batch and should hold up quite a while....$10.00 each!

The depth base attachment for the caliper is nicely made works great and has a nicely ground & square bottom suface....$9.00! (Already had the caliper)

The protractor is made from stainless, has a very nice ground all-over finish and the graduations are sharp & clear; even came with a nice naugahyde pouch....$9.00!

The D.T.I. holder fits great, works smooth and even has a dovetail clamp that fits my D.T.I. perfectly....$9.00!

The only thing that is disappointing is the little threading tool gage, it's a cheap stamping with a cheap looking plating job but it'll probably do the job and was only $3.00.

CDCOStuff.jpg


On the one hand I'm extremely happy with the quality of the items and even happier about the prices, BUT... it's very scary thinking about what has happened to our industrial infrastructure. Anybody have a guess as to what this would cost if made-in-the USA (or U.K. or Canada or wherever) items were substituted...if you could find them in stock? $1000...$1500...more? Sad.:(
 
I am admiring Dickeybirds swag and mourning my loss of my DTI. I bought an inexpensive unit as I am on a budget like most. Well after 2 years of service the needle came out. I think it just unscrewed but I don't know how to open it! As soon as I can pry the SWMBO's fingers off of the purse strings I am ordering a B&S DTI. How hard are the .0001 units to use?

Thanks,
Sean
 
Today I printed the plans for the open column the team is building, needed an image of what they are up to, good choice I think, i'll add that to my list of "want to builds".

The flywheels for my project are almost done, now I need to decide on a finish for the cylinders, maybe flat black with fake rivets.
 
Started a new engine project today. The early 1800's engine is a Water Pressure Engine based on an design used by a Danish water system, powered by "waste water from the purification plant". Yeah... I suspect the same true definition of "waste water", but hey... it's a neat little design, all the same. I was recently offered the chance to buy the engine shown below, but figured out really quick that my idea of its value and that of the owner were nowhere near the same. That's when it hit me that building it might be a good way to go.

I'm working sans drawing dimensions, since the only guide available are the photos and the very old and badly done engraving shown below. I've modeled it out in 3D to see how everything is related, but the actual machining will be full of on the fly type head scratching, as I have to make various extrapolations during the build.

I'm going with a 1 inch stroke and a 3/4 bore to keep the engine small enough to live on a book shelf. I also suspect I'll be at this one for a while...LOL.

Steve

sam023.jpg


sam026.jpg


water1a.gif
 
Some people are really into self flagelation.

Good luck on your adventure, and the cad pics are great.

John
 
I Thought I better tune up the old tractor.The last show I took it to it would not run . all it took was charging the battery ::) Tom
 
I had a really cool day today. I spent a few hours over at Cedges shop then come home and finished dismantling an old copier machine from work. It was loaded with motor, shafting, and other goodies. I'll post some pics tomorrow of all the stuff you can get out of one.
 
Tim
You're welcome back anytime. I only hope you enjoyed the day half as much as I did. Thanks for the gifts.... I'll be trying them out tomorrow, that is unless I need to come over and start up your new lathe for you...(grin). I hope he comes through for ya...

Steve
 
Finally got the lathe over on page 1 painted and put back together. Still needs a little tweaking, but worked well enough to make a tap holder.
 
I'm up to absolutely nothing of value, shop-wise. It's Mother's Day after all!

Unfortunately, I didn't have that excuse yesterday and still got little done. Tomorrow, however, is another day.

Cheers,

BW
 
Need to get cracking on the TB stuff. Am recovering from a very busy somewhat stressful week. Hit a yard sale this am, cooked breakfast for the family (my weekend duty) and am supervising my son building a shelf for the shed out of tread mill leftovers the motor will be powering one of the machines around here. This is a steel frame w/ wooden shelf/work bench
My son (18) has landed himself a part time summer job in a friends steel fab shop . Gee suddenly he is showing an interest in learning to weld and do fab work.I am expecting him to start engineering classes at the county college in the fall.
The shelf is done I did the welding on it he did all the cutting and most of the grinding. Still need to be installed.
Now he is out melting some mig/flux core wire on some scrap pieces.
So I guess you can say dad duties. but fun ones.
Tin
 
I learned about the Air Spring Conversion for the X2 from Dave's
Thread: X2 First Mods

Mine arrived Friday and I found time today to install it.

MiniMillAirSpring.jpg


Great Mod!

Now, what else is out there that I need and never heard of? :D

Rick
 
Tin,

Nice to hear someone else is starting to get involved in the 'metal bashing' trade. In the UK they have now realised that there is a great shortage of skilled metalworkers after the money grabbing policies of the 80's, with apprenticeships being got rid of. Now they are trying to get the kids back into manual engineering trades. Definitely a step in the right direction, and I am sure your young one won't regret it in the long run.

Rick,

We are never happy until we get the machines we have to the latest specifications. Each little mod is a step in the right direction. Can you get power feed for the X2?
Maybe that would be the next step.


For me, been a very busy time.

Two UK members visited me over the last two days, Ralph and John S 1st. Hopefully they went away with a few new ideas to play about with, plus I got to play with all my engines, something I haven't been able to do for the last few months. John S is still trying to get his head around how an elbow engine works.

John
 
Spent yesterday over at Tim's shop getting a few good lessons on threading. He is getting his hands on some very nice toys these days and he's proving willing to share the fun....

I began the Finger Engine challenge this morning, after learning the grandson's ball game was rescheduled for the afternoon. I've actually managed to get quite a bit done. Although I'm never going to beat 17 minutes, the 2 hours and 10 minutes invested, so far, have me at approximately a bit over 80% completion. I'm figuring another hour, this evening, should see it finished and tweaked. I hope so... travel will prevent any significant progress tomorrow.

Got to admit... it all goes much faster when you eliminate the polishing phase. It would go even faster if I'd stop hiding that last tool that I just used.

Steve
 
As much as I would like to be starting on the finger engine challenge, I instead decided to start on the cheap sand muller I threatened to build some time ago. I want to make it easier to temper my casting sand after and there for start doing some more elaborate engine castings.

This may not work like I hope it will, but you know, nothing ventured.. etc. I am only into the cost of the little Harbor freight mixer and few odds and ends, most of the bearings and shafting are scrap parts from work. It's another one of those "learning experiences" :D

I still have ways to go and few things to figure out before I'm done.

Here a little slide show of what got done so far:

Muller
 
Not so much up to today but almost every lunchtime for ages (standfast when I did the blast finger engine). Multi-posted eslewhere apologiies if you've read it already

Picture017-2.jpg


These are 5 Sergeant Majors canes made specially as gifts for ushers at a wedding next week so the deadline snuck up on me. They are styled after the cane carried by the RSM of the Royal Marines. Different regiments have different styles, ie the Guards RSM carries a pacestick similar to a big pair of dividers. The RM version has traditionally a silver ball with the Corps badge and is black.

Picture021-2.jpg

Picture020-2.jpg

Picture019-2.jpg

Picture018-2.jpg


Mine are made from Jatoba with brass fittings; the wood was finish sanded with 2000 grit garnet, sanding sealered and waxed with clear hard wax. The proportion was dictated by the glass test tube which was the only screwed ones of about the correct size I could find, I thought this would give them a bit more perceived value . There is a small mild steel sacrificial on the tip.

Picture014-3.jpg

Picture012-3.jpg

Picture012-3.jpg


The whole batch was entirely made on a Harrison M350. The taper is about 1.5 deg included angle all done with the compound and blended by eye. I wasn't sure about blinging them and considered leaving them satin, however after polishing the first there was no contest. The ferrules are atached to the shaft with a Left hand 2 start thread with the second start machined out of the ferrule and not cut on the shaft due to the splintering of the wood when thread cutting then epoxied.

Picture016-2.jpg


I enjoyed it, I hope you found it interesting.

Al
 
Wonderful work one those Al. Typical military precision.

I don't know whether I dare tell this little story here about a pace stick.

But anyway here goes.
During my two years of RAF training (very young in those days), we were always having full best blue inspection on the parade ground.
We all used to get bruises on the small of our backs, where the Station Warrant Officer (same as an RSM in the army) used to walk down the back of the ranks, poking us in the back with his pace stick, and shouting out 'stomach in, chest out, shoulders back, you're not in the american army here laddie'. In those days he looked 7ft tall, ramrod back, with a big handlebar moustache, and shouted with a broad highland accent. A real antique from WW2.

I still walk about in that ungainly pose, but my stomach is so big it does what it wants now.

John
 

Latest posts

Back
Top