You are using an out of date browser. It may not display this or other websites correctly.
You should upgrade or use an alternative browser.
You should upgrade or use an alternative browser.
Vertical I.C. Rupnow Engine
- Thread starter Brian Rupnow
- Start date

Help Support Home Model Engine Machinist Forum:
This site may earn a commission from merchant affiliate
links, including eBay, Amazon, and others.
DavidLloyd2
Well-Known Member
- Joined
- Jul 16, 2016
- Messages
- 84
- Reaction score
- 111
James,
Thanks for that,
DavidLloyd,
Thanks for that,
DavidLloyd,
As said before--Pull the head off, put the heel of your hand over the top of the cylinder, and rotate the crank with your other hand on the flywheel. If the ring is sealing properly, it will be very difficult to turn the engine over with your hand sealing the compression completely. If that proves that the ring is sealing properly, then it almost certainly means that your valves are leaking. A test that I have made in the past, out of sheer desperation is to make up a dummy sparkplug with a hollow center that you can slip a rubber tube over. Make sure the engine is in the position it would be in with piston at top dead center, ready to fire, and submerge the whole engine in a bucket of clear water and blow your guts out on the other end of that rubber tube. If the exhaust valve is leaking you will get a stream of bubbles coming out of the exhaust pipe. If the intake valve is leaking you will get a stream of bubbles coming out of the carburetor. If the head gasket is bad, you will see bubbles escaping around the sides of the head. Make absolutely certain that when the exhaust valve is not up on the cam that there is .005" to .010" clearance between the rocker arm and the valve stem. 99% of first time engine builders who have the problem of the engine not starting have leaking valves. The engine absolutely must have compression to start. Is it sucking up fuel now when you try and start it? Is it firing at all? try some "quick start" ether sprayed into the carb while turn the engine over with your drill. HAVE YOUR FIRE EXTINGUISHER NEARBY!!! Put your mouth over the inlet spout of your gas tank and blow as hard as you can---does that make the fuel rise up in the line to your carburetor.---that little test shows that you do indeed have a clear passage from the tank up to the carburetor. Do all of that and report back. I damn near went crazy with my first engine build, the Webster, because of leaking valves. Do not despair. I have a fix for everything you may run into.---Brian
Herbie--You're keeping me in suspense. What is happening with your build?---Brian

$24.99
$34.99
Bowl Sander Tool Kit w/Dual Bearing Head & Hardwood Handle | 42PC Wood Sander Set | 2" Hook & Loop Sanding Disc Sandpaper Assortment | 1/4" Mandrel Bowl Sander for Woodturning | Wood Lathe Tools
Peachtree Woodworking Supply Inc

$40.02
$49.99
Becker CAD 12 3D - professional CAD software for 2D + 3D design and modelling - for 3 PCs - 100% compatible with AutoCAD
momox Shop
![DreamPlan Home Design and Landscaping Software Free for Windows [PC Download]](https://m.media-amazon.com/images/I/51kvZH2dVLL._SL500_.jpg)
$0.00
DreamPlan Home Design and Landscaping Software Free for Windows [PC Download]
Amazon.com Services LLC

$94.99
$109.99
AHS Woodmaster 4400 Maintenance Kit for Outdoor Wood Boiler Treatment
Alternative Heating & Supplies

$29.95
Competition Engine Building: Advanced Engine Design and Assembly Techniques (Pro Series)
Amazon.com Services LLC

$99.99
AHS Outdoor Wood Boiler Yearly Maintenance Kit with Water Treatment - ProTech 300 & Test Kit
Alternative Heating & Supplies

$89.99
Outdoor Wood Boiler Water Treatment Rust Inhibitor- AmTech 300 & Test Kit
Alternative Heating & Supplies

$24.99
$27.99
HOZLY 5PCS/Lot ISO30 Tool Holder Clamp Flame Proof Rubber Claw CNC Machines Automatic Tool Changer
HOZLY

$519.19
$699.00
FoxAlien Masuter Pro CNC Router Machine, Upgraded 3-Axis Engraving All-Metal Milling Machine for Wood Acrylic MDF Nylon Carving Cutting
FoxAlien Official

$12.56
$39.95
Complete Plans for Building Horse Barns Big and Small(3rd Edition)
ThriftBooks-Atlanta

$39.99
$49.99
Sunnytech Low Temperature Stirling Engine Motor Steam Heat Education Model Toy Kit For mechanical skills (LT001)
stirlingtechonline
Herbiev
Well-Known Member
- Joined
- Jan 6, 2011
- Messages
- 2,360
- Reaction score
- 311
I took the head off yesterday to check out the compression. Piston slides very smoothly and when I placed my hand over the cylinder it was impossible to turn the flywheel so compression doesn't seem to be the problem. Today I shall make a hollow dummy spark plu and give it the under water leak test to find out where the air leaks are.
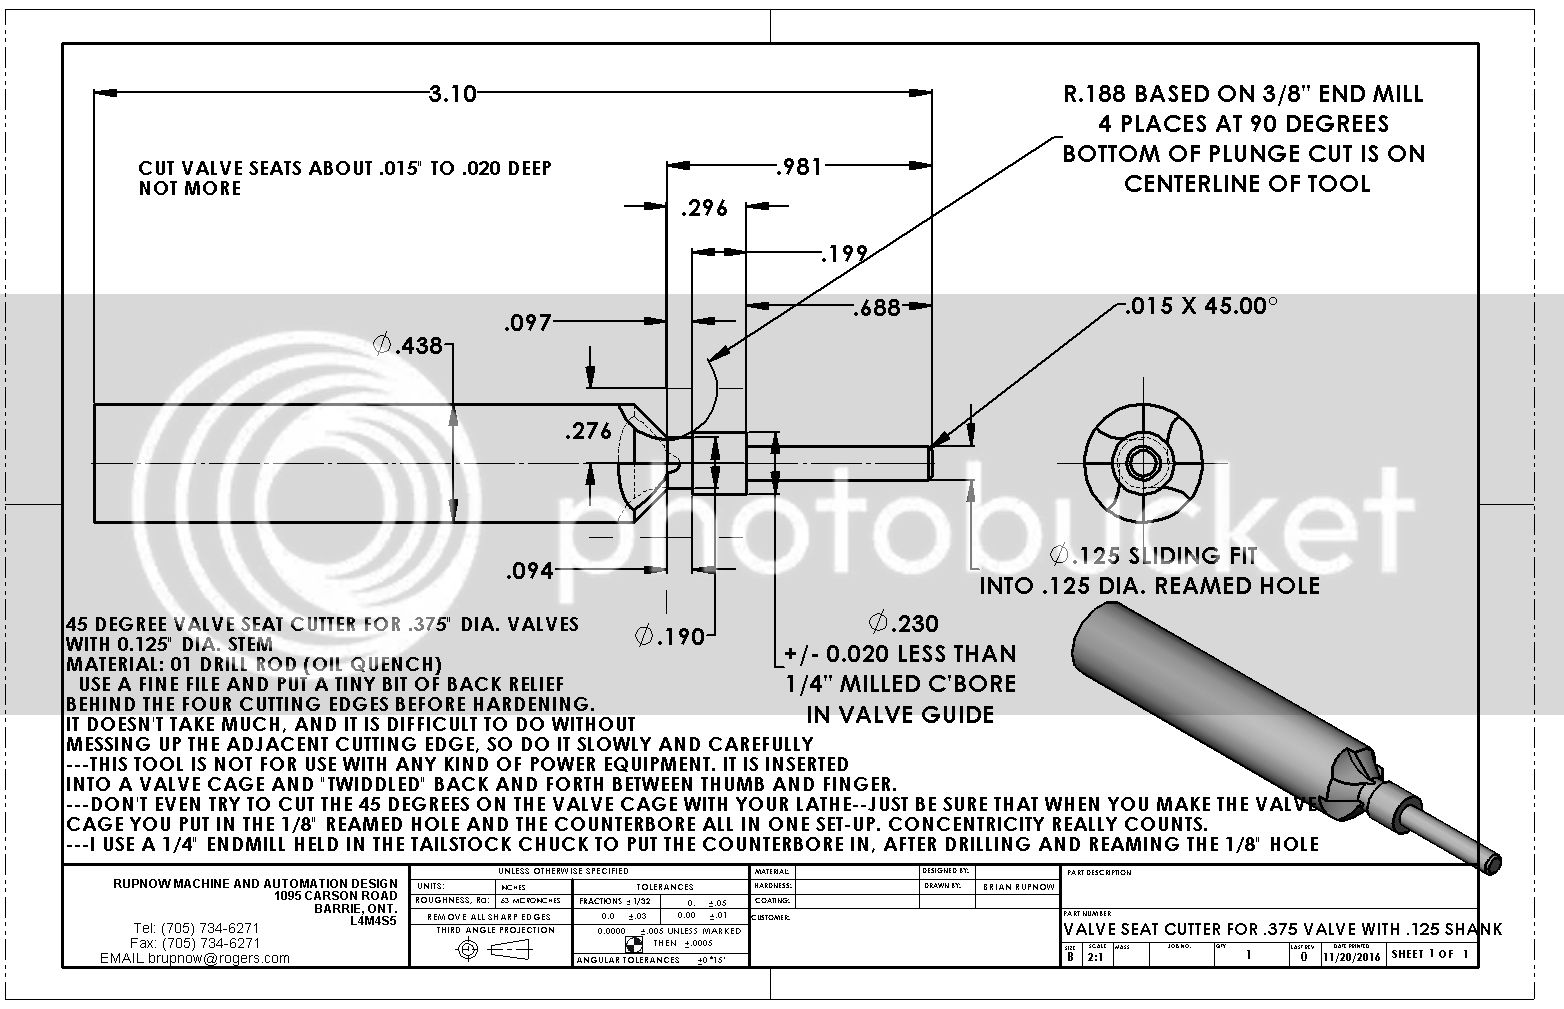
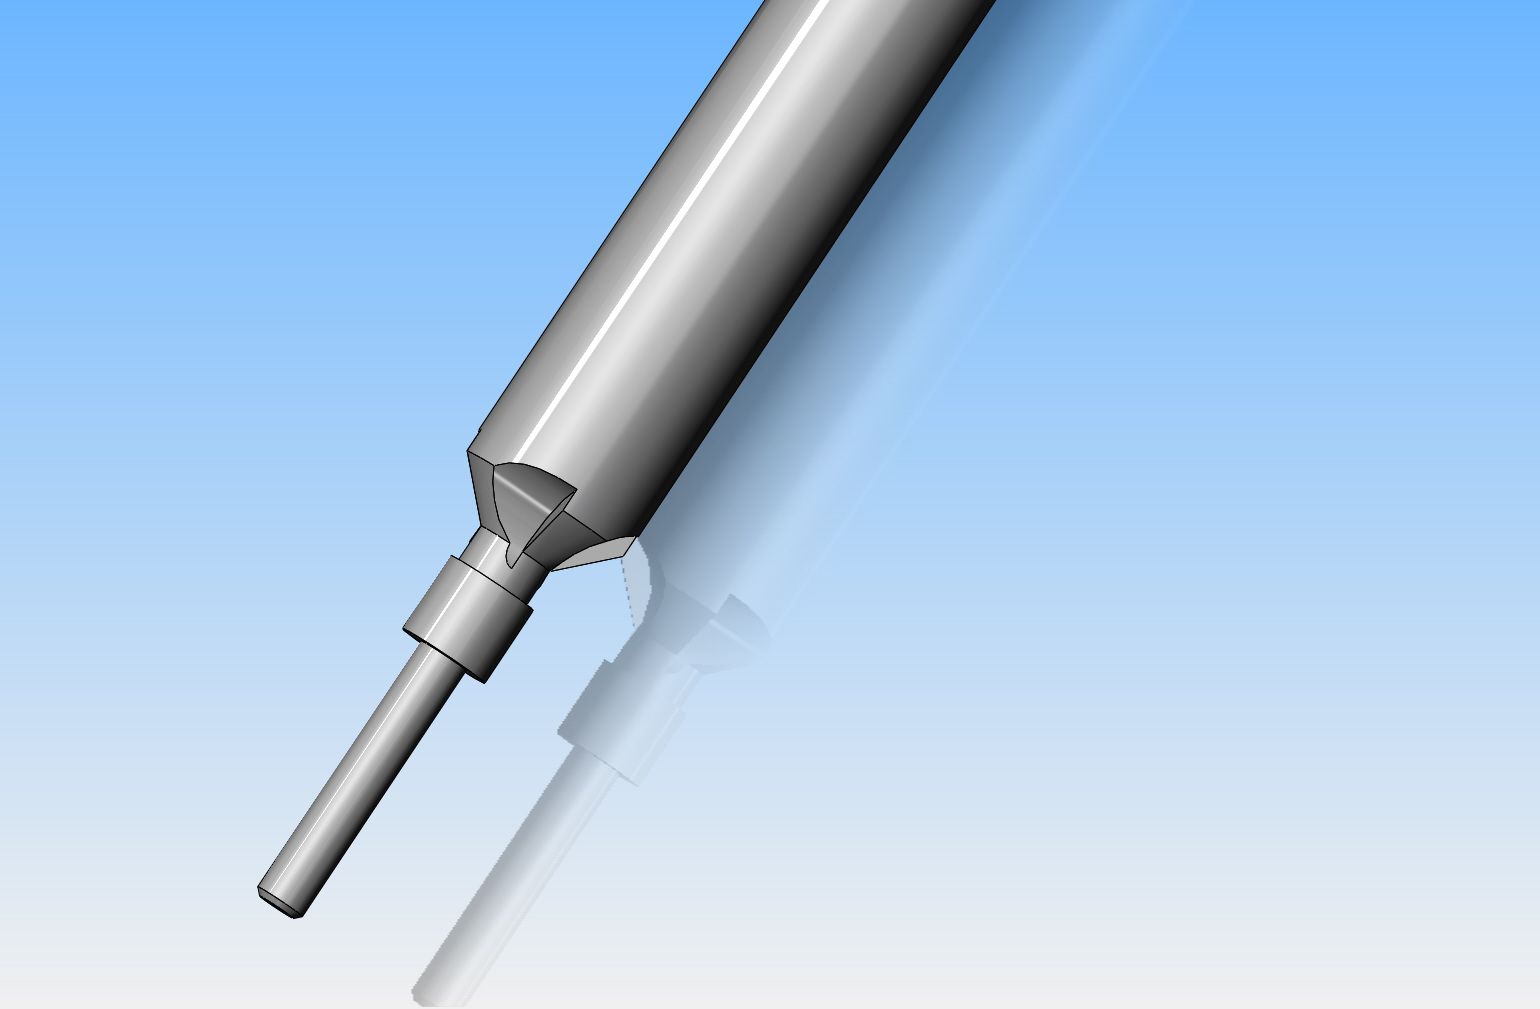
Odds are better than good that your valves are leaking. I absolutely could not make valves that didn't leak (well actually valve-seats that didn't leak) until I built a copy of the magical George Britnell seat shaping device. It is not difficult to make, and it doesn't take much time, but it yields almost magical results.--If you have any questions about it, ask me. You can use O1 steel which is hardened by quenching in oil, or you can use W1 steel which is hardened by quenching in water. Make sure you sharpen it before you harden it, as you won't be able to sharpen it afterwards. There is no need to "temper" it after hardening it, just don't drop it on a cement floor or it will shatter.---Brian


One more thing Herbie--I have found that if you can't get the valves to seal after lapping them properly, it is almost impossible to go in with this tool and "reface" the guides and make them seal. It is quicker and less frustrating to just make new guides and install them, then use this tool first and then lap the valves into the new guides. You can try to save your existing guides by refacing them with this tool, but I've never had any luck doing that. The tool will last virtually forever.
Herbie--It has happened to us all. I strongly advise you to make the Geo Britnell tool that I showed you.---Brian
Hi All,
Made a start, will be a slow build, material is the biggest problem, will use a mix of imperial and metric.
Cam and drive done. Cam cut with a fly cutter. Still have to drill and tap for lock bolt and grub screws.
Cheers
Andrew


Made a start, will be a slow build, material is the biggest problem, will use a mix of imperial and metric.
Cam and drive done. Cam cut with a fly cutter. Still have to drill and tap for lock bolt and grub screws.
Cheers
Andrew


Ghosty--welcome to the gang. This is a fun project, and a good runner. There are at least three other folks down at your end of the planet building this engine, and if you get hung up on anything I will help however I can.--Brian in Canada--Your gears look great.
Hi All,
Got the crank and the push rod and guide done, drilled cam gears for grub screws and lock screw. Found a supplier for the frame alloy block, also ordered some other sizes of alloy bar for other jobs. Should be sent tomorrow. Ball bearings all ready on the way.
Will finish pushrod off after the bearings arrive.
Cheers


Great work Ghosty. I don't know why it is, but my engines are always a big hit in the land down under. I get more builders in Australia, Tasmania, and New Zealand than I do in Canada or USA.---Brian
bruedney
Well-Known Member
Hi Ghosty
Looking good
Where did you source the gears from or did you make them yourself?
Cheers
Bruce
Looking good
Where did you source the gears from or did you make them yourself?
Cheers
Bruce
Thanks Brian.
Bruce, Thanks, I got the gears from http://www.ebay.com.au/itm/162212878642?_trksid=p2060353.m1438.l2649&var=461186782626&ssPageName=STRK%3AM3AIT EBIDX% 16T and 32T,very slow in the post but they get here.
Cheers
Bruce, Thanks, I got the gears from http://www.ebay.com.au/itm/162212878642?_trksid=p2060353.m1438.l2649&var=461186782626&ssPageName=STRK%3AM3AIT EBIDX% 16T and 32T,very slow in the post but they get here.
Cheers
Hi All,
Got two delivery's today, some 6mm hardened steel rod, and some ign magnets, and repair HT lead kits. I have several electronic ign's left over from my RC aircraft days.
Won't get much done tomorrow as I have a specialist 1 1/2hrs away at midday, will most likely be there all afternoon.
Cheers

Got two delivery's today, some 6mm hardened steel rod, and some ign magnets, and repair HT lead kits. I have several electronic ign's left over from my RC aircraft days.
Won't get much done tomorrow as I have a specialist 1 1/2hrs away at midday, will most likely be there all afternoon.
Cheers

Similar threads
- Replies
- 0
- Views
- 719
- Replies
- 11
- Views
- 775
- Replies
- 2
- Views
- 2K


