
You are using an out of date browser. It may not display this or other websites correctly.
You should upgrade or use an alternative browser.
You should upgrade or use an alternative browser.
Simple Jingle Bell Motor
- Thread starter ke7hr
- Start date


Help Support Home Model Engine Machinist Forum:
This site may earn a commission from merchant affiliate
links, including eBay, Amazon, and others.
ke7hr
Active Member
- Joined
- Sep 9, 2009
- Messages
- 42
- Reaction score
- 2
Yes, now I AM in for it... It looks nice but,...
Ok. So, I can't leave well enough alone. I had to tinker with this first engine before
moving on to other projects. Running well on 6 psi was not good enough, it seems.
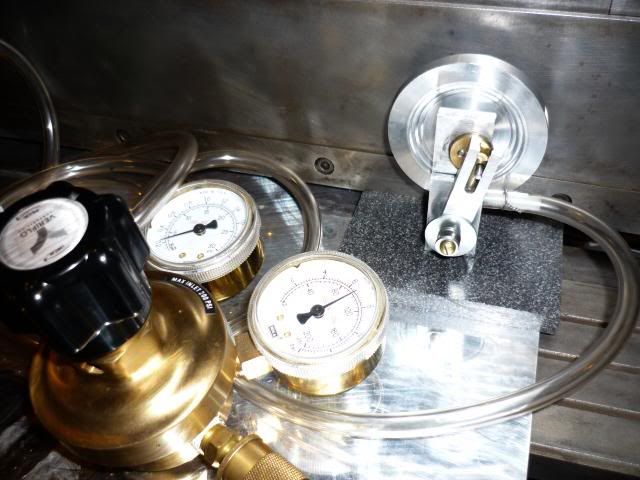
I got a set of accurate pressure gauges with a cool regulator free (from the "Craig's List" in the US) because it only could take 200 psi input and only would give 15 psi on the output, but with really good gauging. They guy that was giving it away had picked it up hoping to use it on welding tanks. His loss my gain! Now, I really know the pressure that the engine is running on.
I lubed the running parts with a drop of air tool oil and added Teflon tape to the pivot screw to reduce friction. I also played around with different washers to put varying amounts of pressure on the cylinder frame face by compressing the spring. By using a larger washer right on the frame, the speed went up at any pressure setting of the regulator. It was giving a better seal to the air input on the cylinder.
Progress. It would now run down to 4 psi all day long.
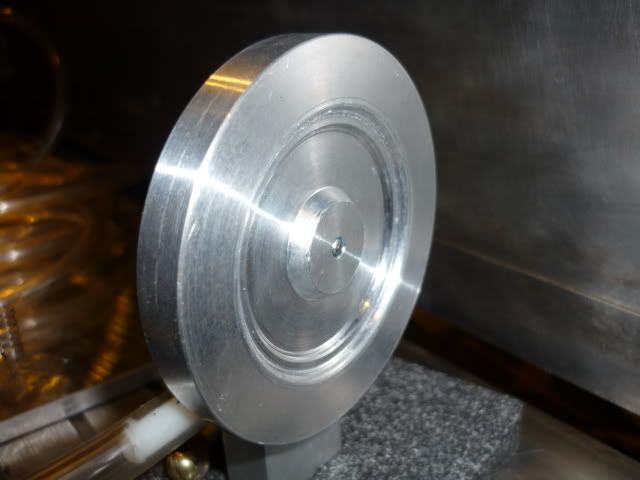
By watching the movement when the lowest pressure would stall the engine, I determined that the flywheel (which probably should have been larger like the plans) probably would be better off with some of the material taken off the middle part to put the heavy part out on the rim where it belongs. Pop the flywheel off and turn 2/3 of the middle of the flywheel into shavings.
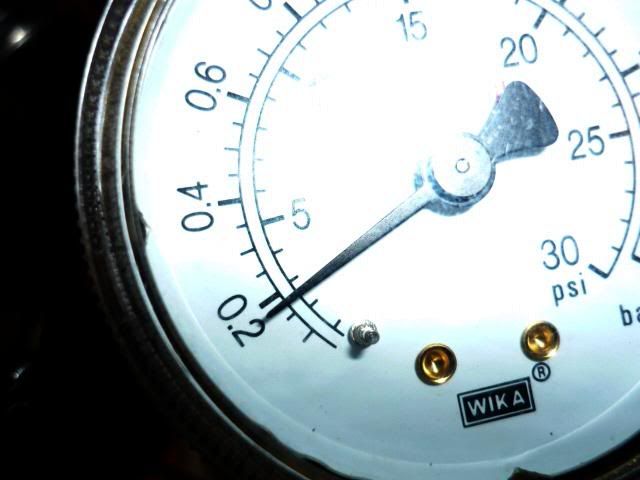
With the flywheel back on the engine, I was able to get it to run quite well at 2.5 psi indicated on the gauge. It ticks over nicely and I let it run for nearly an hour this way before taking the video (below).
<hr>
Running on 2.5 psi!

<hr>
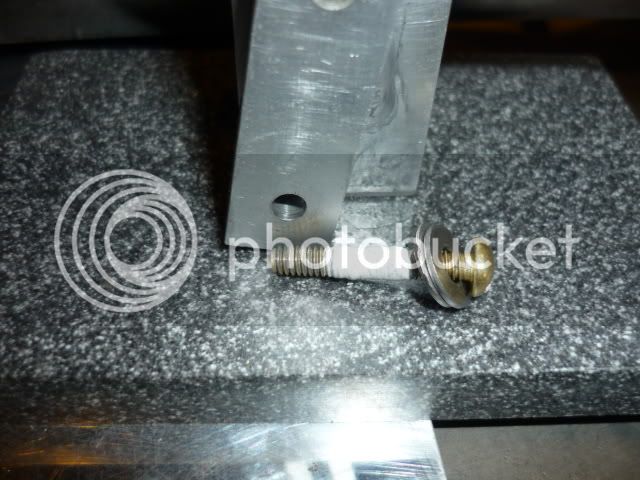
Teflon tape on the threads of the pivot bolt.
<hr>
turned flywheel.
<hr>
2.5 psi indicated!
<hr>
New Gauges and engine running.
<hr>
Now, maybe I can keep myself from turning a full size (according to the original plan)
flywheel and move on to another project...
Ok. So, I can't leave well enough alone. I had to tinker with this first engine before
moving on to other projects. Running well on 6 psi was not good enough, it seems.
I got a set of accurate pressure gauges with a cool regulator free (from the "Craig's List" in the US) because it only could take 200 psi input and only would give 15 psi on the output, but with really good gauging. They guy that was giving it away had picked it up hoping to use it on welding tanks. His loss my gain! Now, I really know the pressure that the engine is running on.
I lubed the running parts with a drop of air tool oil and added Teflon tape to the pivot screw to reduce friction. I also played around with different washers to put varying amounts of pressure on the cylinder frame face by compressing the spring. By using a larger washer right on the frame, the speed went up at any pressure setting of the regulator. It was giving a better seal to the air input on the cylinder.
Progress. It would now run down to 4 psi all day long.
By watching the movement when the lowest pressure would stall the engine, I determined that the flywheel (which probably should have been larger like the plans) probably would be better off with some of the material taken off the middle part to put the heavy part out on the rim where it belongs. Pop the flywheel off and turn 2/3 of the middle of the flywheel into shavings.
With the flywheel back on the engine, I was able to get it to run quite well at 2.5 psi indicated on the gauge. It ticks over nicely and I let it run for nearly an hour this way before taking the video (below).
<hr>
Running on 2.5 psi!
<hr>
Teflon tape on the threads of the pivot bolt.
<hr>
turned flywheel.
<hr>
2.5 psi indicated!
<hr>
New Gauges and engine running.
<hr>
Now, maybe I can keep myself from turning a full size (according to the original plan)
flywheel and move on to another project...
black85vette
Well-Known Member
- Joined
- Jan 18, 2009
- Messages
- 1,084
- Reaction score
- 25
On a wobbler that I built I also used something called teflon tape but not the plumber tape used for pipes. I used a type of tape that has teflon on its surface, a plastic carrier and adhesive on the back. It is used in high heat / pressure sealing applications to keep material from sticking to a heating element.
Anyway, I cut out a small piece of it and put it over the air port on the cylinder and then cut out the port with an exacto knife. It needs to be long enough to keep the air supply covered when the cylinder moves to the exhaust side. Then I put an equal amount on the end opposite the port and the same distance. This reduces the amount of contact area between the cylinder and the frame to two small spots. The tefllon acts as a bearing and reduces the friction even further.
Great idea covering the threads and reducing friction there. Appears that you have caught "the bug". The next bug is when nothing is ever smooth, shiny or perfect enough. :big:
zeeprogrammer
Well-Known Member
- Joined
- Mar 14, 2009
- Messages
- 3,362
- Reaction score
- 13
Nicely done Paul.
And thanks for the tips!
And thanks for the tips!


$45.99
Sunnytech Mini Hot Air Stirling Engine Motor Model Educational Toy Kits Electricity HA001
stirlingtechonline


$12.56
$39.95
Complete Plans for Building Horse Barns Big and Small(3rd Edition)
ThriftBooks-Atlanta


$94.99
$109.99
AHS Woodmaster 4400 Maintenance Kit for Outdoor Wood Boiler Treatment
Alternative Heating & Supplies

$99.99
AHS Outdoor Wood Boiler Yearly Maintenance Kit with Water Treatment - ProTech 300 & Test Kit
Alternative Heating & Supplies


$89.99
Outdoor Wood Boiler Water Treatment Rust Inhibitor- AmTech 300 & Test Kit
Alternative Heating & Supplies


$39.99
$49.99
Sunnytech Low Temperature Stirling Engine Motor Steam Heat Education Model Toy Kit For mechanical skills (LT001)
stirlingtechonline


$24.99
$34.99
Bowl Sander Tool Kit w/Dual Bearing Head & Hardwood Handle | 42PC Wood Sander Set | 2" Hook & Loop Sanding Disc Sandpaper Assortment | 1/4" Mandrel Bowl Sander for Woodturning | Wood Lathe Tools
Peachtree Woodworking Supply Inc


$39.58
$49.99
Becker CAD 12 3D - professional CAD software for 2D + 3D design and modelling - for 3 PCs - 100% compatible with AutoCAD
momox Shop

$519.19
$699.00
FoxAlien Masuter Pro CNC Router Machine, Upgraded 3-Axis Engraving All-Metal Milling Machine for Wood Acrylic MDF Nylon Carving Cutting
FoxAlien Official


![DreamPlan Home Design and Landscaping Software Free for Windows [PC Download]](https://m.media-amazon.com/images/I/51kvZH2dVLL._SL500_.jpg)
$0.00
DreamPlan Home Design and Landscaping Software Free for Windows [PC Download]
Amazon.com Services LLC


Similar threads
- Replies
- 65
- Views
- 30K