PatRoVa Rotary Valve engine

Home Model Engine Machinist Forum

Help Support Home Model Engine Machinist Forum:

This site may earn a commission from merchant affiliate links, including eBay, Amazon, and others.
Hello.

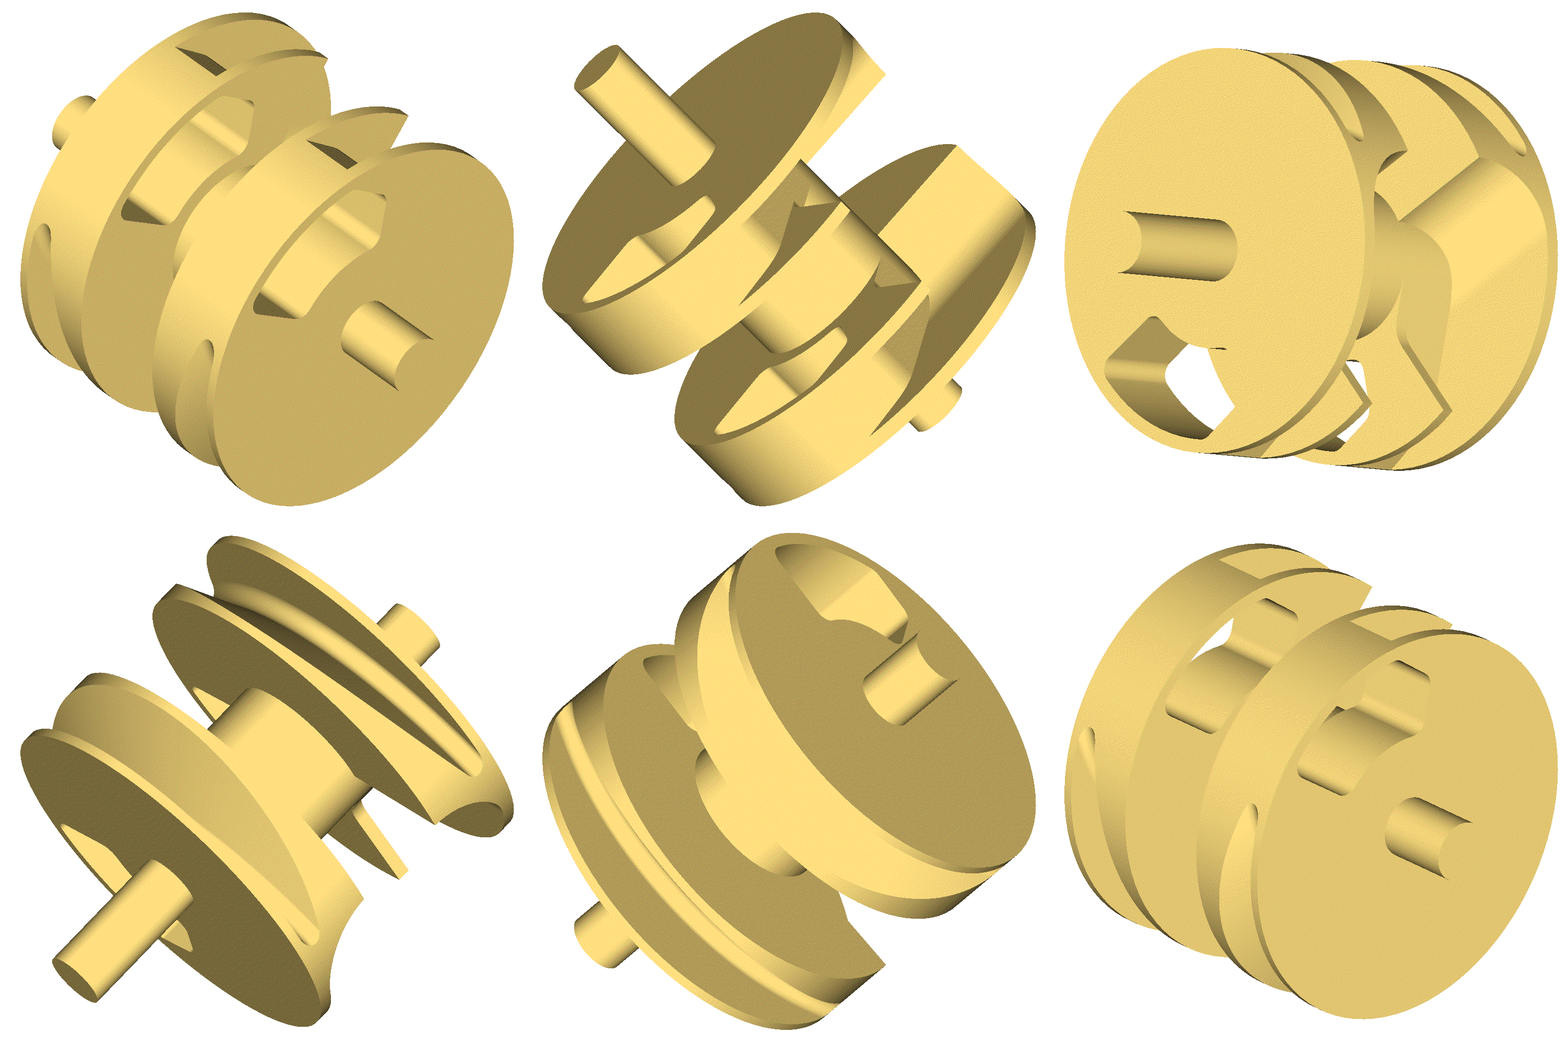
The two lips of the combustion chamber ports (or windows) in cooperation with less than half of the “inner” surface of the two disks do the high pressure sealing as shows the following animation:

PatRoVa_sealing.gif


(the same animation in slower motion is at http://www.pattakon.com/PatRoVa/PatRoVa_sealing_slow.gif

The red color on the window lips indicates sealing of a high pressure in the combustion chamber, the orange color is for the medium pressure period and the yellow color on the window lips is for the low pressure difference period.

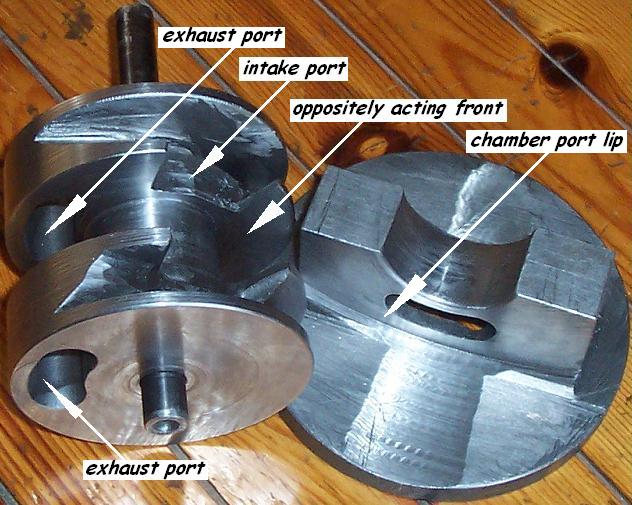
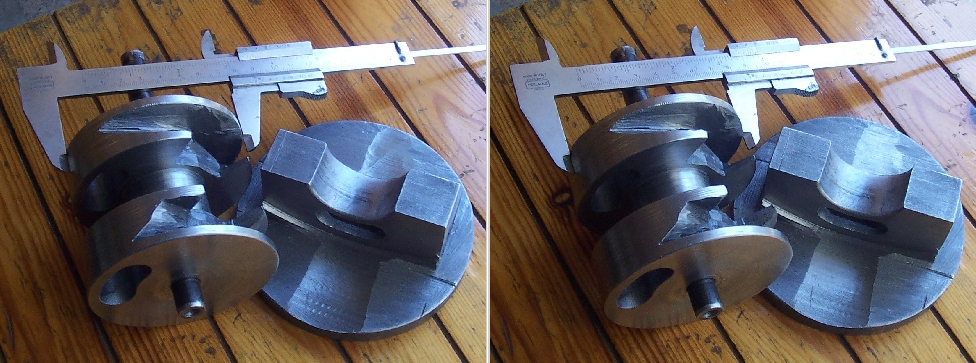
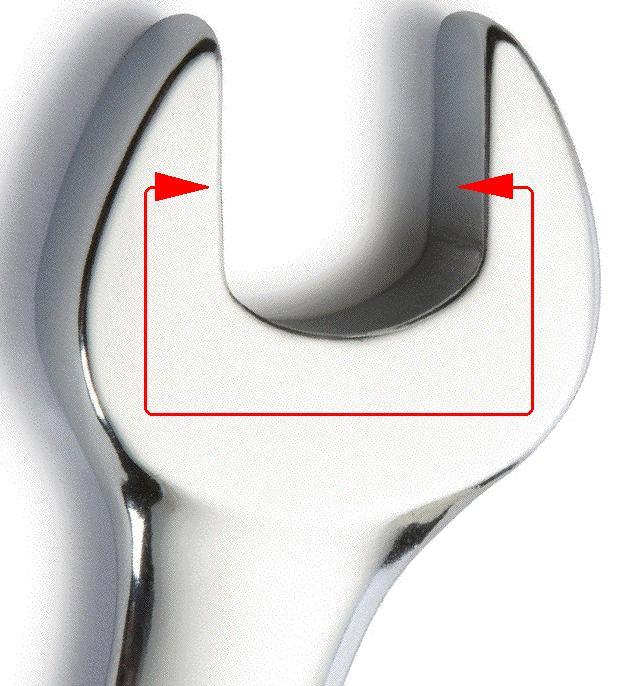
Around the PatRoVa rotary valve, only the, about, one quarter (some 90 degrees) of the flat surface seals high pressure differences. At this quarter the section of the rotary valve is uniform and its shape is extremely robust, as an open spanner / wrench:
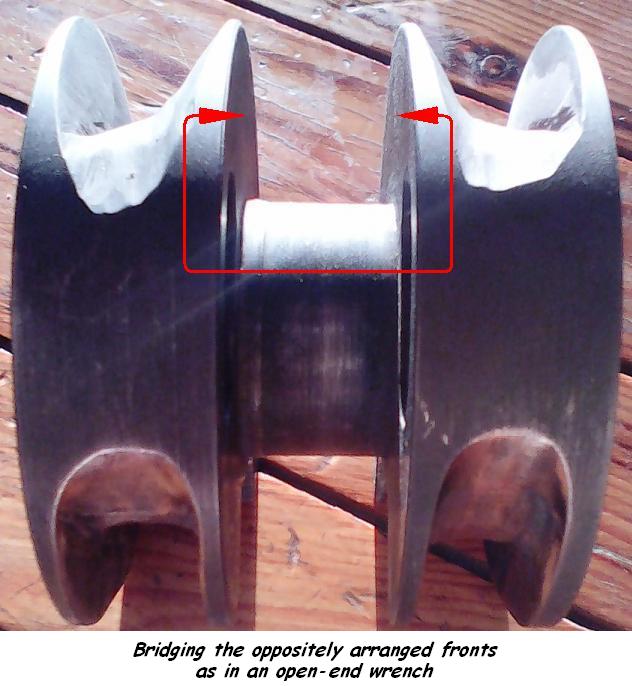

PatRoVa_photo11F.jpg


open_end_wrench.jpg


Worth to mention:


The hub (the robust fat and short shaft at the ends of which the two disks are secured) has about uniform temperature.

Only around the exhaust ports of the PatRoVa rotary valve the temperature is substantially higher than the rest valve. But this part of the rotary valve surface is not related with the sealing of significant pressure differences. So it is not a problem: if necessary, by grinding slightly the flat surface around the exhaust ports periphery, the local thermal expansion cannot cause seizure between the disks and the window lips.


Worth, also, to mention:

In the case of the PatRoVa rotary valve only the one dimension is important for the sealing.
The displacement of the valve at the other two dimensions doesn’t affect the sealing quality.
And, as regards the sealing quality, the significant dimension (in simple words: the distance between the two disks) is small enough to keep the thermal expansion at this direction / dimension low.

The recycling during the next suction cycle of any leakage during the high pressure period is another significant characteristic of the PatRoVa architecture.

The eliminated friction loss is another significant characteristic of the PatRoVa architecture.

Thoughts?
Objections?

Thanks
Manolis Pattakos
 
Hello.

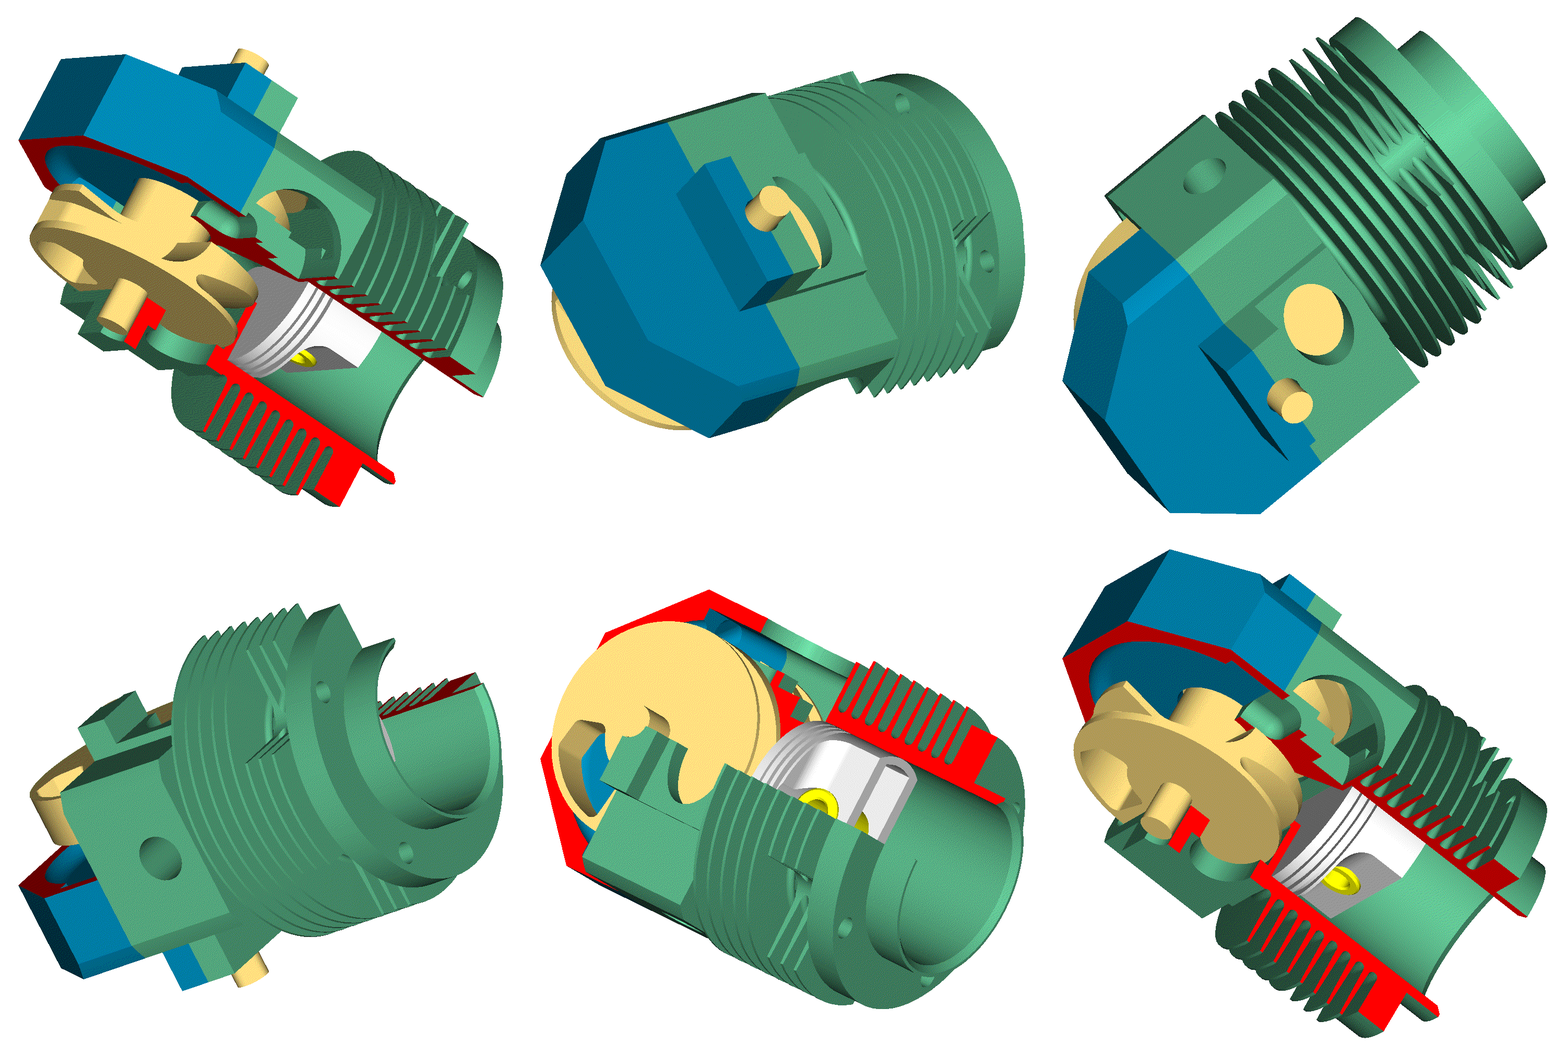
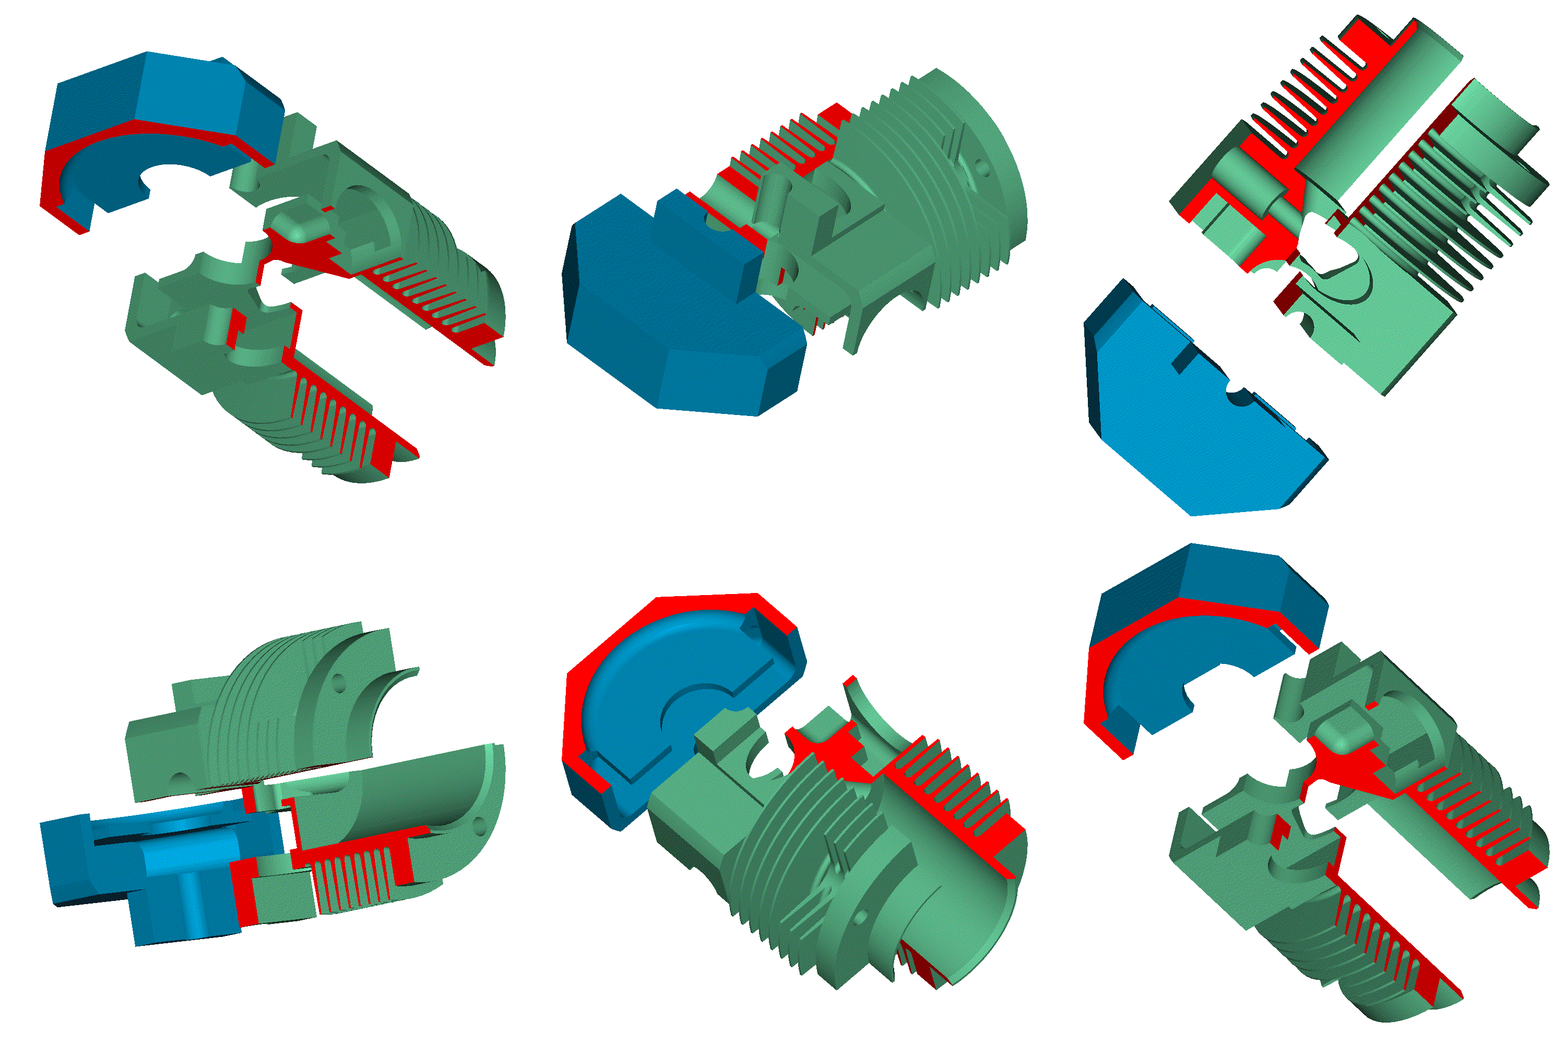
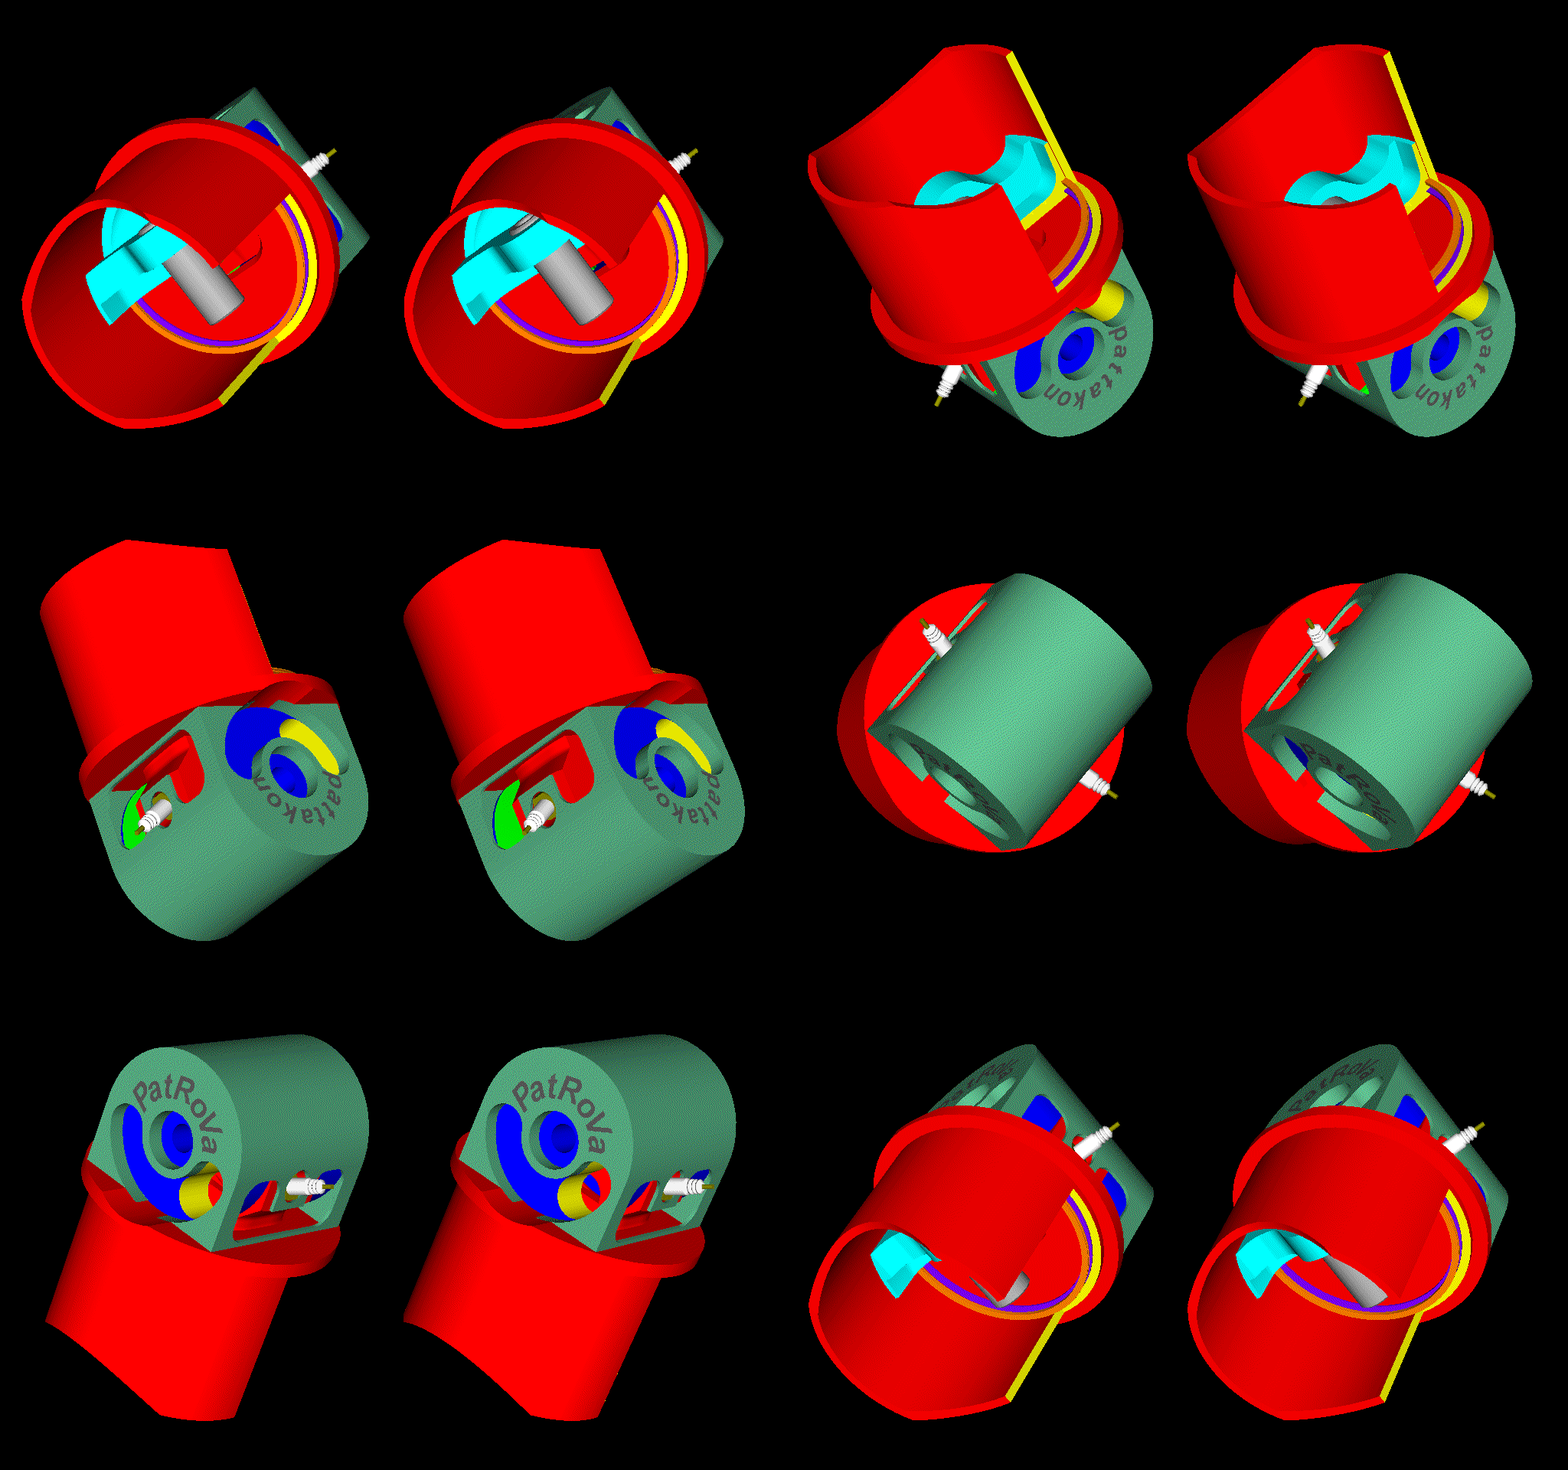
The following animations show several design details of the PatRoVa rotary valve / head / cylinder for normal size engines:

PatRoVa_details_2.gif


PatRoVa_details_3.gif


PatRoVa_details_4.gif


Most of these details are applicable to model engines, too.

Thanks
Manolis Pattakos
 
Manolis, thanks for your interesting comments on the proposed gas flow vs traditional poppet valves. You make some very good points about the shortcomings of poppet valves. I look forward with interest to seeing how the rotary valve project goes when you get it up and running.

I may have missed in your other posts, but how will the rotary valve be lubricated to stand up to 40,000rpm while coping with exhaust temperatures, which even with a short straight path for the exhaust, which will make the valve quite hot, I should think? Are you looking at hi-tech coatings or different materials for head and valve disc?
 
Hello Hopper.

You write:
“I may have missed in your other posts, but how will the rotary valve be lubricated to stand up to 40,000rpm while coping with exhaust temperatures, which even with a short straight path for the exhaust, which will make the valve quite hot, I should think? Are you looking at hi-tech coatings or different materials for head and valve disc?”


In case of normal size engines (say a CFR250 modified to PatRoVa or a Ducati Panigale modified to PatRoVa, or a Yamaha R1 modified to PatRoVa P1 as at http://www.pattakon.com/PatRoVa/PatRoVa_I4_90.gif (it needs different crankshaft, too)) the rotary valve will run dry, with the small roller bearings sealed (or ceramic).
With a DLC coating (Diamond Like Carbon Coating) on the working flat surfaces, the PatRoVa rotary valve will run wear-free (reliability) and at low friction in case of surface contact.


In the case of small engines (model / RC engines) the lubricant used for the lubrication of the piston and of the crankshaft bearings will also lubricate the flat working surfaces of the PatRoVa rotary valve and its bearings.

With the short stroke PatRoVa model engine (animations at http://www.pattakon.com/PatRoVa/PatRoVa_model_short_stroke_crankshaft_support.gif and http://www.pattakon.com/PatRoVa/PatRoVa_model_short_stroke.gif ) running at 50,000rpm, the PatRoVa rotary valve in the cylinder head is rotating with only 25,000rpm (half crankshaft speed) and is completely rid of loads (if it is not yet clear “how”, please let me know to further explain).

In comparison, the crankshaft of the OS.18Z 2-stroke (15mm stroke) runs reliably till 42,500rpm (i.e. at almost double rpm than the PatRoVa rotary valve) and, note, it runs “heavily loaded” (combustion and inertia loads).

So, I can’t see a problem.


Regarding the “high temperature” of the PatRoVa rotary valve, the PatRoVa rotary valve has a mean temperature lower than the temperature of the top cylinder walls and of the head bottom surface and of the piston crown.

The “red hot” exhaust gas does pass through the two exhaust ports of the PatRoVa and inevitably heats it. But it passes freely and quickly (just see the length (it is the width of the disk) and the shape of its path into the PatRoVa).
Most of the rest valve surface is in contact with cold (or, at least, not too hot) gas.
The rotary valve actually lives “into” the fresh cold charge.
During the intake, the fresh / cold charge passes through the intake ports and cools down the rotary valve.
During the final part of the compression and during the combustion and during the expansion, the hot compressed gas “sees” through the two windows only a small part of the inner flat surfaces of the two disks.

In comparison think what happens on the surface of the piston crown and of the bottom of the cylinder head and of the upper cylinder liner:
During the compression – combustion – expansion – exhaust this surface is heated by the hot and extremely hot gas.
The complete above surface is permanently in contact with the hot gas in the cylinder.
Only during the intake ( suction cycle ) the above surface comes in contact with cold gas and is cooled internally.
Without additional cooling (cooling fins, cooling liquid) the engine will melt.


Or compare the temperature of the PatRoVa rotary valve with that of the Cross or Cross-Bishop or Aspin rotary valves. In the Bishop – Cross design, half of the rotary valve is “in the hell”; it actually is an extension of the red-hot exhaust pipe; it never sees cold (or not too hot) gas. The Aspin rotary valve comprises the “top” of the combustion chamber and is difficult to be cooled.


Do I miss something?

Thanks
[FONT=&quot]Manolis Pattakos

[/FONT]
 
One of the main reasons for the success of the 4 valve head is the combustion chamber shape and the central location of the spark plug.
I have problems with your design as I cant see where you put the spark plug and how do you achieve good flame propagation
 
Manolis, no I don't think you have missed something! Very thorough explanation of the theory behind your design. I'm very interested to see it in practice. The full-size motorbike engine in your pictures in earlier posts, has it been made to run? Might it be easier to make a full sized prototype head like the motorbike engine than to do it in miniature on a model engine?
 
Hello Goldflash

You write:
“One of the main reasons for the success of the 4 valve head is the combustion chamber shape and the central location of the spark plug.
I have problems with your design as I cant see where you put the spark plug and how do you achieve good flame propagation”


The Dexmodromic Ducati Panigale is regarded as one of the most technologically advanced engines today.

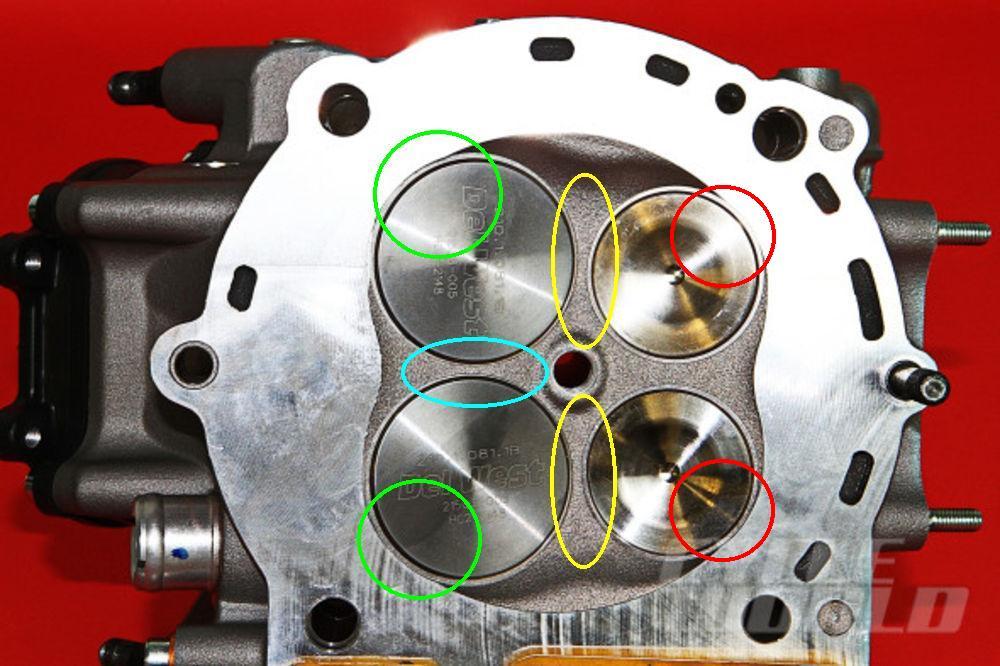
Here is the “bottom” of its cylinder head (the circles / ellipses are explaines at post #20):

Ducati_Panigale_flow_restrictions.jpg


And here it is shown the piston crown of the Panigale 1299, at left, and of the Panigale 1199 at right:

Ducati-1299-Panigale-01-590x393.jpg


The combustion chamber is formed between the cylinder head bottom and the piston crown.

With 12.6:1 compression ratio and 60.8mm stroke, the mean height of the combustion chamber when the piston is at TDC is 5.24mm.

Imagine a 116mm diameter disk with an average height of only 5.24mm.

The space in the valve pockets on the piston crown comprises a significant part of the combustion chamber. A good part of the combustion happens into the valve pockets.

The spark plug is centrally located, however the flame has to travel all the 116/2=58mm to reach to the ends of the combustion chamber.

The combustion chamber (the space between the bottom cylinder head and the piston crown) is designed around the poppet valves, their motion and their limitations.

If the pent-roof combustion chamber were so good, the 2-strokes would use the pent-roof, too.

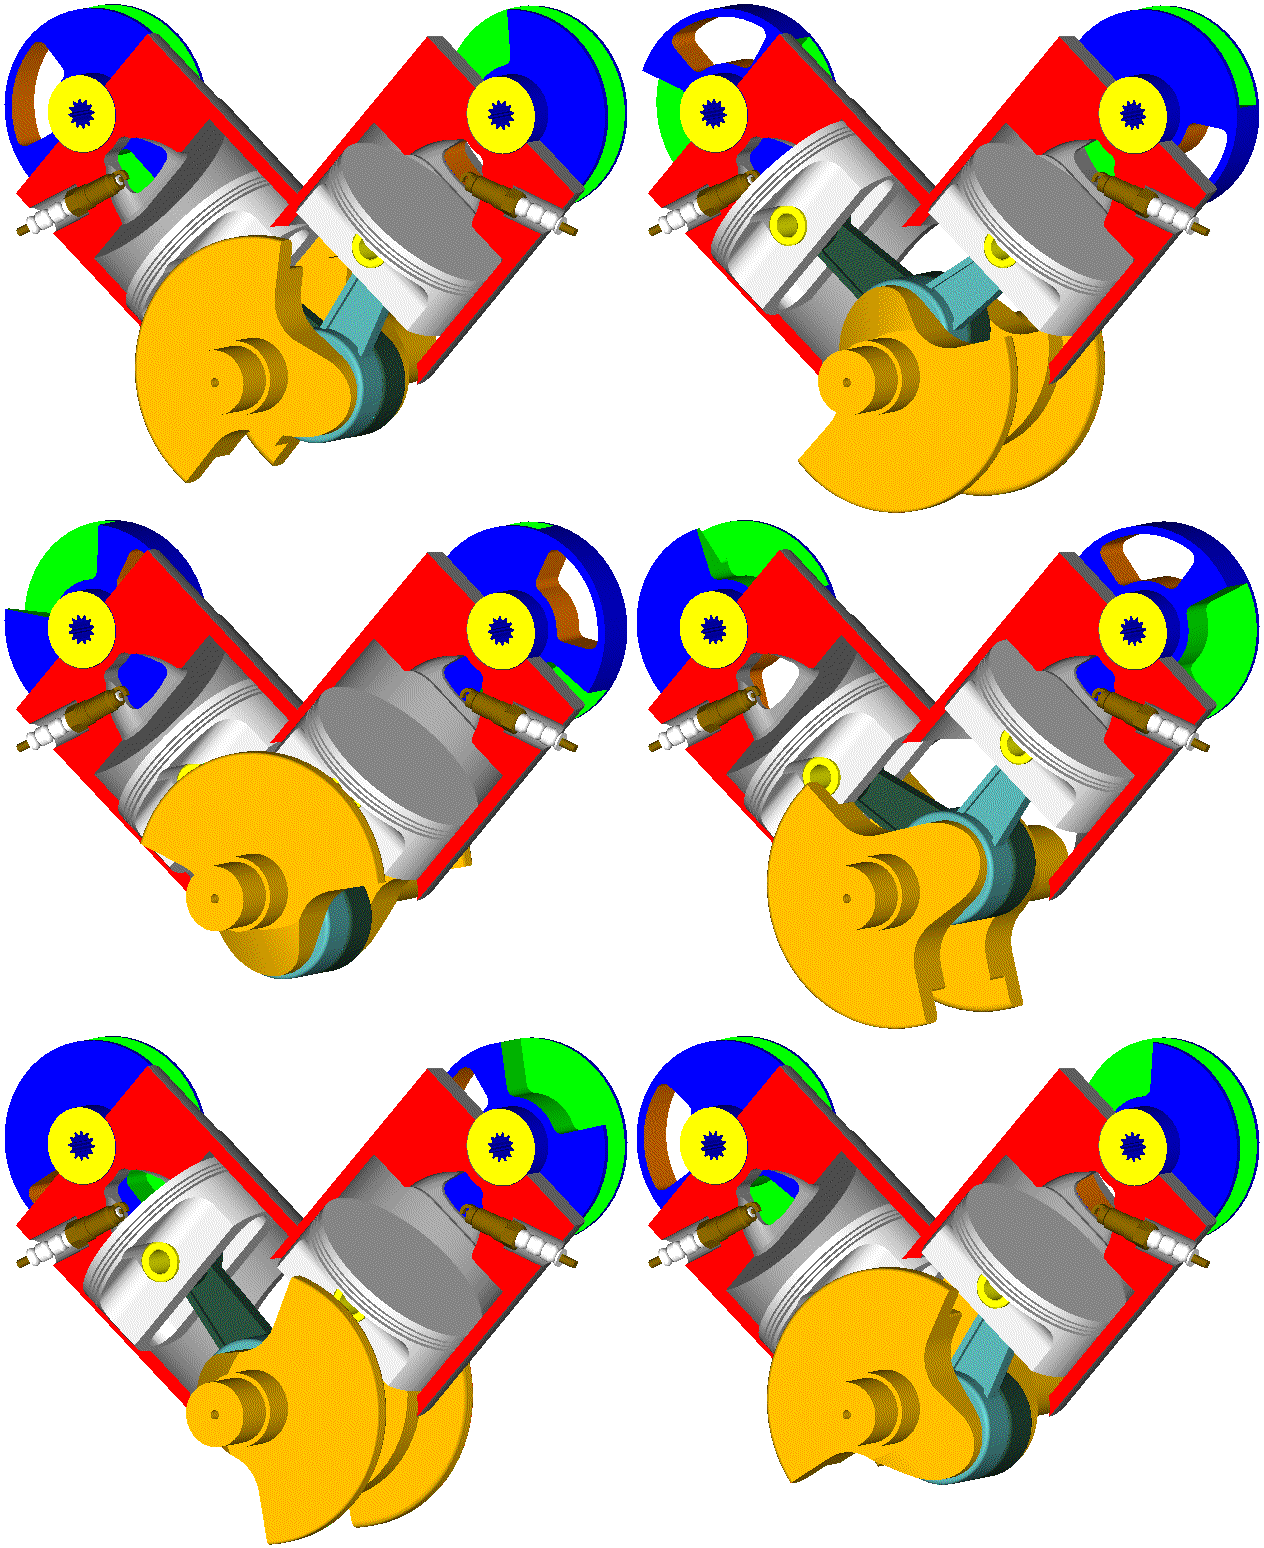
Here is the PatRoVa V-2 for comparison with the abovementioned Panigale:

PatRoVa_V90_small.gif


The cylinders / cylinder heads are sliced in half; the animation shows the shape of the half combustion chamber. The width of the complete combustion chamber is double.

At TDC the clearance between the flat piston crown and the flat bottom of the cylinder head is as small as possible (it is required a safety clearance to not allow piston / cylinder head collision at high revs) so that almost all the compressed gas is in the chamber between the two disks of the PatRoVa rotary valve.
See the size of the squeeze area.
See the shape of the combustion chamber (its width is some 30mm) and how close to the spark plug is concentrated the mixture to be burned.

The travel of the flame is about half than in the Panigale (for same bore).
And while in the Panigale the flame actually propagates along only two dimensions (as explained, the combustion chamber is like a thin disk), in the case of the PatRoVa the flame propagates along all three dimensions and its speed is substantially faster, enabling most of the combustion to end in a narrow area of angle around the TDC.

Unless I am wrong, in the Ducati Panigale they use, at specific conditions, even 60 degrees spark advance. Think what this means.

With substantially faster combustion and with substantially more compact combustion chamber, things improve a lot (fuel efficiency, clean exhaust, less cooling, etc).

While the 4-stroke poppet valve engines are the best engines today, they have several issues. These issues get apparent when alternative designs come to challenge the existing solutions .


Thoughts?

Objections?

Questions?

Thanks
Manolis Pattakos

.
 
Hello Hopper.

You write:
“I'm very interested to see it in practice.
The full-size motorbike engine in your pictures in earlier posts, has it been made to run? Might it be easier to make a full sized prototype head like the motorbike engine than to do it in miniature on a model engine?”


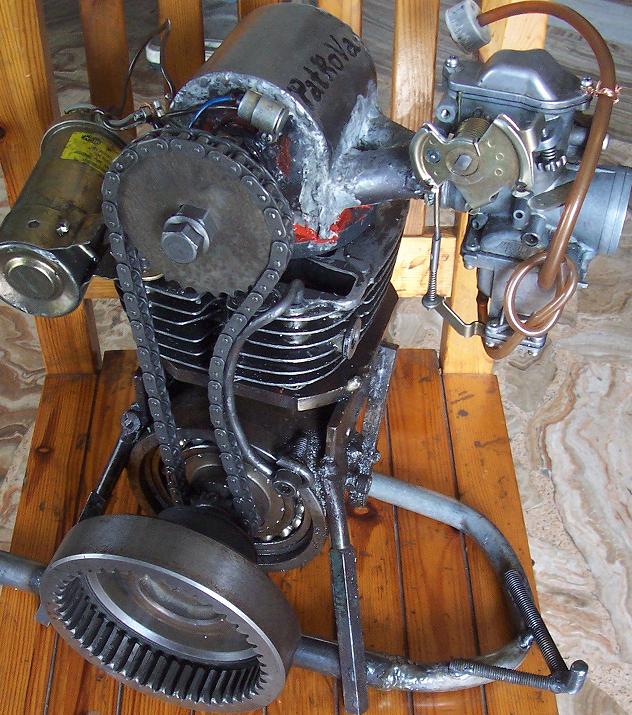
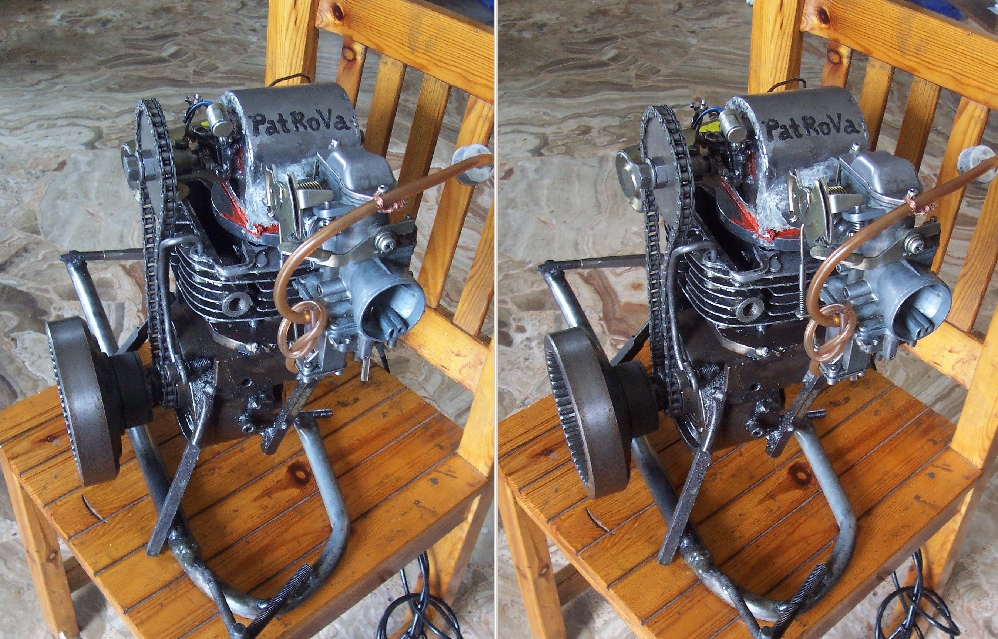
So far we have made a “proof of concept” “full size” running PatRoVa prototype:

PatRoVa_photo8.jpg


PatRoVa_photo9.jpg


Youtube video at [ame]https://www.youtube.com/watch?v=6Q-EGdeS0ws[/ame]

[youtube]https://www.youtube.com/watch?v=6Q-EGdeS0ws[/youtube]

Its manufacturing quality is less than poor, however it shows that the basic idea is right, functional and promising.


So, why a model / miniature PatRoVa?

Because it is too simple and cheap and easy to be made.
And because it will be a unique model / miniature engine: it will be the only 4-stroke model engine running at higher revs than the similar size 2-stroke model engines. Etc. Etc.


If you study the CAD drawing ( email me; contact info at http://www.pattakon.com/pattakonContact.htm ) you will be surprised by its simplicity. Most of it is easy, but accurate, conventional milling work.

If it is made by an independent third party (like one or more members of the Home Model Engine Machinist forum) and is evaluated by a third party, the evaluation would have a different value.
.
Thanks
Manolis Pattakos
 
Sadly, I don't have a mill or rotary table at this stage so can't help out. Hopefully someone will step up and make you a piece, just to see if it works as well as described or not! Come on guys, not a big job and enquiring minds want to know!
 
Thank you Hopper.

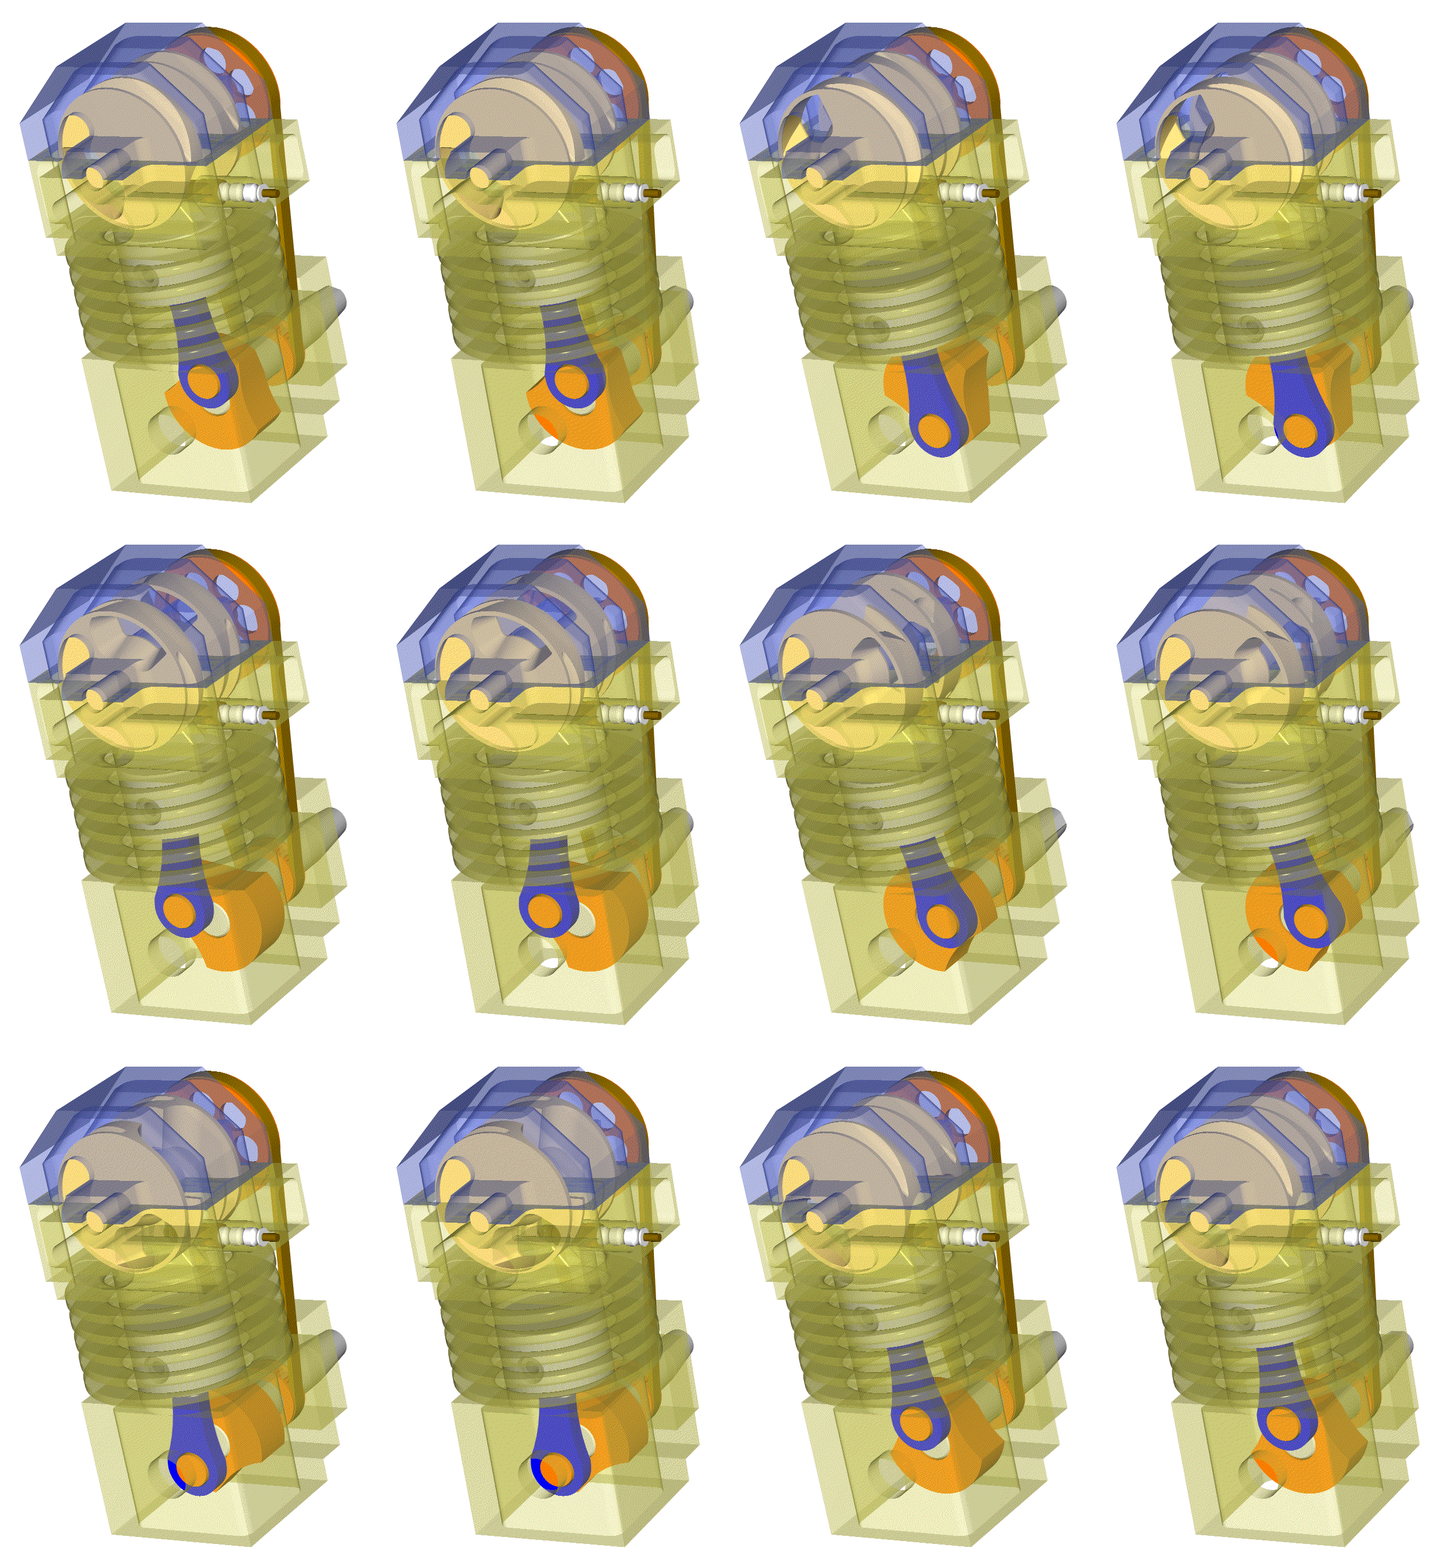
Here is another version of the PatRoVa short stroke model engine:

PatRoVa_finnel_ports.gif


There are two differences as compared to the previous animations.

It has “funnel” exhaust ports (the port area at the outer side of each disk is substantially bigger than at the inner side of the disk).

It exploits the exhaust gas inertia to accelerate a fresh air stream and cool internally by it the exhaust port of the rotary valve as well as the exhaust passageways in the cylinder head.


In the animation the engine is shown at the “overlap”.


The exhaust is near to finish.

The exhaust port in the PatRoVa rotary valve has just started to bridge the exhaust passageways in the cylinder head with a port cut on the head cover (the blue part) providing fresh / ambient air (not air-fuel, just air).

The inertia of the exiting exhaust gas into the exhaust gas piping (not shown) creates a vacuum and suctions fresh air (through the exhaust port of the rotary valve) from the port on the “cylinder head cover”, scavenging the hot gas and cooling internally the exhaust port of the rotary valve, the exhaust passageways in the cylinder head and the rest exhaust piping.

In the specific design, the exhaust port of the rotary valve continues to bridge the “fresh air port” on the head cover with the exhaust for some 120 crank degrees after the overlap.


Note:
In the animation they are not shown the two side covers of the exhaust passageways. Without them, the exhaust gas exits from the sides of the cylinder head. With them, the exhaust gas exits from the two orthogonal holes at the “front” (shown at right) side of the engine (these orthogonal holes are arranged oppositely to the inlet port).


Thoughts?

Objections?

Thanks
[FONT=&quot]Manolis Pattakos [/FONT]
 
just cross your eyes and look at the middle image......love it!!!!
 
Hello IceFyre13th.

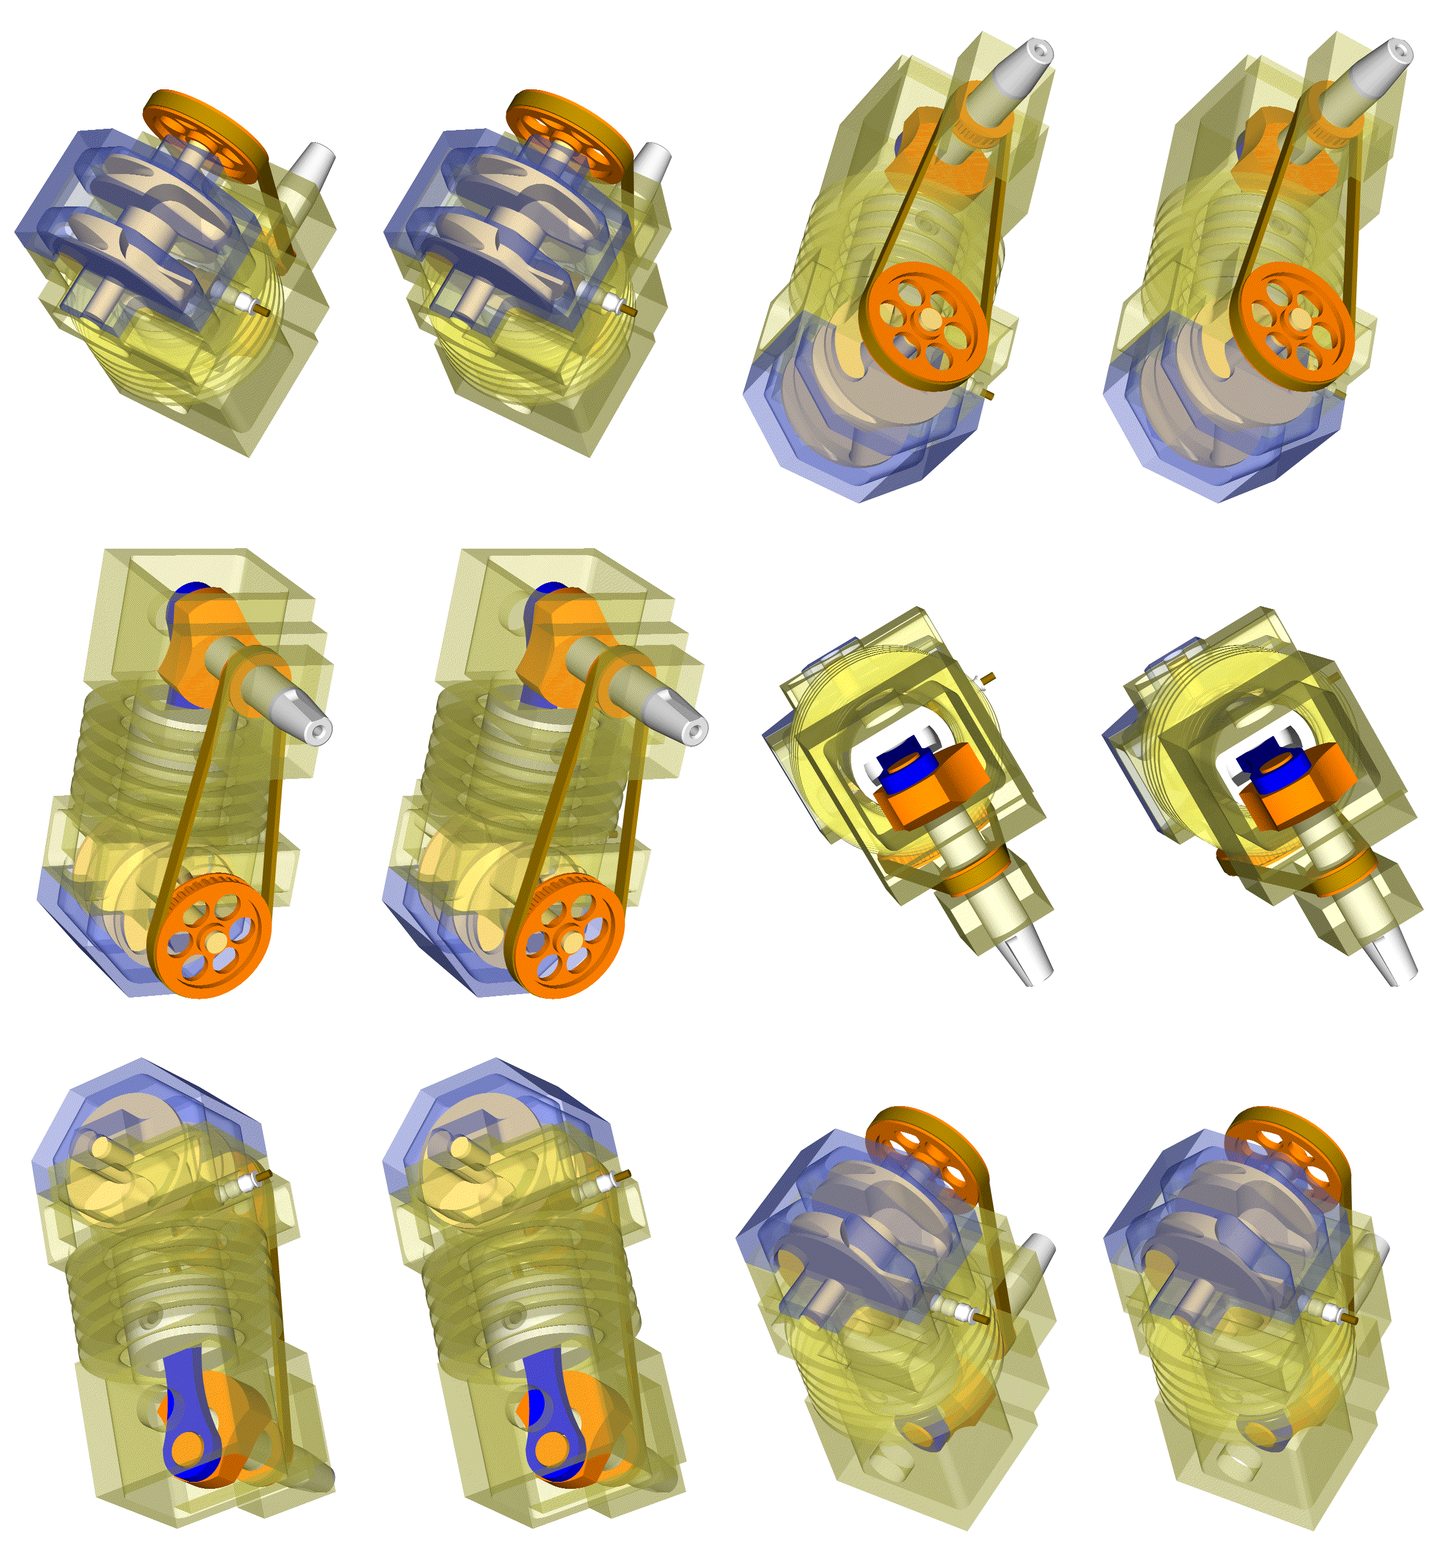
Here is the same engine stopped, shown stereoscopically from various viewpoints

PatRoVa_model_engine_transparent_STE_orbit.gif


Try to explain to the rest forum members how much more info you get by combining with your crossed-eyes the two images, than you can get from each image alone.

You can also try this:

PatRoVa_glass_STE.gif


or

PatRoVa_BigBore_STE.gif


or

PatRoVa_Prot_Ster1.jpg


or

PatRoVa_photo4.jpg


Thanks
Manolis Pattakos
 
How, what did you use to create the stereo images.........Only way I know of is with a dual lens "stereo" camera, is there an app or program that can be used?
 
Hello IcwFyre13th

You write:
“How, what did you use to create the stereo images.........Only way I know of is with a dual lens "stereo" camera, is there an app or program that can be used?”


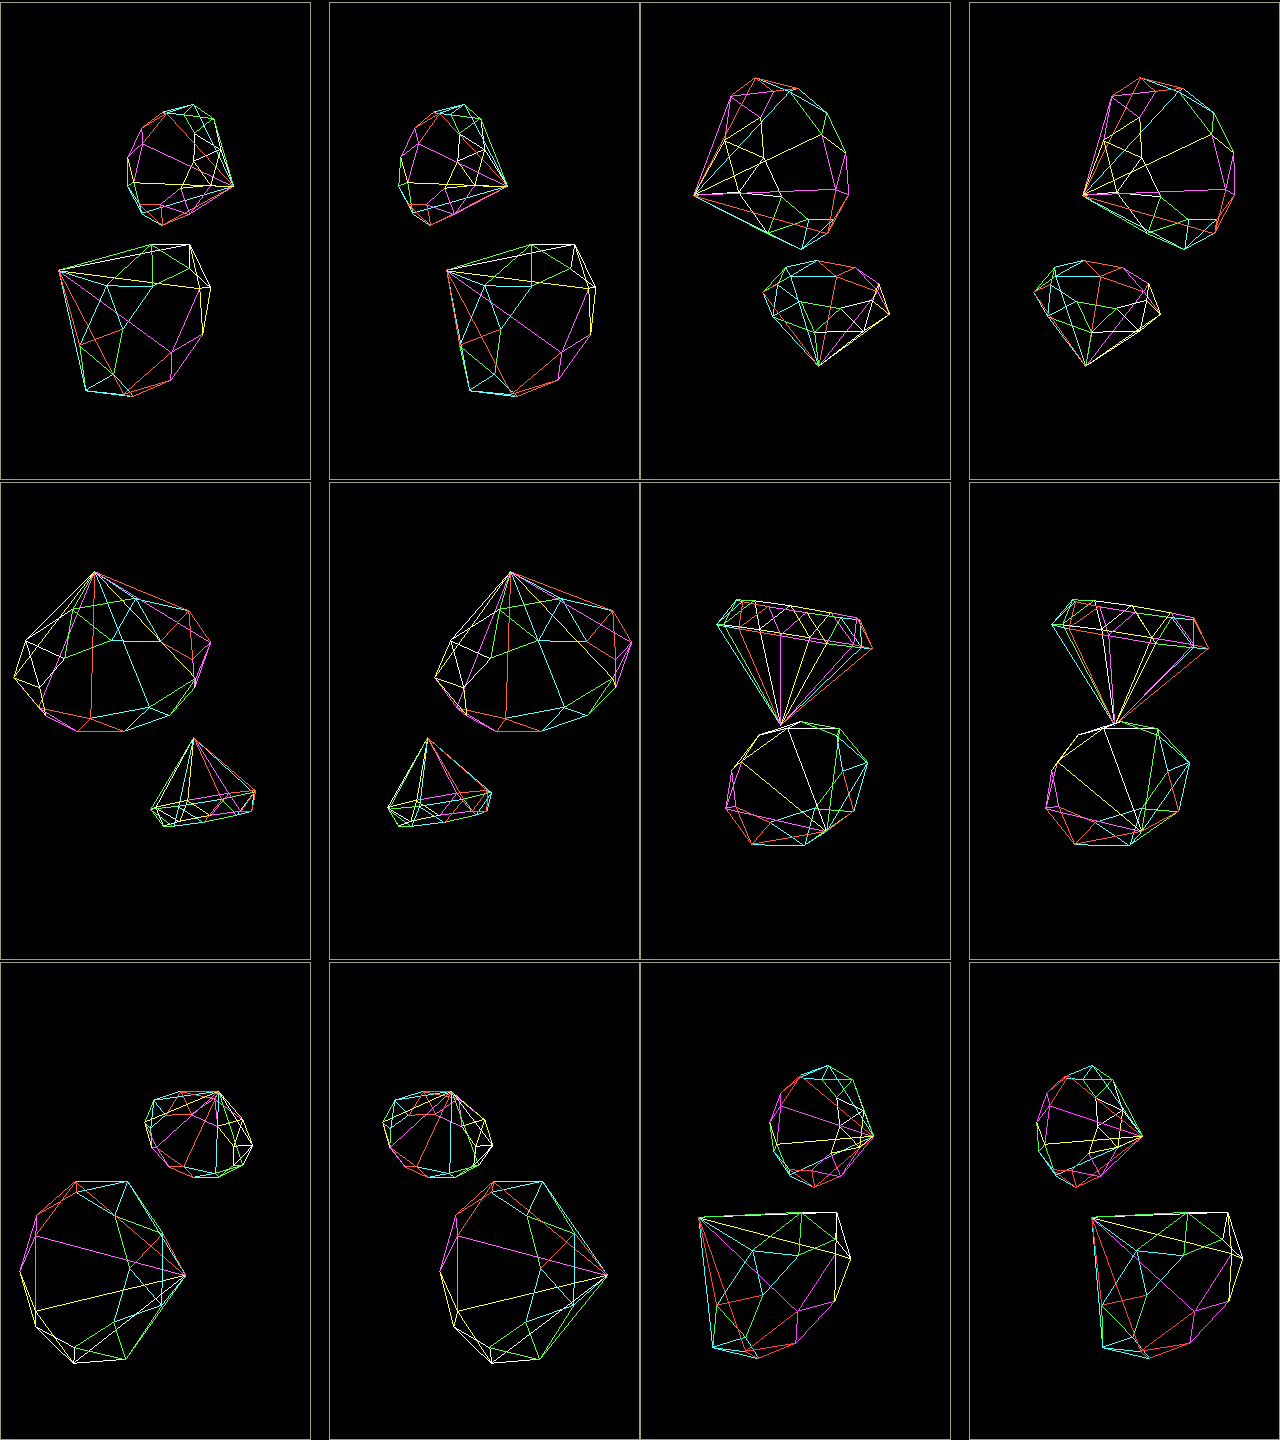
This animation (stereo diamonds):

Diamonds.gif


was made by a small program written in Quick-Basic long ago.

If you hide by your palms the side images, it gets even better.


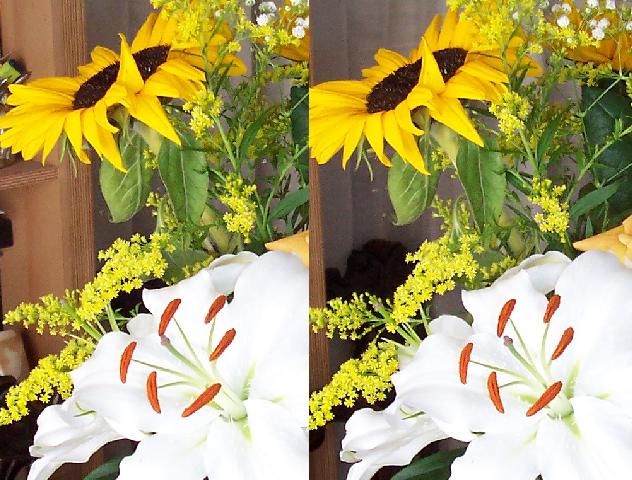
This:

flowers.jpg


stereo-photo is nice by its own.

But what if you could focus on any particular point you like?

This is what the http://www.pattakon.com/educ/StereoFlowers.exe program, written in Visual Basic, does. The result is more impressive and useful than the “static” stereo photo.
Provided you run windows, you open the above exe program and look at the image with crossed eyes; then you move the mouse smoothly around the screen and look; you can spend several minutes “exploring” this photo, and each time you re-open it you discover new details in it..
You can do the same with the http://www.pattakon.com/educ/StereoAgiaKyriaki.exe and http://www.pattakon.com/educ/StereoPatsosMilos.exe (they also need windows).


And you don’t need a “dual lens stereo camera”.
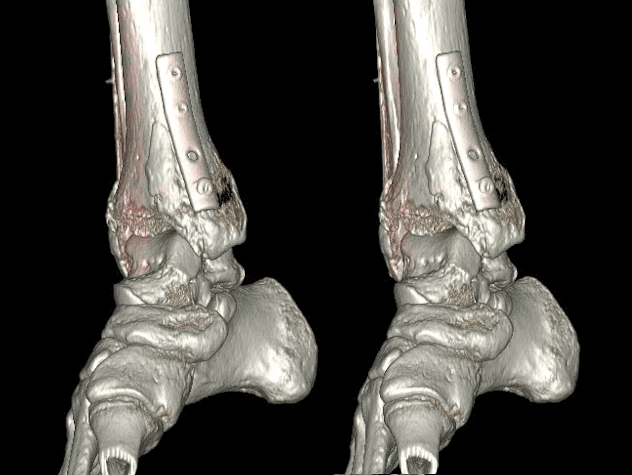
For instance, this stereo image:

Foot_Bones_repair_GE_TC.jpg


was created by combining two independent slides (from a series of slides given to the public) taken with a high tech GE’s computed tomography device.
I.e., all you need is a pair of “compatible” photos (of an object or scene) taken from the proper direction and distance.

For instance, to create the last stereo-photo of the previous post you pick a central point in the scene to focus on, you also choose the “horizontal direction” you like. Take the first photo, then rotate for some degrees (say 5, 7, 10 etc) the camera about the central point keeping the distance from the central point unchanged and the “horizontal” direction unchanged, too. Finally put the two photos side by side and look at them by “crossed eyes”.

In case you want to make stereo videos with a simple camera, you can do it, but it is a little complicated because you need a set of four small mirrors properly arranged in front of your camera. But this is another story.


And what about creating stereoscopic drawings?

Things are not too complicated.

Think simply:
What you need is not necessarily a pair of photos of the same object from two different viewpoints.
If you put properly two “identical” objects side by side and take a single photo of them, you have what you need.
This is what you can easily do with a CAD program.

Suppose you have the CAD design of a mechanism and you want to see it stereoscopically on the screen.

Orbit the mechanism to come to your desired “view direction” and set the UCS (user coordinate system) according the current view (i.e. so that the X axis is horizontal on the screen, the Y axis is normal to the X on the screen too, and the Z axis is normal to the screen towards the viewer).
Copy the complete mechanism at the one side of the original mechanism, at some distance from each other.
Then “center” the screen (pan command) to show both mechanisms (the one at the left side of the screen, the other at the right side of the screen, with an empty space between them).
Now choose the “perspective view”:
In AutoCAD there is the command “Dview” wherein you can choose the distance of the camera and the zoom/lens used.
In Autocad there is also the “Orbit” command in the sub-menu of which you can choose the “perspective view” instead of the standard “parallel view”. If necessary change the lens characteristics (by, say, the Dview command).

Now you have on your screen the mechanism stereoscopic.

If you like, you can orbit the set about the horizontal axis (orbit command) to view it stereoscopically from various viewpoints.


The important with the stereoscopic view is that looking with “crossed eyes” at the two flat images / photos of the object / mechanism / scene, the object / mechanism / scene leaves the screen or the paper and is formed in front of the viewer “alive”. The viewer thinks that he can touch by his fingers the flowers, or the nose of a person, or the piston, or the cooling fins etc of a prototype engine etc.

In complicated drawings the stereoscopic viewing proved in practice a useful and fast way to check for errors.

Talking for errors:
there is a “game” wherein they are provided two slides / scenes having a few small differences / errors between them, with the question being to find the differences / errors.
Don’t try to compete / to win in this game someone who can see “stereoscopically”, because by a glance he can spot on all differences.


It is sad that only few people insist and finally achieve to see this way. Then it is like the bicycle: you can’t forget it.


If something of the previous is confusing, please let me know to further explain.

Thanks
Manolis Pattakos
.
 
Great explanation, thank you........gives me another tool for work. I am a mechanical engineer and use SolidWorks.......its always been a problem with 2D renderings to get the full effect of the look across to others who "don't see as I do". This technique may just be what others need to "see the vision" of the product (s) I am.
 
Hello all.


IceFyre13th, it is nice to see you understood the worthiness of the “stereoscopic viewing” as a tool for all those designing with CAD programs.


I see many “likes” for the last post.
So let me further explain a few things for those interested.


Here is the application in practice of my last post.

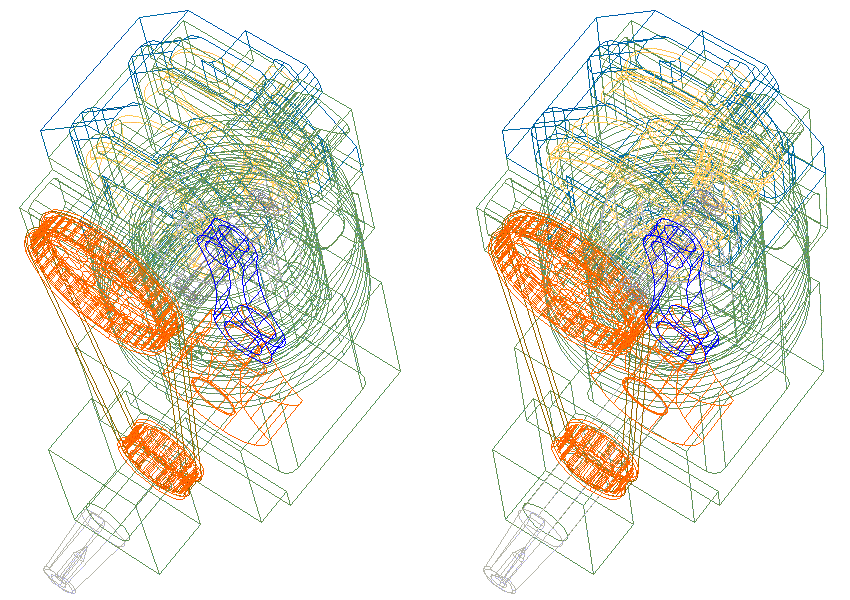
What you see in the following stereoscopic gif slide:

PatRoVa_model_engine_3_STE.gif


is what you will see opening the OOhttp://www.pattakon.com/PatRoVa/PatRoVa_model_engine_3_STE.dxfOO
drawing with a CAD program.

How to open it?
Copy the above link (omit the four O's at the sides of the text) and paste it in the “File name” box of the “Open” dialog box of your CAD.

If after opening the above dxf file:

1. you look normally at the left or at the right image, what you see is “flat” and confusing; for instance, you cannot say which part or line is over the other,

2. you look “crossed eyes” both images, what you see in the middle is the engine formed in the space in front of you and not on the screen; now things have clear out: each line and each part has a specific location relative to the rest; now you can say for sure if this or that part is closer to you (and if you like, you can “orbit” the two images in order to see the stereo engine from various viewpoints; important: the orbit should be exclusively about a horizontal axis) ,

3. you turn from perspective-view to parallel-view (for instance, using the submenu of the “Orbit” command in the case of AutoCAD)
(as you can check, you cannot see, any longer, the object stereoscopically, no matter how much you cross your eyes,
as you can also check, the right image is a copy of the left image with the displacement being exclusively along the horizontal axis),

4. you delete the right image,

then what you get is the following conventional 3D (but non-stereoscopic) dxf drawing:

OOhttp://www.pattakon.com/PatRoVa/PatRoVa_model_engine_3.dxfOO

of the last version of the PatRoVa short-stroke model engine from which the transparent animations were made (note: as expected, the size of the last dxf file is about half than the size of the “stereoscopic version”).


As you see, going from the conventional drawing to the stereoscopic and vice versa, is a simple and fast procedure.


Opening with your CAD program the last dxf file (How? Copy the above link (omit the four O's at the sides of the text) and paste it in the “File name” box of the “Open” dialog box of your CAD), you have what you need in order to examine the details and the easiness of manufacturing of a prototype.


Note: the O's at the beggining and at the end of the links were used to avoid the abreviation the system applies to the long links. If there is a better way, please let me know.

Thanks
Manolis Pattakos
.
[FONT=&quot][/FONT]
 
Hello all.

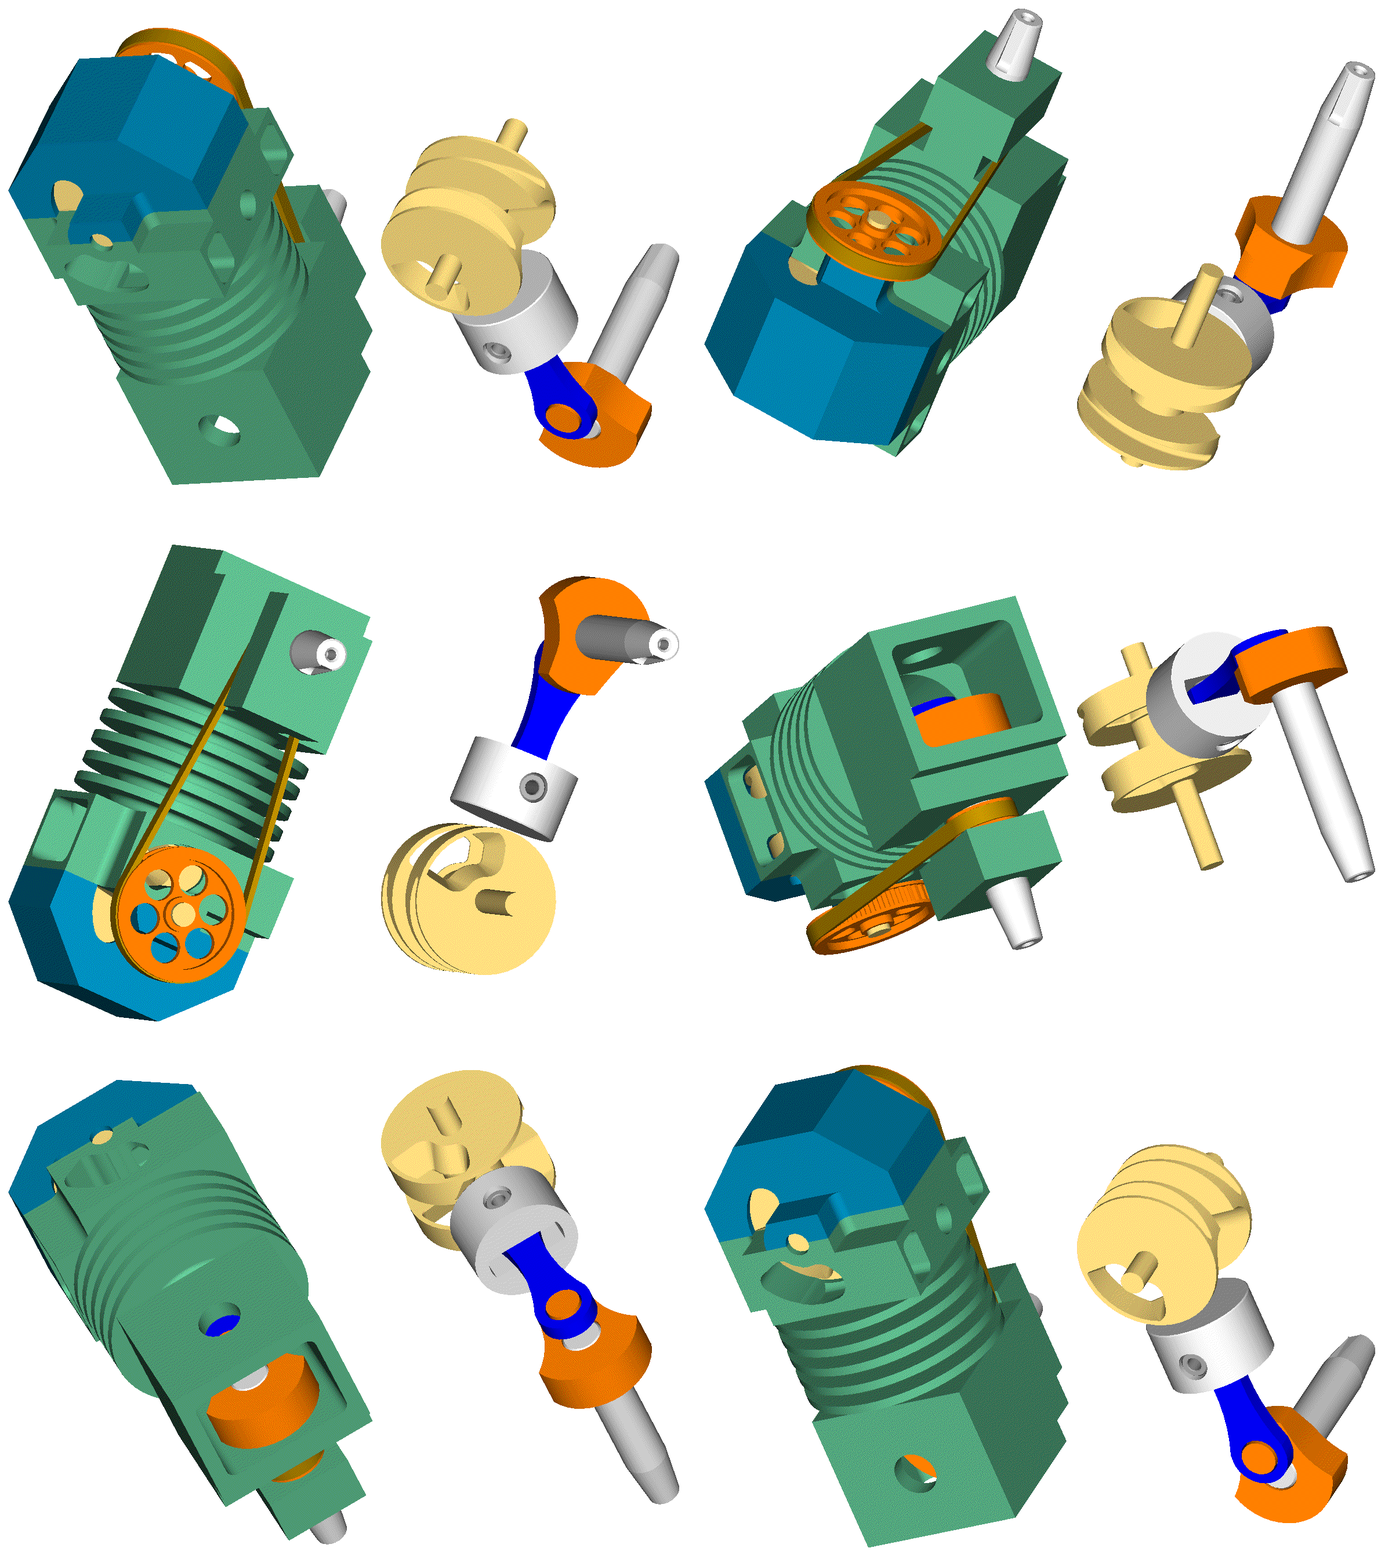
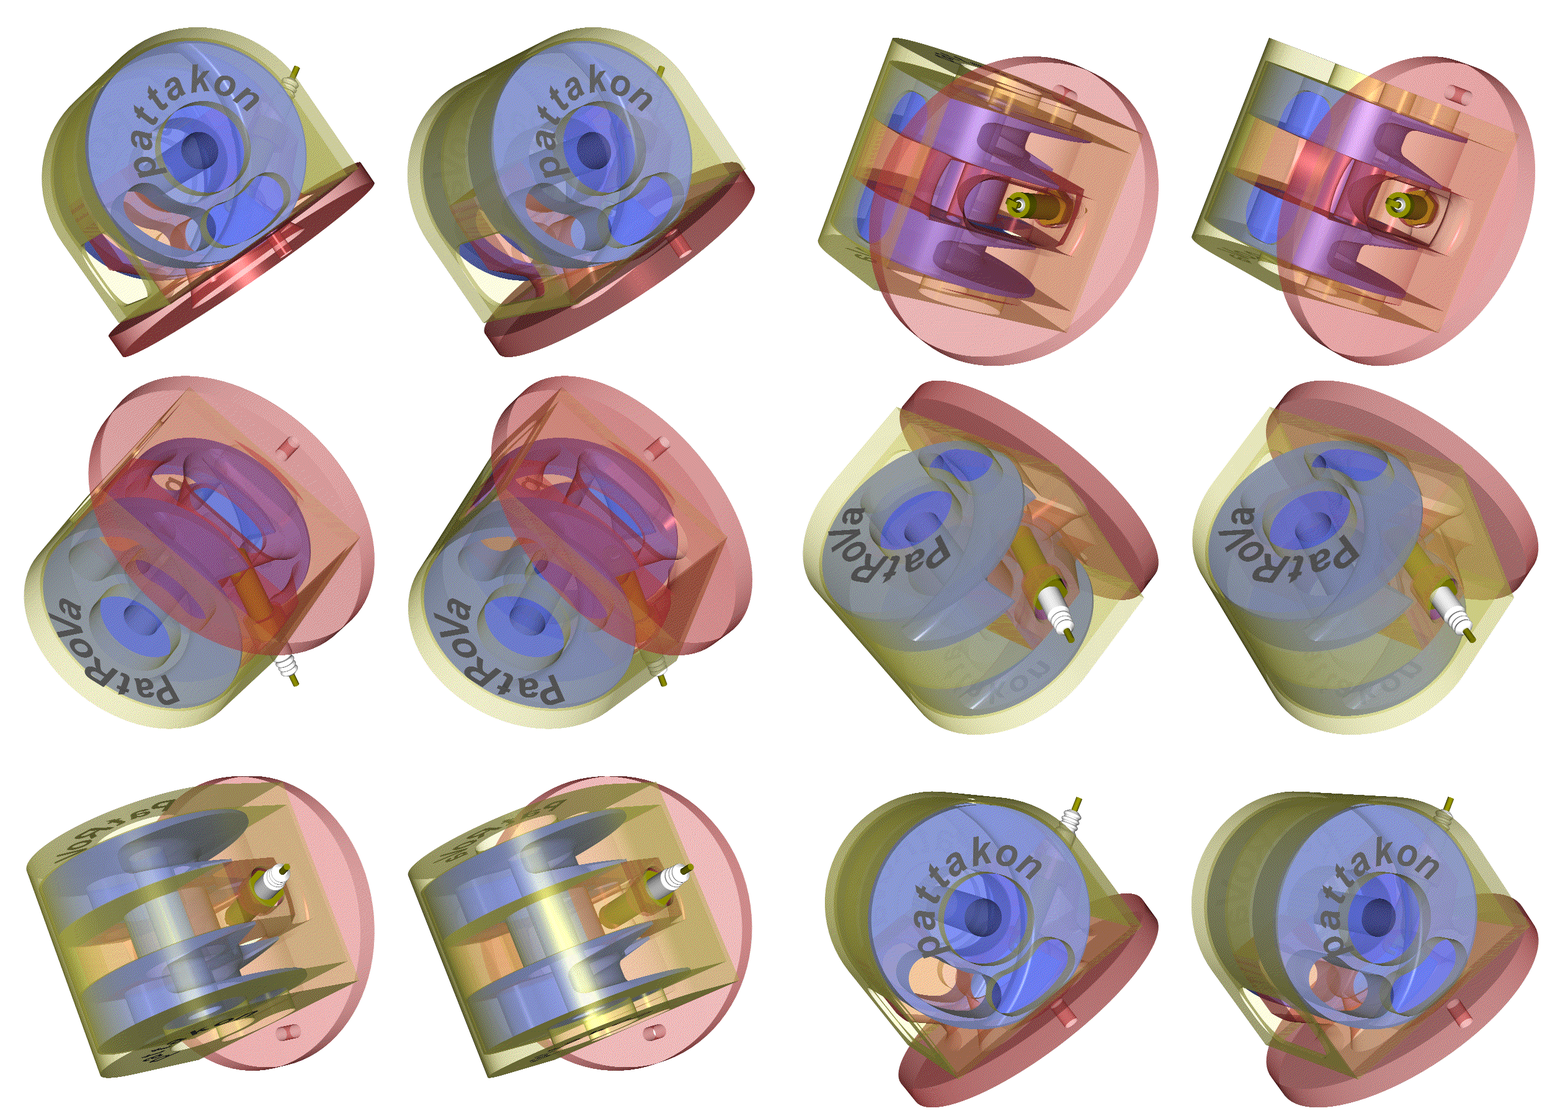
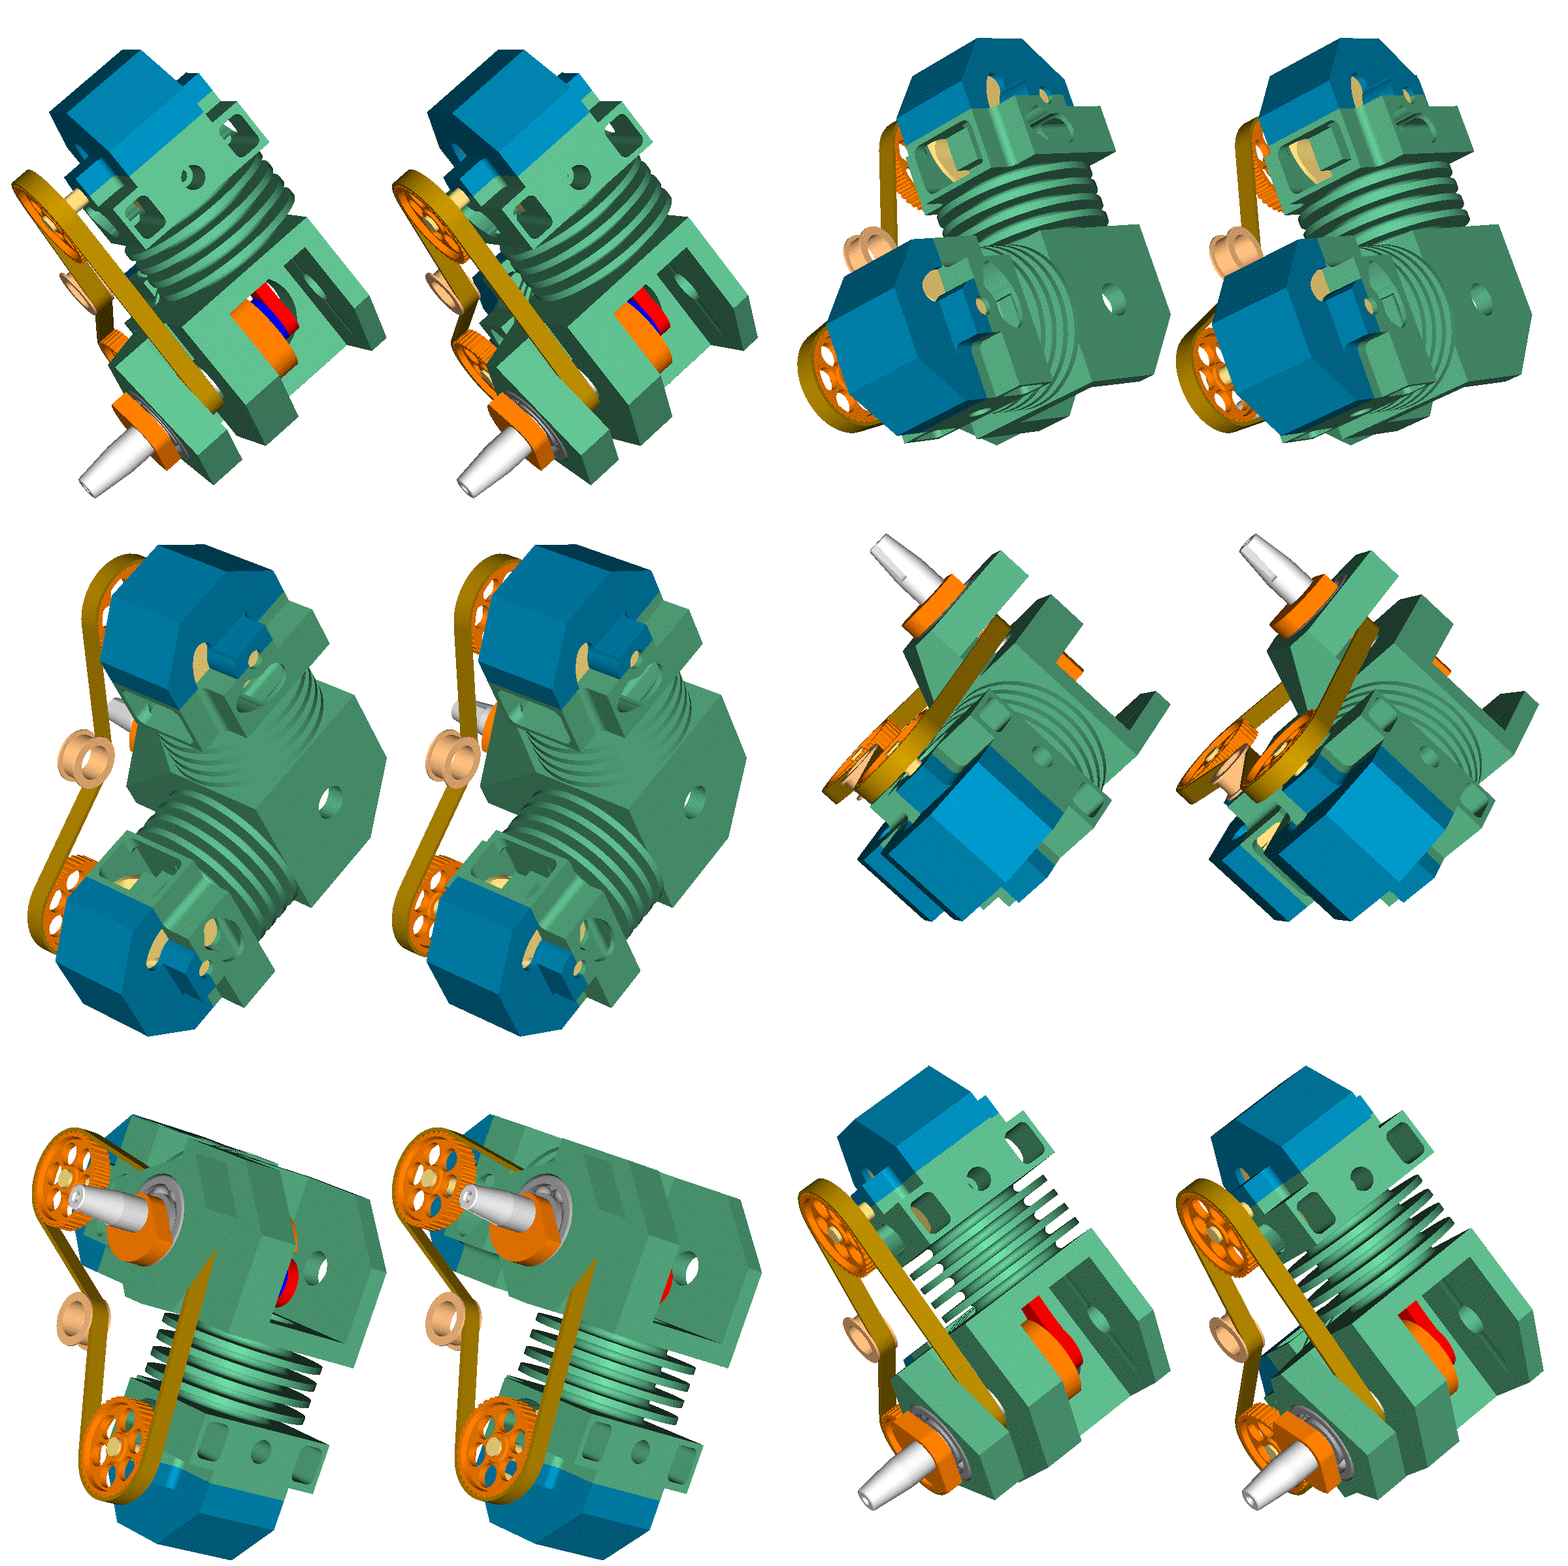
Here is a V-2 model (RC) engine:

PatRoVa_V2_model_engine_STE.gif


The animation is stereoscopic (for instructions on how to look at it: http://www.pattakon.com/pattakonStereoscopy.htm )

Bore 24.8mm,
stroke 13mm (i.e. same bore to stroke ratio with the Ducati Panigale 1299 which has 116mm bore and 60.8mm stroke),
total capacity 12.5cc,
rev limit at 50,000rpm (21.7m/sec mean piston speed).

With the secondary balance web (orange) at the free end of the crankshaft, the “vibration free quality” of this engine is the same with the vibration free quality of the big Ducati Panigale.

The one connecting rod is red, the other is blue. They share the same crankpin.

There is one only, common for both cylinders, timing belt.

There is one only crankpin (it is of bigger diameter than in the single cylinder).

The crankshaft is rotatably mounted on the casing (the green part) by two roller bearings. The roller bearing beside the main balance web (orange, with the crankpin on it) is the strong one.

The casing (the green part with the cooling fins) is a single piece part. See how compact and simple and robust it is.

Thoughts?

Objections?

Thanks
[FONT=&quot]Manolis Pattakos
.
[/FONT]
 
Hello.

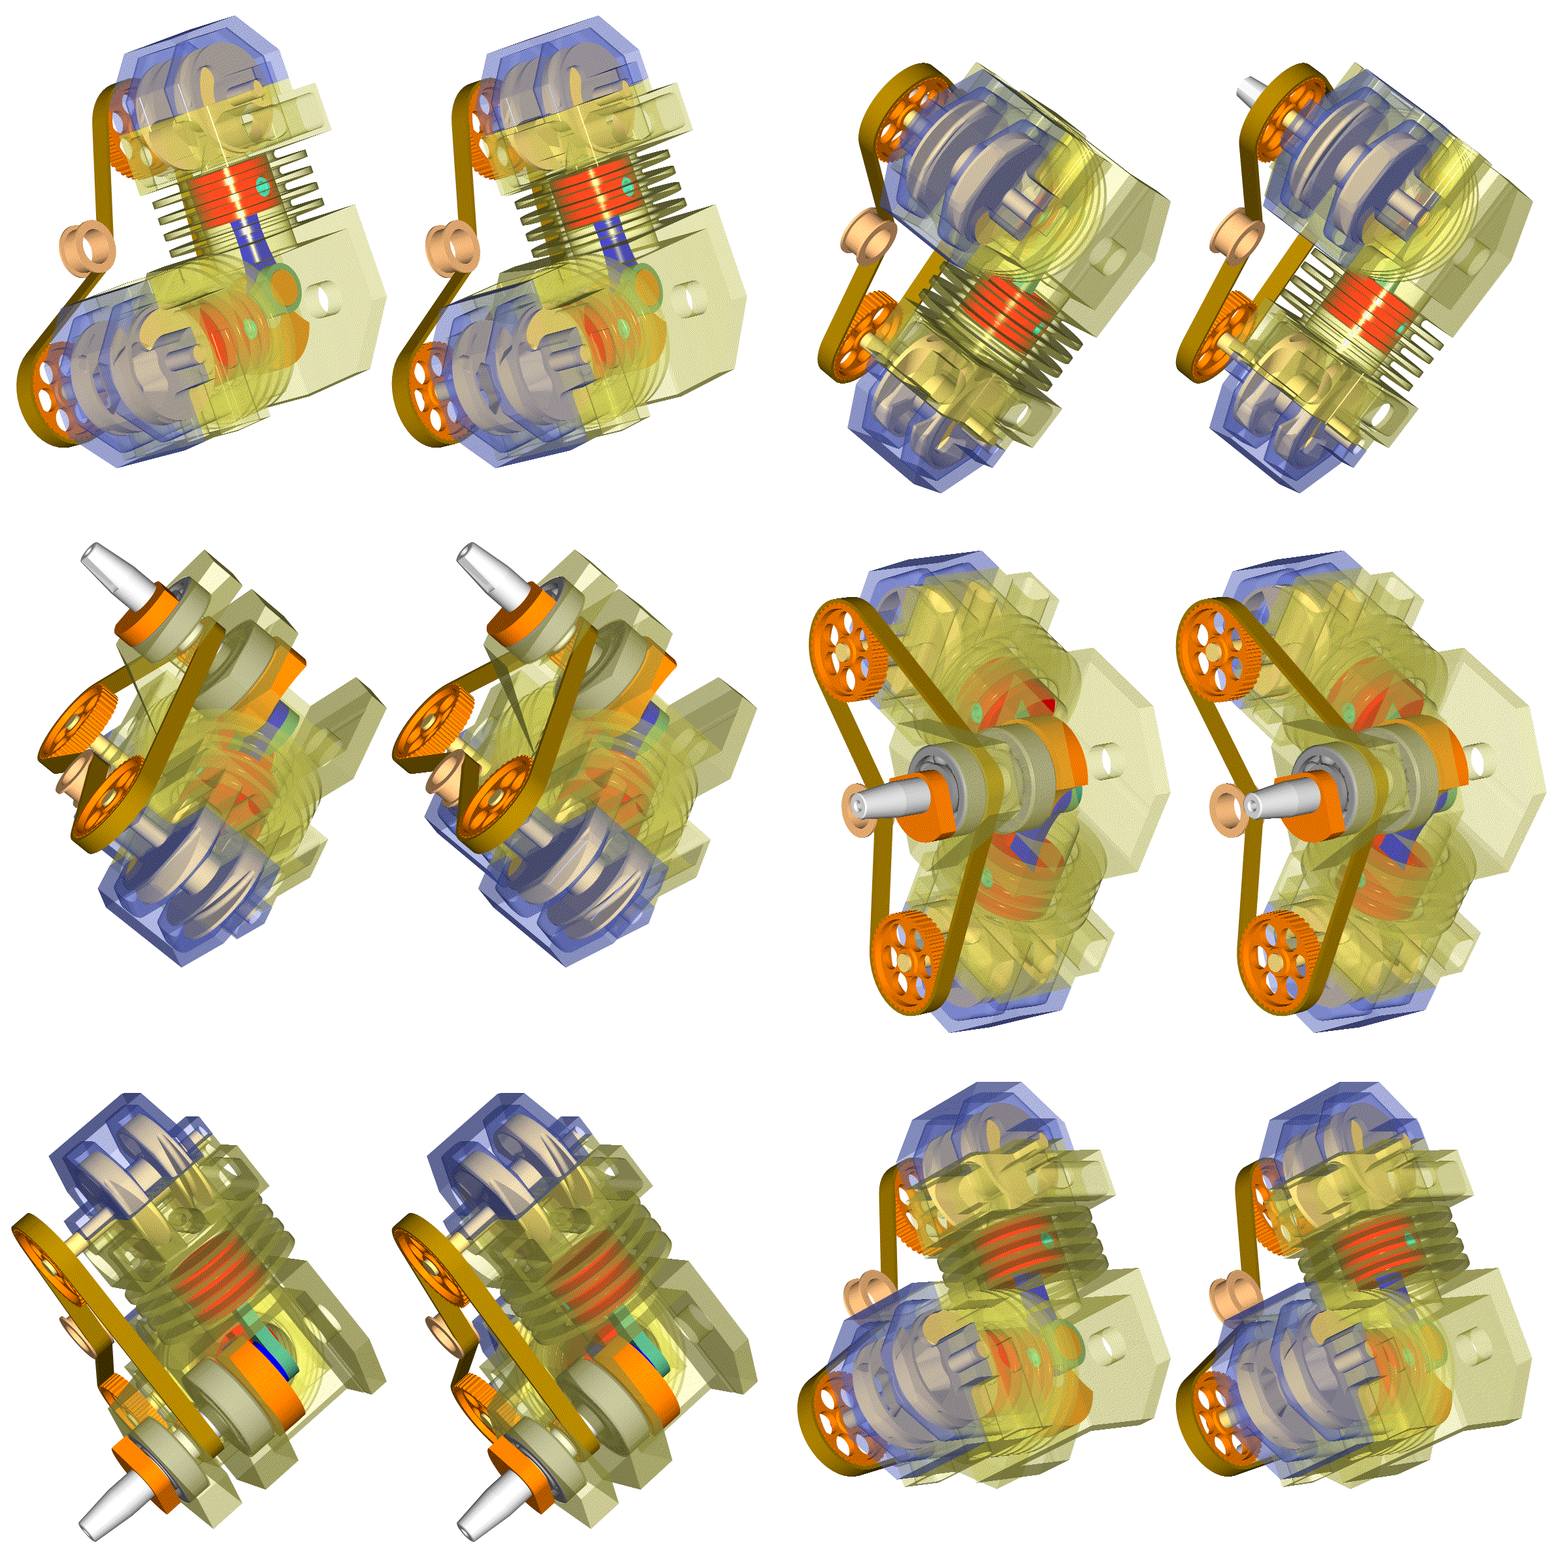
Thiis transparent animation of the last V-2 PatRoVa model engine (last post) may be helpful.

PatRoVa_V2_model_engine_STE_trans.gif


Thanks
Manolis Pattakos
 

Latest posts

Back
Top