Nice perseverence.
Sometimes one has to get a bit creative to make things happen.
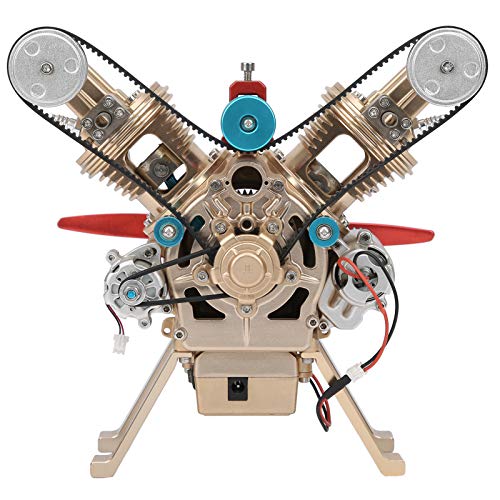
Makes me think that a pre-machining annealing session may be a good idea for some kit gray iron castings.
Looking good so far; nice work !
P.S. - Nice lighting on the photos; I always seem to get dark shadows and such in my shop photos.
.
Sometimes one has to get a bit creative to make things happen.
Makes me think that a pre-machining annealing session may be a good idea for some kit gray iron castings.
Looking good so far; nice work !
P.S. - Nice lighting on the photos; I always seem to get dark shadows and such in my shop photos.
.


 . I have my eye on another P.M. Research casting kit so I'll have to do some research on annealing. I have a couple of led panel lights over my bench which makes it a nice working area. I do need to put some good lighting over my machines, especially the milling machine.