LUC---GET OFF MY CASE!!! That was not a negative post. That was information given freely to someone who may not have known it. I am getting very tired of you Luc, and of your attitude.---Brian
You are using an out of date browser. It may not display this or other websites correctly.
You should upgrade or use an alternative browser.
You should upgrade or use an alternative browser.
My first I.C. engine, a variation on the theme of Webster
- Thread starter JLeatherman
- Start date

Help Support Home Model Engine Machinist Forum:
This site may earn a commission from merchant affiliate
links, including eBay, Amazon, and others.
- Joined
- Aug 16, 2013
- Messages
- 1,068
- Reaction score
- 815
To address a few earlier points, here are pictures of the "mock-up" which is as far as I got in time for Christmas:
I did attempt a "balanced" crank to offset the rod weight and to attempt the keep the engine from walking around too much when running. Got the carb adapter done and installed for an OS #10G model engine carb. Still needs the cam finished, the top of the water hopper, a lot of miscellaneous spacers/bushings/hardware, the points I got didn't include the isolator that the wires mount to so I have to make something for that, and a fuel tank.
JLeatherman !
That is one sweet looking Webster. Nice clean design . . . . Loving it.
If I could respectfully make one point.
In your mock-up. . . . . Wheres that beautiful FLYWHEEL!stickpoke
canadianhorsepower
Well-Known Member
- Joined
- Oct 22, 2011
- Messages
- 1,671
- Reaction score
- 324
LUC---GET OFF MY CASE!!! That was not a negative post. That was information given freely to someone who may not have known it. I am getting very tired of you Luc, and of your attitude.---Brian
Hey did you take your AGRESSIVE PILL AGAIN
BTW I am entitle to my opinion like evryone else
this is not
BRMEM
but HMEM
cheers
and if their is something yuou don't like about my opinion
don't be mother Theresa send me a PM
Last edited:
- Joined
- May 27, 2010
- Messages
- 2,999
- Reaction score
- 1,171
No worry.The Webster is a very forgiving engine to build.
JLeatherman
Well-Known Member
- Joined
- Nov 12, 2012
- Messages
- 93
- Reaction score
- 44
Although I found some of Brian's earlier comments on this thread a bit harsh and one-sided I thought the most recent post about roller cams to be informative. In fact, upon further reflection I think my mistake in cam duration will help me because I didn't account for how the roller would impact cam timing. The roller should, I believe, lengthen cam timing slightly so the fact that I inadvertently shortened it when machining may well be a wash in the end.
I intend to continue building it as I want to, and look forward to the results. Anything that doesn't work as I'd hoped will just be time saved on a future engine.
I intend to continue building it as I want to, and look forward to the results. Anything that doesn't work as I'd hoped will just be time saved on a future engine.
JLeatherman
Well-Known Member
- Joined
- Nov 12, 2012
- Messages
- 93
- Reaction score
- 44
JLeatherman !
That is one sweet looking Webster. Nice clean design . . . . Loving it.
If I could respectfully make one point.
In your mock-up. . . . . Wheres that beautiful FLYWHEEL!stickpoke
It's not pinned in place until i get the came done, and without it being pinned it slides back and forth into the cutout I made in the baseplate. I don't want it getting dinged up. Hopefully soon it will be installed for good!

$99.99
AHS Outdoor Wood Boiler Yearly Maintenance Kit with Water Treatment - ProTech 300 & Test Kit
Alternative Heating & Supplies

$89.99
Outdoor Wood Boiler Water Treatment Rust Inhibitor- AmTech 300 & Test Kit
Alternative Heating & Supplies

$94.99
$109.99
AHS Woodmaster 4400 Maintenance Kit for Outdoor Wood Boiler Treatment
Alternative Heating & Supplies
![DreamPlan Home Design and Landscaping Software Free for Windows [PC Download]](https://m.media-amazon.com/images/I/51kvZH2dVLL._SL500_.jpg)
$0.00
DreamPlan Home Design and Landscaping Software Free for Windows [PC Download]
Amazon.com Services LLC

$40.02
$49.99
Becker CAD 12 3D - professional CAD software for 2D + 3D design and modelling - for 3 PCs - 100% compatible with AutoCAD
momox Shop

$12.56
$39.95
Complete Plans for Building Horse Barns Big and Small(3rd Edition)
ThriftBooks-Atlanta

$519.19
$699.00
FoxAlien Masuter Pro CNC Router Machine, Upgraded 3-Axis Engraving All-Metal Milling Machine for Wood Acrylic MDF Nylon Carving Cutting
FoxAlien Official

$39.99
$49.99
Sunnytech Low Temperature Stirling Engine Motor Steam Heat Education Model Toy Kit For mechanical skills (LT001)
stirlingtechonline

$24.99
$34.99
Bowl Sander Tool Kit w/Dual Bearing Head & Hardwood Handle | 42PC Wood Sander Set | 2" Hook & Loop Sanding Disc Sandpaper Assortment | 1/4" Mandrel Bowl Sander for Woodturning | Wood Lathe Tools
Peachtree Woodworking Supply Inc

$29.95
Competition Engine Building: Advanced Engine Design and Assembly Techniques (Pro Series)
Amazon.com Services LLC

$24.99
$27.99
HOZLY 5PCS/Lot ISO30 Tool Holder Clamp Flame Proof Rubber Claw CNC Machines Automatic Tool Changer
HOZLY
JLeatherman
Well-Known Member
- Joined
- Nov 12, 2012
- Messages
- 93
- Reaction score
- 44
It's been too cold to spend too much time in the shop at once, but I've gotten a bit more done. I made the valve spring retainers, lapped the valves, and installed the valves and springs on the engine. I made a change to the prints (again) in the spring retainers. I counterbored the top side of each retainer so it fits over the pin the goes through the valve stem. This will keep the pin in place, and it wasn't hardly any extra work.
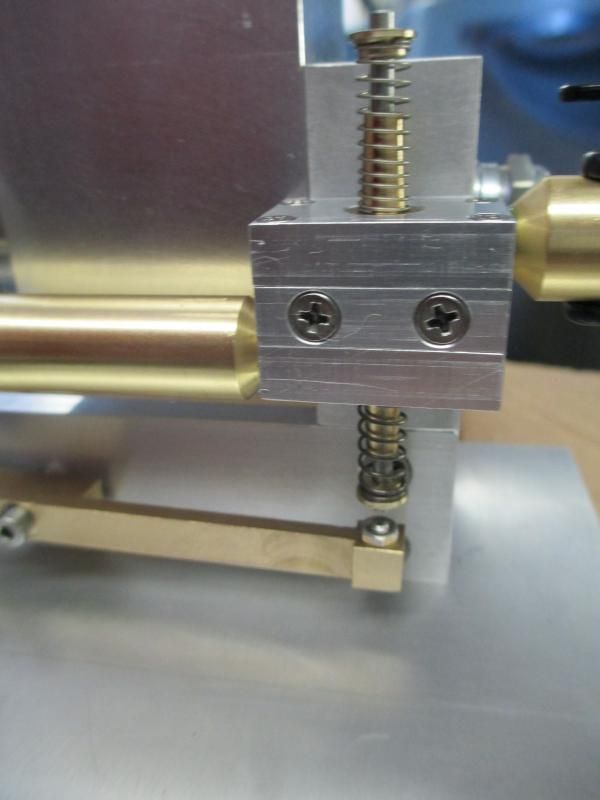
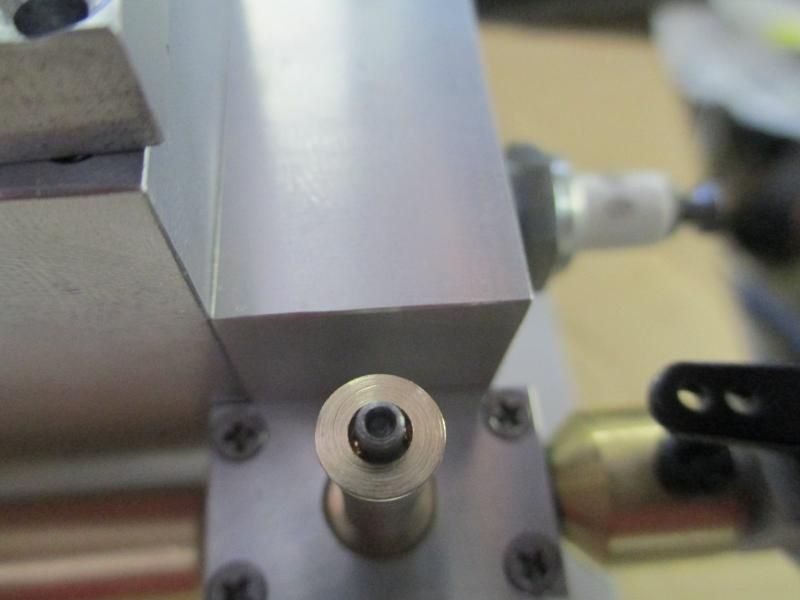
I also finished tapping the rocker arm for the adjuster and installed it, and made a spacer to get the rocker arm directly under the valve.
Lastly I made the top cover for my water hopper. It's not screwed down because I didn't have the correct length screws, but everything looks like it should line up.
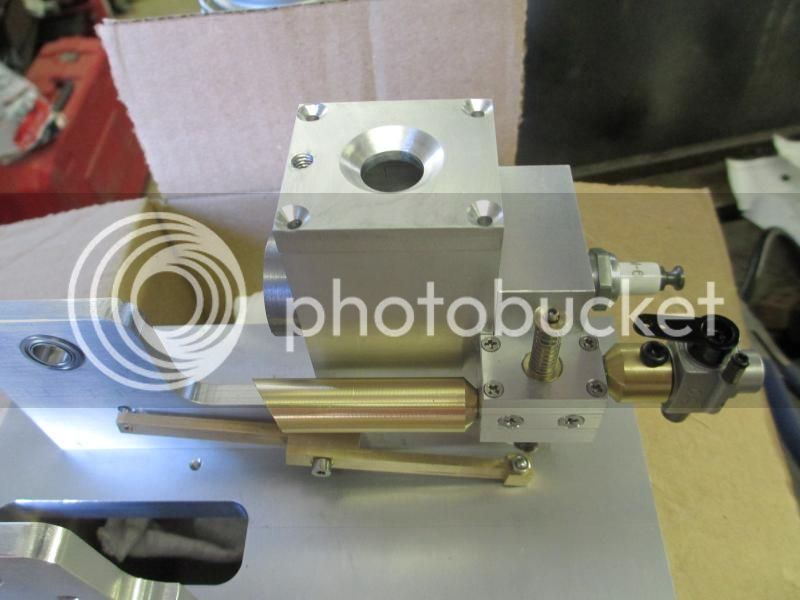
Now that the rocker arm is in place I can make spacers for the cam and flywheel and get them installed.


I also finished tapping the rocker arm for the adjuster and installed it, and made a spacer to get the rocker arm directly under the valve.
Lastly I made the top cover for my water hopper. It's not screwed down because I didn't have the correct length screws, but everything looks like it should line up.

Now that the rocker arm is in place I can make spacers for the cam and flywheel and get them installed.
It is very important to have the correct spring on the rocker arm to keep it in contact with the cam. I used a piece of recoil spring from a weed-eater.
- Joined
- Aug 16, 2013
- Messages
- 1,068
- Reaction score
- 815
Morning JLeatherman
Its definitely been a weird winter, you guys out east both sides of the 49 parallel are having a bad one. Our normal daytime highs for this time of year should be around -12c with 2 or 3 feet of snow pack. This year its more like 0 to +6c and until the 20cm we got last week you could see the stubble sticking up through the snow in the fields.
This Webster is looking sweet. Love the hopper and cover. Your valve block looks great. One thing that I read over and over before I built my Webster was people having trouble starting IC engines because the valves where leaking. What I did so I could test them was make up a block from scrap so that I could connect it to my compressor. I thought I had them seating but with 5 or 10 lbs of air going into the port that goes to the cylinder the whole thing leaked like a window screen.


- Joined
- Aug 16, 2013
- Messages
- 1,068
- Reaction score
- 815
On my build I couldnt use a flat leaf spring like the plans called for because of the flare on the bottom of my frames. Id seen the way Chuck Fellows used trimmed down angle for the frame of his Bessemer Hot Tube Oil Field Engine and liked the look so much I just wanted to go with it not thinking of the spring.


- Joined
- Aug 16, 2013
- Messages
- 1,068
- Reaction score
- 815
What I ended up doing was using a trigger spring on the rocker arm. Youve got straight sides so the flat spring it no problem and like Brian said any spring from a small recoil start will work. If you have a small engine repair shop near you ask if theyve got a broken one you have. Its surprising how many people are willing to help you out (talk to the oldest guy at the counter ;D) once they know what youre doing. Oh and put some pictures on your phone for show and tell. I think the only critical thing is It is very important to have a spring on the rocker arm to keep it in contact with the cam. The engine is coming along great and I cant wait for that smelling burning Coleman and giggling like a school girl moment.Thm:


- Joined
- May 27, 2010
- Messages
- 2,999
- Reaction score
- 1,171
Your spring is a very good idea. Bought flat spring from TokyuHands 2013. Was scrounging in Singapore to no avail but happened to holiday in Tokyo and found flat spring staring at me while shopping.
JLeatherman
Well-Known Member
- Joined
- Nov 12, 2012
- Messages
- 93
- Reaction score
- 44
I'm still here and still working on the Webster when I have a chance. I had to modify a few small details in my plans. The cam roller retainer, which is basically just a small flanged nut, was supposed to have #4-40 threads inside but the walls were too thin and it kept breaking during threading. It now has #3-48 threads and works fine. I've worked on some of the fiddly parts, like the proper spacers for the rocker arm and cam, etc. Doesn't look like much more has happened, but the flywheel is on and some parts have been loctited in place hopefully to remain.
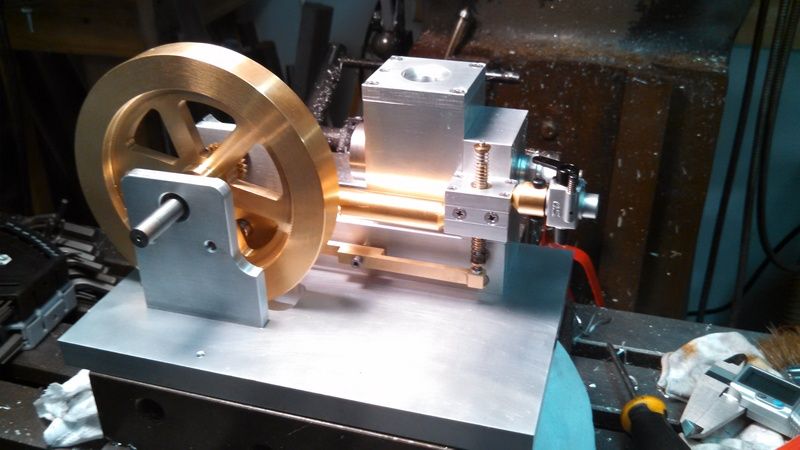
Here's a good shot of the overall engine to date:
And here's a shot of the finished roller-rocker:
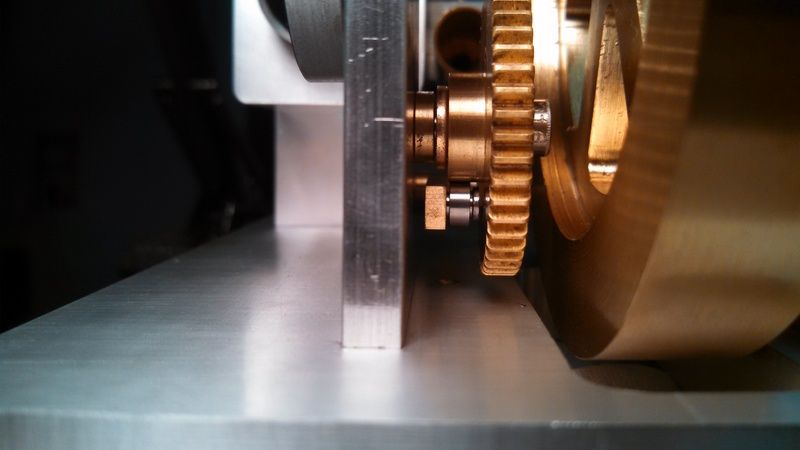
I made a crank that uses a threaded crank-pin, which it now occurs to me should have been LH thread. I'm going to have to make the engine run backwards so that the forces on the crank make the pin tighter as opposed to unscrewing as it runs. Shouldn't be a big change. I'm up to the step where I drill and pin the flywheel in place, just giving myself a little time to be sure everything else is good first. Then I need to start thinking about securing it to a base and working on an ignition and fuel system.
Here's a good shot of the overall engine to date:

And here's a shot of the finished roller-rocker:

I made a crank that uses a threaded crank-pin, which it now occurs to me should have been LH thread. I'm going to have to make the engine run backwards so that the forces on the crank make the pin tighter as opposed to unscrewing as it runs. Shouldn't be a big change. I'm up to the step where I drill and pin the flywheel in place, just giving myself a little time to be sure everything else is good first. Then I need to start thinking about securing it to a base and working on an ignition and fuel system.
Similar threads
- Replies
- 22
- Views
- 2K


