Kozos new shay

Home Model Engine Machinist Forum

Help Support Home Model Engine Machinist Forum:

This site may earn a commission from merchant affiliate links, including eBay, Amazon, and others.
Looking great - will be following along!
 
Wirralcnc, those parts are looking great, I also have the book and will build one in the future. I assume, from your user name, that you have a CNC mill, is that correct, it would certainly make things easier.

Paul.
 
Swifty. I do have access to cnc mill so should help with the build. I don't see me having a problem with the machining of parts. The sheet metal work maybe a different story.
 
Todd.
The bolsters took 10 minutes for 1st op then cut in half and bring thickness in. Another 10 minutes.
The end brackets were made together on one piece of stock. Probs 20 minutes machining then bring thickness in another 10 minutes. Plus set up time.
The problem I have is no tool changer. So once it requires a different tool it stops till I swop tools and press go. It might be idle for an hour till I get back to it.
Robbie
 
Thanks for the info, Robbie. I'm a totally manual operator right now. And, it seems like I lose track of time when I'm in the shop. I'll make a part and think it's only been maybe half and hour. Then I look at the clock... What?! Where'd two hours go?! :eek:

Todd
 
Robbie,

Here are my suggestions to simplify the plumbing challenges near the end of the shay project. I think we want to hear from Crueby what his opinion of these changes are.

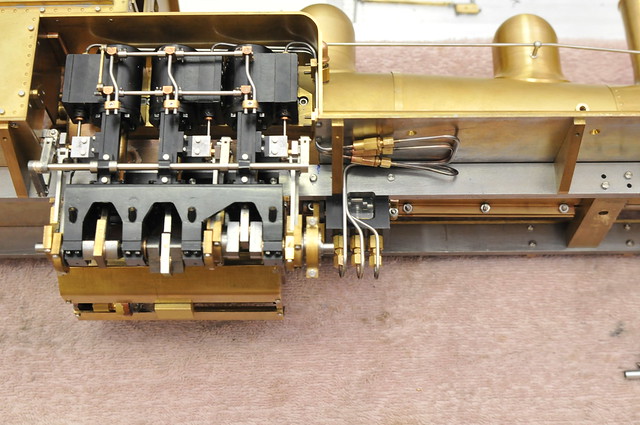
Move the lubricator and mount it on the frame. Do this by adding 8 - 10mm length to the front of the crankshaft so you can slip on an eccentric held by a setscrew. Make the lubricator with an 80 tooth ratchet wheel to compensate for being driven 2x faster.

Here is a photo of the idea:

14061135129_0b2678023b_z.jpg


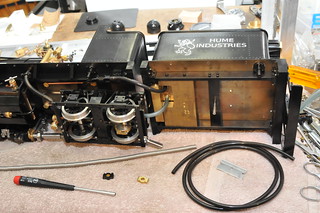
Second, use a wire-wound rubber hose to couple the output of the axle pump to a plumbing joint on the cab floor as in this photo:

15793004699_a3c2d6209d_n.jpg


Regards,
Ed

Ed, I like those changes. The maze of pipes and connections off the trucks and under the frame as done in the book are a real pain at this scale. I wound up having to take things apart many times to add the next piece.

Never seen the wire wrapped tube before. Where did you get it, and how high a temp and pressure can it take? If enough for the feed pump output, it would be great for all the connections under the tender, would connect in to the copper feed lines under the cab, meaning shorter lengths of pipe with many bends to feed into place around other parts.

Wirralcnc, sorry if we are jumping way ahead on some of this, but some of these changes would modify your next parts. Great progress! Your having the cnc is speeding thing's up a lot I think over purely manual tools.

Chris
 
Robbie, Crueby,

Yes, I mention these changes now so you can ponder and evaluate them ahead of time.

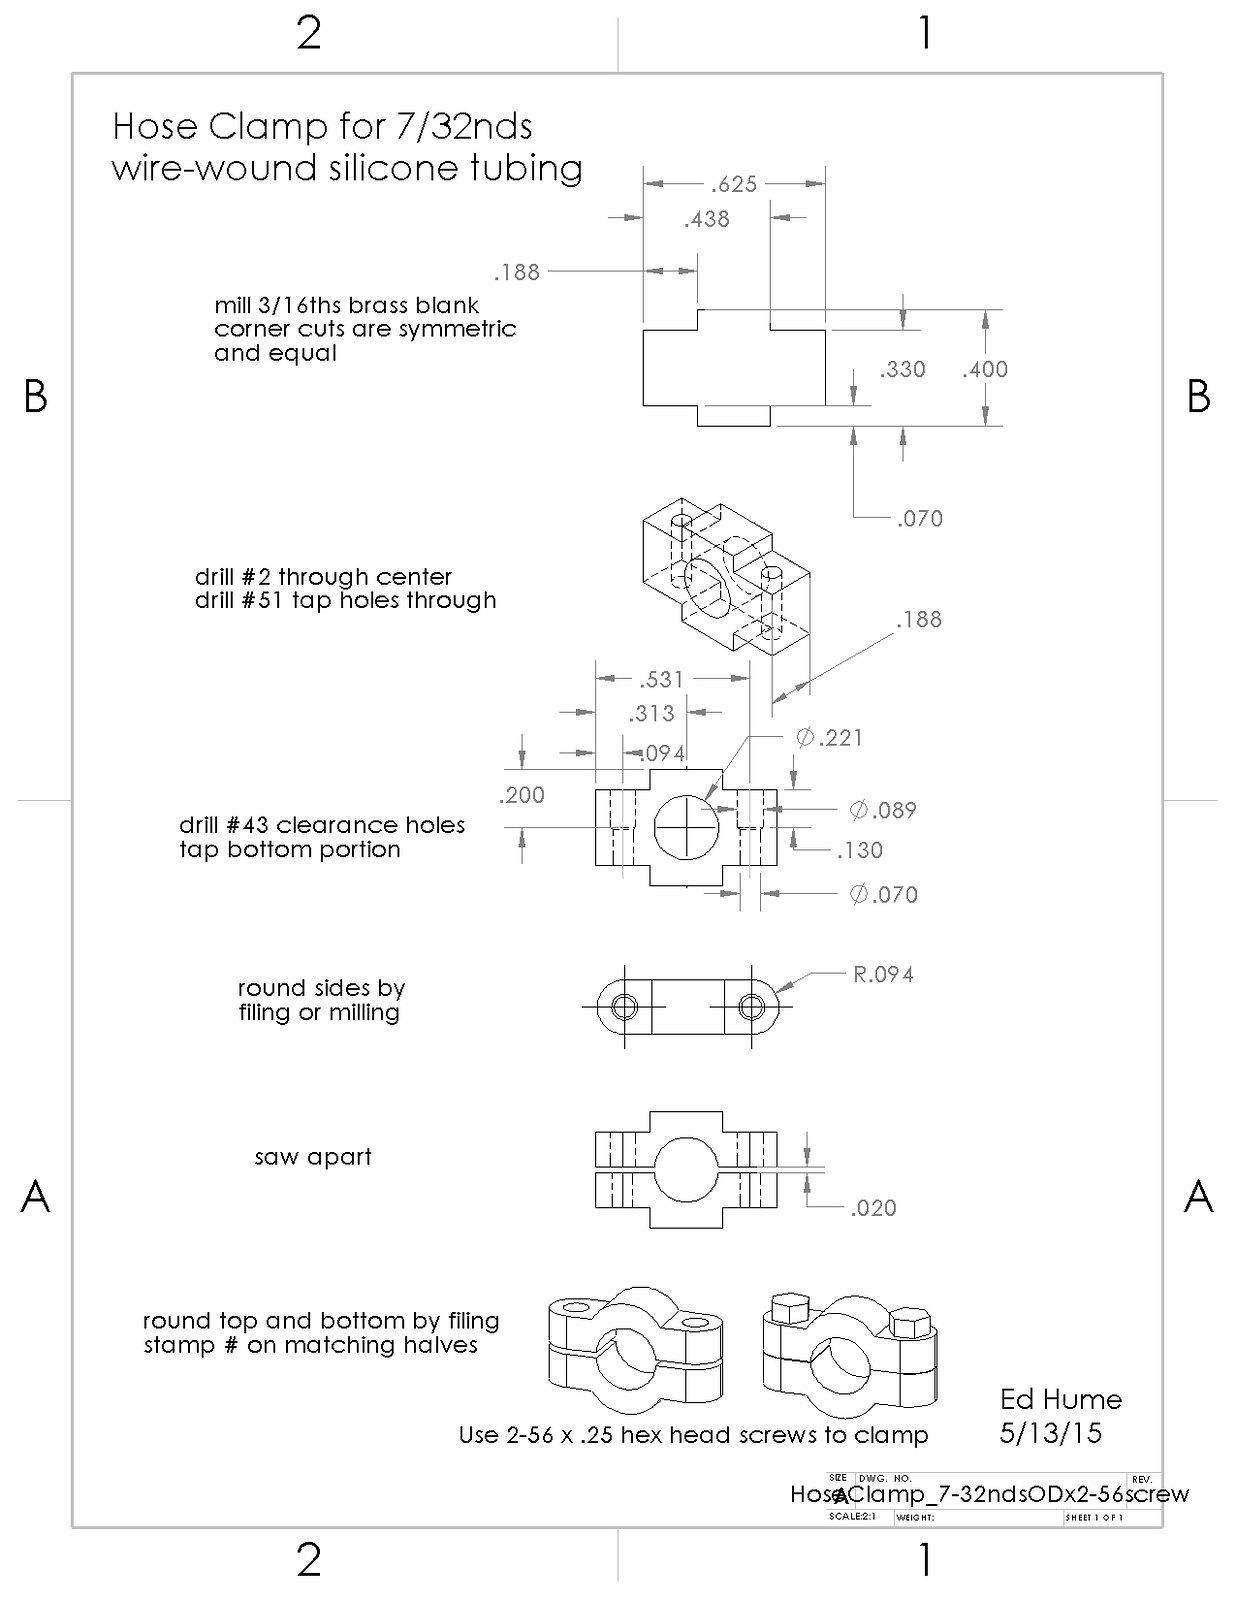
You can buy coils of stainless steel spring wire, 0.015" thick from McMaster-Carr, P/N 9665K84. The coils slip perfectly over 7/32" OD silicone tubing with no tendency to unwind. The silicone tubing (P/N 51135K13) is good for up to 392F and I have also used it to cover and insulate steam piping. When used with proper clamps, the wire-wrapped hose is good for your boiler pressure of 100psi.

Regards,
Ed
 
Chris, ed
Thanks for the input. It will all help as I progess the build. Picked up the steel for the side frames and some brass plate of various thickness. So many pieces to make. Hope to have a rolling frame for end of summer.
Robbie
 
Made a start on the boiler supports.
Started with a piece of steel I found in the workshop. Set this up and flashed the top.
The majority of parts are from 3 mm brass plate. Had a 200mm x 200mm piece which I stuck down with strong double sided tape.
Programmed cnc to mill parts out to a depth of 2.85mm, leaving them attached by a thin shim of brass. A scalpel cuts them out. Leaving just a de-burr to finish the job.

View attachment 1431931076749.jpg

View attachment 1431931087010.jpg

View attachment 1431931100698.jpg

View attachment 1431931115772.jpg
 
Used a lot of double side tape years ago to hold thin parts for CNC milling, I milled them all the way through, the biggest problem was getting them unstuck, eventually sprayed everything with WD40 and it dissolved the glue on the tape.

Paul.
 
Interesting setup there. Just about everything else I've read has you soldering the sheet on to a block.

Todd
 
Back
Top