The Die filer project has surprised me to some extent. Perhaps it is due to giving the project my focused attention, or luck is simply on my side for a change. Knock on wood.... there have been no parts requiring remaking and the dimensions have been falling spot on, or at least close enough that a little hand work has them where they need to be.
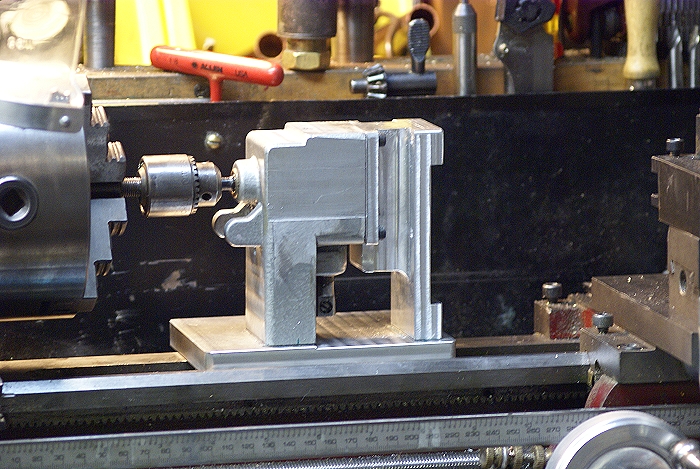
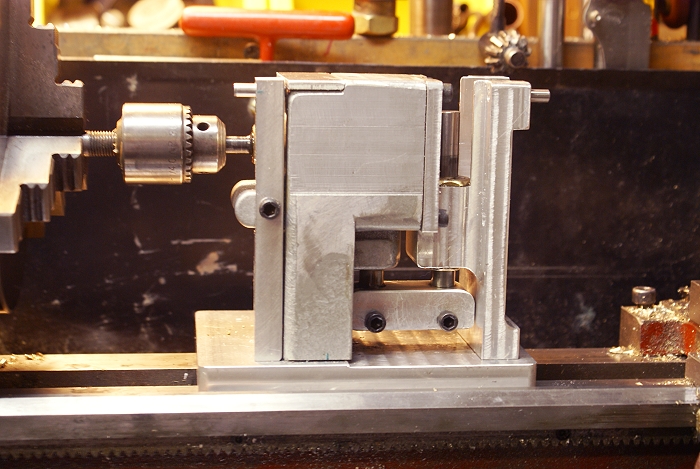
Most of the basic parts have been roughed in and are awaiting their turn in the assembly sequence. I used the need to transfer the assembly's motion to a second shaft to add some additional bracing. This added some more stability to what was already a pretty solid mount. The bracing will also serve to support the table top. It's not often you'll see parts this rough in one of my posts, but I've been to busy designing the darned thing to give the bling aspect much thought.

Once the bracing was to my liking, I began whittling things away to accept the second shaft and the transfer block. I will also need access to the attachment point for the soon to be added file chuck. If you look closely, you can see the upper bushing which was press fitted along with a matching bottom bushing. Using 2 bushings instead of one saved on metal, cut down on friction and made swapping them out easier, should the develop wear. It also allowed me to pack the void between them with grease. Once they were line bored with a 3/8 reamer, smooth vertical alignment was not any problem. The transfer block could then be marked using a transfer punch. The final alignment was dead on and painless.
The transfer block was a little trickier since the original shaft had been flattened and distorted to use jigsaw blades. By making it open ended I was able to machine the upper half with a 3/8 end mill and then use a 3/16 to slot the lower half. This allowed me to use the original screw hole, used to secure the blade, by re-tapping it to 10-24 threads. The second shaft was also tapped for a 10-24 screw, completing the motion transfer simply, but quite effectively.
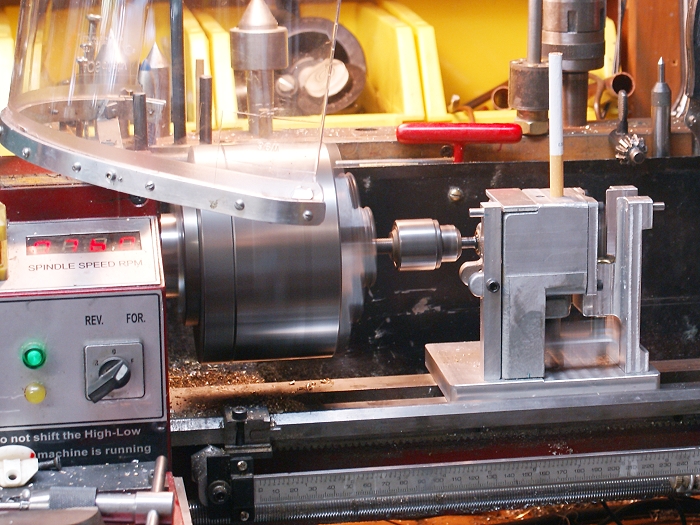
From the outset of the project, I've been concerned that the assembly had a bit of inherent vibration. Nothing dangerous, but it would become annoying when using the finished machine. Keeping everything aligned to the centerline of the lathe rotation was critical and was a major factor in what I could shave from both jigsaw casting and the base plate. The .025 shim under the casting brought everything up to height and careful positioning took care of the lateral alignment.
The photo below was taken with lathe running at 760 RPM. The Coffin Nail was then set atop the body of the assembly. As you can see, while the transfer block, and lathe chuck are motion blurred, the smoke is still balanced rock solid. That's far less vibration than some of the chattering cuts this lathe has seen and enough to convince me the Lovejoy coupling is not going to be required.
The next work frenzy will be tackling the table top. I'm still trying to decide if I really need the top to tilt, but the hinge pins are there and the notch on the right end of the race block was cut to accept an arc, so I'll probably go ahead in that direction.
Steve


![DreamPlan Home Design and Landscaping Software Free for Windows [PC Download]](https://m.media-amazon.com/images/I/51kvZH2dVLL._SL500_.jpg)


![Learning AutoCAD Civil 3D 2014 [Online Code]](https://m.media-amazon.com/images/I/51F3yi9fokL._SL500_.jpg)


