Brian, is the rack inside? Maybe the smaller saws are not so well equipped... (Beautiful saw by the way!)
You are using an out of date browser. It may not display this or other websites correctly.
You should upgrade or use an alternative browser.
You should upgrade or use an alternative browser.
DoAll Bandsaw for Brian
- Thread starter Brian Rupnow
- Start date

Help Support Home Model Engine Machinist Forum:
This site may earn a commission from merchant affiliate
links, including eBay, Amazon, and others.
- Joined
- Jan 4, 2011
- Messages
- 1,445
- Reaction score
- 406
I suppose that if it comes down to the saw or the wife you probably are better off sticking with the wife. If your wife is like mine it would be difficult to find another one who would put up with metal shavings tracked into the house. holes burned in your clothes and permanently stained hands.I can't put the new saw on that side of the garage because it is too big, and would stick out into the area my wife needs to park her car in during the winter.
Gordon---My wife is great. She knows I love my machine shop stuff, and doesn't get too excited when I buy machine shop related things.--I had the other version of a wife for 14 years, but she ran off with an auto mechanic.--Best thing that ever happened to me.
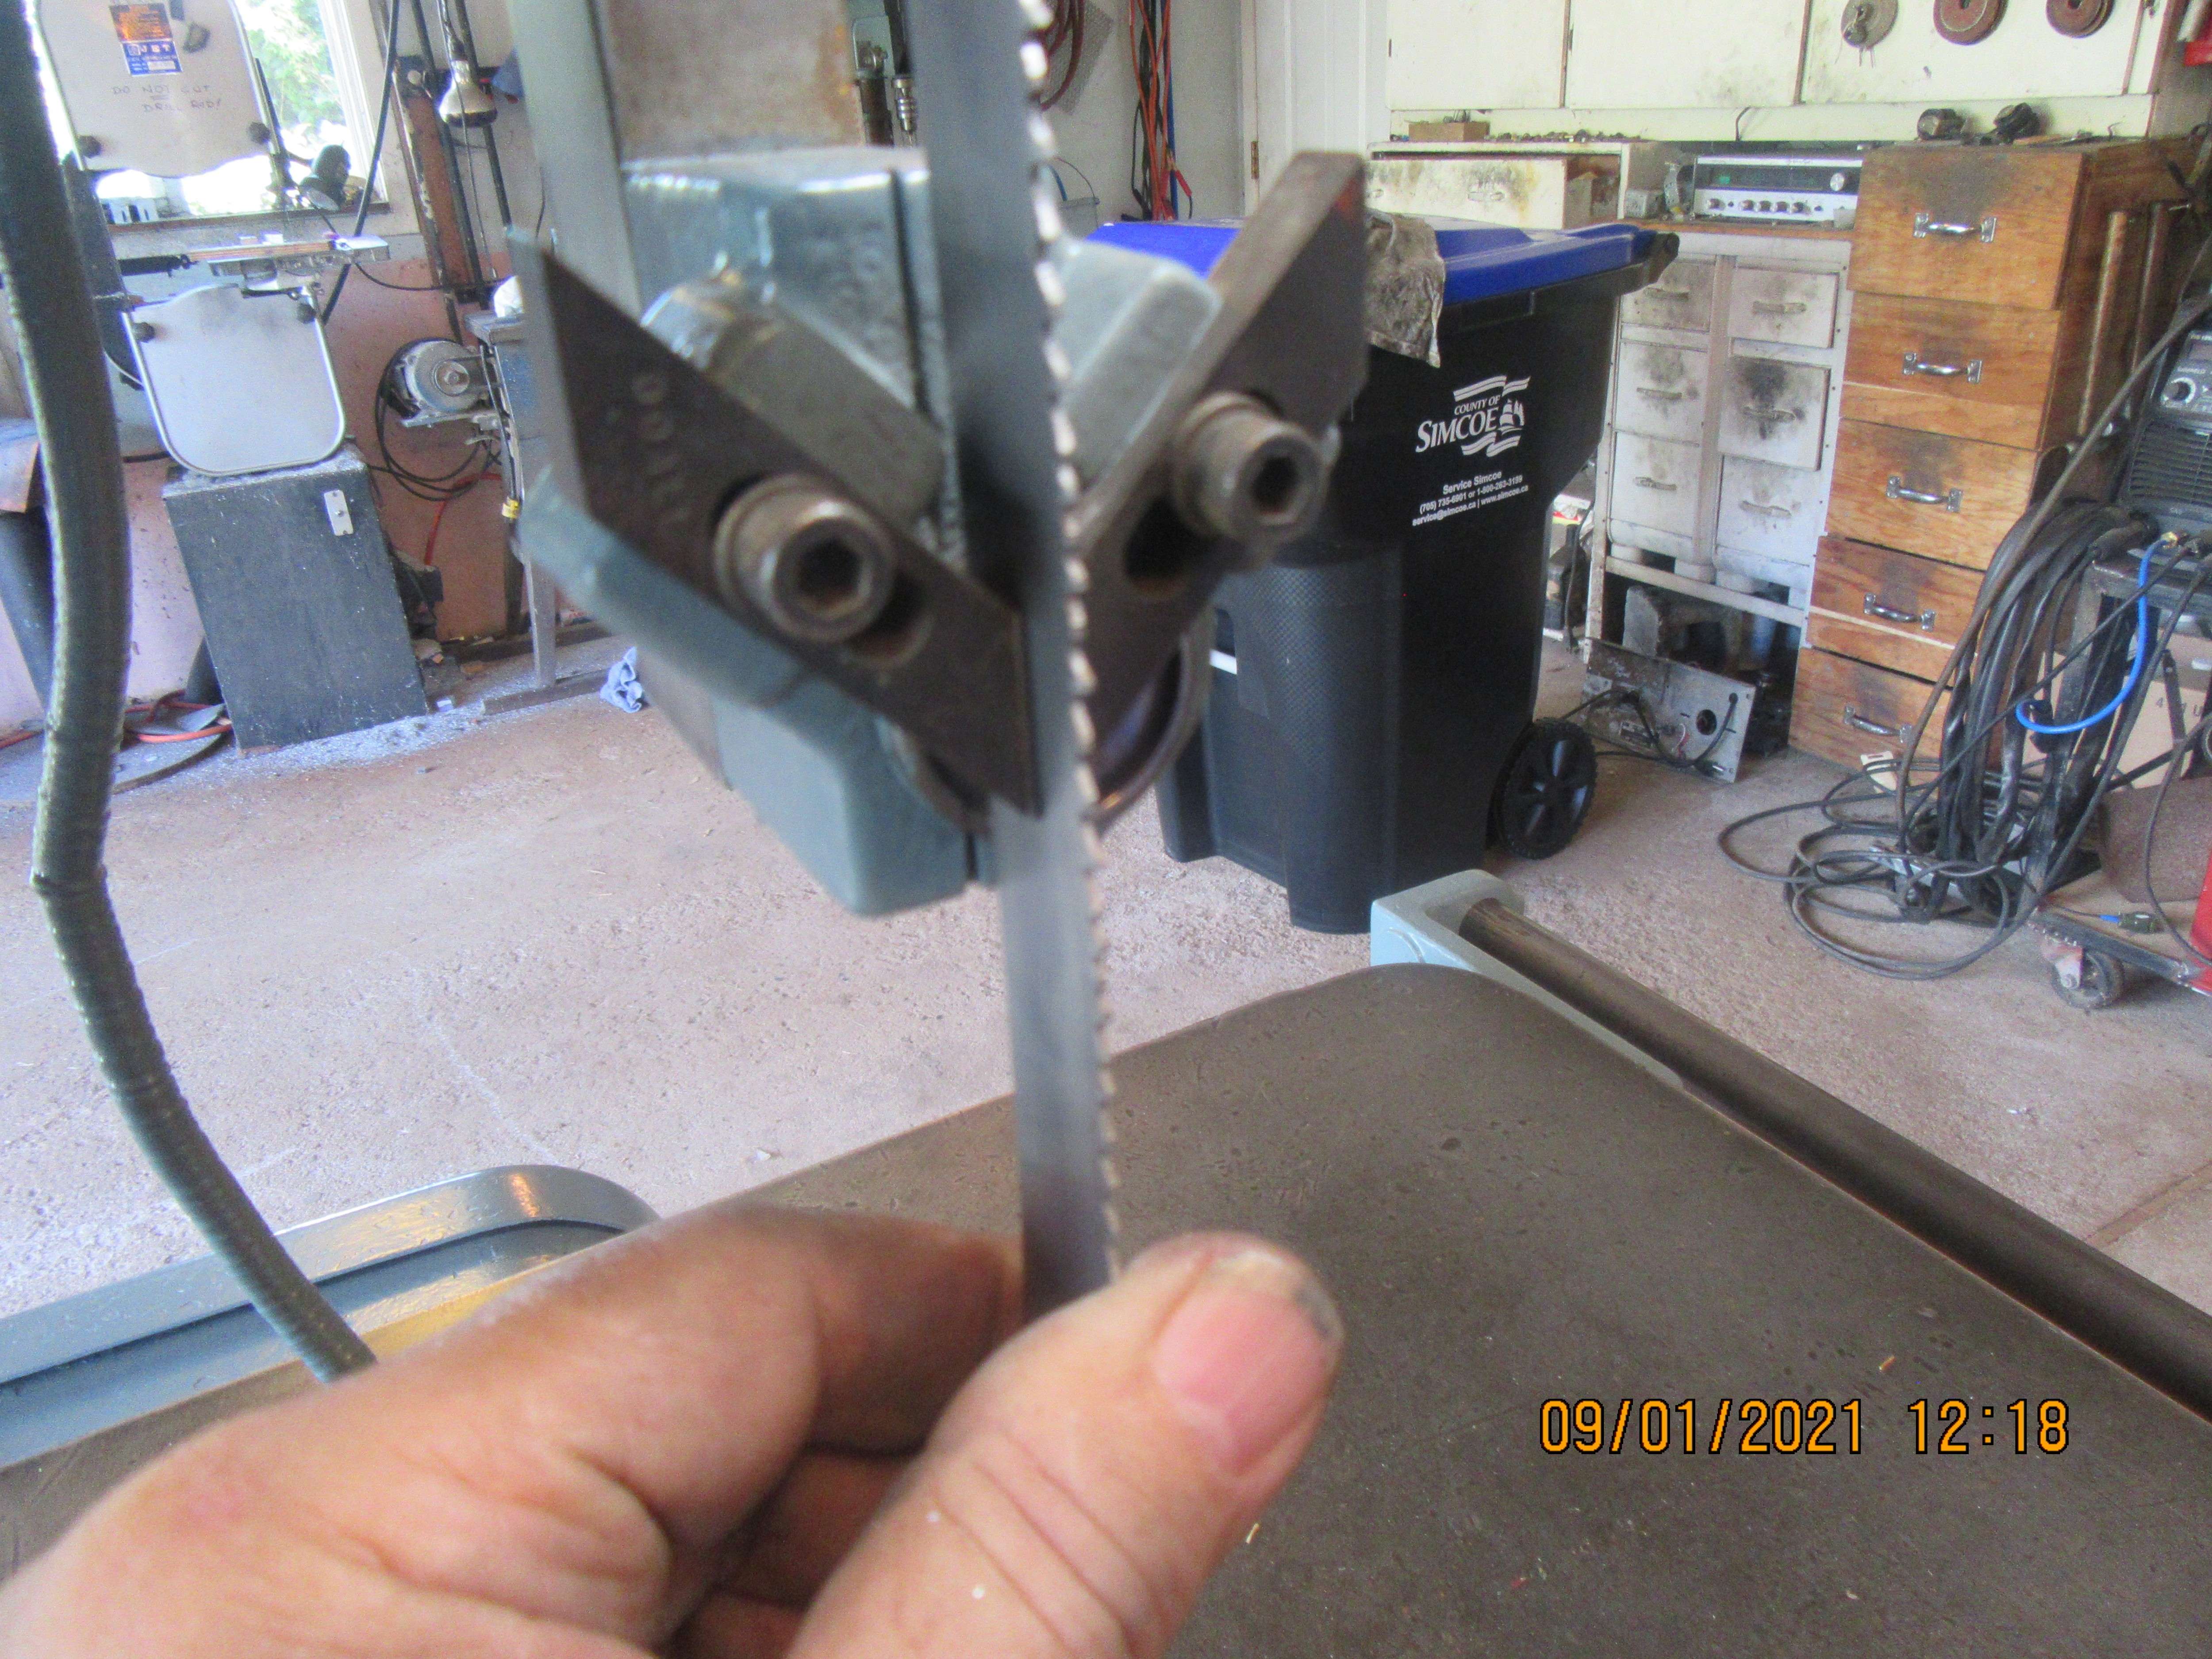
This is a rather crummy picture of a segment of 3/4" blade from my small bandsaw held in place in the guides of the DoALL saw. It fits between the angled guides and the back of it is up against the bearing. If I ran a blade this width with no other changes, all I can see happening is that the blade will not run exactly centered on the 16" band wheels. If I take the DoAll blade guide assembly apart, there might even be room to move the bearing farther back x 1/8", so the blade can run centered on the 16" band wheels.


- Joined
- Jan 4, 2011
- Messages
- 1,445
- Reaction score
- 406
The rear wheel does not move. the guides are just different thickness. As far as I can determine the guide thickness for 1/4=.165 thk; 5/16=.235 thk; 3/8=.265 thk; ; 1/2=.375 thk; 5/8=.510 thk; 3/4=.620 thk. Profile is the same for all of them. They are just hardened tool steel. I doubt that a slight variation on thickness would matter much. You can probably find somebody with a machine shop who could make you some. 
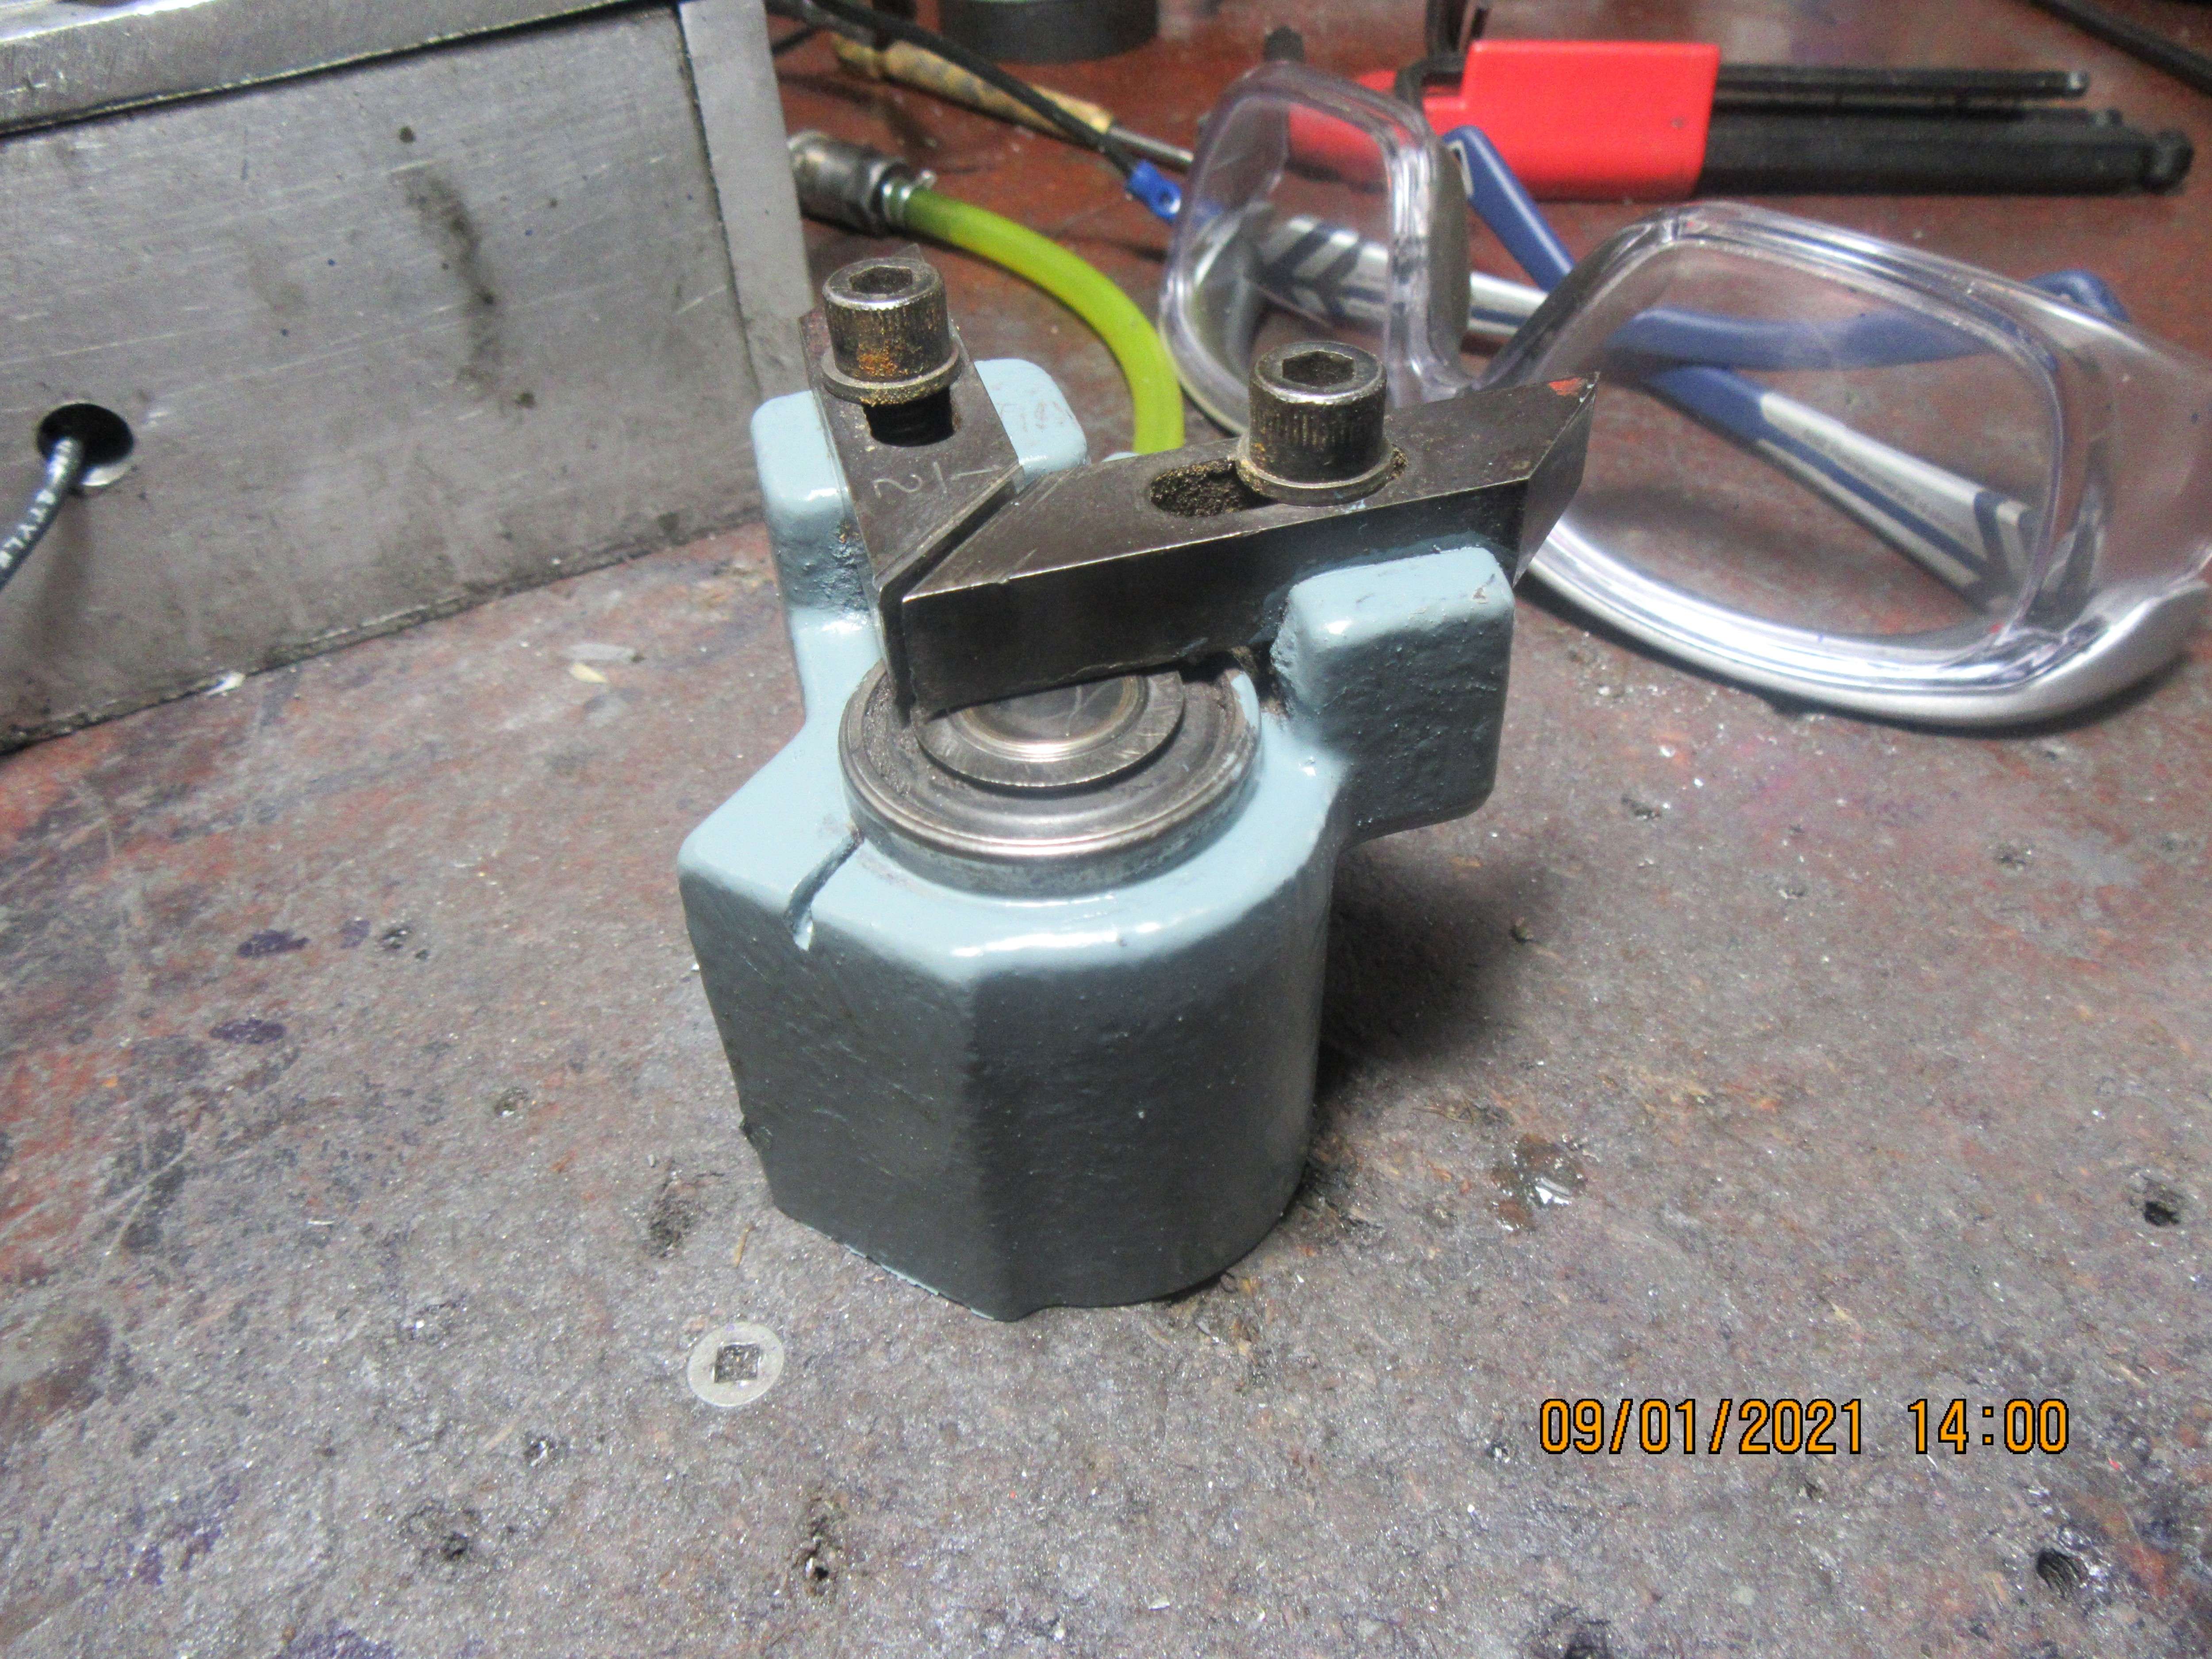
Having a closer look at this blade guide, the angled fingers are stamped 1/2". Notice however, that the ball bearing is setting about 3/16" proud of the cast housing. The bearing on my saw is seized up, so I have to remove and possibly replace it. It will be interesting to see if that bearing can be moved farther into the cast housing.


$99.99
AHS Outdoor Wood Boiler Yearly Maintenance Kit with Water Treatment - ProTech 300 & Test Kit
Alternative Heating & Supplies

$26.89
$34.99
Peachtree Woodworking Supply Bowl Sander Tool Kit w/Dual Bearing Head & Hardwood Handle, 42 Pieces Wood Sander Set, 2 Hook & Loop Sanding Disc Sandpaper Assortment, 1/4 Mandrel Bowl Sander
Peachtree Woodworking Supply Inc
![DreamPlan Home Design and Landscaping Software Free for Windows [PC Download]](https://m.media-amazon.com/images/I/51kvZH2dVLL._SL500_.jpg)
$0.00
DreamPlan Home Design and Landscaping Software Free for Windows [PC Download]
Amazon.com Services LLC

$45.99
Sunnytech Mini Hot Air Stirling Engine Motor Model Educational Toy Kits Electricity HA001
stirlingtechonline

$19.15
$29.95
Competition Engine Building: Advanced Engine Design and Assembly Techniques (Pro Series)
MBC Inc.

$49.95
$55.99
DjuiinoStar Hot Air Stirling Engine Assembly Kit: Spend 30 Minutes to Build Your Own Stirling Engine
djuiinostar

$36.94
$49.99
Becker CAD 12 3D - professional CAD software for 2D + 3D design and modelling - for 3 PCs - 100% compatible with AutoCAD
momox Shop

$599.00
$649.00
FoxAlien Masuter Pro CNC Router Machine, Upgraded 3-Axis Engraving All-Metal Milling Machine for Wood Acrylic MDF Nylon Carving Cutting
FoxAlien Official
- Joined
- Jan 4, 2011
- Messages
- 1,445
- Reaction score
- 406
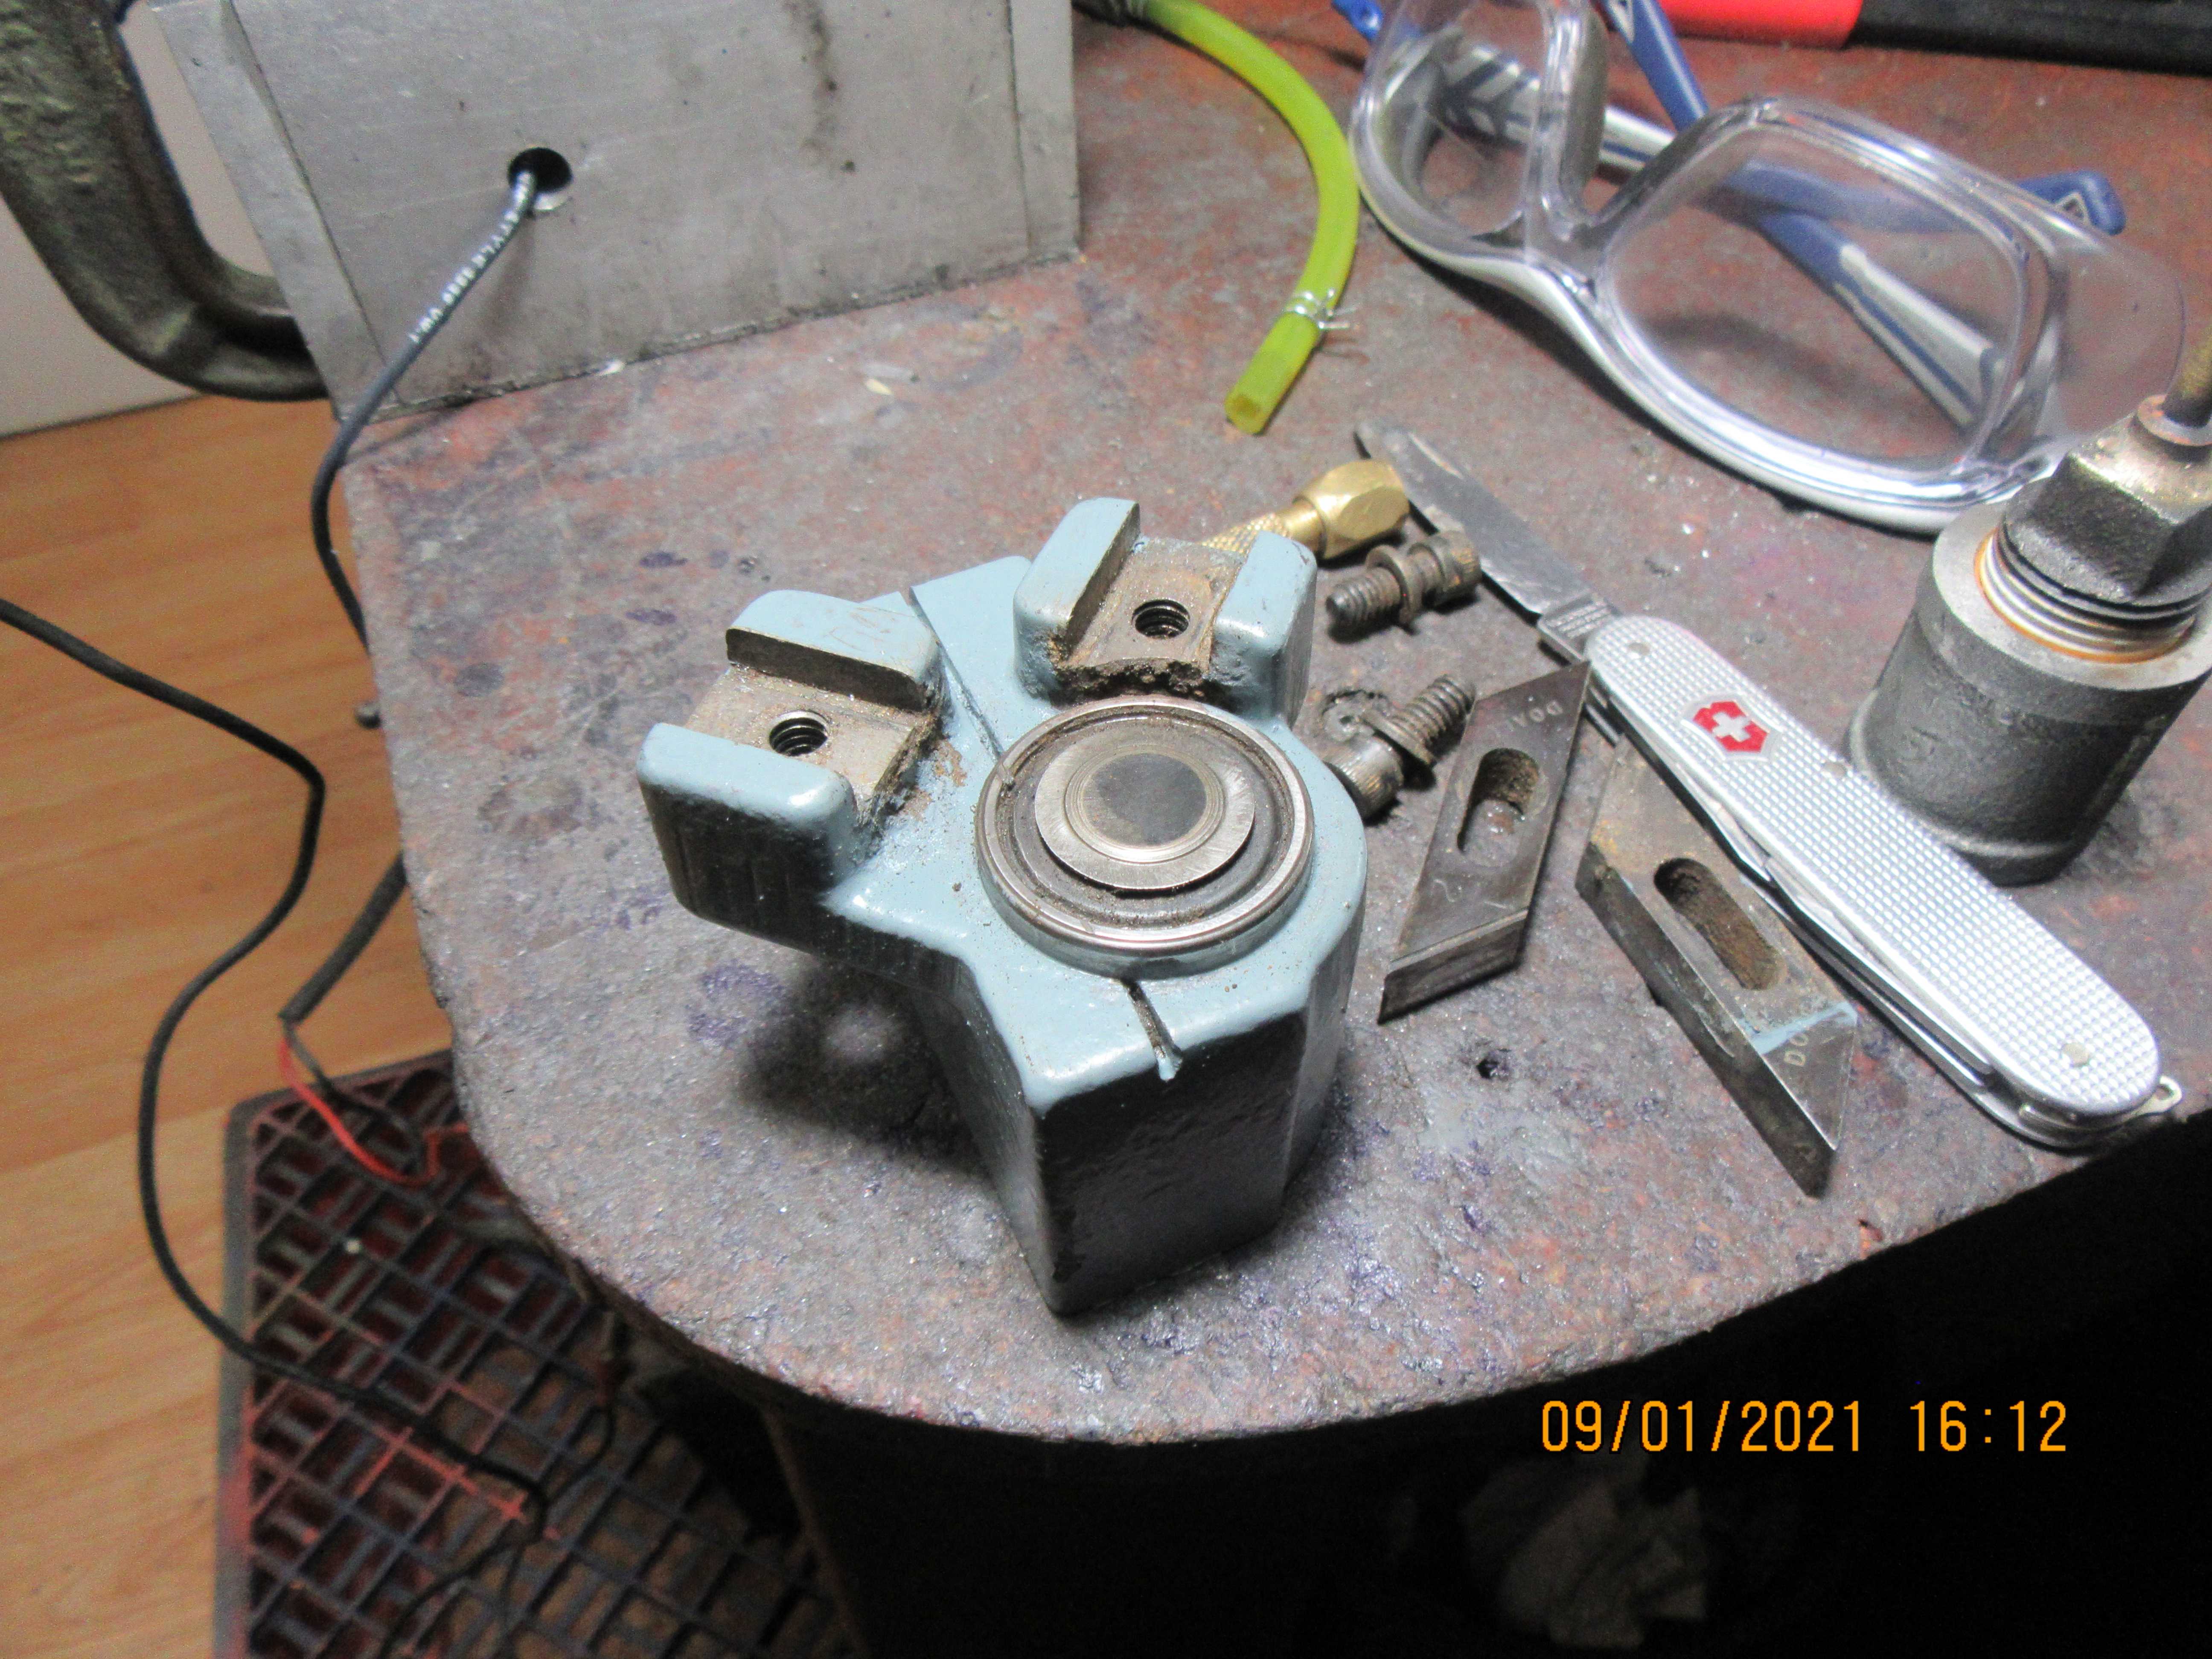
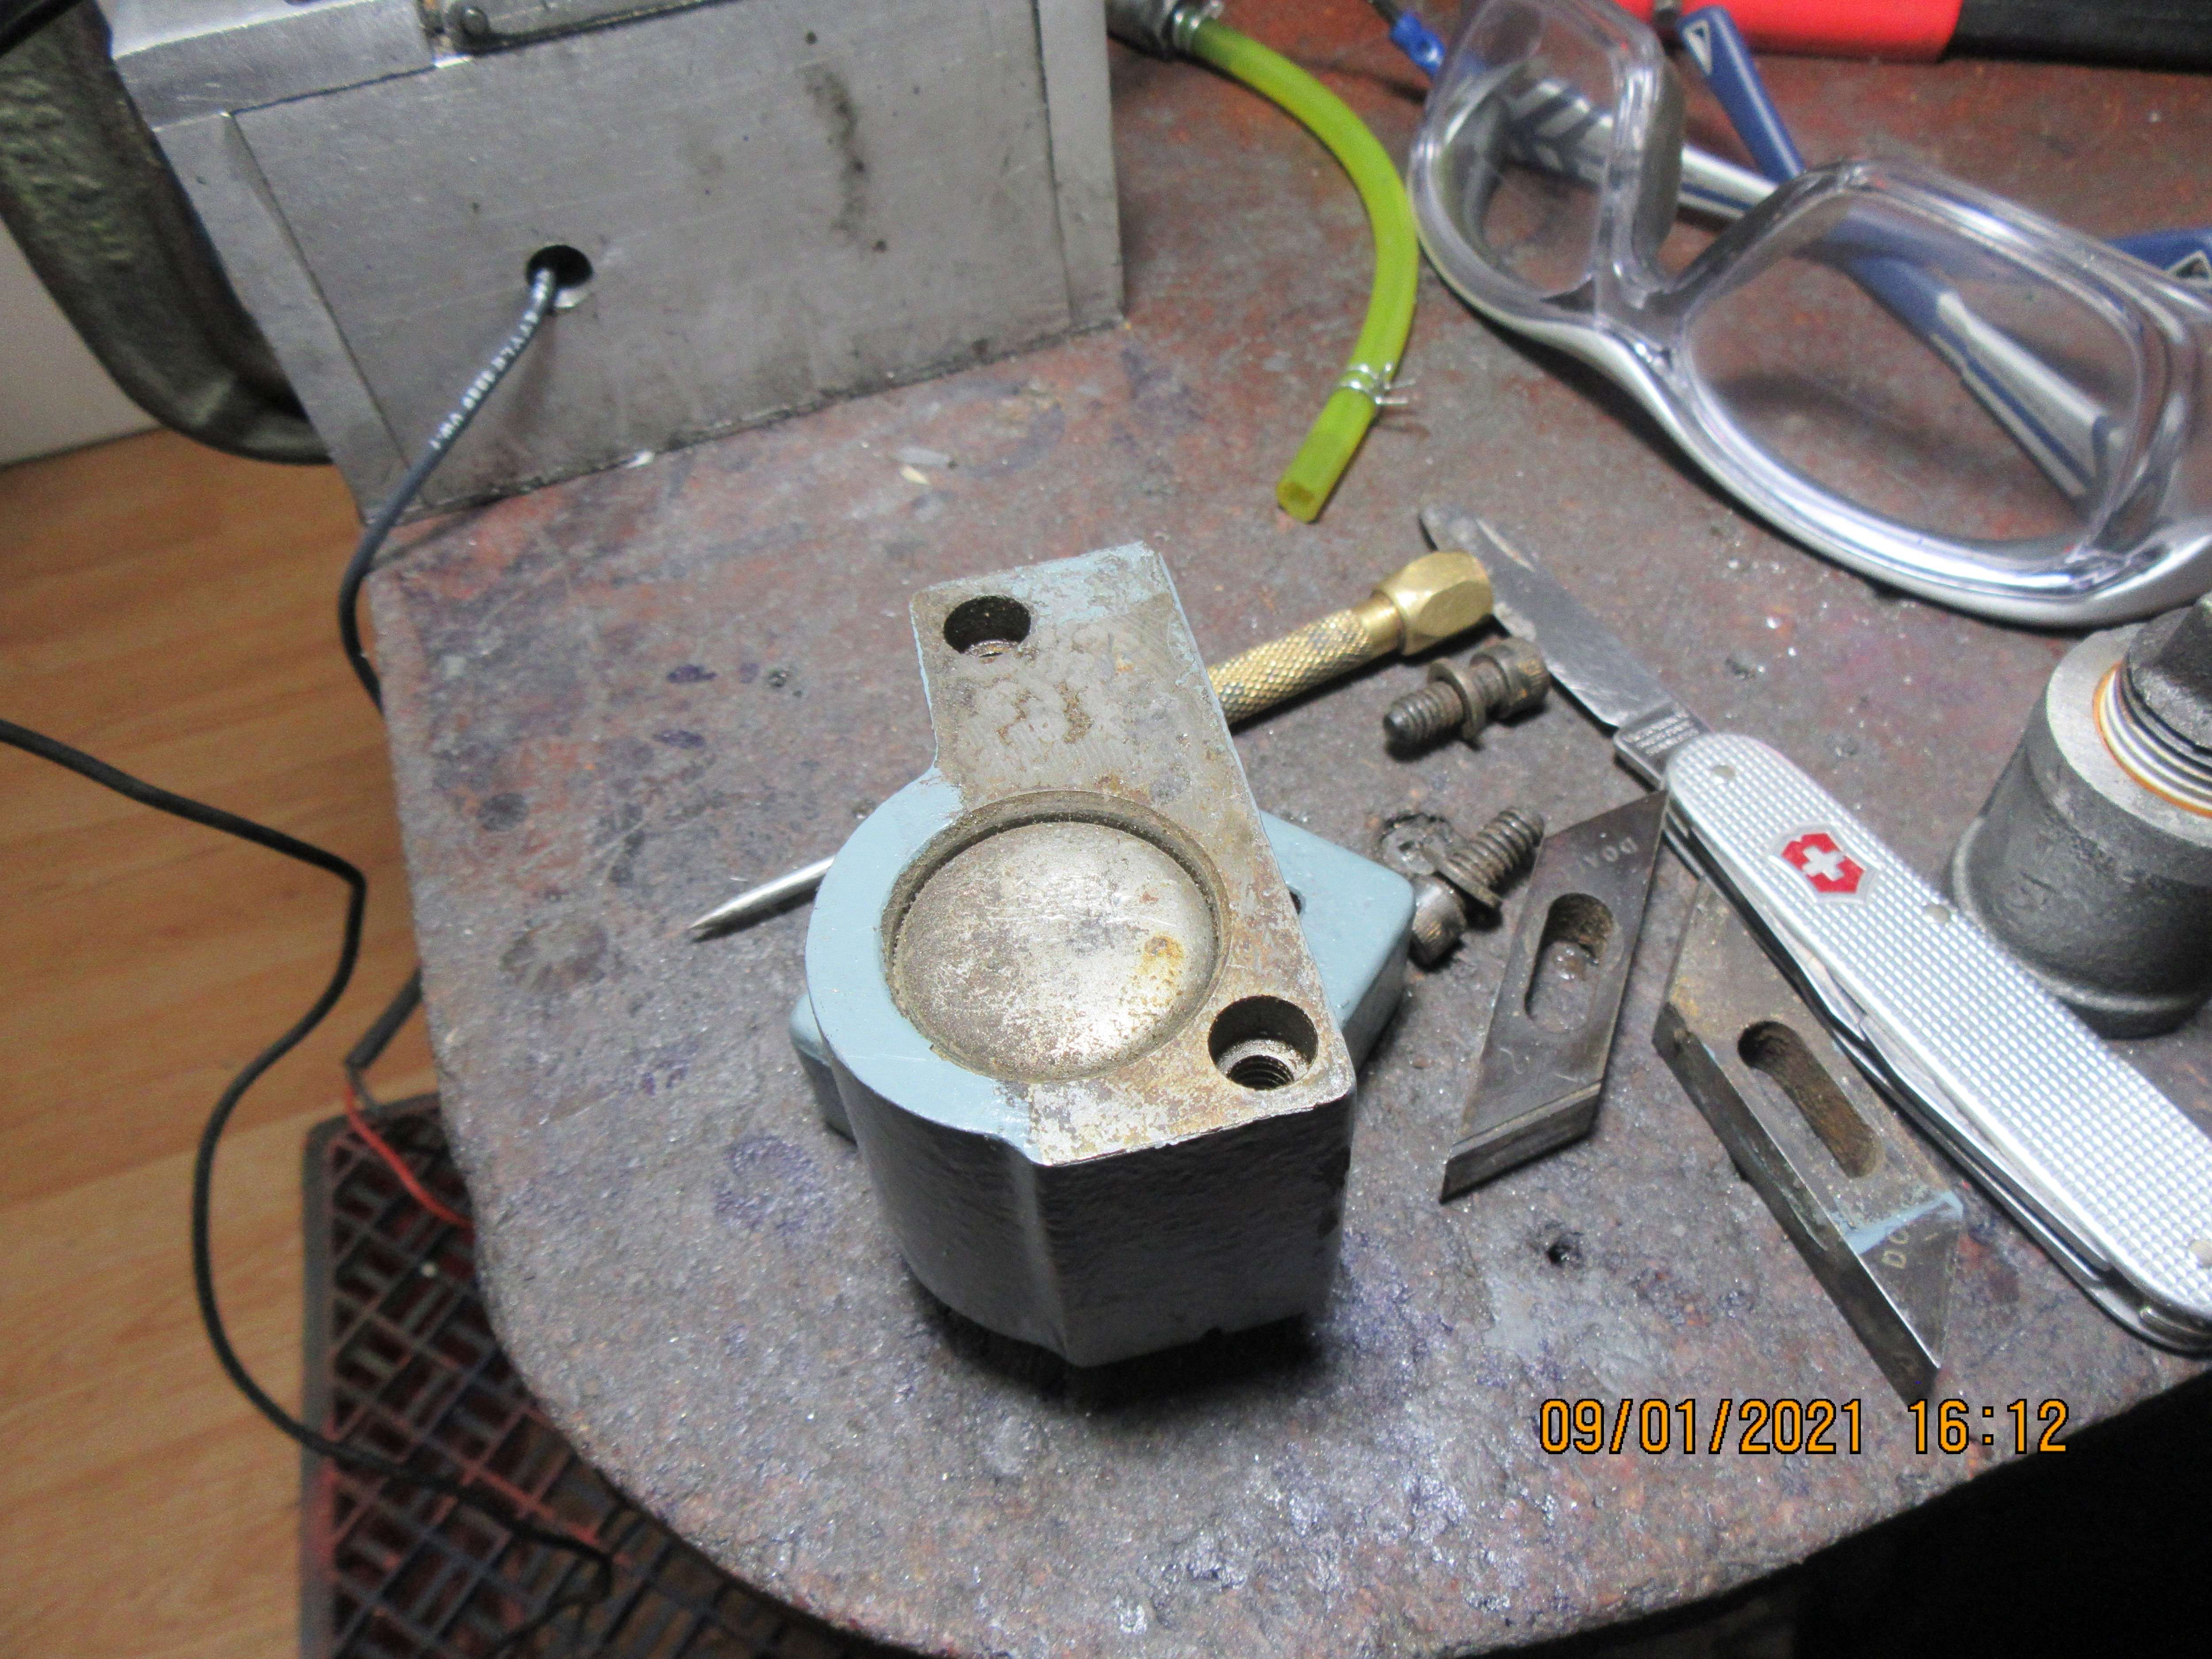
Mine is a 1/4 ID x 3/4 OD cartridge bearing and the axle is a press fit in the bearing and the housing. Originally there is a cap over the face of the bearing. Your saw is quite a bit newer than mine so yours may be different.
A little more information--With the saw guides removed, I have a better look at the bearing. The blade doesn't ride against the face of the bearing. It rides against the face of a mushroom headed hardened steel stub shaft which fits into the bearing. No snap rings are visible, but it looks to me like that thing on the back side is just a cap that should be removeable? The bearing is not seized up after all. It rotates freely. I may just put it all back together and put it back on the saw. I have come to a decision about the saw blade. I am going to go with a 1/2" wide blade. I will get a bi-metal blade with 5-8 staggered tooth pattern. I want to see the saw run successfully before I try something like a different blade size. Who knows? Maybe the 1/2" blade will do everything I want it to.


Figuring things out as I roll along----My little 16" wood cutting bandsaw had a 3/4" wide wood cutting blade on it when I bought it. I added a shaft and pulleys to slow the blade down, and then after seeing how quickly it ran thru ordinary metal cutting blades, I switched to bi-metal blades. With a 3/4" wide blade, you really can't cut curves. That's okay, I never really wanted to cut curves. 99% of my cuts were simple straight cuts. Now this new to me DoAll saw is not called a "bandsaw". It says right on it that it is a "contour saw".---Maybe that should have made me stop and think, but damn, it has two pulleys and a saw band on it, so to me, that's a bandsaw. After two or three days of "faffing about", I now understand why it had a 1/2" sawblade on it.---To cut contours---DUH---Oh well, I'll try it with a 1/2" bi metal blade and see if I'm happy with the results. Maybe it will be fine. If it isn't fine, then it seems that I can make it fine by fiddling with the blade guides and putting a 3/4" blade on it. Here I am, 75 years old, worked in engineering all my life, and never knew that there was such a thing as a "Contour Saw". Life never ceases to amaze me!!!
I have a standard hacksaw and right arm that cuts contours - like it or not... Maybe I should have been a saw-bones instead of an engineer, as they don't make straight cuts either.
But as my Dad put it: the engineer tells the proper guy what he wants, not how to do it, then walks away so the guy can produce what is wanted, without any conflict between how he did it and how the engineer thought it should be done.... Worked well for me most of the time...
But as my Dad put it: the engineer tells the proper guy what he wants, not how to do it, then walks away so the guy can produce what is wanted, without any conflict between how he did it and how the engineer thought it should be done.... Worked well for me most of the time...
Your 3/4" blade will cut a radius, albeit a fairly large one, here's an indication of what a given blade should cut. That is from a woodworking site so your blades may be a bit different as, I think, the set on the teeth is wider for metal cutting blades, on my Baxter roll-in type saw they list the radius for a 3/4 inch blade as 4".With a 3/4" wide blade, you really can't cut curves. That's okay, I never really wanted to cut curves. 99% of my cuts were simple straight cuts. Now this new to me DoAll saw is not called a "bandsaw". It says right on it that it is a "contour saw".

willray
Well-Known Member
Here I am, 75 years old, worked in engineering all my life, and never knew that there was such a thing as a "Contour Saw". Life never ceases to amaze me!!!
You should check out what DoAll was up to, when they were really serious about the contour-saw thing. This thread on PracticalMachinist is a good resource:
Contour bandsaws - what does that mean?
Their lineup included full-power feed for the table, and a special "steering" device to help you drive a part through complex curves while maintaining consistent feed pressure. The welder on your saw isn't there so that you can make your own blades, it's there so that you can break your blade, put it through a hole drilled in the work, and re-weld it for cutting completely-closed internal curves.
There's also - and I think these are still available - bands with literal metal-cutting file segments on the outside surface, so that you could run the thing as a giant die filer.
You've got one beast of a saw.
JLaning427
Active Member
DoAll certainly was a big name and often leader in the industry.
And yes, that's exactly why the welder is on the machine!
Their band filer is certainly a unique piece of equipment. I have read of people converting band filers to band saws. But I have serious doubts that band files could be run on a normal bandsaw without significant modifications, assuming you could find them for reasonable money. Guides and a backup / platen system for the files would be necessary additions, as well as removing the existing blade guides. Probably not worth the trouble. I think there is a reason we don't see these in production anymore. Abrasive belts have come a long way.....
James
willray
Well-Known Member
I have serious doubts that band files could be run on a normal bandsaw without significant modifications, assuming you could find them for reasonable money.
I'm pretty sure my Zephyr is able to run either normal blades or band files. I will admit to it being a completely unfounded assumption on my part that other DoAll models were convertible! Might not be proper to call the Zephyr a "normal bandsaw" though
Will
There is no joy in Mudville---My electrical friend who has really impressive skills came to my house this morning at 9:30 and proceeded to wire up my VFD. While he was doing his wiring thing, I decided on a mounting location and mounted the VFD on the saw. After a whole lot of wire pulling and connecting, he hit the start button on the VFD, and the 3 phase motor started running.---but---the VFD was showing a "trip" light. The VFD was shut down, everything was checked, and the start button was pushed again. This time the VFD came to life, but the motor didn't start, and the "trip" light on the VFD came on again. Everything was checked, then re-checked, then checked again.---No Dice. The instruction booklet which came with the VFD acknowledged that yes, there was a "trip" light, but failed to mention what to do about it, nor exactly what it meant. Finally at 3:00 my friend had to leave and go home, with both of us scratching our heads and the saw still not functioning. I don't really need the saw right now, because I still have my smaller converted wood bandsaw. In a total crunch, I can take the two horsepower single phase motor of my old power hacksaw and run the DoAll saw with it---if I have to. Still, a rather disappointing way to end the day. My friend will do some research on Tuesday when everything is open again, and hopefully come up with an answer.
- Joined
- Jan 4, 2011
- Messages
- 1,445
- Reaction score
- 406
I am sure that your electrical friend has checked but the motor has to be connected internally for 220 volts. Most industrial equipment is wired for 440 volt so the motor has to be changed also.There is no joy in Mudville---My electrical friend who has really impressive skills came to my house this morning at 9:30 and proceeded to wire up my VFD. While he was doing his wiring thing, I decided on a mounting location and mounted the VFD on the saw. After a whole lot of wire pulling and connecting, he hit the start button on the VFD, and the 3 phase motor started running.---but---the VFD was showing a "trip" light. The VFD was shut down, everything was checked, and the start button was pushed again. This time the VFD came to life, but the motor didn't start, and the "trip" light on the VFD came on again. Everything was checked, then re-checked, then checked again.---No Dice. The instruction booklet which came with the VFD acknowledged that yes, there was a "trip" light, but failed to mention what to do about it, nor exactly what it meant. Finally at 3:00 my friend had to leave and go home, with both of us scratching our heads and the saw still not functioning. I don't really need the saw right now, because I still have my smaller converted wood bandsaw. In a total crunch, I can take the two horsepower single phase motor of my old power hacksaw and run the DoAll saw with it---if I have to. Still, a rather disappointing way to end the day. My friend will do some research on Tuesday when everything is open again, and hopefully come up with an answer.
JLaning427
Active Member
Oh, no! Well that isn't much fun..
I will second what Gordon said, confirm that the motor is wired (in the junction box physically on the motor) for 208/240 not 440/460/480. Usually there will be 12 wires that need to be reconnected in the correct arrangement.
And obviously you need to confirm it really is a 3 phase motor, and that someone didn't swap it for a single phase motor somewhere in the saw's life.
Also, the drive needs to be connected directly to the motor. Which means bypassing the contactor / motor starter that would have been factory installed in the machine. If there is anything in between the motor and the drive, it won't work right.
Additionally, you may need to look at various settings in the drive. Like number of poles and such, but usually it'll start and try to run with those kinds of settings mismatched, just won't run quite perfect.
If you've already done all that stuff, then we will need to ponder what else could be wrong.
James
Wiring up VFD's is beyond my skill set. When I went to Toronto to buy the saw, the man selling the saw plugged it into what he said was 220 volt 3 phase, and the saw ran nicely. I'm sure that we can get it all sorted out Tuesday.
JLaning427
Active Member
Well, if you have seen it run, you should be ok.
Really, the trick to wiring up a VFD is that the motor needs to be wired directly to the VFD. No switches, no motor starter, do not pass go, do not collect $200, connect it directly to the VFD.
Which means wiring up the 3 phase side (output) is actually pretty easy. 3 phases and ground, direct from the VFD to the motor (terminal blocks or wire nuts are ok).
The input side of the VFD is pretty straightforward (220V is 2 hots and a ground). And it sounds like you might be ok there already, as it powered up.
Controls is a bit more exciting (or painful, depending on how you feel about electricity), but you can usually just use the buttons on the front of the VFD during setup.
James
trlvn
Well-Known Member
I am sure that your electrical friend has checked but the motor has to be connected internally for 220 volts. Most industrial equipment is wired for 440 volt so the motor has to be changed also.
220, 440, 380, 550...it is like Forrest Gump's box of chocolates! You never know what you're going to find!!

Larger industrial 3 phase equipment in Canada is more likely to be 550/575/600 volts, 60 hertz. But there are lots of other variants out there:
https://www.worldstandards.eu/electricity/three-phase-electric-power/
Standards are so good that we just seem to want lots of them!
Craig
Similar threads
- Replies
- 1
- Views
- 2K


