BobWarfield
Well-Known Member
- Joined
- Dec 27, 2007
- Messages
- 1,151
- Reaction score
- 1
Sometimes, we get so busy finishing projects, we have no time for anything else. We fall behind, and we stick to tried and true "fastest most familiar" methods. That's a shame. Do you make time for experiments? I find that's where I learn the most. I try not to be so busy that I can't stop and go try something out.
What kinds of experiments?
Well, like trying a bunch of different ways of measuring precise Z-axis location on my mill. What works better:
- Touch off by feel: Move the cutter down until you feel it touch the workpiece without the spindle running? I get an accuracy of 0.012" doing that. Lousy! And repeatably so!
- Touch off by sound: Fire up the spindle and lower until you hear it cut. 0.0085" accuracy, and repeatable. Better, but no great shakes.
- Touch off with paper: The traditional old school method. Fire up the spindle, insert a slip of paper atop the workpiece, move down until the cutter grabs the paper. Most paper is around 0.001" thick, so allow for that too. Alas, I got a very repeatable 0.010" inaccuracy on this. BTW, repeatable inaccuracy can be factored in! And be sure you use a long enough slip of paper so your fingers holding it are in no danger!
- Use a fancy Z-axis presetter gizmo:
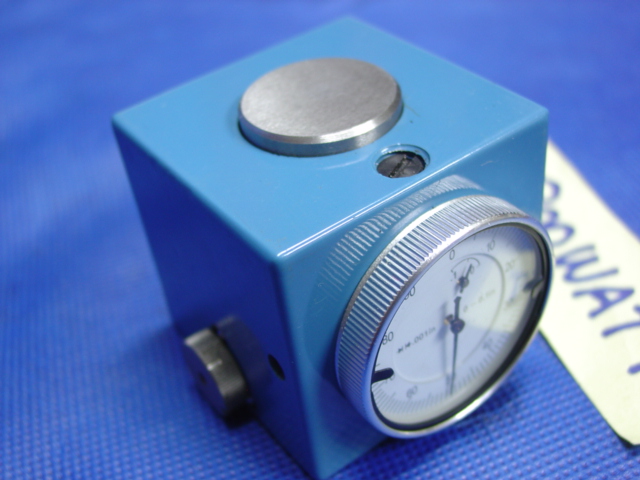
By now you guys know I'm a total gadget junkey. Those presetters are available from 800watt and others on eBay. They have a self-calibrating standard inside. You run the cutter down until you detect any motion at all on the needle. At that point you are exactly 2" above the workpiece. Use your quill DRO or other aid to close the gap exactly 2". This bad boy put me exactly onto my target. I can't say how exactly other than that it was well under a thousandth. At that time I had not the ability to measure to a tenth, but it was dead on to a thousandth.
Recently, I did another experiment. I wanted to measure runouts on my mill spindle and some ER32 collet chucks. Have you ever checked your runouts?
I ran an 0.0005" Interapid DTI on the inside of the R8 taper using a magnetic indicator stand sitting on the mill table:
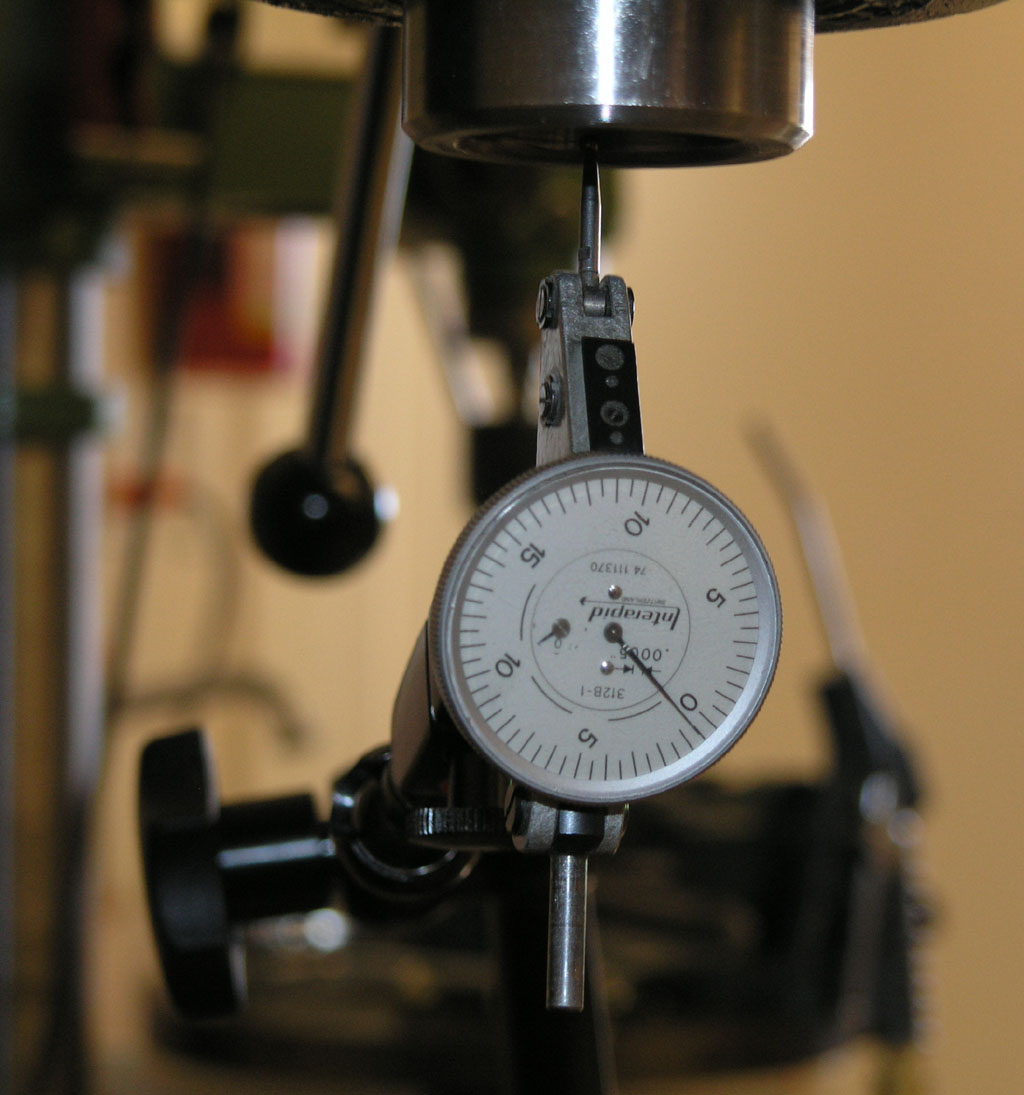
I flicked the spindle on at lowest revs and then hand rotated it to max runout to measure. It was 0.0005". That's very tolerable for this kind of machine.
Then I stuck a collet chuck in and measured the outside barrel:
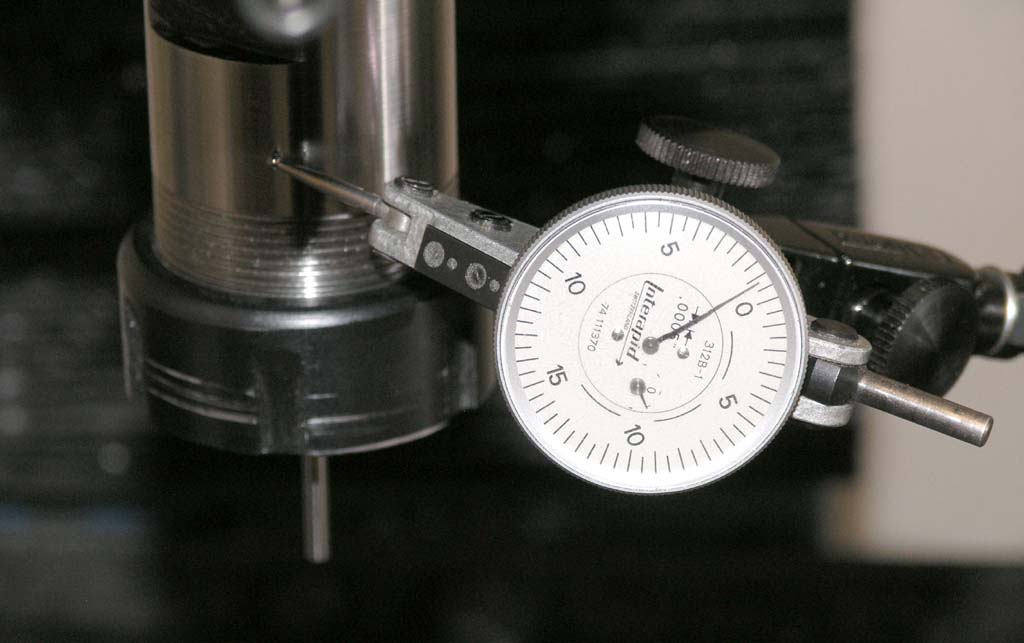
About the same, even on an El Cheapo 800 watt chuck versus my 'spensive Bison chuck. Hmmmm.
Now I pulled out a pin gage from my set. I verified it was straight and true on my surface plate, stuck it in a collet, and checked the runout there:
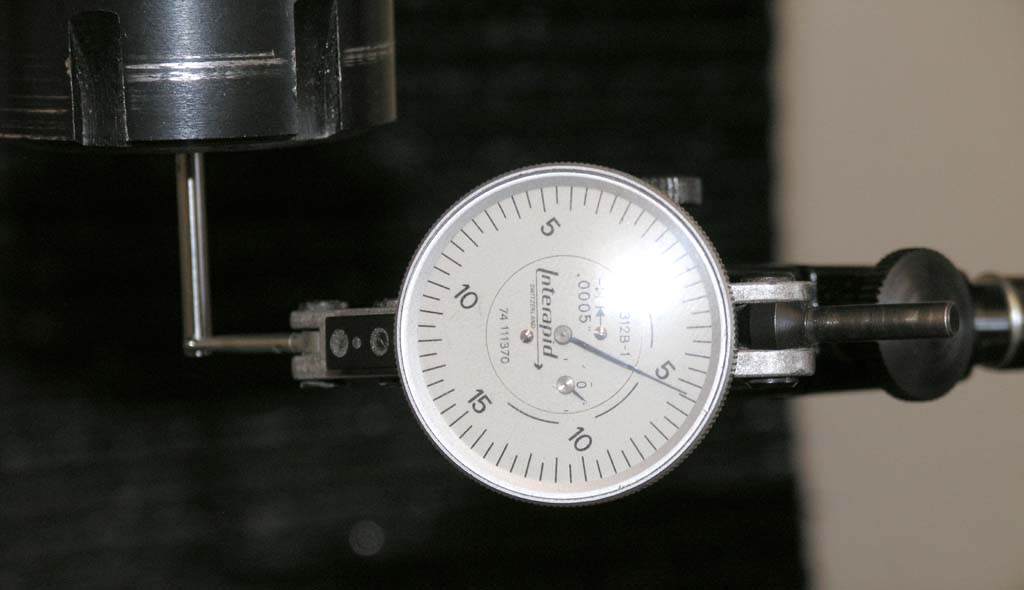
Oops! Bad collet, bad!
And that's how I knew I could've stayed with my cheap chuck, but should've bought nicer collets. Sigh....
What kinds of experiments?
Well, like trying a bunch of different ways of measuring precise Z-axis location on my mill. What works better:
- Touch off by feel: Move the cutter down until you feel it touch the workpiece without the spindle running? I get an accuracy of 0.012" doing that. Lousy! And repeatably so!
- Touch off by sound: Fire up the spindle and lower until you hear it cut. 0.0085" accuracy, and repeatable. Better, but no great shakes.
- Touch off with paper: The traditional old school method. Fire up the spindle, insert a slip of paper atop the workpiece, move down until the cutter grabs the paper. Most paper is around 0.001" thick, so allow for that too. Alas, I got a very repeatable 0.010" inaccuracy on this. BTW, repeatable inaccuracy can be factored in! And be sure you use a long enough slip of paper so your fingers holding it are in no danger!
- Use a fancy Z-axis presetter gizmo:

By now you guys know I'm a total gadget junkey. Those presetters are available from 800watt and others on eBay. They have a self-calibrating standard inside. You run the cutter down until you detect any motion at all on the needle. At that point you are exactly 2" above the workpiece. Use your quill DRO or other aid to close the gap exactly 2". This bad boy put me exactly onto my target. I can't say how exactly other than that it was well under a thousandth. At that time I had not the ability to measure to a tenth, but it was dead on to a thousandth.
Recently, I did another experiment. I wanted to measure runouts on my mill spindle and some ER32 collet chucks. Have you ever checked your runouts?
I ran an 0.0005" Interapid DTI on the inside of the R8 taper using a magnetic indicator stand sitting on the mill table:

I flicked the spindle on at lowest revs and then hand rotated it to max runout to measure. It was 0.0005". That's very tolerable for this kind of machine.
Then I stuck a collet chuck in and measured the outside barrel:

About the same, even on an El Cheapo 800 watt chuck versus my 'spensive Bison chuck. Hmmmm.
Now I pulled out a pin gage from my set. I verified it was straight and true on my surface plate, stuck it in a collet, and checked the runout there:

Oops! Bad collet, bad!
And that's how I knew I could've stayed with my cheap chuck, but should've bought nicer collets. Sigh....


![DreamPlan Home Design and Landscaping Software Free for Windows [PC Download]](https://m.media-amazon.com/images/I/51kvZH2dVLL._SL500_.jpg)


