colour problem

Home Model Engine Machinist Forum

Help Support Home Model Engine Machinist Forum:

This site may earn a commission from merchant affiliate links, including eBay, Amazon, and others.

max corrigan

Well-Known Member
Joined
Aug 24, 2008
Messages
156
Reaction score
4
can anyone help on my pc (xp home) pictures seem ok other than pictures containing mostly red which comes out with black shadows/streaks have i altered some setting somewhere and can i rectify it, in the most simplest terms possible or is the "pc colour card"gone wrong and hit the skids
Best regards Max.............
 
Max,

Maybe this will help, you may have inadvertently changed your colour profile.

Failing this your "drivers" for colour may have been changed.

Last your card or monitor may be at fault.

Sorry no real easy answer. :mad:

Regards
Bob


To add a color profile to a monitor
You must be logged on as an administrator or a member of the Administrators group in order to complete this procedure. If your computer is connected to a network, network policy settings might also prevent you from completing this procedure.

Open Display in Control Panel.
On the Settings tab, click Advanced.
On the Color Management tab, click Add to open the Add Profile Association dialog box.
Locate the new color profile you want to associate with the monitor.
Click the new profile, and then click Add.
Notes

To open Display, click Start, point to Settings, click Control Panel, and then double-click Display.
Color profiles communicate the color characteristics of a device to the color management system. Associating the correct color profile with all of your publishing tools helps to ensure consistent color application throughout the publishing process.
For more information about a profile in the Add Profile Association dialog box, right-click the profile, and then click Properties.
Color profiles are usually installed in the systemroot\System32\Spool\Drivers\Color folder.
Windows provides a color profile named sRGB Color Space Profile.icm, which you can use with any device that supports Image Color Management 2.0.


Bob many thanks for your promp reply to my query i did as you suggested ie added sRGB as default but it did not make any difference regarding the black on red problem the problem did not bother me too much until i took a picture of my workshop where a lot of my stuff is painted red (had a large can left over from something or other)when i put pictures onto the PC (they were ok in the camera image)it looked as if somebody had thrown a bucket of old engine oil over everything black streaks everywhere! i was intending to publish in "show workshop page", once i had sussed out how to use photo bucket (another problem)
it has been like this for sometime so cannot use system restore,if i remember correctly it happened very suddenly which would as you suggest a card or monitor problem
is there a way to set pc to default colour settings to check this?
Anyhow Bob thanks for your input greatly appreciated
Thanks Max..............
 
Max,

Restart your computer in safe mode, this will set the display and resolution to minimum values.

Have a look at a problem picture in this mode, if its OK try the following

Is the correct monitor selected in your display settings?
Make sure that the correct monitor appears in Display properties. If the wrong monitor is selected, Windows might not use the full capabilities of your monitor, and you might be restricted in your choice of screen resolutions.

To check your monitor selection

Open Display Properties in Control Panel.
Click the Settings tab, click Advanced, and then click the Monitor tab.
The monitor that is selected for your computer is displayed under Monitor Type.

If correct monitor isn't listed, click Properties.
Click the Driver tab, and then click Update driver.
After the Hardware Update Wizard starts, click Install from a list or specific location, and then click Next.
Click Don't search. I will choose the driver to install, and then click Next. This provides a list of monitor manufacturers and models.
In Manufacturers, click the manufacturer of your monitor, and then in Models, click the model name.

If your monitor isn't listed, click (Standard monitor type) in Manufacturers, and then choose the most compatible setting for your monitor in Models.
Click Next, and then click Next again.
Note

To open Display Properties, click Start, click Control Panel, click Appearance and Themes, and then click Display.

If not ???

Regards
Bob

 
Max,
I'm afraid your problem is going to be darn near impossible to diagnose without actually seeing the computer. Since it happened "suddenly" it most likely is not software related. Meaning it's not a setting in the operating system.

Since it is most likely hardware there can be many possible sources including the monitor, the card, the cable, even the motherboard itself.

One simple option to try:
Almost all modern monitors have a user accessible menu. Check the front buttons or the user manual if it's still available. Look for an option called "DEGAUSS". Tube type monitors use magnetic fields to bend the electron beam that produces the picture. Sometimes magnetic fields get out of whack, the DEGAUSS option helps set them straight. This is most often a problem on large monitors, but also happens to small ones. I had a 19 inch monitor that the colors would get out of whack just by rotating it 90 deqrees on the table, as it was sensitive to the magnetic fields of the Earth. DEGAUSS would set it straight.

Good luck.
 
kevin and bob thanks for your replies to my problem i pretty sure i have narrowed it down to the monitor a couple of years ago i installed a flat screen monitor, (one of those very slim units not sure of the right name)but i kept the original compaq monitor luckily! re-installed this and although the picture is not in the same class as the later one the black smears on red were not there so that is the problem!
Kevin i will now try and do the correction you suggest ie. DEGAUSS i have never heard of that one, it did not come with a manual but i think it has a online effort! i will have to check
thank you both again, if i degauss it and it sorts the problem i will let you know
Regards Max..........
 
Degaussing only applies to CRT type monitors Max, If by Flatscreen type you mean LCD or TFT Flat panel -Only about 3" thick maximum, don't bother looking for degauss. On a CRT - deep back, like the old Tele's, when I switch mine on there's a definate "Boing" which means the degaussing circuit is/has worked.
Regards Ian.
 
I have seemingly solved the problem in my last post i mentioned i had tried the old monitor, the old fashioned type! and the problem disappeared, when i reconnected the newer (TFT or LCD it is only about 3" thick) monitor i moved it away from an external hard drive that sat directly underneath the screen as suggested by Kevin as being possible cause ie magnetic field etc.switched on, and the problem was gone! i carefully edged the monitor back over the external h/d expecting to see the black smears come back but it did'nt, so i can only assume possibly unplugging pc connection and reconnecting did the trick, does a monitor reset itself when disconnected for a time? because the problem i have had for months is now ok, without seemingly doing much at all, so all ends well,
once again thanks one and all for taking the time and trouble to help! i am very grateful
Regards Max.............
 
Max,

Great news, a lesson learned, (for me), about relative placement and best of all, fixed without damage to the hip pocket nerve. :D

Regards
Bob
 
Maryak said:
fixed without damage to the hip pocket nerve. :D

Bob, you clearly have access to the same Aussie book of "Eternally useful phrases" as Tel :D :big: :D :bow: ............... any chance I can crib a copy ::)

Max ............ glad your up n' running again, must admit I suspected a new monitor was on the cards, good result ;D
 
Max,
Yes, the problem could have easily been fixed by just unplugging the cable and plugging it back in. That's actually a very common solution. The cables carry a (somewhat) high frequency low voltage current, and just a little bit of corrosion is enough to block the signal. Wiggling the connector probably would have done the same thing. Moving the connector caused just enough abrasion to re-establish the connections.

Glad the solution was so simple. I'm a software guy, so I really hate hardware problems...
 
Sorry it's a purely Ozzie thing, can't be written down because most of it is gleaned when holding up a bar in the local and solving the worlds problems at the same time ;D

In this state one tends to lose sight of most things, however fortunately they spring to light, at opportune moments. ::)

Unfortunately they also have a nasty habit of springing to light at inopportune moments, this accounts for Australia's prowess in sports which involve moving rapidly in a given direction, (usually away from the other bloke at the bar). ;)

Regards
Bob
 
CrewCab said:
Bob, you clearly have access to the same Aussie book of "Eternally useful phrases" as Tel :D :big: :D :bow: ............... any chance I can crib a copy ::)

Max ............ glad your up n' running again, must admit I suspected a new monitor was on the cards, good result ;D

I'd lend you my copy except that the Head Wombat would then 'ave me killed. :(
 
Kevin i think you hit the nail on head although i don't think wiggleing the wires would work here as the connections at both ends are those long thumbscrew type i think the answer is as you said the plugs at both ends completely removed from both monitor and pc would possibly remove any debris or whatever maybe caused the problem in the first place! thank god for that and the ole hip-pocket nerve was definately beginning to tremble LOL

Now the other problem i hedged on in an earlier post i don't think this warrants a new thread (please tell me if i'm wrong and by all means move it) posting pictures i've got photobucket and imageshack i can upload pics to these, i can copy and post them, tried it in a mock-up email and the signature (for want of a better word) of the picture comes up, but clicking on it does not produce the picture, is it different when you post on a forum website and will it produce a thumbnail pic like i have seen in other posts?
sorry to be so long winded but as i've said before i don't think i reached the "n" in novice regarding PC's and you being a software merchant can probably do it with your eyes shut
Many regards Max..........
 
Max,
There are techniques used for Photobucket and Imageshack. I don't use them so I'm not familiar with them, but many here do. Hopefully someone will speak up and offer some assistance.

I run my own web server, so I host my pictures on it. Here is what I do.
Refer to this screen shot:

hmem_sp.jpg


When you are in the "Reply" screen you will see a row of buttons. If you hover the mouse pointer over a button it gives a description of what the button is used for. In this instance I want to post a picture, so I select the third button on the row above the smilies. That places the two tags that will tell HMEM software that the text between them is the internet address and name of the photo I want to display.

Then in between, I type the server name and directory path to the photo. I can have text above and below the tags. You can not just post the directory on your hard drive. It won't work because you don't have a server and publicly accessible internet address. You must be running a web server or have the photos hosted on a web site such as Photobucket to make them work.

If you have two browsers open, one for HMEM and another for Photobucket you could brows to the picture you want in Photobucket, highlight the address, press <ctrl> C to copy. Then go to the HMEM browser and press <ctrl> V to paste it in your "Reply" text between the tags.

I hope that's not too confusing. It really is quite simple to do, it's just the first time you do it that's a bit tough.

Good luck.
If I can be of any more assistance, just ask.
 
I can't speak for the Imageshack site, but the Photobucket site is easy to use for posting pictures. You have to have the account and all of that obviously. Once your pictures are uploaded to photobucket, under each one will be four windows of code. The bottom window will be the one you want for adding pictures here. Simply click on that window and it will copy the image code into your clip board, and you just paste it into you post.

PM me if you need help.

Regards,
W/E
 
W/E am going to paste picture now! let me know if it comes Regards Max...
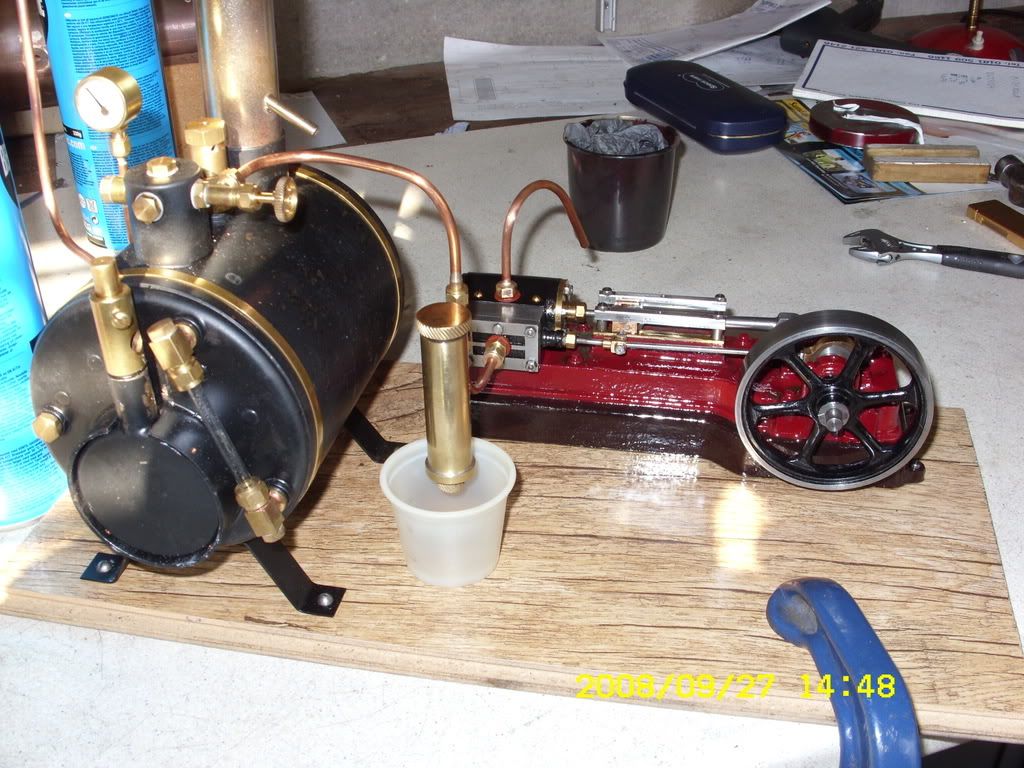
SN850053.jpg
 
W/E thanks a lot i have actually manage it with your help of course! :bow: and Kevin thanks for all your help and effort like you said it is so simple when you do it, it makes you wonder how you can be so dumb in the first place (me that is )
many regards Max...........
 
Nice pics...great job...sorry where did you find the drawings for that nice boiler?
Regards
Paolo
 
Paola i am sorry to say i did'nt it is a stuart turner boiler that i bought second hand on ebay a couple of years ago i have some more pictures especially one through the burner end is quite interesting i had better not post on this site though
regards Max...........
 

Latest posts

Back
Top