Brian's Donkey Engine

Home Model Engine Machinist Forum

Help Support Home Model Engine Machinist Forum:

This site may earn a commission from merchant affiliate links, including eBay, Amazon, and others.
hey brian, model is looking good are you coming to cookstown show this summer............sure would like to see some of your models.

take care

chuck
 
Chuck---Thats a good question. I have so many new models now that no one except the guys on this forum have ever seen. i might come down, but they would have to rent a compressor to run all of my stuff alone.----Brian
 
i am sure a compressor could be arranged if you like .......... i can talk to my friend ed, he has a bunch of gas engine models there every year and he is kind of in charge of the model stuff.

i look forward to seeing you and your models, and this year i will be bringing some of my models.

chuck
 
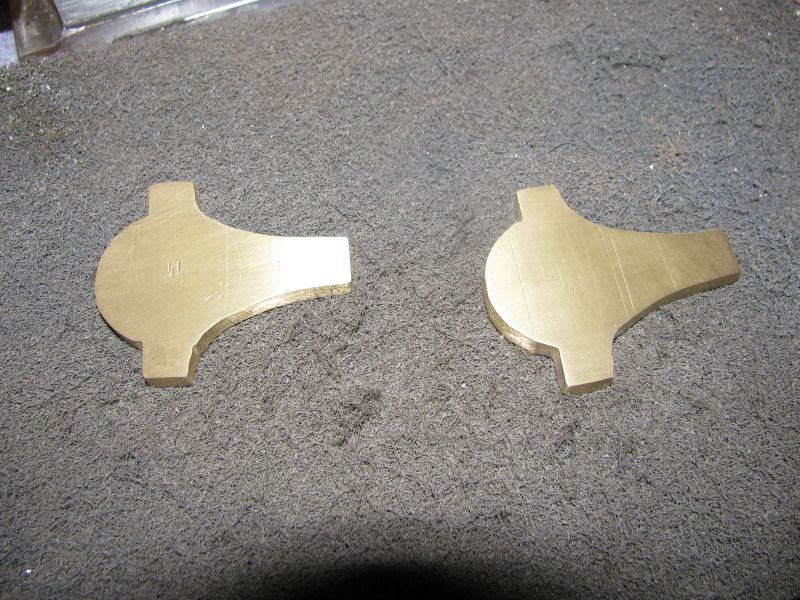
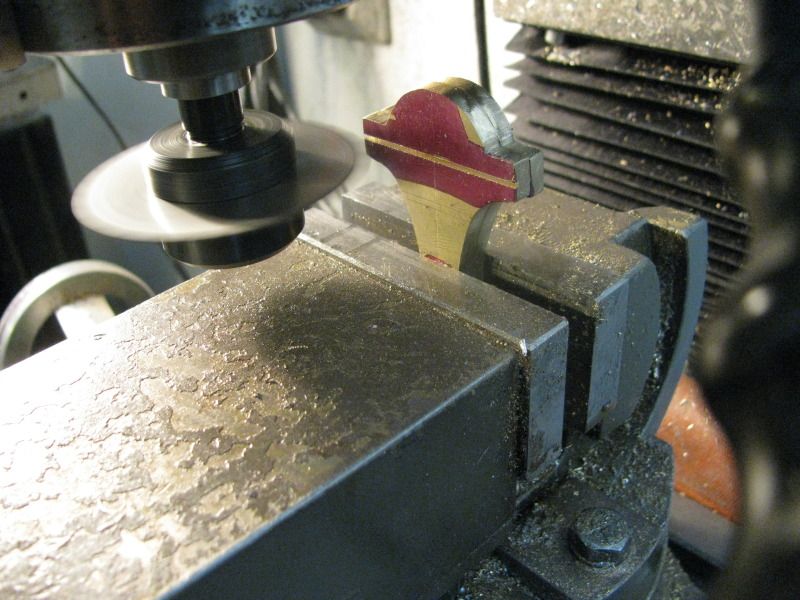
I'm going to "borow" a trick I seen Stew Hart do the other day on the engine he is currently building. I have always made my eccentric straps in two pieces and then fiddled them together after the fact. Stew makes them as one piece but leaves the center section a bit longer than necessary---just the width of a slitting saw blade. Once they are slit, the pieces fit exactly together and can then be bolted together and bored.
ECCENTRICSTRAPS001-1.jpg
 
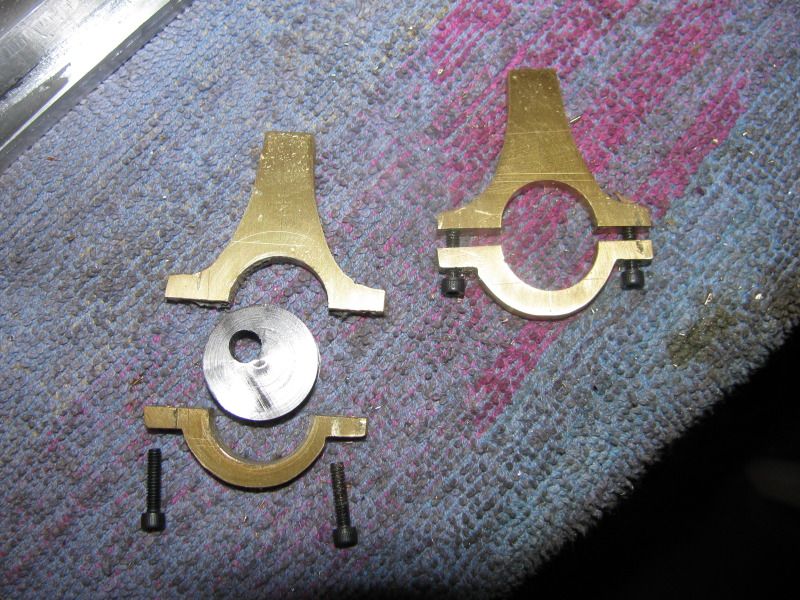
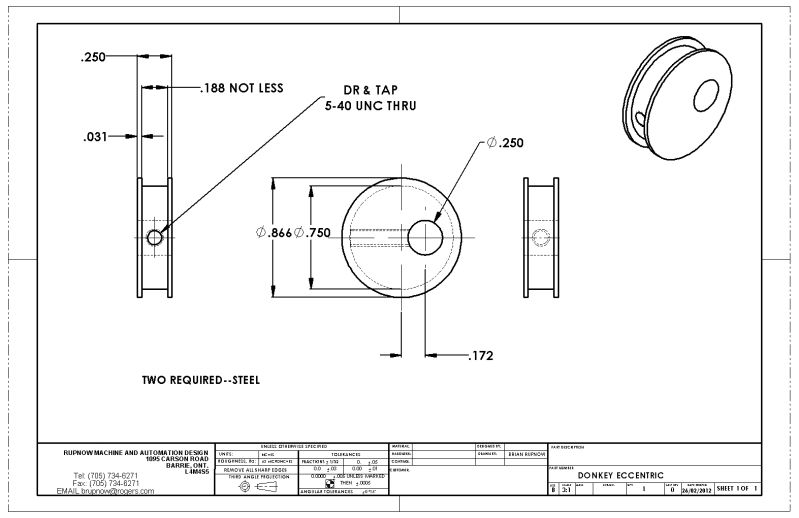
And here's how it ended up. I may do a bit of cosmetic filing here or there, but all in all it went well. Also in the picture you can see one of the hubless cams. In my original design these cams had hubs on them, but there is so little room between the flywheels and the bearing stands that I eliminated the hubs just to give myself some room. These cams work just as well as the hub style, its just that they are a real bugger to adjust the valve timing on. You have to remove the "cap" side of the eccentric strap to get at the set screw in the center of the hubless cam to adjust it rotationally. Please note that I have removed the eccentric strap drawing which I had posted much earlier in this thread, as it has undergone some fairly dramatic changes. I will post a new drawing tomorrow.
ECCENTRICSTRAPS002-1.jpg
 
Brian

When I have used hubless eccentrics in the past, I have drilled a hole through the cap big enough to pass the hex wrench that adjusts the set screw. Then you can loosen the set screw, move the crnkshaft and retighten without taking it apart. Much easier.

Jerry
 
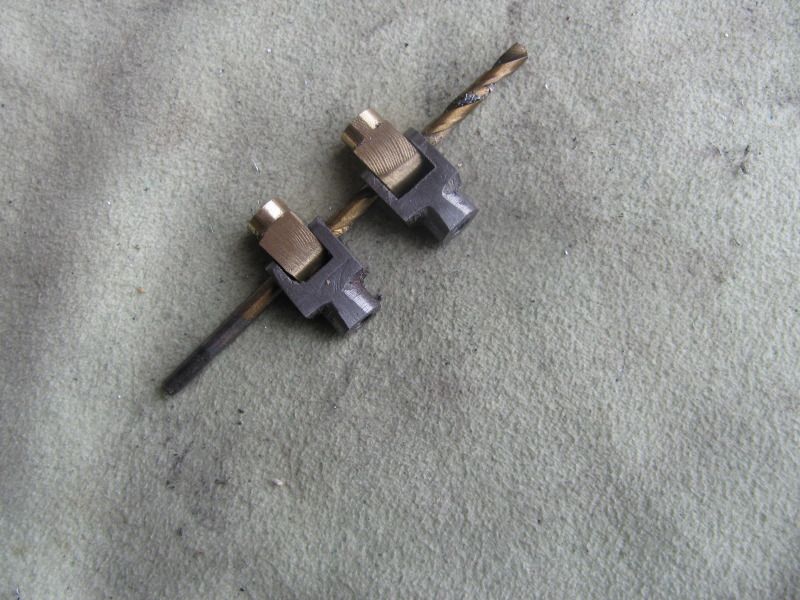
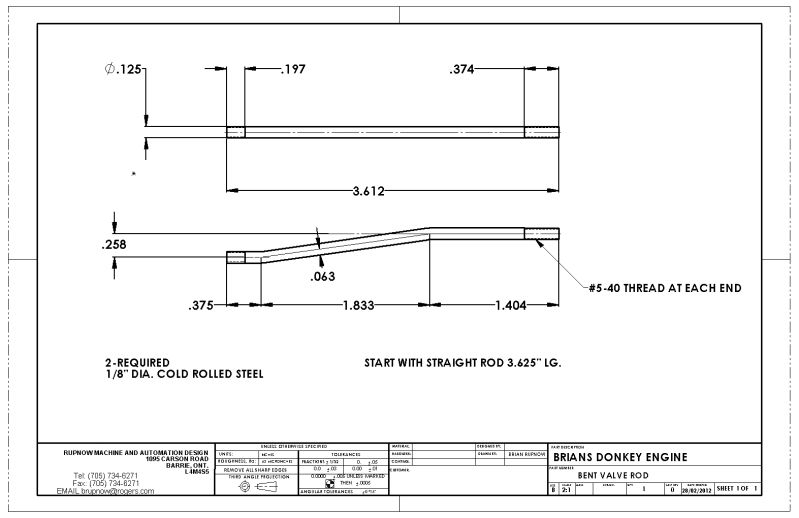
And these my friends, approach the threshhold of what I can see and work with. They are also the last of the engine parts except for the bent valve control rod which is a peice (well, 2 pieces) of bent 1/8" round cold rolled with a #5-40 thread on each end. Cross your fingers for me. We may have a runner by tomorrow!!!!
VALVERODJOINTS006.jpg
 
Brian Rupnow said:
And here's how it ended up. I may do a bit of cosmetic filing here or there, but all in all it went well. Also in the picture you can see one of the hubless cams. In my original design these cams had hubs on them, but there is so little room between the flywheels and the bearing stands that I eliminated the hubs just to give myself some room. These cams work just as well as the hub style, its just that they are a real bugger to adjust the valve timing on. You have to remove the "cap" side of the eccentric strap to get at the set screw in the center of the hubless cam to adjust it rotationally. Please note that I have removed the eccentric strap drawing which I had posted much earlier in this thread, as it has undergone some fairly dramatic changes. I will post a new drawing tomorrow.
ECCENTRICSTRAPS002-1.jpg

Another little trick is to drill and tap before you split, that way they bolt back together exact.

Comming together well Brian it will soon be a runner.

Stew
 
And I do 'em slightly differently again - bolt two bits of material together as the first stage, before any whittlin' begins.

 
I must have lived right this week!!! ;D ;D ;D I timed the engine statically, disconnected the far side connecting rod, and plugged in the air.---And away it went!!! Its running on about 10 PSI which is the lowest I have ever had a brand new engine run with no break in whatsoever. Tomorrow, if I have as good luck with the far side cylinder hooked up, I'm golden!!!
 
Whoohoo! Nice one! :big:
 
Nice one th_wav

Stew
 
Great Job Brian!!!!!! It sure look like a good runner. I'll bet when the other cylinder is hooked up it will run like a finely tuned Rolls Royce.
Keep em coming!

Harold
 
Hooray! Half a runner!

Its funny that we both come to the same operation (eccentric straps) at about the same time from different directions. Not surprisingly, I do it a bit differently. I drill and tap the solid bar before splitting with a saw. The American Hoist donkey has a slightly different set up but it is very tight in there. In fact on the Amhoist design, the eccentrics do not even have flanges which saves just a bit of room.

Jerry
 
Nice, Brian! Isn't it great to realize that we are getting better and better with our projects.
 
This is what I've been looking foreward to for the last week!!! The engines run real sweet together, and self start easily at any point in the rotation. The second cylinder had a few more tight spots in the crosshead tube, but after a bit of work with 320 grit lapping compound it loosened up. As soon as it loosened up, I ran it in using the other operating cylinder for power for an hour. Its sitting on the floor in my office as I type this, ticking away on about 10 PSI air pressure running on both cylinders. I hope to take a bit of a break now, and then start on the rest of it---winch assembly and faux boiler. I simply had to assure myself that the engines were going to run all right before I invested a lot of time in the rest of it. Thanks for watching guys, and stay tuned-----There is a lot more yet to come.---Brian
 
Sweet! Looks and runs great.

Chuck
 

Latest posts

Back
Top