Bazmak diary of a sieg SX 2 bench mill

Home Model Engine Machinist Forum

Help Support Home Model Engine Machinist Forum:

This site may earn a commission from merchant affiliate links, including eBay, Amazon, and others.
Next job was a small face mill.I set the swivel vice at 45o and held a piece of 25dia bar.Milled a recess depth to centerline of bar + tip thickness
I then filed an undercut for the rear edge to slip under.This directs the cutting
forces away from the screw and into the overhang.Drilled and tapped M4
turned the head of an M4 csk hex socket setscrew and fitted.Dismantled and cut bar to 75mm lg.Chucked in the 3 jaw and turned down to 18dia x 35lg
Reversed and mounted in the 18dia collet.Skimmed OD and end and small chamfer to clear cutting point.Its magic cuts better than a bought one
Next will be a 40mm dia x 3 tip
 
I wanted to make a simple pair of parallels rather than buy an expensive set at this stage.I cut 2 pieces of 25x5 flat bar x 100 long and cleaned up the faces
on the linisher.Clamped bboth pieces in the vice.I first tried the 22mm dia
rotabroach but this just pulled into the job(I assume the tooth configuration
is
part of the design to aid plunge Cutting)Next i tried my new flycutter.Worked well took 3 passes at 20 thou.Nice clean cuts and trailing edge just touched
So tram in X axis is about right.Turned the bars over and tried to repeat the process.No luck,i hit a hard spot in the steel and it just kept taking the edge off the the HSS tool.Thats when i made the RCT tool.Then i gave it a try
Absolutely brilliant,went through the steel like butter.May still buy a proper one
but plan to make more homemade ones at this stage
 
Dont know the spec but i bought a few odd ones on ebay' 16 triangle 5 thk
with 4mm clearance hole positive rake For steel and cast iron
 
Back to the milling vice,as described i got the vice jaws to 2thou/200mm in 3 posns but could not get repeatability.Lots of play in the vice so stripped it down
The pin in the lower casting was a press fit but rocked?? taking the pin out revealed a 16 dia hole part machined and part casting and the sneaky sods had
cold chiseled a groove to give a press fit.I set up the bottom casting in the lathe ON MY NEW FACEPLT.I could not have done the job without it.Opened the bore to 17dia and skimmed top faces true.Made a new pin to proper fits and reassembled.Next was the gib plts.Approx 5thou lift to vice jaw.Screws to the gibb plts were loose and flat bar strips with scale and burrs all intact.Cleaned up
and skimmed a 3thou step in the plts.Slightly tight fit so nudged the high spots with a file to a good sliding fit.Clean crud and burrs fro leadscrew etc.I had skimmed the 2 supplied T nuts but had 3 thou play in the table slot so made new
ones to a good fit.After all this i guess the jaws would no longer be trammed
Not too bad but could not get repeatability and the problems seems to be with the location screw i fitted.Vice handle to left and right 2thou over vice jaws and with handle to front 7 thou .Will need to re evaluate later.Footnote
New faceplt and RCT cutter are magic
 
Is vise M.I.C. Aka MAde In China Or M.I.T. aka Made in Taiwan??
M.I.J. vises are very expensive. Just for info may ask for pricing on MIT vise.
 
Probably made in china Gus.Its the same design from many suppliers
For the price its a nice vise as long as your happy to strip it down
and mod to a better spec.The problems were easily solved and its all
part of the fun.No more uncertaincies i know its limitations.The screwed location pin i fitted does not work.I intend to retram and fit a larger dowel pin.Will keep you informed.Regards barry
 
When i returned the wood lathe back to original i refitted the T slot table
to the lathe cross slide and used it in a couple of setups,now i have the mill
all milling mods to the lathe were redundant.However i needed an angle plt
and decided to convert. The plate was 220x120x21 thk with 2 T slots
I fully welded a flat bar 50x12x220lg and gusset plt to it.The job was tacked and alternately stitch welded in sequence to minimise pull(distortion)I then machined all required faces,flat and square.Managed to get square to 1 thou in 3inches
Also machined holding down slots and gave it 2 coats of Hammerite paint,all as attached photos.Waste not want not.A few surplus holes but i am very pleased with it.Its very substancial and looks good.I also need it for a future setup The new RCT tool breezed thru the steel and welds http://s1327.photobucket.com/user/bazmak47/media/angleplt01_zps9fa6b3a4.jpg.html?filters[user]=134054592&filters[recent]=1&sort=1&o=1
 
Hello Bazmak
I have never owned a mill.
Why is R8 better than MT3?
Am european and consider buying one like Yours.
 
Hi Niels,when i bought the mill i wanted MT3 so my tooling was suitale for lathe
and Mill but R8 was what i got in order to also get the fixed head and belt drive
The R8 is a more secure drive as its not solely on the taper.Also a simple tap releases it rather than heavy hammer blows with MT,also tooling is not expensive
In my opinion more important,do not get the swivel column and try to get belt
drive rather than gears.Look on this forum,google mini mill and look on youtube
before you make a decision.The version i bought is excerlent and i am very happy with it. Regards Barry
 
When i first got the mill i was using a medium quality drill vice and it handled light milling very well.The jaws were machined with a step in the top corner and Vs
for holding round bar or square at 45o I decided to Mod to a more usuable standard.Stripped everything down cleaned,made shim washer adjusted etc
The moving jaw had a couple thou lift but there was no adjustment but i can live it.The moving jaw and the body had a machined dovetail that was quite good
I also took a couple of thou off the corner step of the jaws,tough but not hardened.I then set vice on the mill upside down with the jaws clocked and milled a 12w x 3 dp location slot.Drilled and tapped M5 and fitted a piece of 12 squre bar (which is a good fit in the Tslots).Now the vice can be set on the table accurate to a couple of thou for simple milling.Remove the bar for general drilling SIMPLES RL=http://s1327.photobucket.com/user/bazmak47/media/drillvice01_zps7a6211a6.jpg.html]
drillvice01_zps7a6211a6.jpg
[/URL]
 
Hi Barry,

That will be a very good reworked vise but are you also planning to do a bit of scraping for very good contact seatting. Just curious. These M.I.C. vises were rushed thru the mill by sub-contractors paid piece rate.
 
Hi Gus,really just for simple milling.Just usde it on a job and the piece was out of square.either the vice jaws or jaw lift.Will keep an eye on it but dont think its worth the effort of trying to make it something its not.Still very usefull
 
Hi Gus,the moving jaw was on dovetails but no gibs.Filled and scraped and fitted
4thou shims.Nice and firm now with no lift.Milled some test pieces to check sq/parallel etc.Jobs a good un
 
My dial indicator had a broken clamp that was annoying so i fixed it.This led to me making a tram brkt
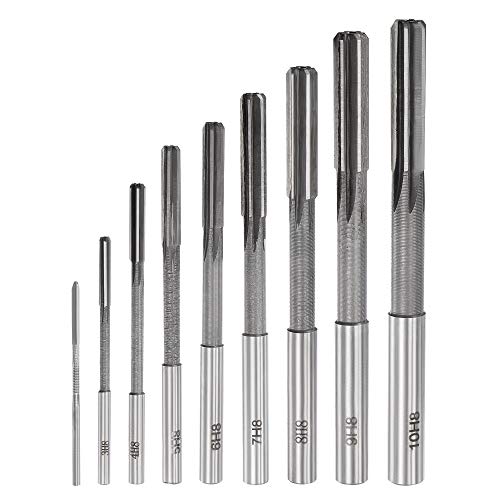
I drilled a 1/4 hole and reamed thru my homemade milling cutter.Drilled and tapped for a clamp screw
Made a 1/4 dia shaft to hold the dial indicator.This then led to tramming the mill table.A fiddly time consuming job that i had not done before but had read in forum with great interest.All i can say is
that i am glad i bought a fixed column mill,i would not want to go thru this on a regular basis.
No matter how i calculated it was wrong finished up trial and error.Had to shim 4thou for the x axis and 1 thou for the y.I also took apart the 4 bolt conn and cleaned etc.Looked like China had made an effort
as one side had been touched with a file and no burrs.I bolted the 6" faceplt off the lathe to the table and got to a thou in x-x and y-y then finished with good old alum baking foil.Fine tuned the x axis over 12"
on the table and got mto 1.5 thou.May try to improve at a later date
 
I also looked for an easy way to set up the vice on my mini mill. With a set up gauge there is no reluctance to remove or move the vice as it is so easy to put in back in perfect position.

I made a single parallel with a squared end. This brass piece is clamped in the jaws and positioned to just touch the table. With a square I use the table edge to set the vice and tighten down a T nut holding the vice. Remove the gauge and tighten the second T nut and it's done.

It works so well that made a second set up gauge for the vice on my bigger mill in the main workshop.

IMG_1969.jpg
 
I was doing something similar then took it to the next stage and drilled/dowelled.See thread.Repeatability is within a couple of thou
bazmak
 
Repeatability is within a couple of thou

What is 'near enough' for a vise? I've only just got the equipment to square my milling vise accurately and I aim for less than 1 thou out of square. Am I being too pedantic here?

Same question for tramming as well. I trammed for the first time just the other day and spent ages trying to get below 2 thou over 10 inches on the X axis. Eventually I managed to get it to 1 thou (I thought) but it was a lot of trouble. As I was pulling the assembly down, I realised I'd grabbed the metric indicator instead of the imperial one and I'd been chasing 1/100th of a millimetre. So I'm happy my X axis is less than 0.0004" out. My Y axis I don't have the ability to change at the moment, so it's about 4 thou out over 10 inches. Is this going to cause me grief?
 
I'm sure that the dimensional requirements of the part being created will determine the accuracy of the set up of any machine. Most of my shop is populated with 1940s equipment like an old Southbend lathe and Burke mill. They do good work for me within their limits.

For mini mill tramming I simply placed a long pointer in a fly cutter holder then lowered the head until the pointer just touched the bed. With a feeler gauge I tested clearance when the pointer was swung to the other end of the bed. A few taps on the column then I locked down the big nut, checked with feeler gauge again and left it alone since then.

It's been good enough for my jobs and given that column flex has been reported on these mini machines, it probably doesn't matter much anyway.

Personally I do not think that any of the home level machines are rigid enough for high precision work. I worked at SKF in my youth where bearings were manufactured to aircraft quality specs. That was serious machining and serious testing of product at every stage of the process.

My level of machining and welding are better suited to farm repair work.

Just another viewpoint for your consideration.
 
I also assume that a thou is near enough for most jobs.Anything better is special and needs to be treated as such.As regards to your question
The vice accuracy is good for all facing.To check anything else mill the corner off a piece of flat bar say 6" long.Check the width at each end and this gives you the x-x axis parameters.Check the depth and this gives the vice jaw depth
tolerance.Repeat for y-y.If you are happy with the dims over 6" then its ok
Slotting,grooving or rebating done over short lengths will be ok.One good way
is to make a T nut say 5" lg and check for parallel etc if its within say 2 thou thens thats ok.Then cut up into 4 etc etc
 

Latest posts

Back
Top