Nice job and good thinking on how to hold it. Looking forward to the next instalment.
You are using an out of date browser. It may not display this or other websites correctly.
You should upgrade or use an alternative browser.
You should upgrade or use an alternative browser.
1/3 Scale LS1
- Thread starter bhusted
- Start date

Help Support Home Model Engine Machinist Forum:
This site may earn a commission from merchant affiliate
links, including eBay, Amazon, and others.
Thanks guys. As for making it a cutaway, I did consider this, but decided against because I wanted it to look complete. The engine will be held onto the stand by 4 magnets on the bottom so that it can be picked up and watch the crank move. I have considered making the heads from clear polycarbonate and polishing it so that you can see through. I don't know yet. Hopefully I can finish the block today.
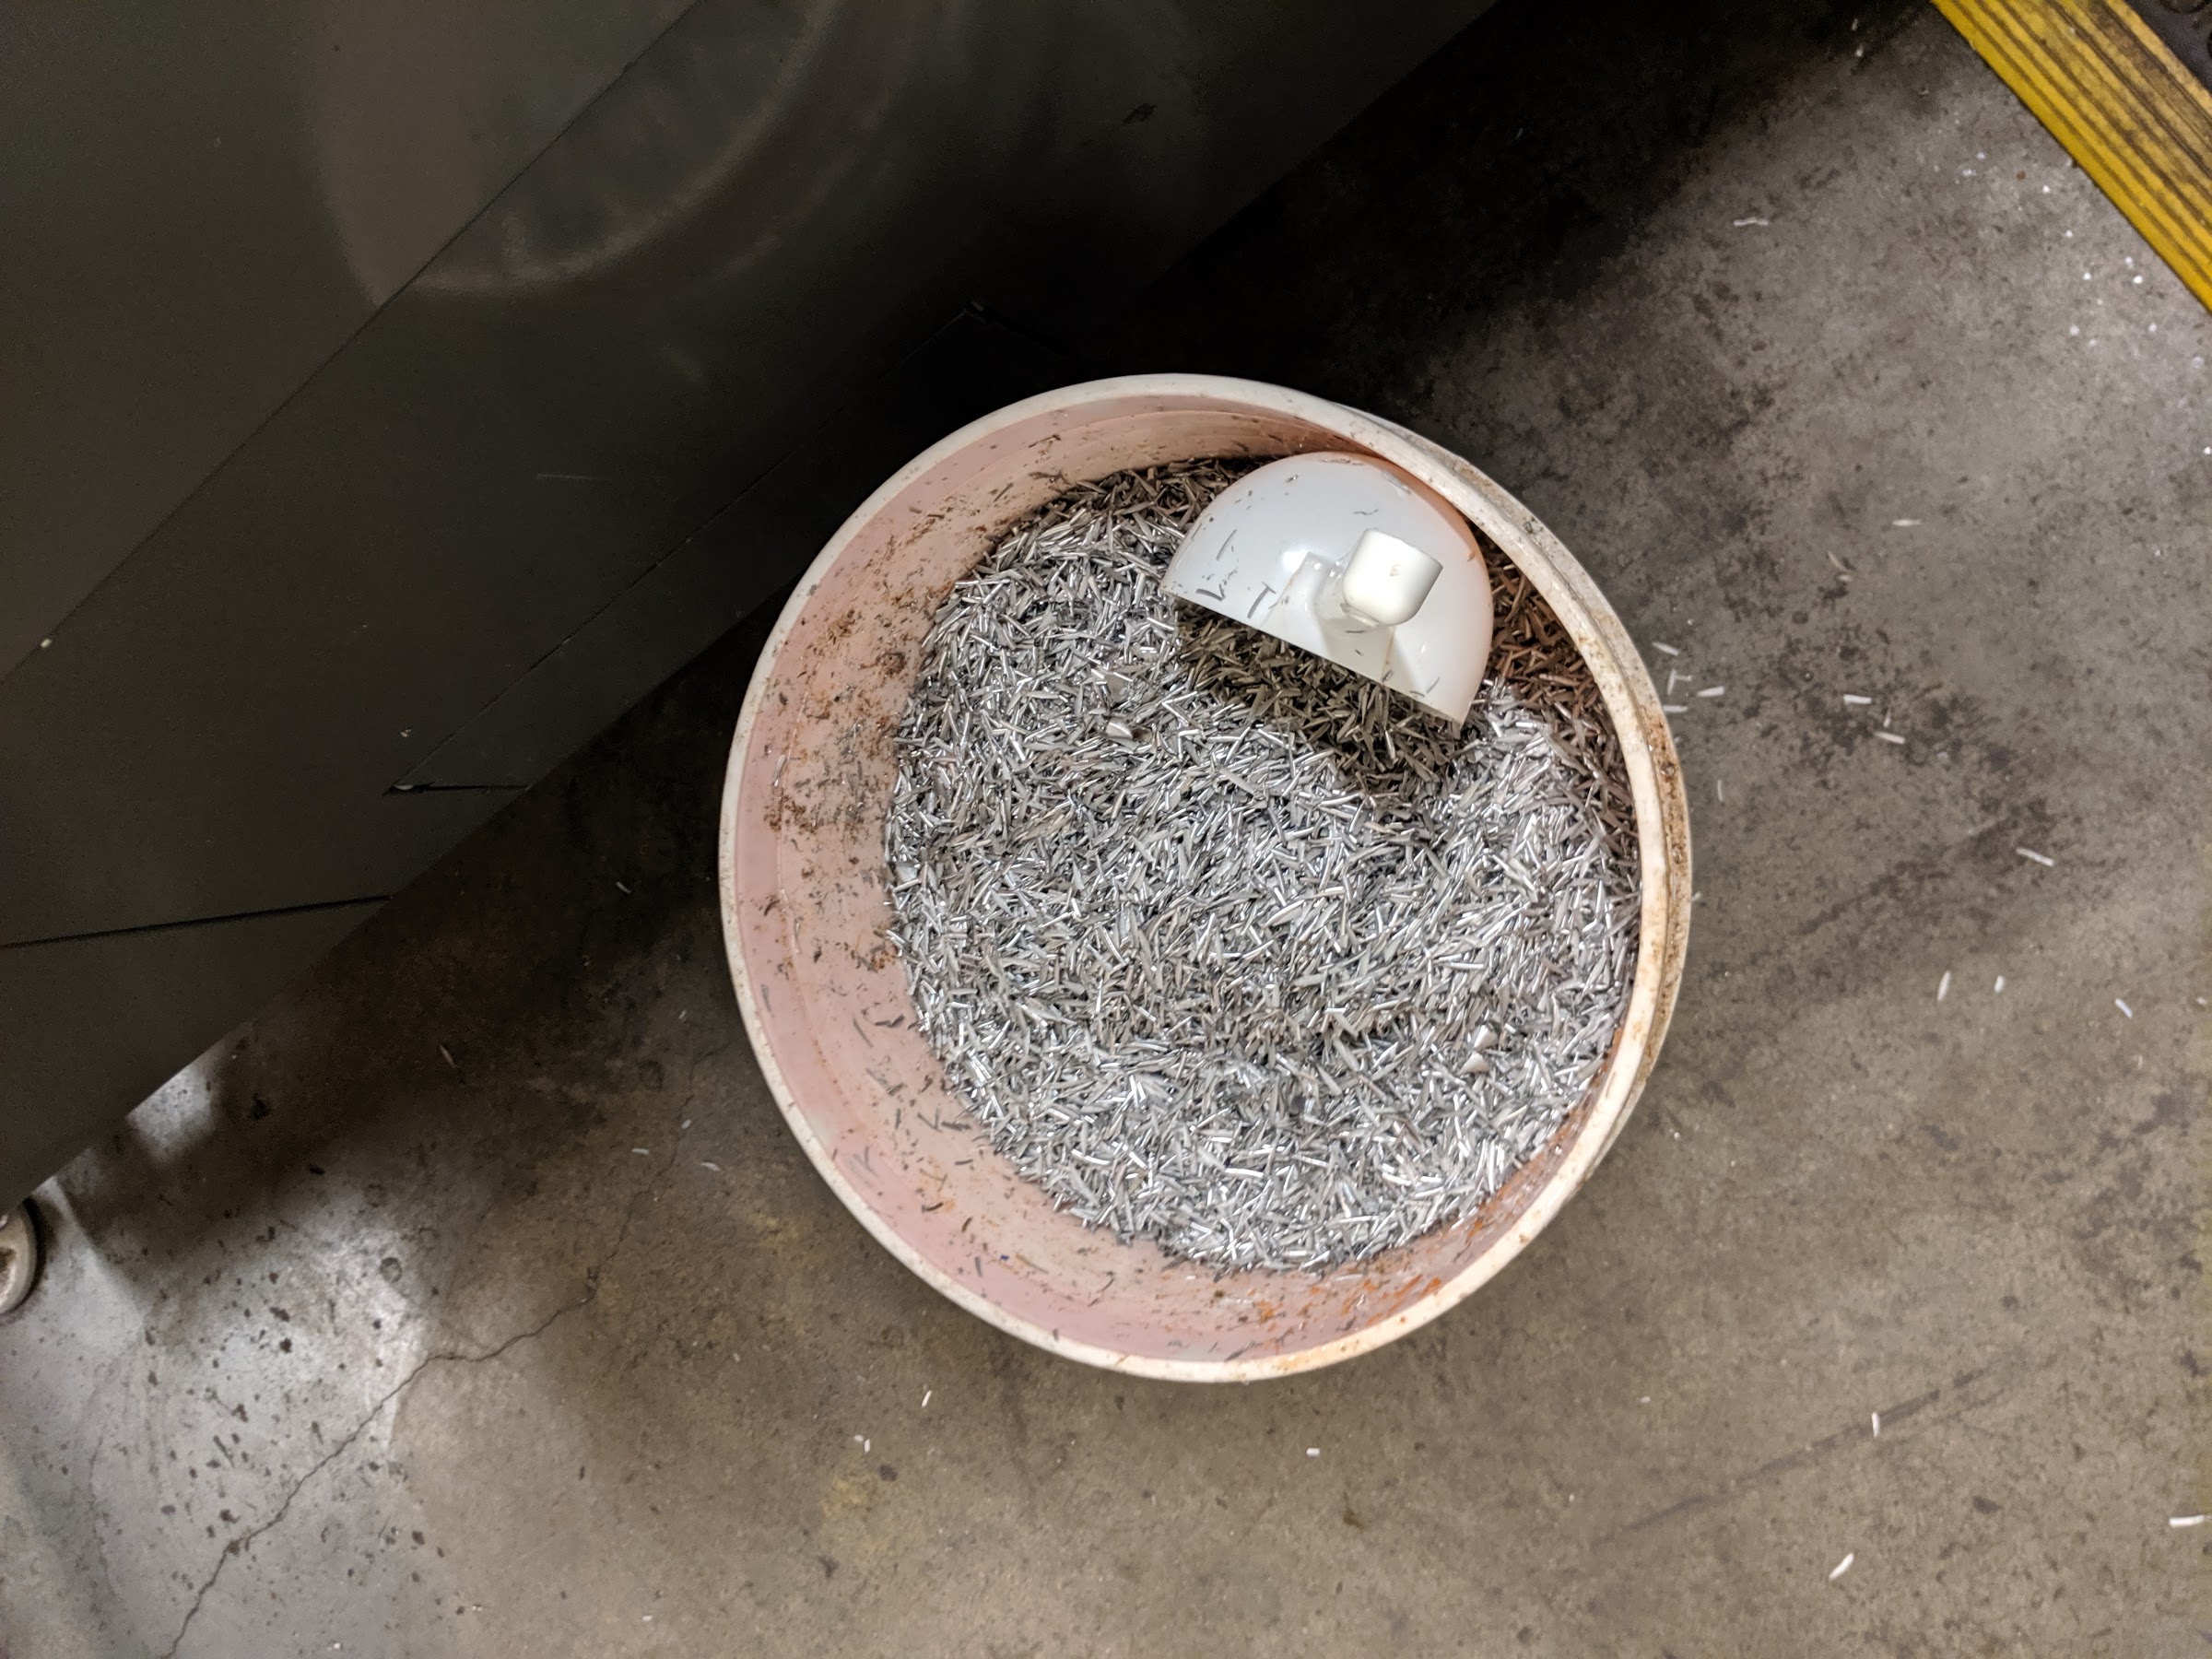
Update time. I had hoped to be finished with the block by now, but ran into some issues. To start, I had to shovel out all of the chips since they had blocked the coolant drains. I wish I had weighed the stock before cutting so that I could calculate the weight of the chips. This 5 gallon bucket was empty when I started...
Back to machining, I tapped a bunch of 8-36 holes. roughed out the cylinder bores, cut the lifter pockets, and roughed out the crankcase.
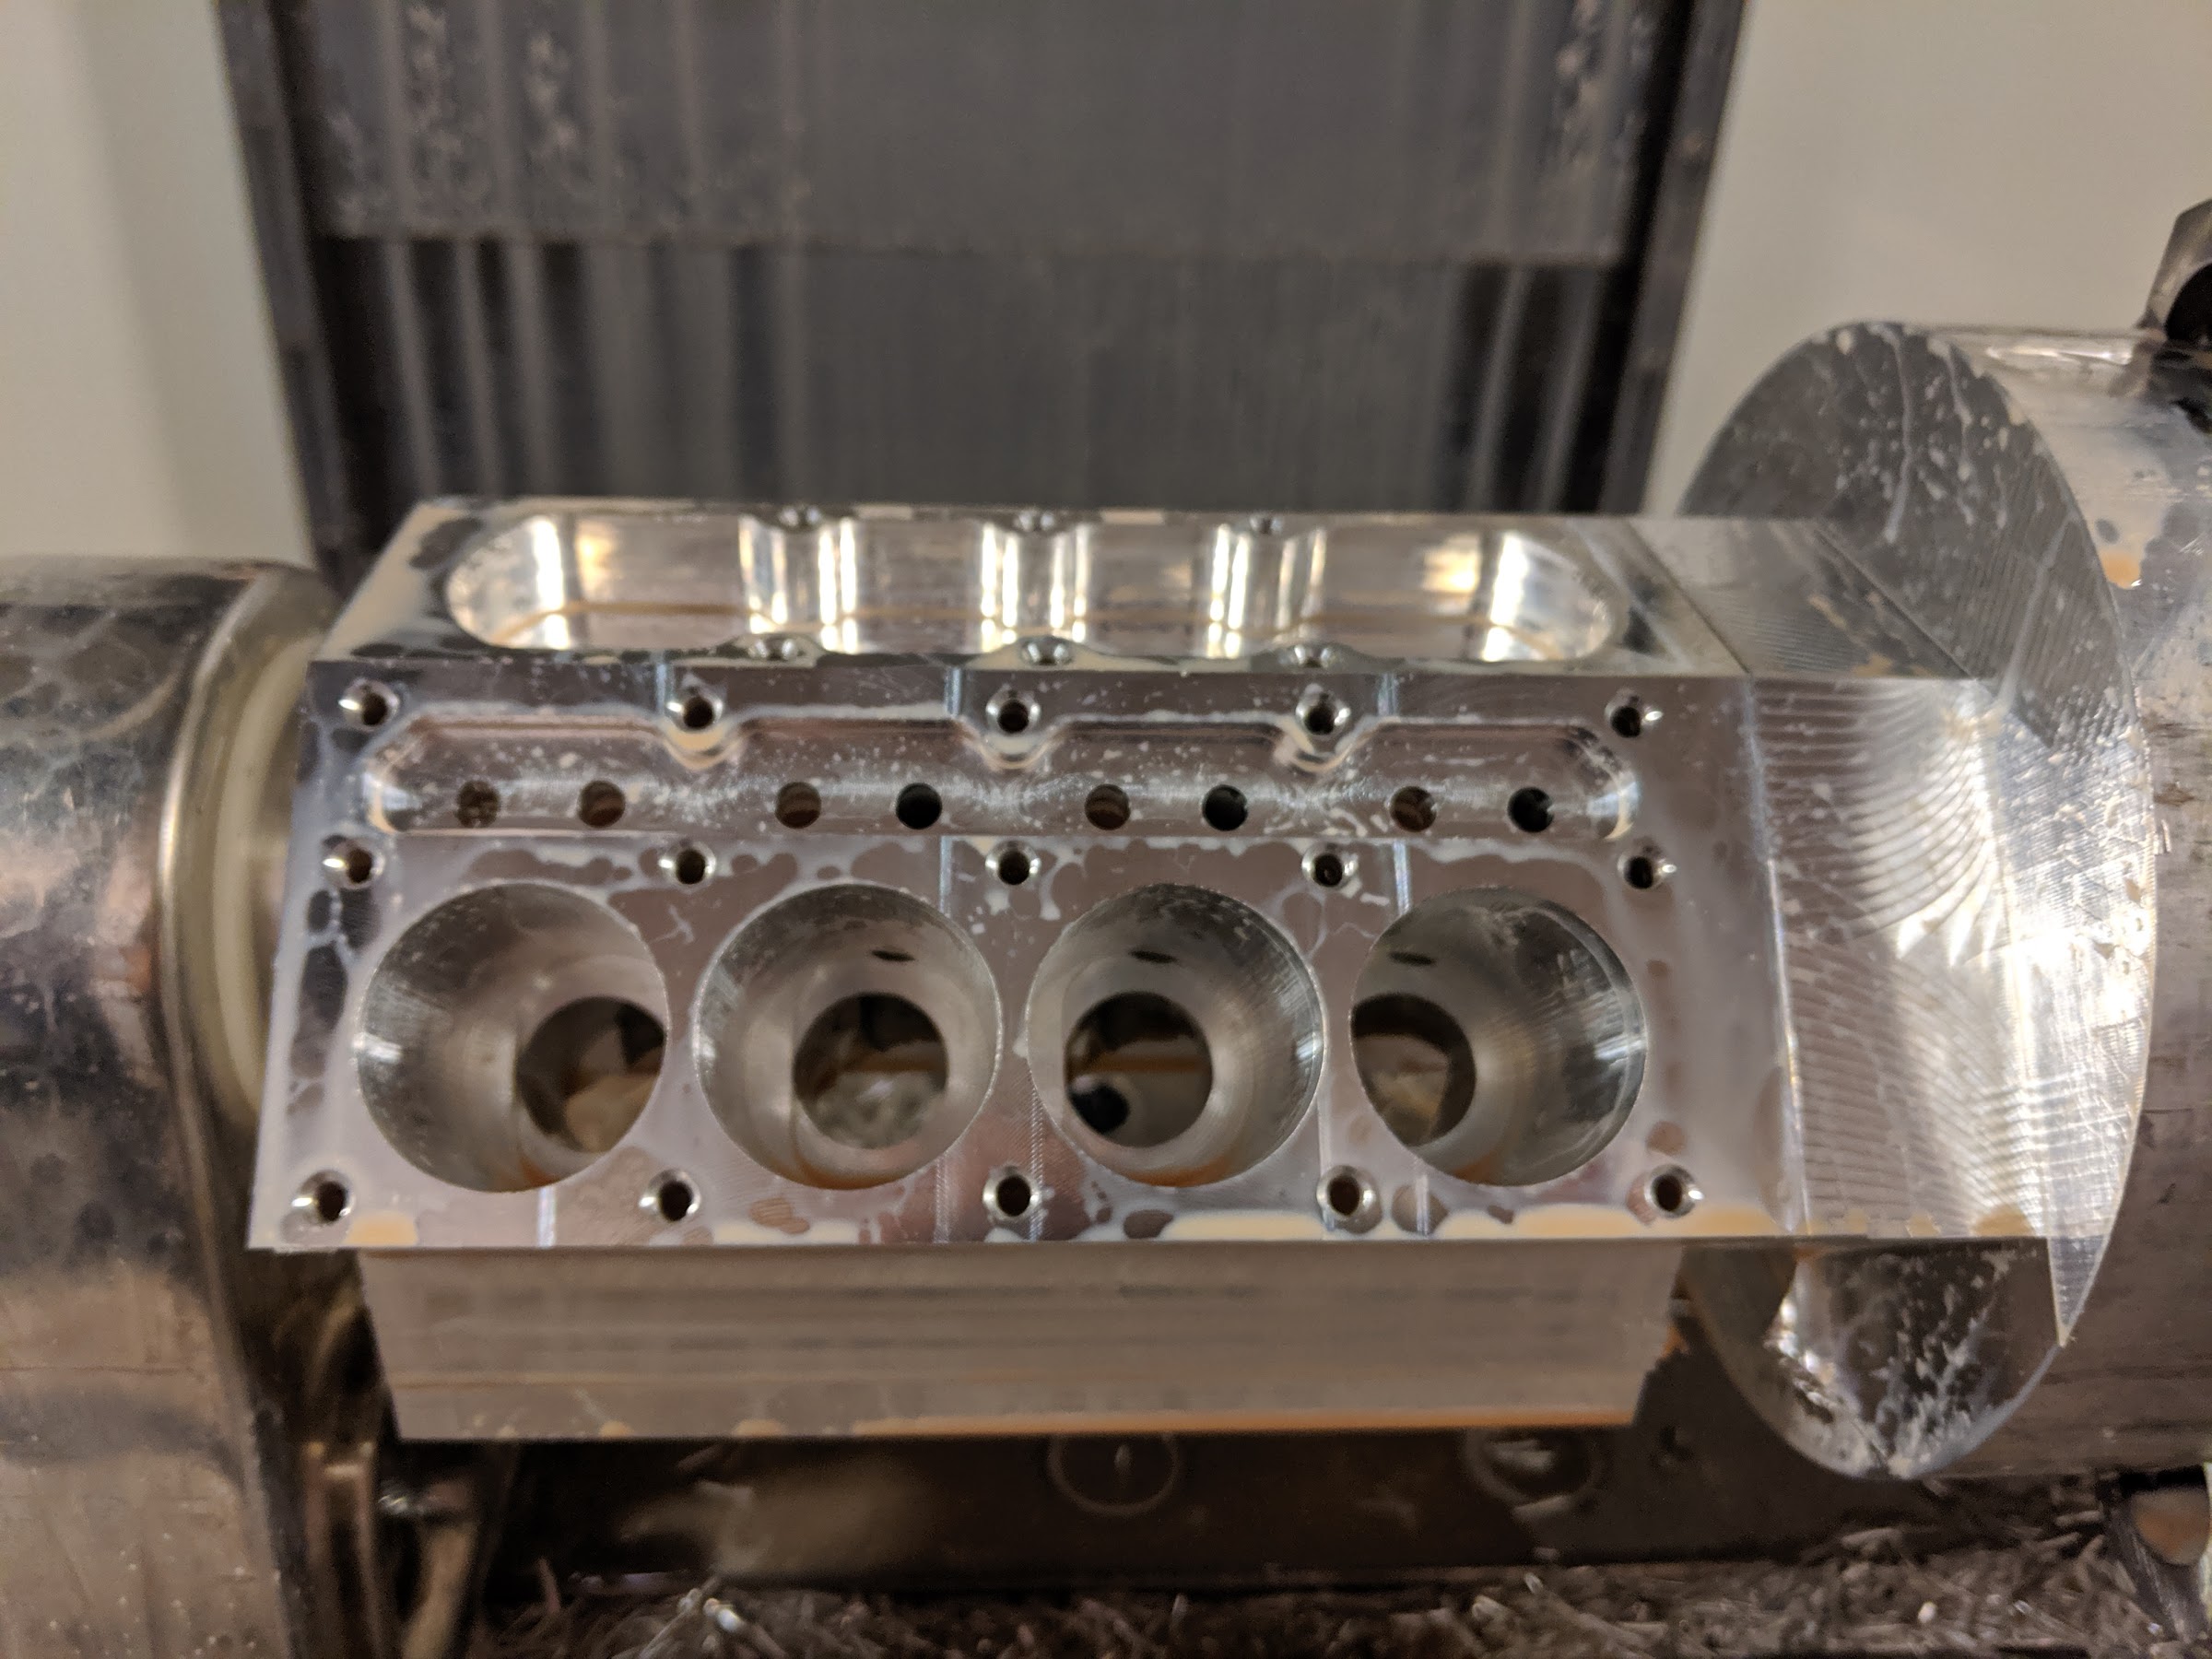
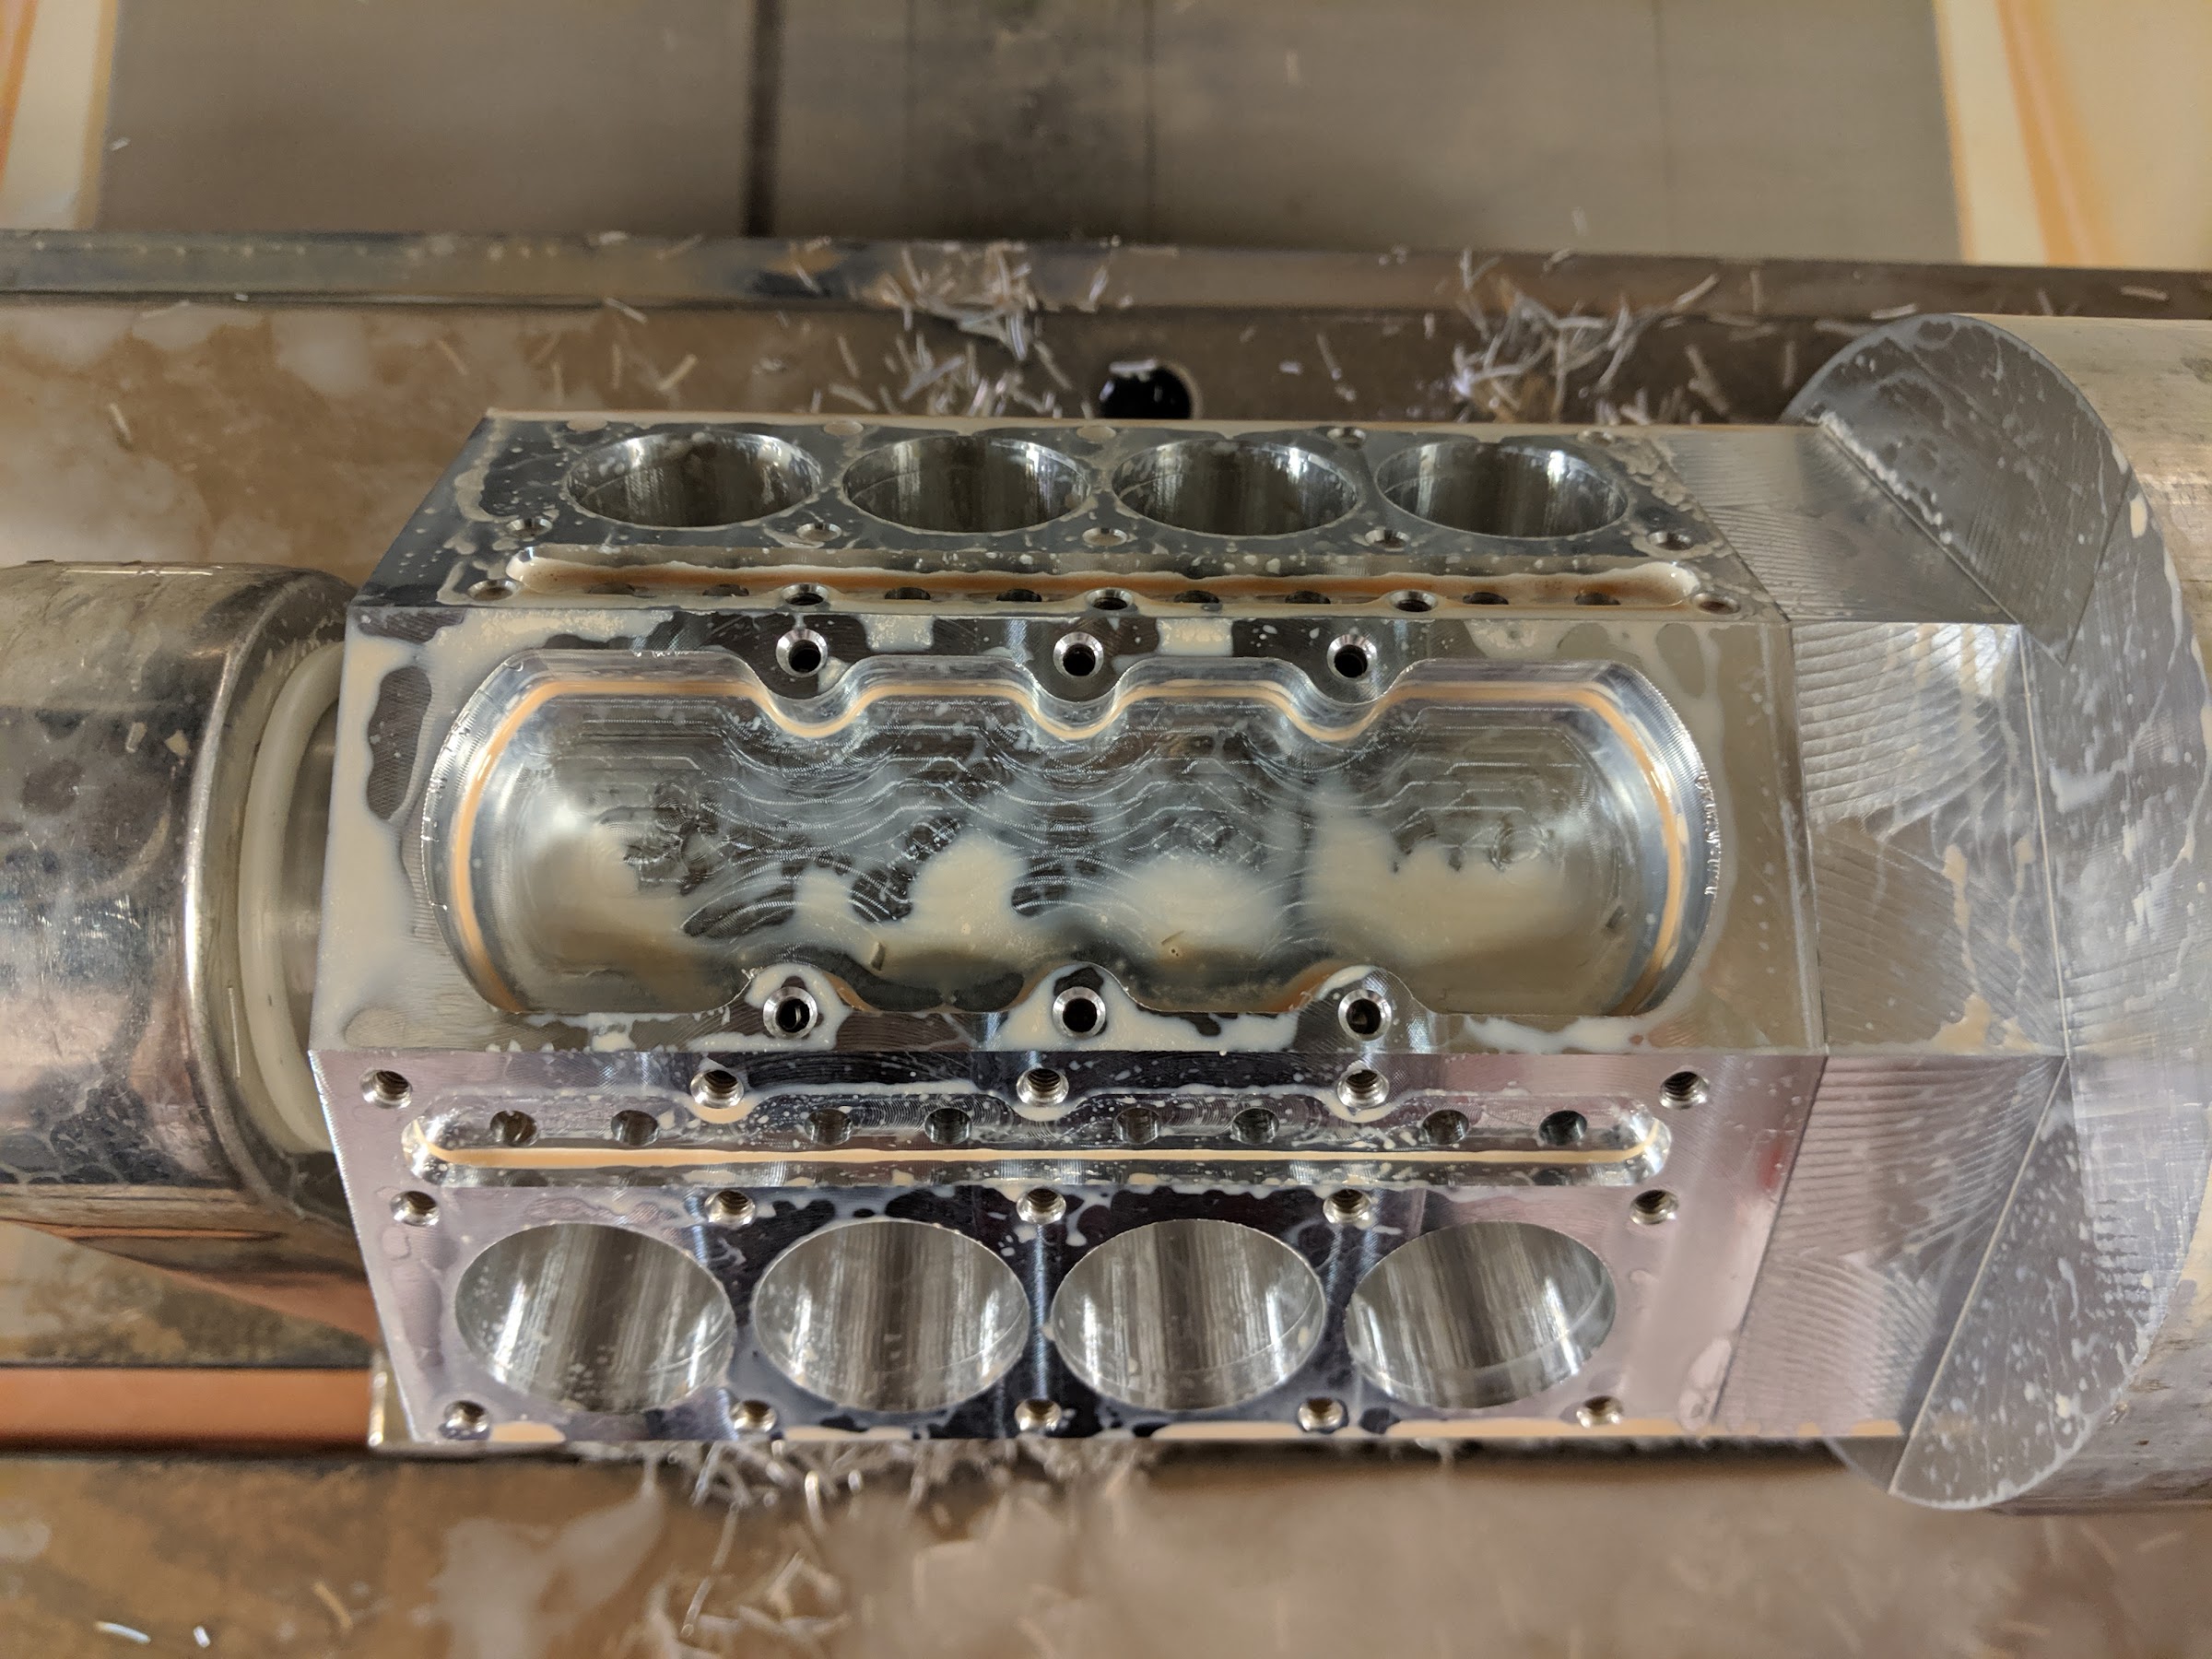
This is where I start to notice things are not right. The spot drill is deeper on some holes than others and offset in places. Since I was this far in, I figured I would run the finishing operations and just see how it turns out. Only when I pulled it out did I discover what had happened. The stock slipped in the chuck, so some features were at odd angles. Needless to say I was not happy.
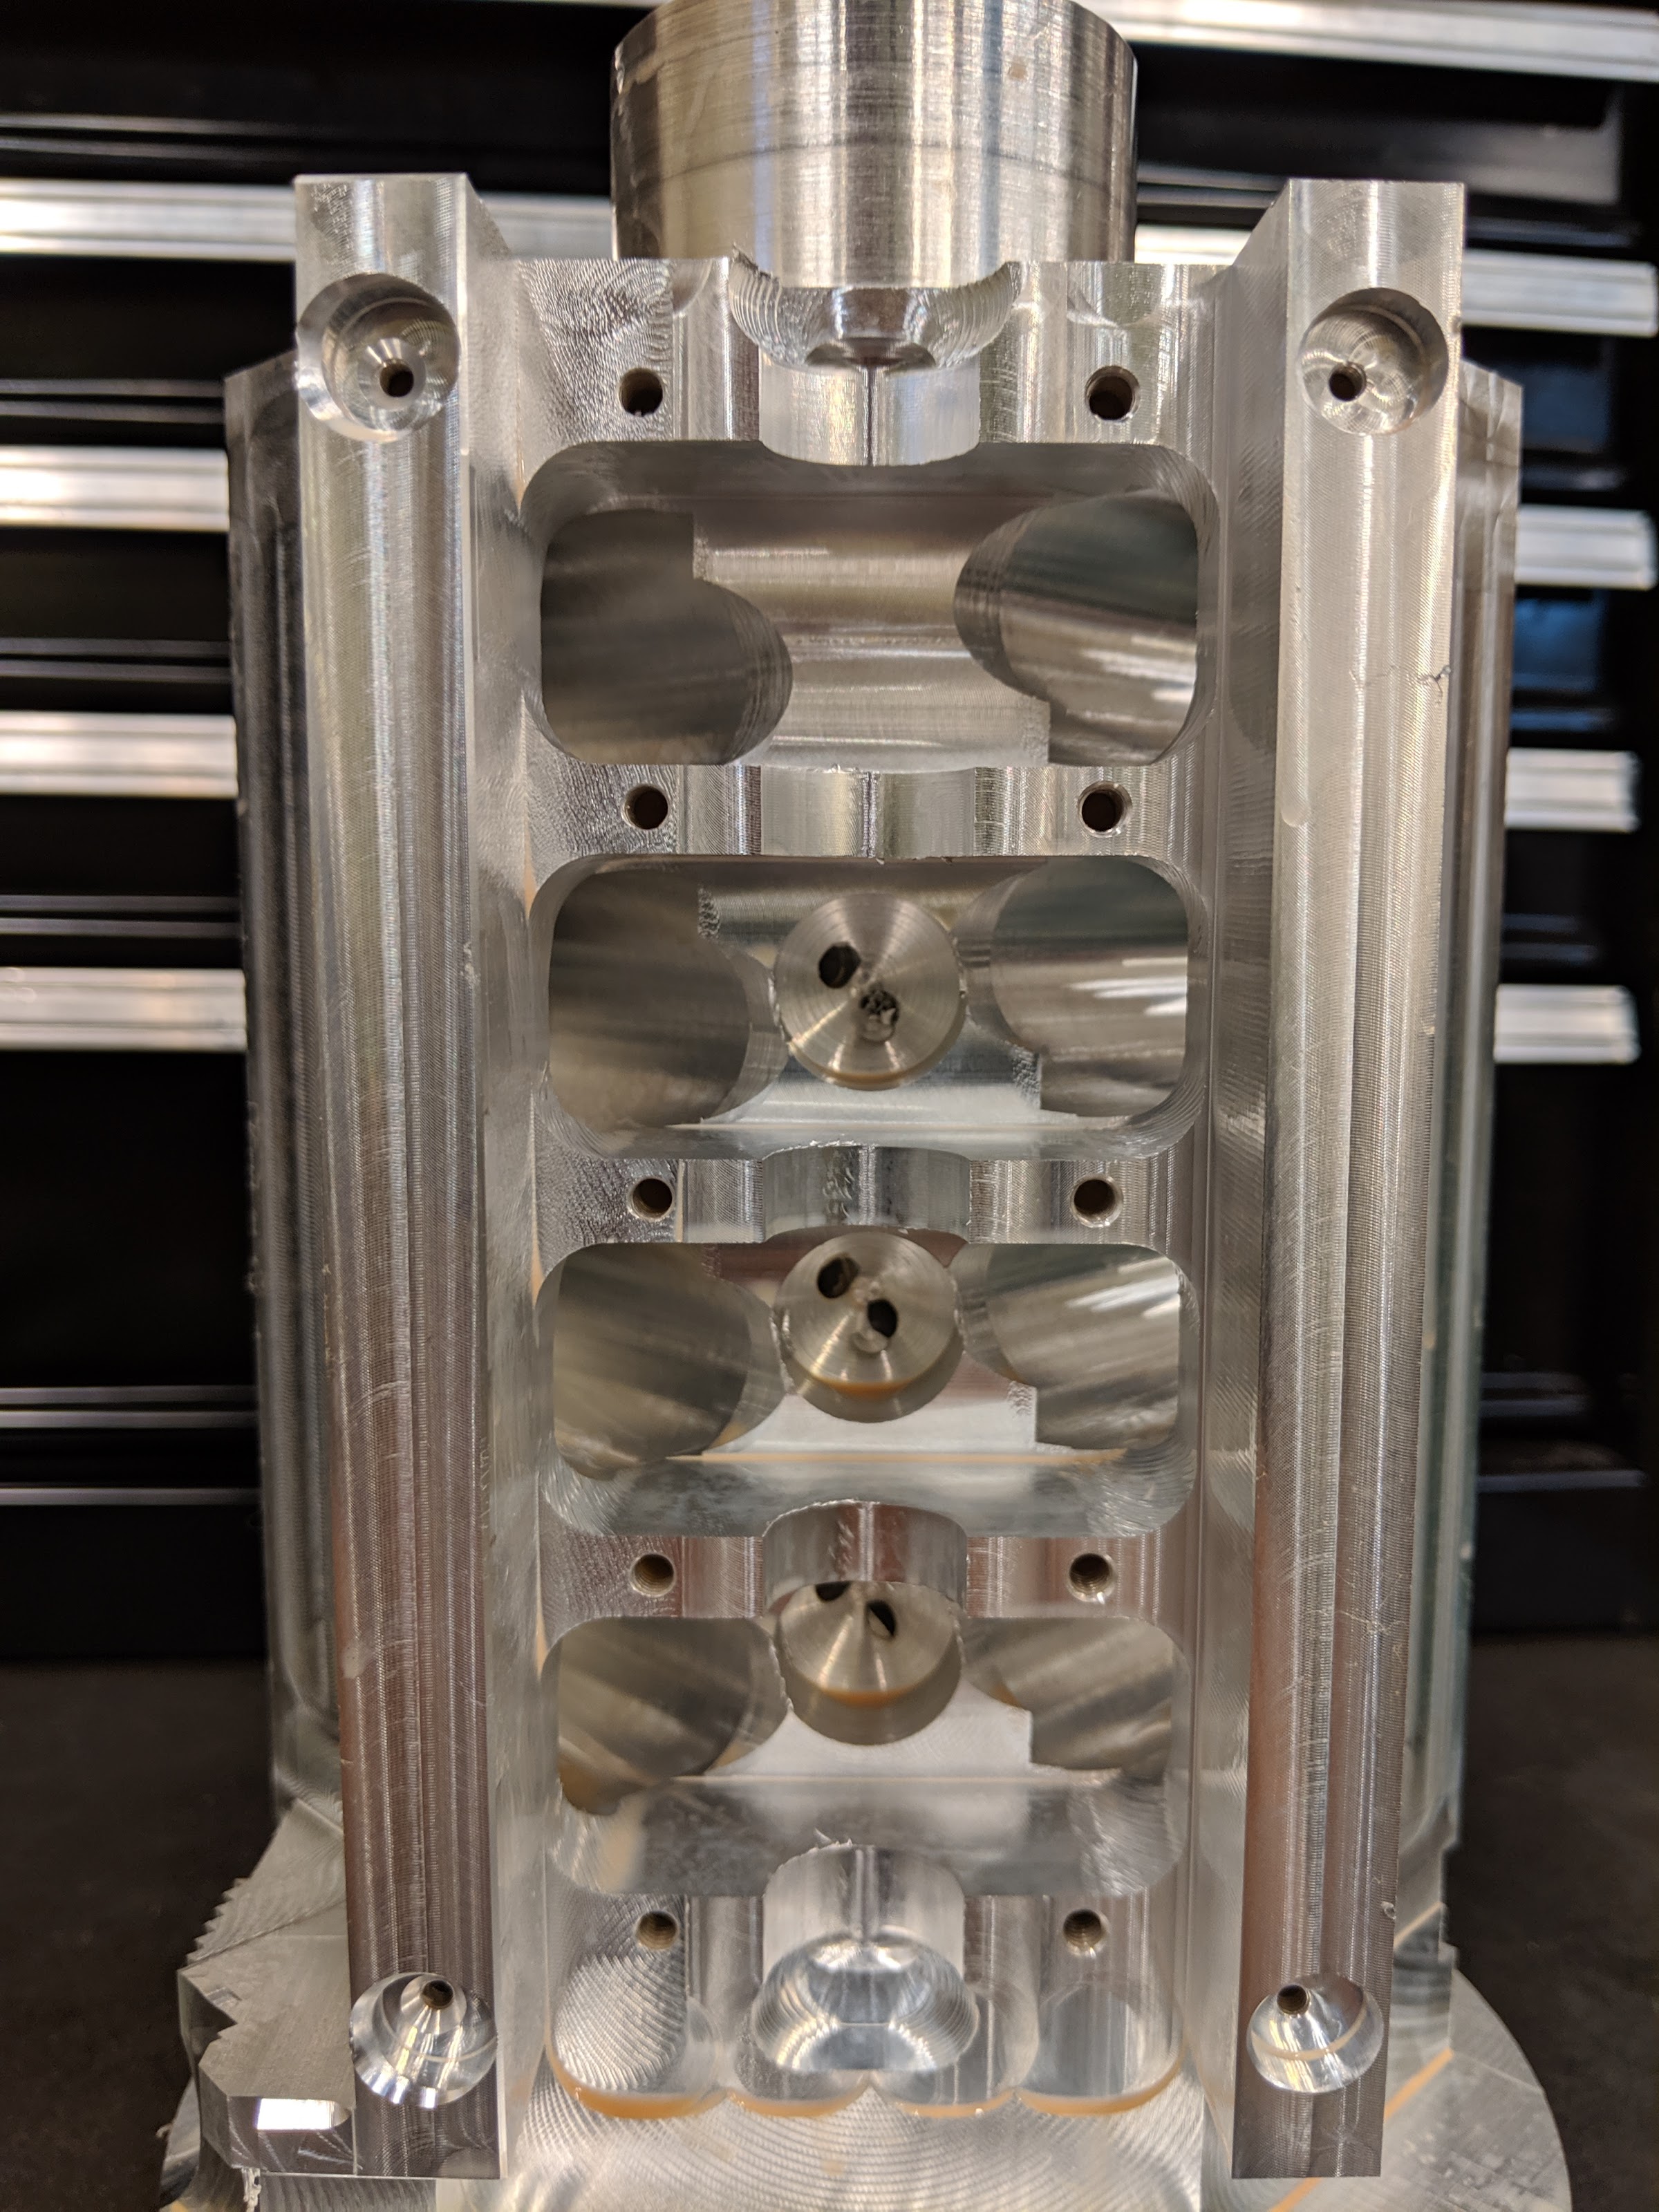
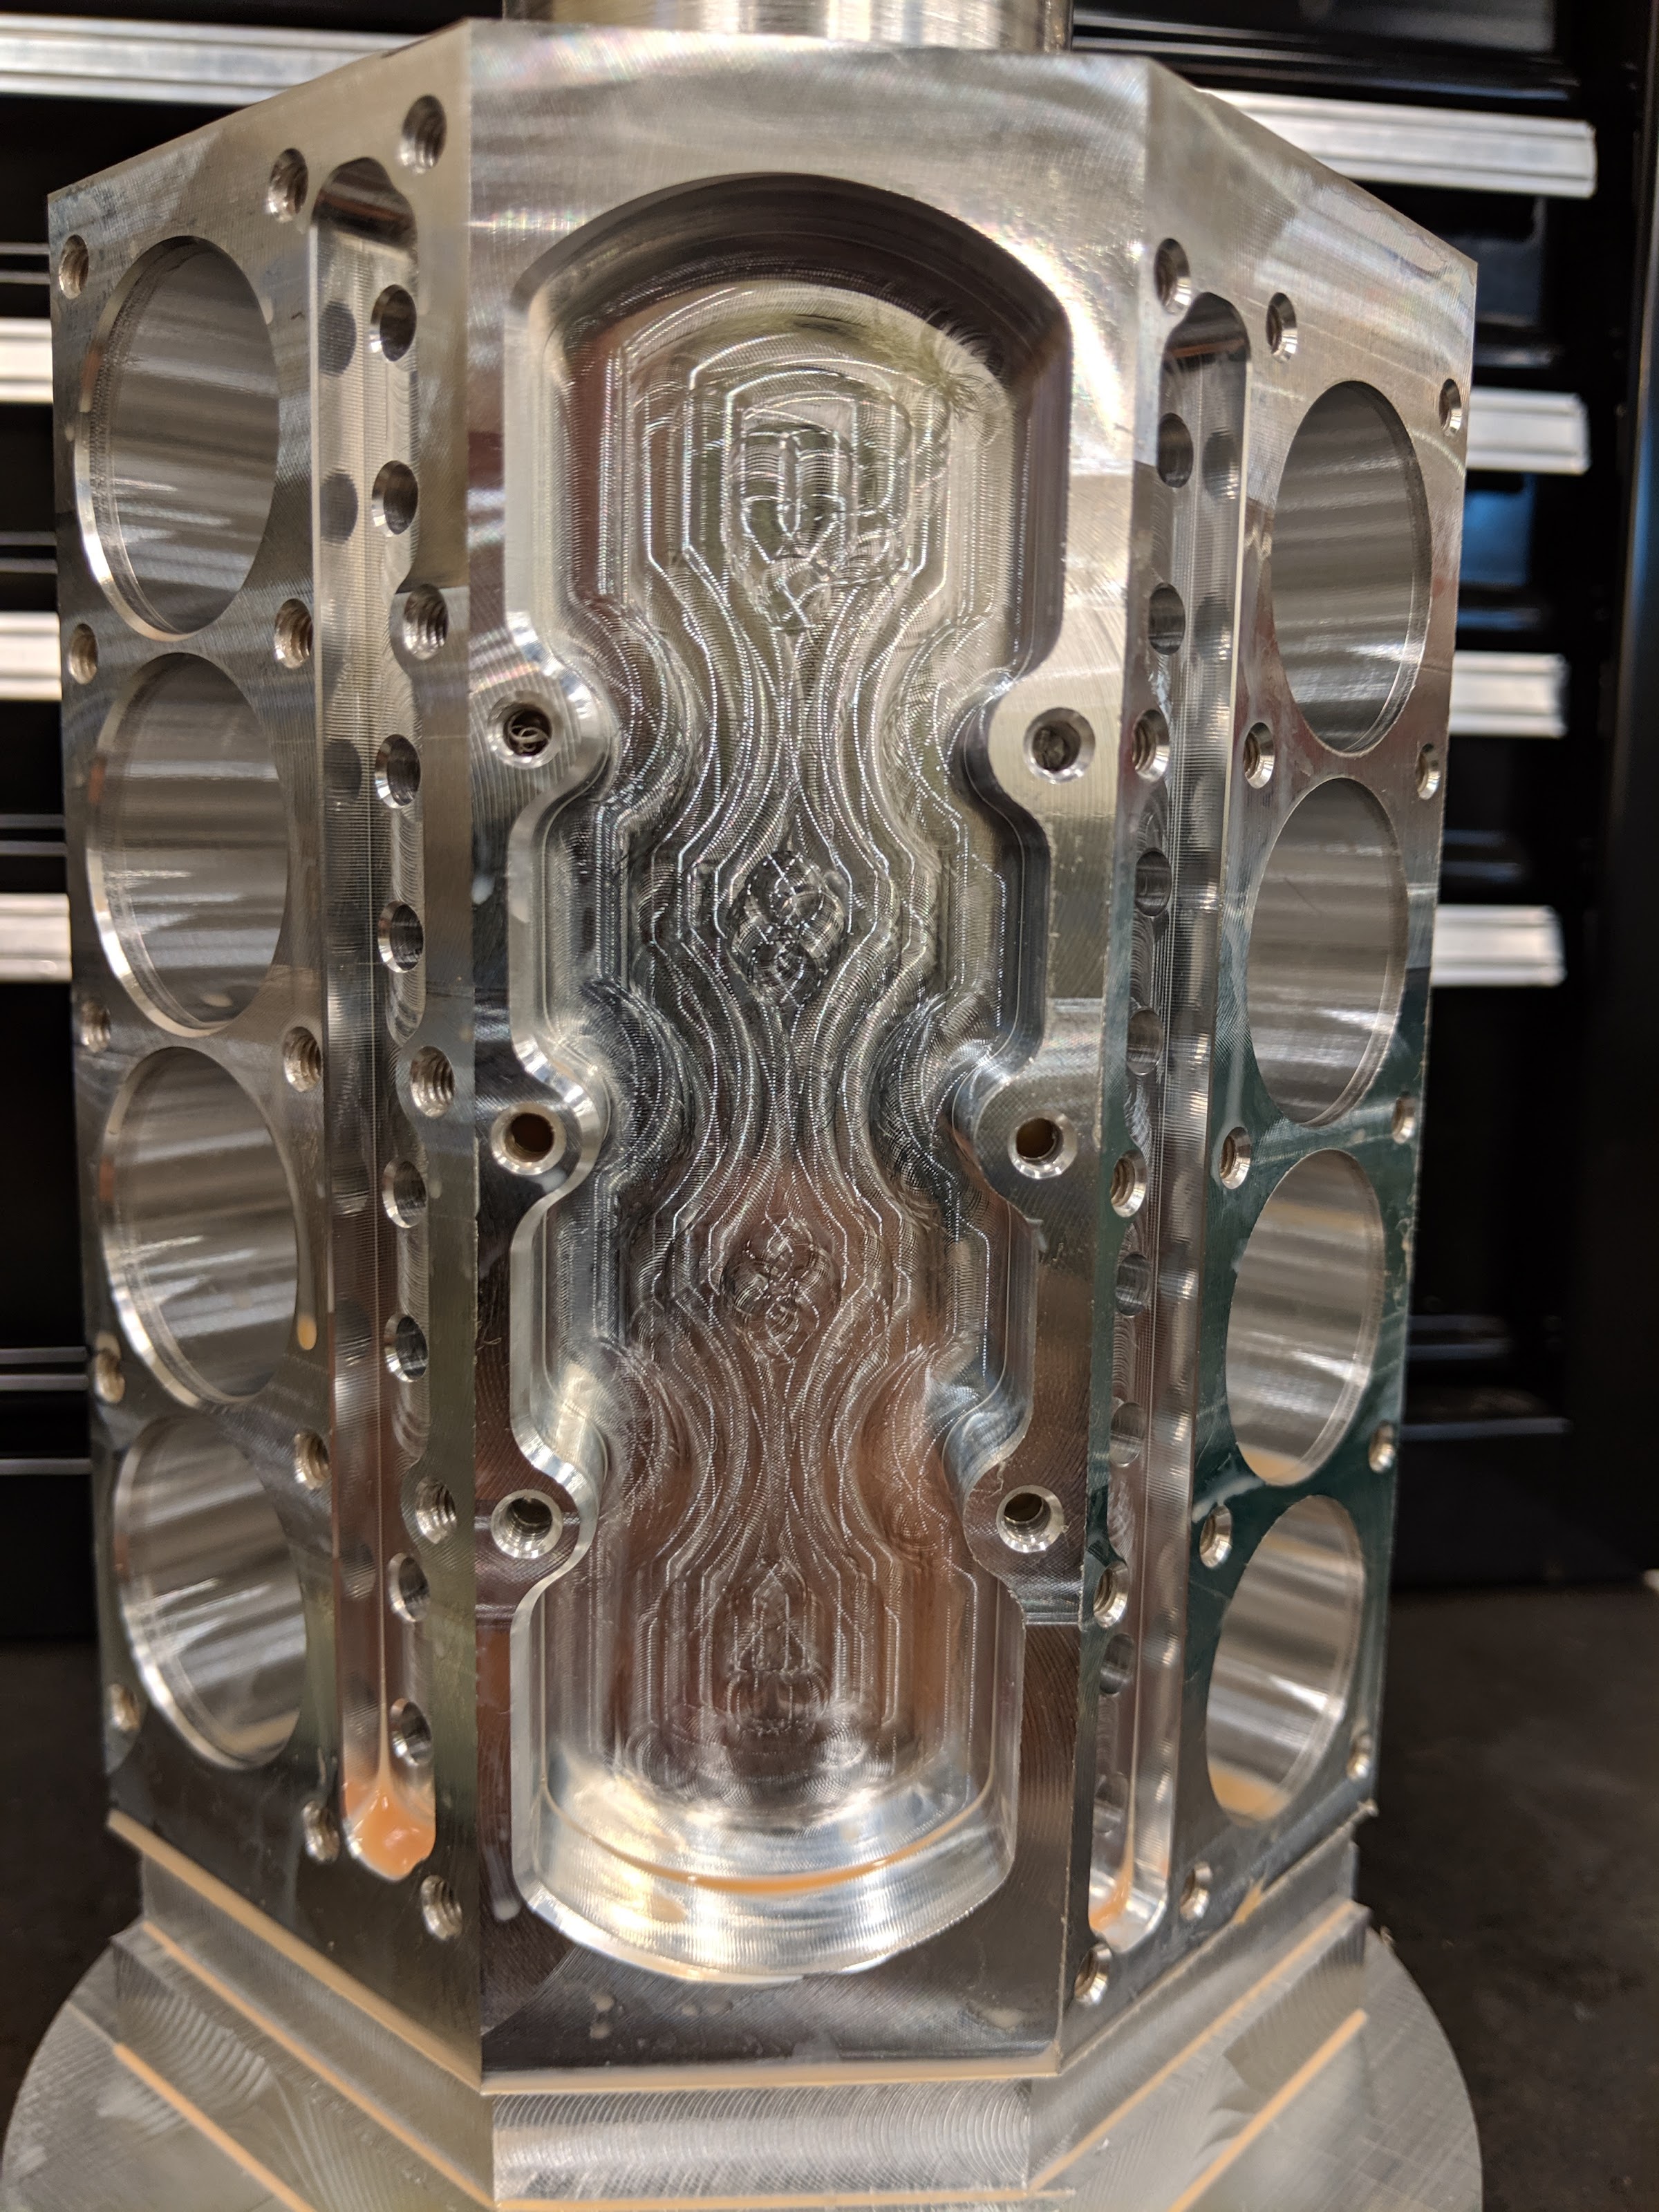
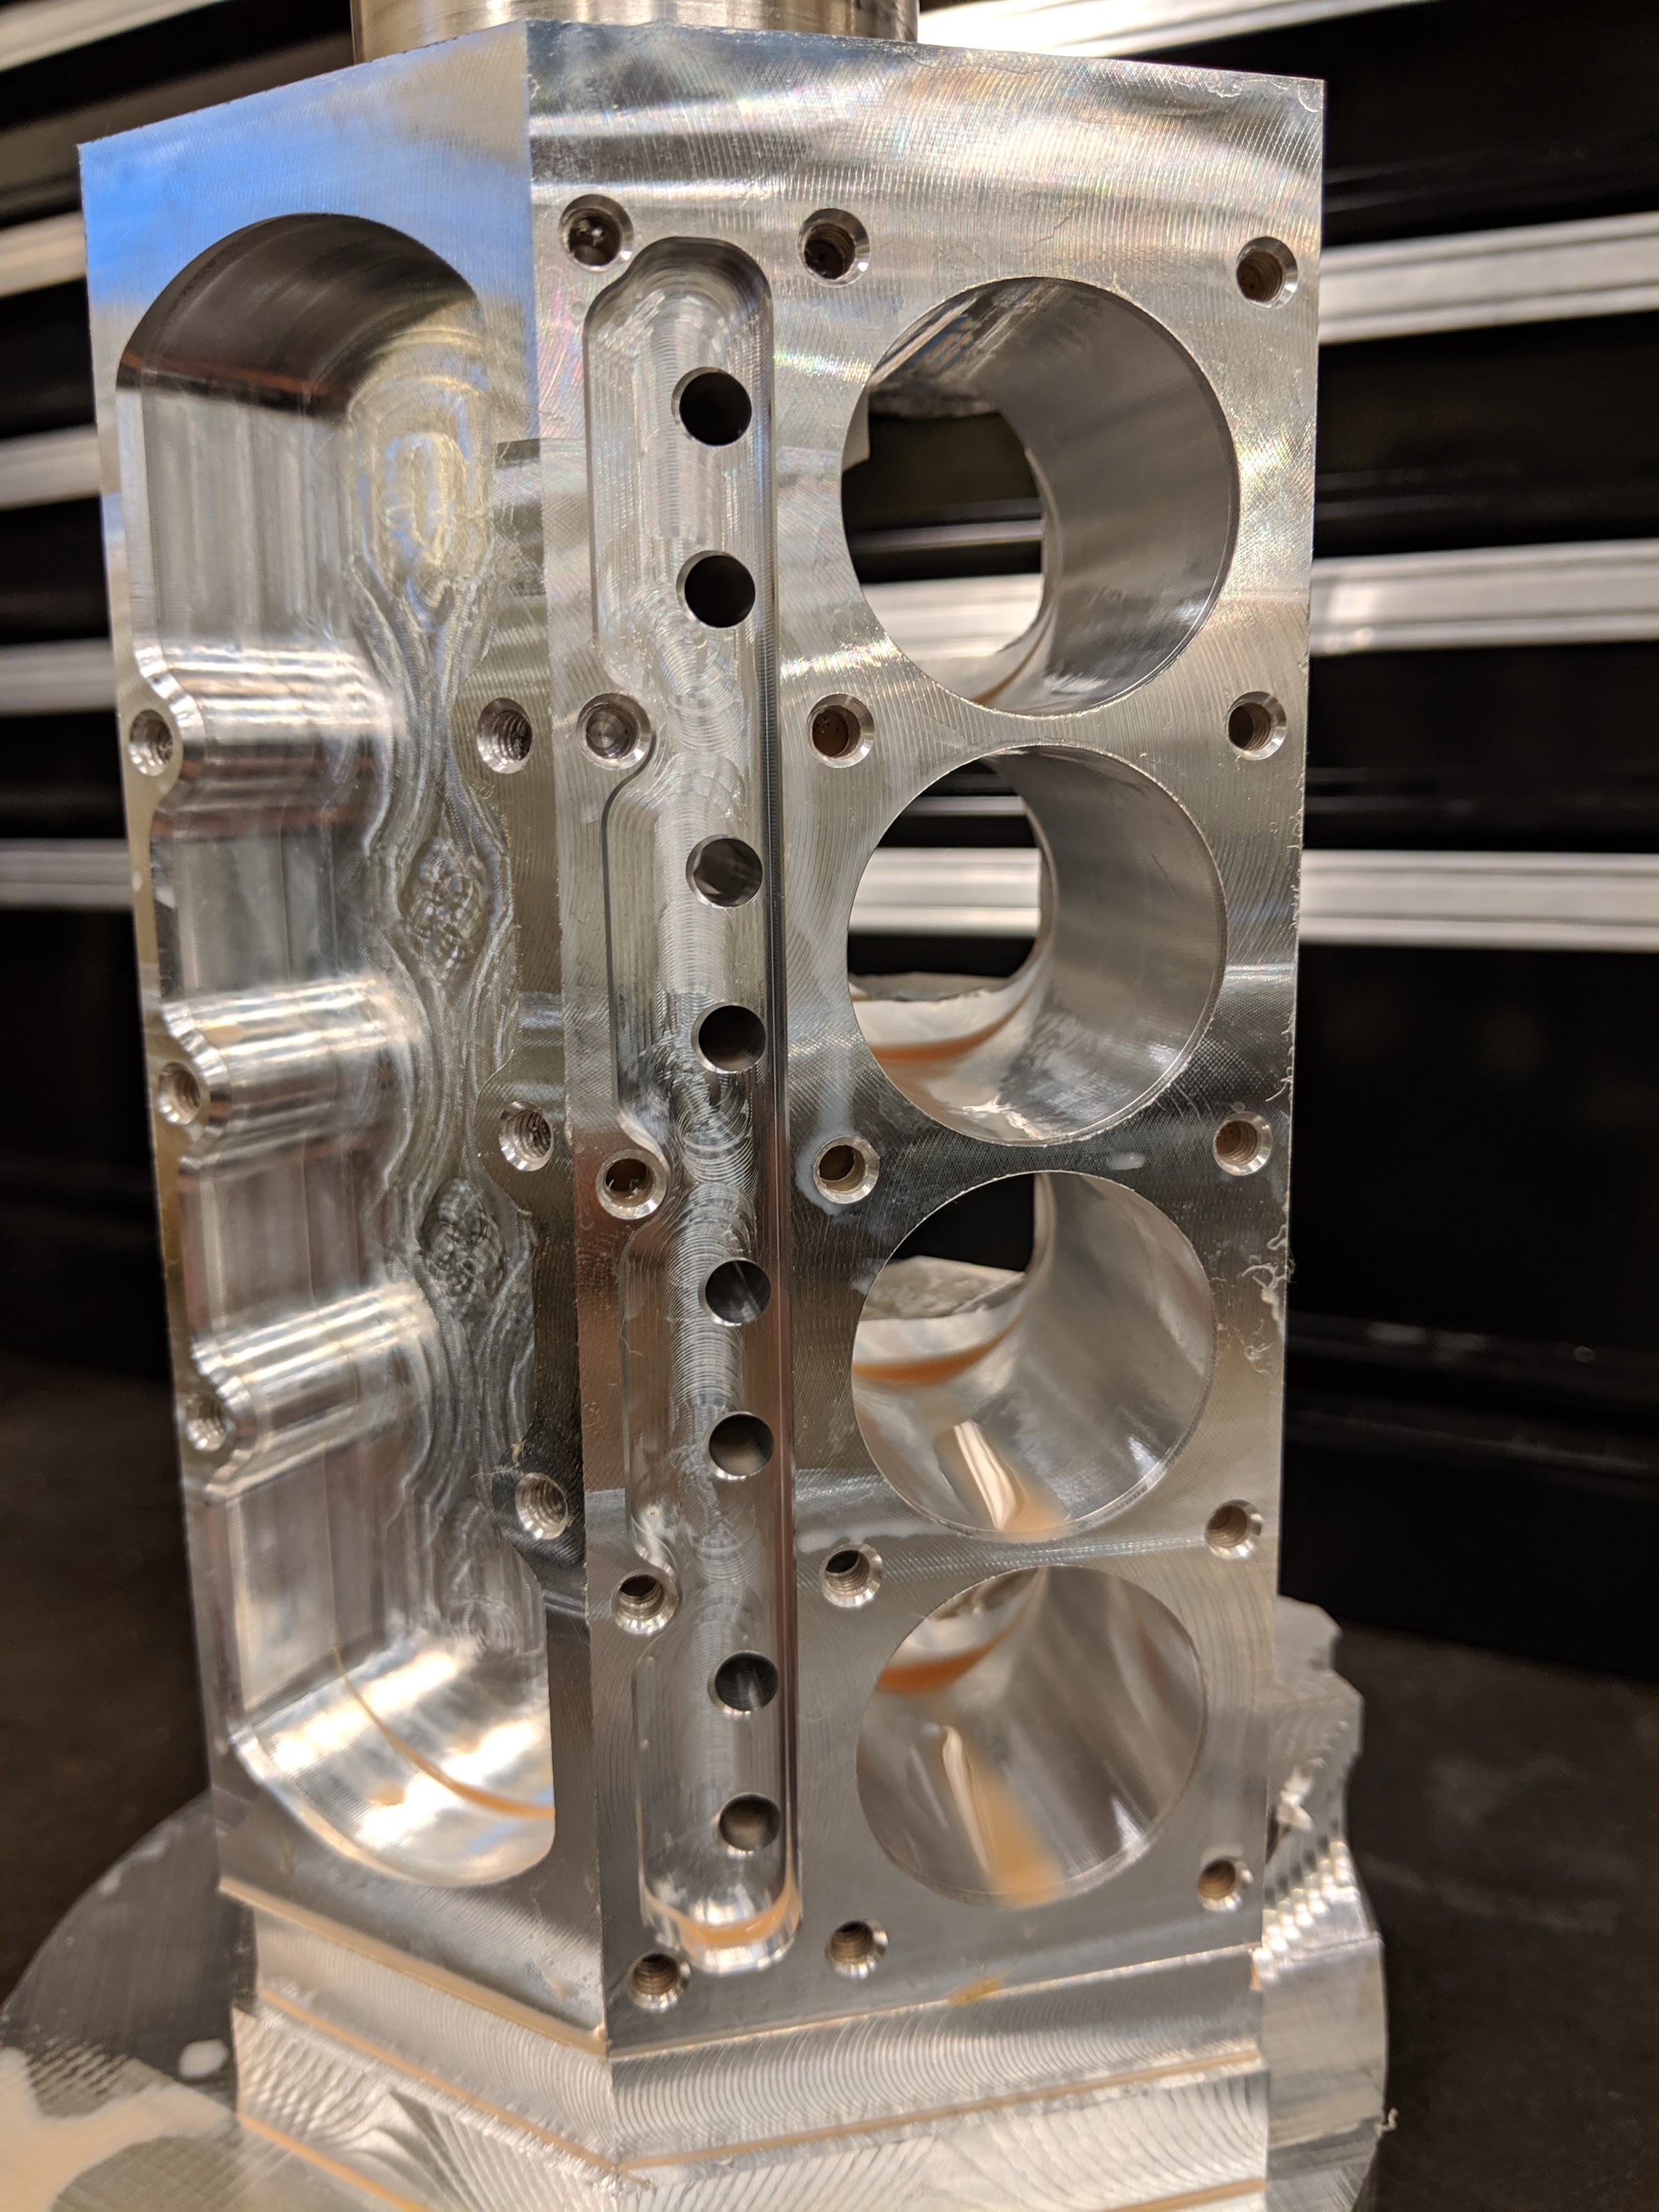
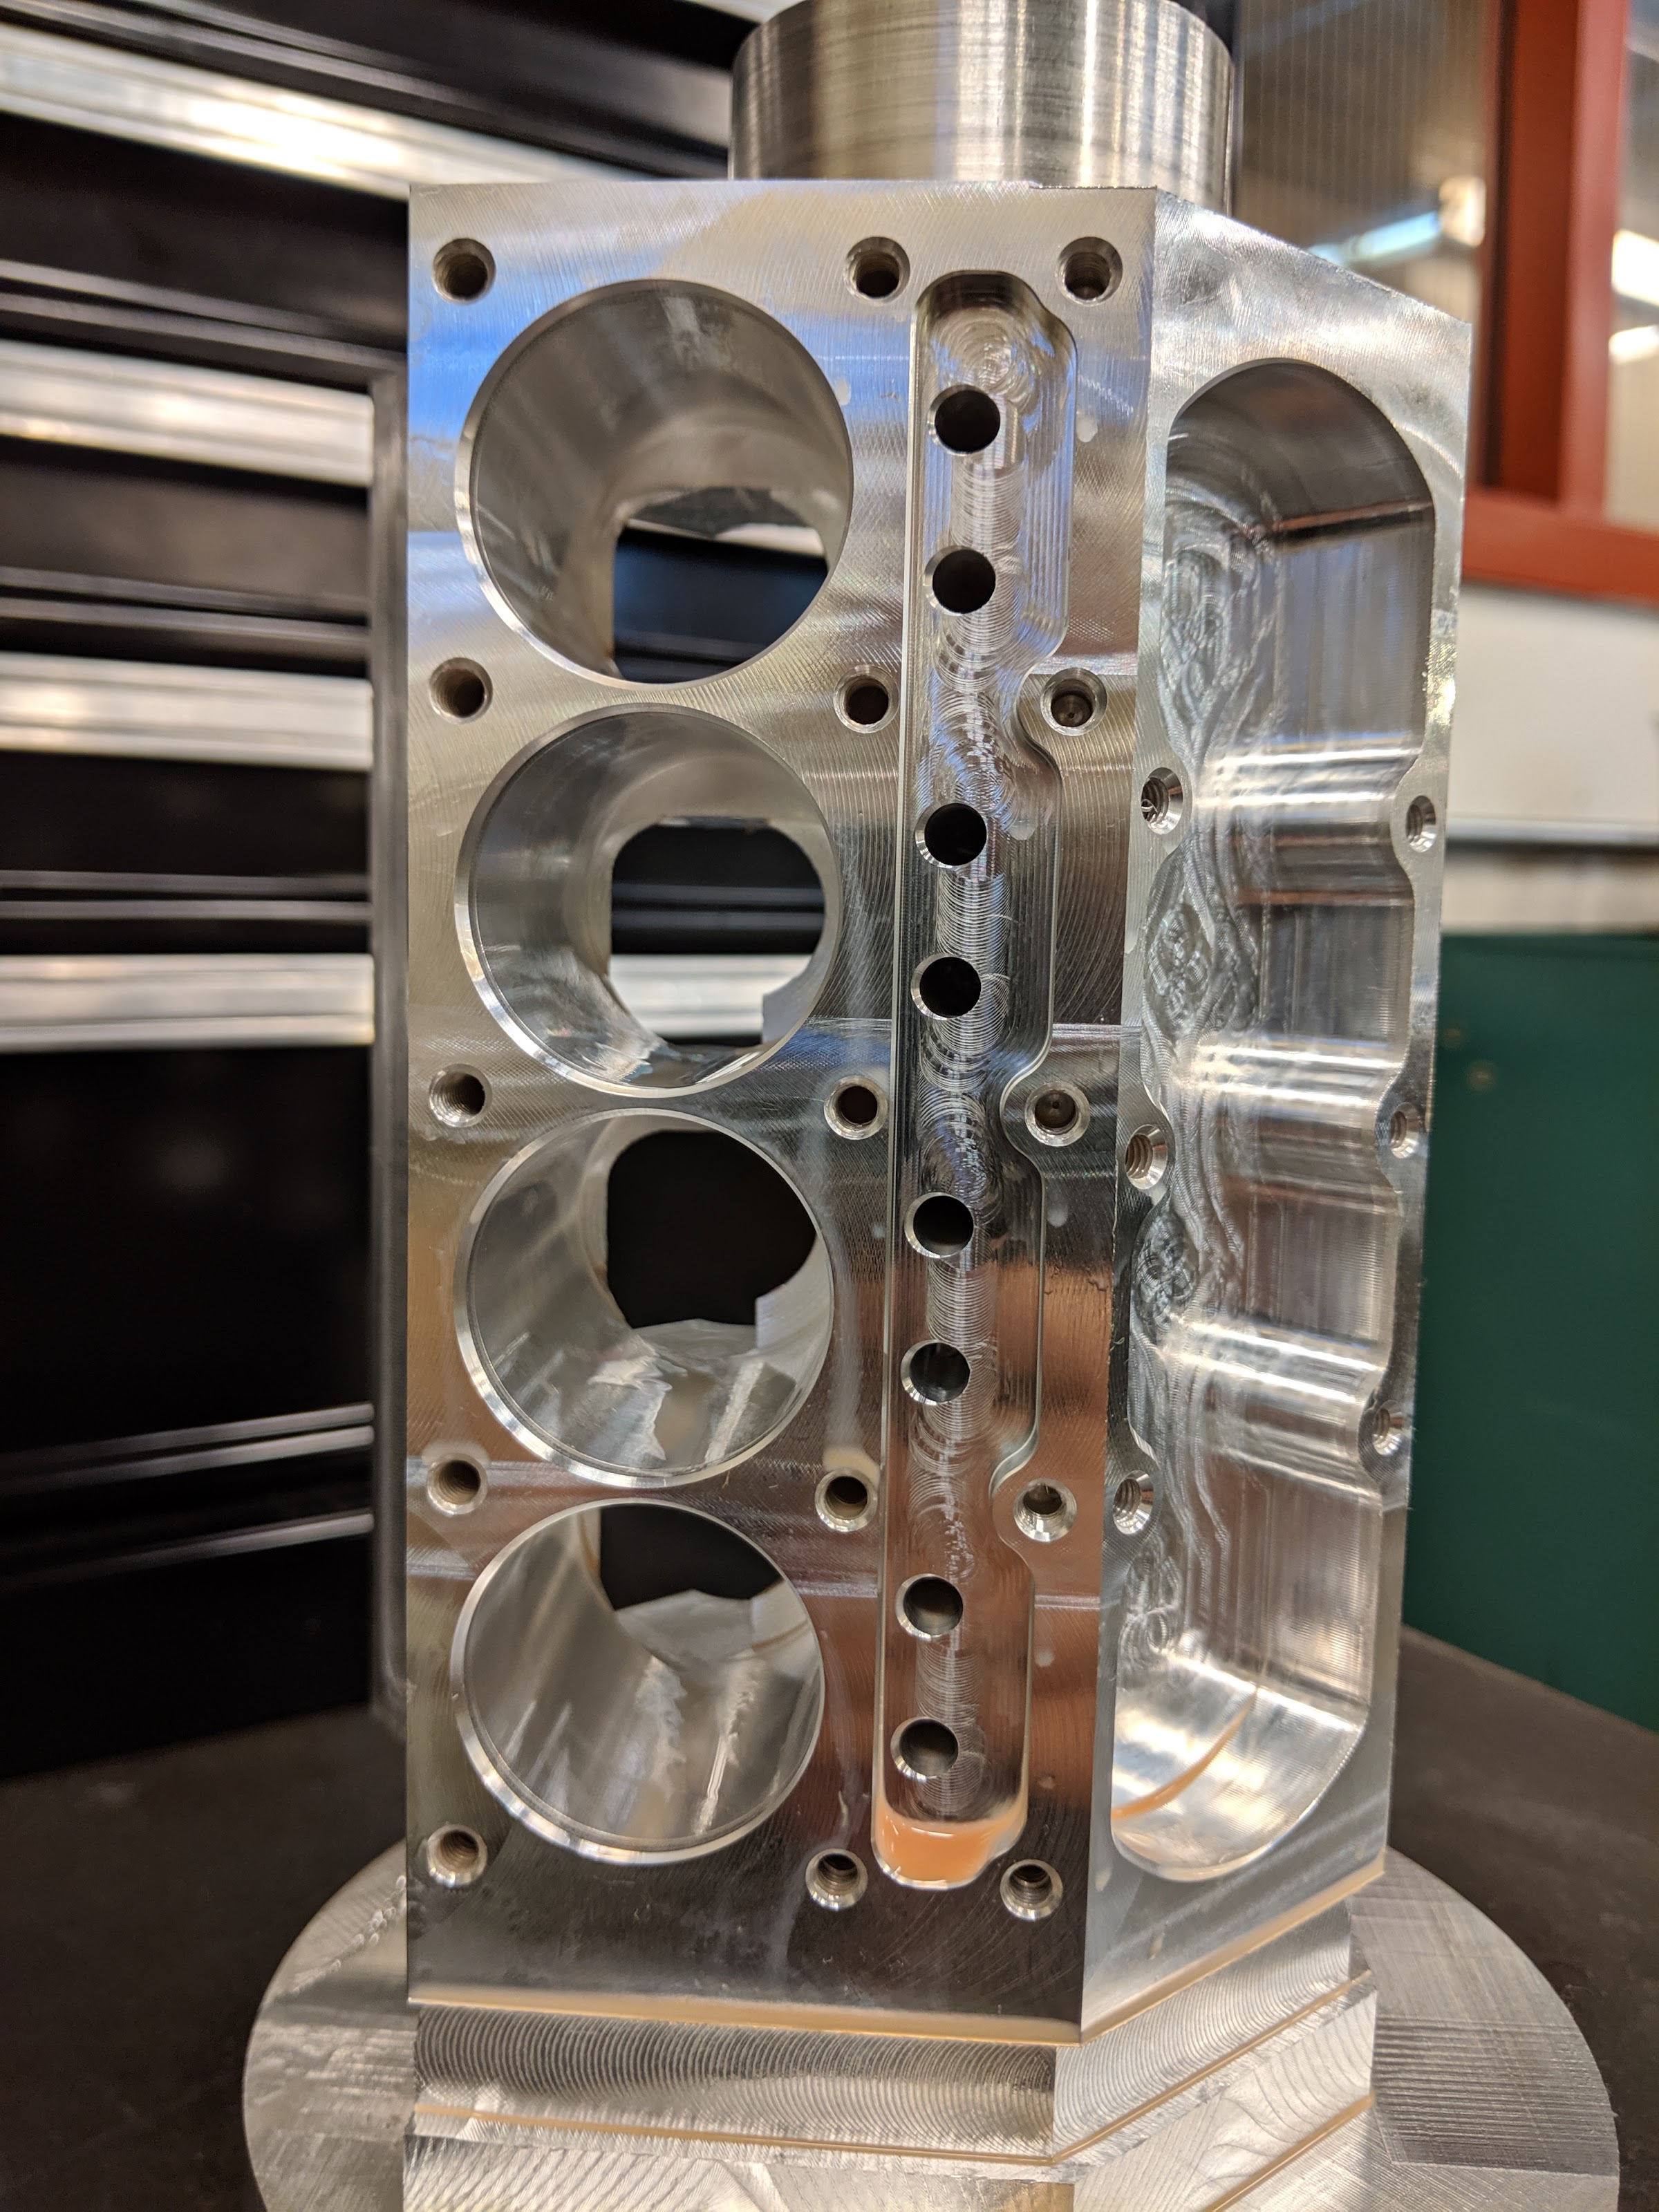
After talking things over with my instructor, he wants me to try again. The program has been proven, so no babysitting the machine required. To try and prevent the slippage issue I've implemented a couple of changes. The first is when I setup the stock, I machined 3 flats on the OD where the chuck jaws will grab. Second, I used a cheater bar on the chuck key to really tighten it. Third, I put in a couple of stops so that I can inspect the part at strategic parts of the program. After the major roughing was done I used a test indicator to ensure that each 90 degree rotation of the A-axis still aligned with the spindle. So far so good. I'll be back at it on Monday, but right now it looks like it did at the end of day on Tuesday.
Back to machining, I tapped a bunch of 8-36 holes. roughed out the cylinder bores, cut the lifter pockets, and roughed out the crankcase.
This is where I start to notice things are not right. The spot drill is deeper on some holes than others and offset in places. Since I was this far in, I figured I would run the finishing operations and just see how it turns out. Only when I pulled it out did I discover what had happened. The stock slipped in the chuck, so some features were at odd angles. Needless to say I was not happy.
After talking things over with my instructor, he wants me to try again. The program has been proven, so no babysitting the machine required. To try and prevent the slippage issue I've implemented a couple of changes. The first is when I setup the stock, I machined 3 flats on the OD where the chuck jaws will grab. Second, I used a cheater bar on the chuck key to really tighten it. Third, I put in a couple of stops so that I can inspect the part at strategic parts of the program. After the major roughing was done I used a test indicator to ensure that each 90 degree rotation of the A-axis still aligned with the spindle. So far so good. I'll be back at it on Monday, but right now it looks like it did at the end of day on Tuesday.
cool stuff. keep the updates coming.
Very nice work. With the changes you are making to your setup, the second run should go well.
Things slip and it can get exciting. It's happened to all of us.
Chuck
Things slip and it can get exciting. It's happened to all of us.
Chuck
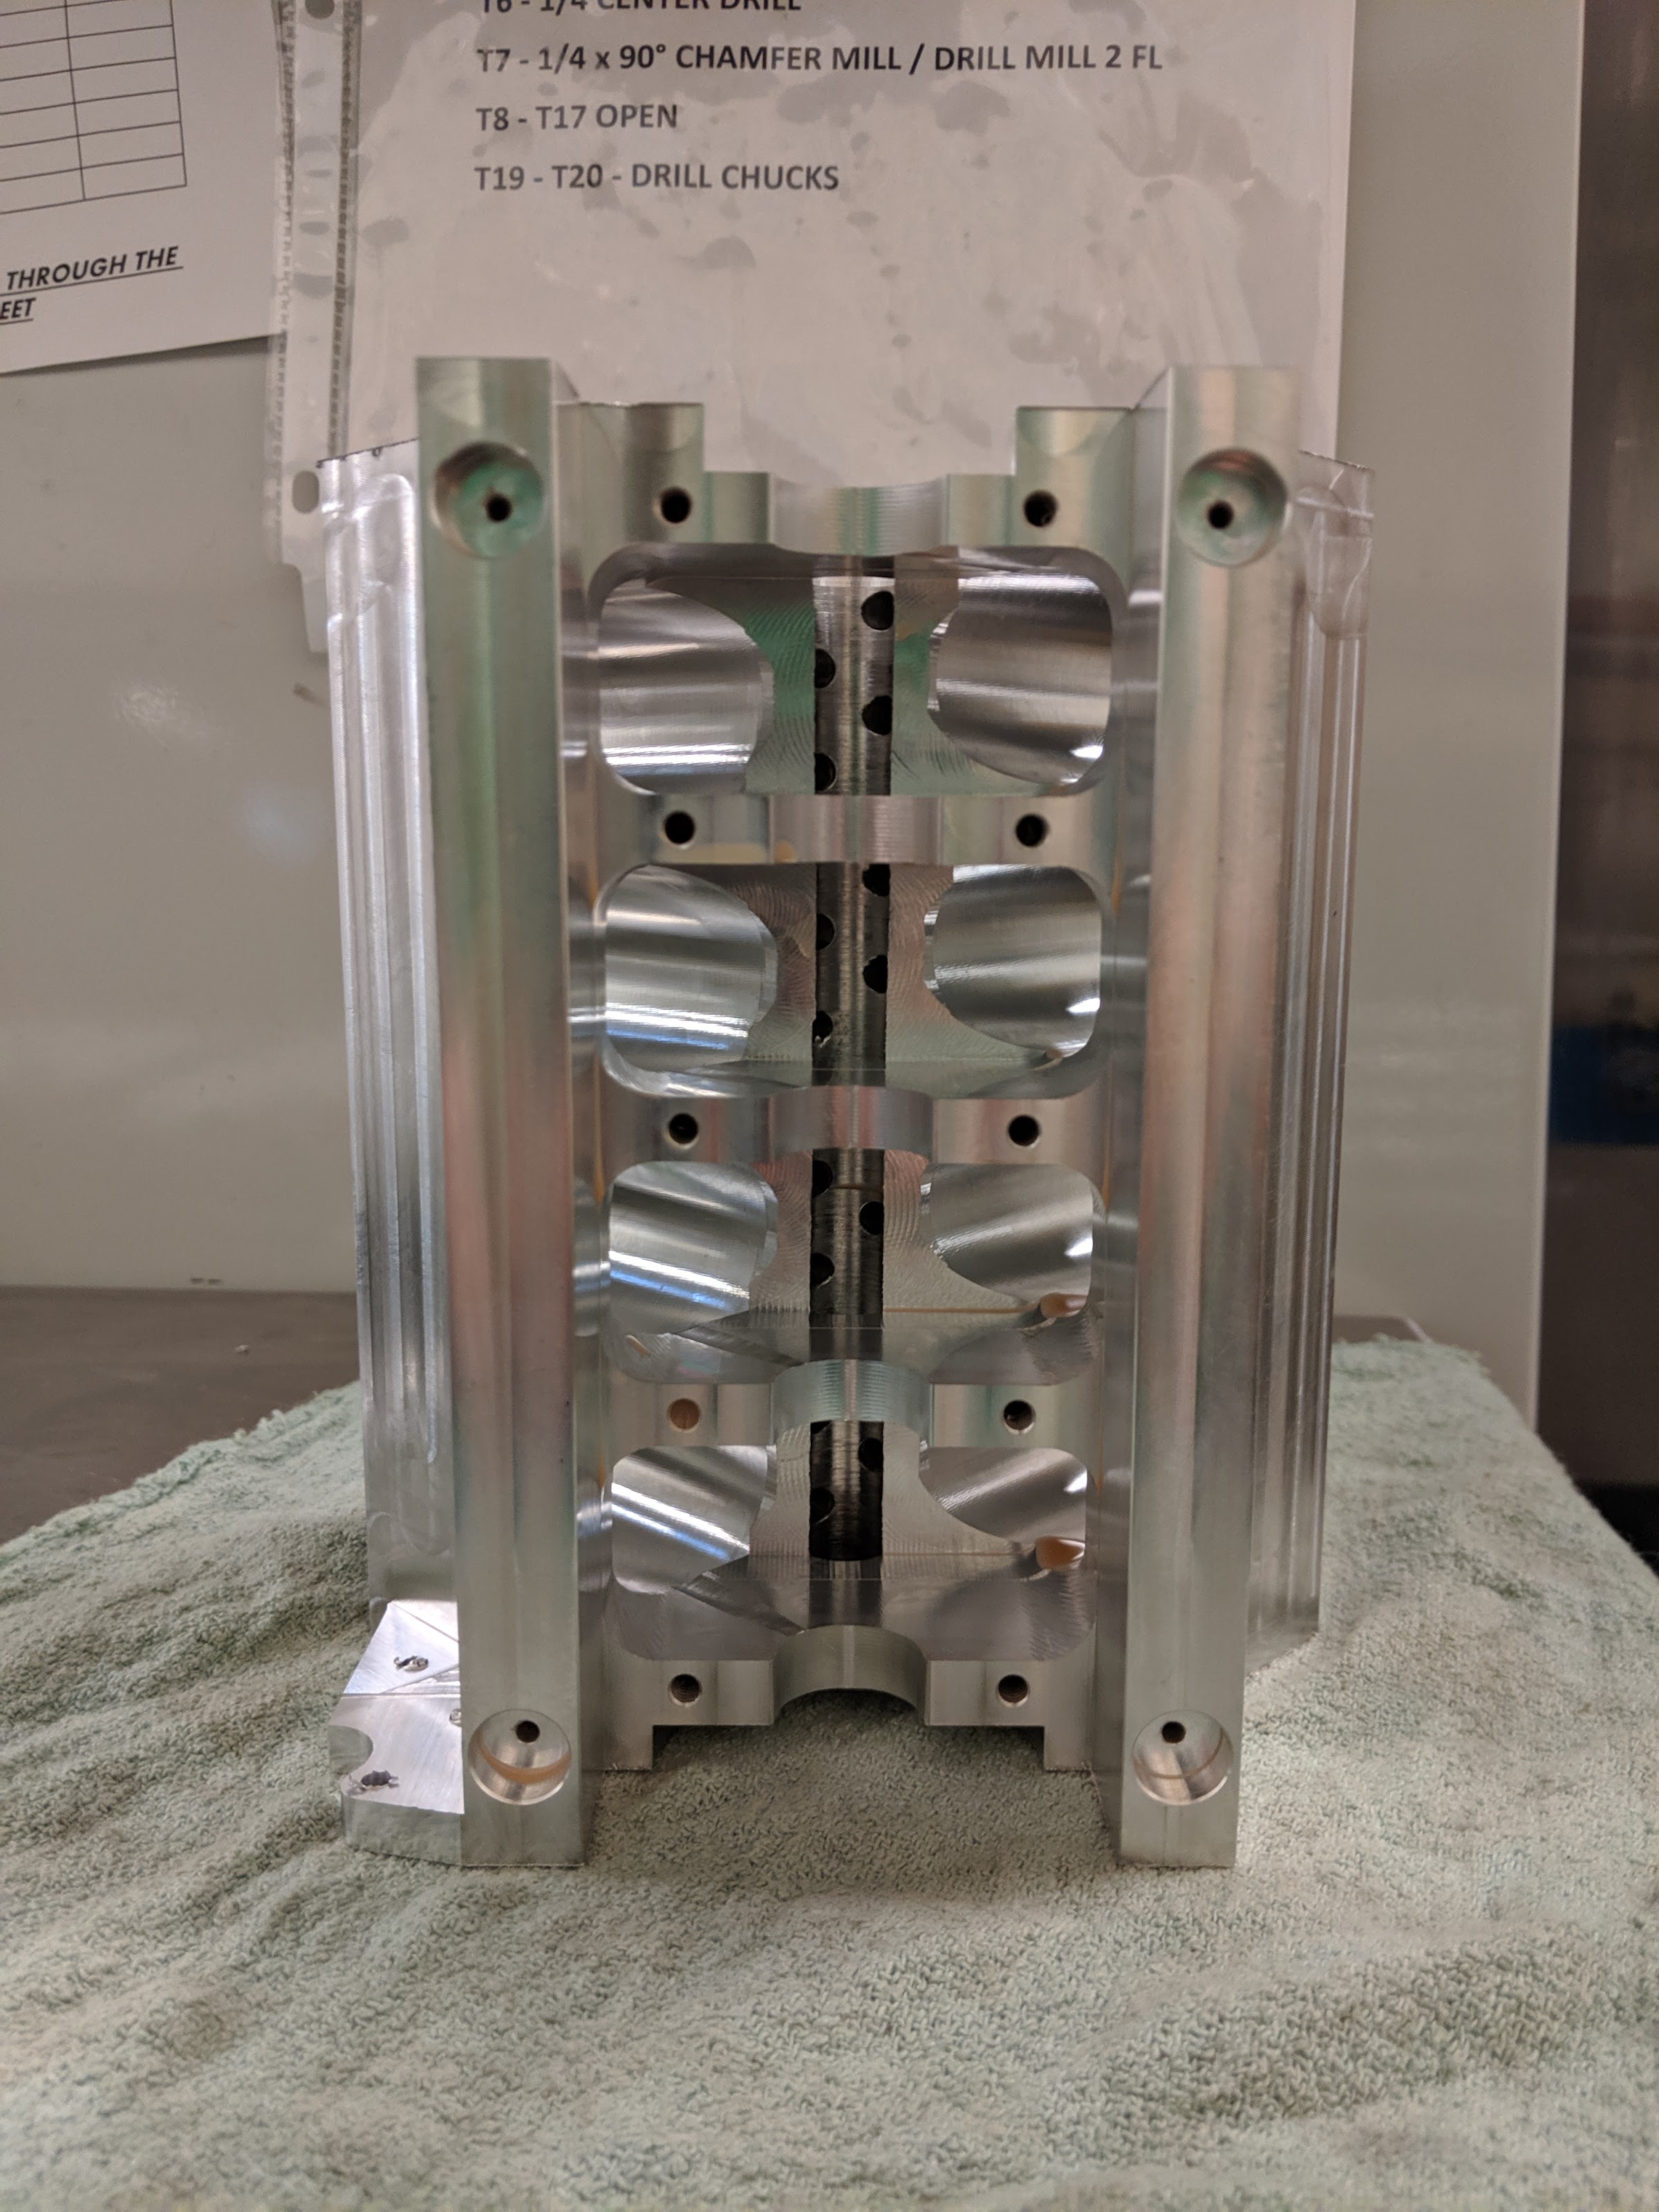
It's been a few days, but I have progress to report. Two blocks are completed. I decided to go ahead with the final operations on the flawed block and the "good" one. It turned out to be really helpful to have a test mule for the other operations so that if anything went wrong, I could fix the problems before running the good one. Anyway, I used the bandsaw to separate the block from the parent stock and then started the machining on both ends.
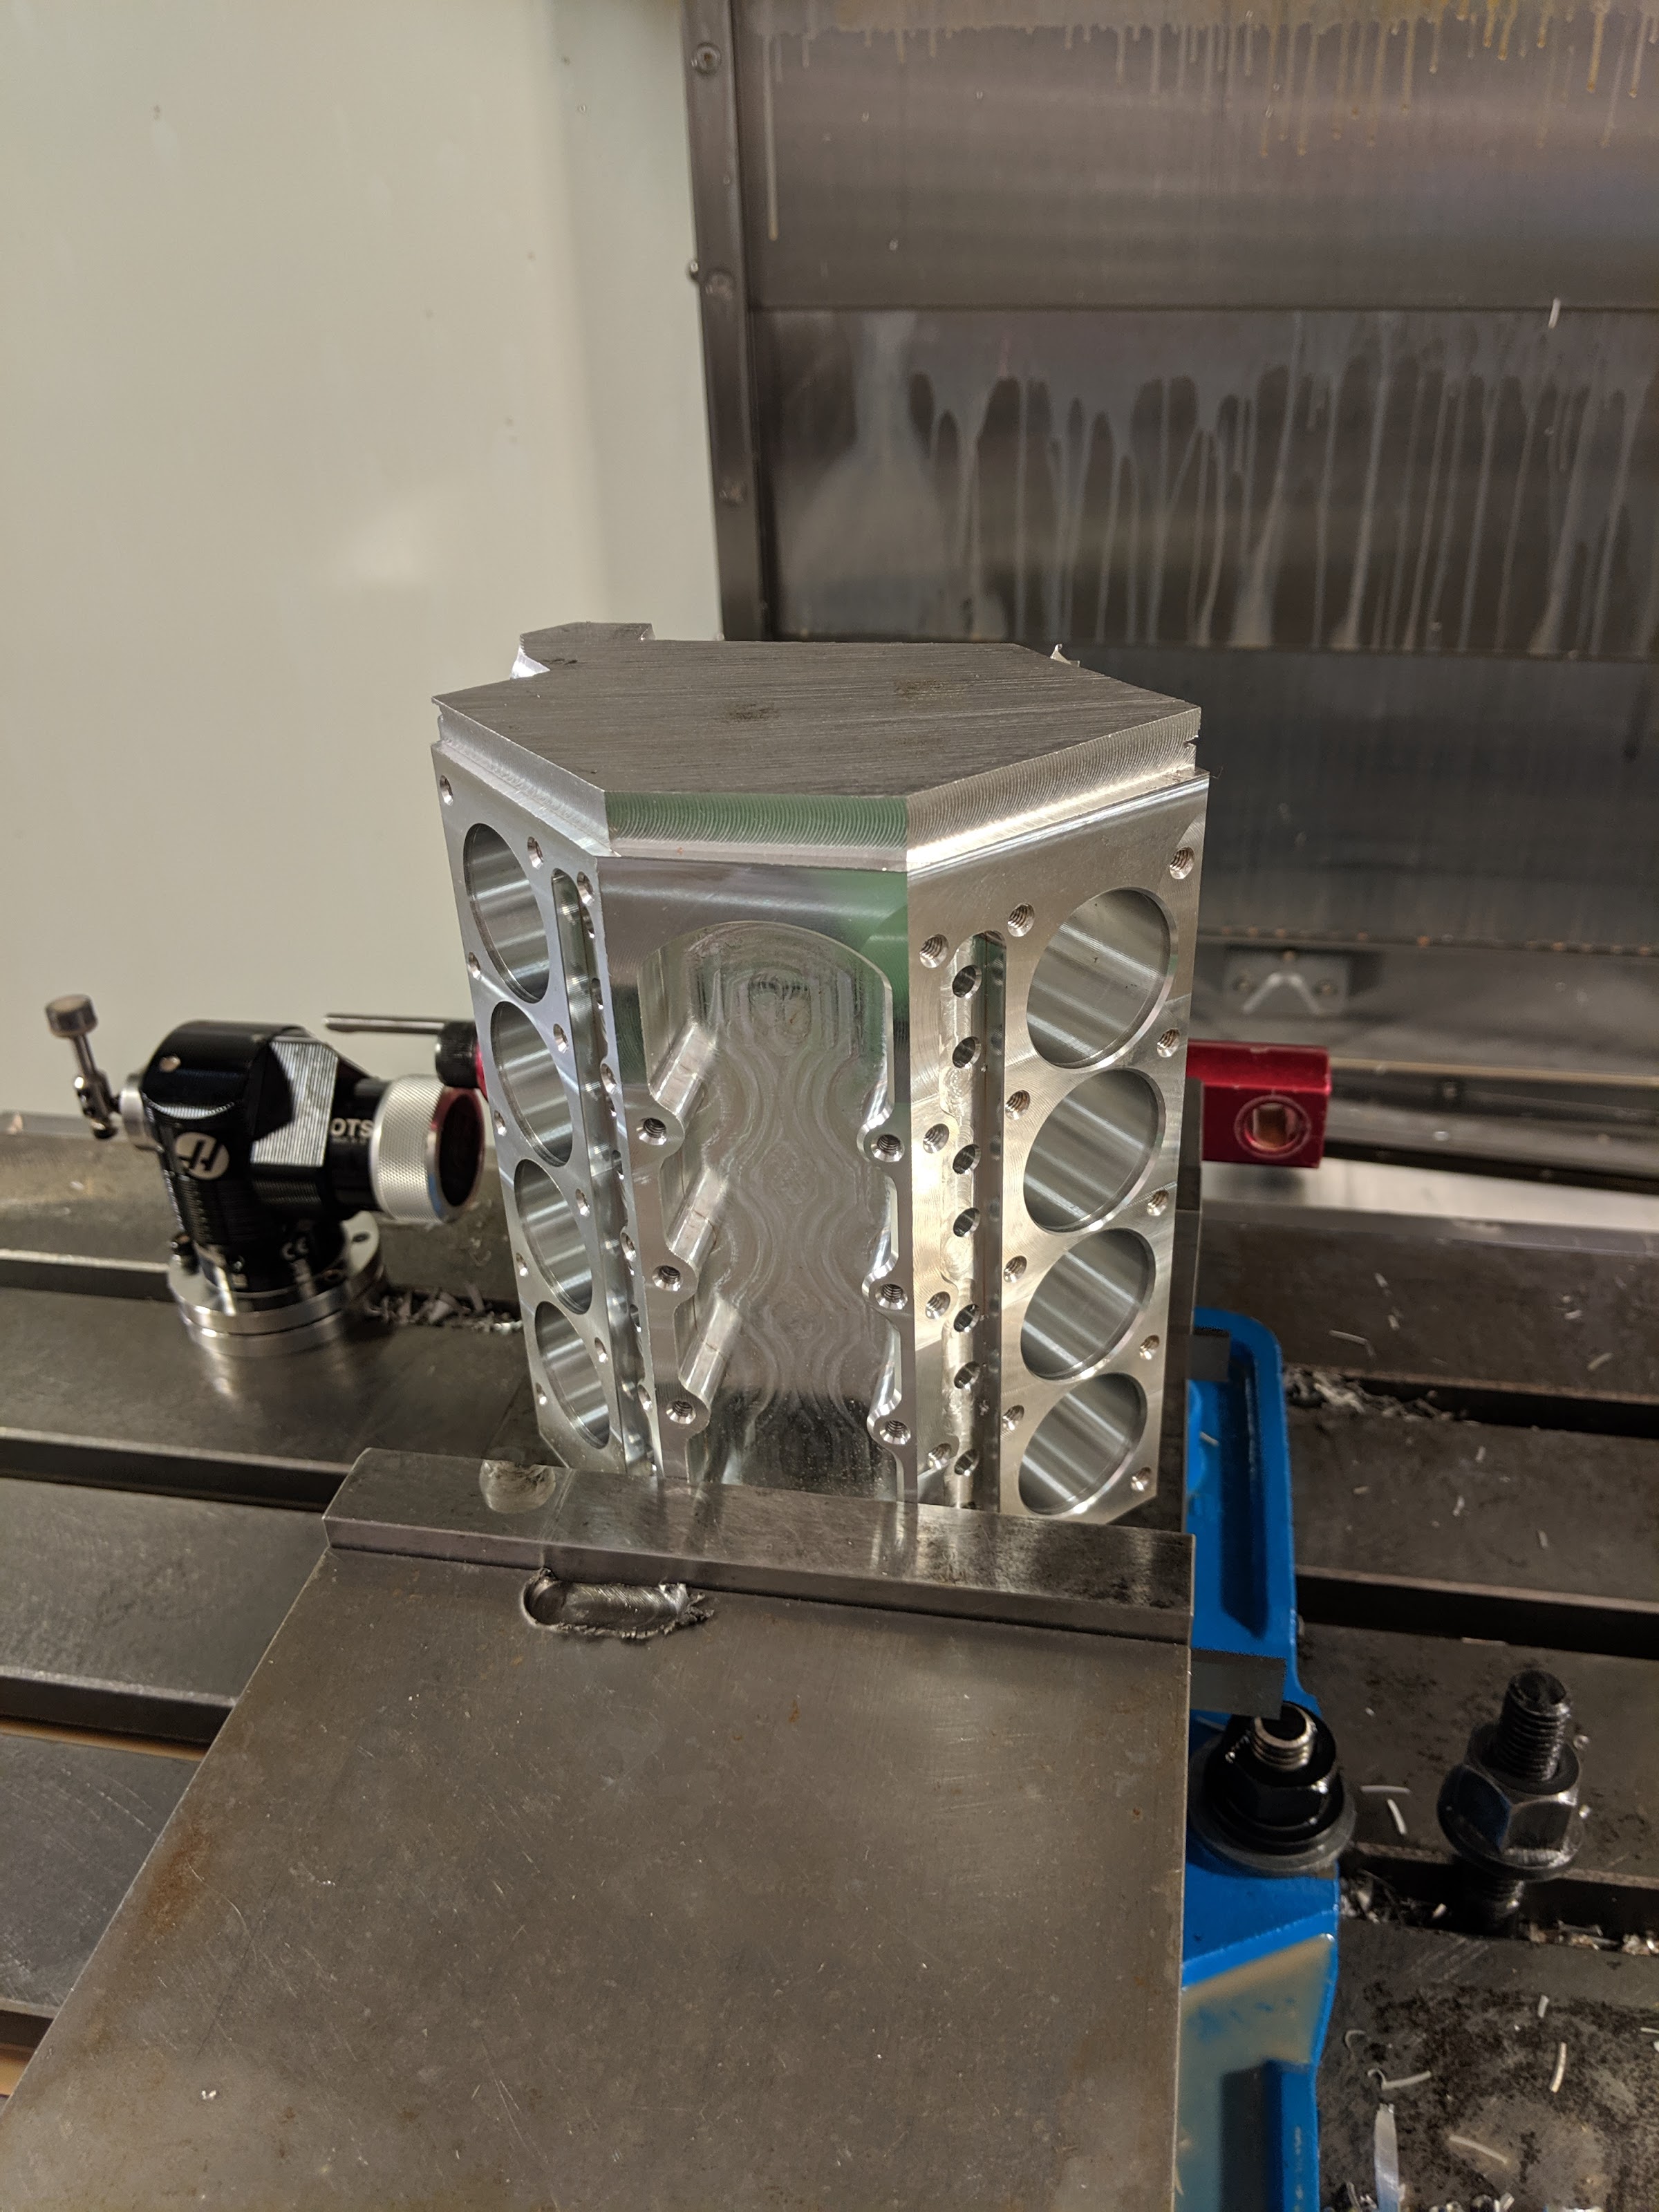
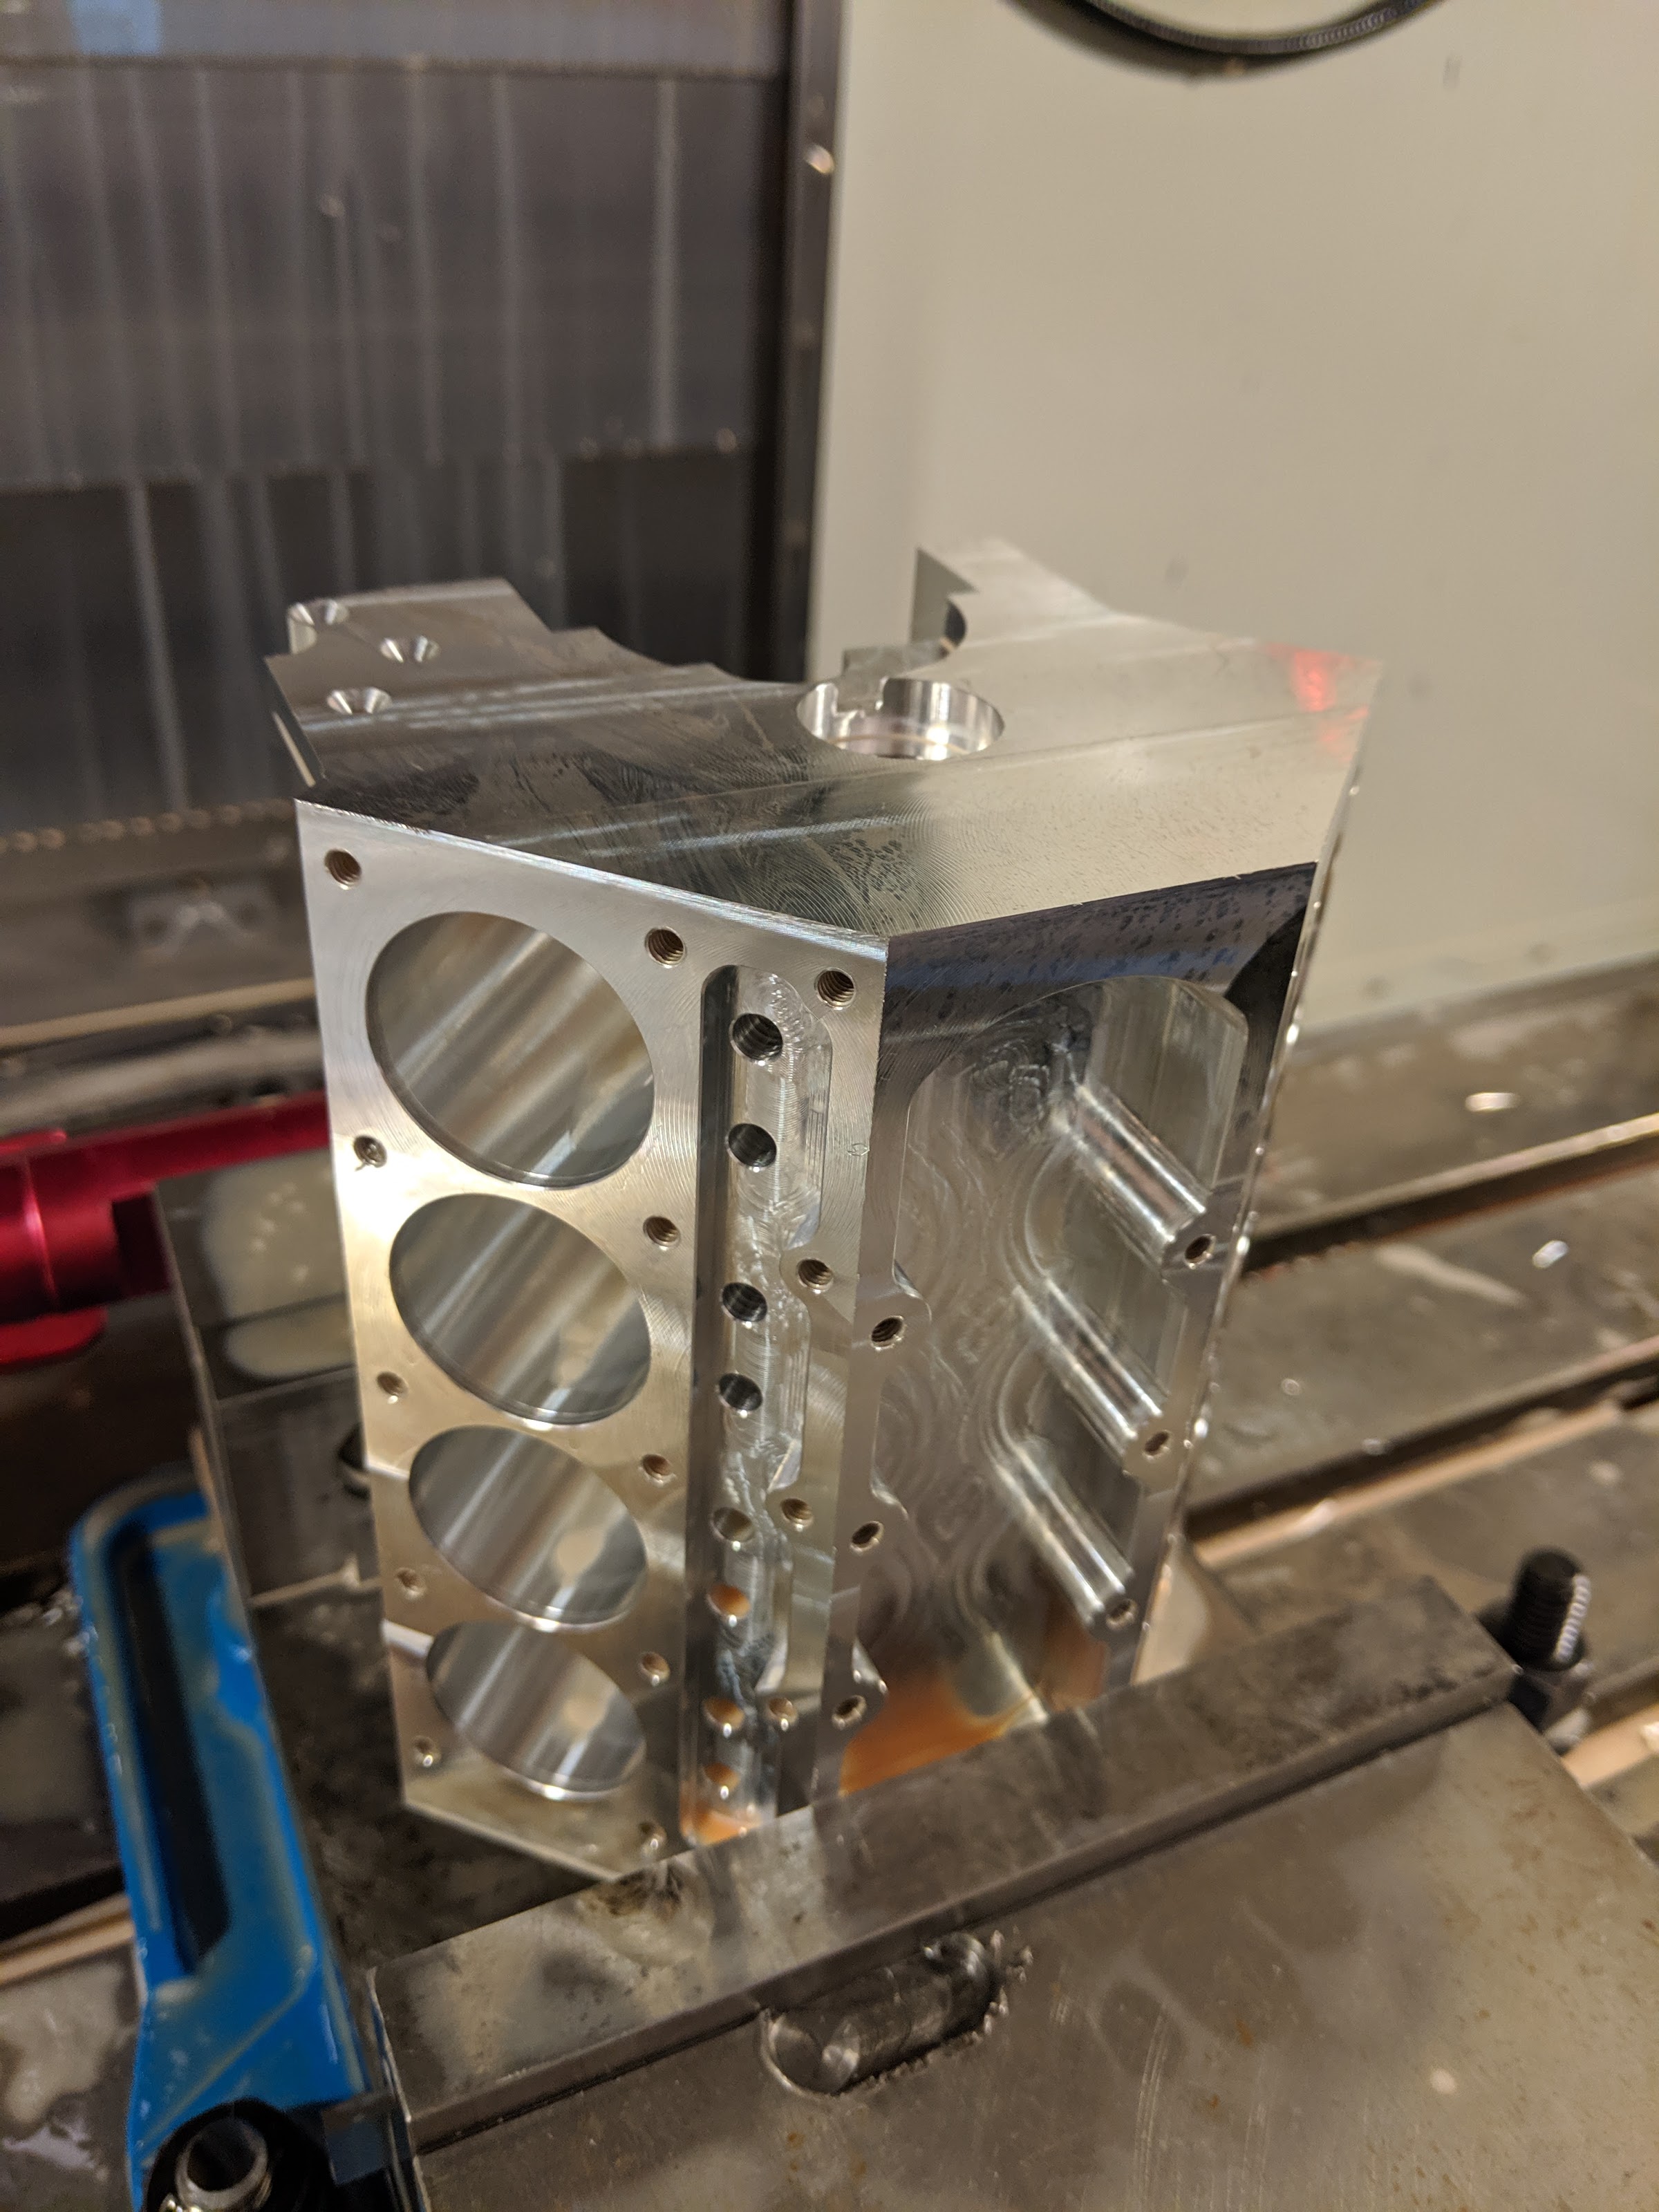
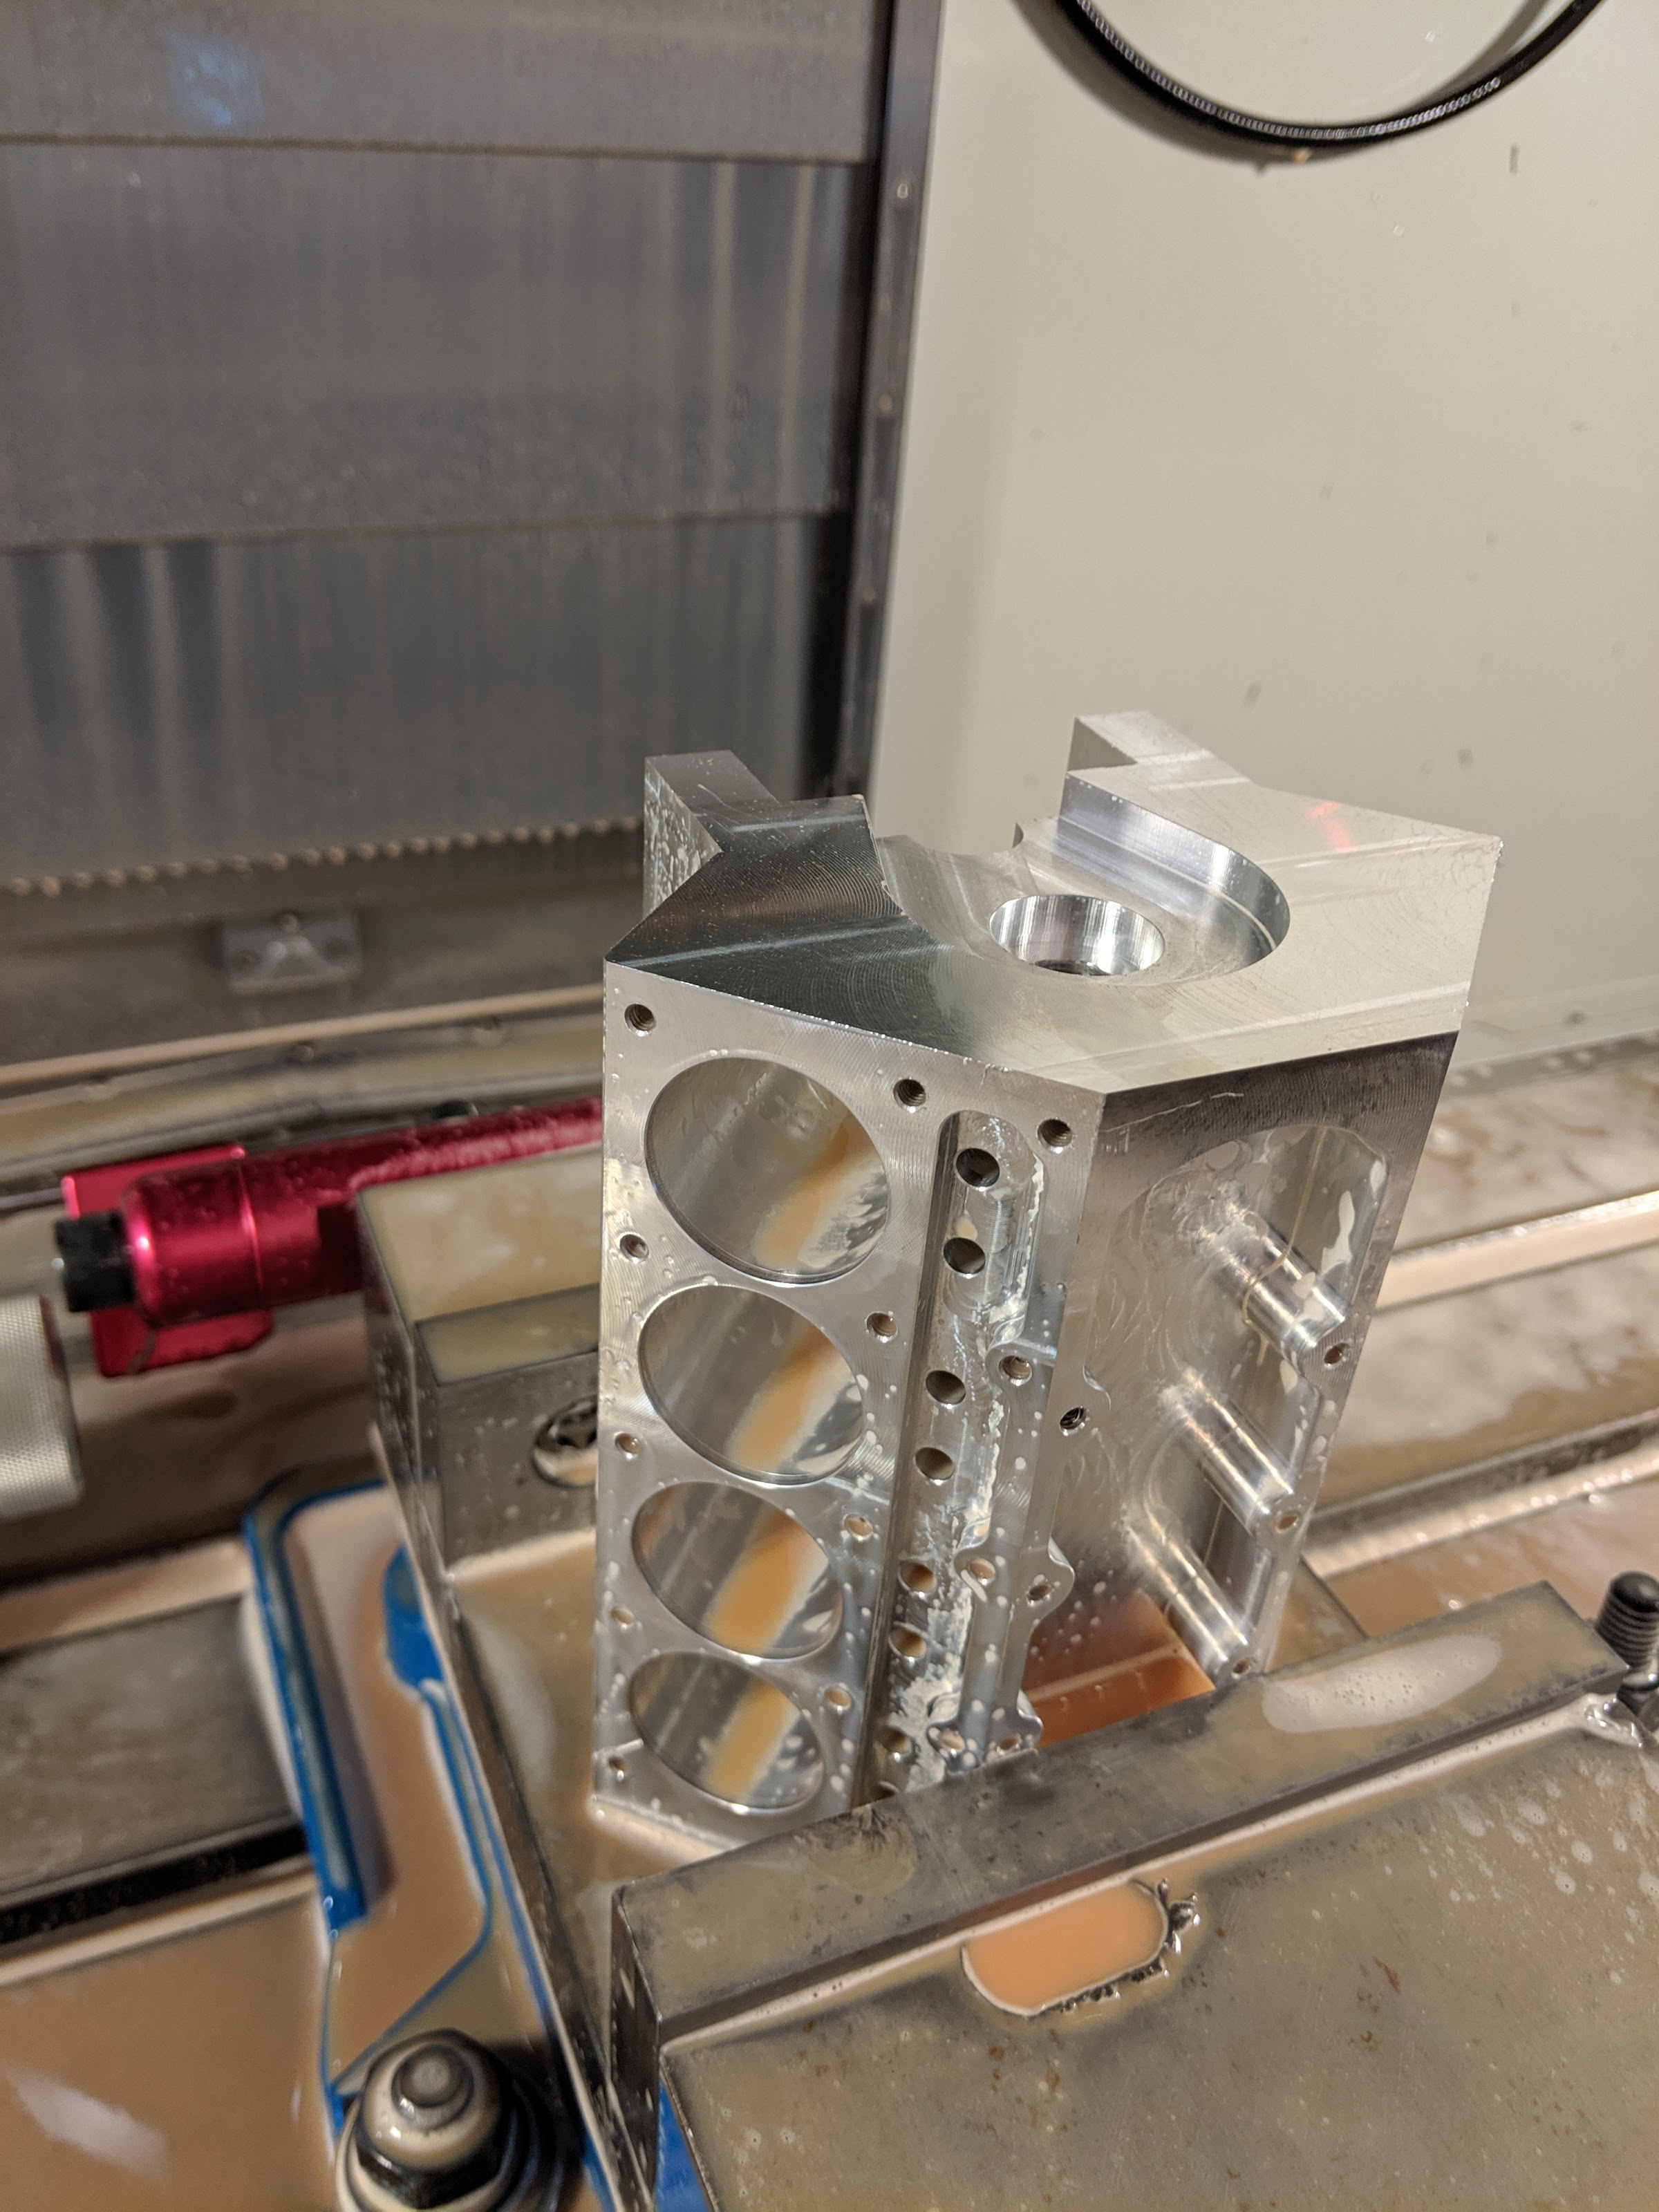
Here are the finished pictures. Sorry no glamor shots, just a couple of cell phone pictures for now.
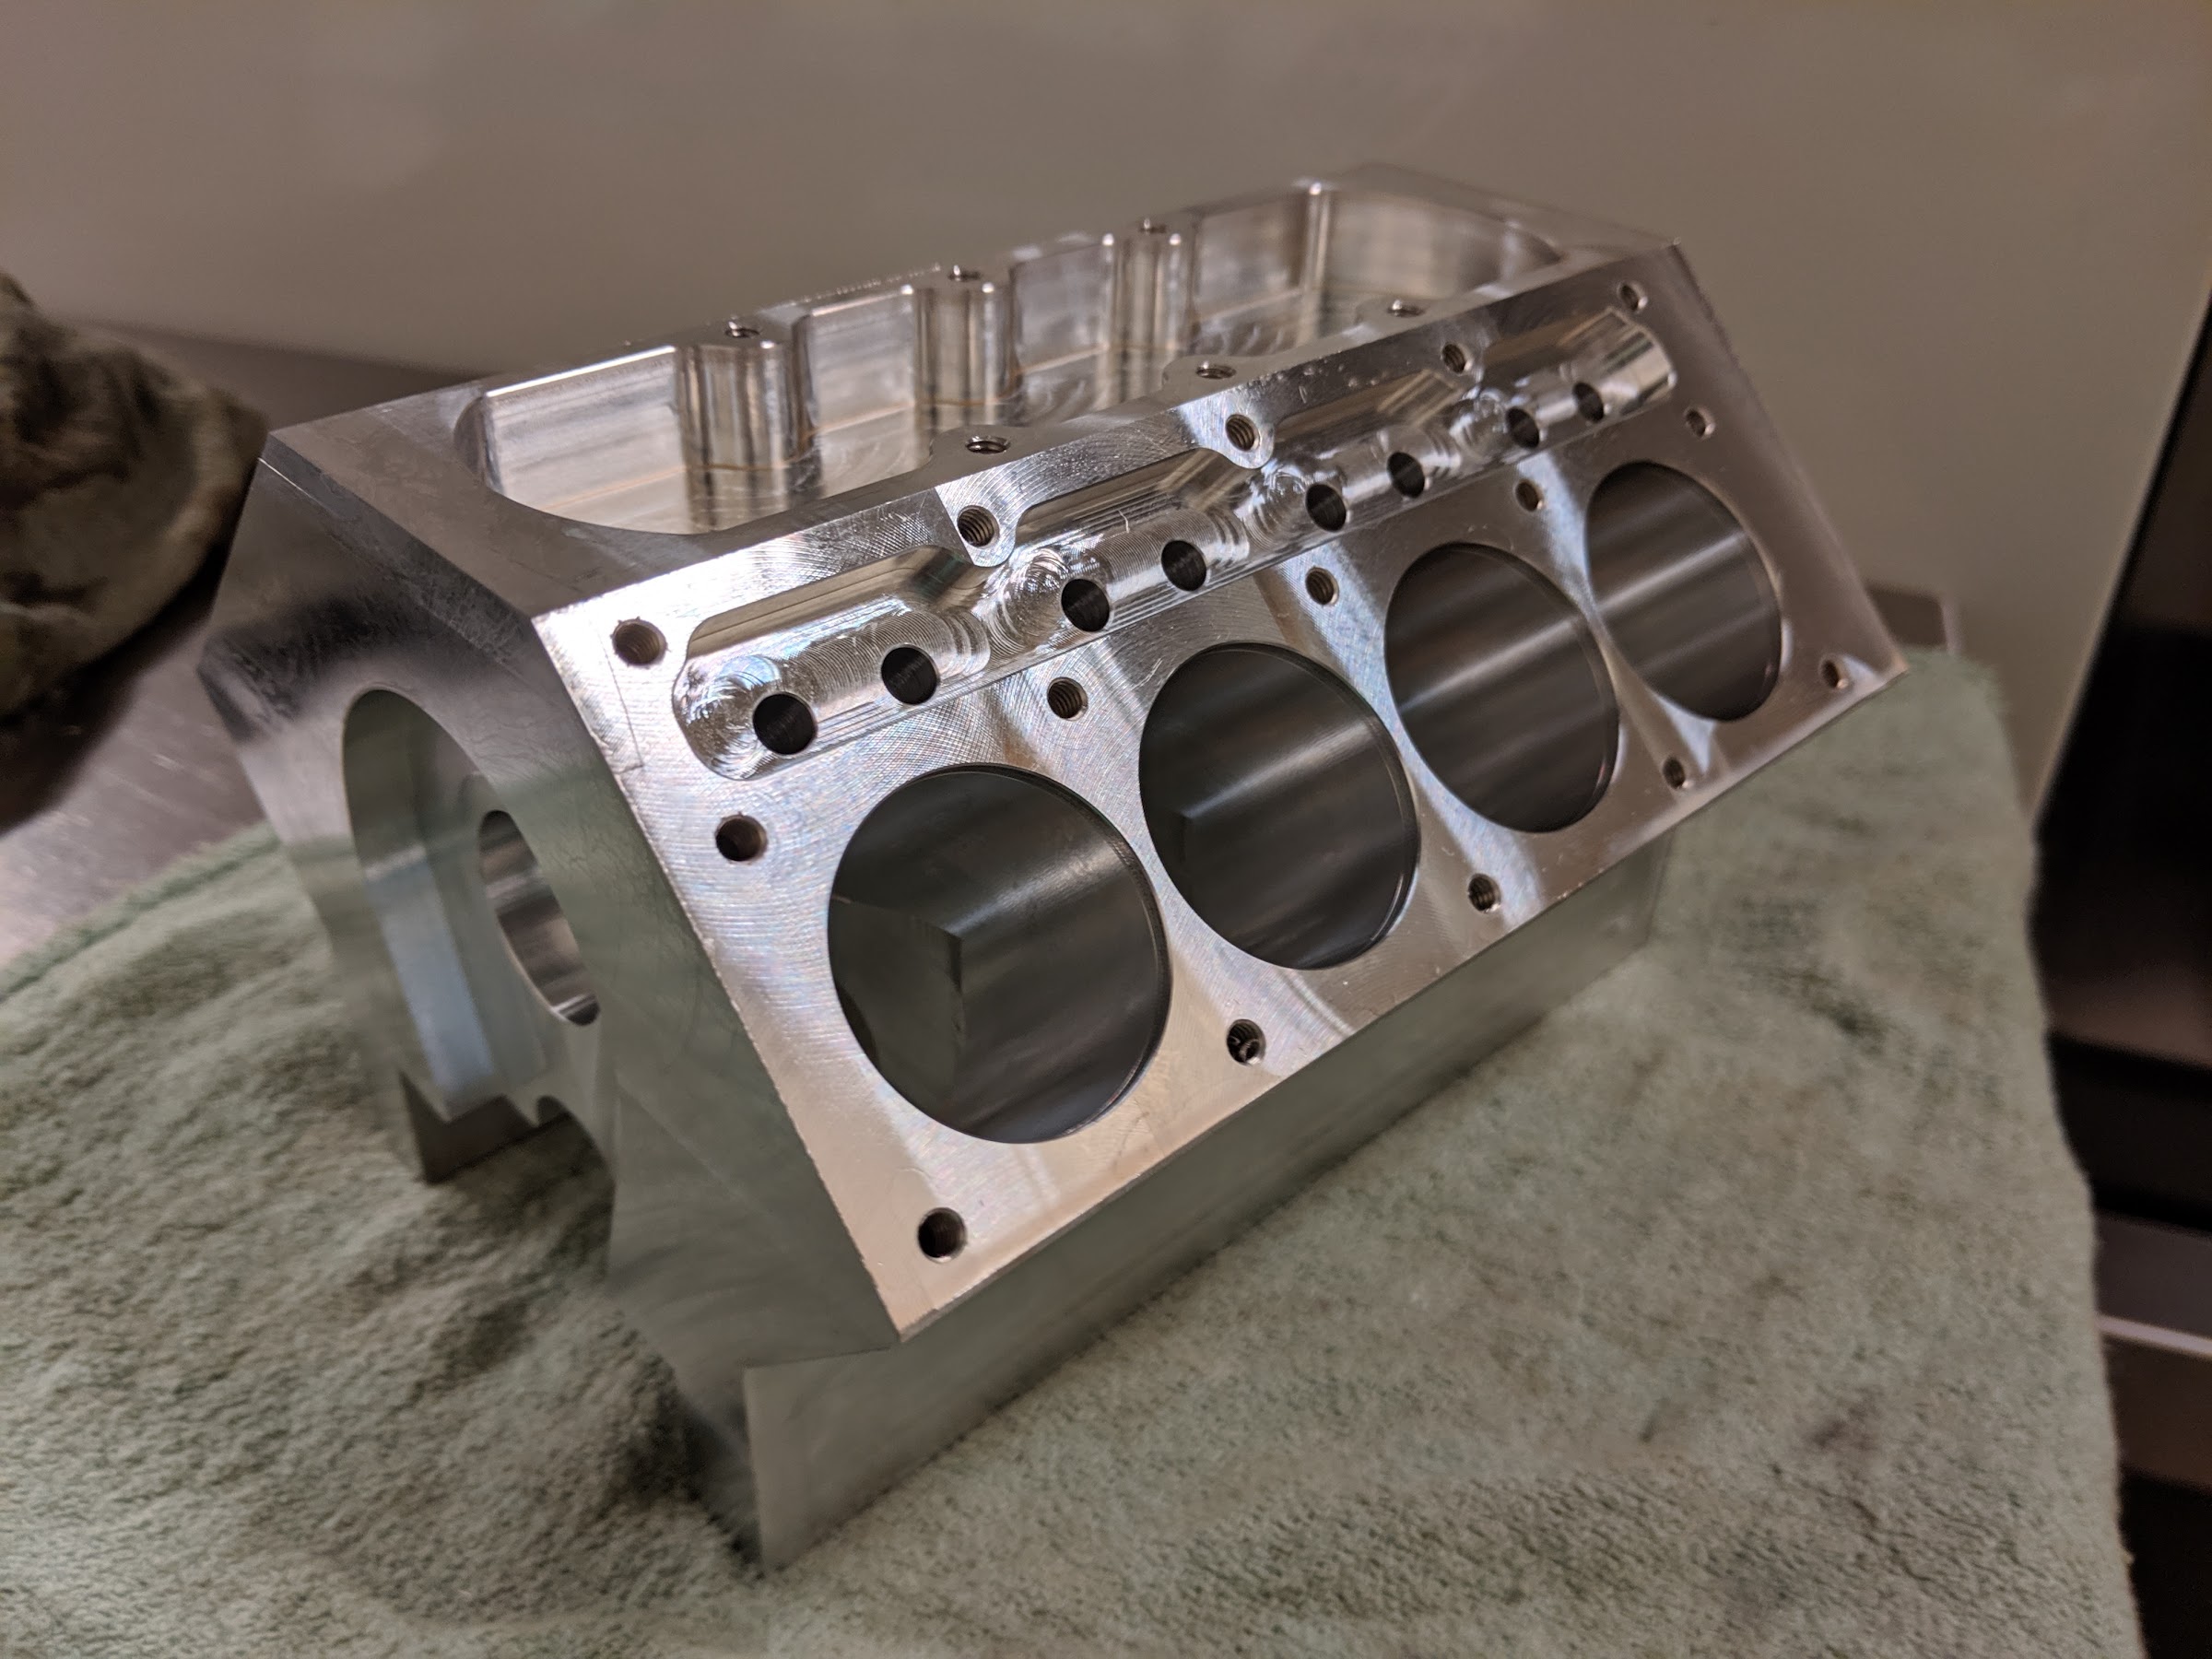
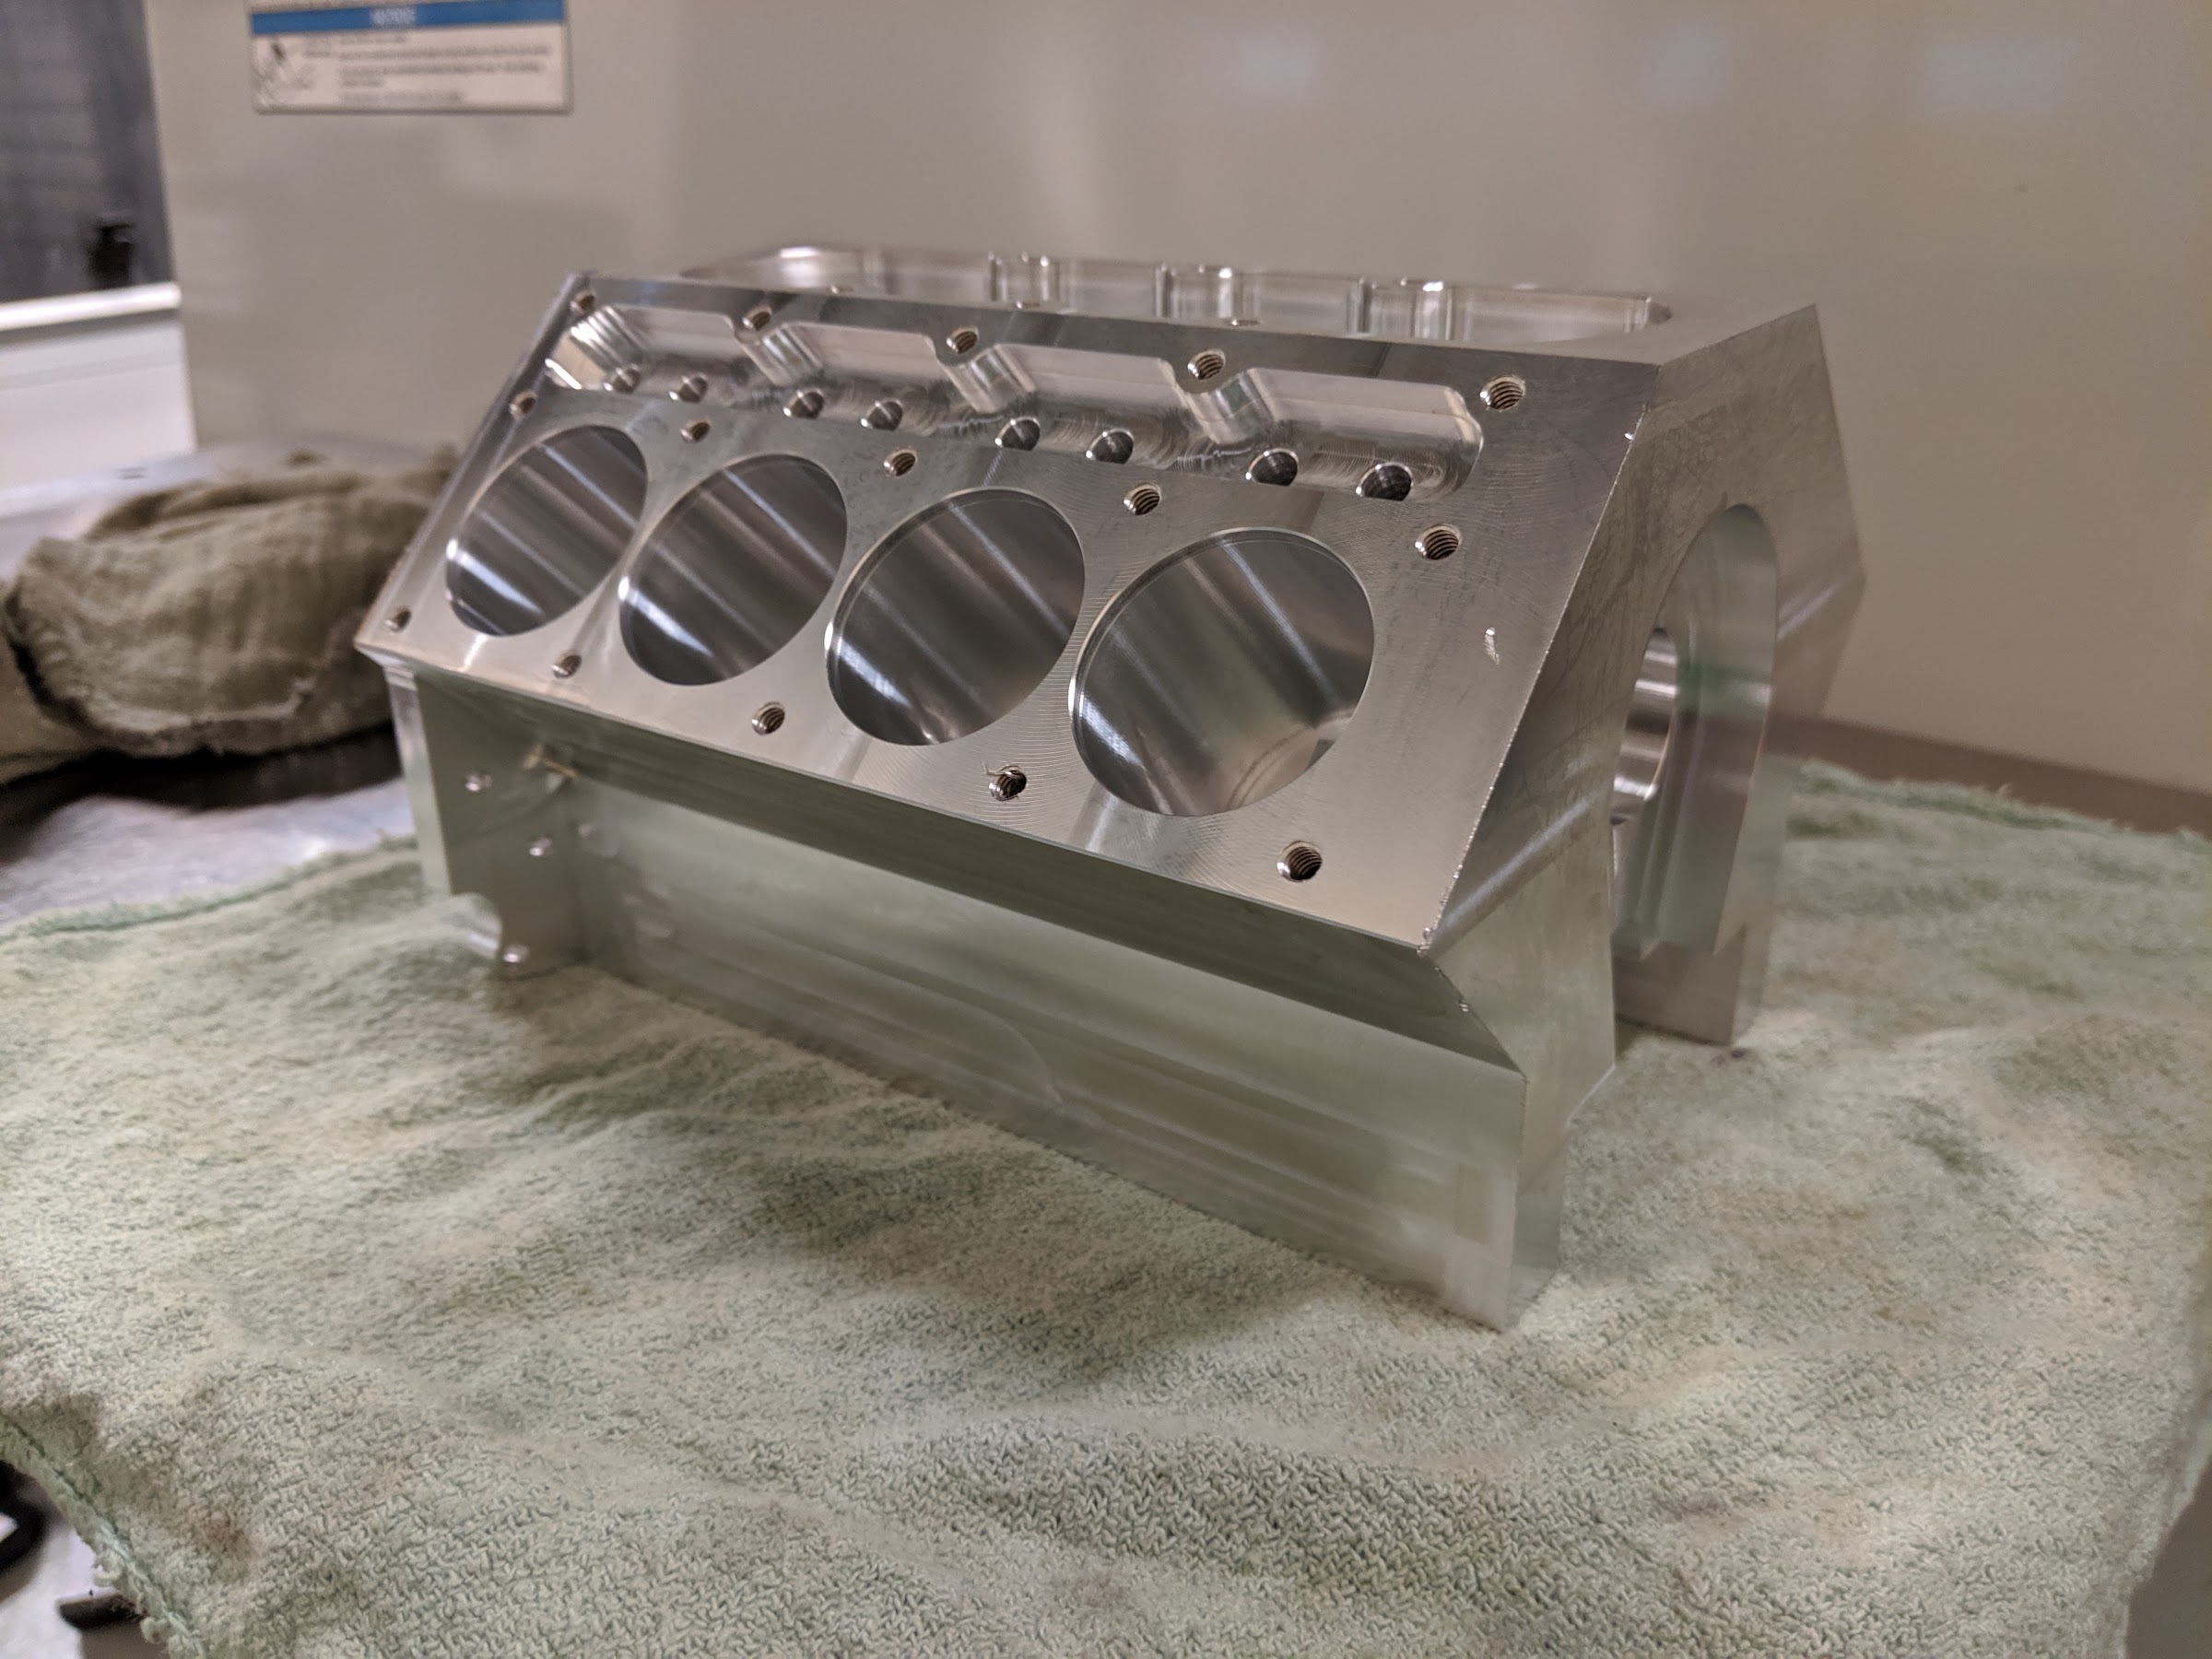
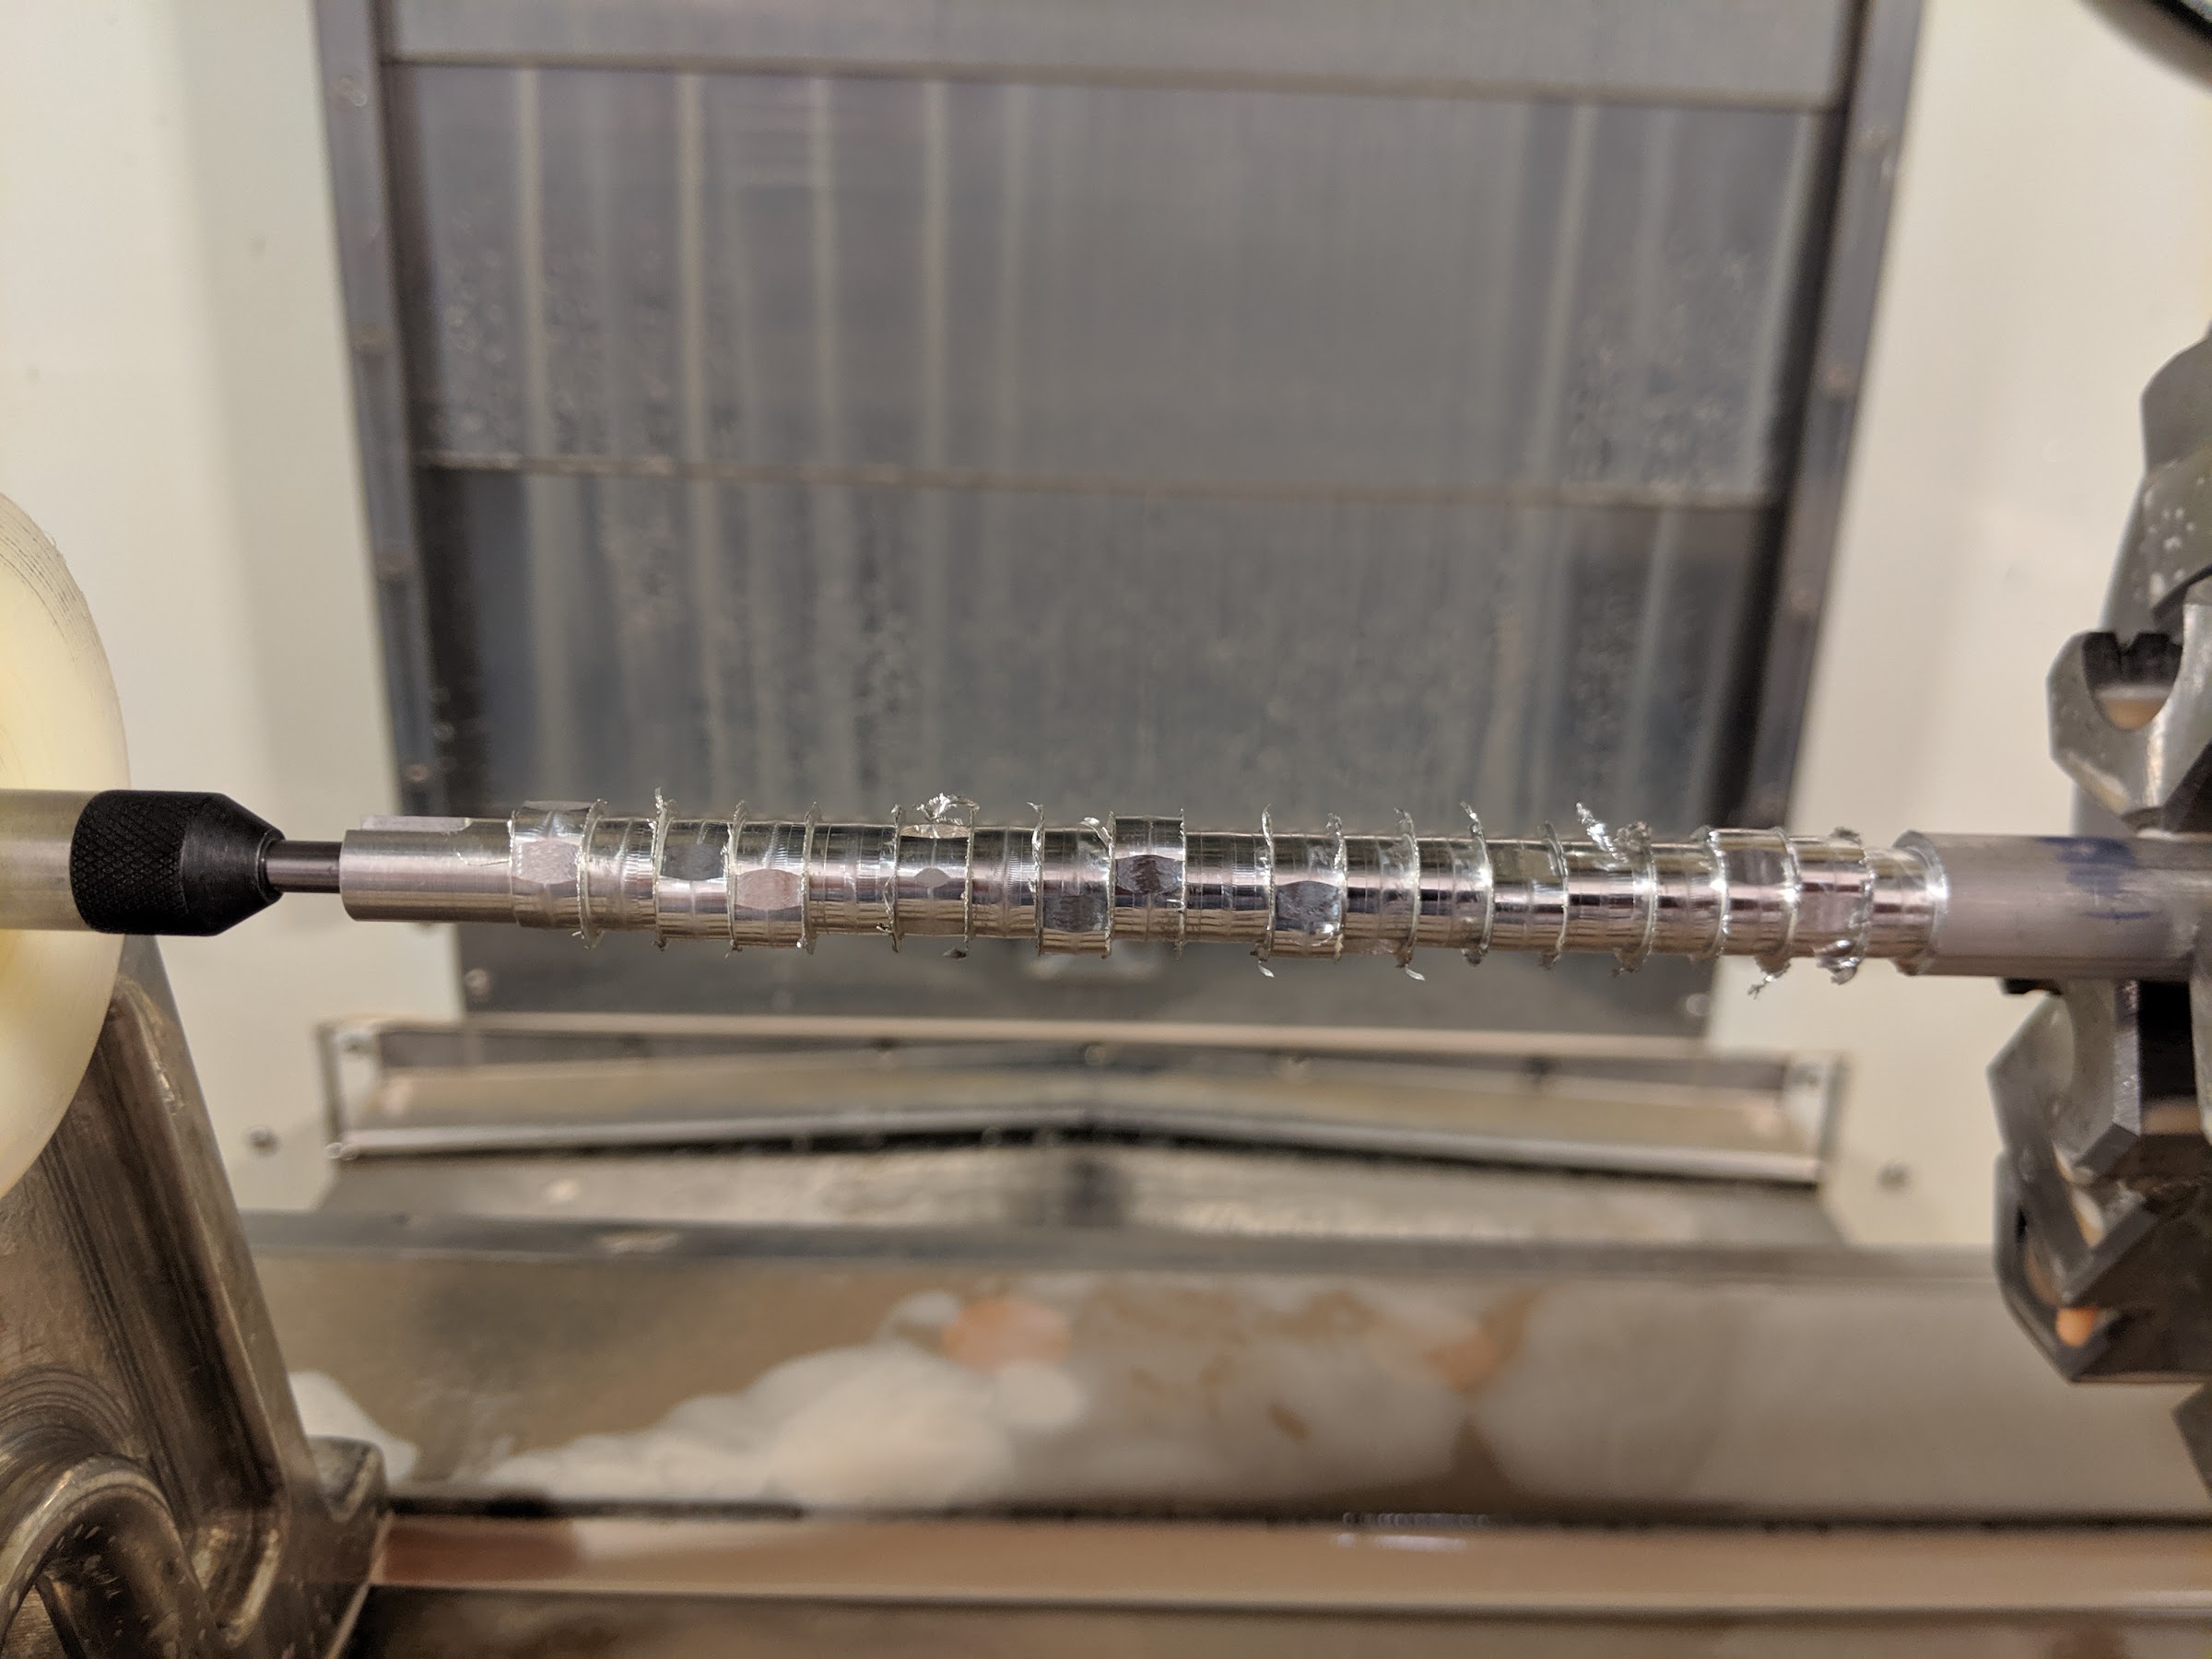
Finally, I've been working on the camshaft. I got one made today using the 4th axis. While I'm happy with the result, milling it this way with an endmill leaves a nasty bur that I'll have to clean up manually. Hopefully more on this tomorrow.
Here are the finished pictures. Sorry no glamor shots, just a couple of cell phone pictures for now.
Finally, I've been working on the camshaft. I got one made today using the 4th axis. While I'm happy with the result, milling it this way with an endmill leaves a nasty bur that I'll have to clean up manually. Hopefully more on this tomorrow.

$49.95
$55.99
DjuiinoStar Hot Air Stirling Engine Assembly Kit: Spend 30 Minutes to Build Your Own Stirling Engine
djuiinostar

$26.89
$34.99
Peachtree Woodworking Supply Bowl Sander Tool Kit w/Dual Bearing Head & Hardwood Handle, 42 Pieces Wood Sander Set, 2 Hook & Loop Sanding Disc Sandpaper Assortment, 1/4 Mandrel Bowl Sander
Peachtree Woodworking Supply Inc

$599.00
$649.00
FoxAlien Masuter Pro CNC Router Machine, Upgraded 3-Axis Engraving All-Metal Milling Machine for Wood Acrylic MDF Nylon Carving Cutting
FoxAlien Official

$19.15
$29.95
Competition Engine Building: Advanced Engine Design and Assembly Techniques (Pro Series)
MBC Inc.

$99.99
AHS Outdoor Wood Boiler Yearly Maintenance Kit with Water Treatment - ProTech 300 & Test Kit
Alternative Heating & Supplies

$45.99
Sunnytech Mini Hot Air Stirling Engine Motor Model Educational Toy Kits Electricity HA001
stirlingtechonline

$180.58
Replacement For/Fits A152179 Tractor Water Pump Fits 770 870 970 1070
Astra Tech Global Corp
It's been a few days, but I have progress to report. Two blocks are completed. I decided to go ahead with the final operations on the flawed block and the "good" one. It turned out to be really helpful to have a test mule for the other operations so that if anything went wrong, I could fix the problems before running the good one. Anyway, I used the bandsaw to separate the block from the parent stock and then started the machining on both ends.


Here are the finished pictures. Sorry no glamor shots, just a couple of cell phone pictures for now.


Finally, I've been working on the camshaft. I got one made today using the 4th axis. While I'm happy with the result, milling it this way with an endmill leaves a nasty bur that I'll have to clean up manually. Hopefully more on this tomorr
Hi Bhusted
What program do you use to create Gcode for camshaft?
Hi Bhustet
What program do you use to create Gcode for camshaft whit the 4th axis ?
congratulations for your great work
What program do you use to create Gcode for camshaft whit the 4th axis ?
congratulations for your great work
When the program and tooling and workholding and setup are right, the CNC can look easy, but I've learned that all of those are far from being easy. Just because it works in the computer simulation doesn't necessarily mean that's what it will spit out. This was certainly designed with CNC work in mind.
The camshaft right now is aluminum. I'm debating what material to go with, but wanted to do a test run of the setup and the code today. Since this is just a model, the aluminum camshaft will be more than adequate, but kind of feels like cheating. I don't want to just use steel because it will develop rust over time. Maybe I stick with the aluminum one, maybe 303SS?
All of the design and programming for this project is done in Fusion360.
I was planning on spending this morning deburring my practice camshaft and the engine block, but decided that I'd rather make more parts. I got all of the main bearings done.
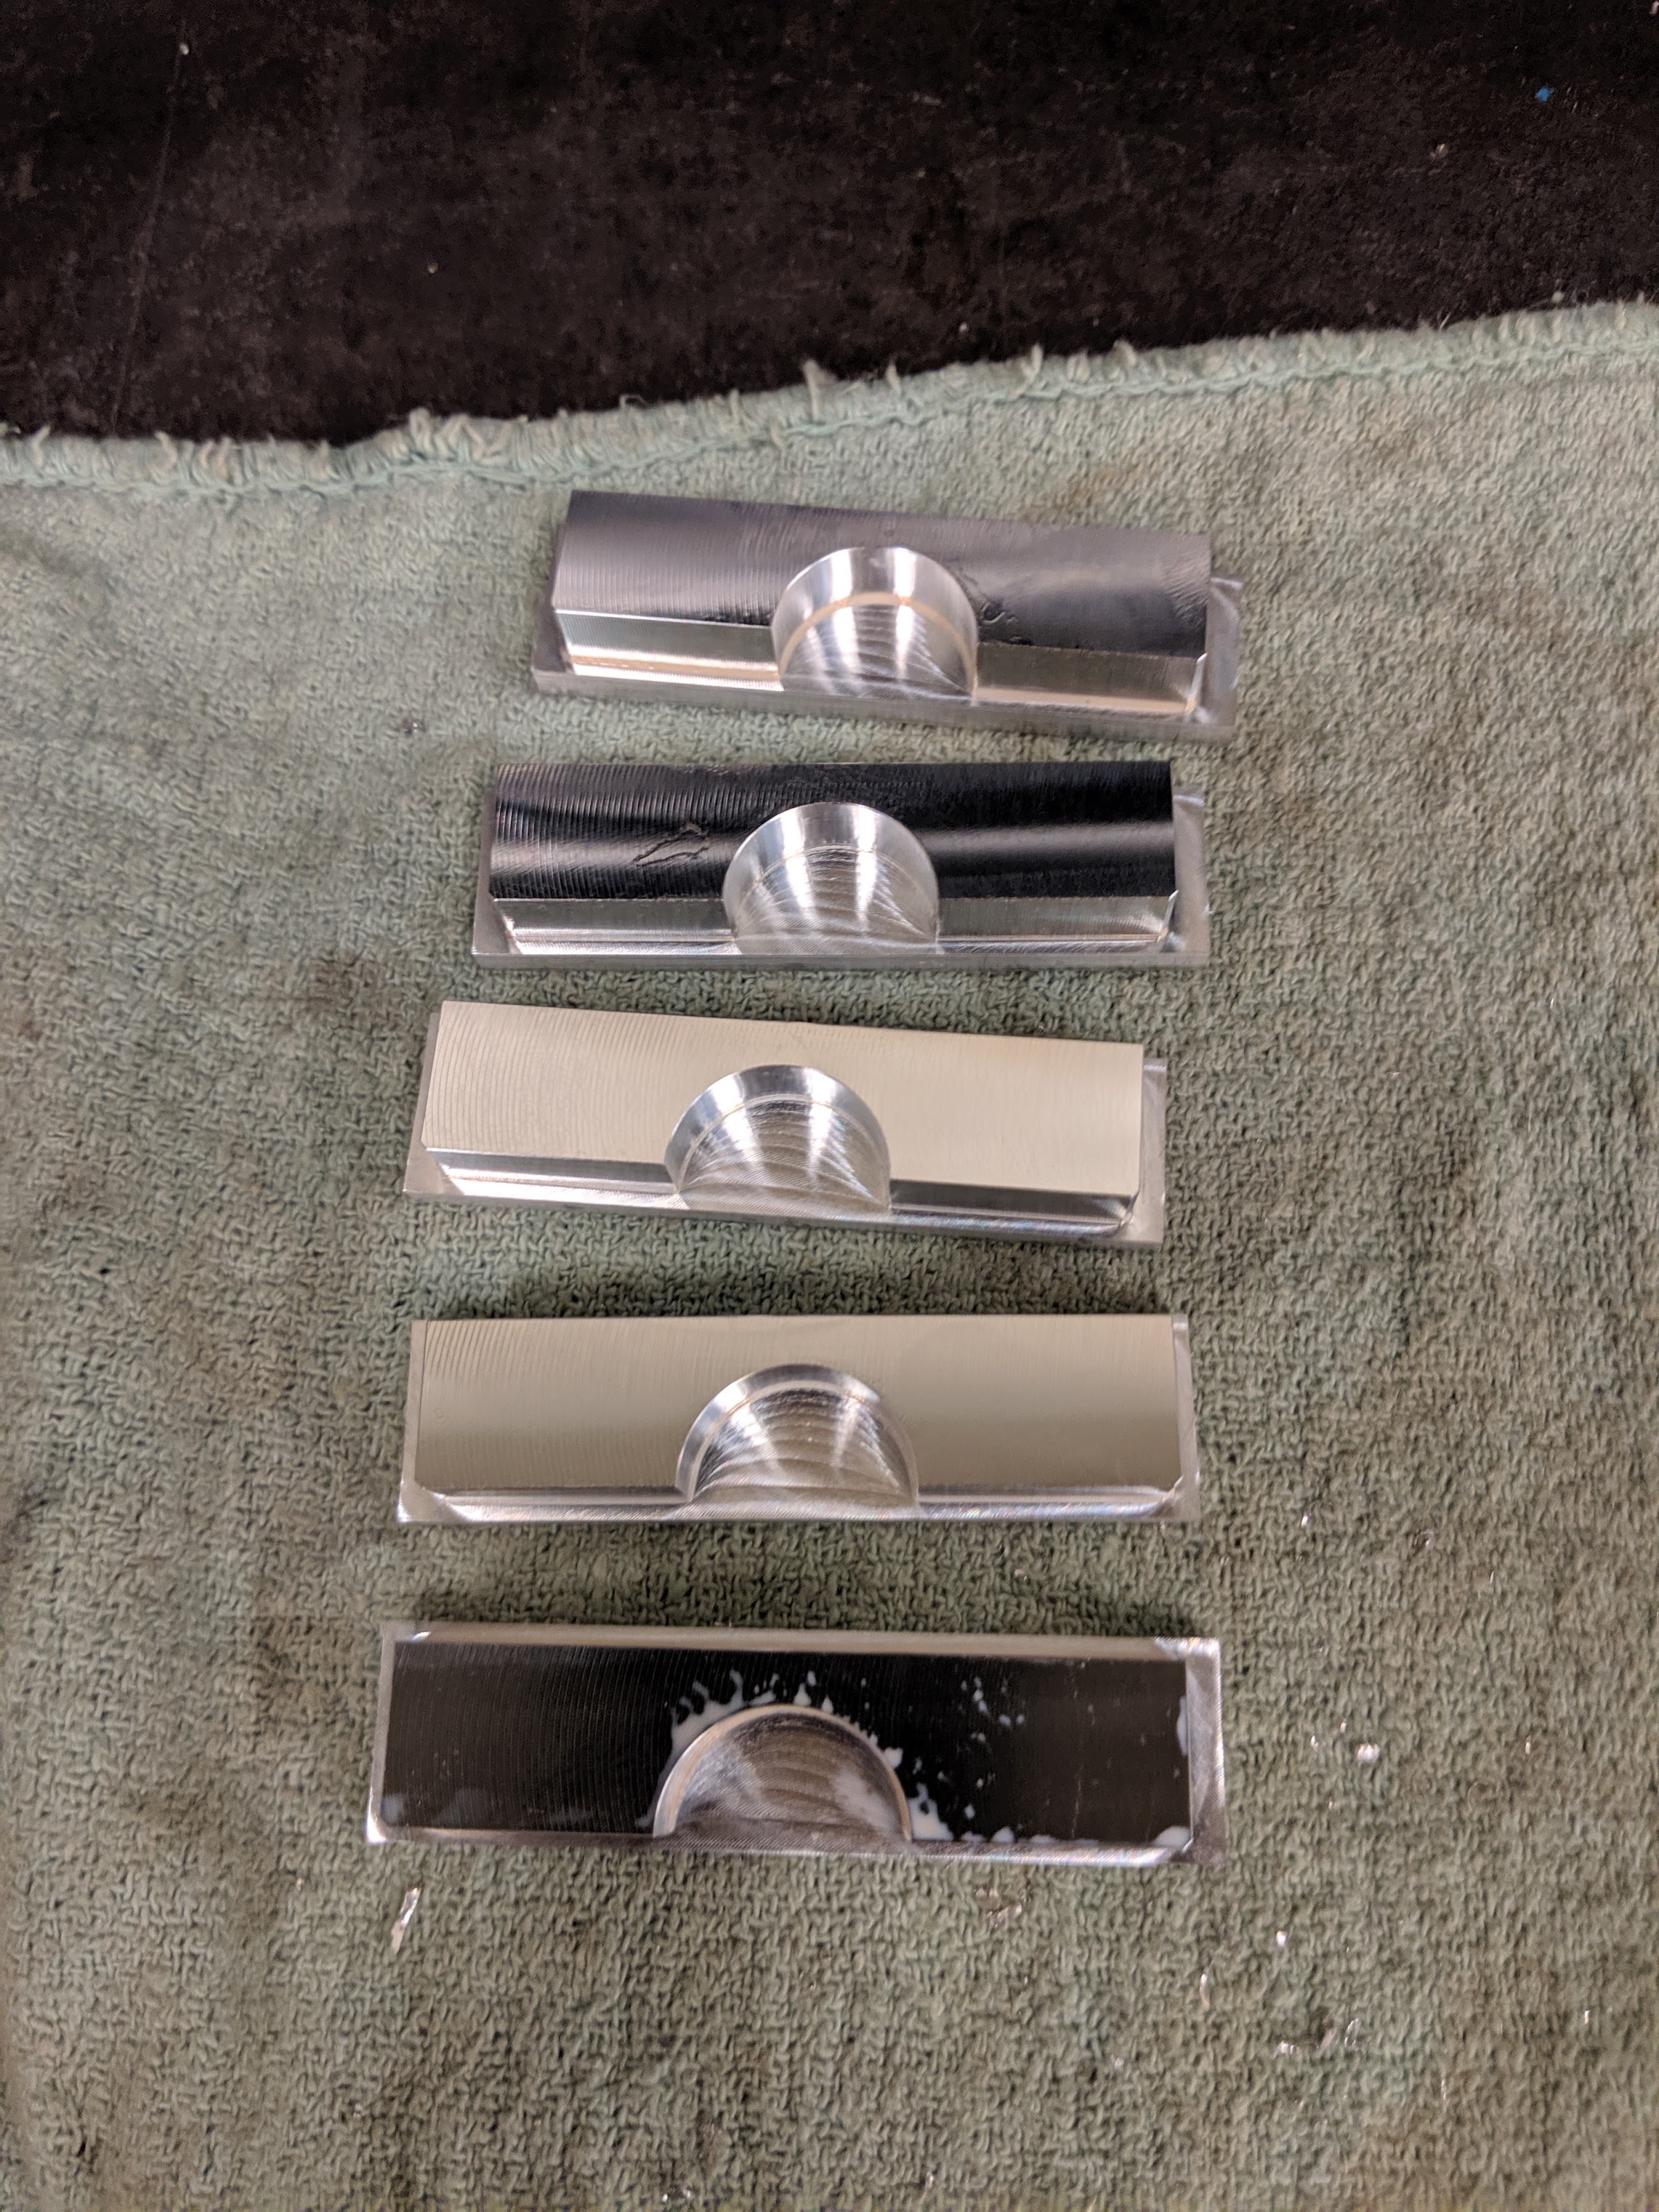
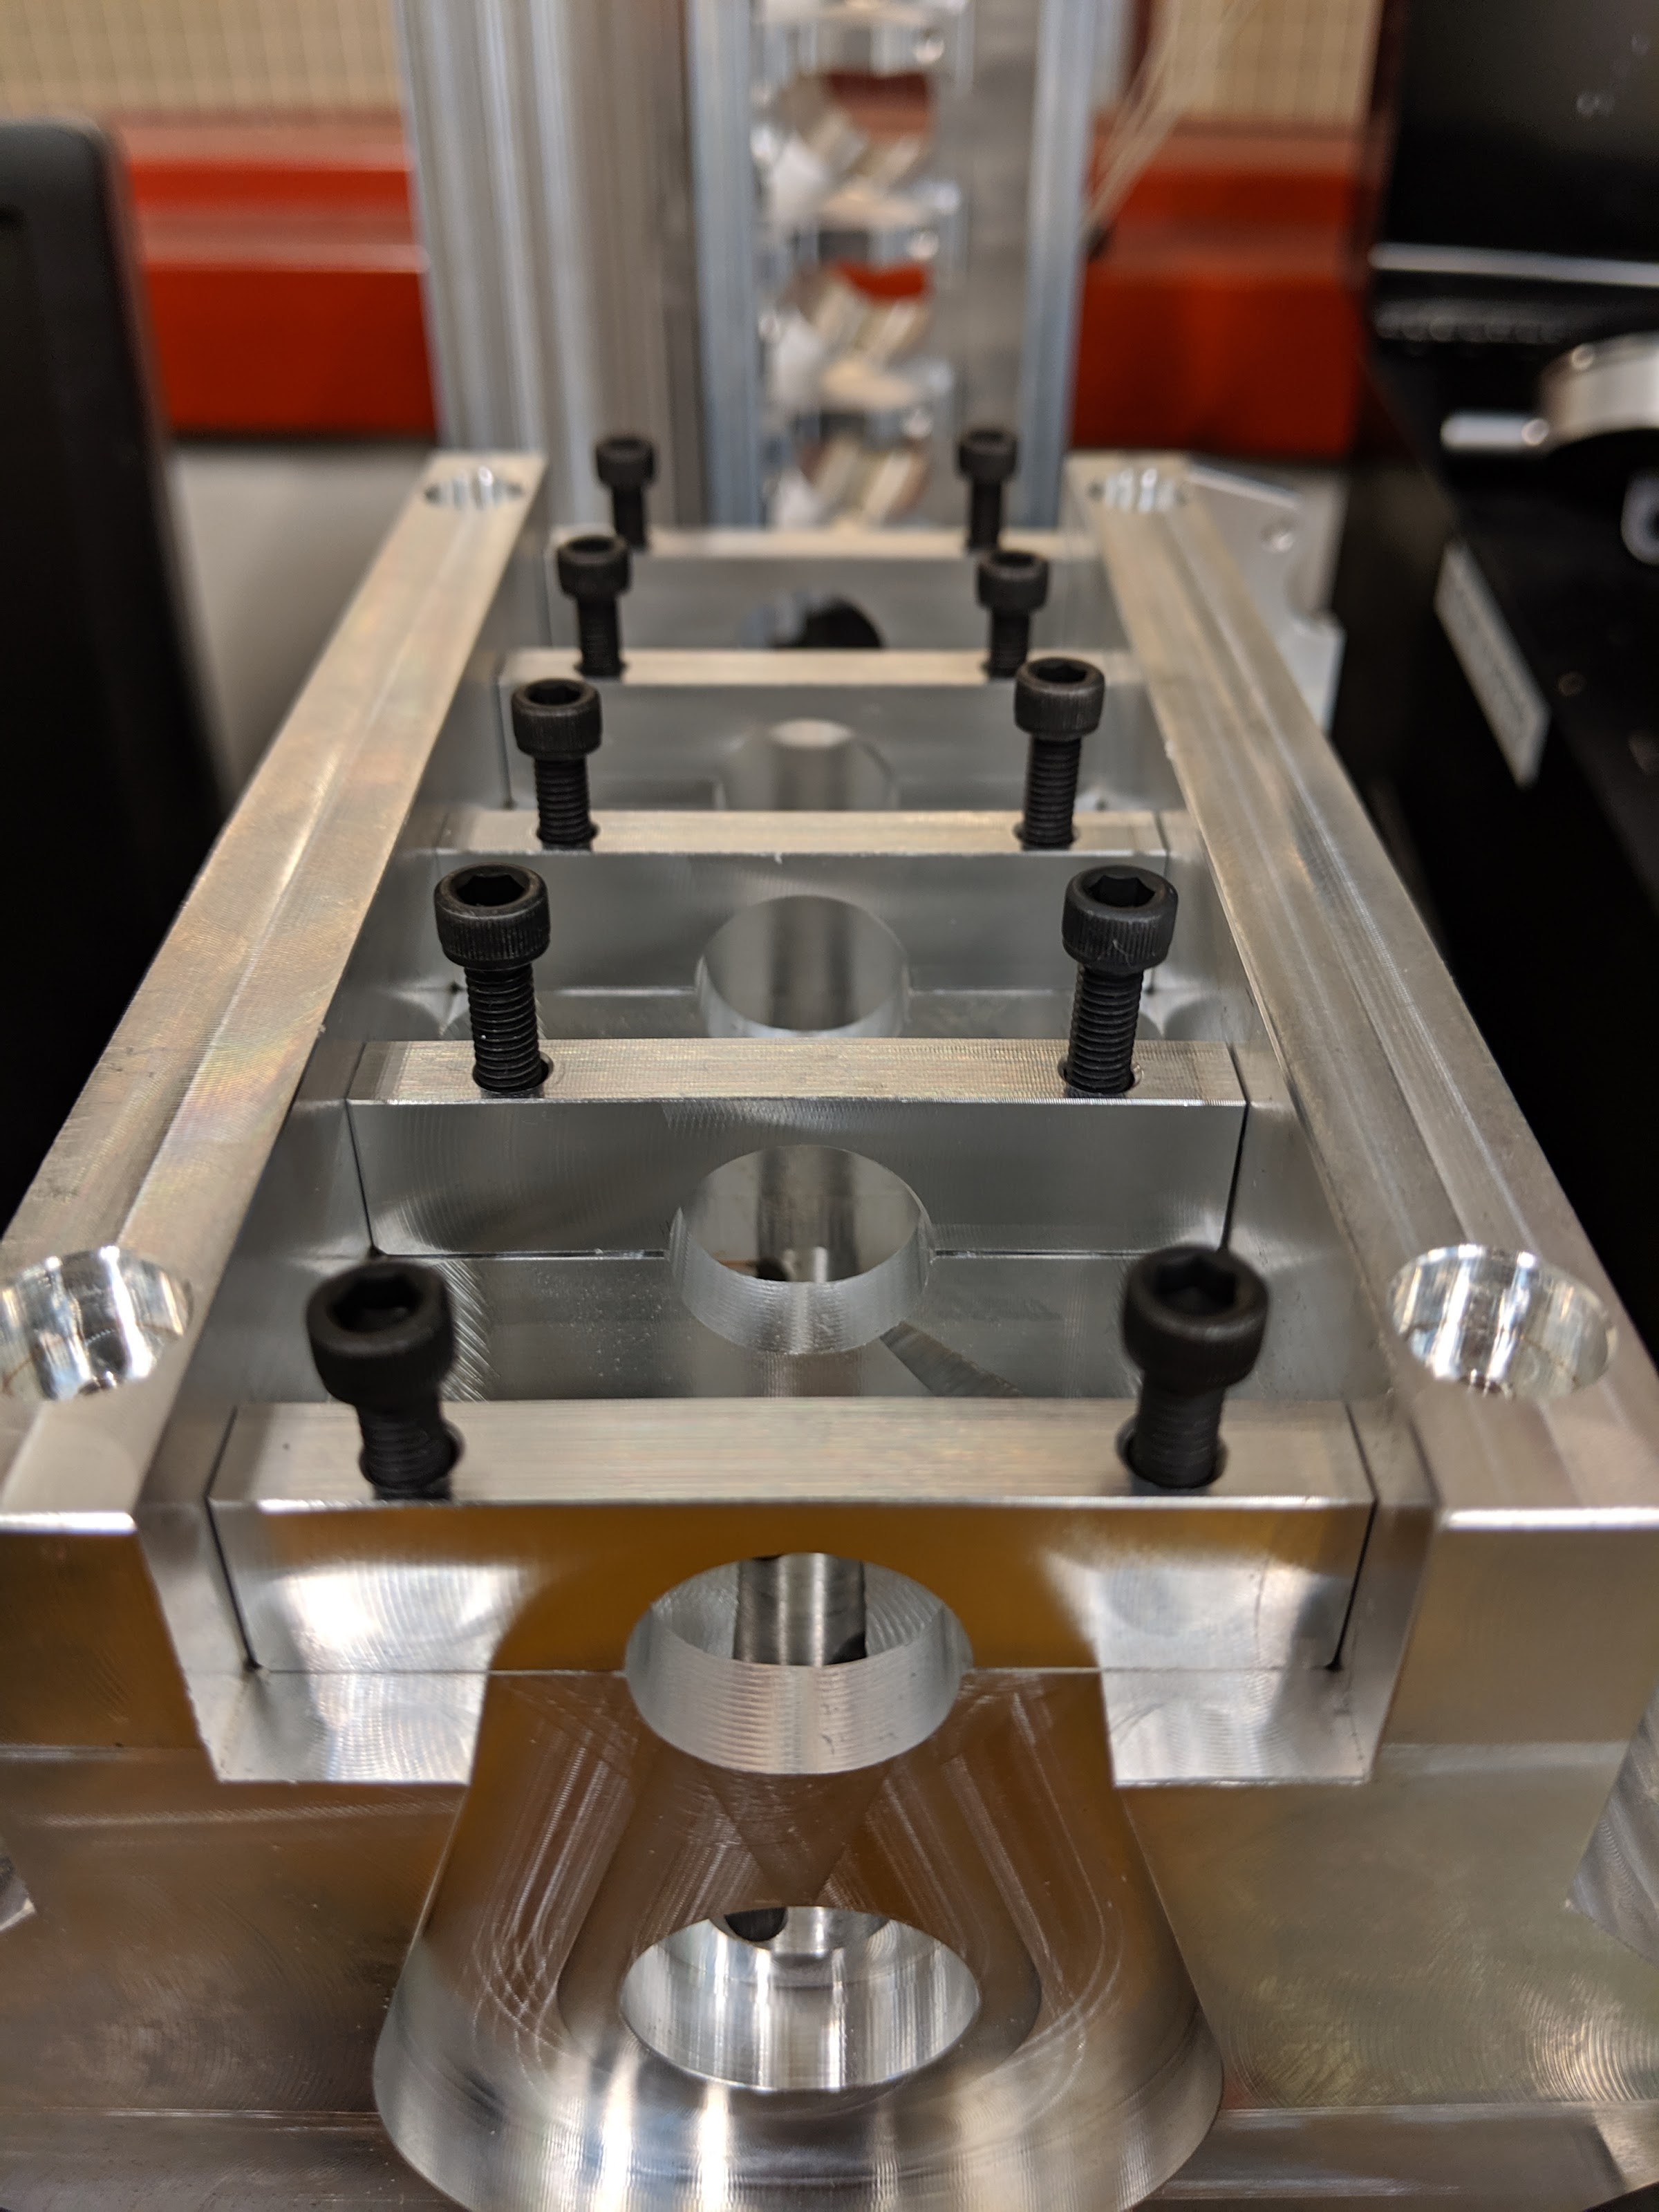
The mains didn't take long, so I worked on the connecting rods. I was really happy with how it was coming out until I looked at the fit of the cap...
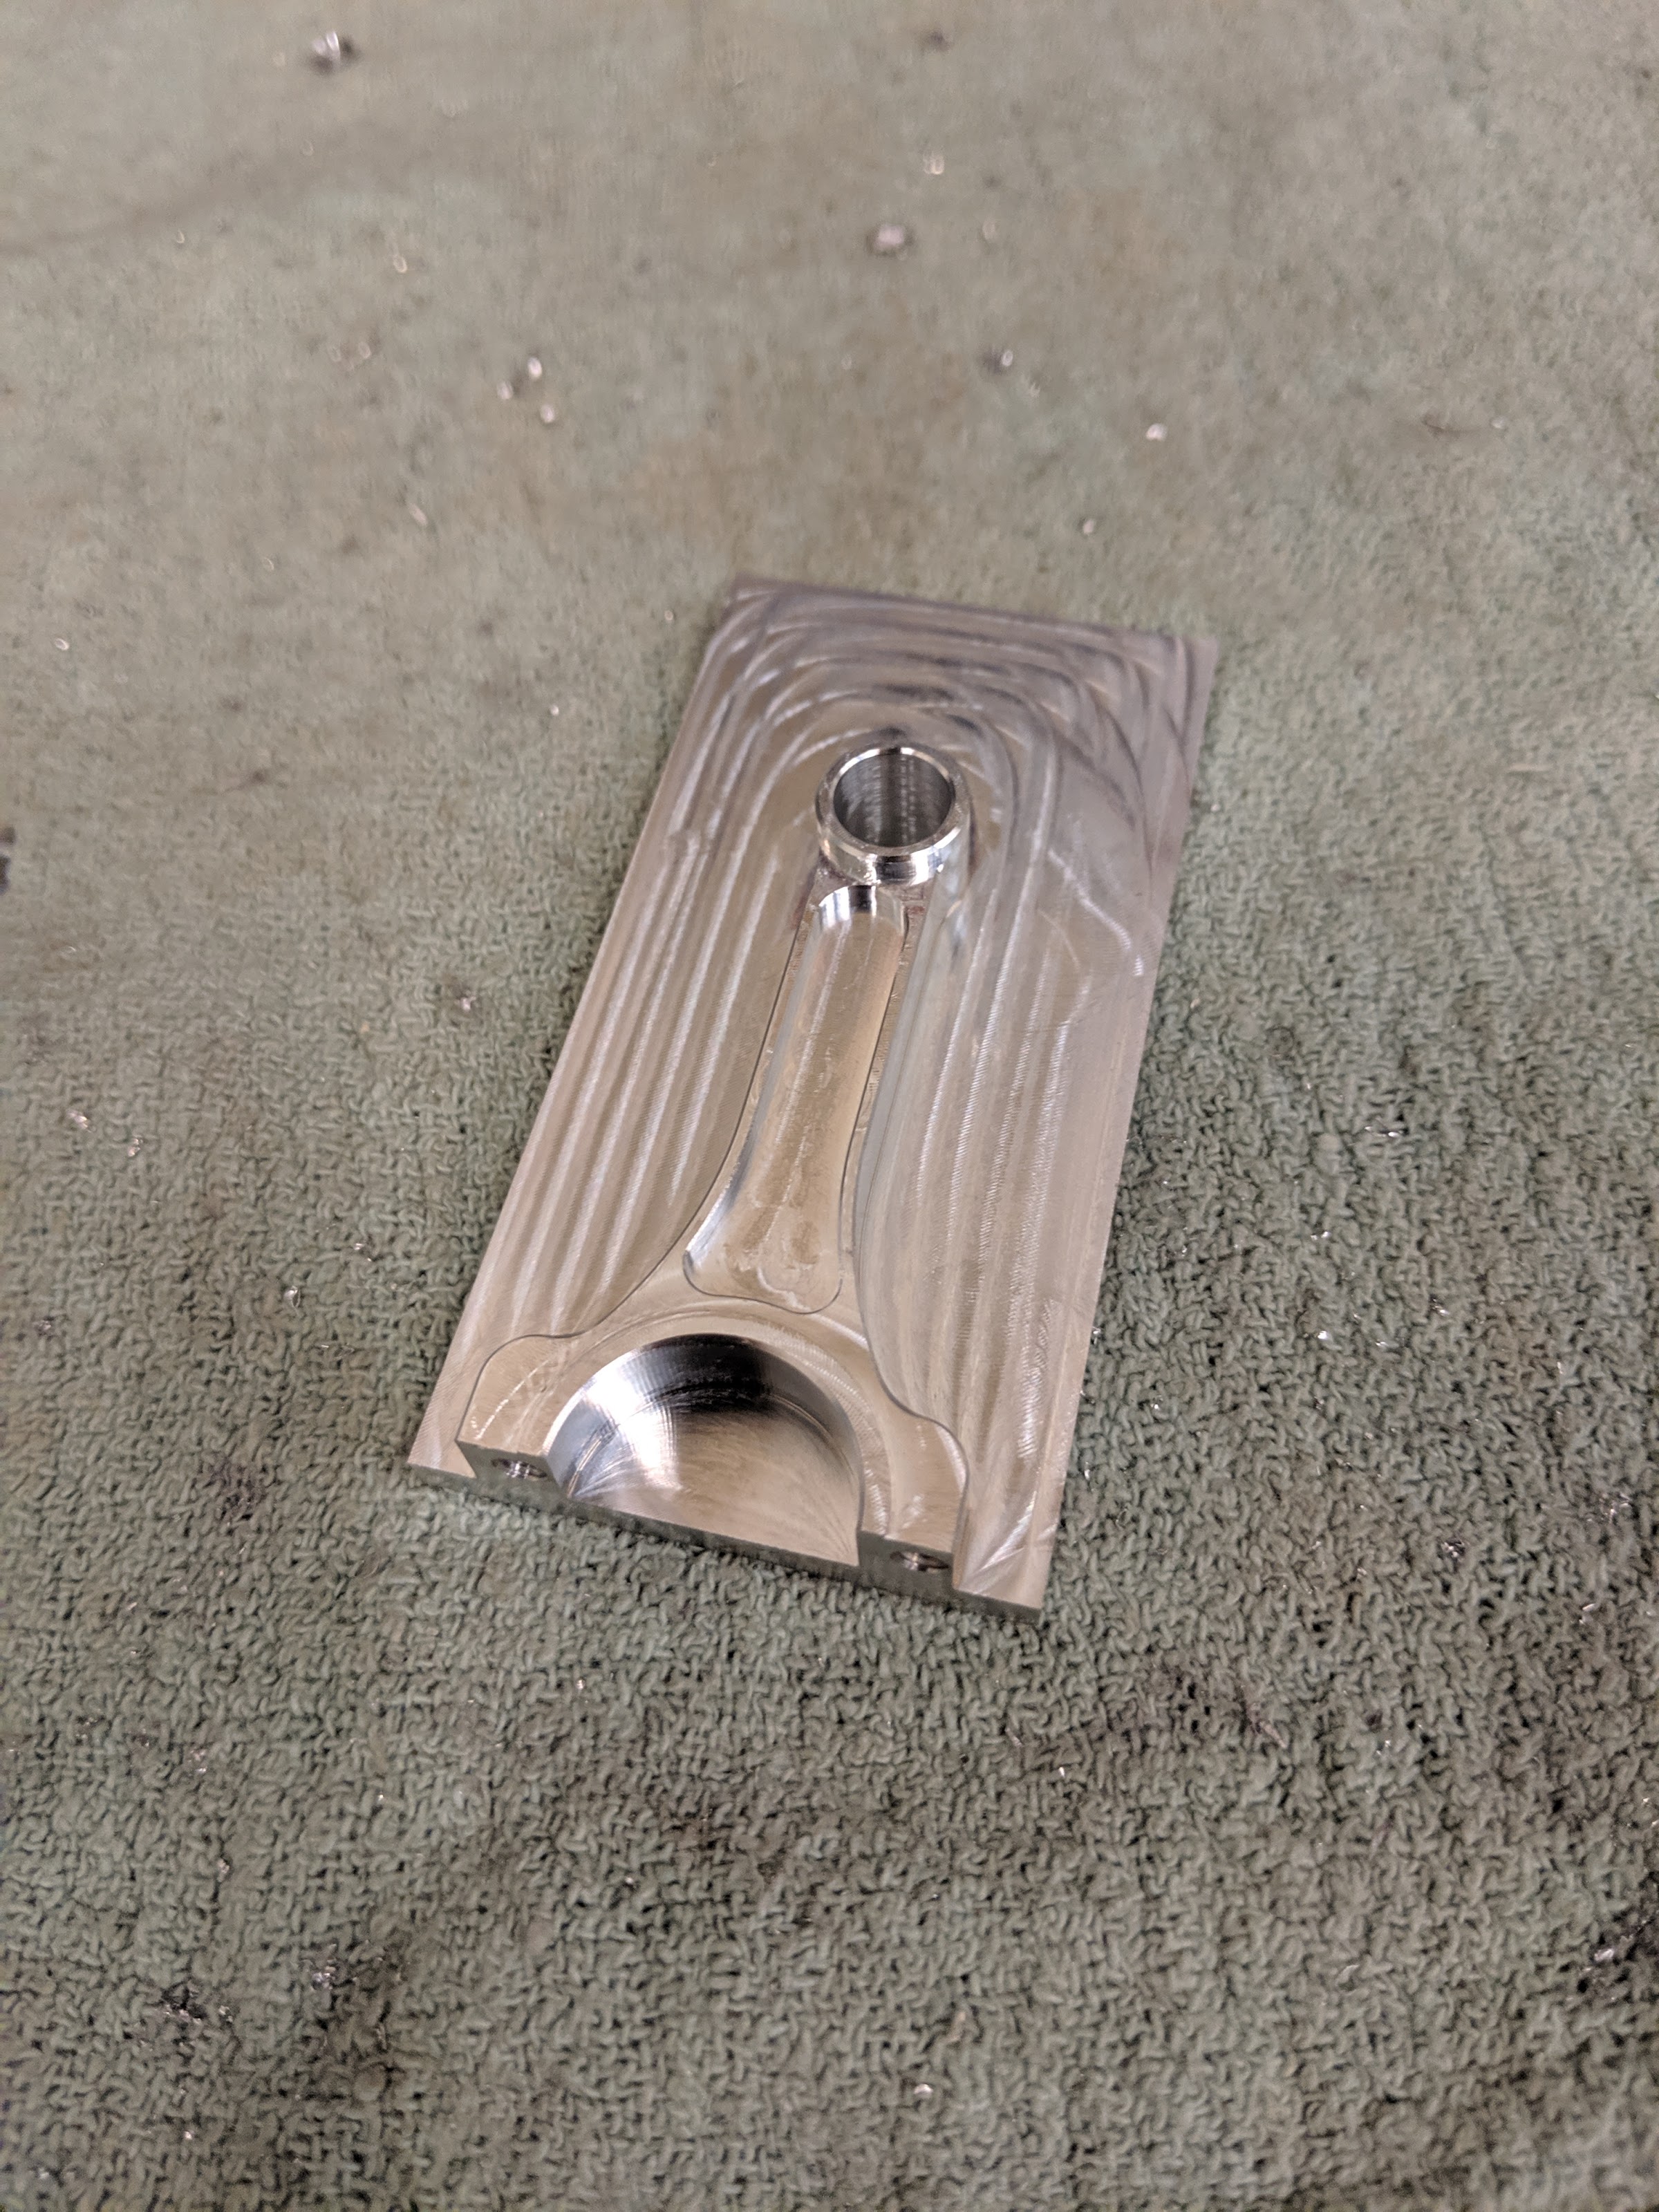
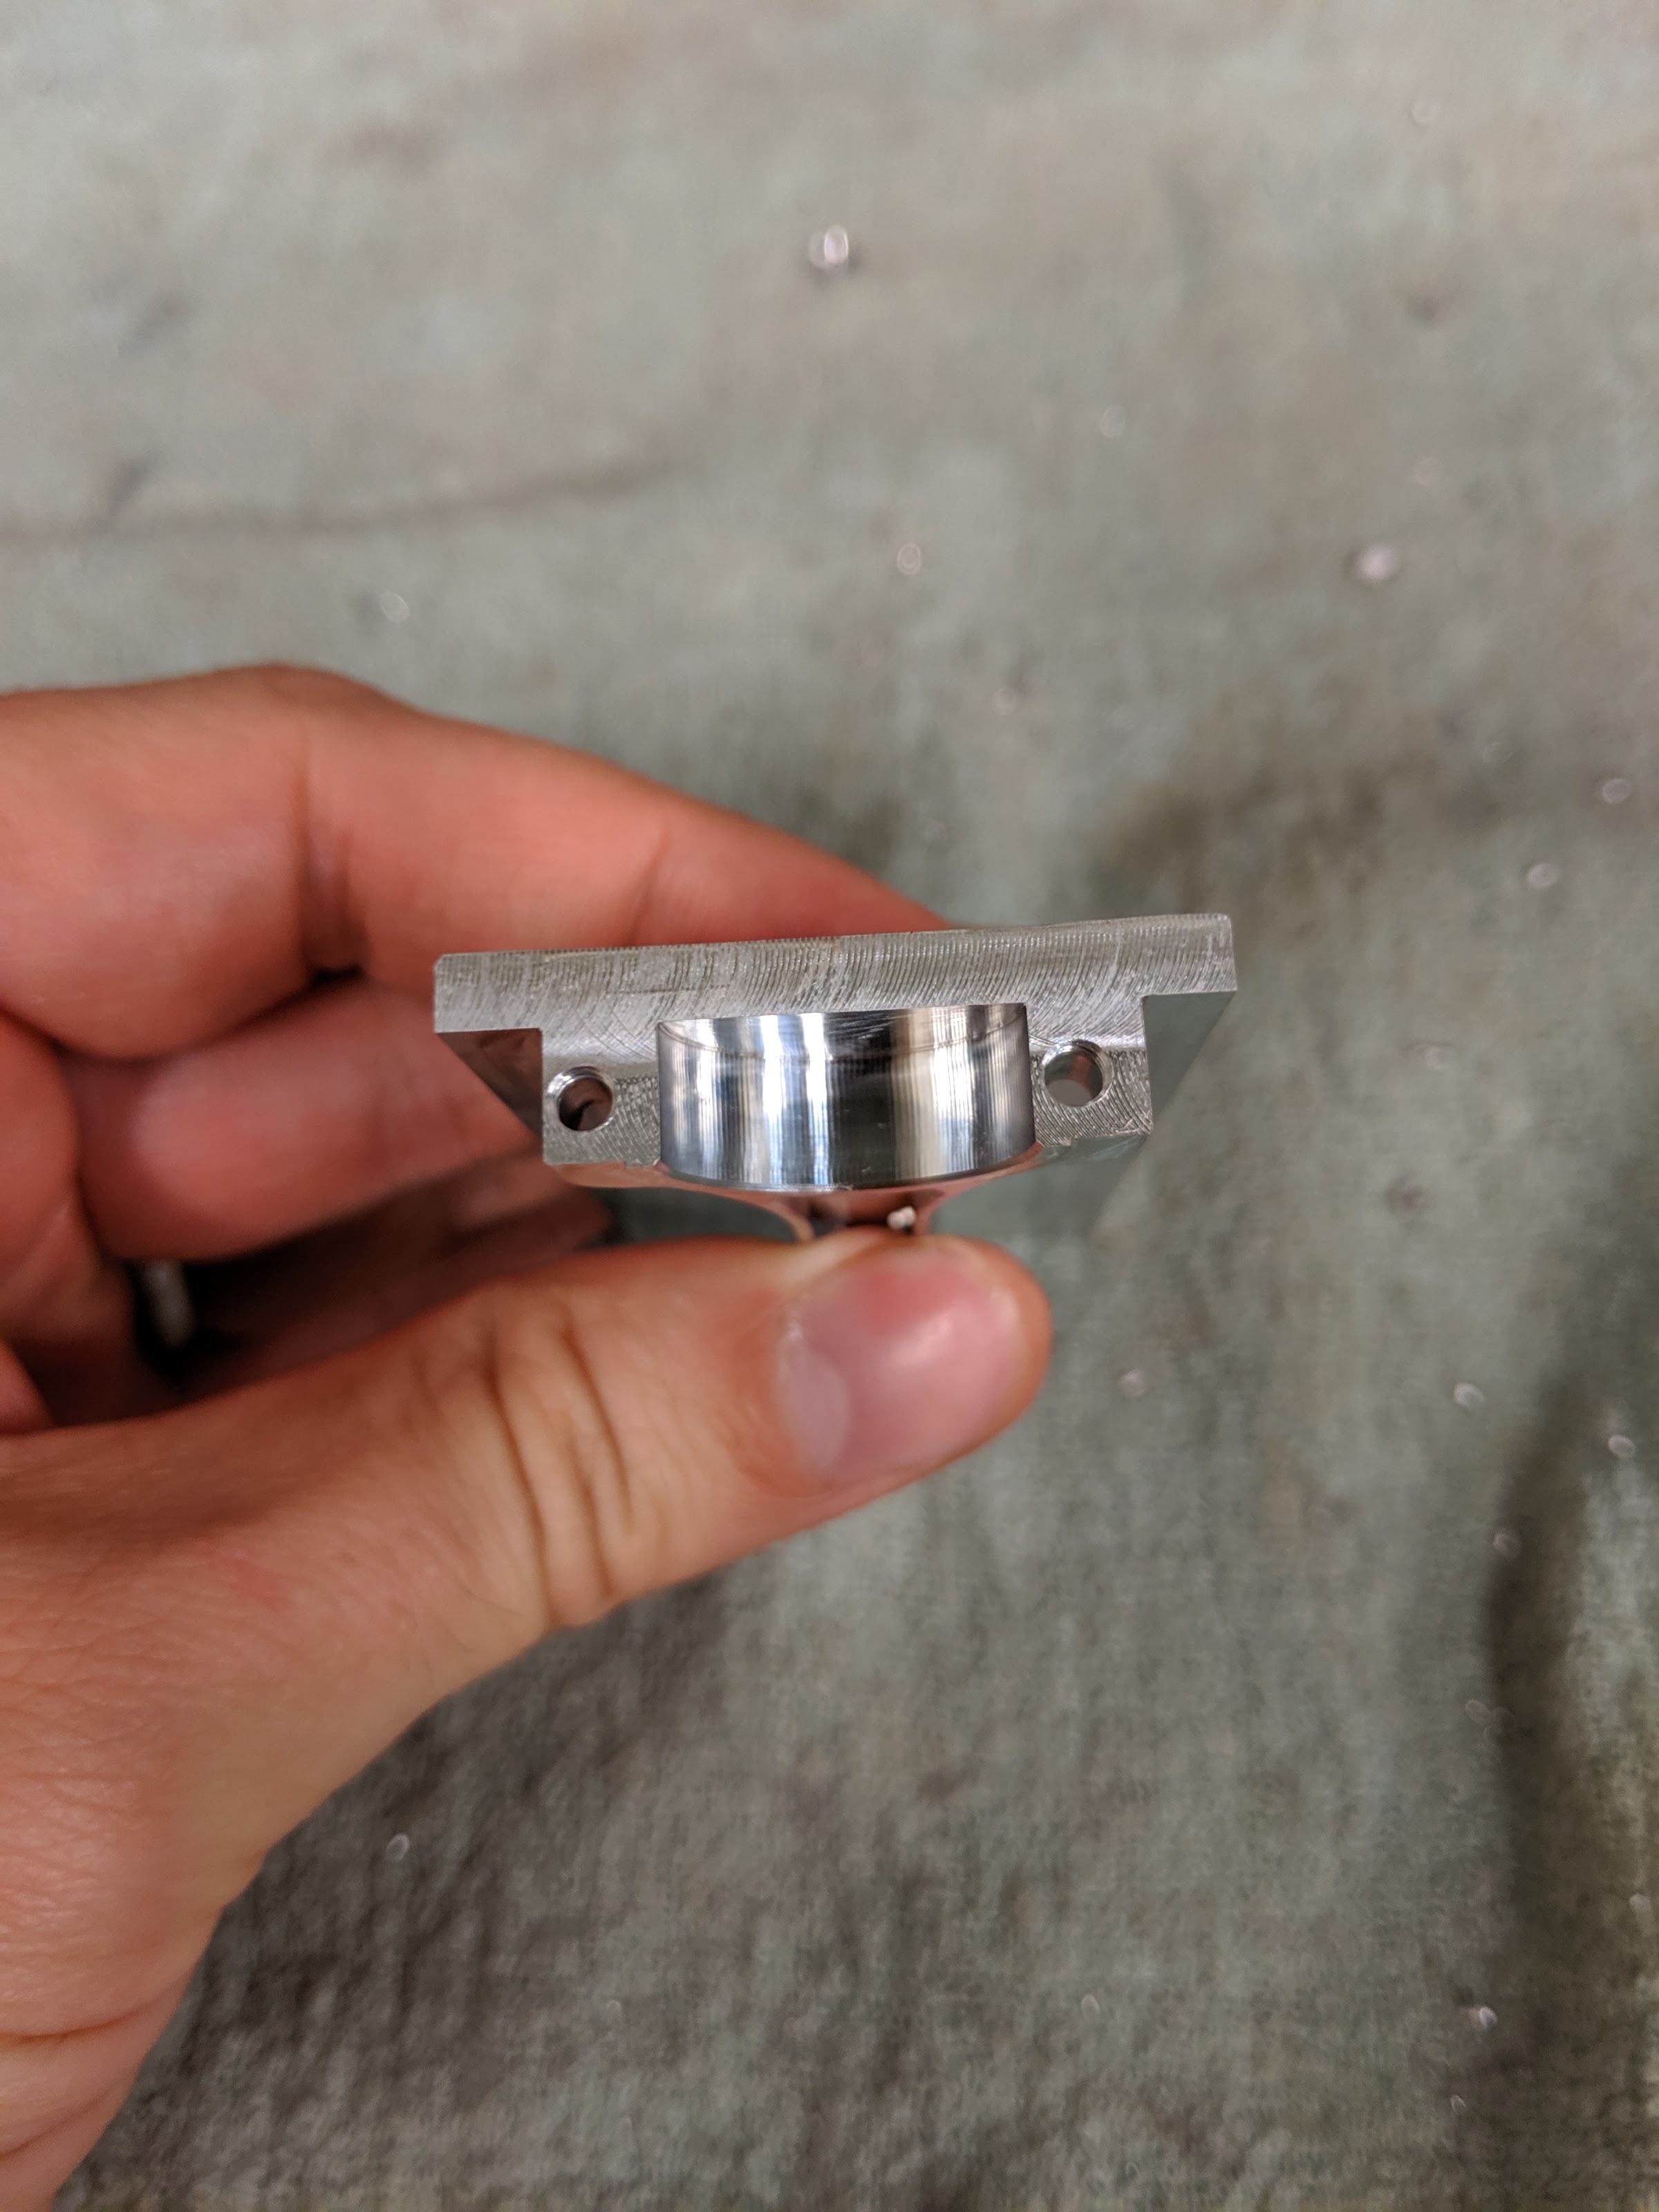
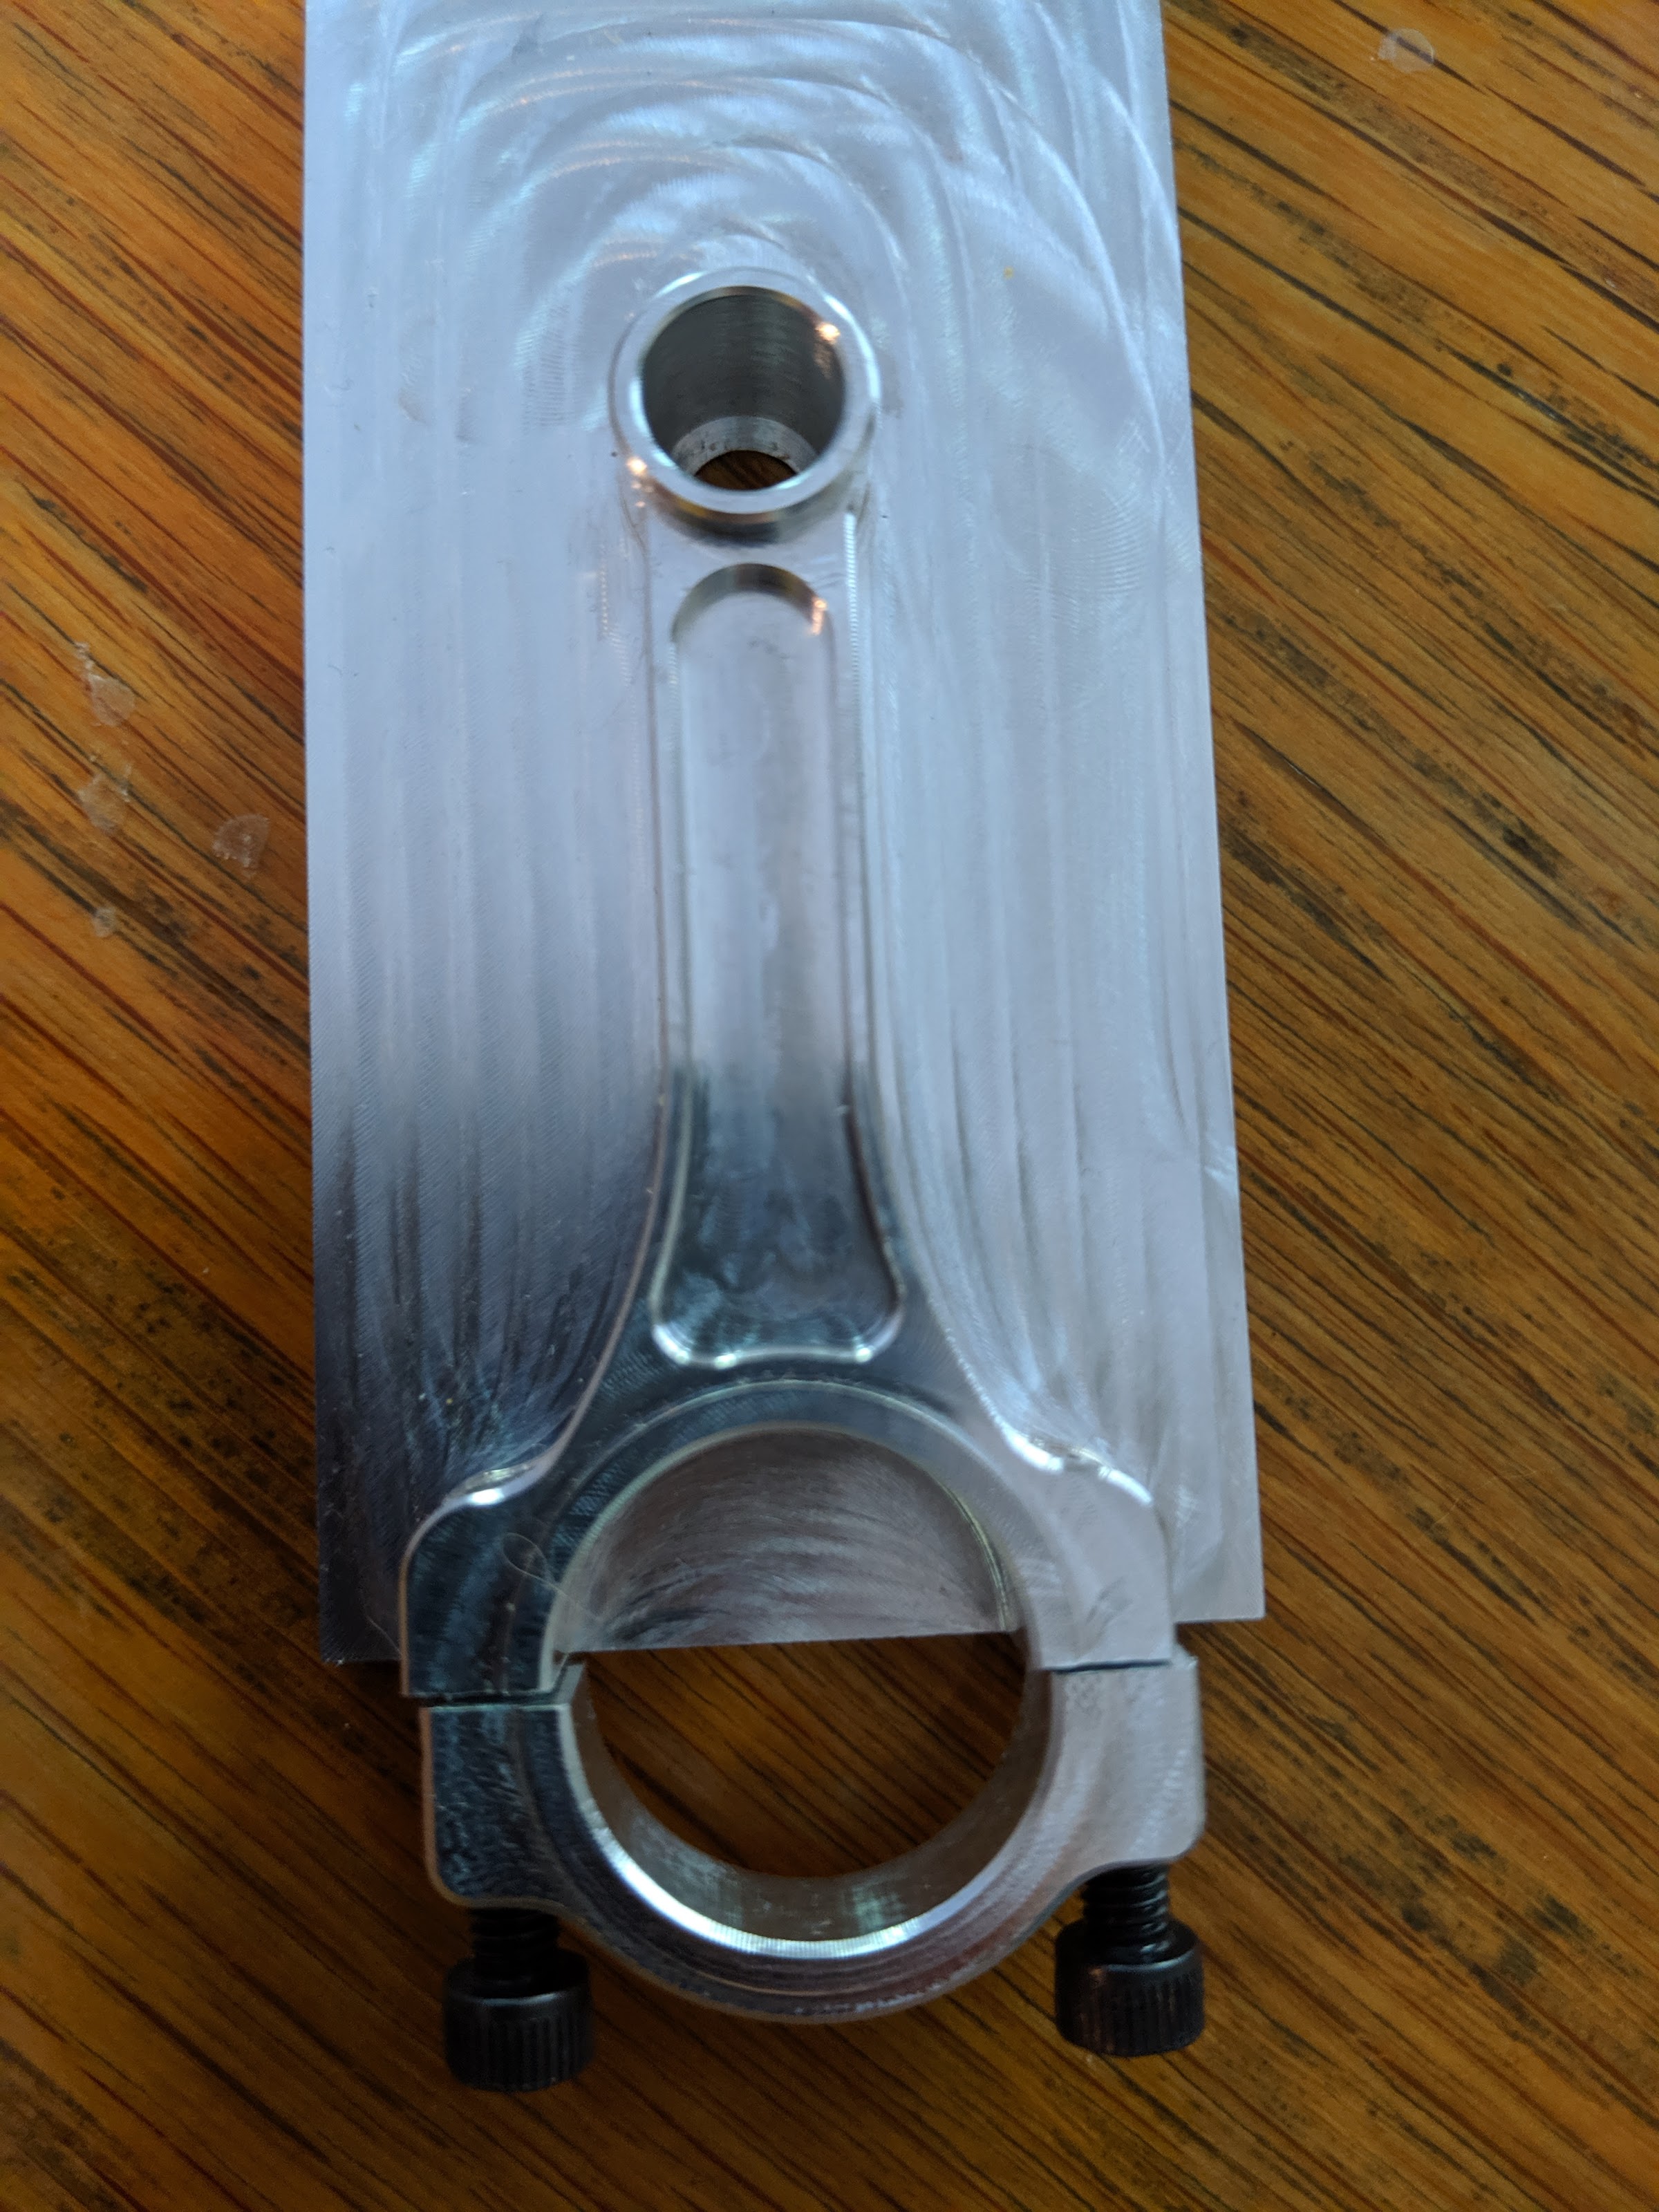
Somehow my stop must have moved, so the tapped holes do not align with the bearing cap. The issue is obviously with the rod and not with the cap, so I'll try again on Monday. Then I'll need to cut some soft jaws for machining the other side of the connecting rod.
The mains didn't take long, so I worked on the connecting rods. I was really happy with how it was coming out until I looked at the fit of the cap...
Somehow my stop must have moved, so the tapped holes do not align with the bearing cap. The issue is obviously with the rod and not with the cap, so I'll try again on Monday. Then I'll need to cut some soft jaws for machining the other side of the connecting rod.
The connecting rods are nearing completion. I did some testing this morning to make sure that I didn't get the same offset issue I had previously and things were looking good.
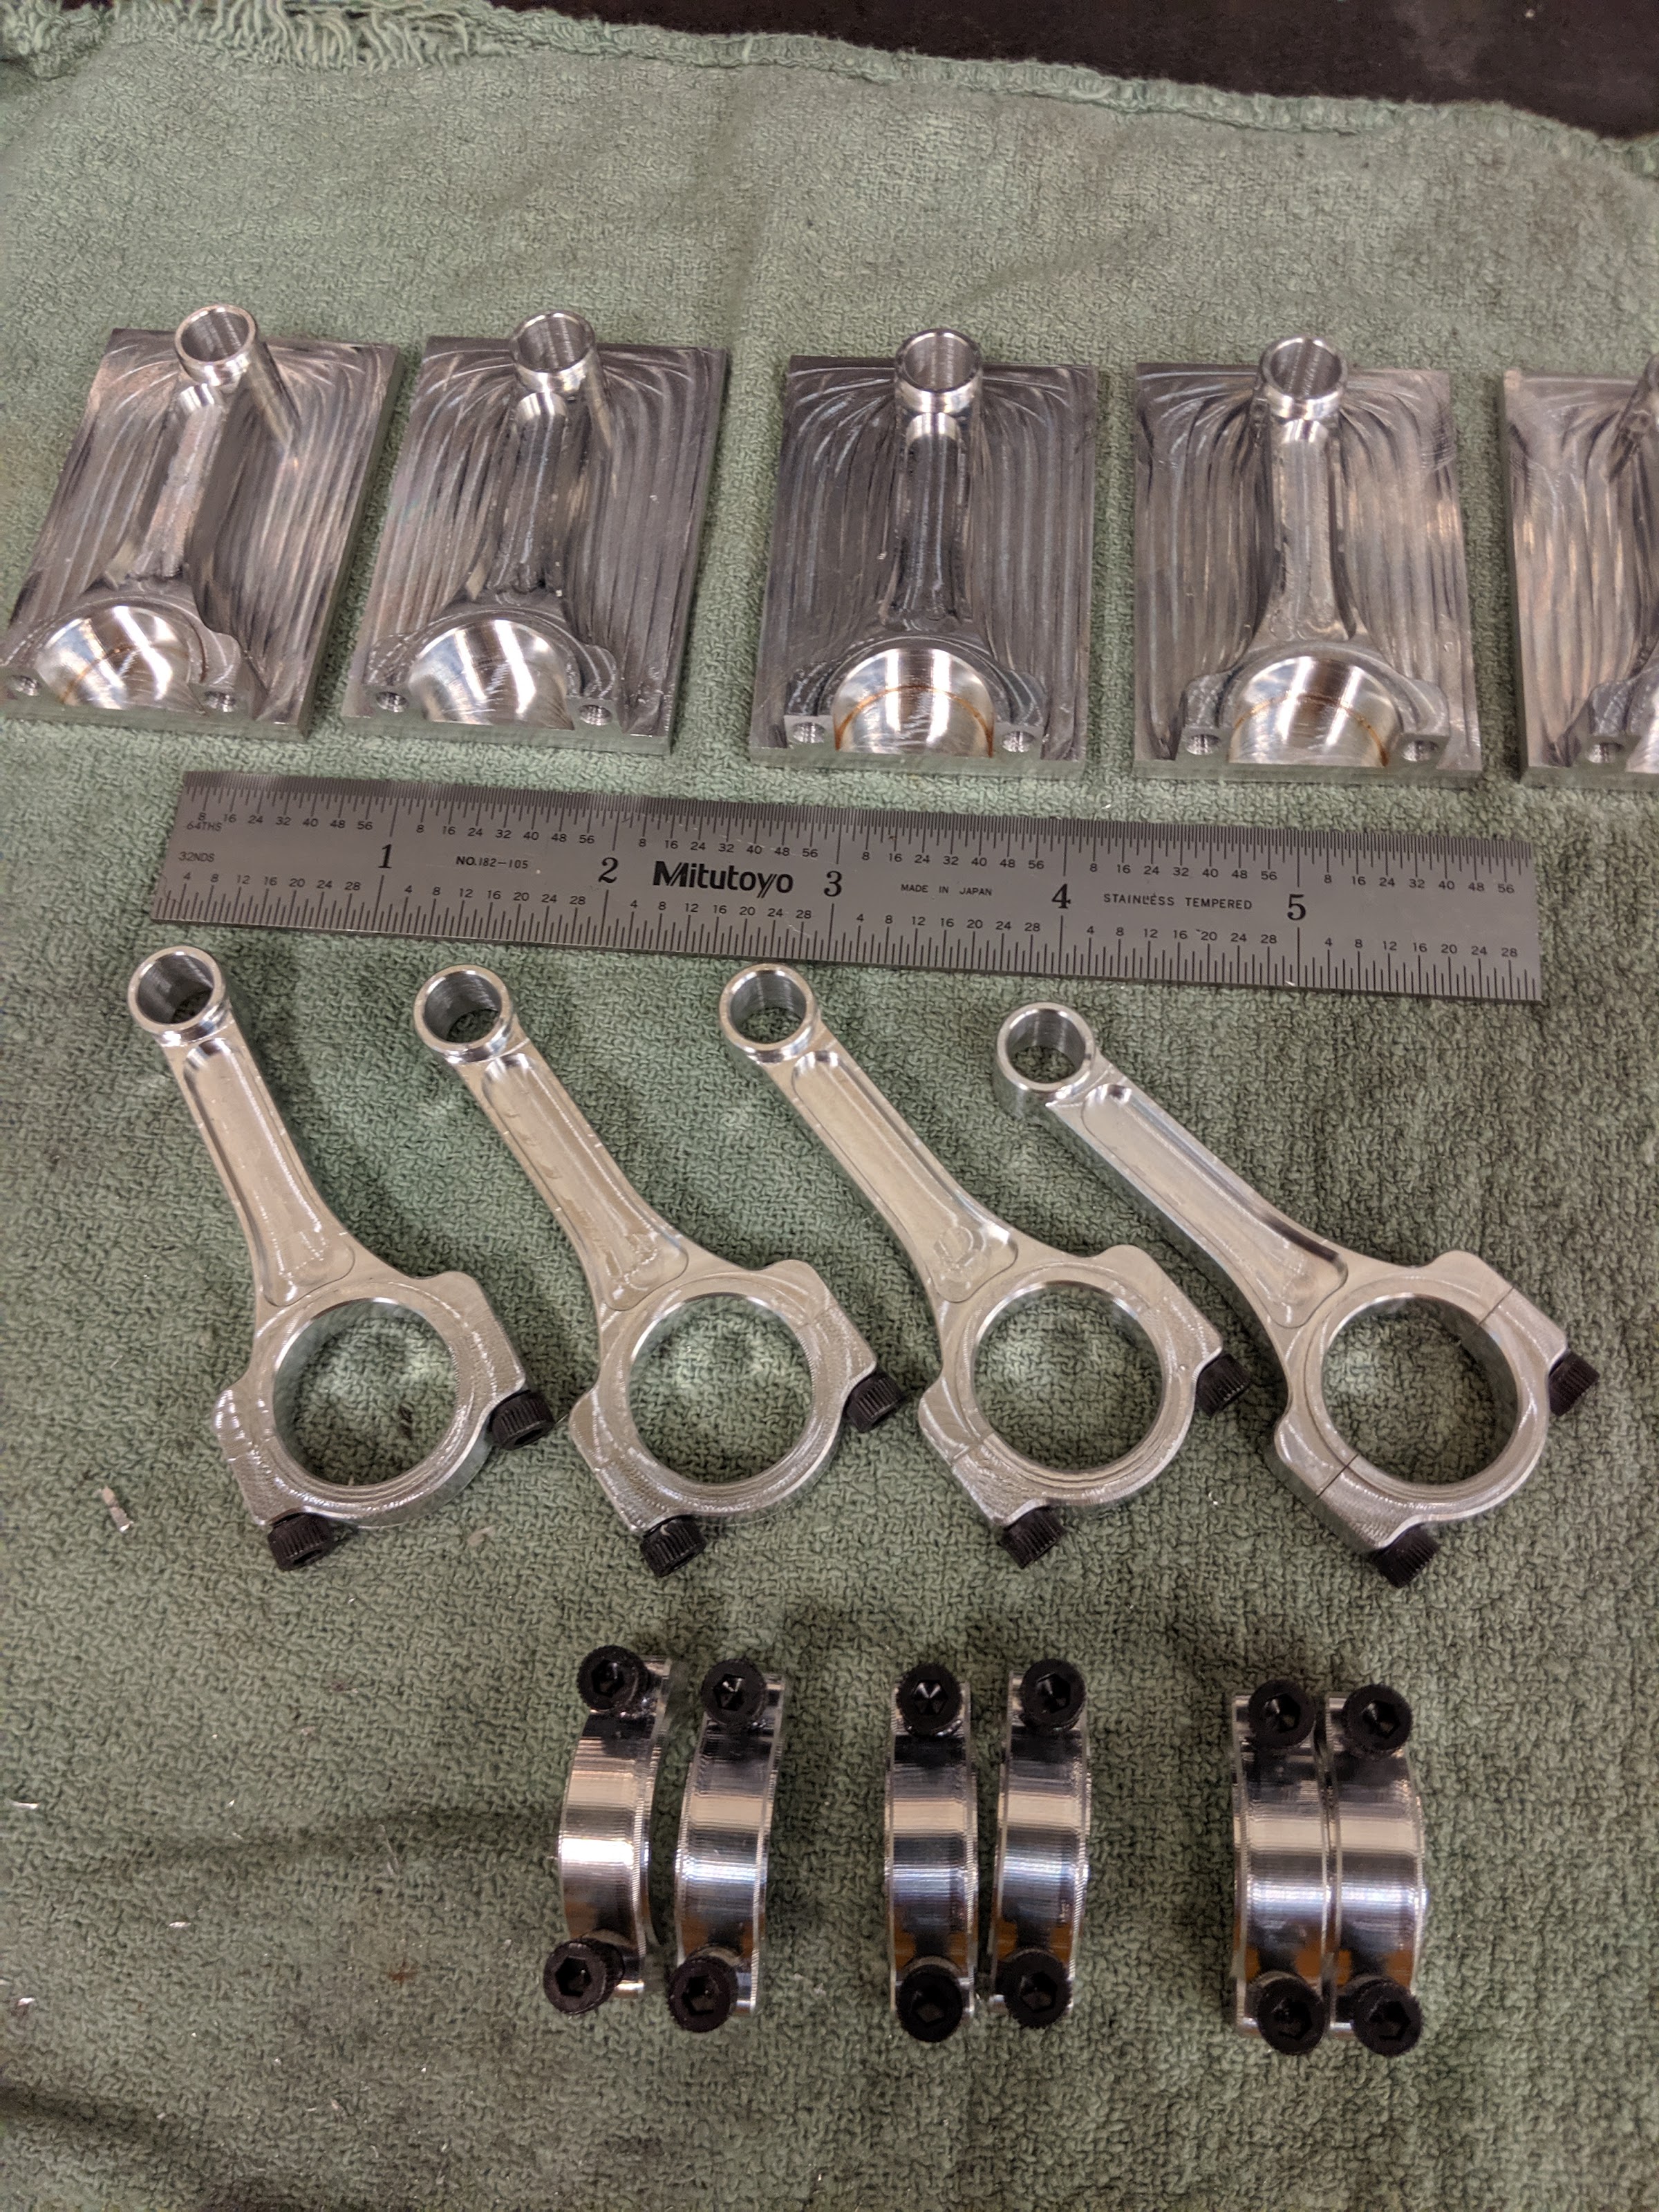
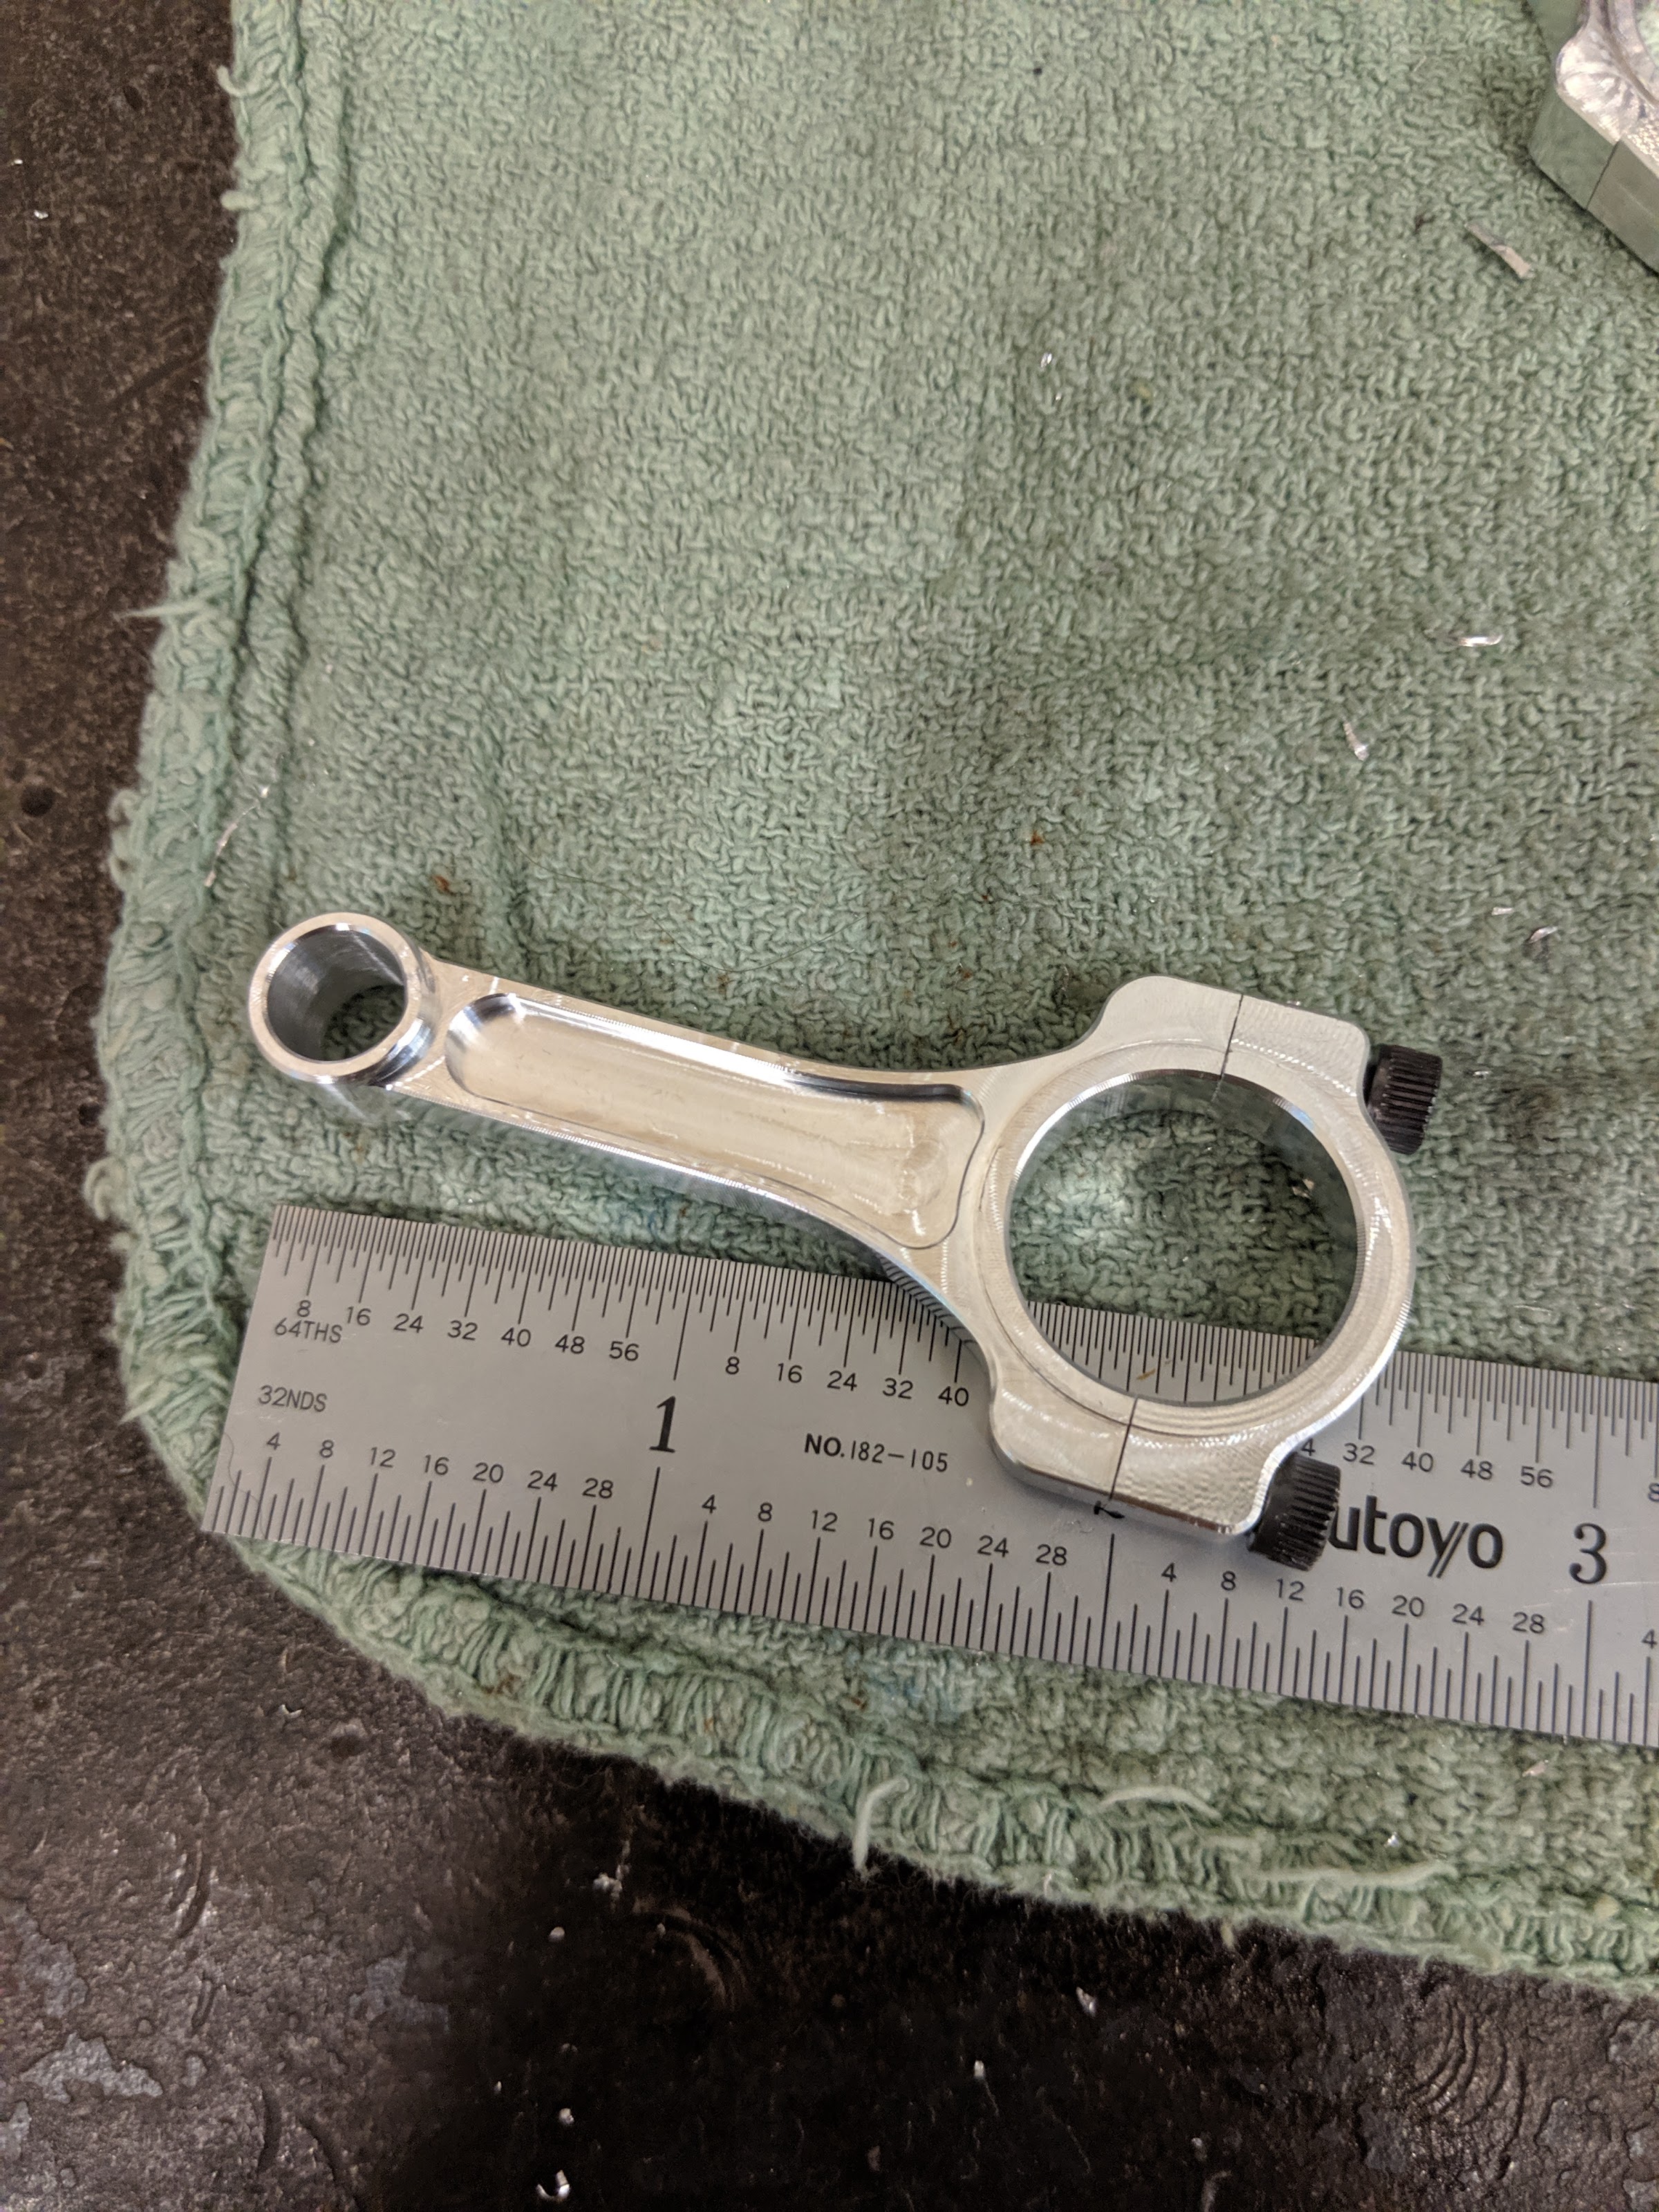
There is still a little work to do on the rods before they are completely done, but we're getting closer. With the longish cycle time (~9 minutes/side) for the second and third operations on the rods, I occupied my time deburring the camshaft and engine block.
There is still a little work to do on the rods before they are completely done, but we're getting closer. With the longish cycle time (~9 minutes/side) for the second and third operations on the rods, I occupied my time deburring the camshaft and engine block.
Very nice looking rods!
doing a fine job. keep the pictures coming.
Thanks guys. Today was productive, but not a lot to show. I started by finishing up the connecting rods. There were just a couple more to run for the third operation from yesterday. The hole where the rod connects to the crank was just interpolated with an endmill and still needed to be reamed to final size. I modified my soft jaws and ran the final operation. Everything turned out great, so the rods are officially finished.
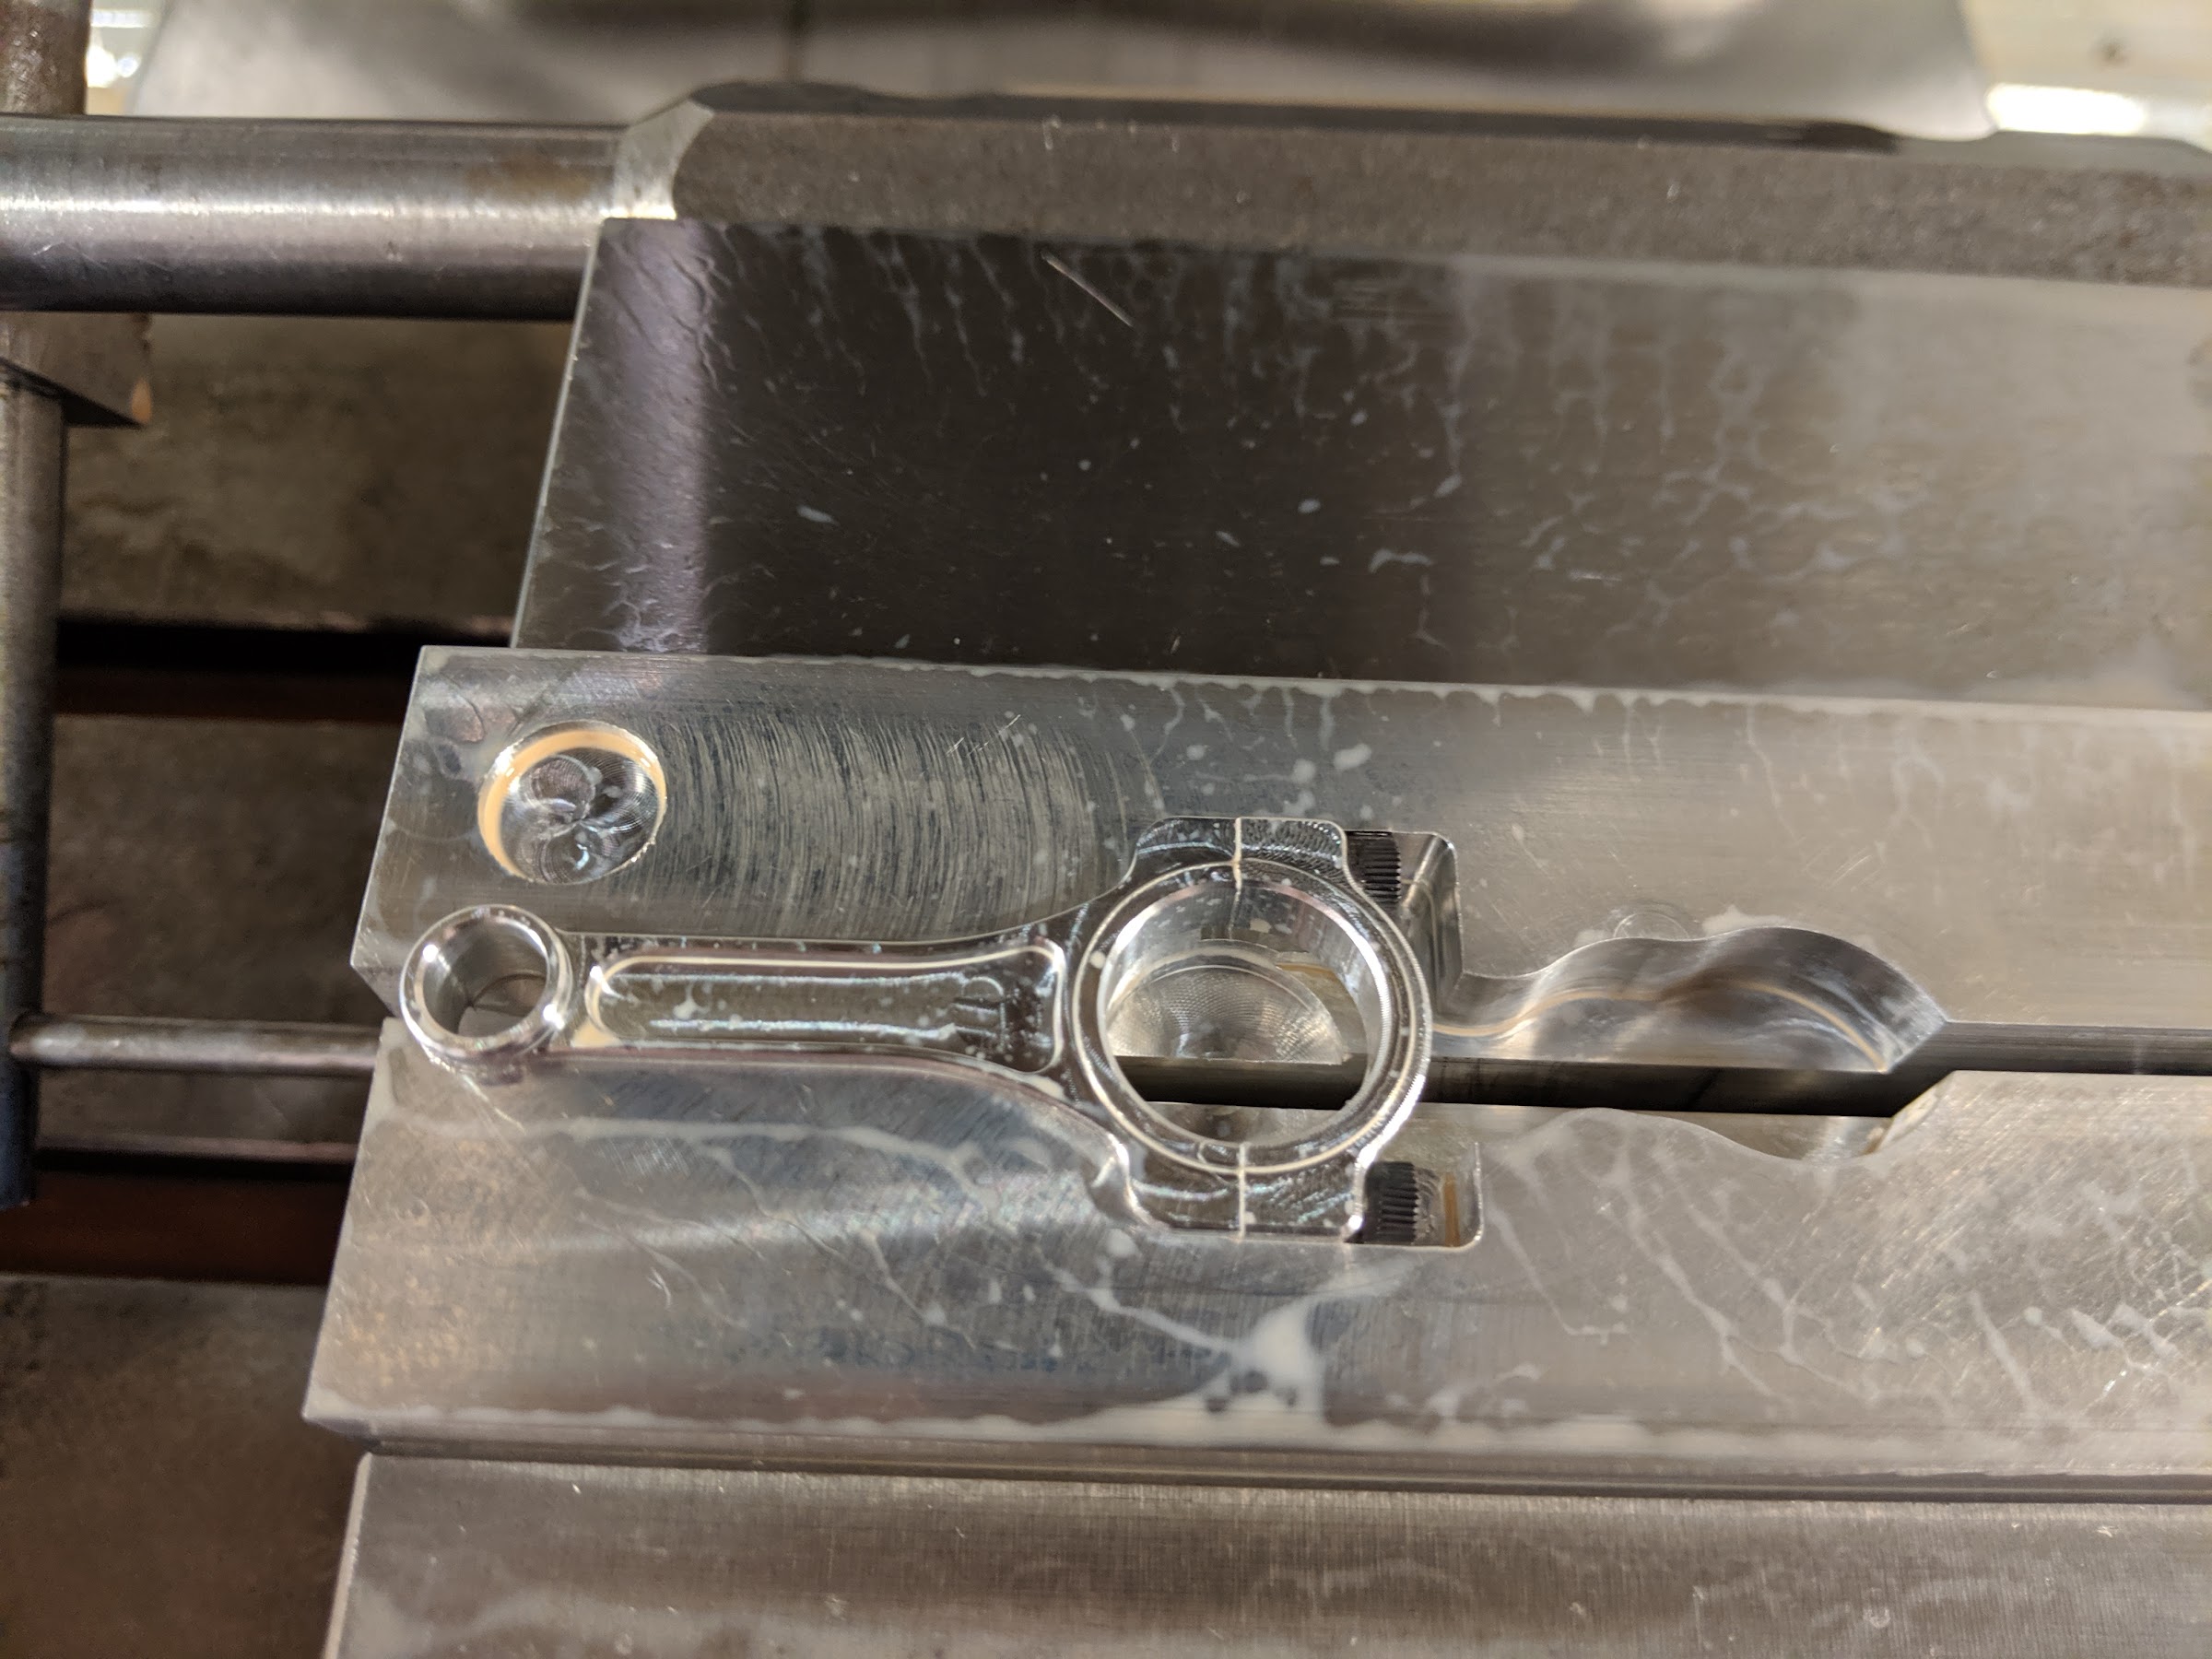
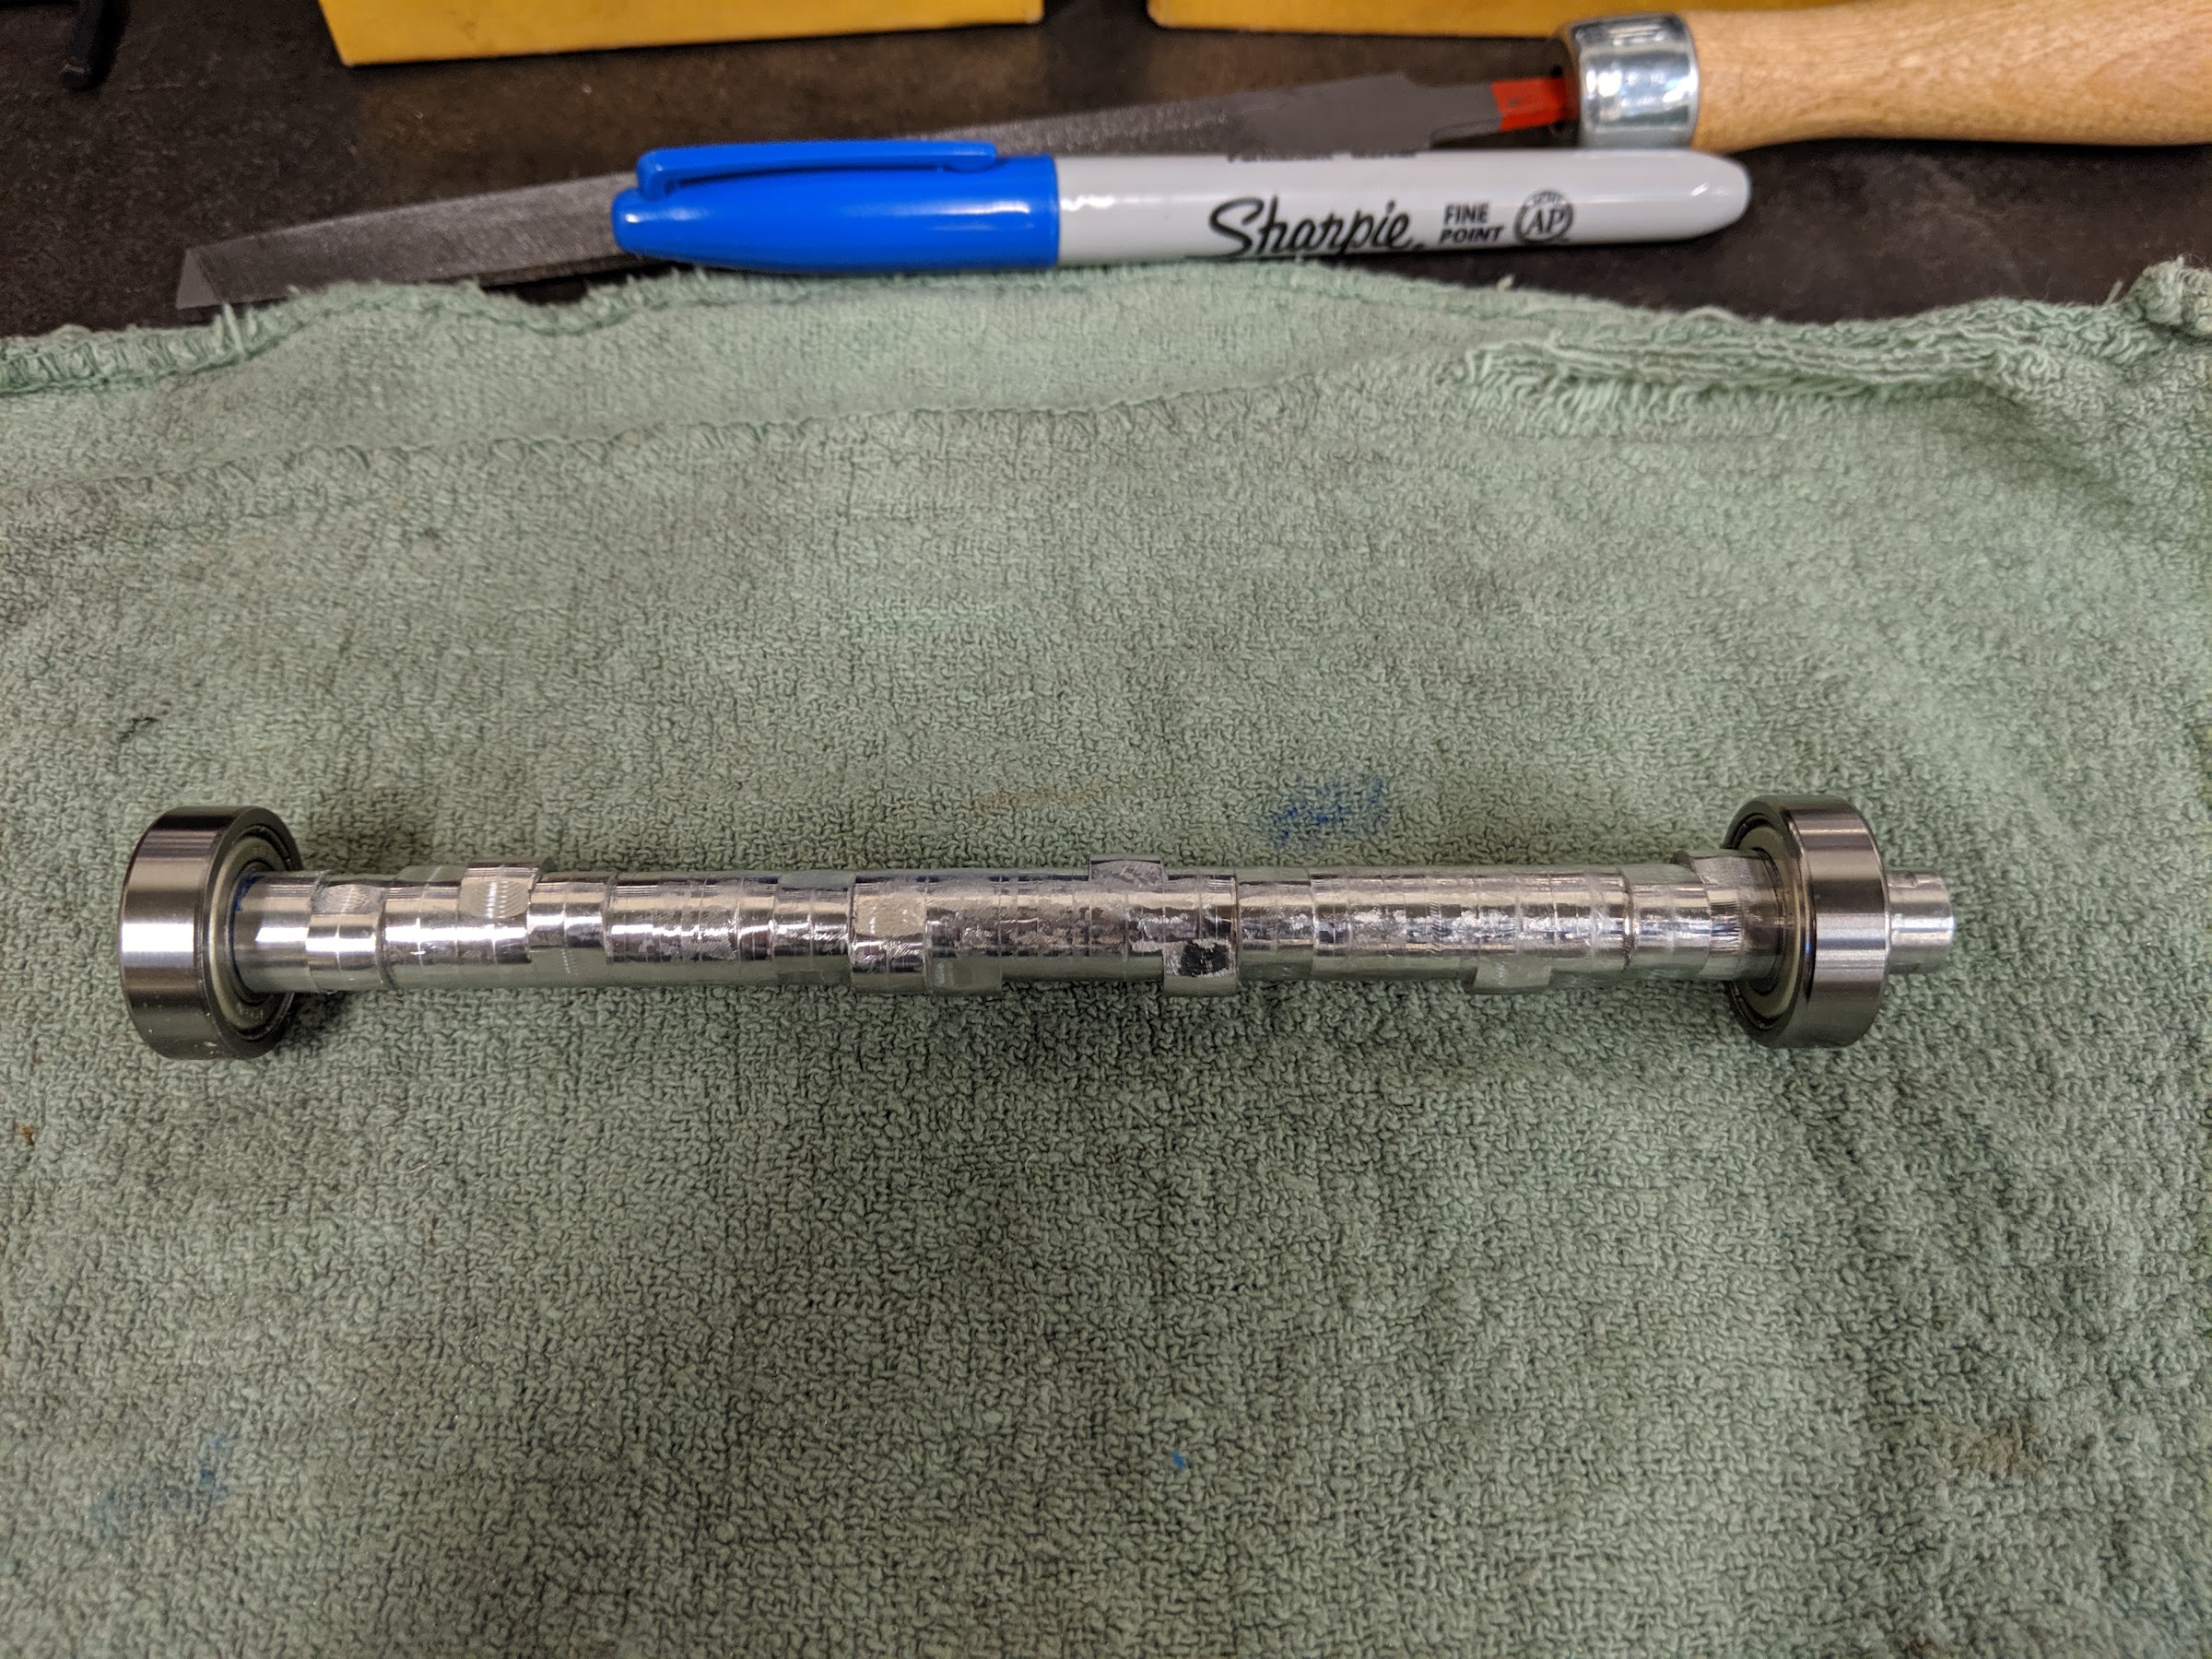
Other work that needed to get done was to finish the back side of the camshaft. For now I'm sticking with the aluminum one. It's been deburred and the bearing journals are finished. I'll probably do some polishing on it later.
Since I had finished the main caps, I also needed to ream the mains to size with everything torqued down. If the model was any bigger I wouldn't have been able to get this done. I did it on the Bridgeport and had to start with the knee all of the way down and feed with the knee and the quill because there wasn't enough travel in the quill.
With my remaining time today I broke down and cleaned up all of the mill tooling and started setting up the lathe for making pistons. Hopefully tomorrow I have at least one piston done.
Other work that needed to get done was to finish the back side of the camshaft. For now I'm sticking with the aluminum one. It's been deburred and the bearing journals are finished. I'll probably do some polishing on it later.
Since I had finished the main caps, I also needed to ream the mains to size with everything torqued down. If the model was any bigger I wouldn't have been able to get this done. I did it on the Bridgeport and had to start with the knee all of the way down and feed with the knee and the quill because there wasn't enough travel in the quill.
With my remaining time today I broke down and cleaned up all of the mill tooling and started setting up the lathe for making pistons. Hopefully tomorrow I have at least one piston done.
awesome to see this project coming to life.
Hi Bhusted!
Very nice work, congratulations! You should think about making this wonderful work to run.
Edi
Very nice work, congratulations! You should think about making this wonderful work to run.
Edi
Originally I had planned to make the pistons from Delrin so that they would be self lubricating in the cylinder bores. As fate would have it, my local plastic supplier was out of stock yesterday and I really wanted to make some more progress today. I decided to just go ahead with running the pistons in aluminum. I may need to put a drop of oil down the cylinders once in a while, but oh well.
I finished getting the lathe setup and pressed go. 14 minutes later, this guy pops out. For now there is just a gauge pin slid in for the wrist pin, since I wasn't ready to press them in.
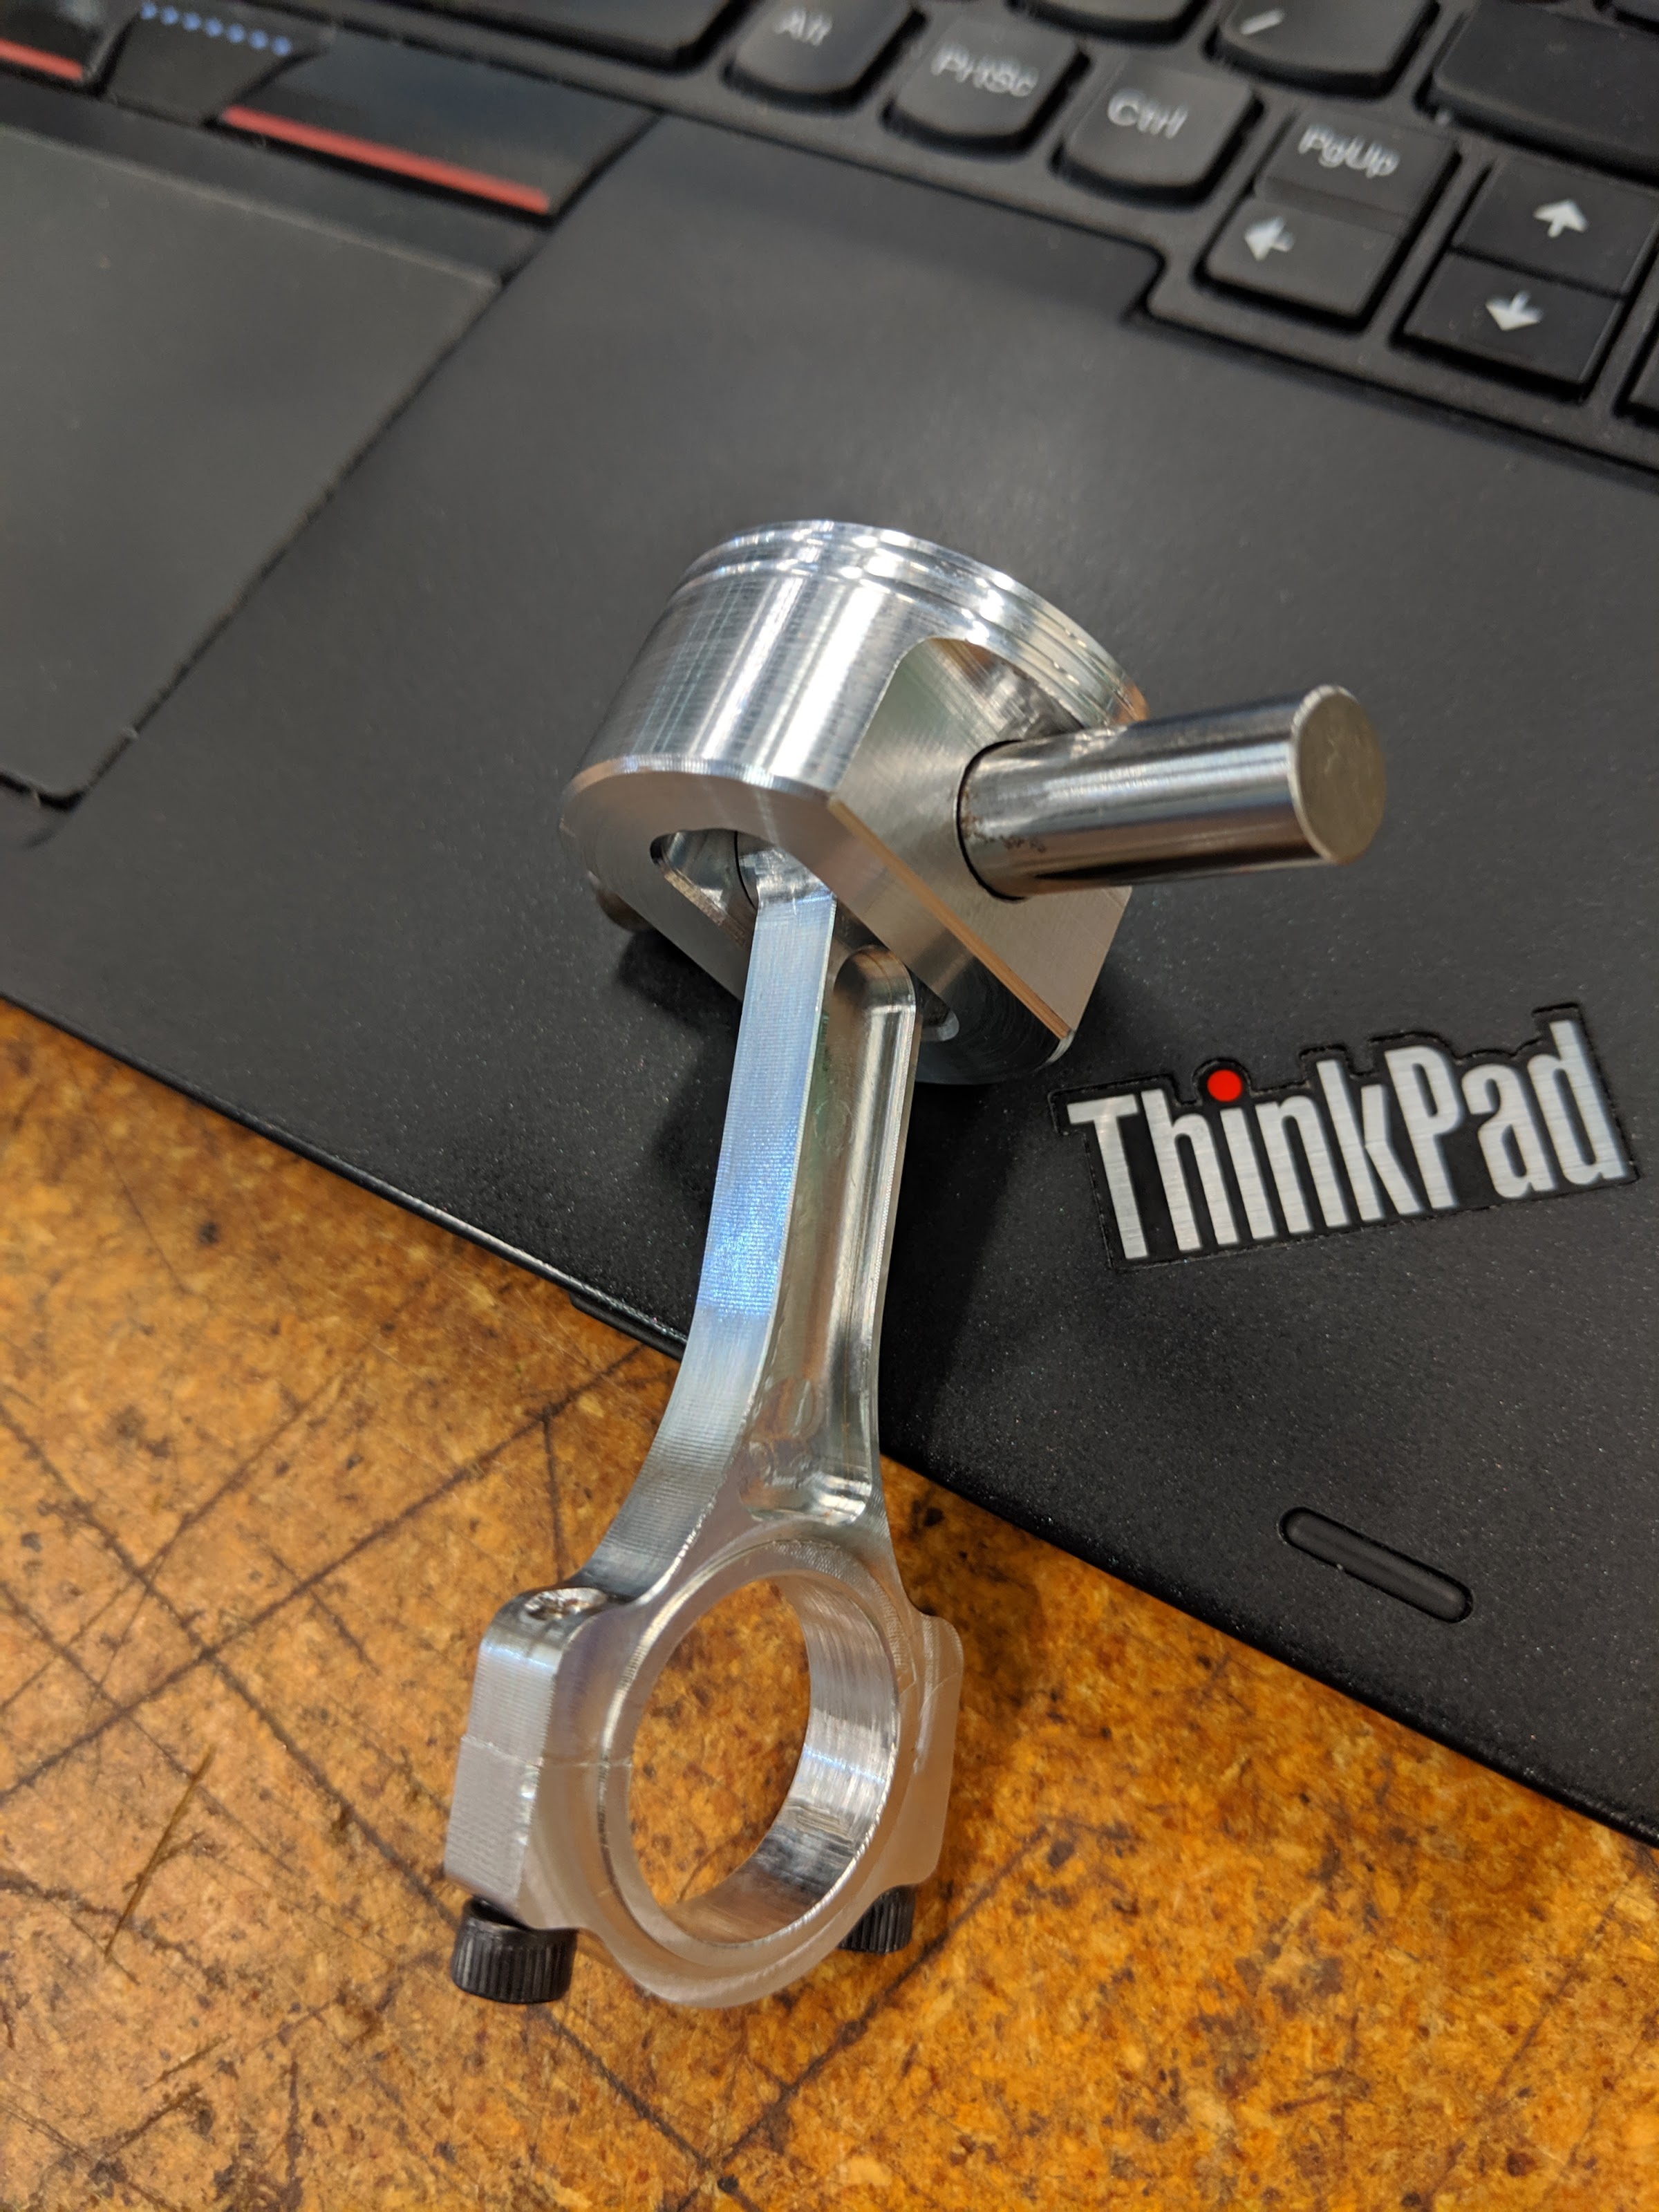
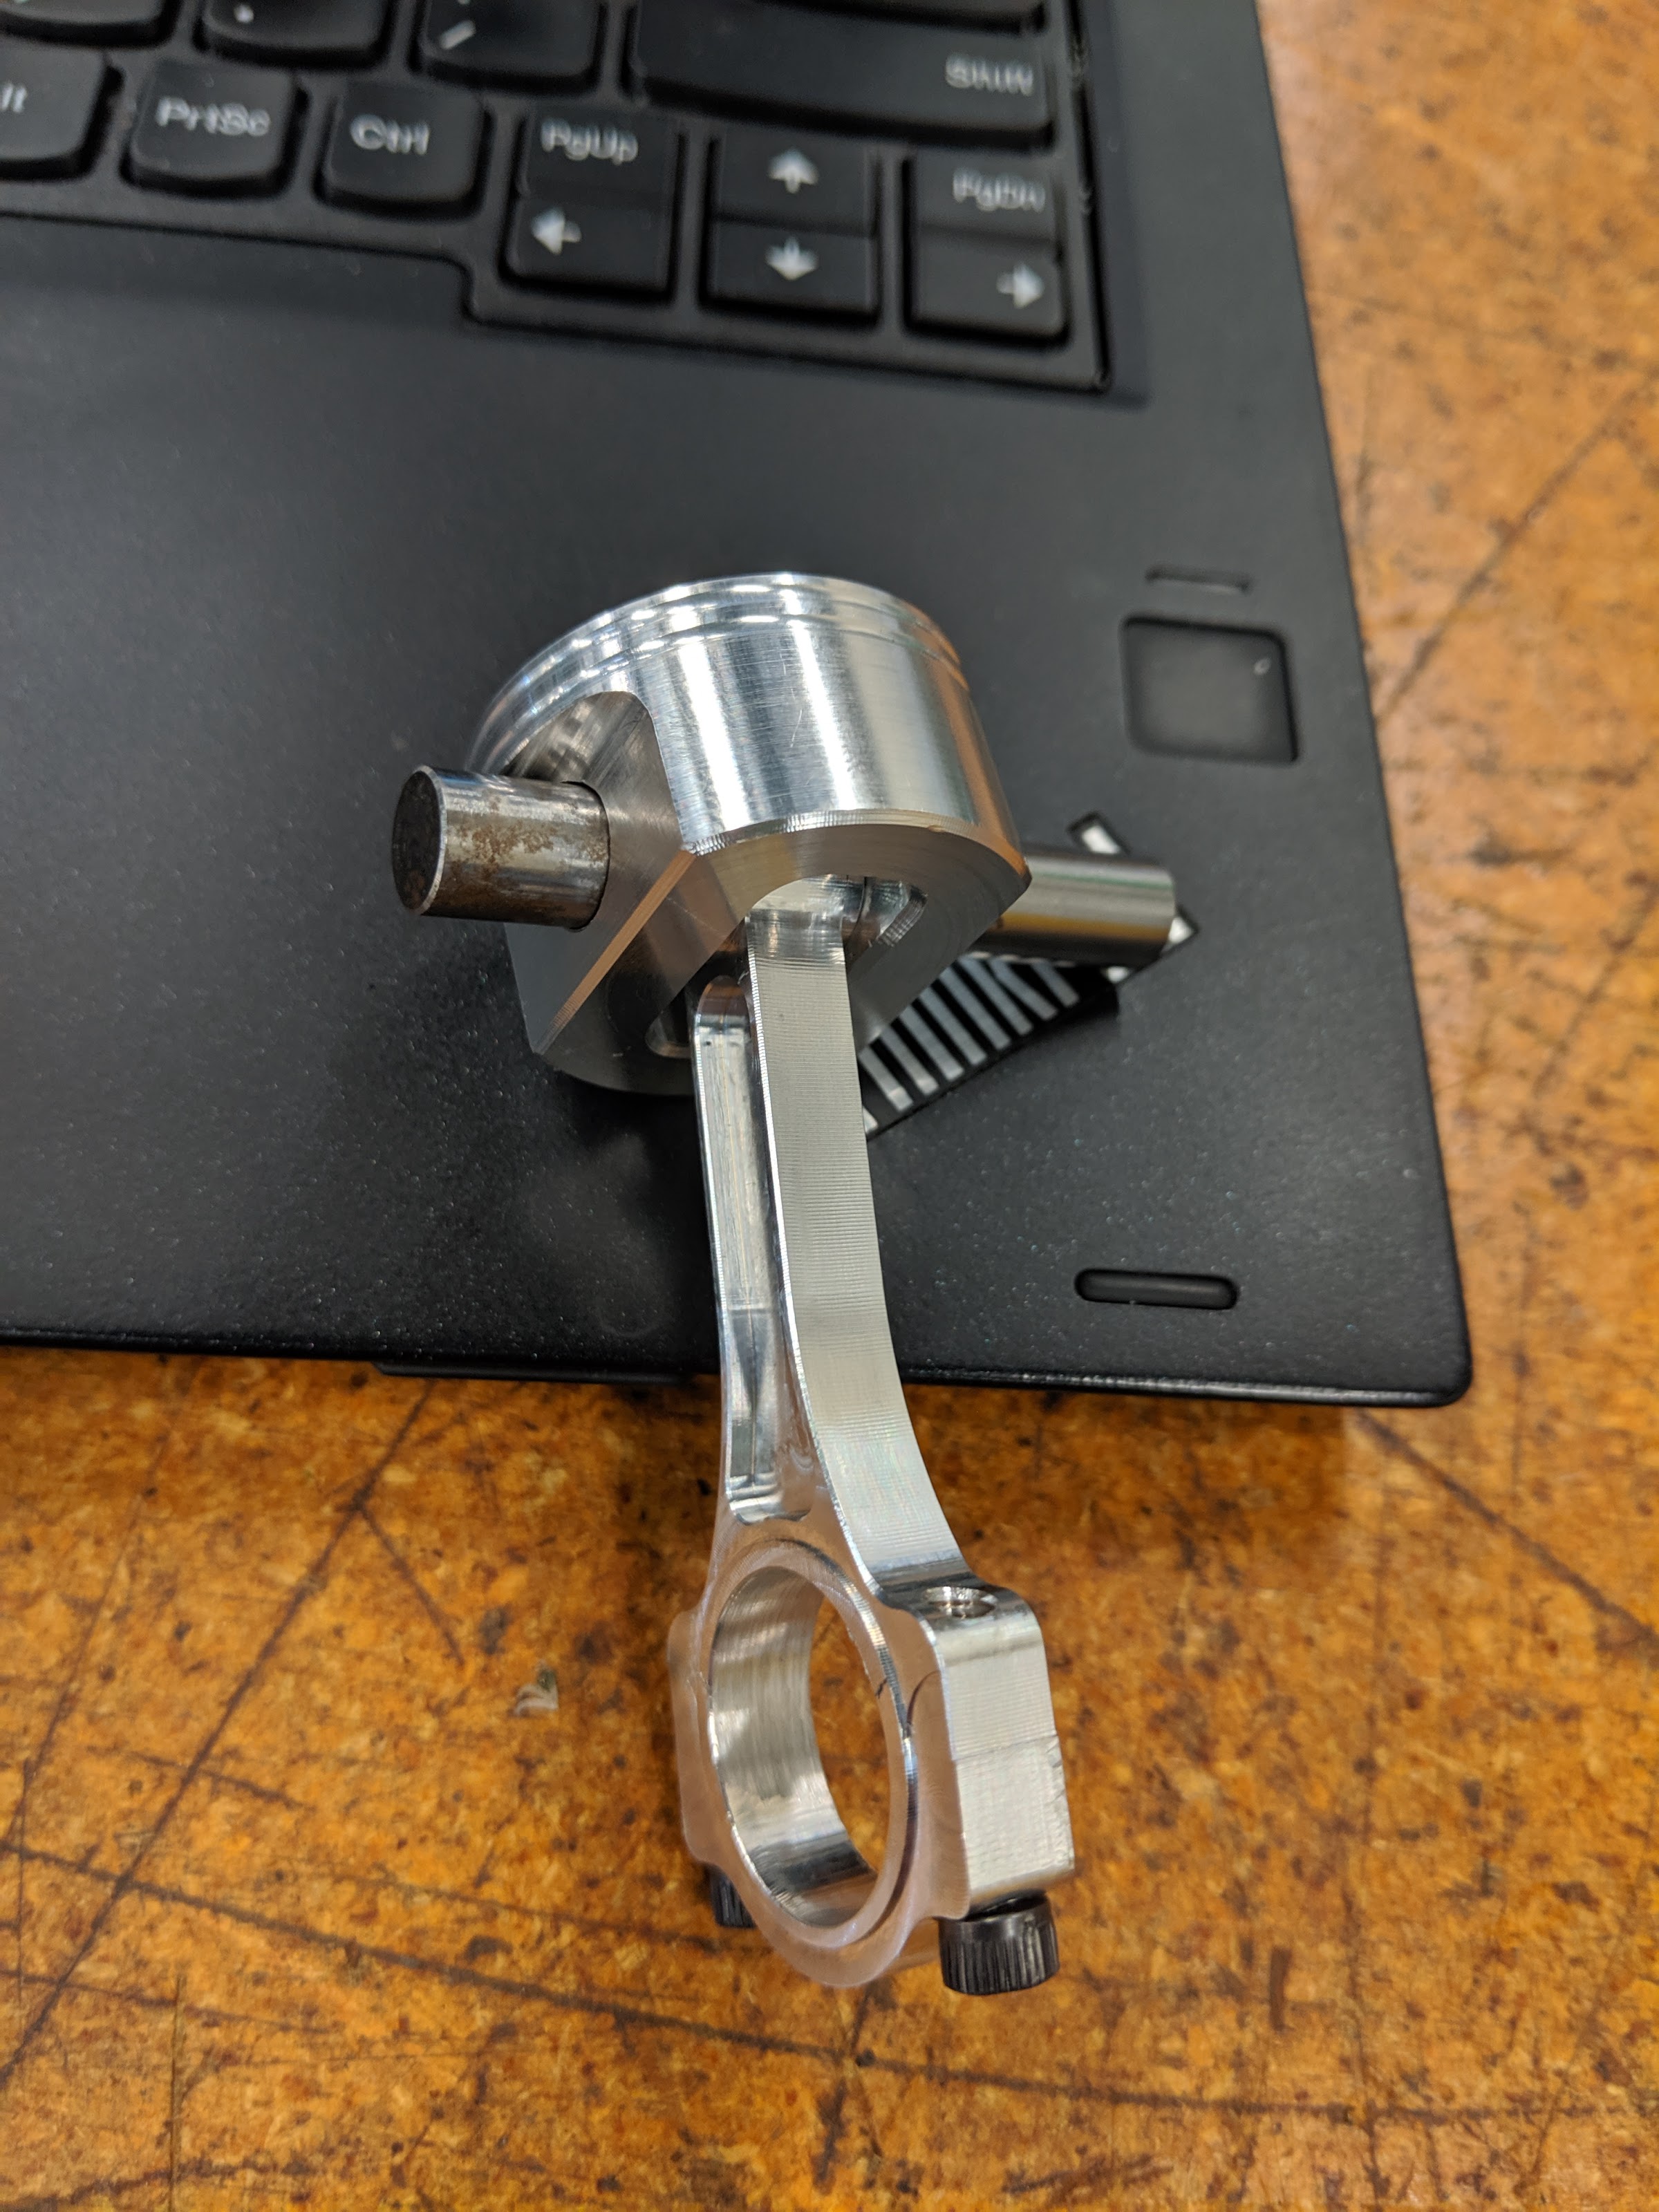
If only it were that easy... Setting up the typical turning, facing and parting tools is easy, but this lathe is equipped with "live" tools on the turret as well, which I had a heck of a time getting dialed in. In the end I still have to ream the wrist pin hole by hand because I couldn't get the tool holder aligned with the x-axis. I still have four more pistons to run in the morning and I'll probably spend the cycle time deburring and lapping the tops of the pistons where the parting tool leaves a bit of a nub.
I finished getting the lathe setup and pressed go. 14 minutes later, this guy pops out. For now there is just a gauge pin slid in for the wrist pin, since I wasn't ready to press them in.
If only it were that easy... Setting up the typical turning, facing and parting tools is easy, but this lathe is equipped with "live" tools on the turret as well, which I had a heck of a time getting dialed in. In the end I still have to ream the wrist pin hole by hand because I couldn't get the tool holder aligned with the x-axis. I still have four more pistons to run in the morning and I'll probably spend the cycle time deburring and lapping the tops of the pistons where the parting tool leaves a bit of a nub.
I look at your work and I feel that I'm stuck in the stone age. Awesome.
Similar threads
- Replies
- 26
- Views
- 1K
- Replies
- 26
- Views
- 4K
- Replies
- 28
- Views
- 3K


