Powder painting a flywheel

Home Model Engine Machinist Forum

Help Support Home Model Engine Machinist Forum:

This site may earn a commission from merchant affiliate links, including eBay, Amazon, and others.

Brian Rupnow

Design Engineer
Project of the Month Winner
Joined
May 23, 2008
Messages
15,234
Reaction score
8,520
Location
Barrie, Ontario, Canada
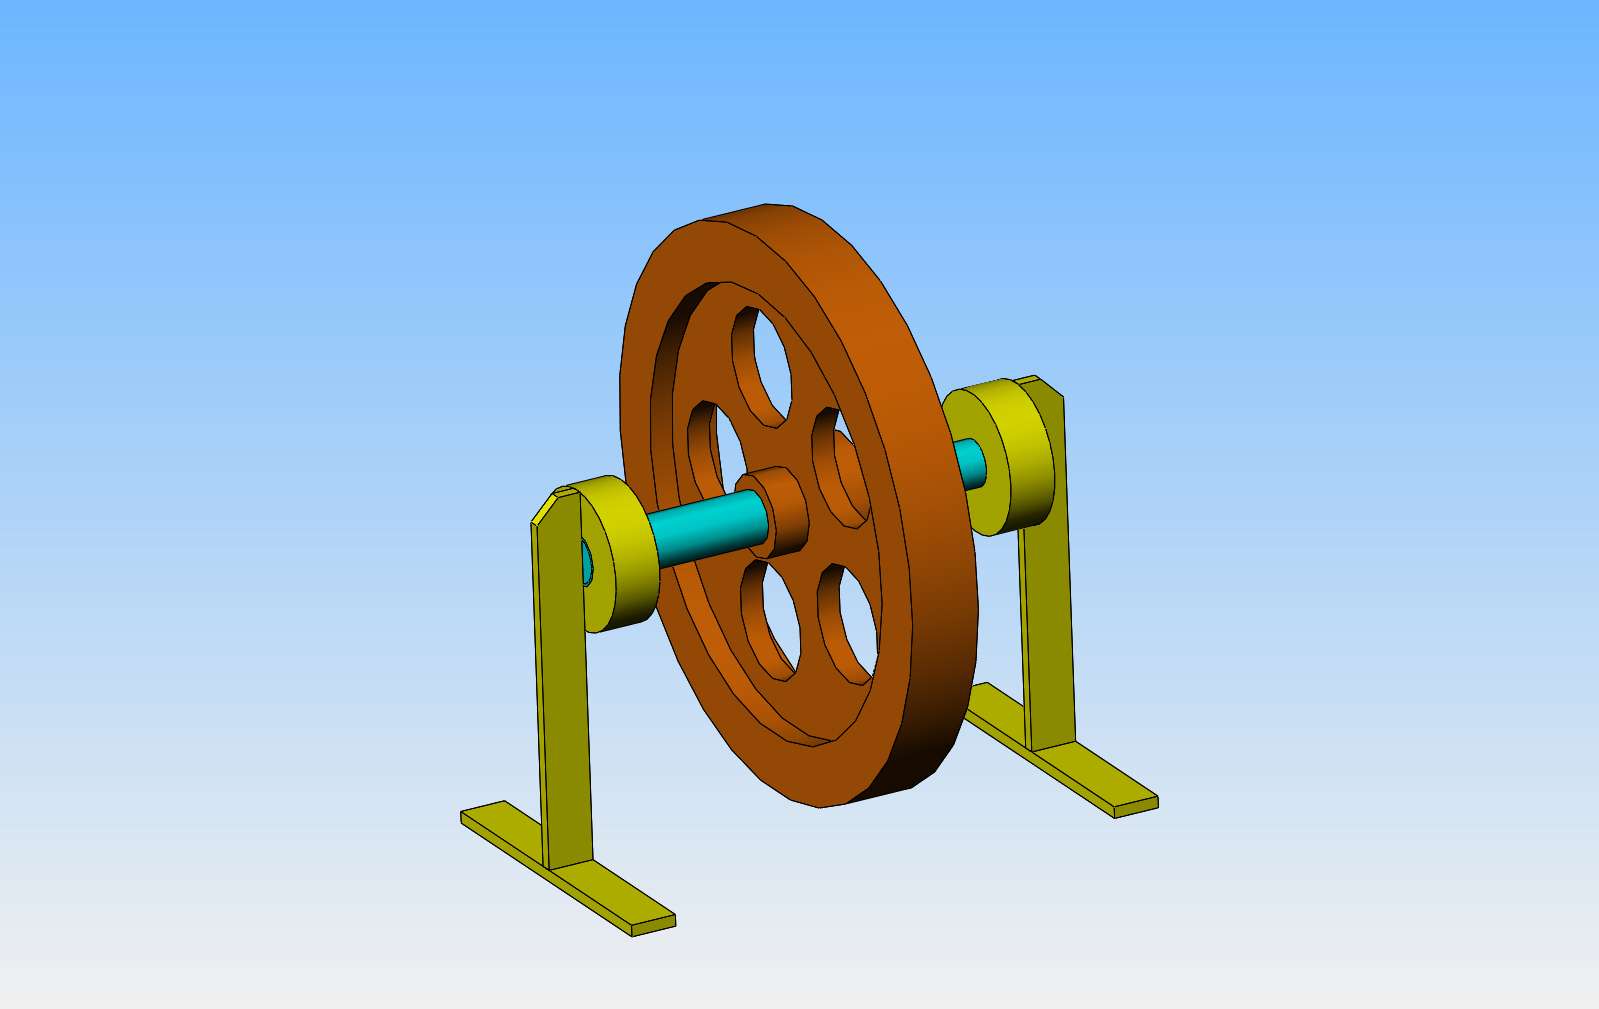
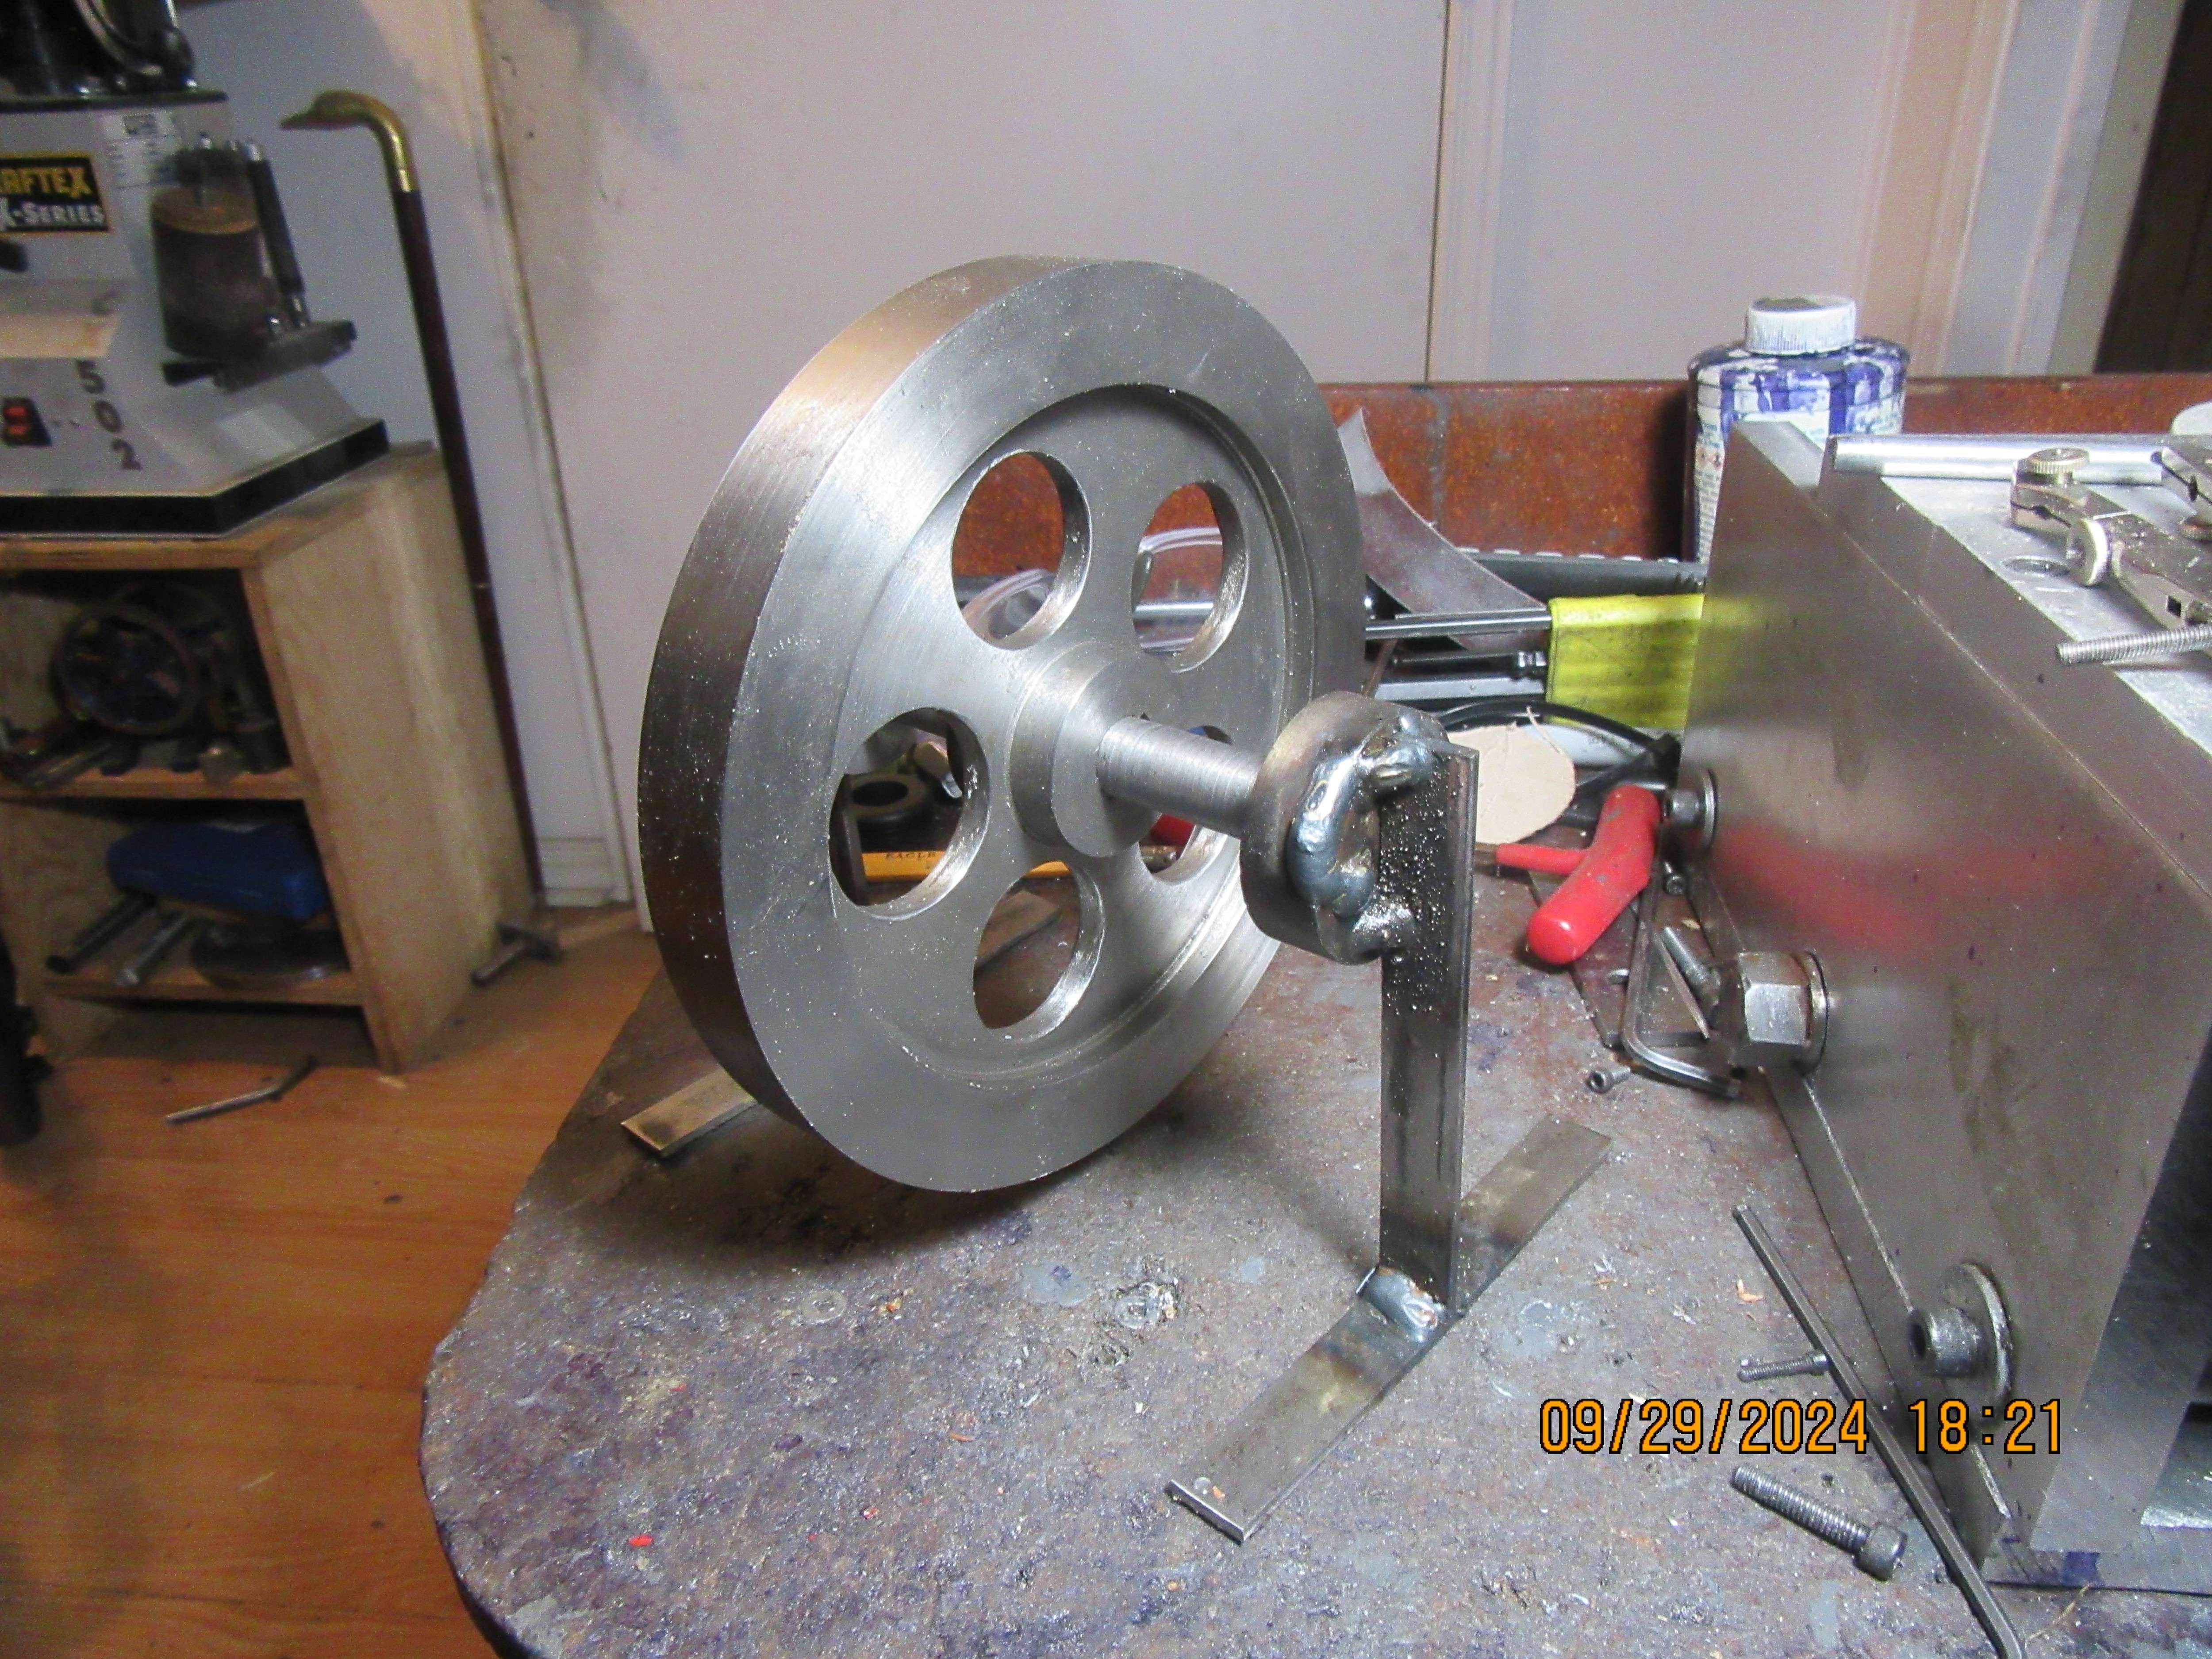
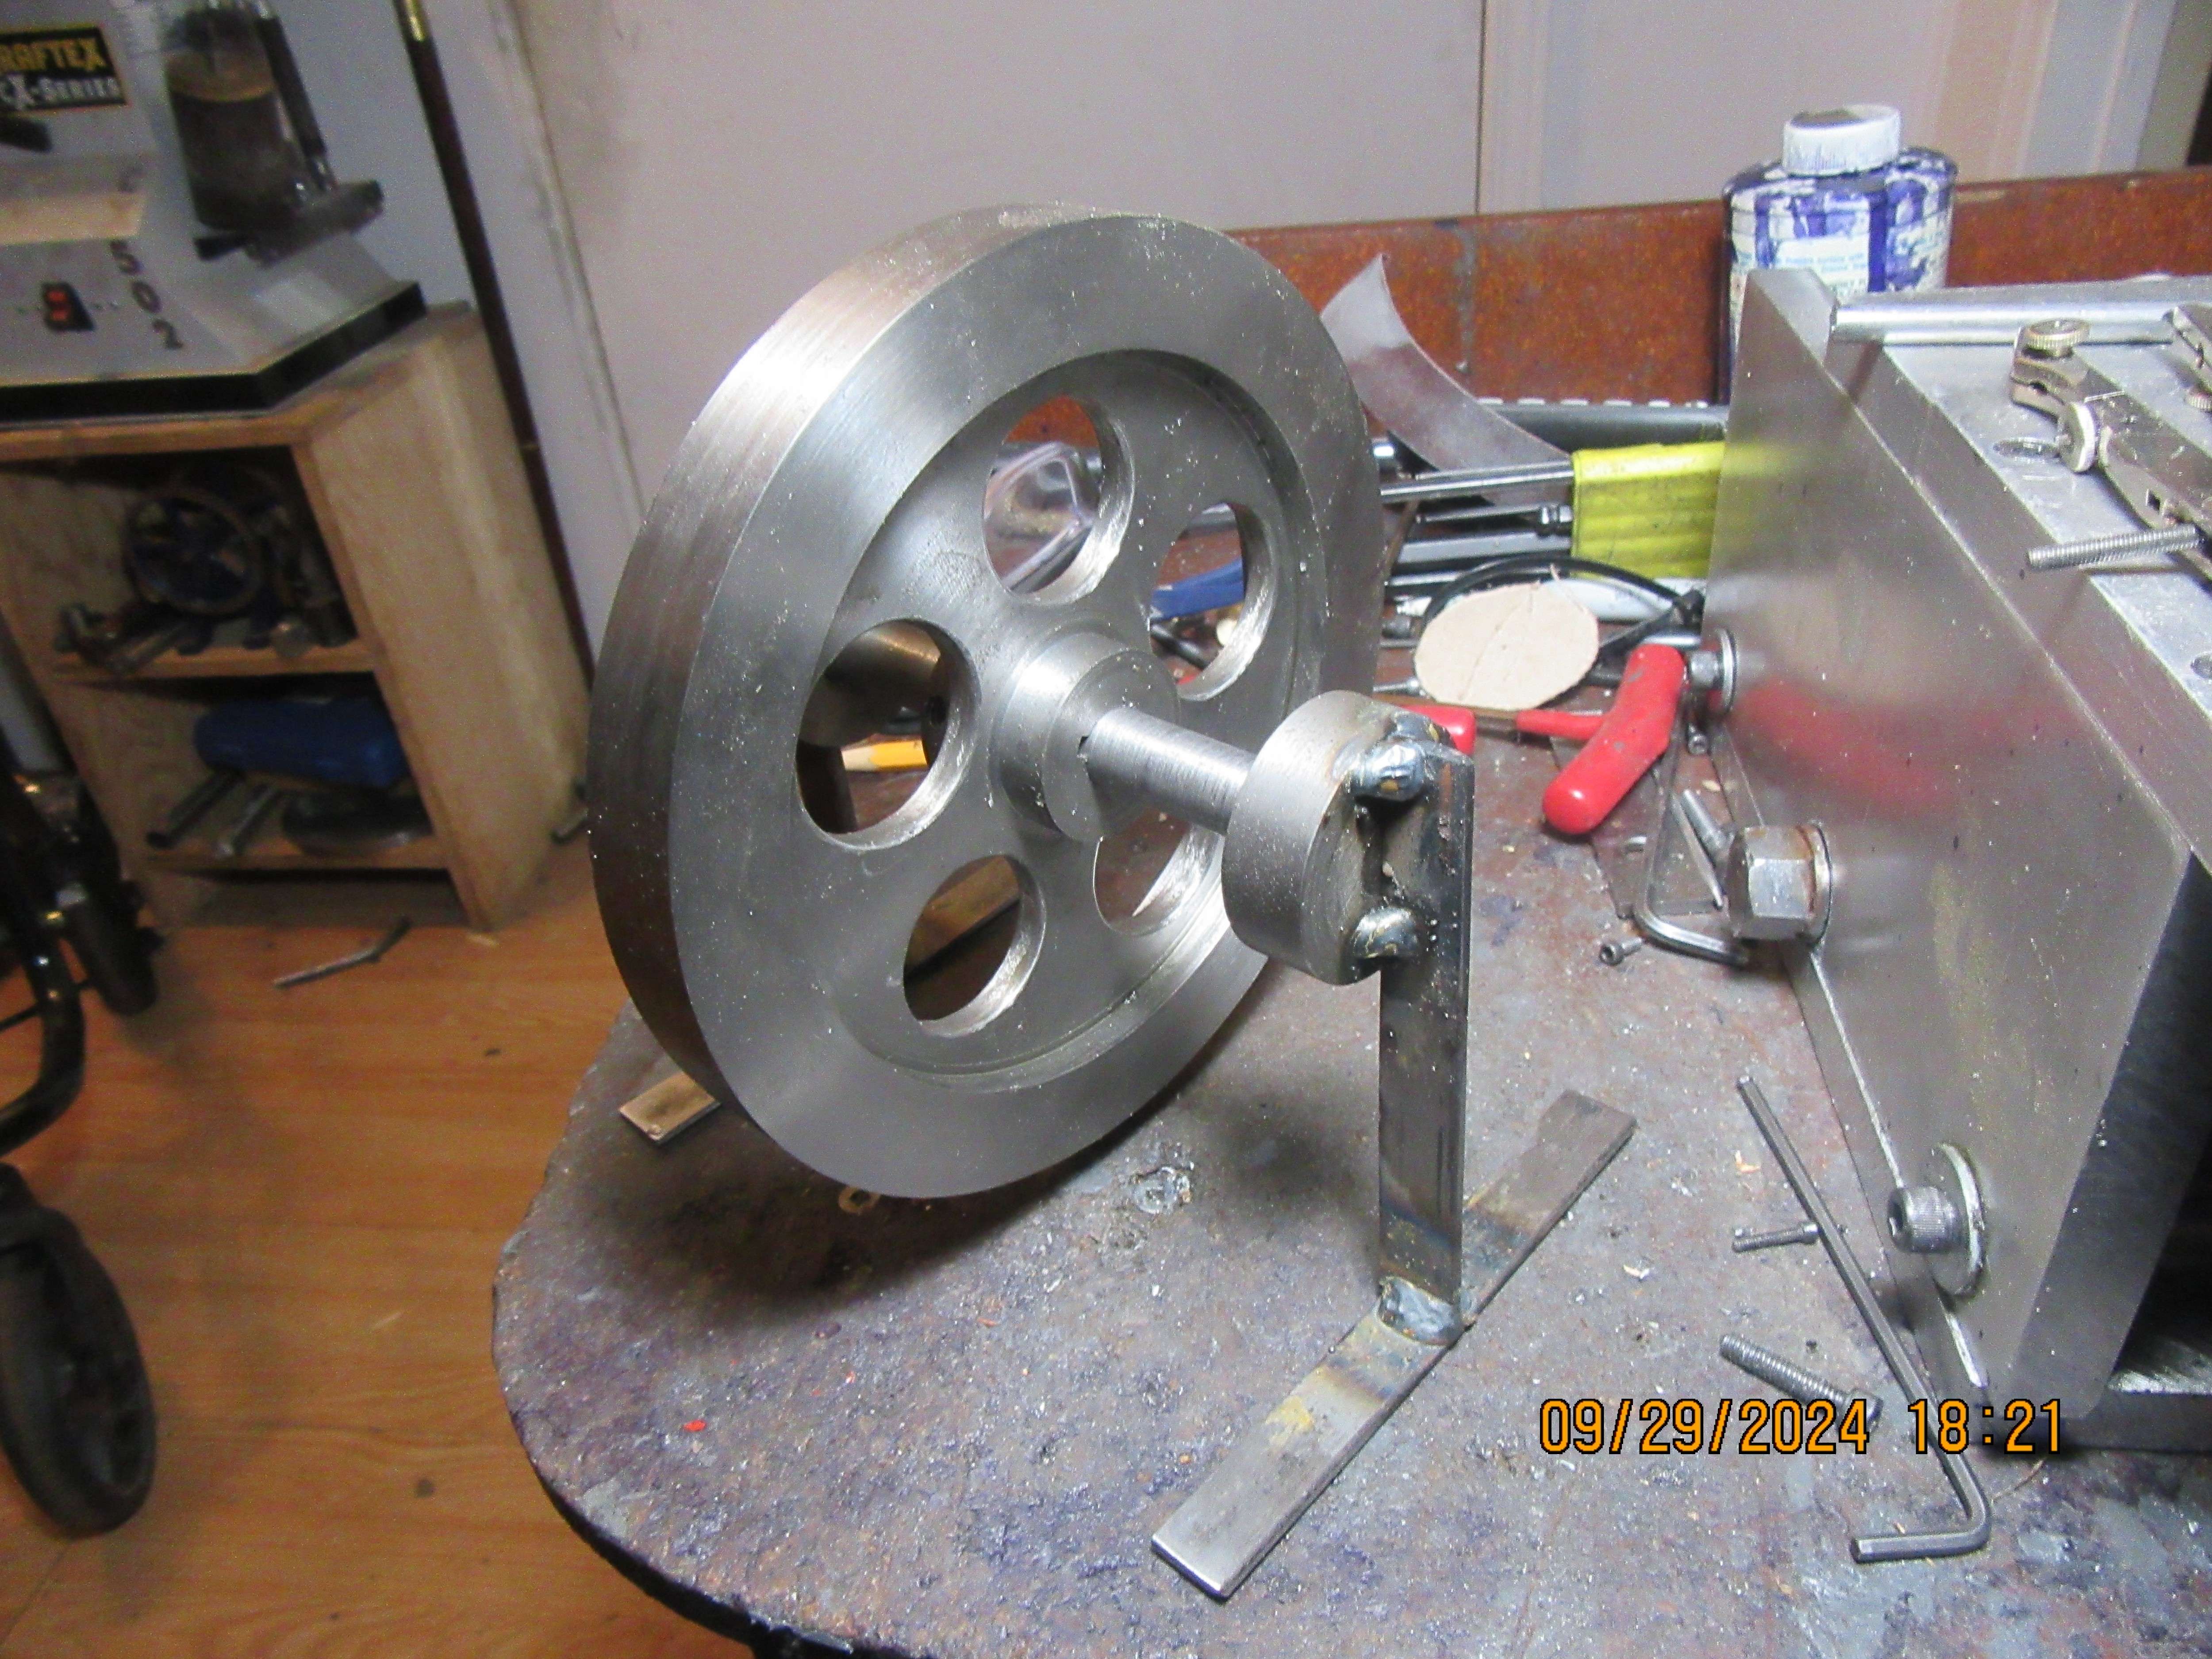
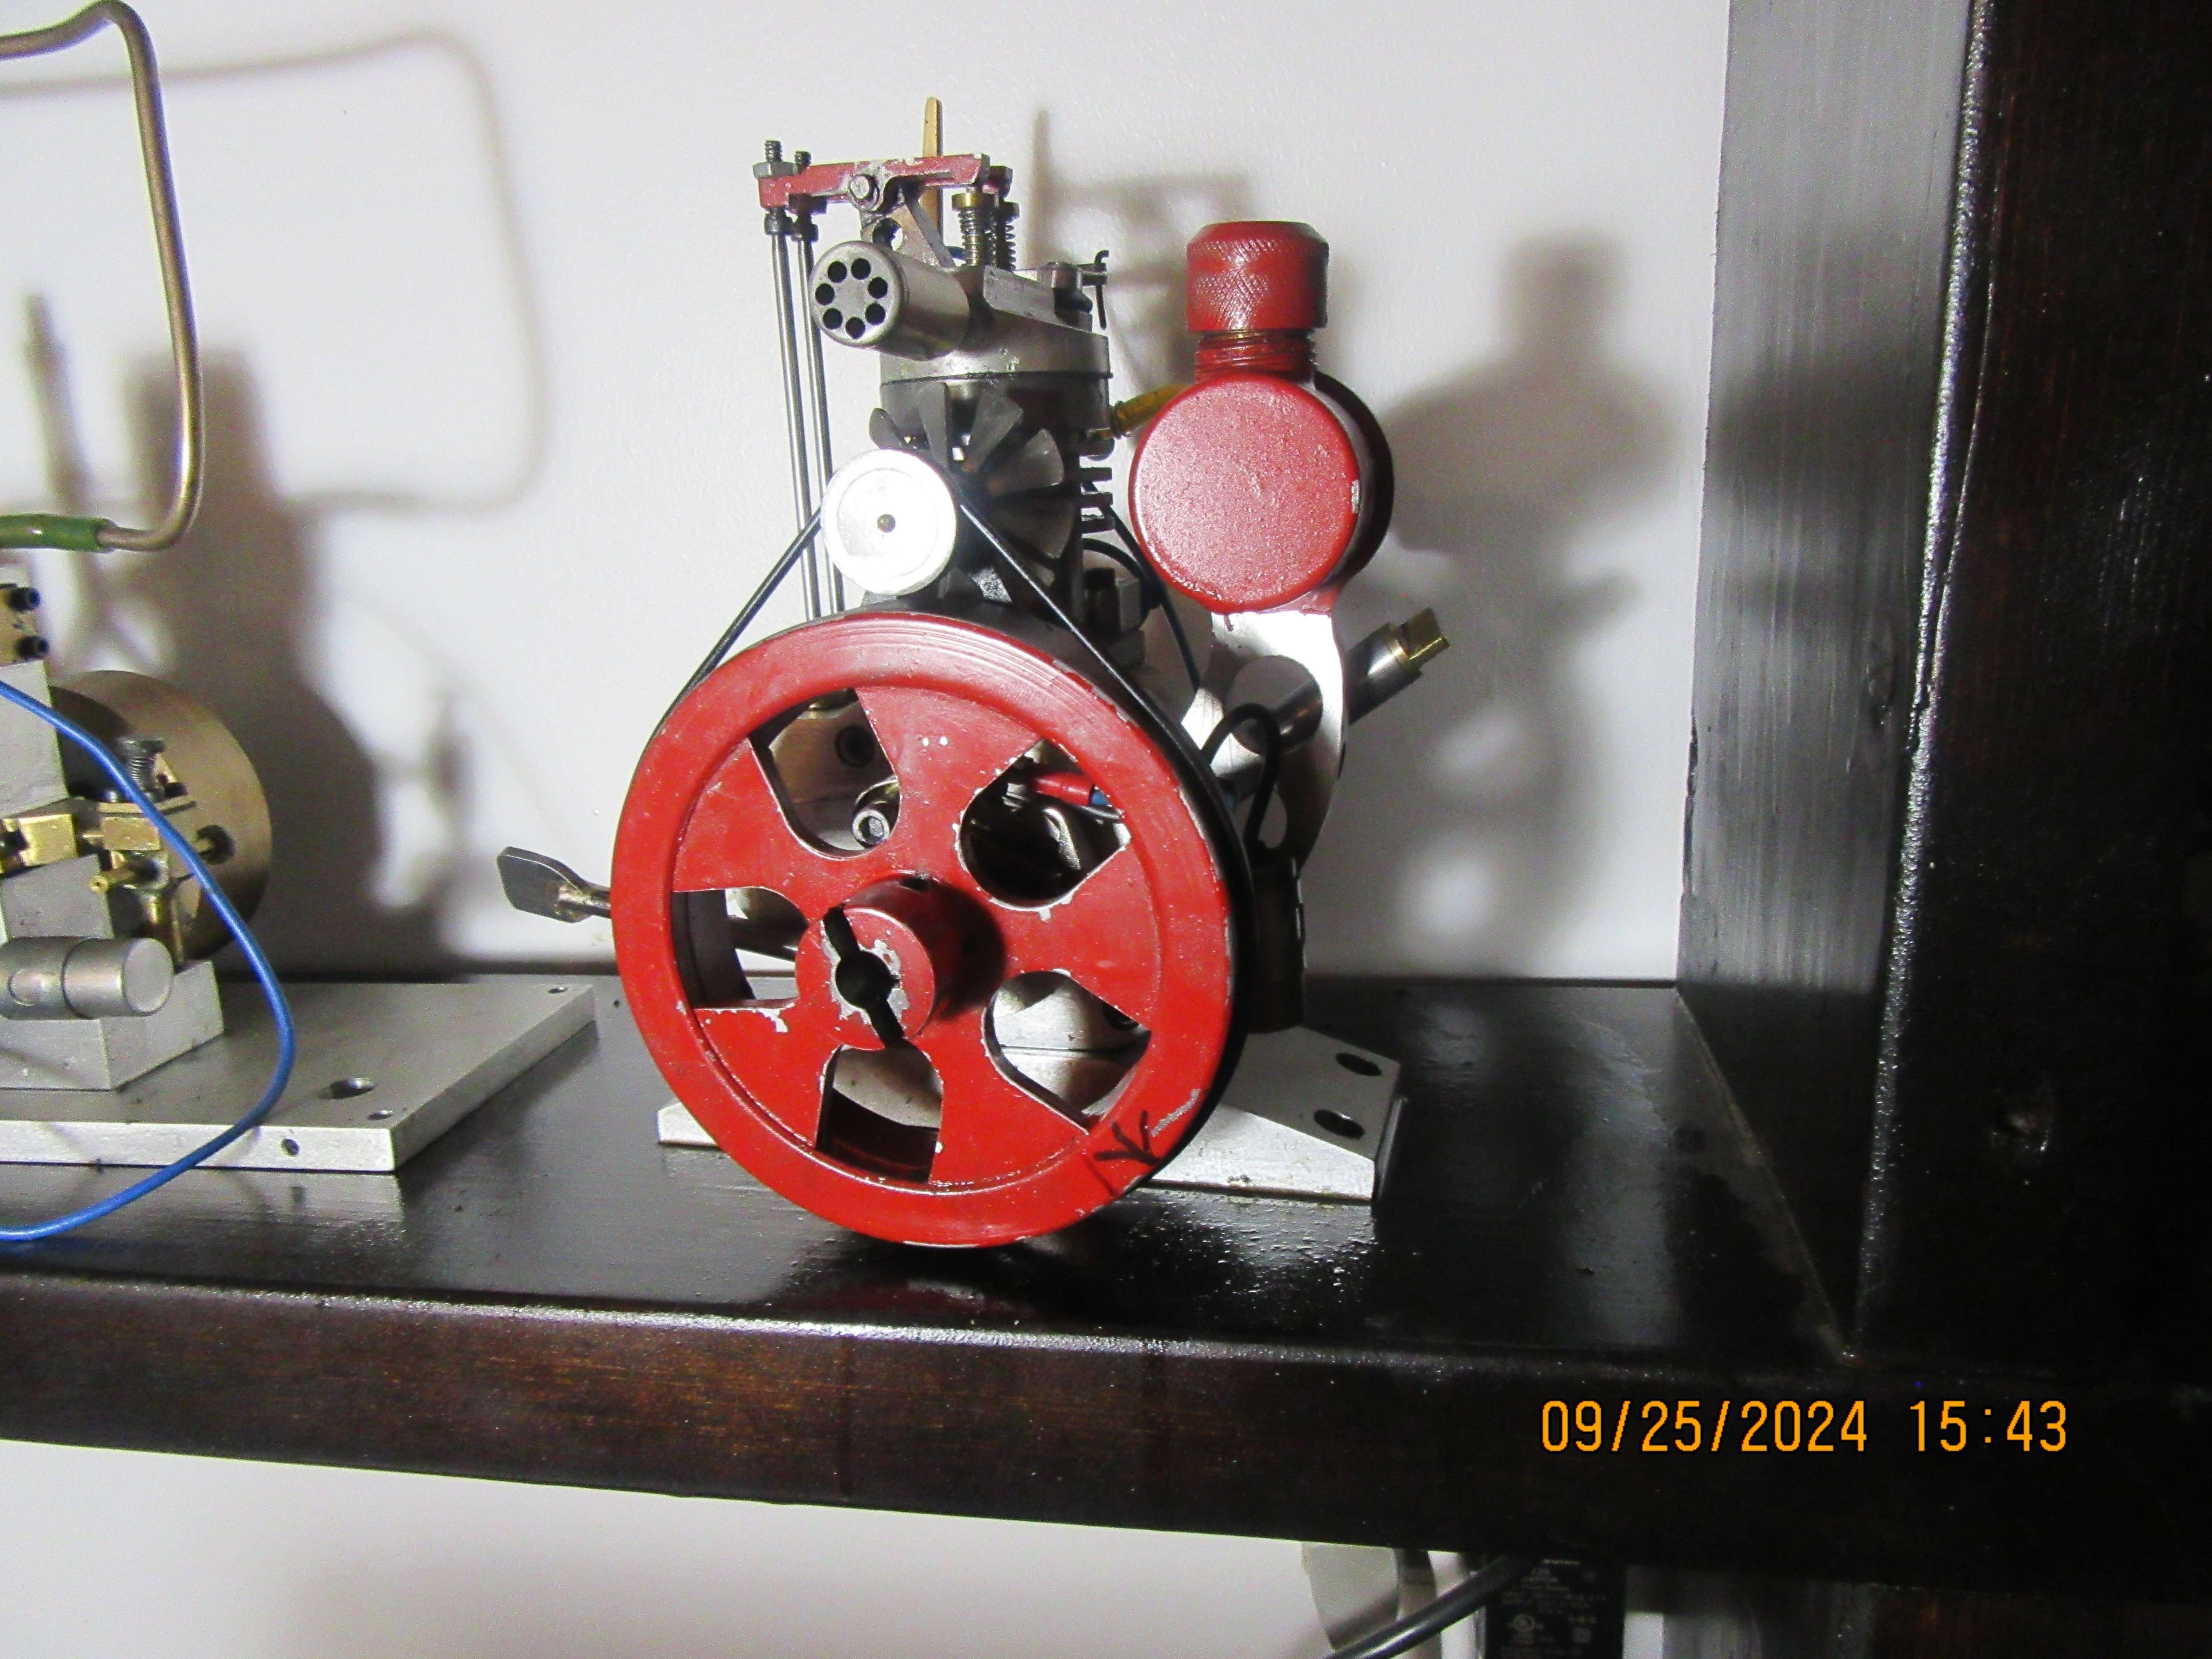
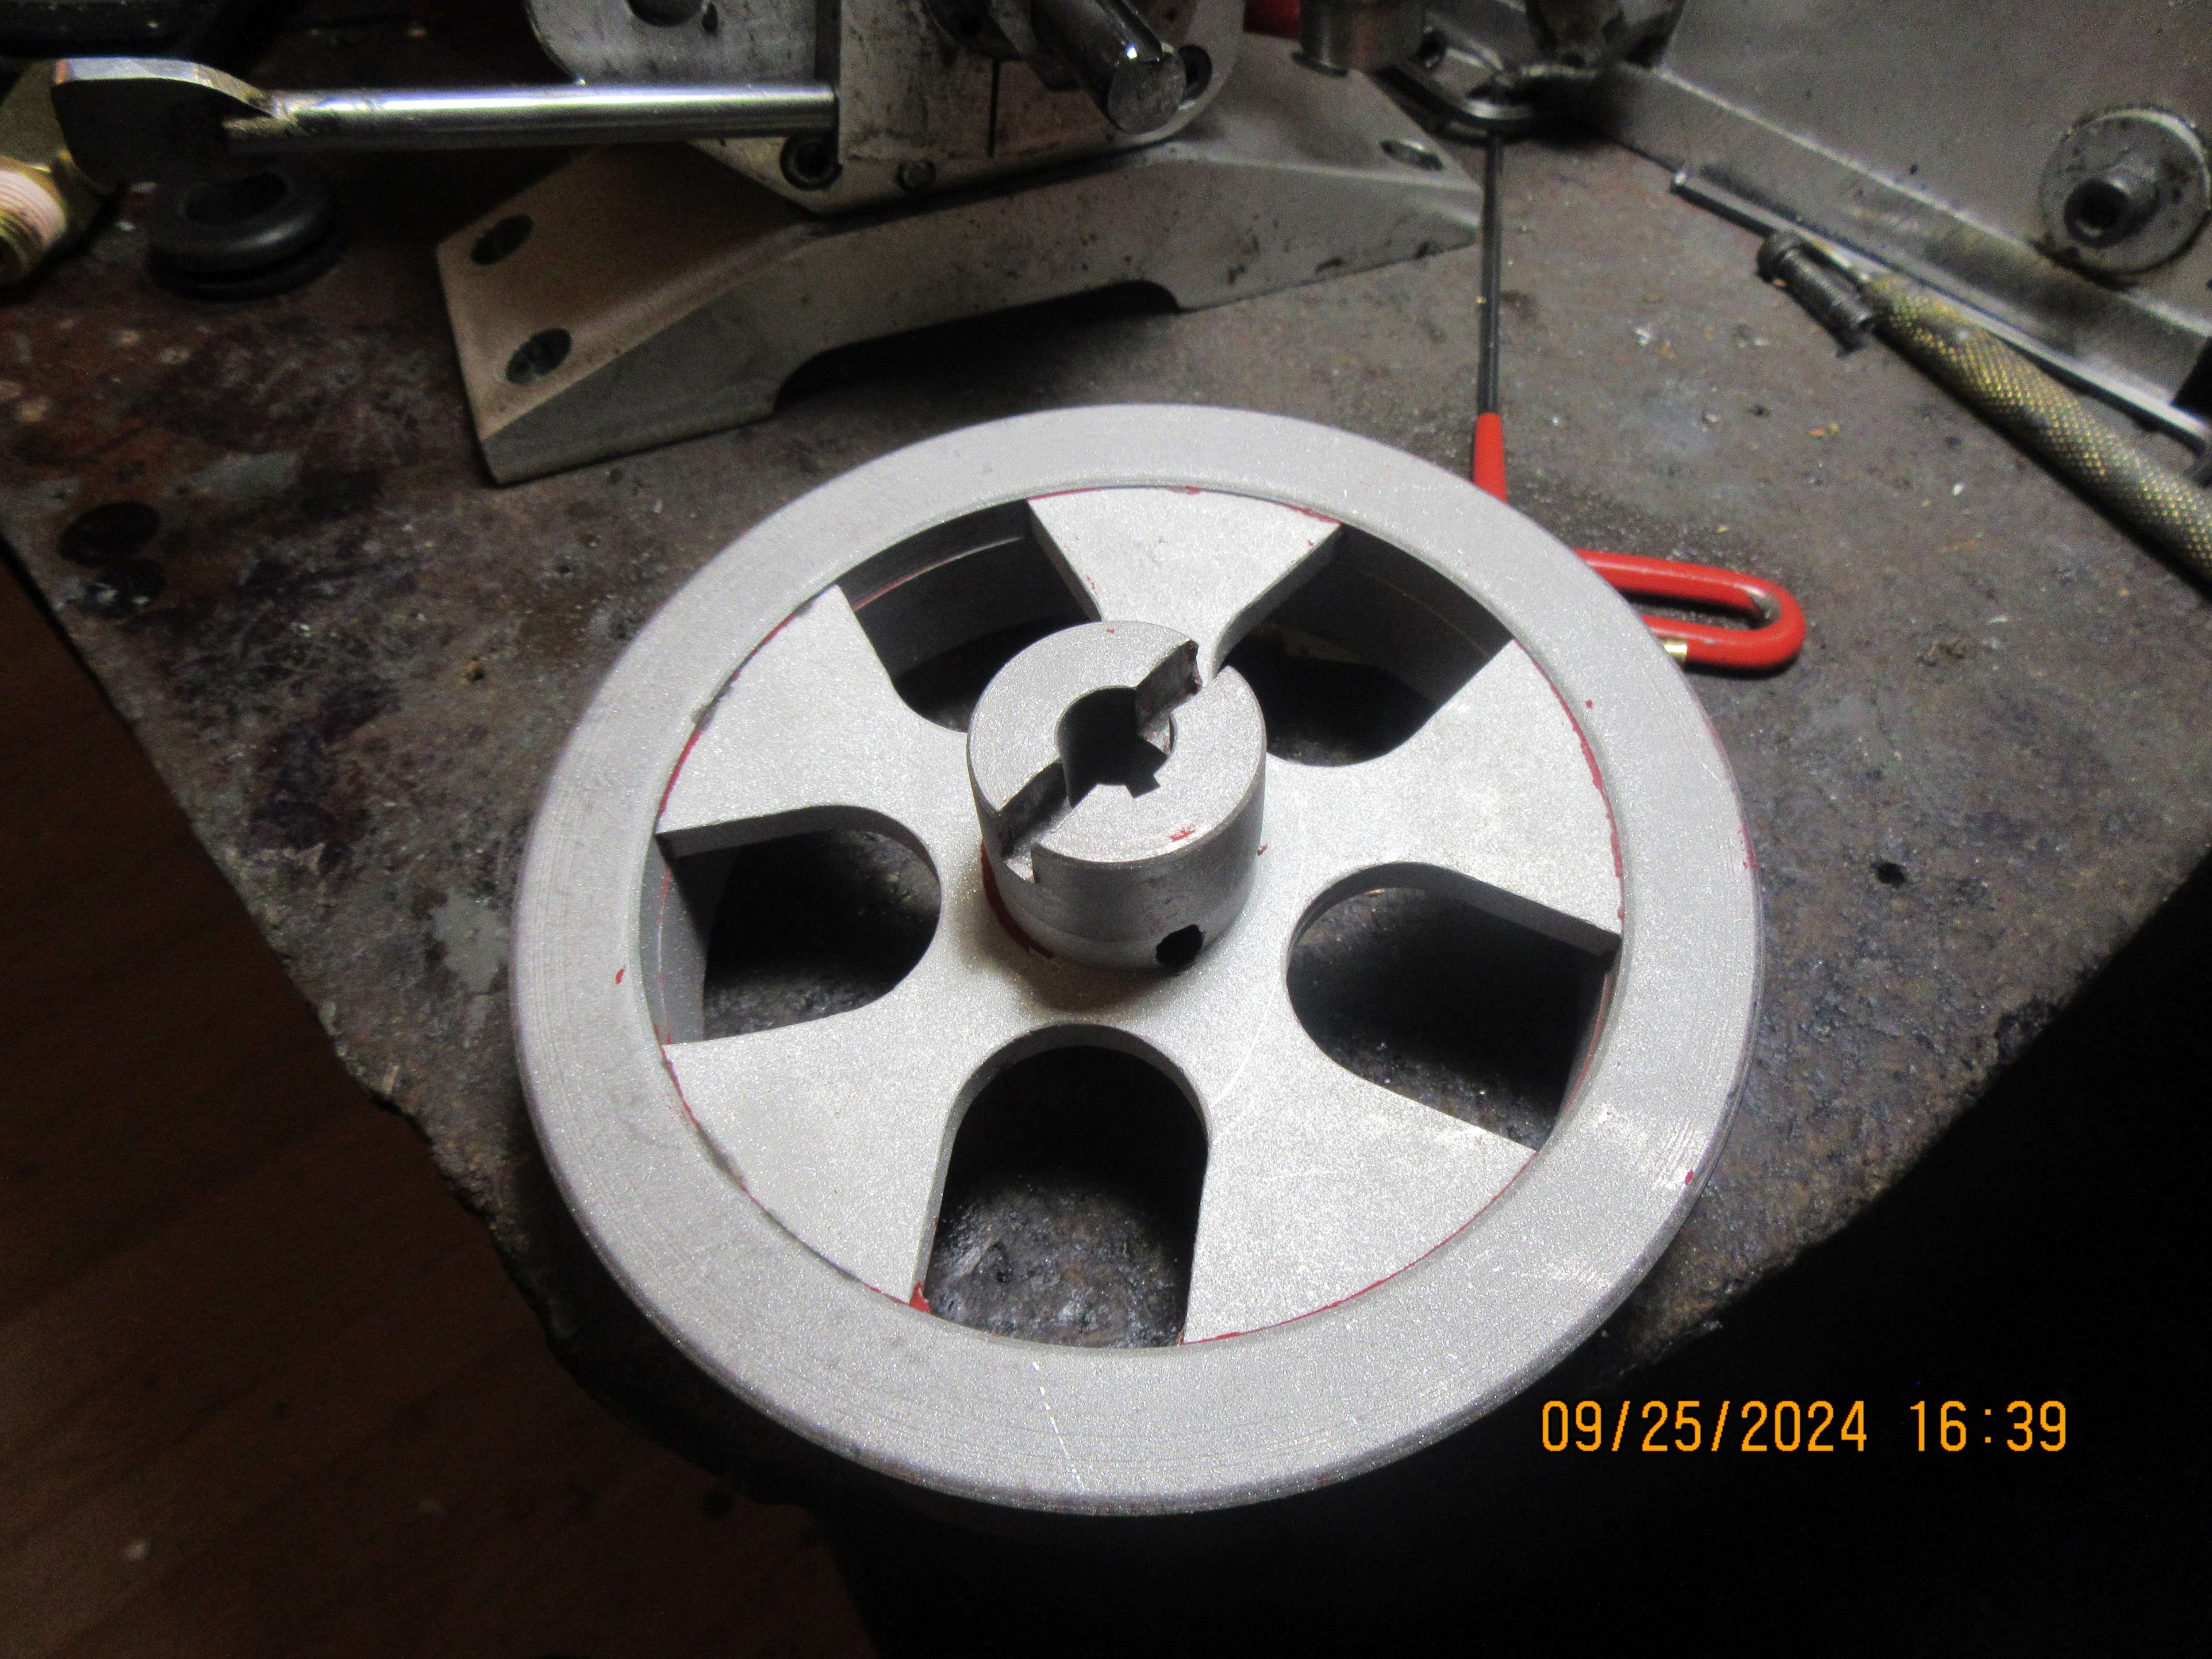
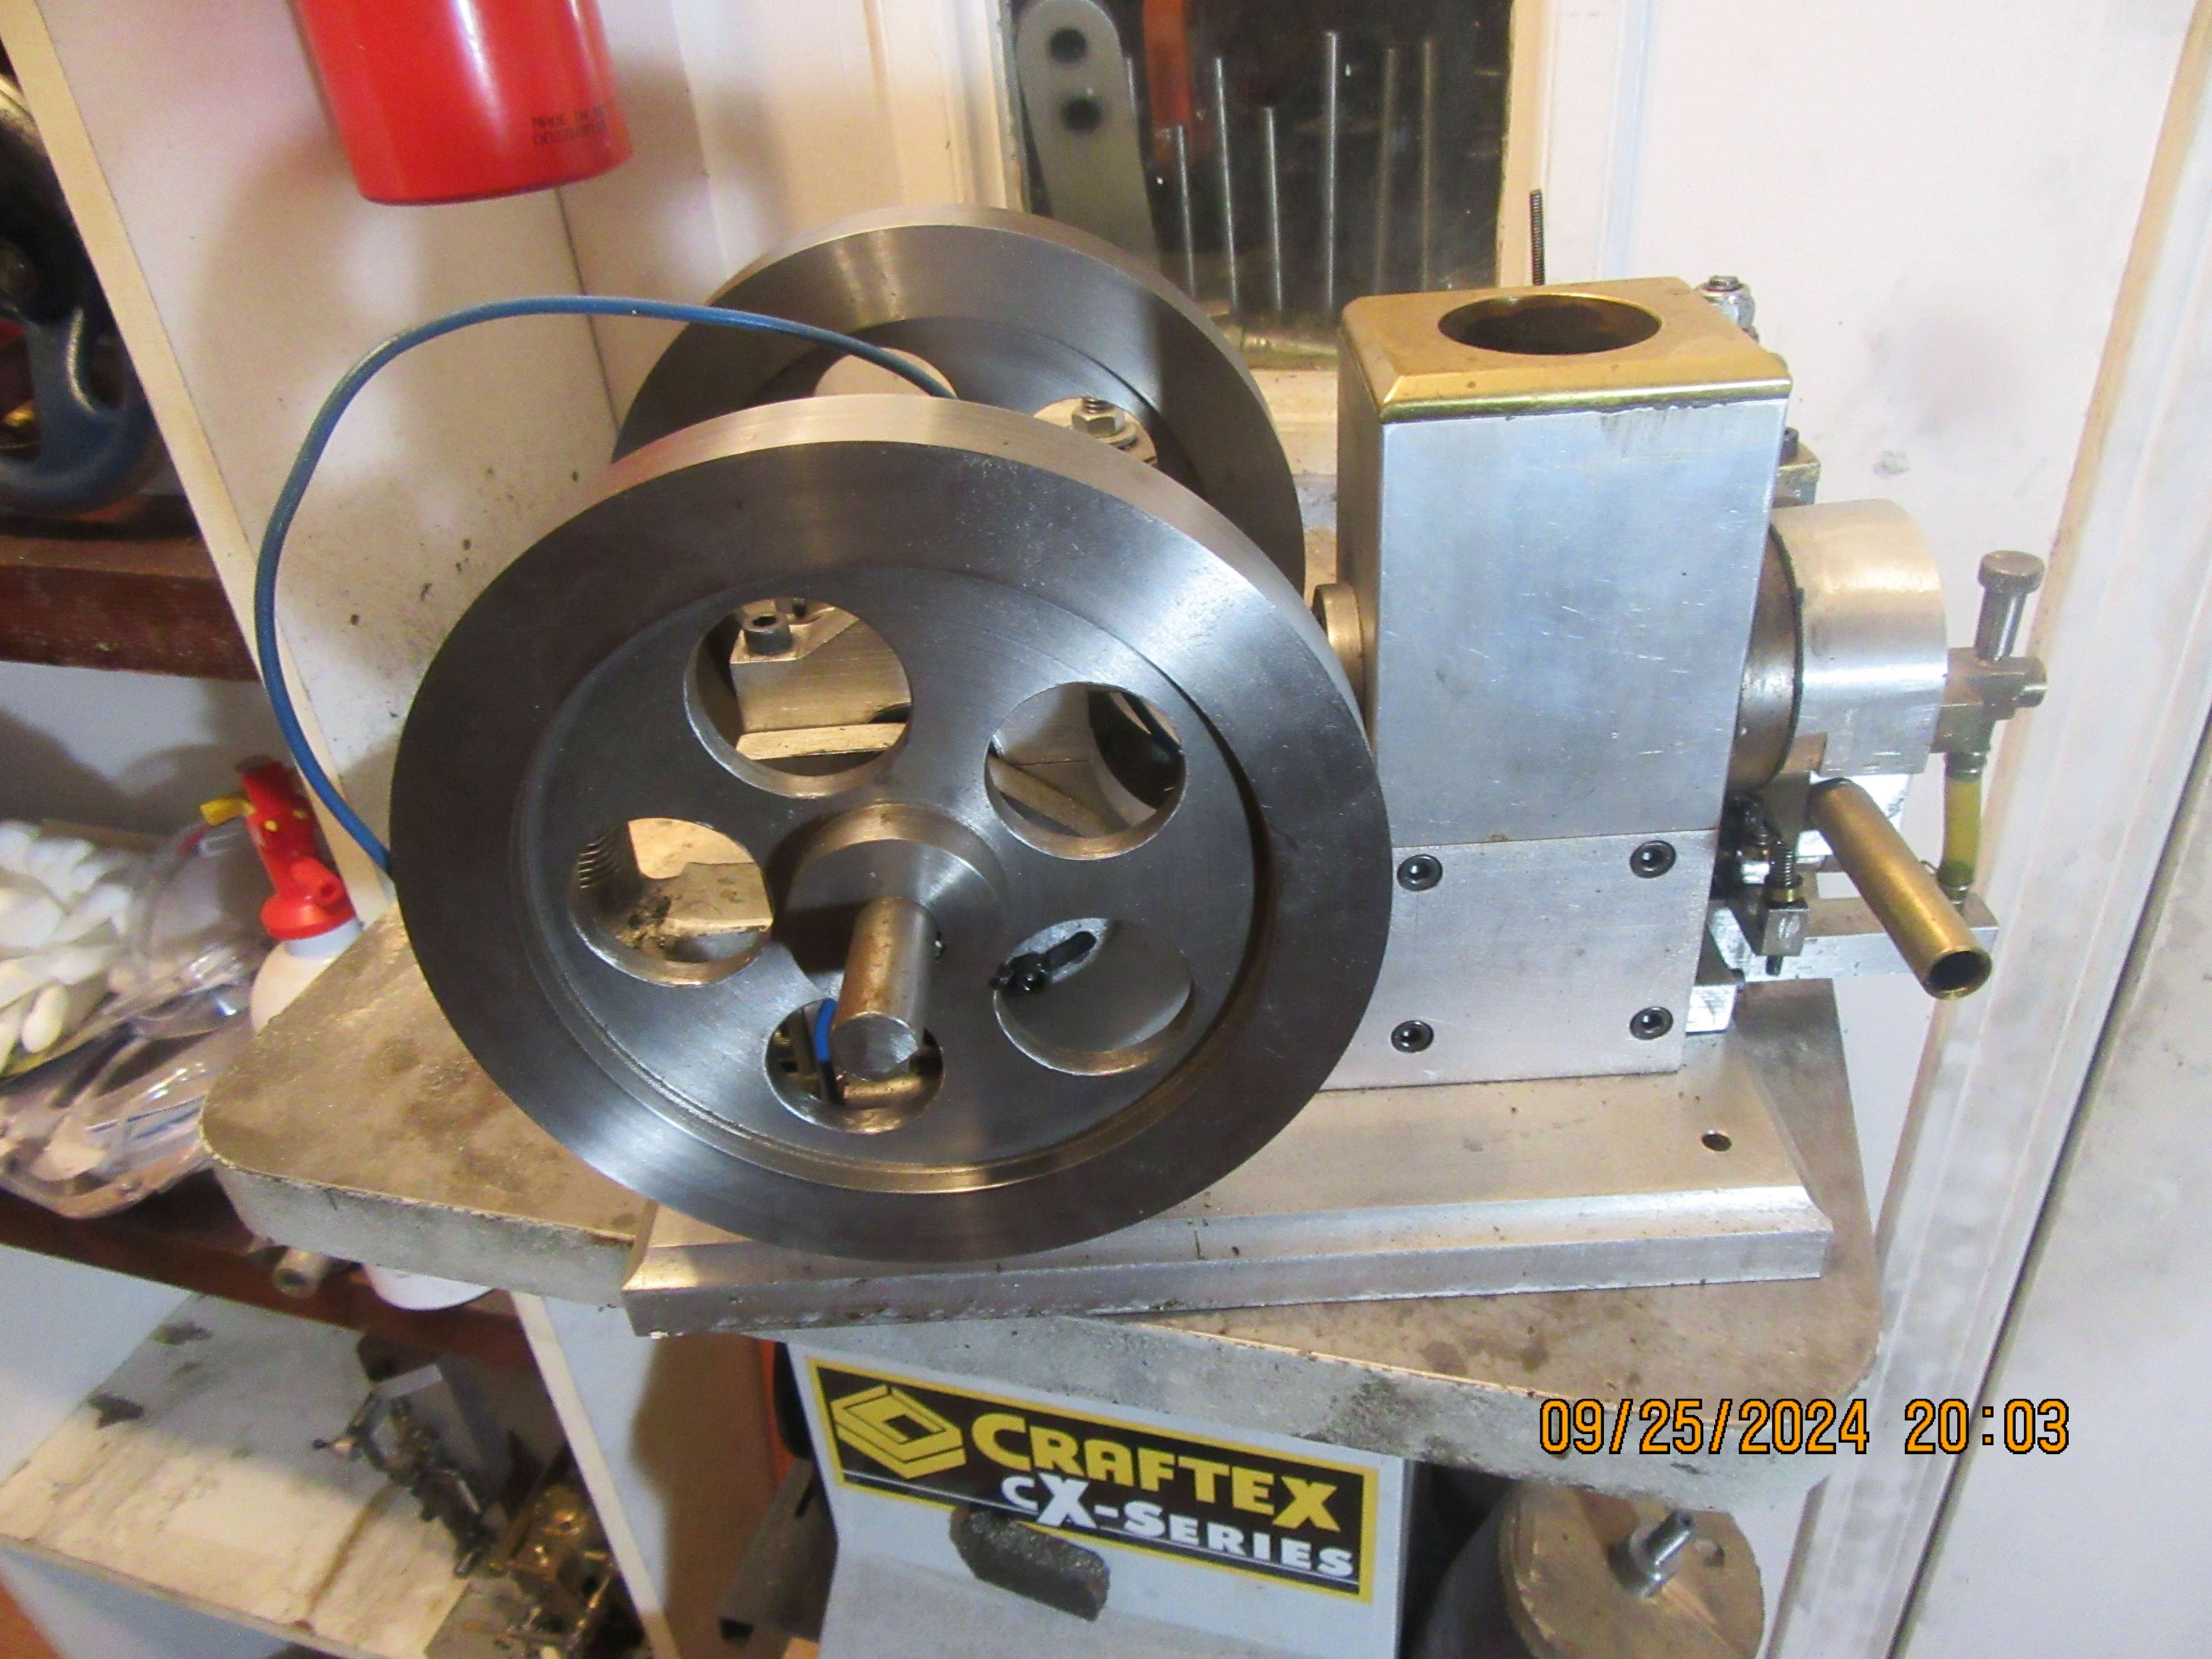
A few years ago I designed and built this i.c. engine, and at the time I painted the gas tank and the flywheel with red spray on enamel. As time went by, the enamel paint on the flywheel got chipped, scratched, and generally buggered up. To redo this flywheel with powder paint, the enamel paint will have to be totally removed (sandblaster). Then the powder paint (which is applied as a dry powder) will be sprayed onto the flywheel and baked in an oven until the powder melts and flows out smoothly. This results in an almost bullet-proof coating, which is very resistant to scratches and chipping away. In order to hold this part securely in place while applying the powder paint and baking it will require some simple fixturing which I will show as I go along. This will be the first thing I have ever powder painted, so stay with me and we'll see what the results will be.---Brian
2tGXmy.jpg
 
This is the flywheel after sandblasting. 99.9% of the paint is blasted away. I didn't realize it, but this flywheel is made up from three different pieces which have been pressed or Loctited together. Powder paint has issues with this as any oil trapped between the pieces tends to "boil up" during the baking process and this affects the paint finish. I may just re-spray this flywheel with enamel and pick on a one piece flywheel to powder paint.
C5ApHq.jpg
 
Okay---we'll try something different. These flywheels are one piece, and I'm sure of that because there is no paint on them to hide things. They will not have to be sandblasted, but will be wiped down with thinners and cleaned up with a lint free rag, then straight into the powder paint booth. I have built so many engines over the years, that once paint is on the flywheels, I don't remember if they were one piece, two piece, or three piece. The flywheel I sandblasted that turned out to be three piece will be repainted with spray can enamel and reinstalled on the engine it came off of.
qvS5Ci.jpg
 
Probably too late this time, but I would recommend that you sand blast bare metal lightly to give the powder coat some grip. Powder coat, although tough in it's own right is only as good as the prep as far as sticking to the base metal.

On another note. Good thing you didn't paint the flywheel that's loctited together. The loctite would cut loose at less than the 400 deg or so require to cure the paint.

Also cast material takes some special care. The part should be preheated first to above the curing temp. I can be cooled to say 200deg or so while being painted. What happens (as me how I know with cast aluminum) is you'll paint it and the finish will get rice crispy like bubbles popping in the finish. Air trapped in the castings expands out when it's heated bubbling through the liquid paint.
One hell of a mess requiring re-sandblasting and then proper treatment.
 
dsage---Thank you. I did know most of that. I've read a lot of write ups about the application of powder paint, what it sticks to, what it doesn't stick to, and what screws up the finish. I didn't do anything today. Today my left knee, the one not operated on was giving me all kinds of Hell---wouldn't bear any load on it. My good wife had gone out for the day, so I laid in bed until 2:00 in the afternoon waiting for my wife to come home and save me. I'm up and about now, but not up to doing any real work.----Brian
 
BTW. If you need to mask portions. You can use tin foil or better, Kapton tape and (reusable silicon plugs and caps.
(Caps and Plugs company in Mississauga has everything you need).
 
BTW. I should add that I had no problem with the cast aluminum using the pre-heat first. I believe I pre-heated to 450 and cured to 400.
 
Right at the moment I have no plans for powder coating cast material. However, powder painting is so new to me that anything is possible. I'm still having problems with my good leg, but I think it is getting better. If I'm lucky, I may be well enough to make the stands that these two flywheels will set on while being powder painted and oven cured tomorrow.
 
Items painted with powder paint should be painted "everywhere" in one go. There may be a way to powder paint and bake one side, then after the part has cooled off, flip it over and powder coat and bake the other side, but I'm not sure you can do that successfully. The model below shows what I intend to do. There are two welded end supports, colored yellow, and one shaft support colored blue. I could have made the fixture simpler and then cut it apart after all the painting and baking is finished, but I'm going to try and save any fixtures I make for re-use. What is shown will fit comfortably into my spray booth and into my baking oven. I'm only going to do one flywheel at a time until I get a bit more comfortable with this paint system. One exposed end of the shaft will have to be masked off so no paint gets on it so I will be able to get things apart after the painting and baking is finished.
McOnGl.jpg
 
You don't need anything so elaborate. I just hang my parts from stiff bare wire.. Coat hangers work if you clean the paint or varnish off at the touch/connection points.
Put a large hook in the end and hook the hole in the wheel and hang it up.
With your setup - I'm wondering how you are going to remove the wheel from the through shaft. The through shaft is going to be larger in diameter with the paint. Unless of course you mask the shaft (tin foil works).
 
Last edited:
dsage---read my whole post. I cover the issue of masking one end of the exposed shaft in my previous post. I would hang the flywheel from a piece of wire as you suggest, but then the wire itself would mask the powder paint, leaving a line on the side of the flywheel. These flywheels are quite heavy, and they have to be turned and manipulated a bit in the powder paint booth to achieve full coverage. Then they have to be moved over into the powder paint oven without disturbing the powder paint.
LbfzXs.jpg
 
Last edited:
And yes boys and girls---Even the old and the lame can build a fixture to hold flywheels for powder painting. Nothing has been cleaned up or ground smooth yet, even the flywheel is dirty---but---It gave me something to do this afternoon.
G5EoHr.jpg

AVZZV7.jpg
 
And here we are---ready to ROCK AND ROLL!!!! The flywheel has been wiped down with acetone. I added a 1/8" aluminum plate to the bottom of the fixturing just to keep things from flopping around when I move from the paint booth over to the bake oven. The flywheel is not fastened to the shaft--it can turn on there. The long bolt setting in one set screw hole lets me reach in and turn the flywheel thru a partial rotation and not disturb the powder on the flywheel. I still have to mask the smaller diameter of the shaft with a special hi temperature masking tape so that I can get the flywheel off the shaft after the painting and baking is done.---Wish me luck.---Brian
0PaMB7.jpg
 
Maybe rock and roll will be postponed for a bit. I can not get the bake oven from Eastwood up to 400 degrees F. I have followed all the correct procedures and everything is set up to what Eastwood specifies in terms of dedicated circuit, no extension cord, and settings on the oven dials. The message below, written in italics is the message I sent Eastwood last night. They are currently jumping thru hoops to help me out here, as I have had them on the phone three times this morning I will let you know what happens.---Brian
.Help!!! In the last month or so, I have purchased the dual voltage powder paint gun kit, assorted powder paints, and your baking oven to bake these powder finishes. Every piece of literature that came with the dual voltage powder paint kit tells me that 400 degrees F is the temperature to bake and cure the finishes correctly. I have your oven on a dedicated 110 volt circuit and the highest temperature it reaches is about 355 degrees F. I purchased an oven thermostat locally, and in my wife's kitchen oven, set at 400 degrees, that is what the thermostat reads, 400 degrees F. I have tried all the time settings on your oven, from 15 minutes up to 60 minutes, and the hottest it gets is 355 degrees F. I have invested considerable money in a powder paint booth and a sandblasting set up, and I'm ready to powder coat my first part (a 1" bore i.c. engine flywheel). Is the oven faulty? Will it bake and cure my powder paint at 355 degrees F? I really need some help here. I have purchased other items from Eastwood in the past, and they always worked well. Please call me at 705-734-6271 (Ontario time) or email me and help me get this sorted out. Thank you---Brian Rupnow
 
I read similar reports of not hitting 400 in reviews of that oven.

Doing that flywheel as your first ever powder coating adventure is probably not the best idea. You should so some scrap, a wrench or something just to get the hang of it first. I bet the over will cure the powder just fine. Something as heavy as that flywheel will take quite a bit of soak time to reach temp and cure. I am following but don't have a horse in the race.
 
Okay---New News!! I have spoken with the rep at Eastwood, tried a couple of things he suggested, and oven still won't go above 355 degrees. They are sending me a new oven, no charge. I asked them to PLEASE plug it in and check that it goes to 400 degrees before they send it.---They were very nice to deal with.----Brian
 
Stick it in the kitchen oven when she is looking the other way:cool:
 

Latest posts

Back
Top