You have left yourself a fair bit of lapping to do if those ali pistons are to run freely when hot.
You are using an out of date browser. It may not display this or other websites correctly.
You should upgrade or use an alternative browser.
You should upgrade or use an alternative browser.
Upshur's opposed twin engine
- Thread starter Brian Rupnow
- Start date

Help Support Home Model Engine Machinist Forum:
This site may earn a commission from merchant affiliate
links, including eBay, Amazon, and others.
Maybe.
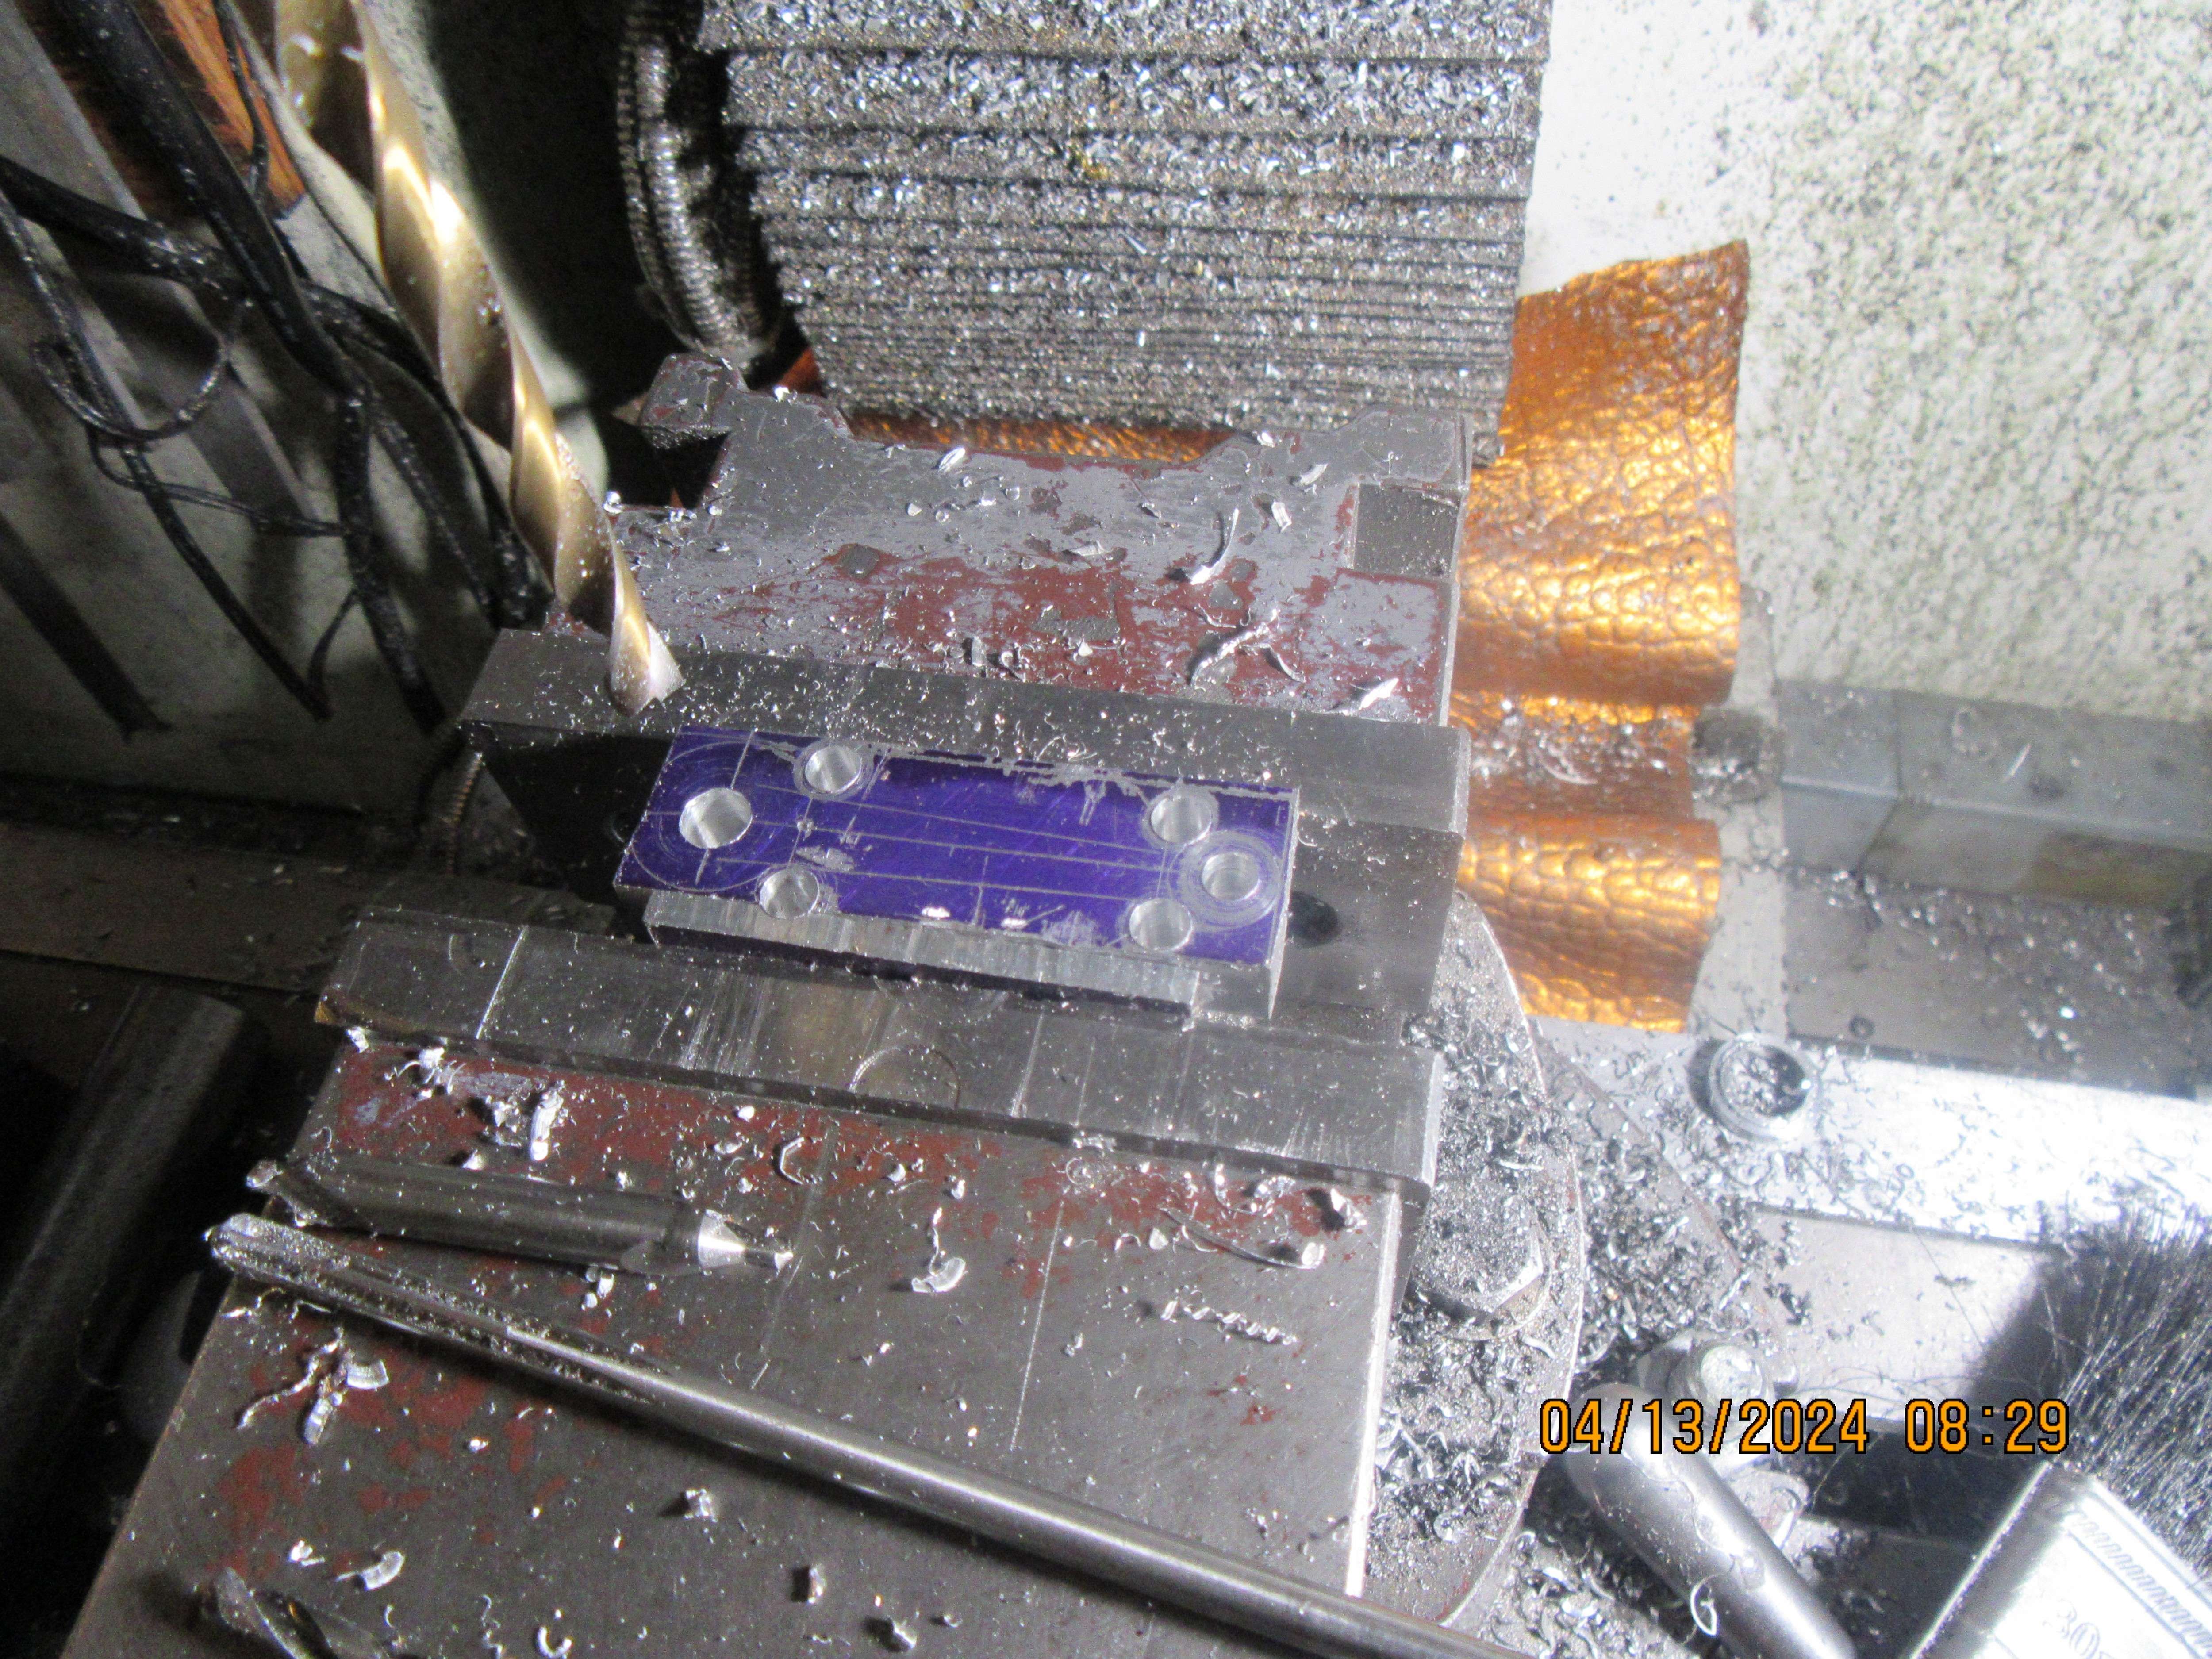
I know what I'm going to do tomorrow. I won't actually cut to the layout lines. All positioning will be done with my X and Y dro's on the milling machine. The layout lines and punch marks are only there to keep me from dialing in something wildly wrong.
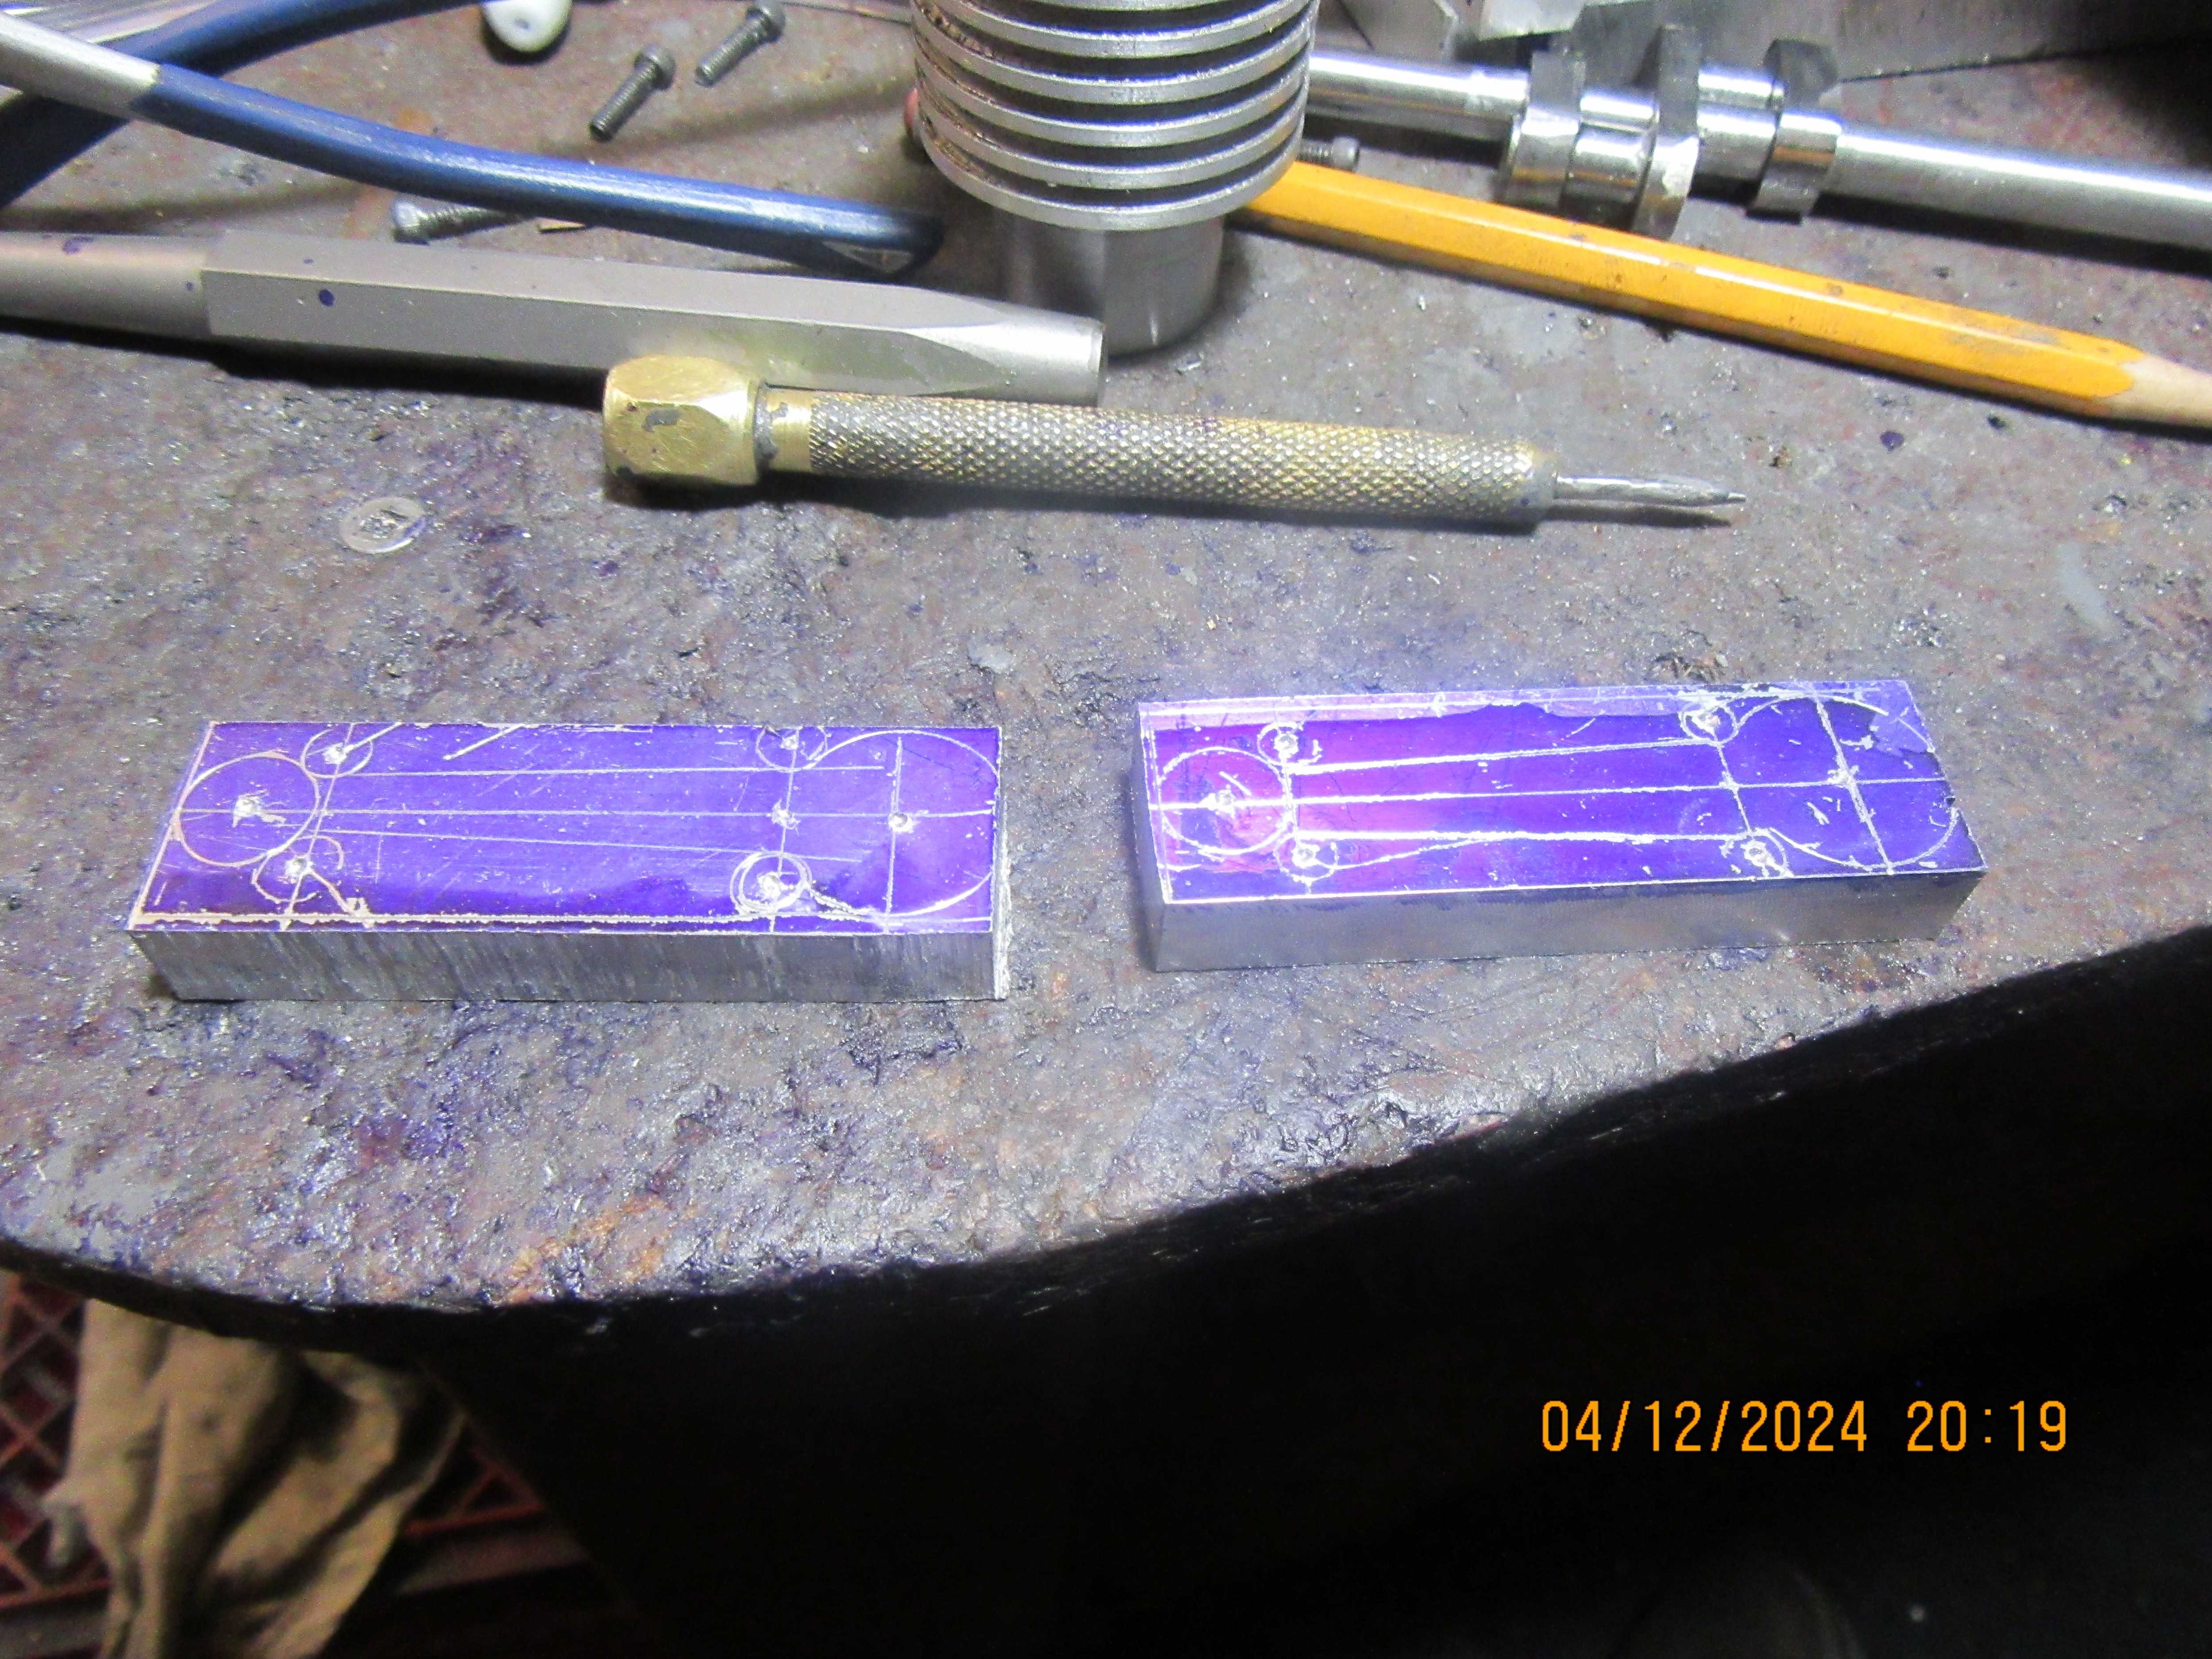

I know what I'm going to do tomorrow. I won't actually cut to the layout lines. All positioning will be done with my X and Y dro's on the milling machine. The layout lines and punch marks are only there to keep me from dialing in something wildly wrong.

Might want to look again and recheck those scribe lines on the left hand piece before cutting !
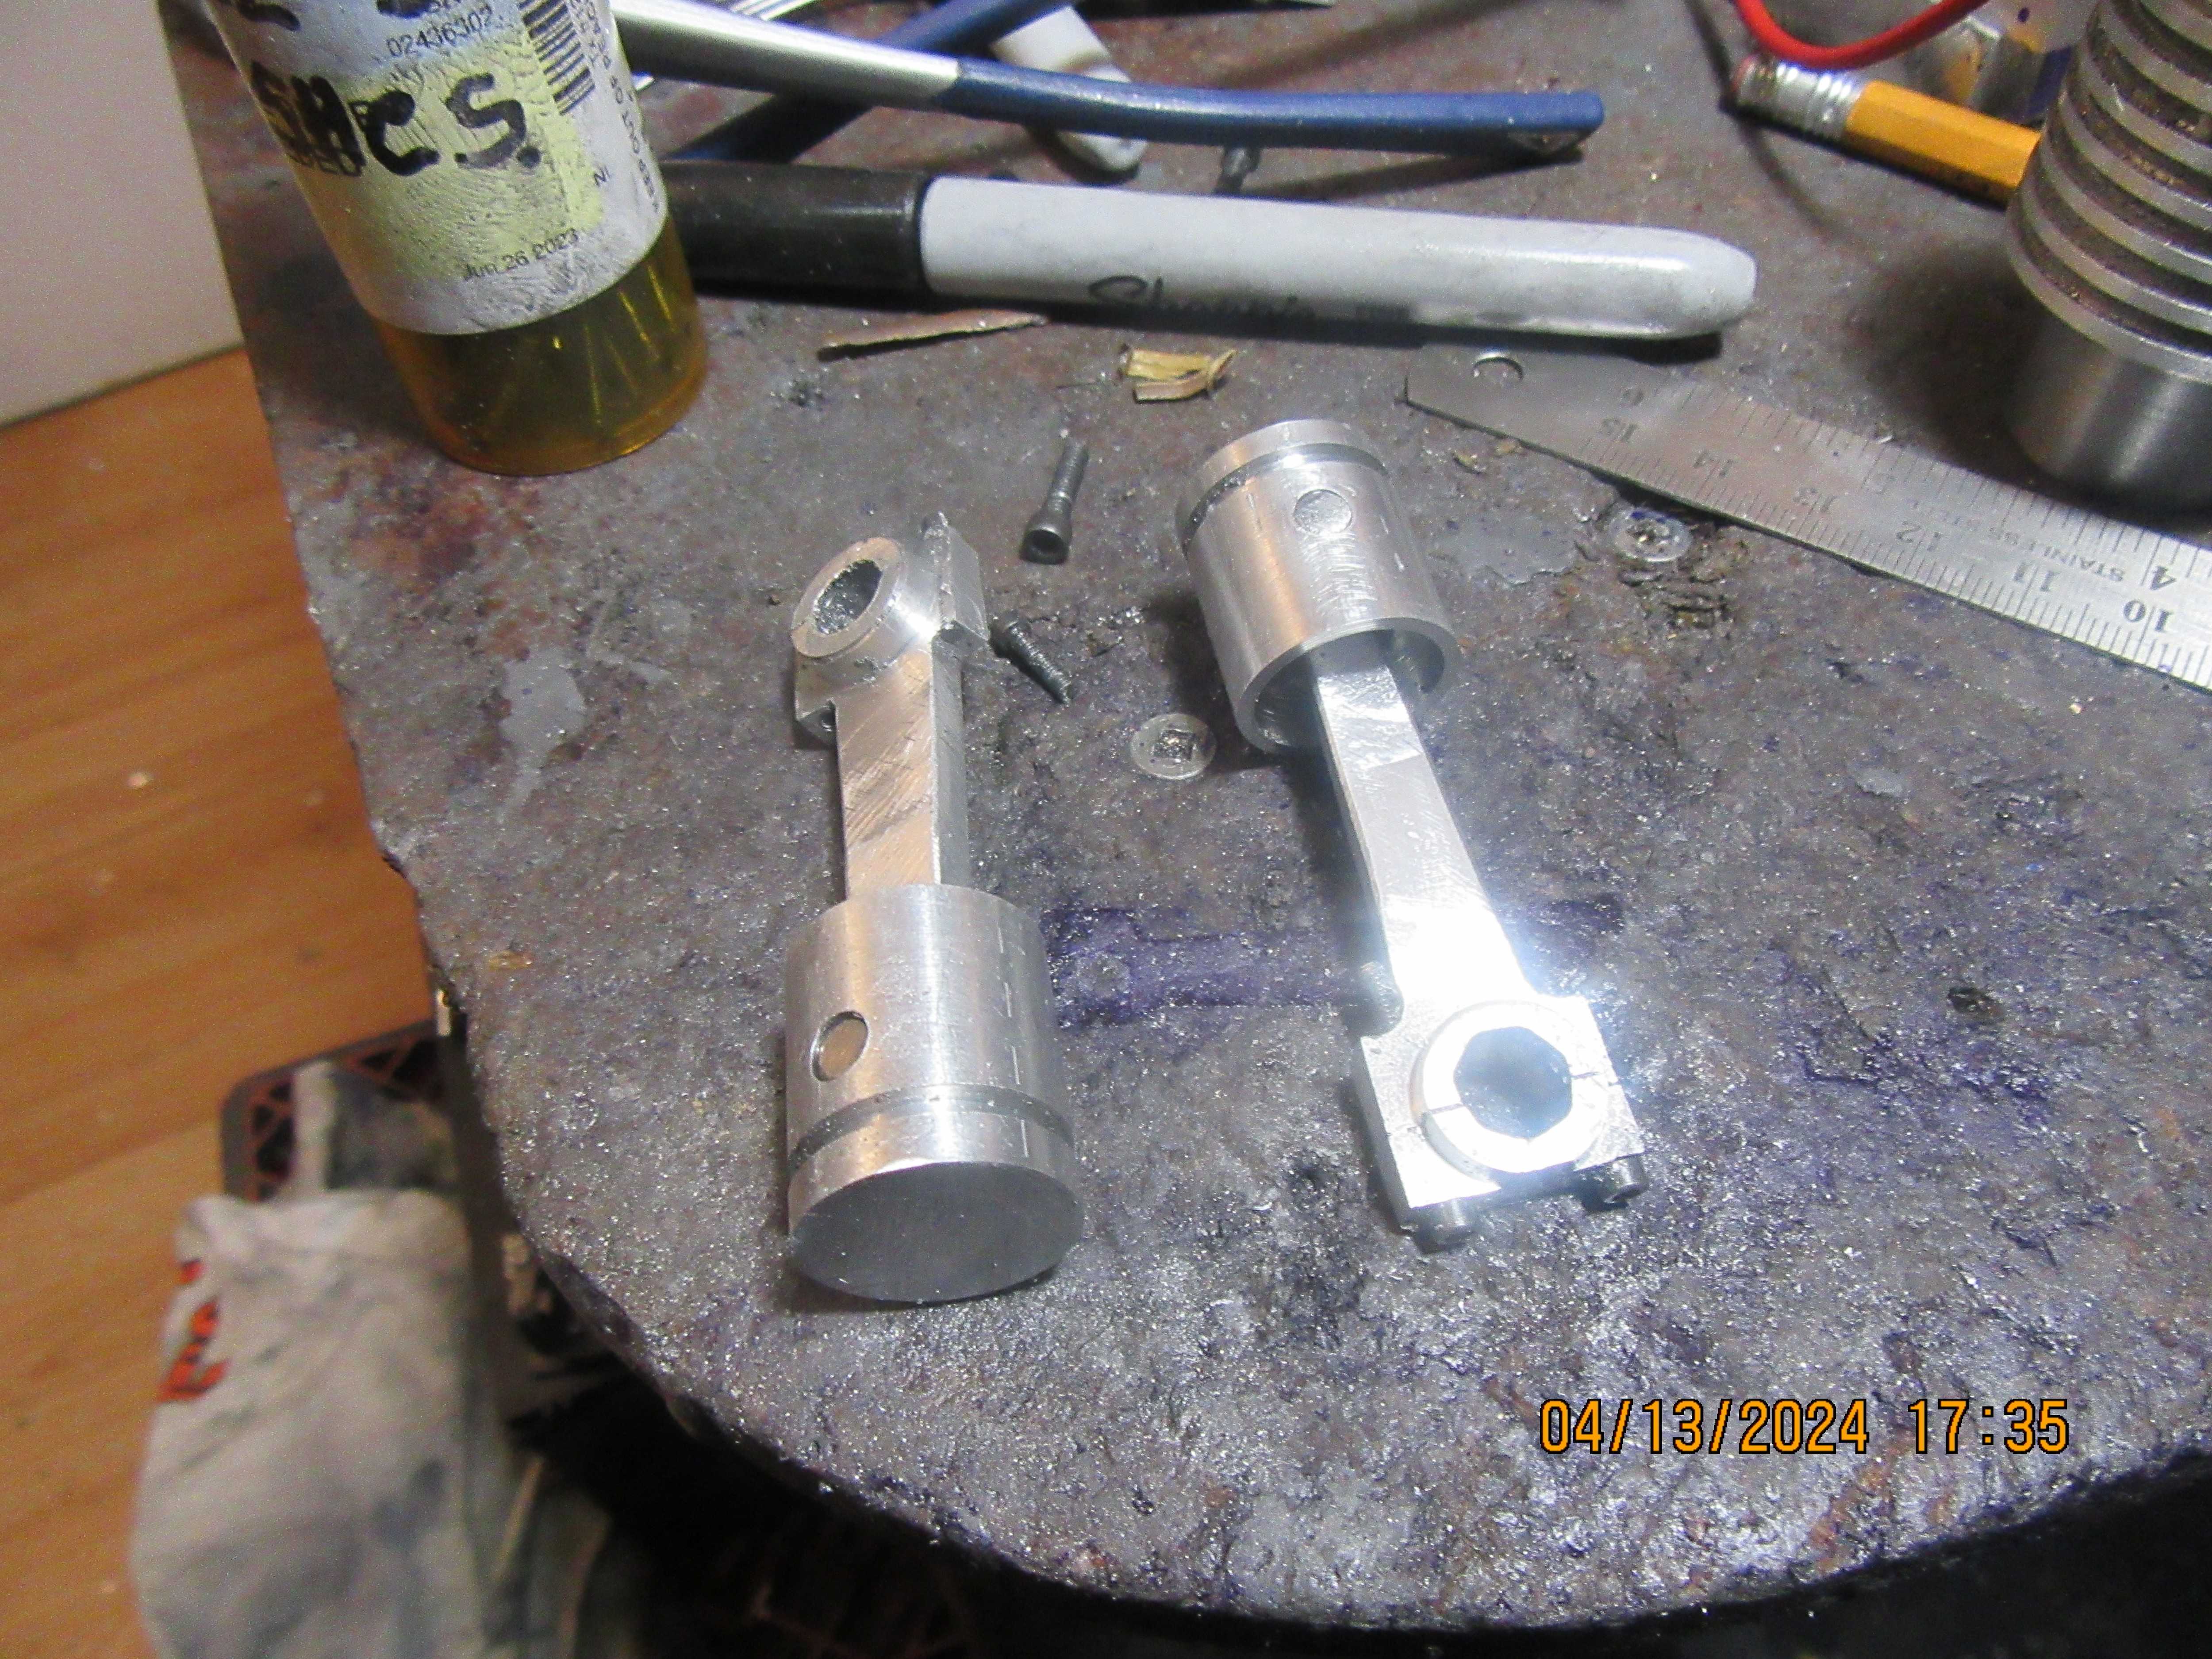
Today was connecting rod day. I thought I might have time to do something else, but I worked right up to supper time on these connecting rods. They turned out okay, but there were a lot of different set ups required. Thought I would pin the crankshaft today, but unless I get a surge of energy between now and bedtime, that will get done tomorrow.


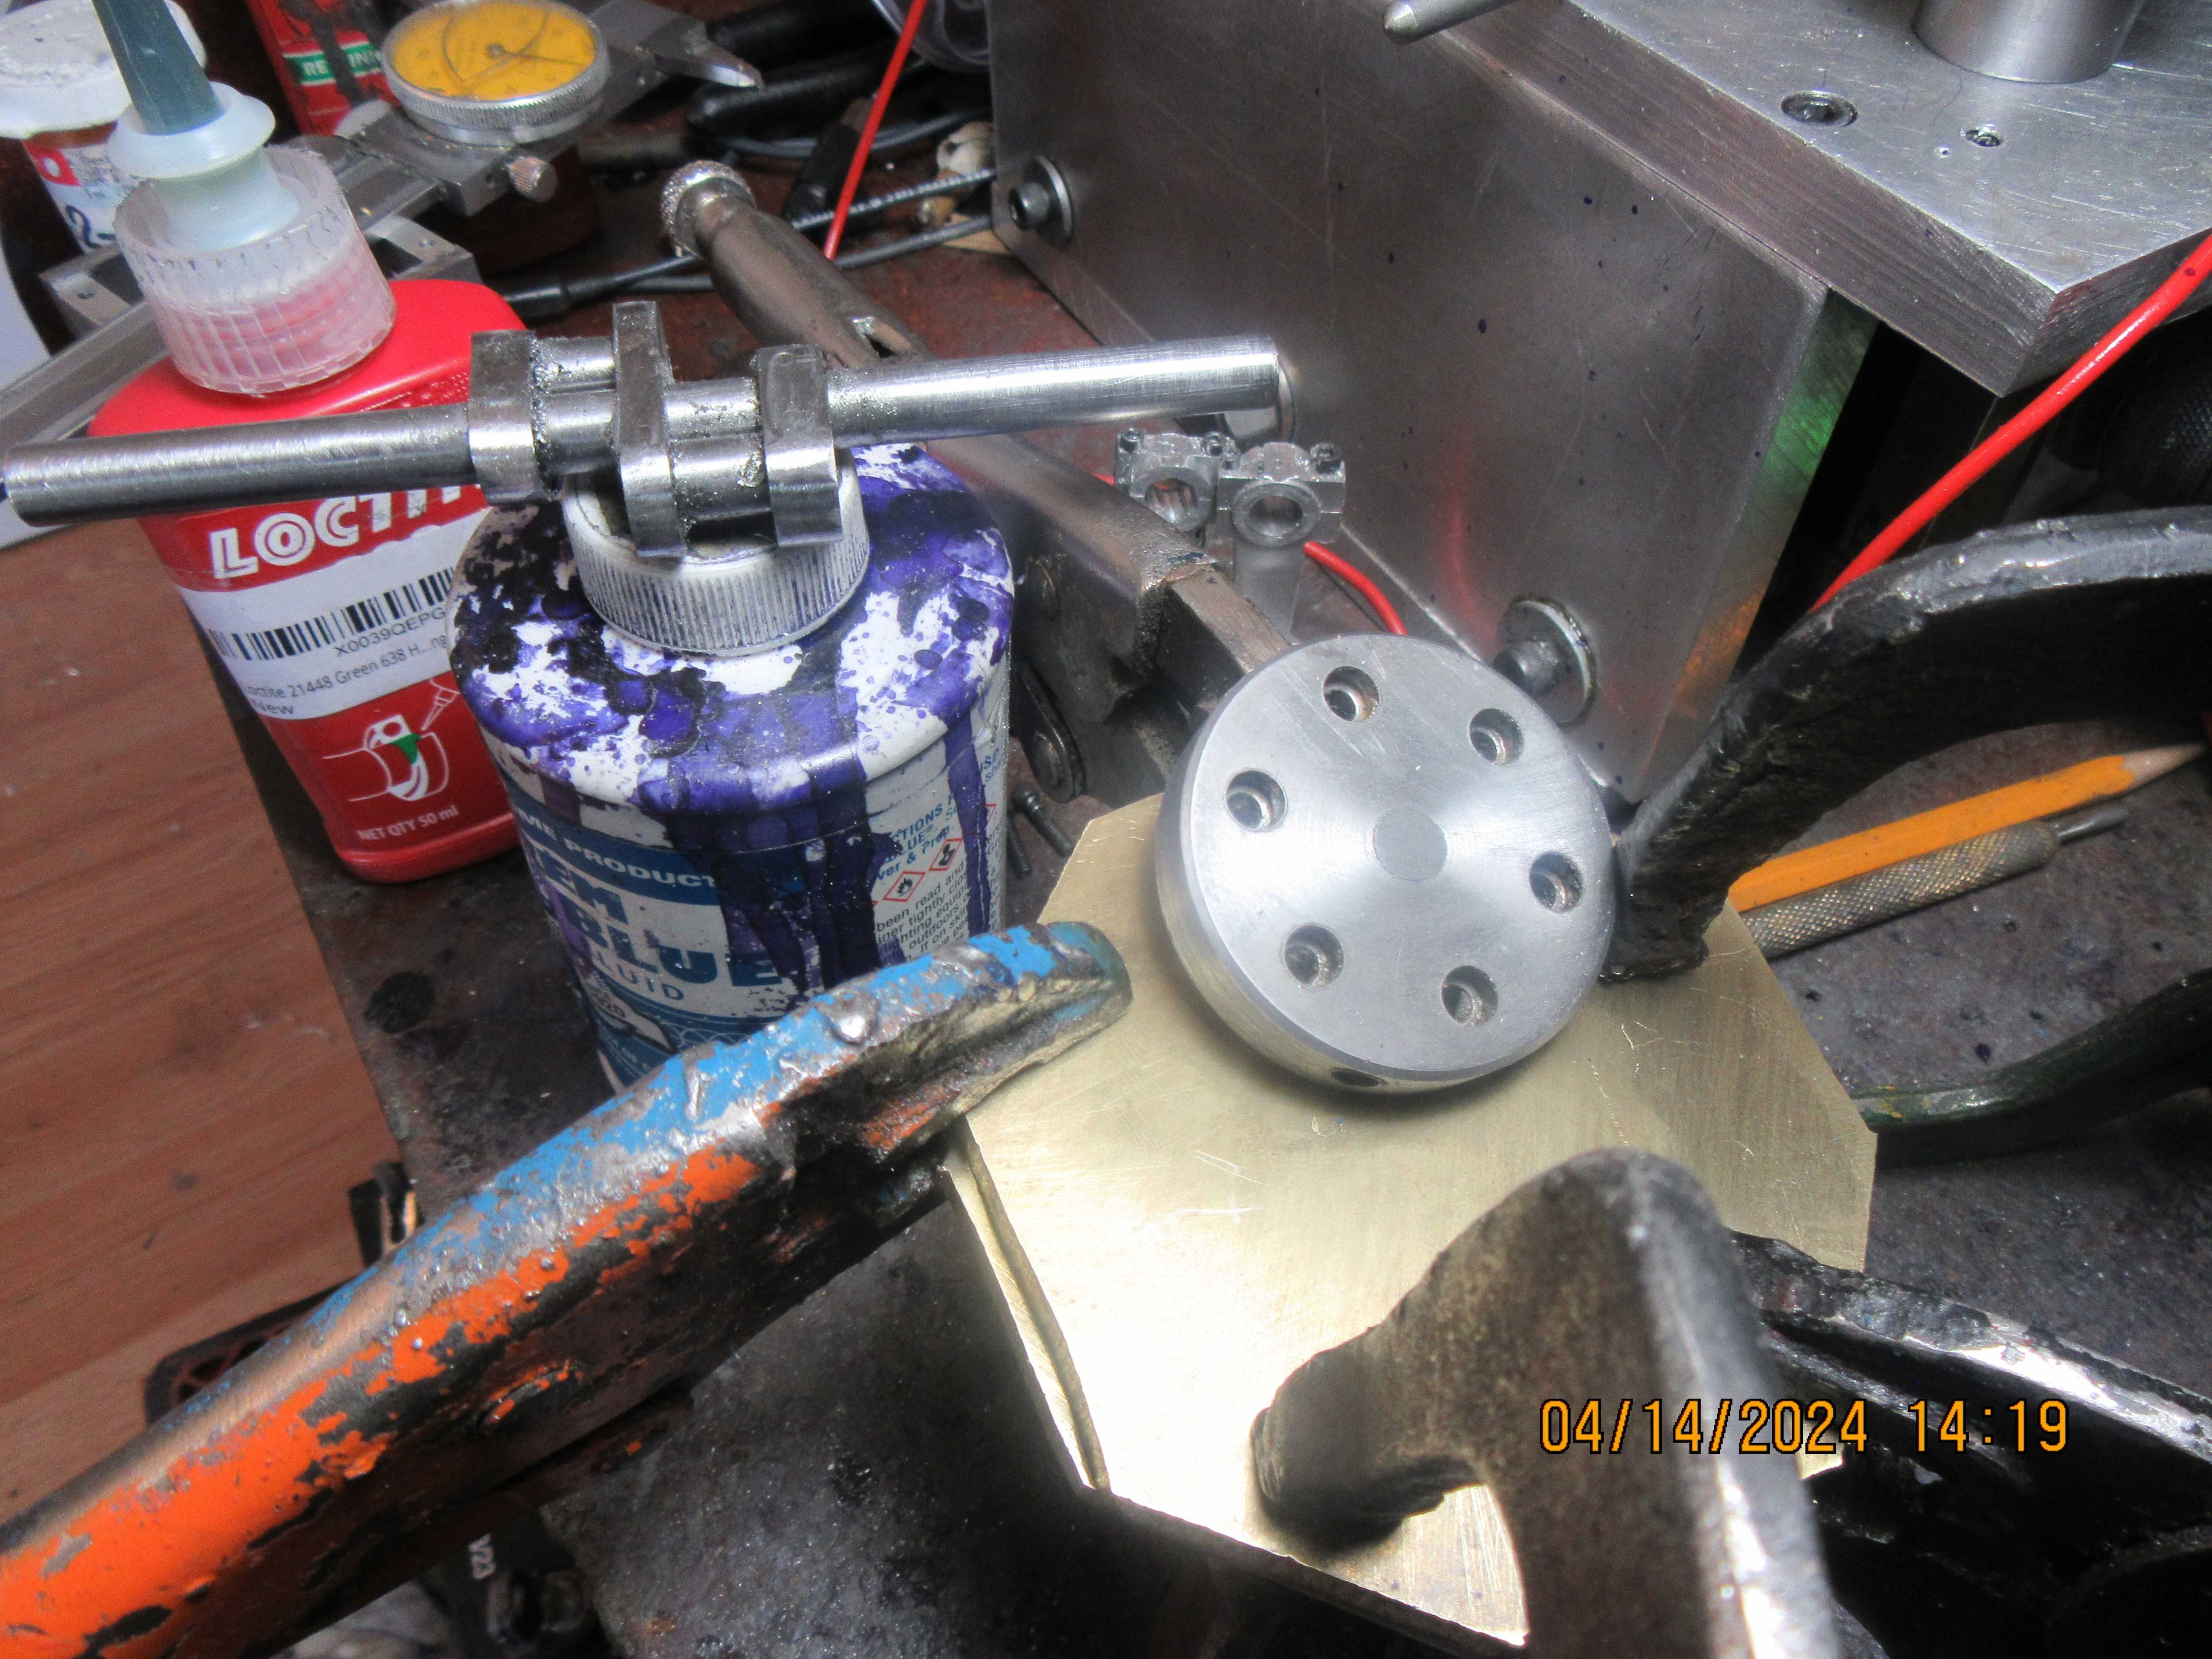
I actually did find enough energy to drill and pin the crankshaft last night before I went to bed. This afternoon when the Loctite has set up good, I filed the exposed ends off of the pins and brought them down flush with the outside of the throws. I searched around in my odds and ends box, and came up with material to build a flywheel. There are two sheets of 1/4" brass Loctited and vice gripped together in the picture, and a hub that is complete except for the center hole. I'm lazy today, and don't plan on doing much more in my shop today.


$599.00
$649.00
FoxAlien Masuter Pro CNC Router Machine, Upgraded 3-Axis Engraving All-Metal Milling Machine for Wood Acrylic MDF Nylon Carving Cutting
FoxAlien Official

$39.99
$49.99
Sunnytech Low Temperature Stirling Engine Motor Steam Heat Education Model Toy Kit For mechanical skills (LT001)
stirlingtechonline

$99.99
AHS Outdoor Wood Boiler Yearly Maintenance Kit with Water Treatment - ProTech 300 & Test Kit
Alternative Heating & Supplies

$25.34
$34.99
Peachtree Woodworking Supply Bowl Sander Tool Kit w/Dual Bearing Head & Hardwood Handle, 42 Pieces Wood Sander Set, 2 Hook & Loop Sanding Disc Sandpaper Assortment, 1/4 Mandrel Bowl Sander
Peachtree Woodworking Supply Inc

$171.00
$190.00
Genmitsu CNC 3018-PRO Router Kit GRBL Control 3 Axis Plastic Acrylic PCB PVC Wood Carving Milling Engraving Machine, XYZ Working Area 300x180x45mm
SainSmart Official

$40.02
$49.99
Becker CAD 12 3D - professional CAD software for 2D + 3D design and modelling - for 3 PCs - 100% compatible with AutoCAD
momox Shop

$54.46
Amana Tool - 46280 CNC 2D & 3D Carving 6.2 Deg Tapered Angle Ball Tip x 1/32 Dia x 1/64
Express Tool Supply
![DreamPlan Home Design and Landscaping Software Free for Windows [PC Download]](https://m.media-amazon.com/images/I/51kvZH2dVLL._SL500_.jpg)
$0.00
DreamPlan Home Design and Landscaping Software Free for Windows [PC Download]
Amazon.com Services LLC
- Joined
- Jan 4, 2011
- Messages
- 1,437
- Reaction score
- 401
Brian: What sequence do you use when making a connecting rod with a removable cap? If you drill the crank journal hole before you split it the hole is no longer round. Do you split it and bolt it together before you drill it? I generally just start out with two pieces of rod and cap and then bolt them together and then drill them. I am curious as to how others do it.
I've done it both ways. On these rods, I made them from one piece of material but made the rod and the cap both 1/32" longer than the finished assembly. Then I drilled and tapped for threaded hole and clearance holes from the big end, then I cut the cap away from the rod itself using a 1/16" slitting saw.
I'm about to do something new, that I haven't done before. I found the "silver lead free solder" recommended for soldering the cylinder assemblies to the platework in the crankcase. It is 96% tin and 4% silver solder and is sold by Oatey, product number 48319. The recommendation is that both surfaces to be soldered should first be "Tinned" before soldering. I had to look this up on the internet, as I haven't "tinned" anything before soldering it. The flux that I bought with this small "kit" contains "#95 tinning paste", and according to the internet I heat up the pieces to be soldered and use the brush from the kit to spread some of this "tinning paste" onto the joint before actually trying to solder it. Okay, sounds easy enough.--I will let you know how things worked out.
Brian,
Try it on some scrap first to get the "feel" for the way it works first.
Cheers
Andrew
Try it on some scrap first to get the "feel" for the way it works first.
Cheers
Andrew
Tinning is quite a common way to solder parts together, I was first shown how to do it at school. Basically it is the application of a thin layer of solder to both parts so that you can see they are fully coated before assembly. It does need to be thin, just enough to put a film on the surfaces. Tinning should ensure that the whole of the mating surfaces are soldered and you are not just hoping that the solder has fully flowed into the joint this is why it is often used for larger areas than this particular joint where the solder may need to flow some distance.
Flux and apply solder to the part and then wipe off excess solder with a cloth (not man made fibre), assemble the parts with flux and "sweat" them together this means bringing them upto the temp that the solder melts at, apply a little more solder if needed.
Fluxed split bearings ready to be sweated together
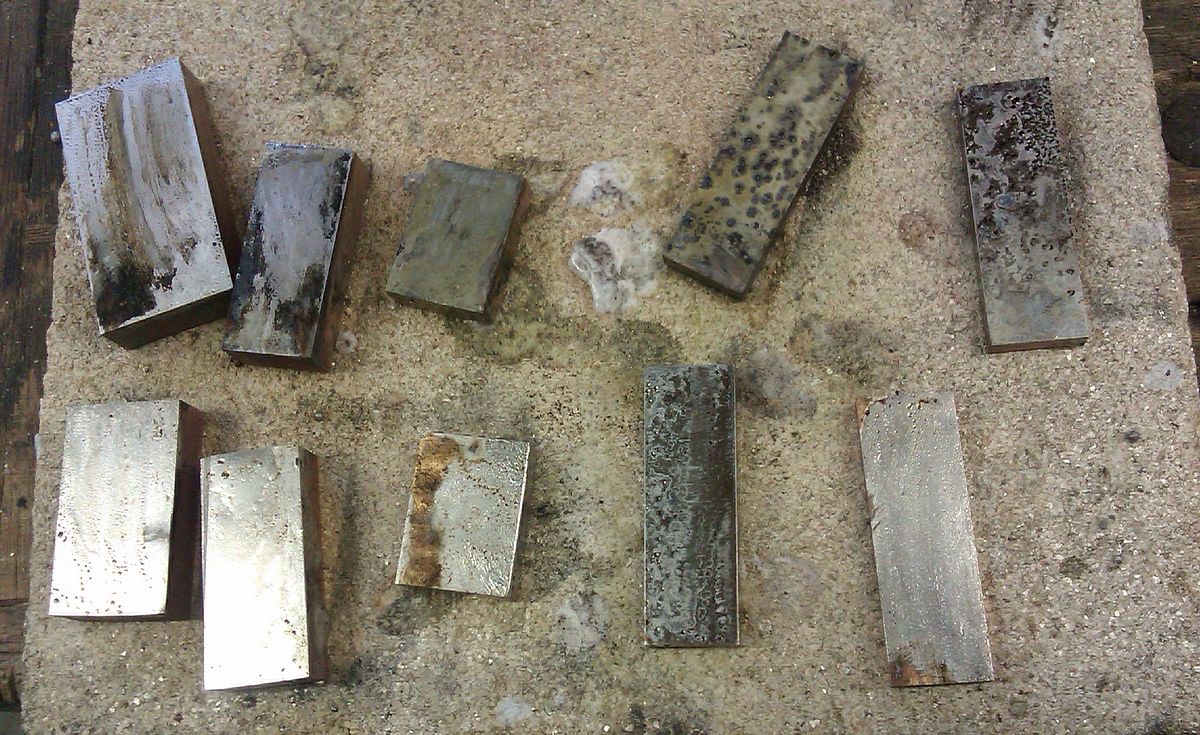

It is 96% tin and 4% silver solder and is sold by Oatey,
Just be aware that the solder you say you have got is not 4% silver / 96% Tin as spec'd on the drawings so may affect the joint strength. The 4/96 is a high tensile solder often used for HVAC as a replacement for silver braze. Oatey don't give strengths for what you have but I would think it could be as low as half the stength of a 4/96 solder.
Upto you whether you change it now or risk joint failure later.
Last edited:
Thank You Jason.---I will risk it with what I have bought.----Brian
I researched Oatley product #48319 out of curiosity. In the Q and A section Oatley responded that the silver content is less than 2% for that product.Just be aware that the solder you say you have got is not 4% silver / 96% Tin as spec'd on the drawings so may affect the joint strength. The 4/96 is a high tensile solder often used for HVAC as a replacement for silver braze. Oatey don't give strengths for what you have but I would think it could be as low as half the stength of a 4/96 solder.
Upto you whether you change it now or risk joint failure later.
https://www.rona.ca/en/product/oatey-silver-solder-kit-483191-1120099
Last edited:
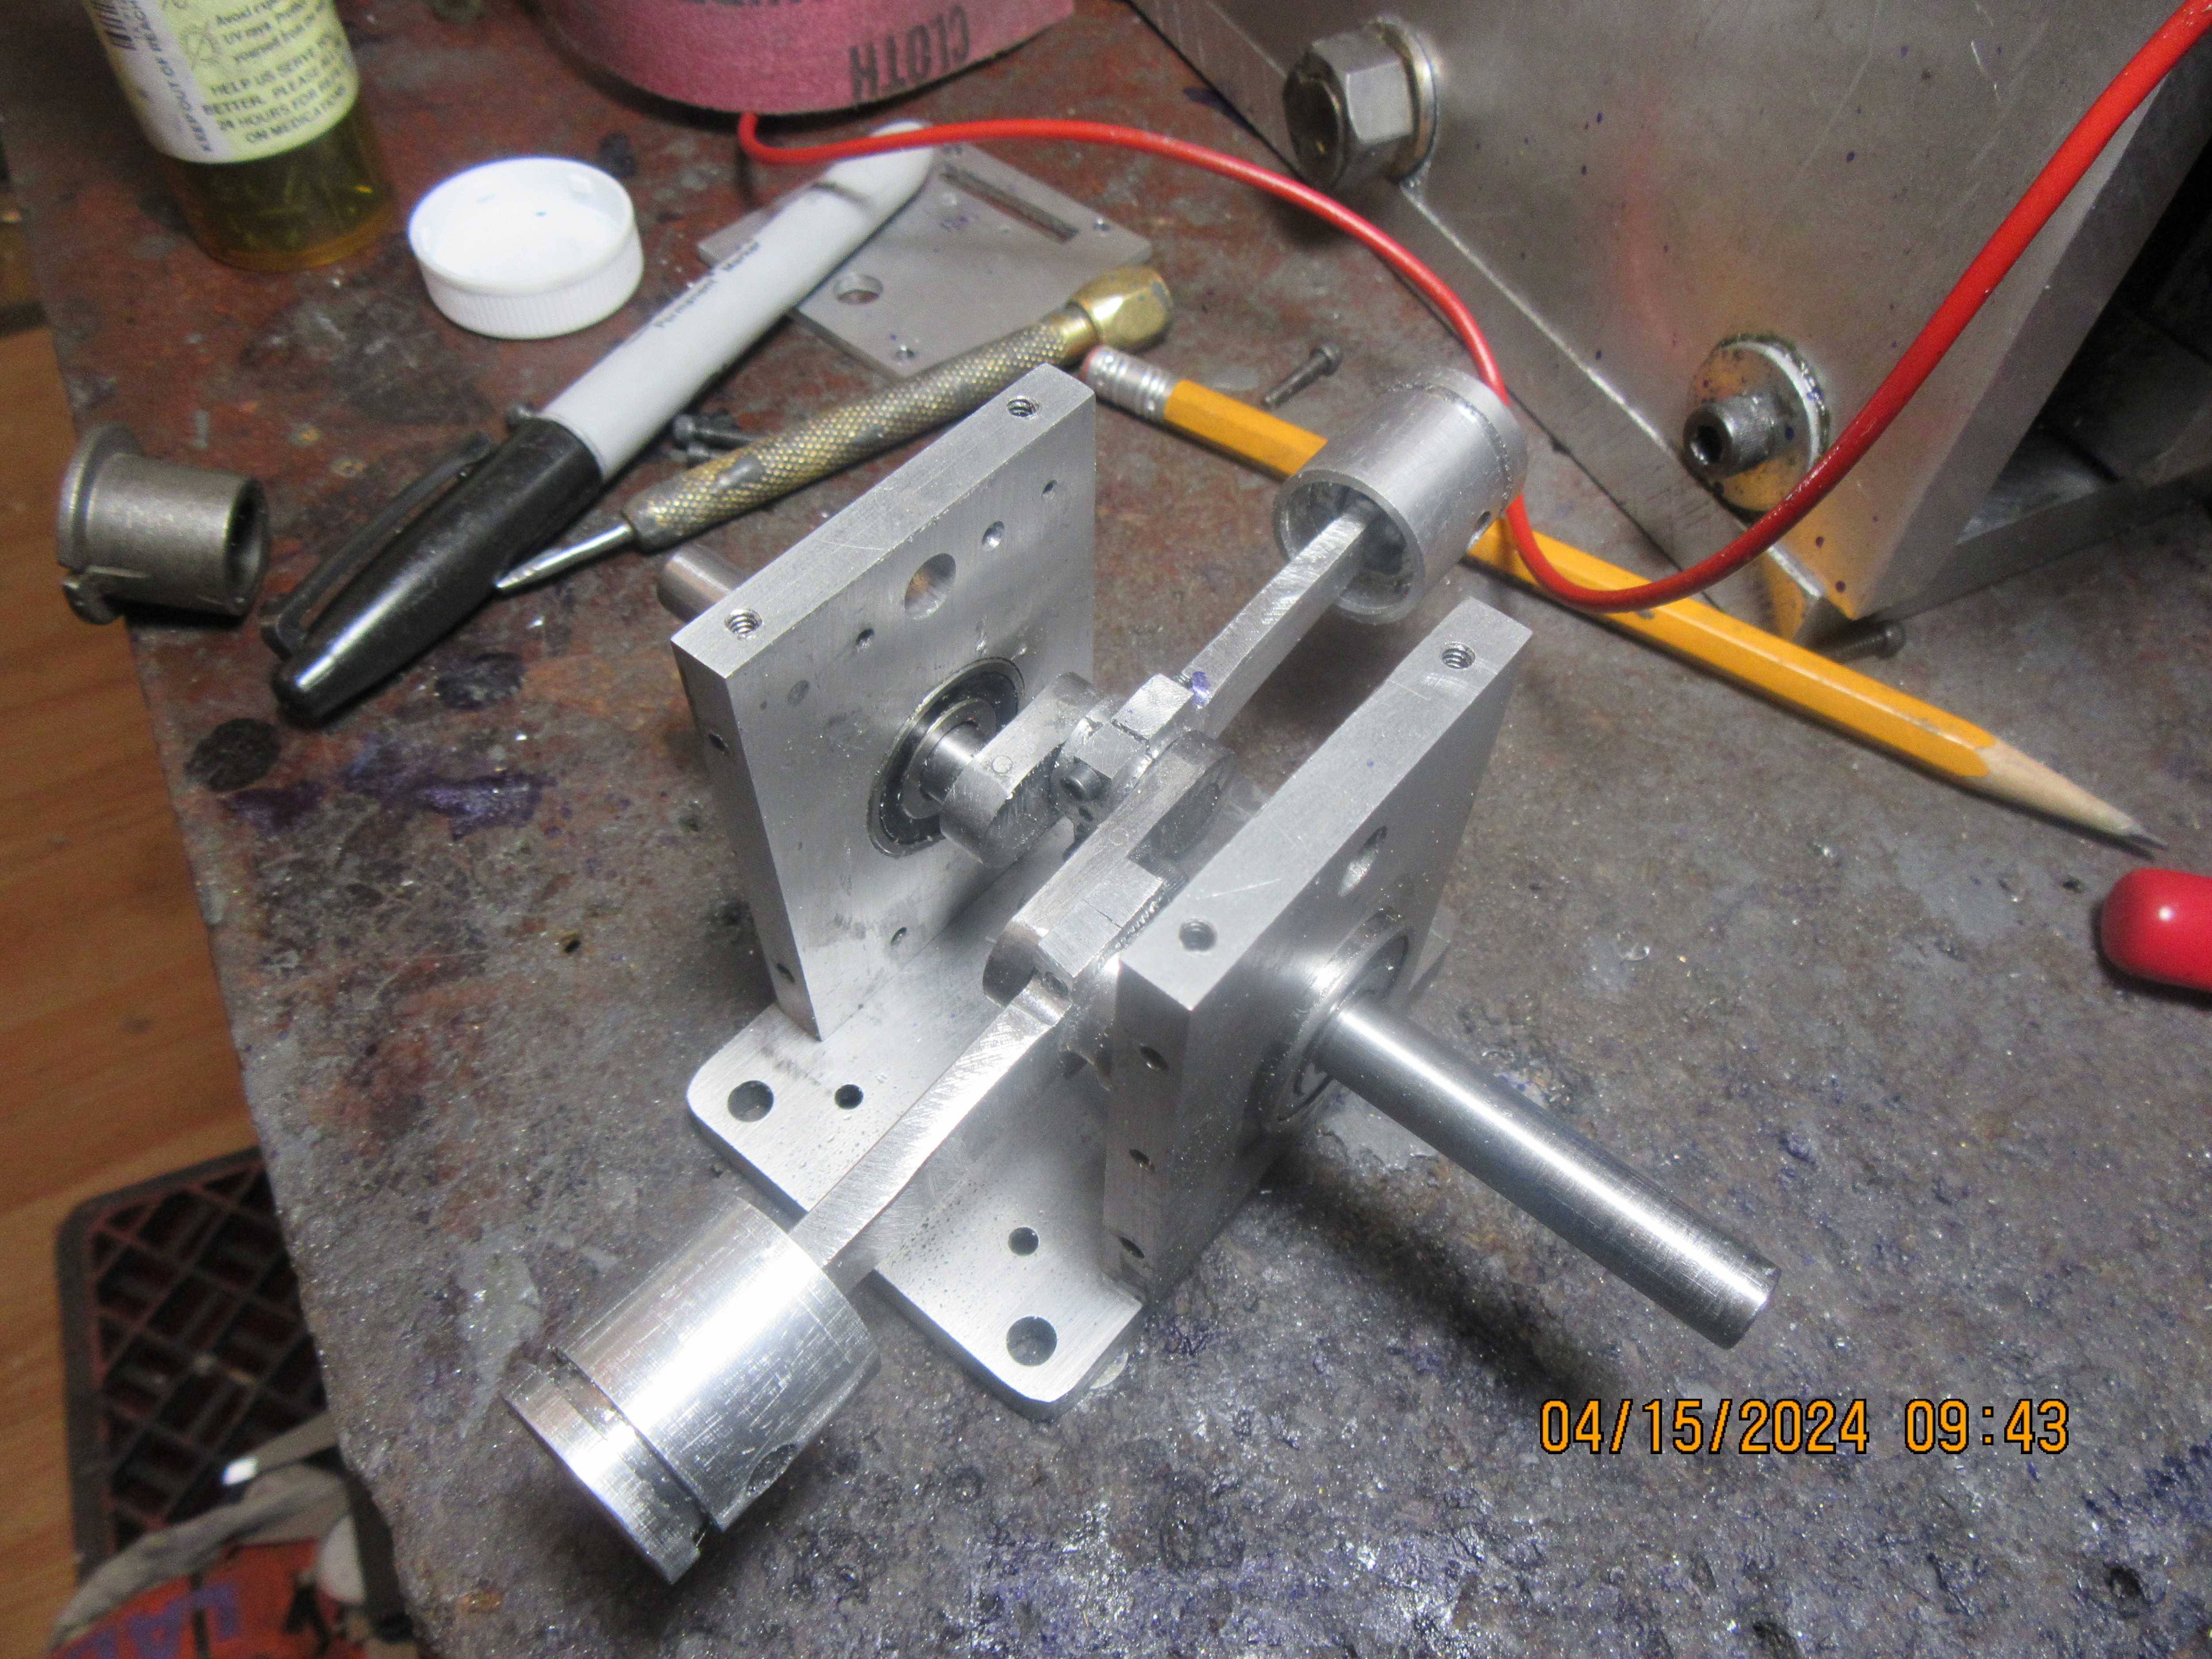
This morning bright and early I got up and cut the crankshaft to give it's final shape. The con rods and their caps were installed, and they went in with no problems. I emailed Andrew Whale in the U.K. about application of the special solder to the cylinders where they attach to the crankcase plates and he answered my question. I think that will be my next job.

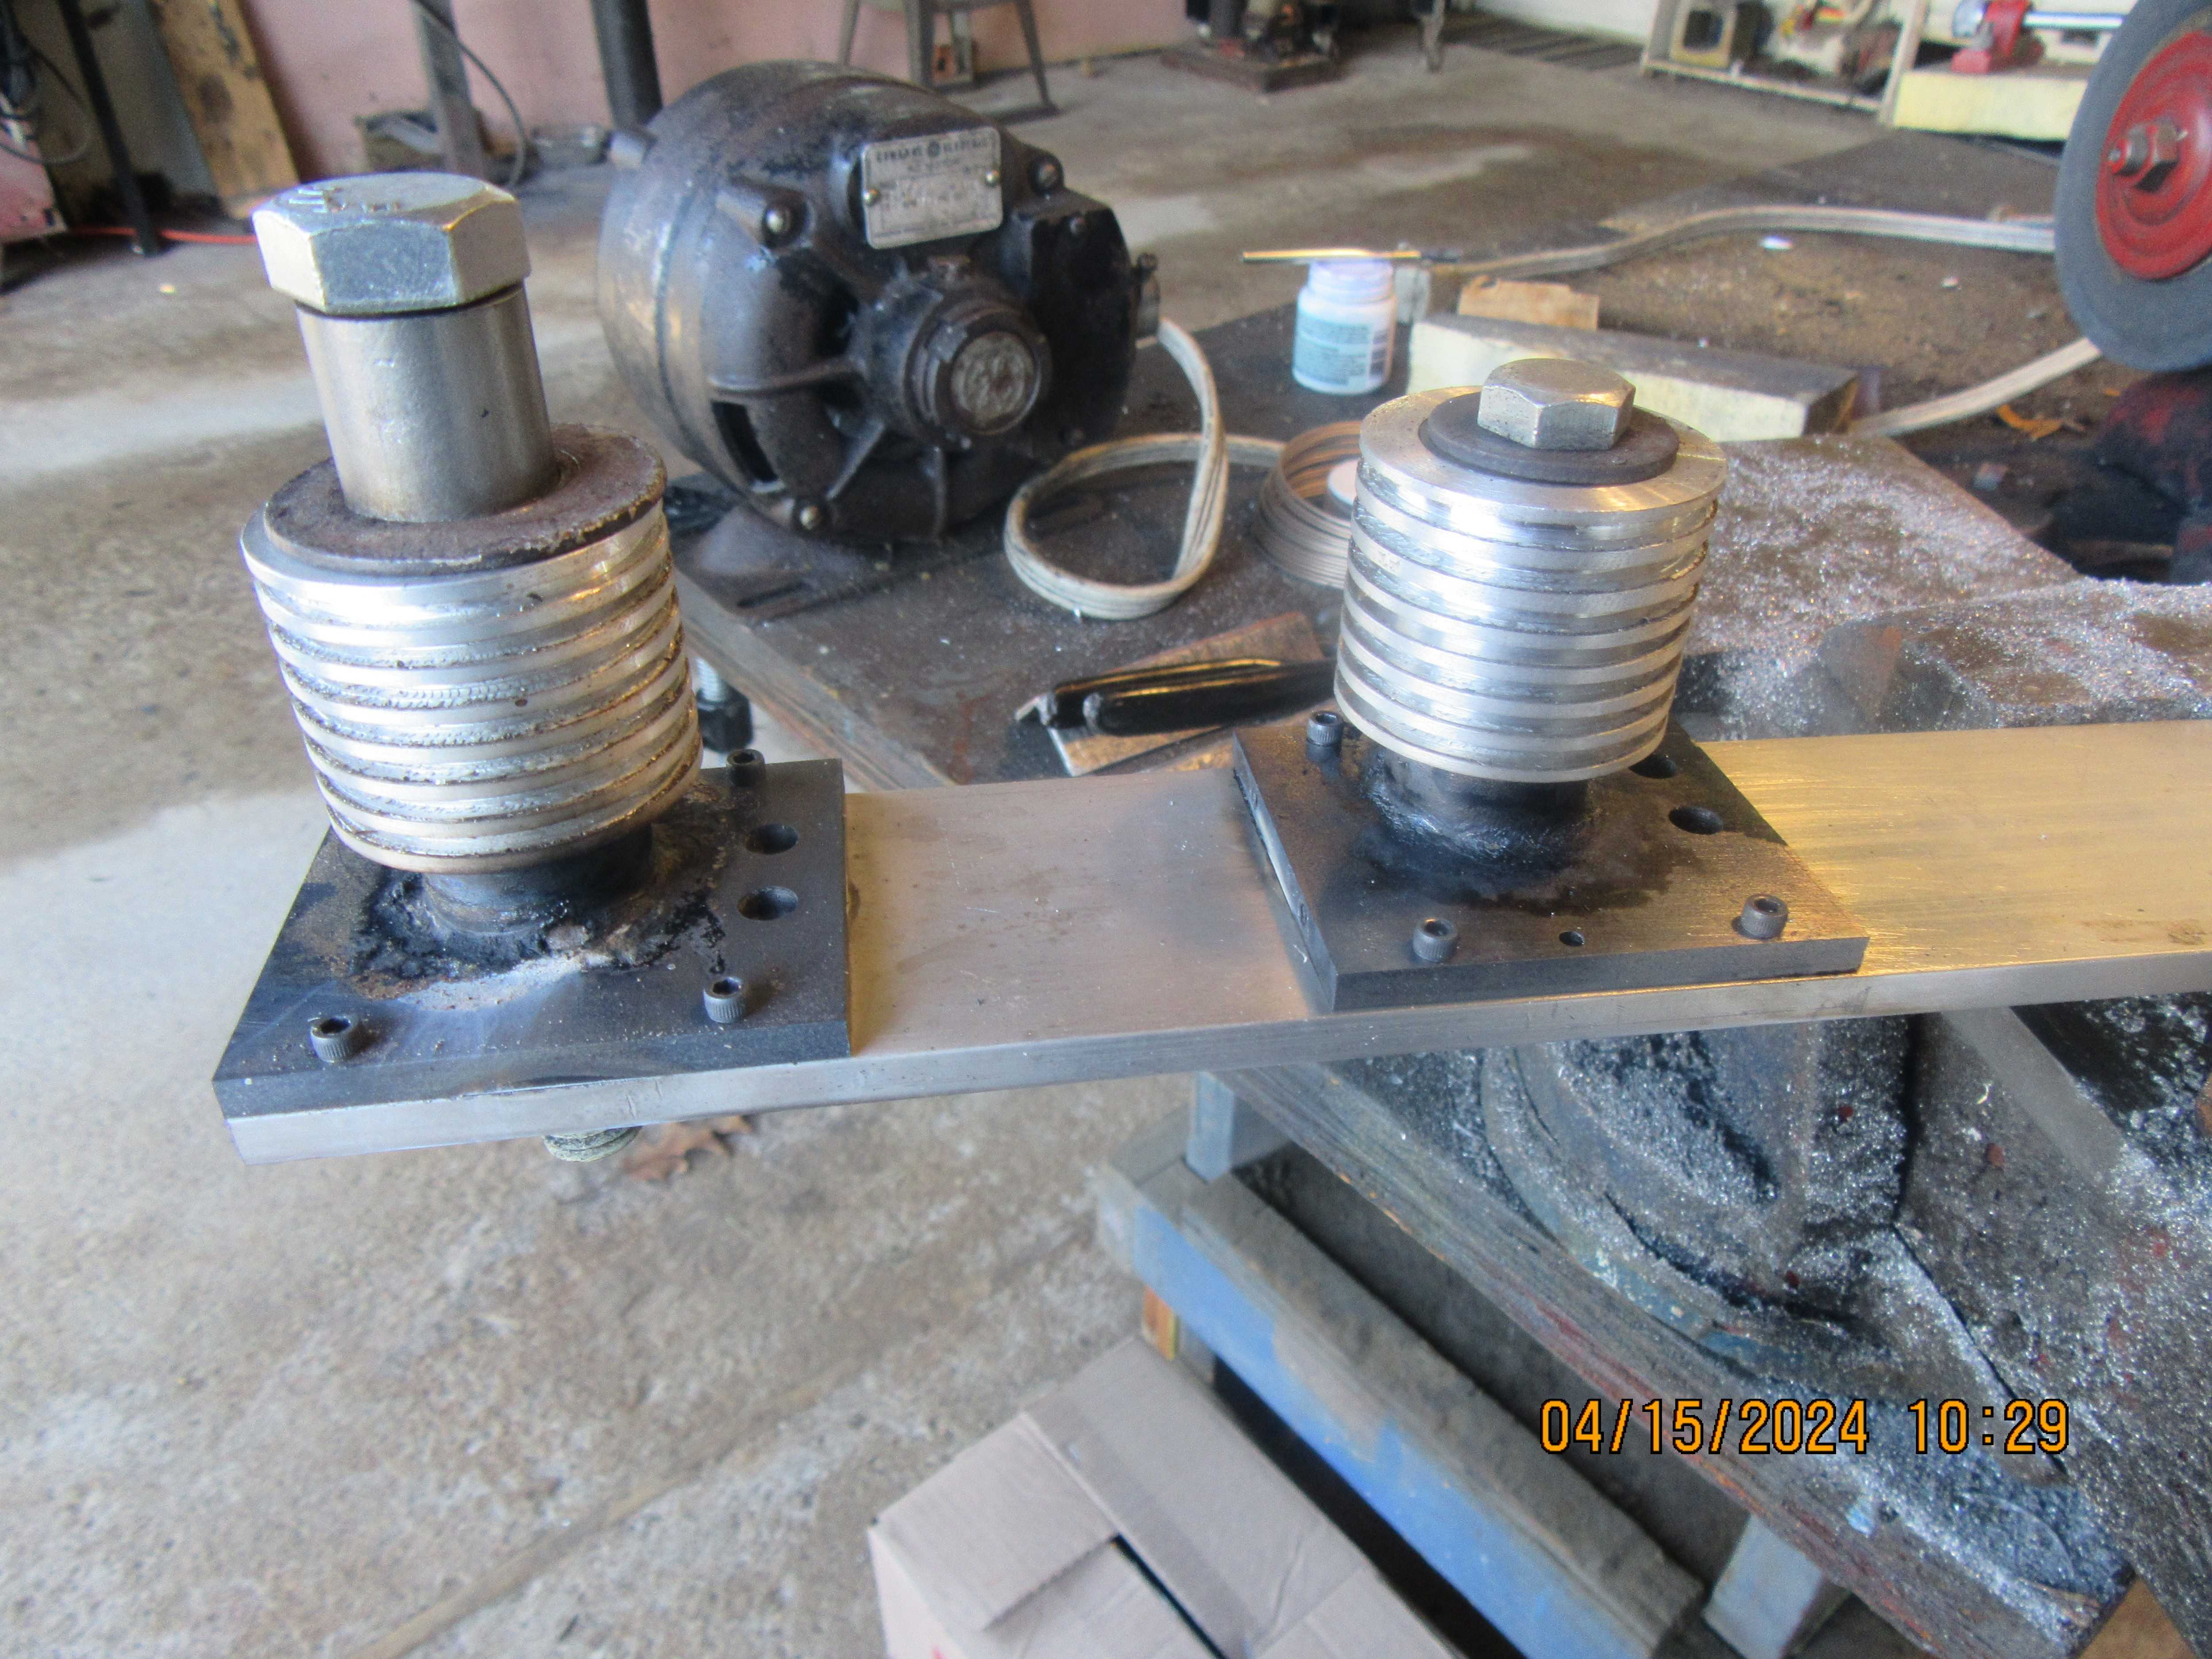
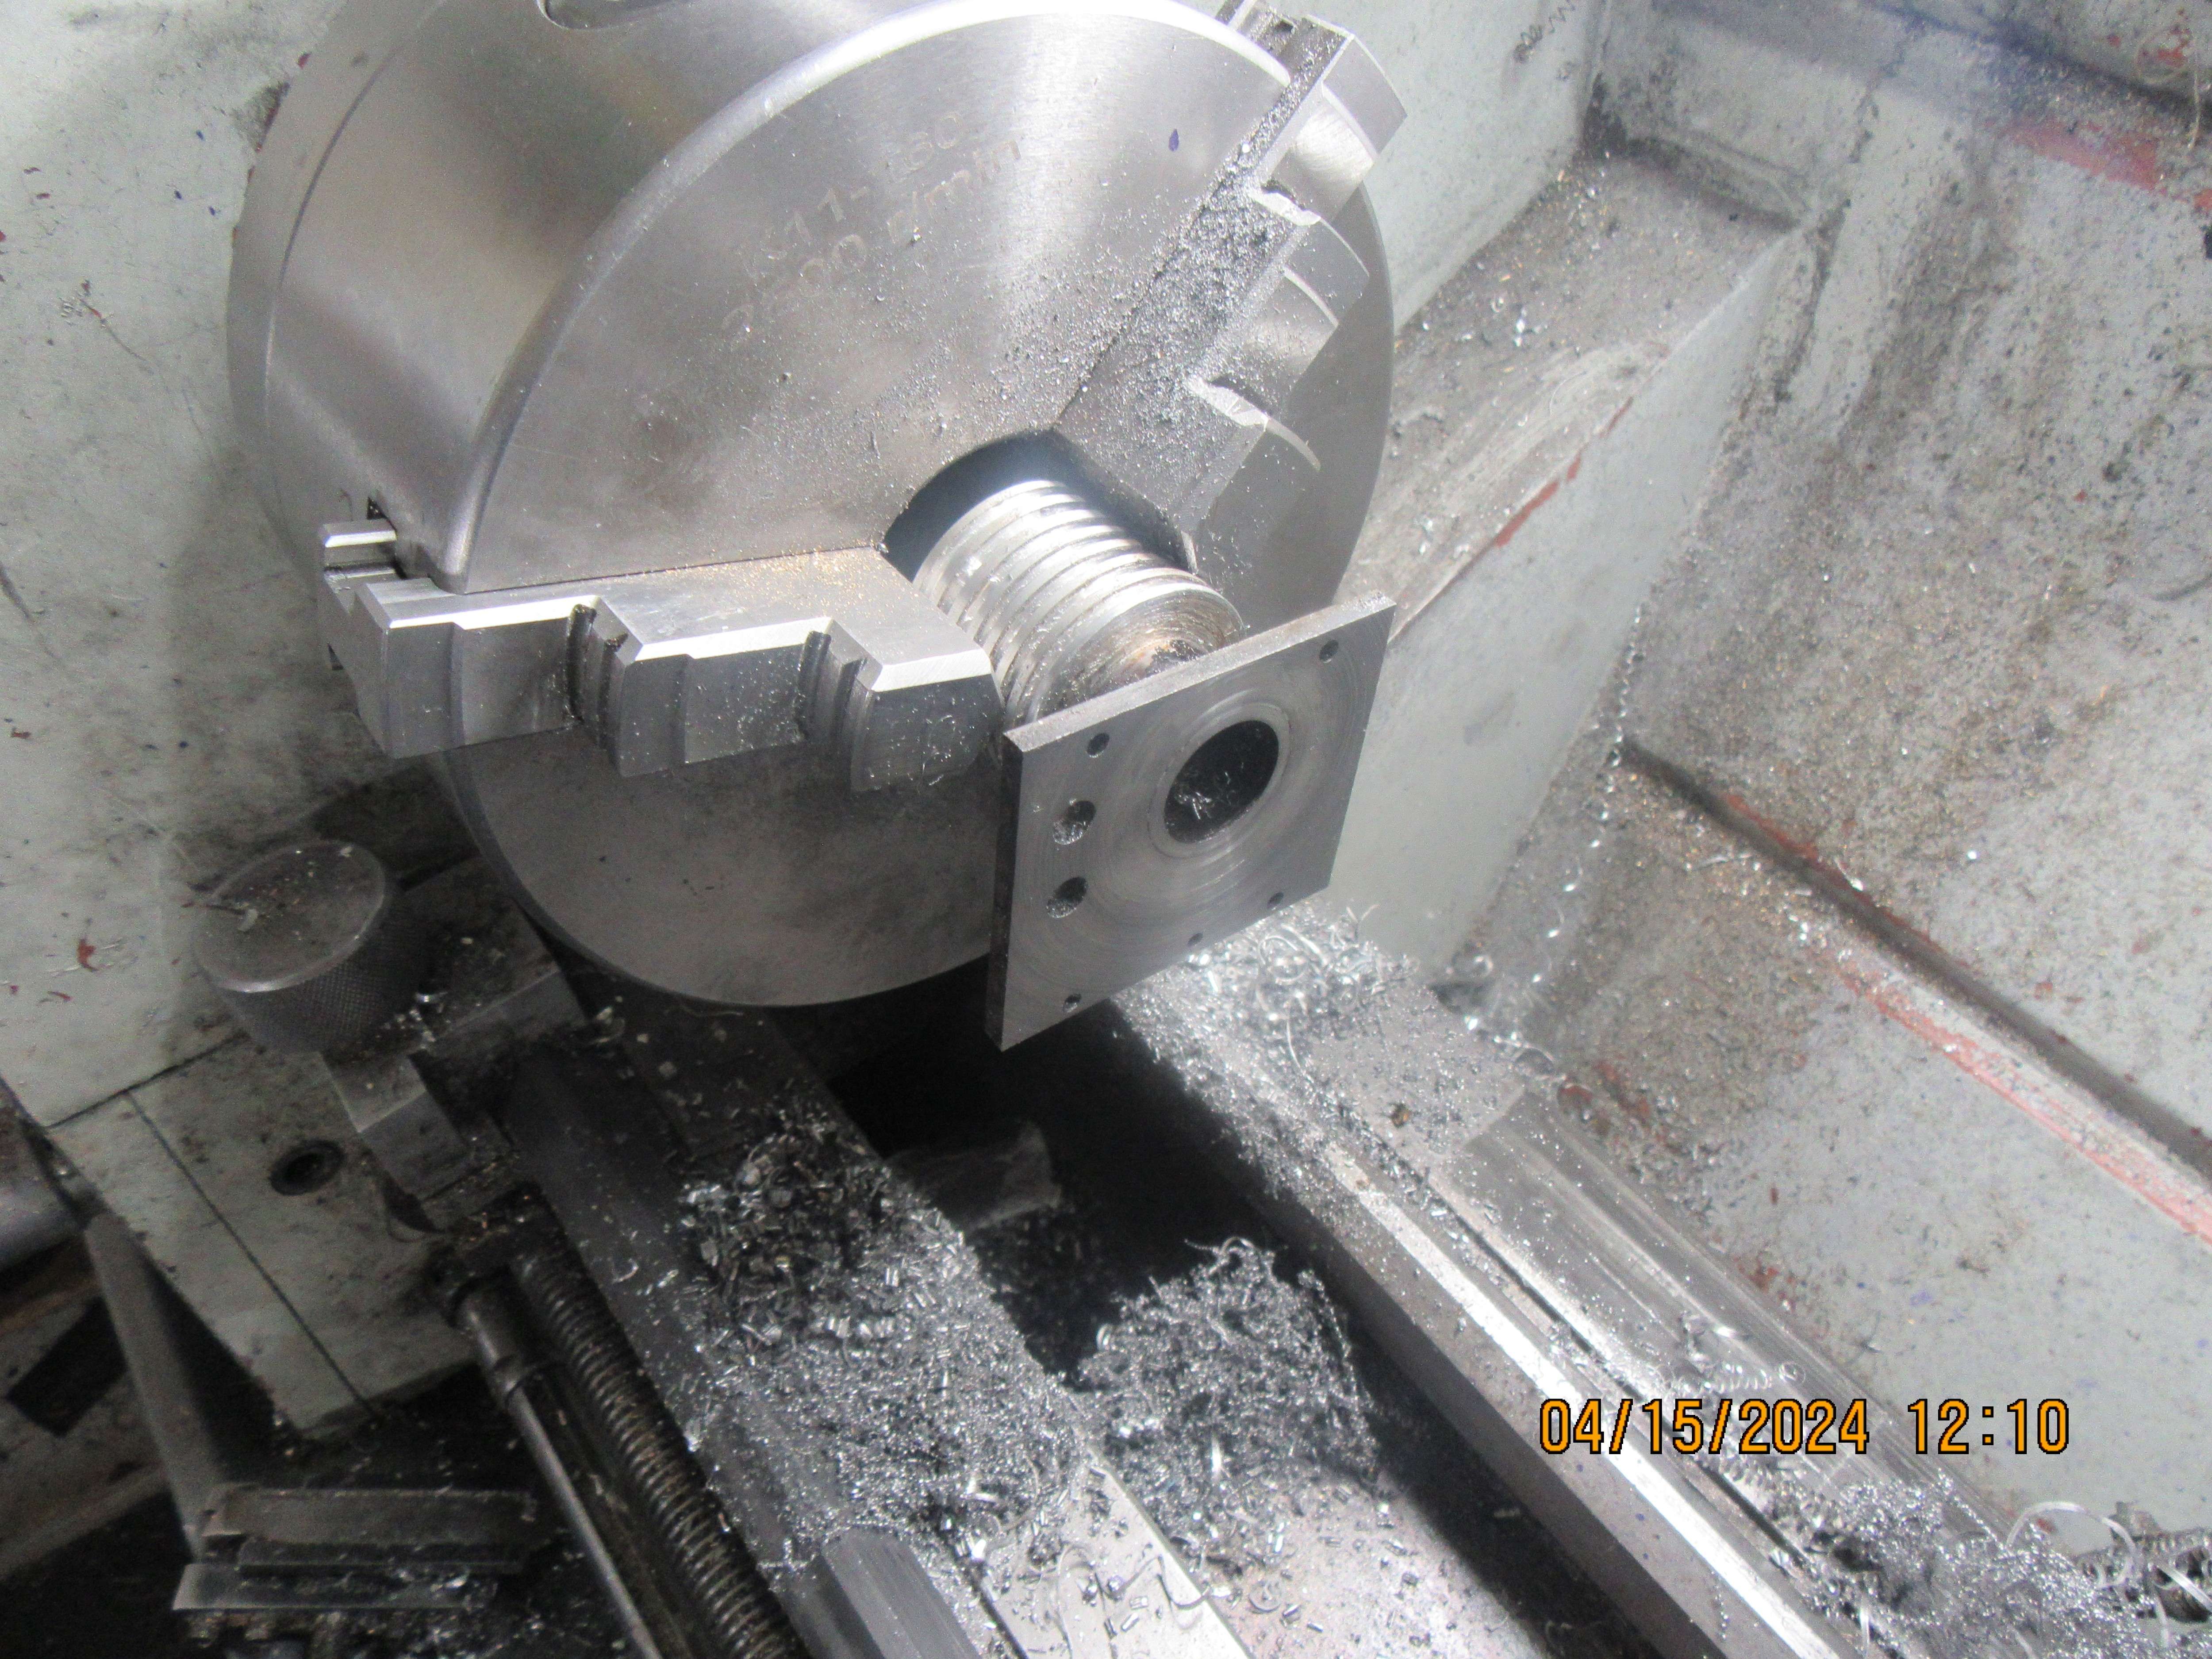
So, here we are. The parts to be soldered were heated up and coated with tinning paste. Then they were assembled in the correct relationship to each other and a 1/2" bolt put thru each cylinder to hold the cylinder portion tight against the plate it gets soldered to. The solder was cut into 16 short pieces about 1/8" long and 8 were arrayed around each cylinder, right where I wanted the joint to be. Then I used my torch to heat from underneath the aluminum set-up bar. I haven't done this before, but it worked--the solder began to flow, and it sucked into the joint all around the cylinder. The second picture shows the resulting joint. I am waiting for things to cool down, and then will clean up the joints. I'm happy.--Learned something new today!!!
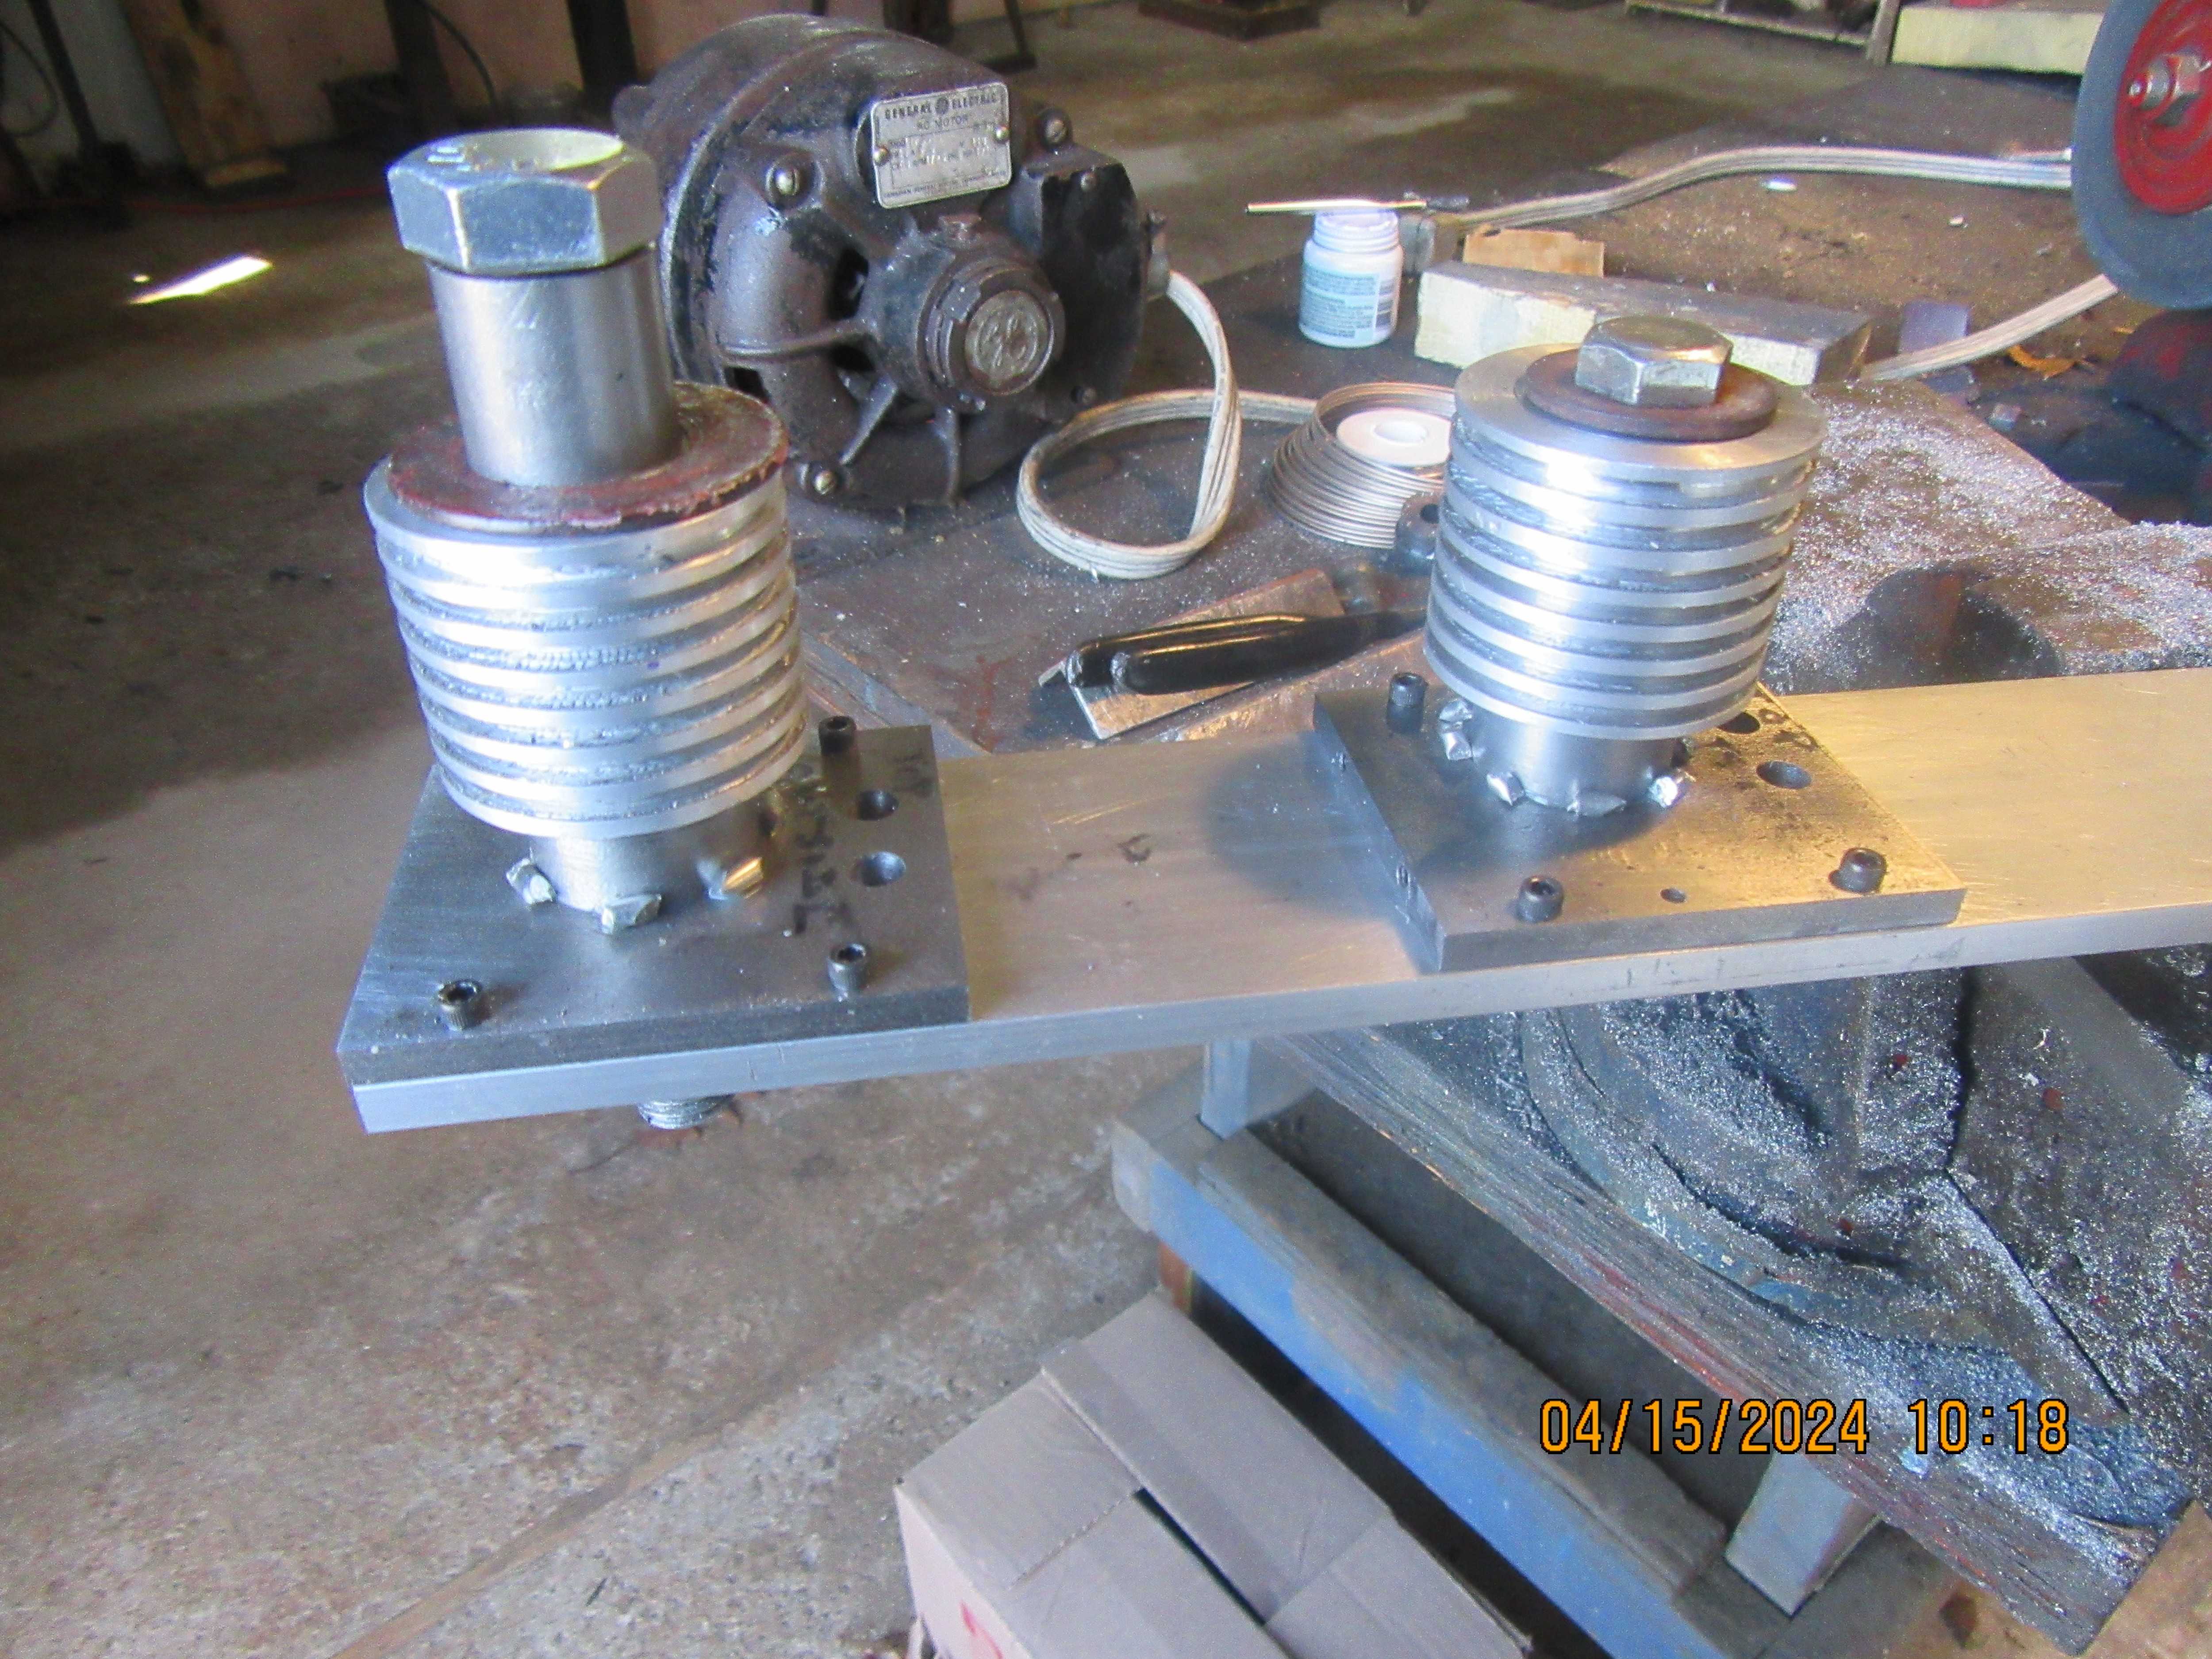


And this is how I got the 0.156" thick plate that the plans call for under the cylinders. I used 3/16" plate, and after everything was soldered together I set it up in my lathe and machined 0.030" off the face of the plate.

Looking good, Brian.
I will stick my neck out and suggest that to avoid marking up aluminum in a chuck, you cut a strip of soft drink can aluminum and wrap the piece in it before clamping.
The other point I'll make is that if I remember correctly, the original Upshur design leaked oil past the crankshaft. The solution was to use sealed ball bearings or put shaft seals in place.
Thats all I remember from others who built the engine (except the one guy who built it upside down whereupon it leaked very badly).
- Joined
- Sep 2, 2011
- Messages
- 1,405
- Reaction score
- 412
good point on the sealed bearings. on my single i used sealed bearings but also put a little silicone on the crank as i slid it in the bearings so it would seal there as well. just a very little bit and was on final assembly after it has already been ran and torn down for sealing all over. bout the only leak i get now is a little oil vapor wetting around the vent.Looking good, Brian.
I will stick my neck out and suggest that to avoid marking up aluminum in a chuck, you cut a strip of soft drink can aluminum and wrap the piece in it before clamping.
The other point I'll make is that if I remember correctly, the original Upshur design leaked oil past the crankshaft. The solution was to use sealed ball bearings or put shaft seals in place.
Thats all I remember from others who built the engine (except the one guy who built it upside down whereupon it leaked very badly).
I have used sealed ball bearings. Werowance--was it this engine that you built? If so, please give me a link.---Brian
Similar threads
- Replies
- 413
- Views
- 67K
- Replies
- 27
- Views
- 8K
- Replies
- 27
- Views
- 5K
- Replies
- 61
- Views
- 14K


![MeshMagic 3D Free 3D Modeling Software [Download]](https://m.media-amazon.com/images/I/B1U+p8ewjGS._SL500_.png)


