George_Race
Well-Known Member
- Joined
- Jul 28, 2010
- Messages
- 125
- Reaction score
- 2
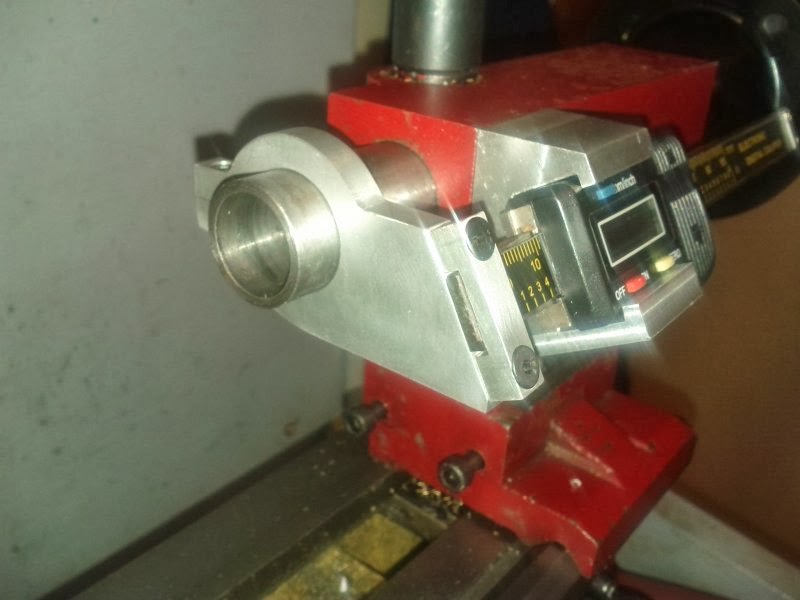
Here is something that I have not seen before. Wanting to know exactly how far I was drilling into material being turned in the lathe, I came up with an interesting Tail-stock DRO.
I started with a 4 inch linear DRO, drew and CNC cut a mounting bracket for the tail-stock shaft out of .125 aluminum, and then bent up a piece of .032 aluminum to hold the DRO indicator to the tail-stock.
Drilled and tapped three holes in the bracket, drilled and tapped a couple of mounting holes in the tail-stock for the bracket, assembled it on the tail-stock and away we go.
See pictures below for the details. By the way, if you want the CamBam file or G-Code for the shaft mounting bracket, let me know and I will send it to you.
My next project will be to fit a 6 inch DRO to the bed so I can see exactly where I am cutting. Will post pictures when that is up and working as well.
George


