You are using an out of date browser. It may not display this or other websites correctly.
You should upgrade or use an alternative browser.
You should upgrade or use an alternative browser.
Steam Tractor
- Thread starter Harold Lee
- Start date

Help Support Home Model Engine Machinist Forum:
This site may earn a commission from merchant affiliate
links, including eBay, Amazon, and others.
Harold Lee
Well-Known Member
- Joined
- Apr 23, 2008
- Messages
- 236
- Reaction score
- 2
Thank all of you for your help and compliments. Regarding the color, I am going to make the tractor primarily green and black, and use red and a little yellow for accent.
I think my progress from this point forward will be small finishing touches and not the massive construction one sees when making the "bones" of any project. Today I decided to tackle the steam dome. I had turned an aluminum one and made a dome using a ball turner that I had made a few years ago. I then had to machine out the inside and I was having some difficulty figuring out how to hold a hemisphere in a lathe while carving the guts out. The vertical part of my steam dome is a piece of 1 inch copper tubing that I had made a few years back.

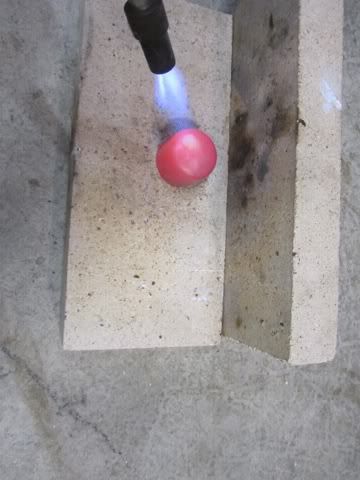
So I decided to make the dome from copper as well. Copper is very malleable but it work hardens very quickly and therefore must be annealed by heating to cherry red and either quenching or letting air cool. I makes no difference unlike high carbon steels. When I make all of my tubing bends I first anneal it and then anneal it a couple more times during the bending. It works like butter. I started off with a one inch copper cap from Home Depot and since it is deep drawn the first thing I did was to soften it.
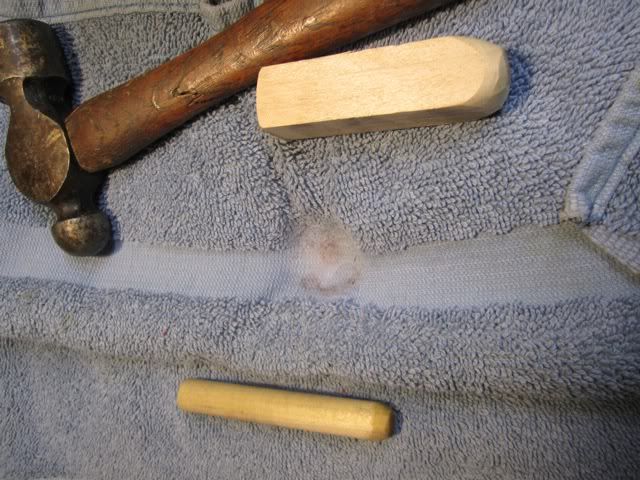
The best way to make a dome shape is to use a dapping block and wooden punches which I do not have. So I used a towel folded many times for the die and took a round and a square hunk of hardwood and took it to my belt sander to radius the end.
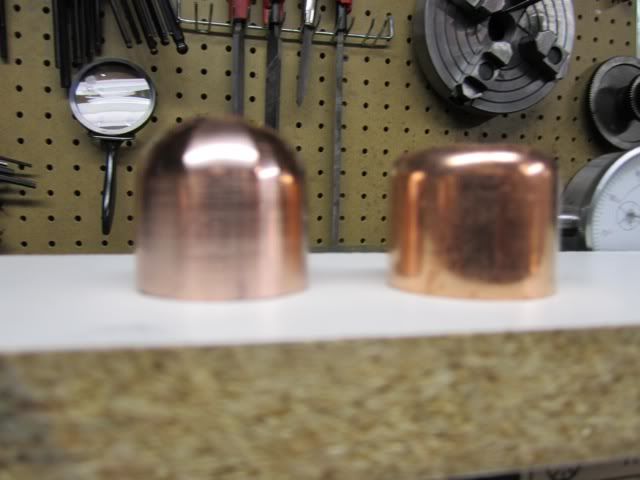
There were a number of reheats and more pounding which had to go slowly and a little at a time. I was chuckling as I did this thinking how much Dennis' approach and mine were different. Dennis took the "Craftsman" approach where it looks like he finessed his material into shape. I wonder if he even broke a sweat or got his hands dirty since I cannot imagine a maestro doing either. I took the "blacksmith" approach. If it didn't look like what I wanted, I got it hot and hit it with a hammer. Simply repeat until it looks like what I had in mind. A then put it in the lathe and did a little filing to knock out the hammer marks.
I then trimmed the skirt and milled/filed the throttle slot.
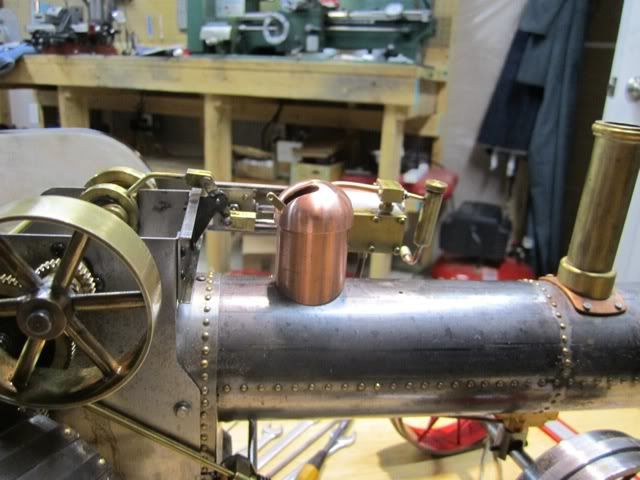
I then turned a small brass flange and silver soldered it to the bottom.
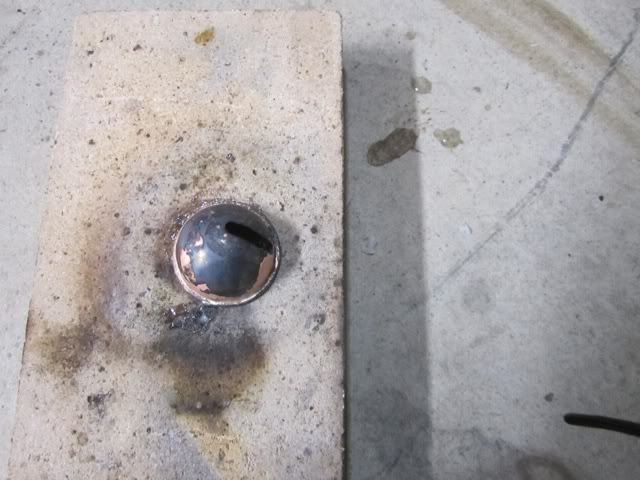
After a pickle and a little clean up work it is ready for painting.
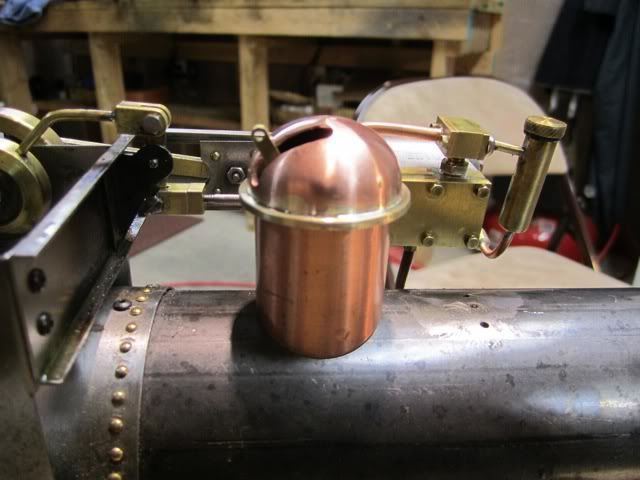
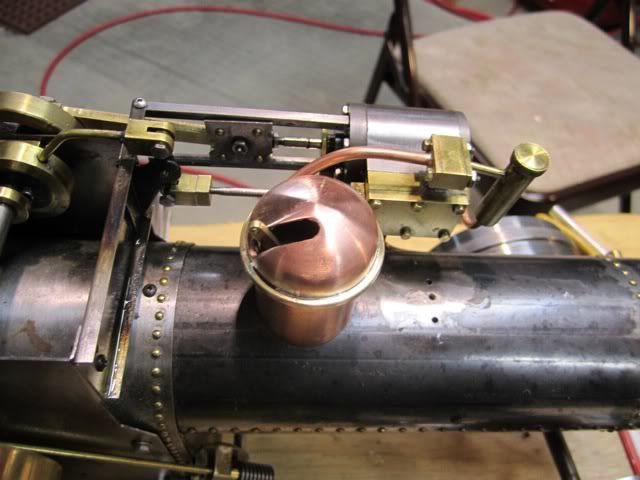
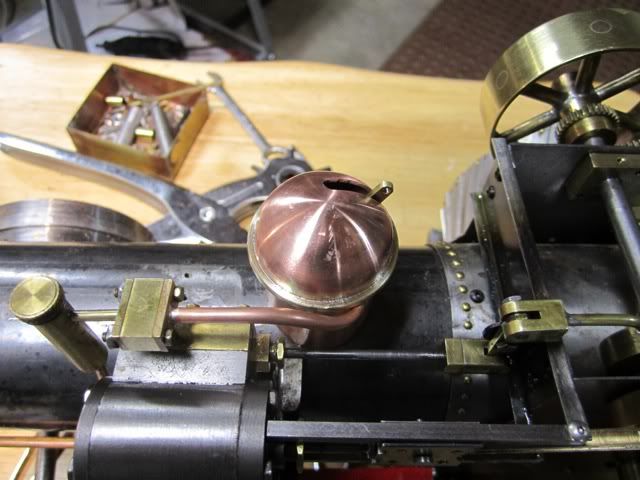
That's it for the day.
Harold
I think my progress from this point forward will be small finishing touches and not the massive construction one sees when making the "bones" of any project. Today I decided to tackle the steam dome. I had turned an aluminum one and made a dome using a ball turner that I had made a few years ago. I then had to machine out the inside and I was having some difficulty figuring out how to hold a hemisphere in a lathe while carving the guts out. The vertical part of my steam dome is a piece of 1 inch copper tubing that I had made a few years back.

So I decided to make the dome from copper as well. Copper is very malleable but it work hardens very quickly and therefore must be annealed by heating to cherry red and either quenching or letting air cool. I makes no difference unlike high carbon steels. When I make all of my tubing bends I first anneal it and then anneal it a couple more times during the bending. It works like butter. I started off with a one inch copper cap from Home Depot and since it is deep drawn the first thing I did was to soften it.

The best way to make a dome shape is to use a dapping block and wooden punches which I do not have. So I used a towel folded many times for the die and took a round and a square hunk of hardwood and took it to my belt sander to radius the end.

There were a number of reheats and more pounding which had to go slowly and a little at a time. I was chuckling as I did this thinking how much Dennis' approach and mine were different. Dennis took the "Craftsman" approach where it looks like he finessed his material into shape. I wonder if he even broke a sweat or got his hands dirty since I cannot imagine a maestro doing either. I took the "blacksmith" approach. If it didn't look like what I wanted, I got it hot and hit it with a hammer. Simply repeat until it looks like what I had in mind. A then put it in the lathe and did a little filing to knock out the hammer marks.

I then trimmed the skirt and milled/filed the throttle slot.

I then turned a small brass flange and silver soldered it to the bottom.

After a pickle and a little clean up work it is ready for painting.


That's it for the day.
Harold

$39.99
$49.99
Sunnytech Low Temperature Stirling Engine Motor Steam Heat Education Model Toy Kit For mechanical skills (LT001)
stirlingtechonline

$45.99
Sunnytech Mini Hot Air Stirling Engine Motor Model Educational Toy Kits Electricity HA001
stirlingtechonline

$519.19
$699.00
FoxAlien Masuter Pro CNC Router Machine, Upgraded 3-Axis Engraving All-Metal Milling Machine for Wood Acrylic MDF Nylon Carving Cutting
FoxAlien Official

$180.50
$190.00
Genmitsu CNC 3018-PRO Router Kit GRBL Control 3 Axis Plastic Acrylic PCB PVC Wood Carving Milling Engraving Machine, XYZ Working Area 300x180x45mm
SainSmart Official

$17.90
$24.95
Backyard Building: Treehouses, Sheds, Arbors, Gates, and Other Garden Projects (Countryman Know How)
Amazon.com

$94.99
$109.99
AHS Woodmaster 4400 Maintenance Kit for Outdoor Wood Boiler Treatment
Alternative Heating & Supplies
![DreamPlan Home Design and Landscaping Software Free for Windows [PC Download]](https://m.media-amazon.com/images/I/51kvZH2dVLL._SL500_.jpg)
$0.00
DreamPlan Home Design and Landscaping Software Free for Windows [PC Download]
Amazon.com Services LLC

$99.99
AHS Outdoor Wood Boiler Yearly Maintenance Kit with Water Treatment - ProTech 300 & Test Kit
Alternative Heating & Supplies

$25.34
$34.99
Bowl Sander Tool Kit w/Dual Bearing Head & Hardwood Handle | 42PC Wood Sander Set | 2" Hook & Loop Sanding Disc Sandpaper Assortment | 1/4" Mandrel Bowl Sander for Woodturning | Wood Lathe Tools
Peachtree Woodworking Supply Inc

$29.95
Competition Engine Building: Advanced Engine Design and Assembly Techniques (Pro Series)
Amazon.com Services LLC

$39.58
$49.99
Becker CAD 12 3D - professional CAD software for 2D + 3D design and modelling - for 3 PCs - 100% compatible with AutoCAD
momox Shop

$89.99
Outdoor Wood Boiler Water Treatment Rust Inhibitor- AmTech 300 & Test Kit
Alternative Heating & Supplies
Similar threads
- Replies
- 3
- Views
- 446
- Replies
- 11
- Views
- 1K


