Overhaul of a 9" SB model "A"

Home Model Engine Machinist Forum

Help Support Home Model Engine Machinist Forum:

This site may earn a commission from merchant affiliate links, including eBay, Amazon, and others.
I have stock to make a new base. I am seriously considering it.

Reasons:

I don't realy want loose shims under the TS ...I would rather repair

I could add plates to the top of the original base, but the casting is thin there and removing enough to get a .062
plate in would result in a thin part...and then how do I fix the plate? #2 flat head screws?

I could also machine and add plates to the bottom of the base in the flat and V's. Here I could use #8 screws, but I'm worried it would start moving around unless they were substantial, and again the casting is kinda thin.

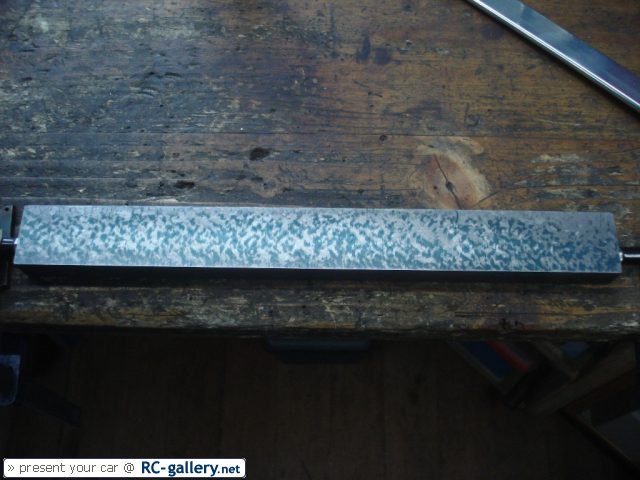
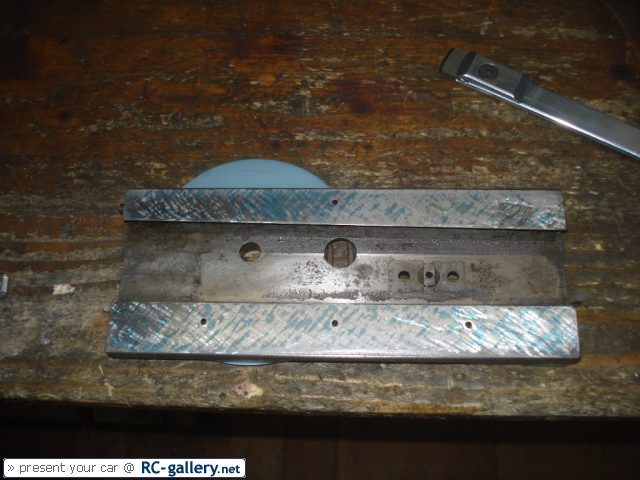
I could just hog a new base out of a chunk of iron. Cut the tongue to fit the TS bottom, then machine the flat and V in a holding fixture to machine them square to the tongue and to the correct depth. Then finish it by Scraping the base to the bed for bearing.


I'm leaning toward the last option

Thoughts?

Dave


steamer said:
I could add plates to the top of the original base, but the casting is thin there and removing enough to get a .062
plate in would result in a thin part...and then how do I fix the plate? #2 flat head screws?

I could also machine and add plates to the bottom of the base in the flat and V's. Here I could use #8 screws, but I'm worried it would start moving around unless they were substantial, and again the casting is kinda thin.

Thoughts?

Dave

Maybe you could add the plates and screws but put Devcon between them. Over that surface area I'd be reasonably confident things wouldn't move about.

On a larger scale I have repaired triple expansion LP and IP valves by screwing cast iron plates onto the guides and machining back to tolerance so I know it works, they haven't moved in 12 and 6 years respectively. As you know, there's a lot of flanging about of big lumps inside the steam chests. ;D

Best Regards
Bob


Well...first things first.

Setting the TS body and quil in the surface plate shows it's pointing down by about .004/2"

Now the why is eluding me at the moment

I checked the quil diameter and as best as I can measure with a mic, it MIGHT have about .0002" taper/out of roundness. When I clamp the quil, it repeats well, unclamped it's a bit loose fully extended, but there isn't much quil in the body when your at the 2" mark. The taper looks good anyway, no scores.

I think the TS was droped at some point as I found a large burr on the bottom rear side near the offset indication mark. Though I stoned it off, I suspect that is the source of the .004" tip.

I put rolls in the vee's of the TS Base mounted up side down on the surface plate and there is .004" tip at the front, and it's even left to right

So there's half my drop (.004" + .004")

Connelly is being read up on right now.... ::)
We'll get the TS body sorted first....then see.
I don't see making a quil for it though unless I offset the taper to correct the height.....

Dave
 
Hey Dave

You are doing a nice job here!
And it remembers me on the things i had to do on my schaublin...

But now, what kind of paint is that you use for touching up? I always was told that red is far less suitable for touching up than blue (because the blue is in a better contrast to the cast iron than red) but it looks like your paint was in an extremely good contrast to the cast iron!??

Or is it just because you use very much of it ?

Florian
 
Actually I use it very thinly. The tailstock base shows some streaks, meaning its too heavy, but I was scouting trying to see just how bad it is....It's not good. ::)

The marking I use is by E. S. Dyjak company from Milford Michigan in the USA.

It comes in RED and YELLOW, and is water soluable. It comes off your clothes!.. ;D

If you can still see all the features of the master under the marking, you PROBABLY put it on right.

I use a Brayer, which is a type of roller used by printers, to spread the marking medium.

With use you get the feel for how heavy to use. It depends on the situation of course....I use much thinner coating for a master than for rough scraping.

Dave


Hi Dave

Well, i also put more color for rough scraping and very few for the finish; that is all no problem, I also use a brayer and i think i have kind of a feeling how much color i need to put.

Here some pictures from my lahte overhauling:

771_223d26cbf8f31ac01b2dfd7958a45dbc.jpg


771_bb6282aafb6ff011df2fc437c331f626.jpg


DSC04265.JPG


Fact is, that the color you use seems to be absolutely non transparent, is that right?
The color i know is transparent and based on oil (and though needs to be cleaned with oil or thinner)

The thing is, i often had problems with seeing the smallest spots when finishing a surface and had to put the right light in the right angle and sometimes even needed to use some white paper as a background.

Maybe i find that color in europe aswell...

Cheers Florian
 
For rough scraping, the Dyjak marking is very easy to see, and it is semi transparent...the flash on the camera makes it seem otherwise. As you know it can be difficult to photograph the mark up.
When it comes to "pin spotting" or finish scraping, though, I still need low angle light to see the real bearing spots

Below is an angle master I used on my Waltham lathe to rescrape the top slide. The next one show's the same master ready to use to mark the top slide with an appropriate coat of marking medium on it. You'll notice I can see through the marking in this case, as I was finish scraping the part.
The last is the marking medium itself, with label.

Dave

P2050081.jpg


P2050080.jpg


P2050083.jpg

 
Florian,

Sometimes you need a little shadow too. It depends on the situatiion, but sometimes the light I use causes too much glare. Then I shadow the part with my hand or a piece of cardboard to get the correct light condition to see it right.

 
steamer said:
Sometimes you need a little shadow too.


"sometimes the light I use causes too much glare."

Absolutely my experience and i also started to use cardboards to make a little shadow.
But it looks like you have the same "Problems" as i have... :p

Well then, i am not going to look for other paint... 8)

Anyway, happy scrapping! ;D

Cheers Florian
 
It does come out of the clothes easier...and you can actually wash it off your hands while with "Hi Spot" blue, you usually have to wait for it to wear off! :p ;D

Dave
 
Yesterday, I started to correct the TS body "Tilt down" issue. First I checked the quill again. I extended it to full travel and locked it, measured, and then retracted and extended it and locked it and measured.

I did this cycle 4 or 5 times. I got repeatable numbers.

I then extended the quill and wacked the end with a rubber mallet, first down, and measure, and then up an measure. Within the measurement error of my stuff probably .0002"...it didn't move

Conclusion:
All the tilt is in the body.

Checking the bottom of the body for bearing shows that the area that I had stoned and thought "pretty" flat wasn't at all! I have done a few step scrape cycles and it is coming down and the bearing is starting to fill in.
I did take some pictures....I'll post later......I've never been so damn busy while on "Vacation" in my life!

Dave
 
Paint update:

I put another coat of paint on the previously coated parts after a good rub with 180 grit.

They look good!....Rustoleum rules as far as I'm concerned.

Don't paint when its in the 90's (30C) as the paint sets up so fast the brush marks won't flow out.

Got a new SB belt guard for the lathe yesterday. Thanks Dave! It already has a coat of paint on it, but will need another one.

The paint on the side of the can of Ben Moore is STILL wet by the way!

Dave
 
Here's some pictures of the HS coming off....good thing I did...what a mess under there.

P7100018.jpg


P7100019.jpg


P7100020.jpg


P7100021.jpg


P7100022.jpg


I cleaned the taper out gently with a MT#3 reamer, it was nice and clean and no scores

Here's the new belt guard with a coat of paint on it.

More to come

Dave
 
Here's how the TS started .....004" low towards the front

P7120026.jpg


P7120027.jpg


I'll post the process later

Dave
 
After checking the current state in the previous post, I marked up the bottom and found this

P7120024.jpg


I had already done a few cycles to get it this good. It WAS bearing only on the top back side and the front

You'll notice the sides aren't bearing much at all, the rear is where I found the burr that indicates to me the TS body was dropped, probably on the floor off the end of the bed.

So I started in rough scraping and checking alignment by scraping only the back and when needed the sides.

P7120030.jpg


P7120033.jpg


P7120043.jpg


P7120040.jpg


P7120043.jpg


P7120046.jpg


Leading up to ...

P7120048.jpg


P7120049.jpg


or parallel to within about .0002"....I don't really believe that , but I can't measure any better than that, so I'll leave it be

Next is the TS base. I'll verify the error so that I can figuire out what to do.

Dave
 
Oh and got my serial number card. She left the factory on 9/20/1951

Went to "Packard 170" Whom they tell me was a dealer...but I don't know where.

She was originally 220, 3 phase, and had legs.

Dave

 
Dave,
I'm watching this thread with much more interest now that my SB is coming back from long term loan.
There will most likley something to fix that you have addressed. Thanks for the lessons and good work.

Mike
 
Well, Thanks Maverick. I've got a long way to go on this one.

The TS is low, for a few of reasons.

The base is worn. I KNOW this is the case...I just don't know how much, it's at least .004"

The TS Body was damaged. I have just fixed that I may want to take a few more cycles on it to fill in the bearing on the sides, but I'm still working out the TS issues and I don't want it any lower than it is already

The Bed is worn by the HS? I don't know about that yet, but I have to believe it is to some degree.

What I don't know ...yet...is how much each cause contributing!

Additionally, and this point needs to be taken into account by me. The lathe is just sitting on a bench at the moment
It isn't level or bolted down. Before any determination can be figuired about the lathe bed/ways, that will need to happen.

I say this because I don't want any of you to just start willy nilly scraping away. You need to proceed with some planning and forethought. If your going to tear into a lathe like this, get "Machine Tool Reconditioning" by Connelly. It's pretty good! Also understand, that there is way more to scraping than just grinding up an old file and push the material around. There is a lot of references and gauges required, to say nothing of some practiced skill. Some of these references you have to make! Don't take it lightly. You will spend time and or money doing this. Practice on something OTHER than a lathe first, like making some gauges. If you can tolerate doing that, you can think about touching up a lathe.

Dave
 

Latest posts

Back
Top