[size=+3]MY TRIPLE WOBBLER[/size]
[size=+2]INTRODUCTION[/size]
This post briefly describes some aspects of the design and building of a three cylinder, double acting oscillating engine which I have just finished. The idea to make a triple wobbler came from a post I well recall enjoying on HMEM about a year ago but which now I cannot find.
Before starting the build, I made detailed design drawings extracted from a 3D CAD model. Now that the build is complete, I have updated the model and the drawings to reflect what I actually built. Attached to this post are six PDF files, each with one drawing on an A4 page.
Here are two pics of the engine and a link to a video showing its first run on compressed air. The engine is very quiet; to hear the sound of the video the volume needs to be right up!
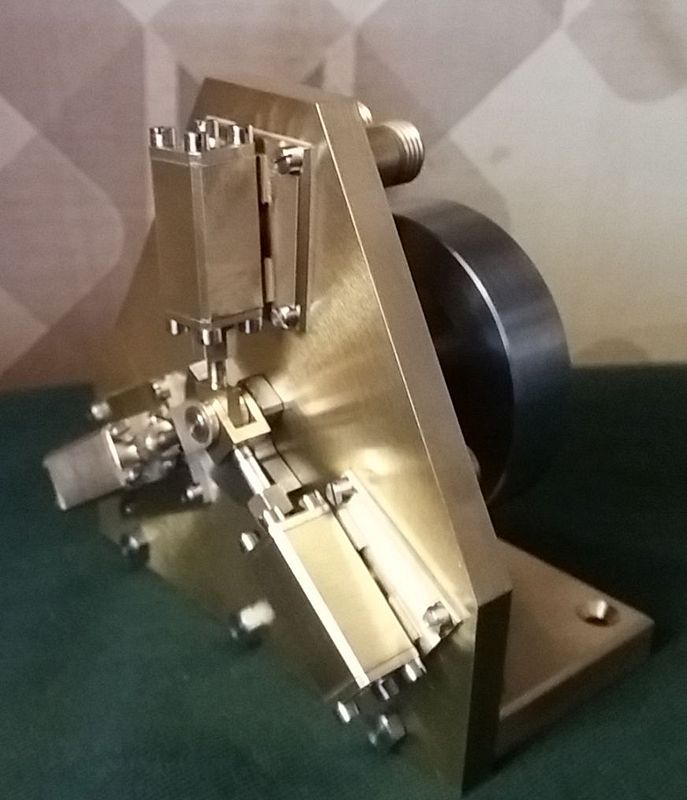
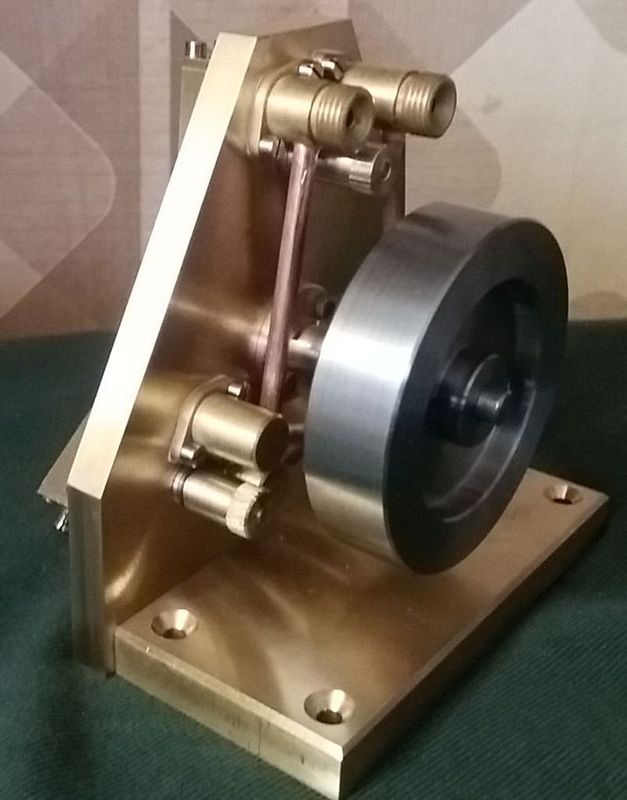
Link to 40 second video
[size=+2]DESIGN ASPECTS[/size]
[size=+1]The 3D model[/size]
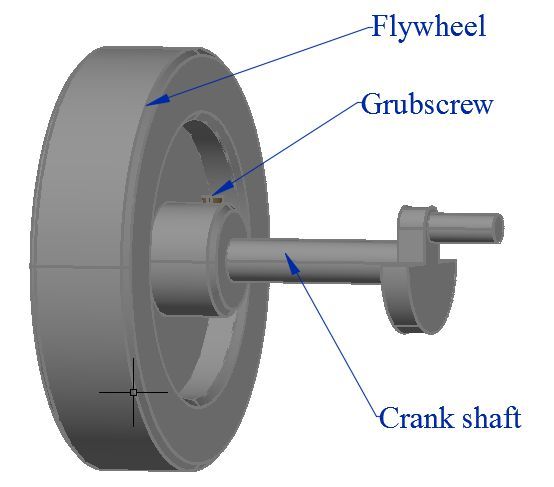
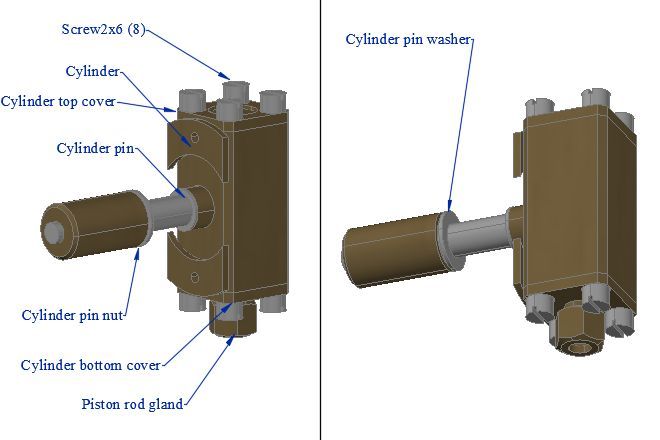
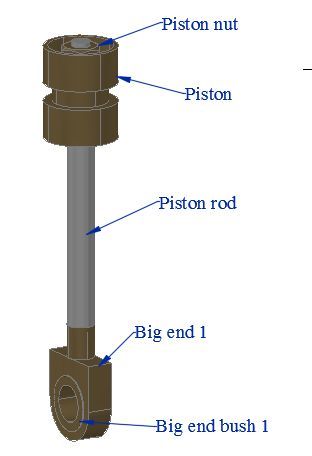
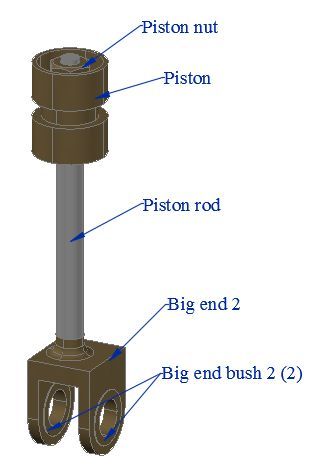
With an eye to a possible simulation with the 3D model of the movement of the engine, I decided to structure the design drawings into a Fixed Assy with all the non-moving parts, and four sub-assemblies, the instances of which each move as a whole:
Below are images extracted from the drawings of these five types of sub-assembly.
Fixed Assembly - Front
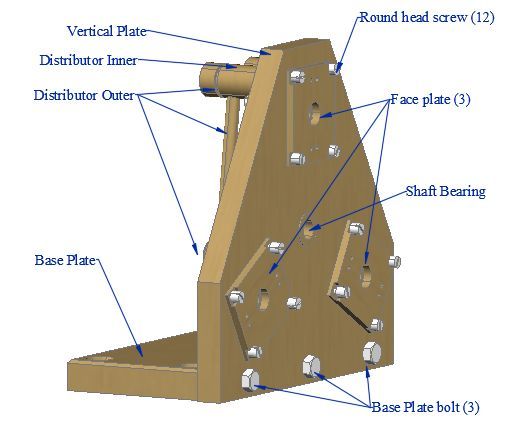
Fixed Assembly - Back
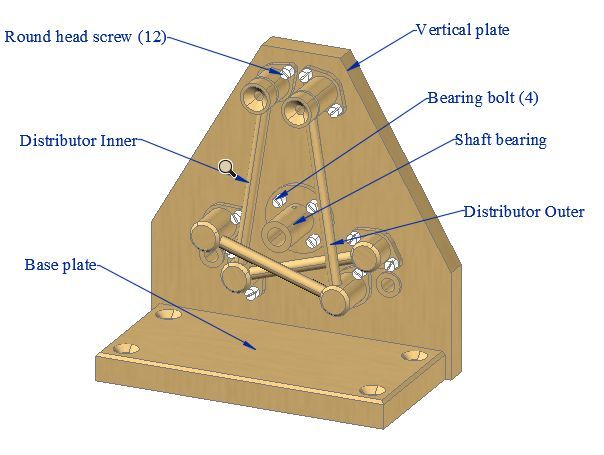
Shaft Assembly
Cylinder Assembly
Piston Assembly 1
Piston Assembly 2
[size=+1]Connecting the inputs and the exhausts[/size]
Three double-acting cylinders means a total of six input ports and six output ports. The input ports must be interconnected and the output ports must be interconnected so that the engine has a single input connector and a single output connector. I examined three ways of doing this.
[size=+1]Fitting three big ends on the same crank pin[/size]
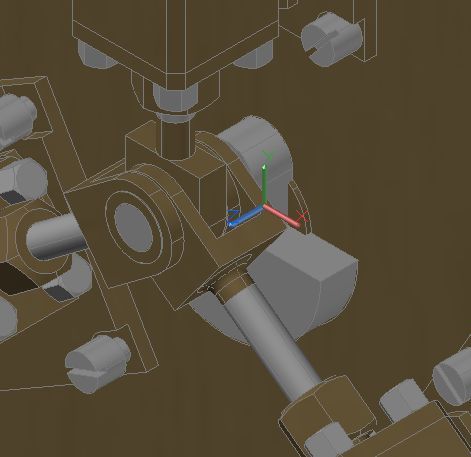
A second design issue that worried me a bit was the effect of three Big Ends acting on the same crank pin. I was afraid that the offset of a Big End from the axis of its Cylinder would cause a twist stress on the Cylinder that could lead to it not oscillating correctly on its Face Plate.
A solution with the cylinder axes moving in three different planes, so that each Big End was aligned with the axis of its cylinder, seemed both excessive and ugly. So, in the end, I decided on a solution in which the Big End of one cylinder (the top one) was aligned with its cylinder, while the other two big Ends have two bearings each on the crank pin, one on either side of the plane containing the axes of the cylinders. This solution seems to work satisfactorily. Below is a close up, extracted from the 3D model, of the three Big Ends sharing the space available on the Crank Pin.
[size=+2]BUILD ASPECTS[/size]
Build operations are all done on my Praximat lathe. I do milling and fly-cutting by mounting a machine vice on the lathe’s top slide, which is itself mounted on a sturdy 90° angle plate fixed to the lathe cross slide.
[size=+1]Making the three Face Plates coplanar[/size]
For the engine to run smoothly without binding, it is necessary that the outer surfaces of the three Face Plates lie perfectly in the same plane. To ensure this, I used a technique that I had used with success in the fabrication of my Kimble engine. A slow shallow fly-cut of the outer surface of all three Face Plates while they are fixed to the Vertical Plate ensures that these surfaces are coplanar. If, for this operation, the Vertical Plate is itself fixed to a rectangular block of aluminium, the face of which has itself just been fly-cut, then not only will the surfaces of the three Face Plates be coplanar, but this plane will be parallel to the back surface of the Vertical Plate. Since this back surface of the Vertical Plate is the reference surface for the Shaft Bearing, we can be sure that the axis of the Crank Shaft is perpendicular to the plane containing the outer surfaces of the Face Plates.
Note the four corners of the Face Plates have rebates so that they can be fixed to the Vertical Plate with screws that remain below the level of the surfaces to be fly-cut.
Unfortunately, I forgot to take photos of this process.
[size=+1]Building the Manifolds [/size]
Building the Input and Exhaust Manifolds posed two problems, firstly getting all the angles right when making the nipples and secondly holding the parts of a Manifold in the right position for soldering.
Getting the angles right
Each Manifold has three Steam Nipples interconnected by two short pipes, and fixed to the back of the Vertical Plate by two screws through their flanges. The pipe ends fit into holes in the sides of the Steam Nipples and, for each Manifold, the set of three Nipples and two pipes are silver soldered together to make a single rigid part. For each pipe connecting to a Steam Nipple, there is a required angle (see Page 3 of drawings) between the axis of the hole for the pipe and the axis of the flange. A final angle relates to the angle of the straight edges of the flange with respect to the axis of the flange.
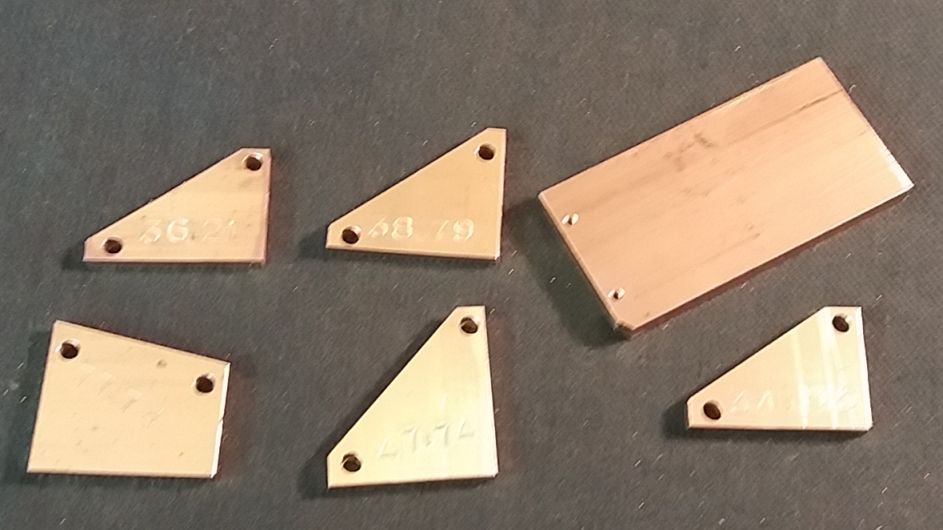
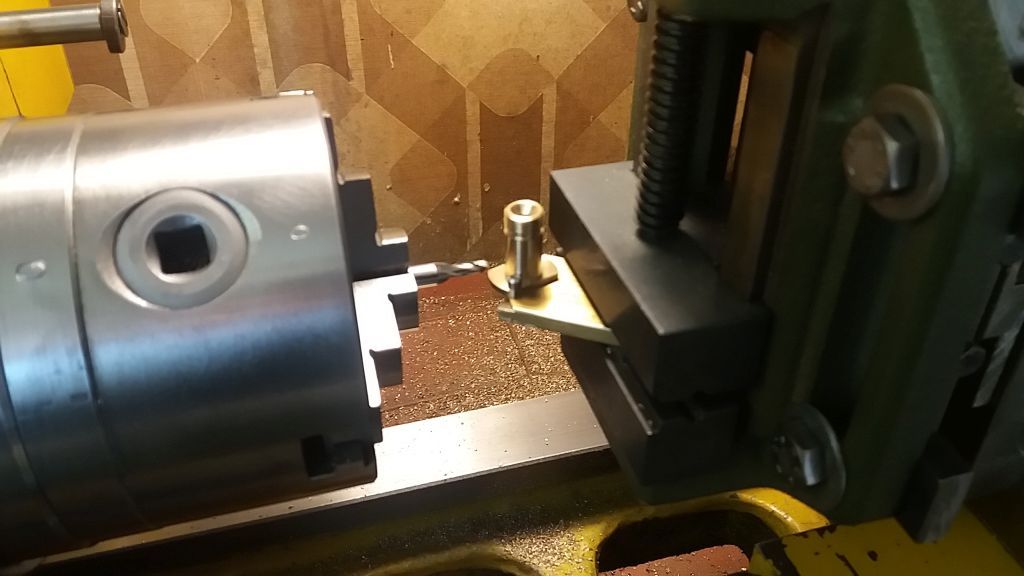
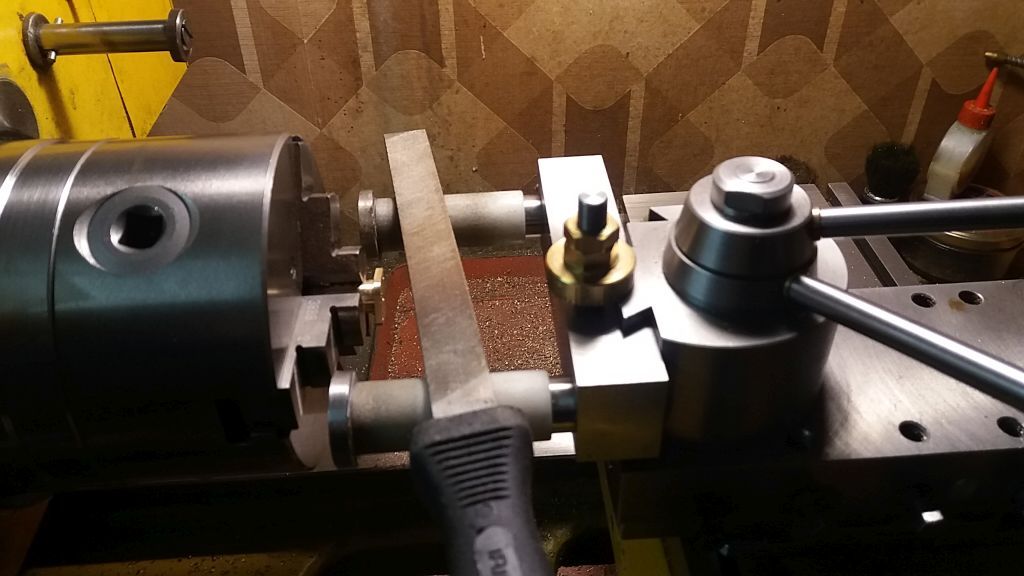
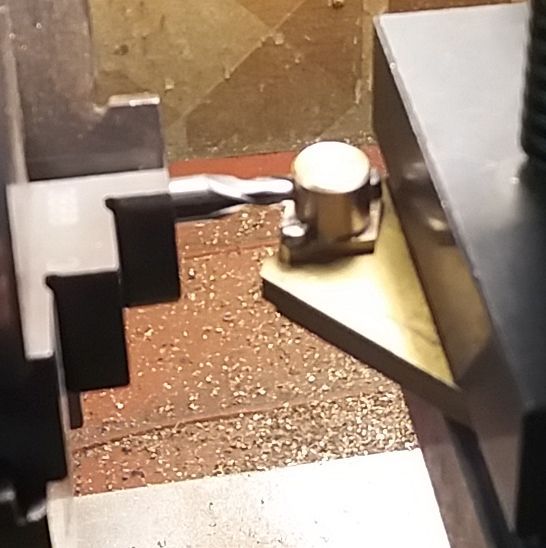
To get these angles right I used the technique of “wedges” described in my [thread=25412]post on my Kimble engine[/thread]. To do the machining, the Nipple is mounted by its flange on a specially prepared rectangular scrap of brass plate, the reference edge of which is parallel to the line through the centres of the two holes for the screws holding the flange. In turn, this plate is held in the machine vice at the angle determined by a wedge with the required angle.
The pictures below show what I’m trying to explain…
The Wedges and the Custom Rectangular Plate
Milling an edge of a flange
Filing a curve on a flange
Preparing the hole for a pipe
Silver-soldering the sub-parts of the Manifolds
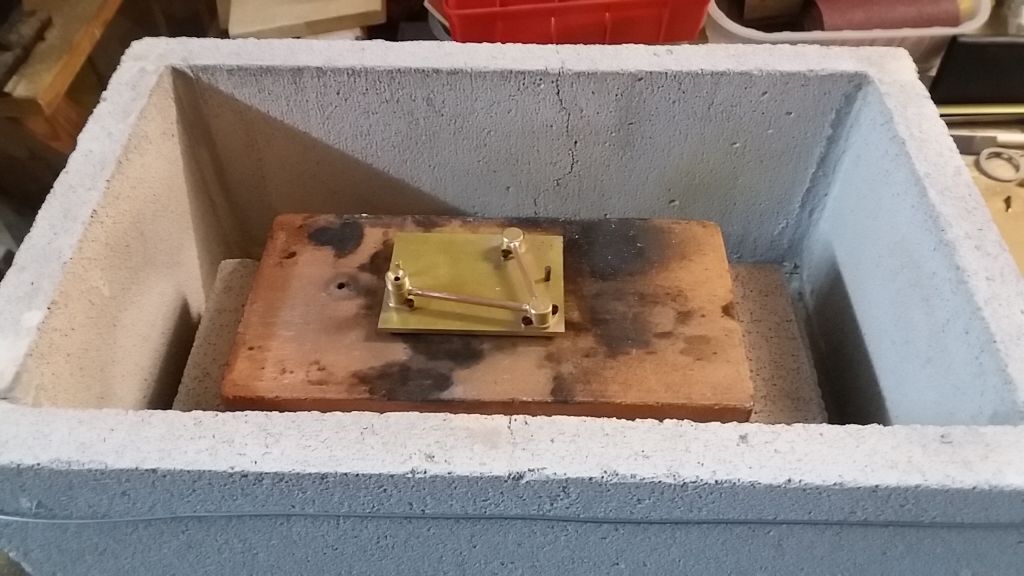
To ensure that the three flanges of a Manifold would all seat flush on the back of the Vertical Plate with their bolt holes aligned correctly with the threaded holes in Vertical Plate, I prepared a plate of 2mm brass with six carefully placed holes, and bolted the Manifolds to this plate for soldering. This worked fine.
The setup for silver-soldering the five sub-parts of a Manifold
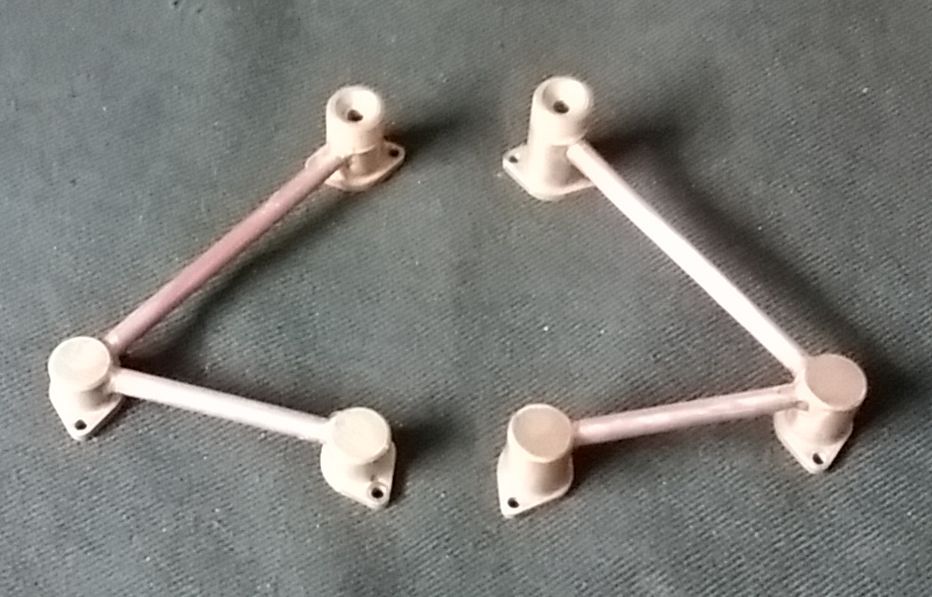
The finished Manifolds
[size=+1]Other pictures taken during the build [/size]
Milling the sloping edge of the Vertical Plate
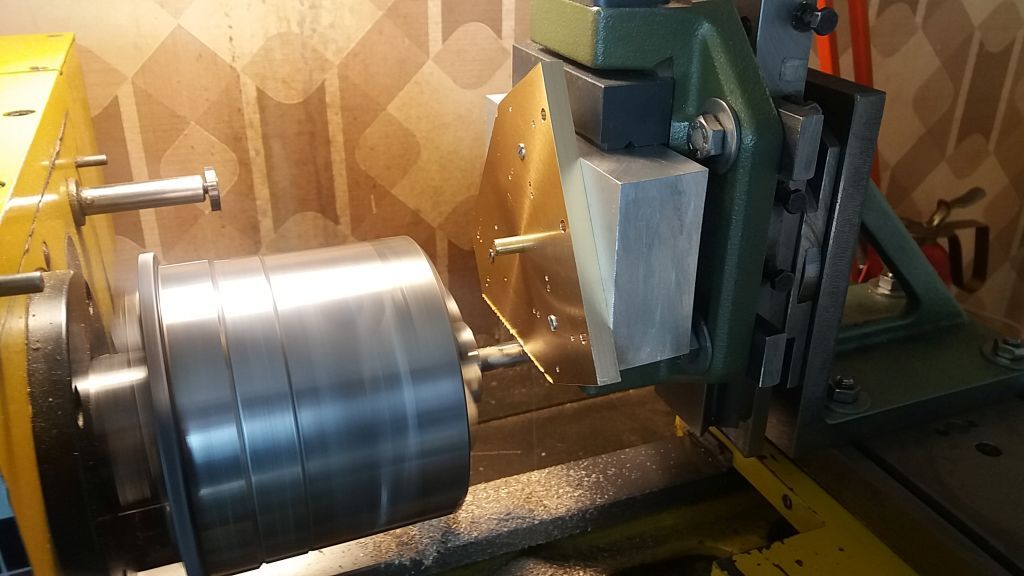
Milling the bevel down the edge of a Cylinder
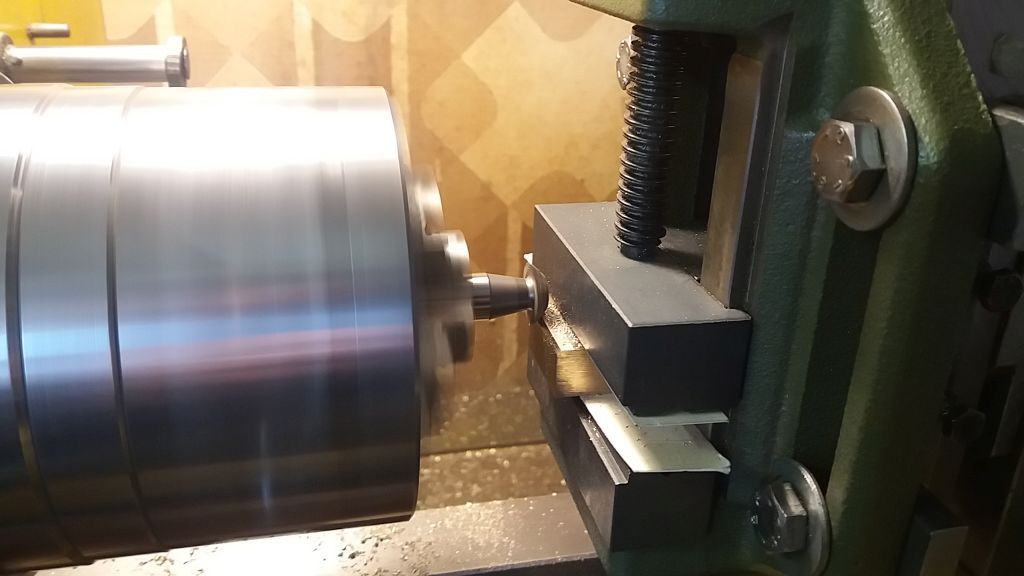
Milling the groove down the side of a Cylinder
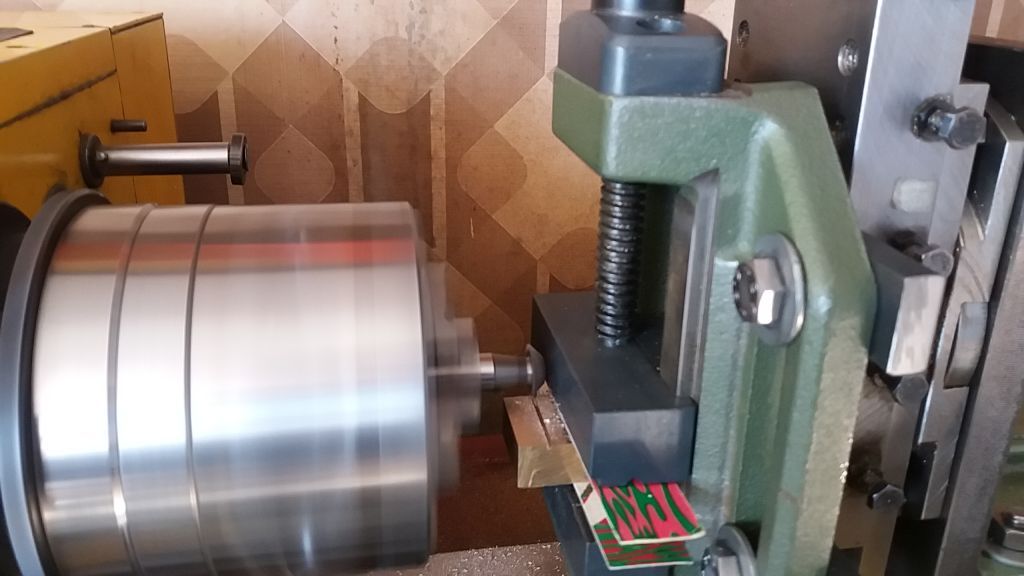
Setting up in 4-jaw chuck to turn the Cylinder face
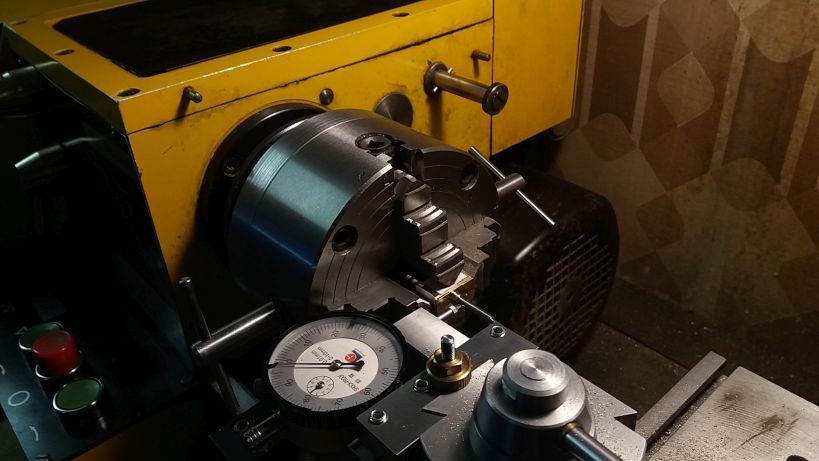
Turning the cylinder face
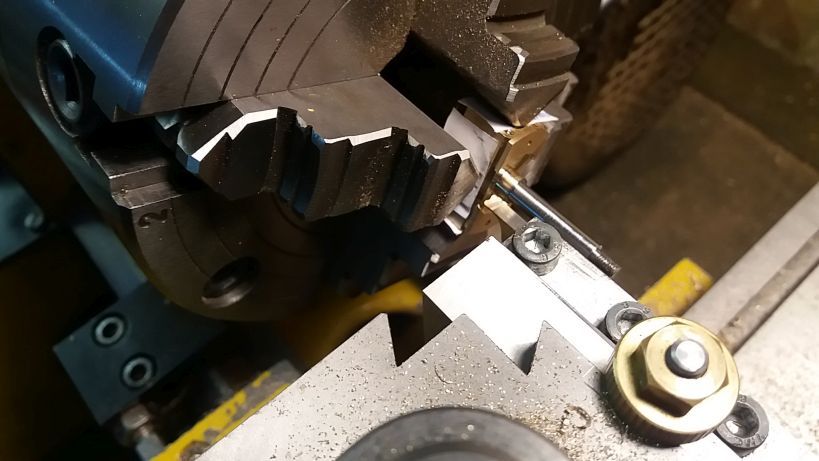
Turning a side of the web of the flywheel
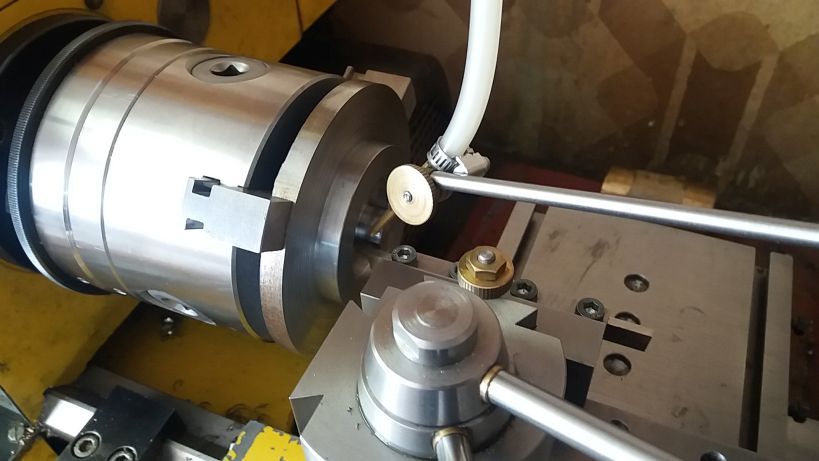
The custom mandrel for finishing the rim of the flywheel
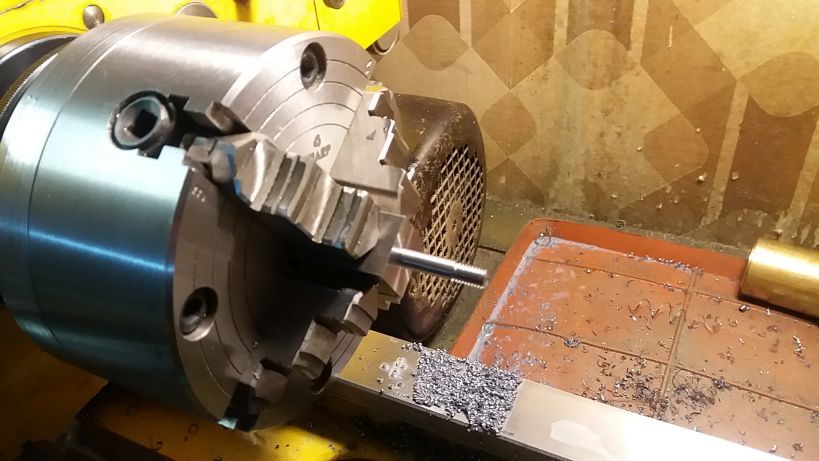
Finisihed Fixed Assy - front
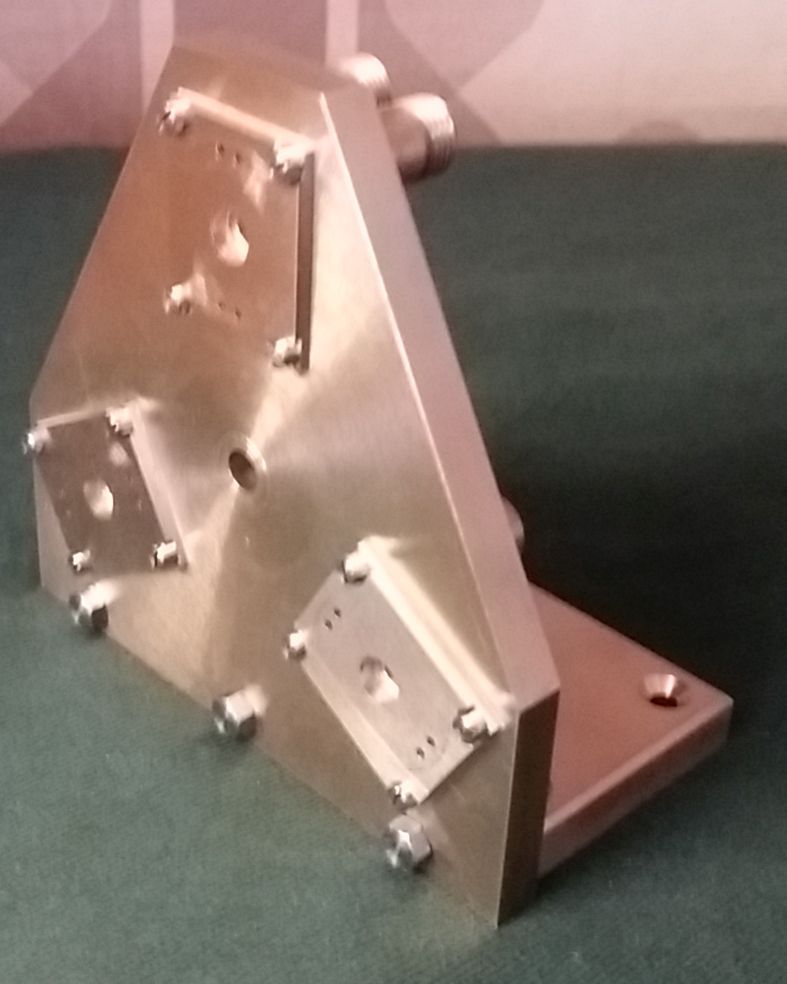
Finished Fixed Assy - back
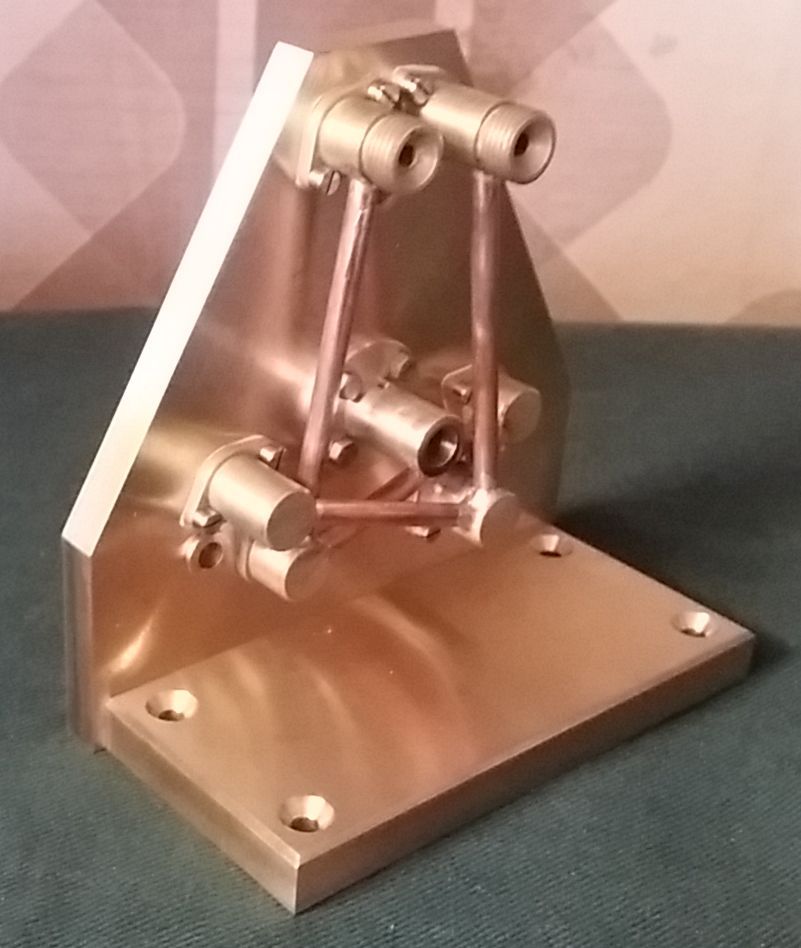
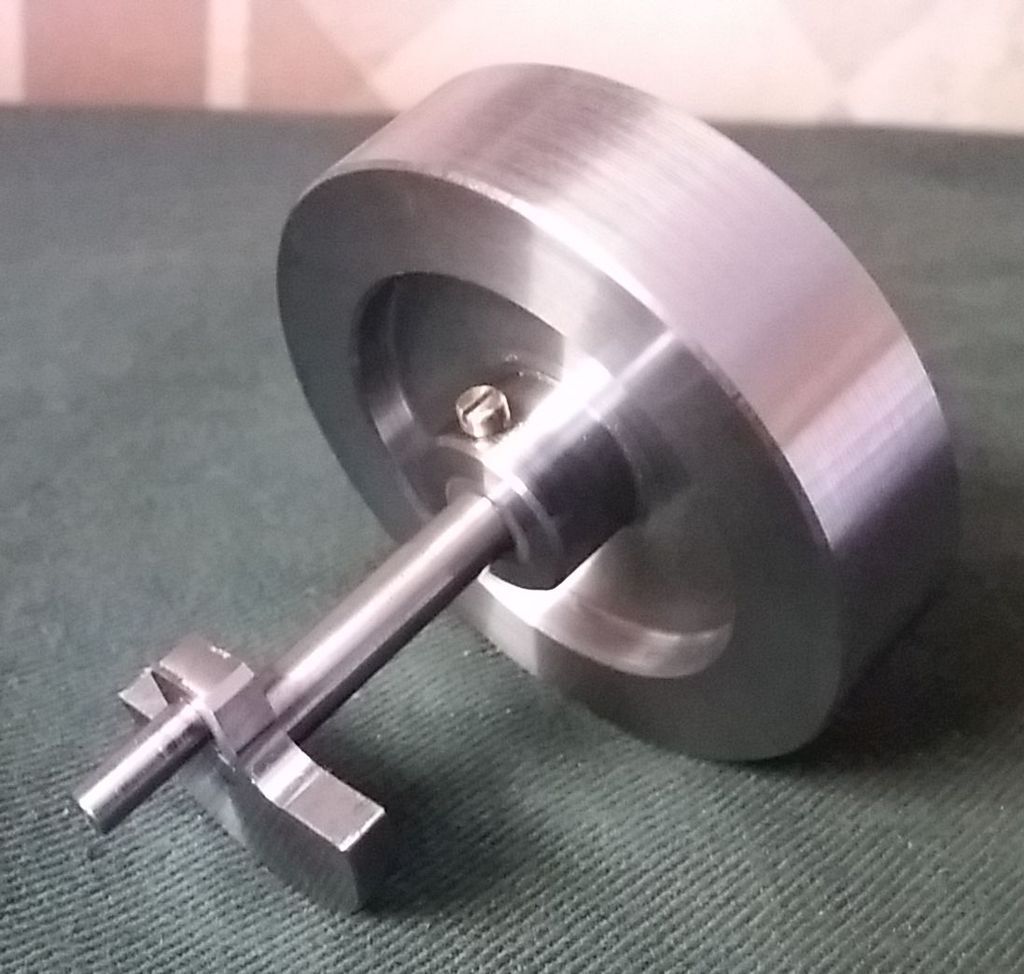
Finished Shaft Assy
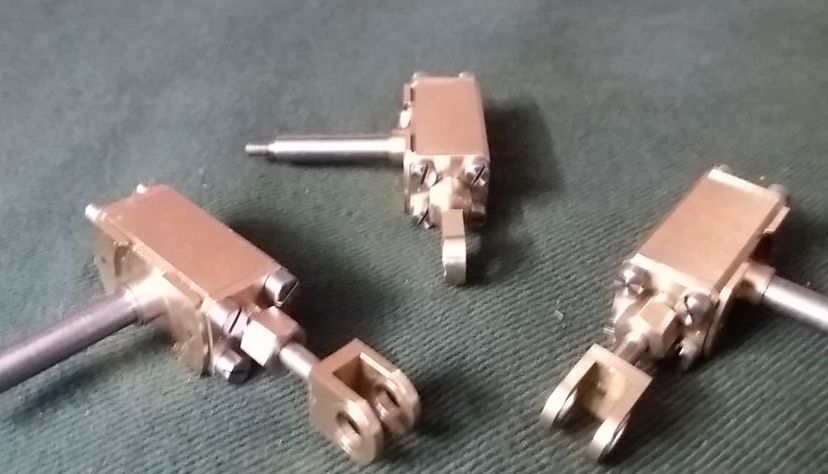
Finished Cylinder and Piston Assys
[size=+2]CONCLUSION [/size]
Well that’s it. I’ve enjoyed making this engine and have learnt some new tricks!
View attachment Sheet1.pdf
View attachment Sheet2.pdf
View attachment Sheet3.pdf
View attachment Sheet4.pdf
View attachment Sheet5.pdf
View attachment Sheet6.pdf
[size=+2]INTRODUCTION[/size]
This post briefly describes some aspects of the design and building of a three cylinder, double acting oscillating engine which I have just finished. The idea to make a triple wobbler came from a post I well recall enjoying on HMEM about a year ago but which now I cannot find.
Before starting the build, I made detailed design drawings extracted from a 3D CAD model. Now that the build is complete, I have updated the model and the drawings to reflect what I actually built. Attached to this post are six PDF files, each with one drawing on an A4 page.
Here are two pics of the engine and a link to a video showing its first run on compressed air. The engine is very quiet; to hear the sound of the video the volume needs to be right up!


Link to 40 second video
[size=+2]DESIGN ASPECTS[/size]
[size=+1]The 3D model[/size]
With an eye to a possible simulation with the 3D model of the movement of the engine, I decided to structure the design drawings into a Fixed Assy with all the non-moving parts, and four sub-assemblies, the instances of which each move as a whole:
- a Shaft Assy,
- a Cylinder Assy
- two variants of a Piston Assy (with different Big Ends).
Below are images extracted from the drawings of these five types of sub-assembly.
Fixed Assembly - Front

Fixed Assembly - Back

Shaft Assembly

Cylinder Assembly

Piston Assembly 1

Piston Assembly 2

[size=+1]Connecting the inputs and the exhausts[/size]
Three double-acting cylinders means a total of six input ports and six output ports. The input ports must be interconnected and the output ports must be interconnected so that the engine has a single input connector and a single output connector. I examined three ways of doing this.
- Interconnection via passages inside the metal of the Vertical Plate, made by accurate drilling of interconnected holes.
- Interconnection by fabricating the Vertical Plate by soldering together two thinner plates in which appropriate channels have been milled.
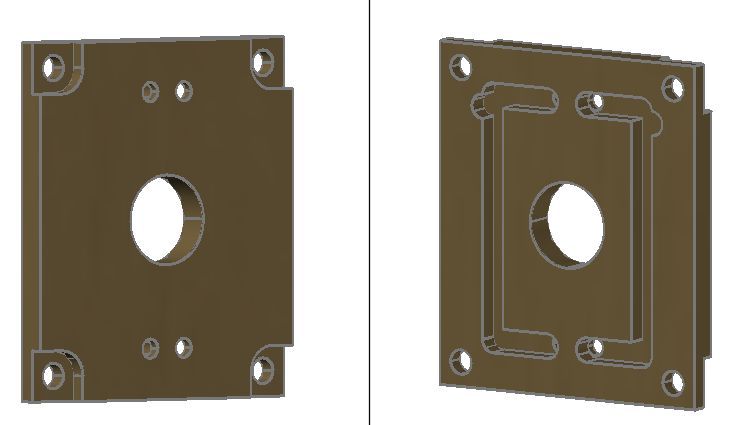
- Interconnection by external manifolds fixed to the back of the Vertical plate and, fixed to the front of the Vertical Plate, individual fixed Face Plates for the each cylinder, with milled channels to interconnect its two input ports and its two exhaust ports. Below are views of a Face Plate extracted from the drawings.
[size=+1]Fitting three big ends on the same crank pin[/size]
A second design issue that worried me a bit was the effect of three Big Ends acting on the same crank pin. I was afraid that the offset of a Big End from the axis of its Cylinder would cause a twist stress on the Cylinder that could lead to it not oscillating correctly on its Face Plate.
A solution with the cylinder axes moving in three different planes, so that each Big End was aligned with the axis of its cylinder, seemed both excessive and ugly. So, in the end, I decided on a solution in which the Big End of one cylinder (the top one) was aligned with its cylinder, while the other two big Ends have two bearings each on the crank pin, one on either side of the plane containing the axes of the cylinders. This solution seems to work satisfactorily. Below is a close up, extracted from the 3D model, of the three Big Ends sharing the space available on the Crank Pin.

[size=+2]BUILD ASPECTS[/size]
Build operations are all done on my Praximat lathe. I do milling and fly-cutting by mounting a machine vice on the lathe’s top slide, which is itself mounted on a sturdy 90° angle plate fixed to the lathe cross slide.
[size=+1]Making the three Face Plates coplanar[/size]
For the engine to run smoothly without binding, it is necessary that the outer surfaces of the three Face Plates lie perfectly in the same plane. To ensure this, I used a technique that I had used with success in the fabrication of my Kimble engine. A slow shallow fly-cut of the outer surface of all three Face Plates while they are fixed to the Vertical Plate ensures that these surfaces are coplanar. If, for this operation, the Vertical Plate is itself fixed to a rectangular block of aluminium, the face of which has itself just been fly-cut, then not only will the surfaces of the three Face Plates be coplanar, but this plane will be parallel to the back surface of the Vertical Plate. Since this back surface of the Vertical Plate is the reference surface for the Shaft Bearing, we can be sure that the axis of the Crank Shaft is perpendicular to the plane containing the outer surfaces of the Face Plates.
Note the four corners of the Face Plates have rebates so that they can be fixed to the Vertical Plate with screws that remain below the level of the surfaces to be fly-cut.
Unfortunately, I forgot to take photos of this process.
[size=+1]Building the Manifolds [/size]
Building the Input and Exhaust Manifolds posed two problems, firstly getting all the angles right when making the nipples and secondly holding the parts of a Manifold in the right position for soldering.
Getting the angles right
Each Manifold has three Steam Nipples interconnected by two short pipes, and fixed to the back of the Vertical Plate by two screws through their flanges. The pipe ends fit into holes in the sides of the Steam Nipples and, for each Manifold, the set of three Nipples and two pipes are silver soldered together to make a single rigid part. For each pipe connecting to a Steam Nipple, there is a required angle (see Page 3 of drawings) between the axis of the hole for the pipe and the axis of the flange. A final angle relates to the angle of the straight edges of the flange with respect to the axis of the flange.
To get these angles right I used the technique of “wedges” described in my [thread=25412]post on my Kimble engine[/thread]. To do the machining, the Nipple is mounted by its flange on a specially prepared rectangular scrap of brass plate, the reference edge of which is parallel to the line through the centres of the two holes for the screws holding the flange. In turn, this plate is held in the machine vice at the angle determined by a wedge with the required angle.
The pictures below show what I’m trying to explain…
The Wedges and the Custom Rectangular Plate

Milling an edge of a flange

Filing a curve on a flange

Preparing the hole for a pipe

Silver-soldering the sub-parts of the Manifolds
To ensure that the three flanges of a Manifold would all seat flush on the back of the Vertical Plate with their bolt holes aligned correctly with the threaded holes in Vertical Plate, I prepared a plate of 2mm brass with six carefully placed holes, and bolted the Manifolds to this plate for soldering. This worked fine.
The setup for silver-soldering the five sub-parts of a Manifold

The finished Manifolds

[size=+1]Other pictures taken during the build [/size]
Milling the sloping edge of the Vertical Plate

Milling the bevel down the edge of a Cylinder

Milling the groove down the side of a Cylinder

Setting up in 4-jaw chuck to turn the Cylinder face

Turning the cylinder face

Turning a side of the web of the flywheel

The custom mandrel for finishing the rim of the flywheel

Finisihed Fixed Assy - front

Finished Fixed Assy - back

Finished Shaft Assy

Finished Cylinder and Piston Assys

[size=+2]CONCLUSION [/size]
Well that’s it. I’ve enjoyed making this engine and have learnt some new tricks!
View attachment Sheet1.pdf
View attachment Sheet2.pdf
View attachment Sheet3.pdf
View attachment Sheet4.pdf
View attachment Sheet5.pdf
View attachment Sheet6.pdf
Last edited:


