You are using an out of date browser. It may not display this or other websites correctly.
You should upgrade or use an alternative browser.
You should upgrade or use an alternative browser.
Locomobile steam engine
- Thread starter mnay
- Start date

Help Support Home Model Engine Machinist Forum:
This site may earn a commission from merchant affiliate
links, including eBay, Amazon, and others.
I finally got back to my project after a couple of weeks. I was able to machine the pistons and rods.
I decided to make my own design 2 piece piston which will have a press on carbon teflon ring/rider in the center.
We use carbon teflon successfully in large compressors at my work. I will see how well it works with steam.
I don't intend to run very high pressure, probably less than 100 psi, so the steam will be wet.
Mike

J
JorgensenSteam
Guest
Mike-
That is beautiful work there.
The Stanley's used a two piece piston.
I am not sure about the Mason.
Worst case, you can replace the pistons with some that have cast iron rings. I have had trouble with machining many many things, but I can actually make cast iron piston rings without much trouble. I just turn off a few extra in case I break one, but they are not that bad. I don't do the heat-treatment, but turn them oversize, cut the gap, spring them in on a mandrel, and then turn them to final size. I make them slightly wide, and then sand the sides on a flat plate until the fit into the slot in the piston with a little to spare.
Powder keg
Well-Known Member
- Joined
- Oct 10, 2007
- Messages
- 1,091
- Reaction score
- 3
Looking great!!!
~Wes~
~Wes~

$99.99
AHS Outdoor Wood Boiler Yearly Maintenance Kit with Water Treatment - ProTech 300 & Test Kit
Alternative Heating & Supplies

$19.15
$29.95
Competition Engine Building: Advanced Engine Design and Assembly Techniques (Pro Series)
MBC Inc.

$37.82
$49.99
Becker CAD 12 3D - professional CAD software for 2D + 3D design and modelling - for 3 PCs - 100% compatible with AutoCAD
momox Shop

$9.99 ($1.00 / Count)
$13.99 ($1.40 / Count)
10 Pcs Carbide Burr Set Bits 1/8" Shank Compatible with Dremel Milwaukee Rotary Grinder Tool Kit Accessories Drill Rasp File Attachment Wood Metal Stone Carve Grind Cut Sand Engrave Polish Porting
SworkerDirect

$171.00
$190.00
Genmitsu CNC 3018-PRO Router Kit GRBL Control 3 Axis Plastic Acrylic PCB PVC Wood Carving Milling Engraving Machine, XYZ Working Area 300x180x45mm
SainSmart Official
![DreamPlan Home Design and Landscaping Software Free for Windows [PC Download]](https://m.media-amazon.com/images/I/51kvZH2dVLL._SL500_.jpg)
$0.00
DreamPlan Home Design and Landscaping Software Free for Windows [PC Download]
Amazon.com Services LLC

$49.95
$55.99
DjuiinoStar Hot Air Stirling Engine Assembly Kit: Spend 30 Minutes to Build Your Own Stirling Engine
djuiinostar

$26.89
$34.99
Peachtree Woodworking Supply Bowl Sander Tool Kit w/Dual Bearing Head & Hardwood Handle, 42 Pieces Wood Sander Set, 2 Hook & Loop Sanding Disc Sandpaper Assortment, 1/4 Mandrel Bowl Sander
Peachtree Woodworking Supply Inc

$599.00
$649.00
FoxAlien Masuter Pro CNC Router Machine, Upgraded 3-Axis Engraving All-Metal Milling Machine for Wood Acrylic MDF Nylon Carving Cutting
FoxAlien Official

$45.99
Sunnytech Mini Hot Air Stirling Engine Motor Model Educational Toy Kits Electricity HA001
stirlingtechonline
Thanks for the encouragement. This is most time consuming project that I have taken on.
It's hard to be patient, life gets in the way of hobby time!!!
I will have to do some research on the Mason Steam Car, I am not familiar with that one.
Mike
It's hard to be patient, life gets in the way of hobby time!!!
I will have to do some research on the Mason Steam Car, I am not familiar with that one.
Mike
I made a few brass chips this weekend. I machined the crossheads for both cylinders.
Next will be the crosshead slides/frames. The originals in the articles were castings. I will be machining them from solid round bar. Not very efficient but I believe it will work ok.
Mike

Next will be the crosshead slides/frames. The originals in the articles were castings. I will be machining them from solid round bar. Not very efficient but I believe it will work ok.
Mike

I was able to start on the next parts for the locomobile. My preference would have been to cast the crosshead guide/bearing brackets, but I don't do cast iron yet and they needed to be strong. I started with some scrap stressproof (1144 steel) round bar I got from work and started whittling away.
I will end up milling more than half of the bar away before I am done. After I complete one I will try to saw some of the material away to save time. I am designing as I go.

I will end up milling more than half of the bar away before I am done. After I complete one I will try to saw some of the material away to save time. I am designing as I go.

In the last post I showed a photo of milling the crosshead slide/bearing bracket. I got ahead of myself with that post. Before I started milling I pre-machined the bar round and to length and calculated the bores to put in to save some milling later. I left a section of round stock when milling so I could go back and finish bore the crosshead bore after all of the milling was complete in case something warped or stress relieved. Lots of hours to go to complete these parts. Castings would certainly been faster to machine, but with pattern making time etc. probably sixes....
Mike

Mike

More progress on the bearing standards/crosshead guides.
I decided to work smarter instead of harder.
The first standard I removed all of the material by milling, a very slow process. The second standard I got a little smarter and machined a slot at each end and cut a large section out with my band saw. I saved at least 3-4 hours in the mill.


I decided to work smarter instead of harder.
The first standard I removed all of the material by milling, a very slow process. The second standard I got a little smarter and machined a slot at each end and cut a large section out with my band saw. I saved at least 3-4 hours in the mill.


Here is a photo of one standard with most of the mill work done. The ring on the bottom I left to be able to chuck it up in the lathe for a final bore in the crosshead guide after all of the stress relieving caused by the large amount of milling on the piece. The other part is the vise is about 70% milled.
One chip at a time!!!!!
Mike

One chip at a time!!!!!
Mike

I am finally back at it again. I have all of the basic milling done on the uprights and am boring the crosshead guides. I had to extend my boring bar to the max and run at only 80 rpm to eliminate the chatter
The ring left on the bottom of the upright was for chucking purposes. I may leave part of it for an engine mount.

The ring left on the bottom of the upright was for chucking purposes. I may leave part of it for an engine mount.

I was able to bore the crosshead guide bores successfully even though they were flimsy long parts. I had to machine with a very fine feed and slow rpm.
Because the parts were long I borrowed a right angle attachment for the bridgeport from work. This made drilling the holes in the top of the standards an easy job. Sorry about the blurry photo.
One chip at a time.

Because the parts were long I borrowed a right angle attachment for the bridgeport from work. This made drilling the holes in the top of the standards an easy job. Sorry about the blurry photo.
One chip at a time.

Allen
Well-Known Member
- Joined
- Jul 14, 2008
- Messages
- 128
- Reaction score
- 55
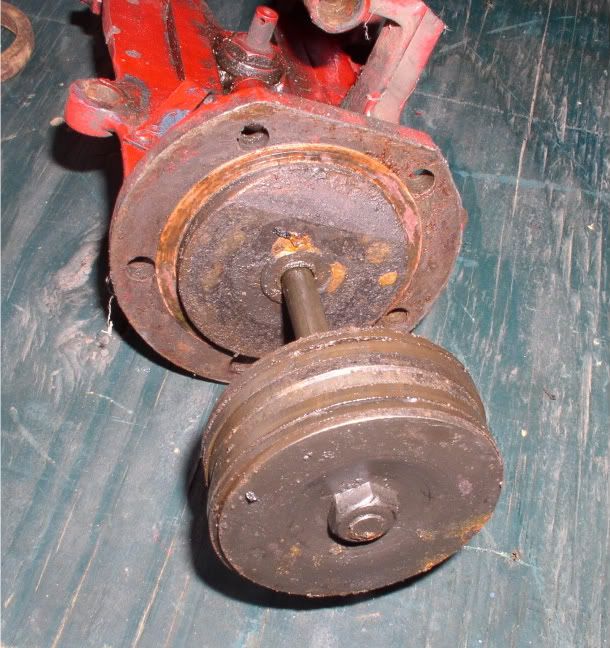
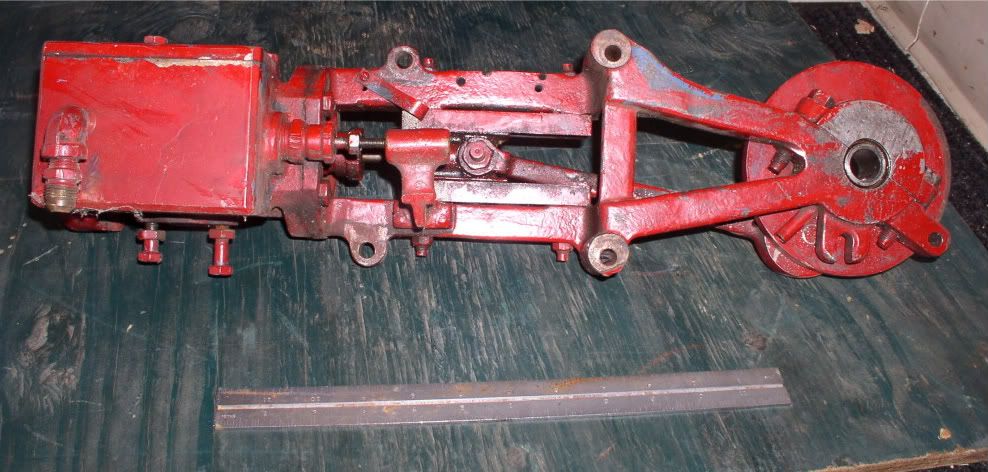
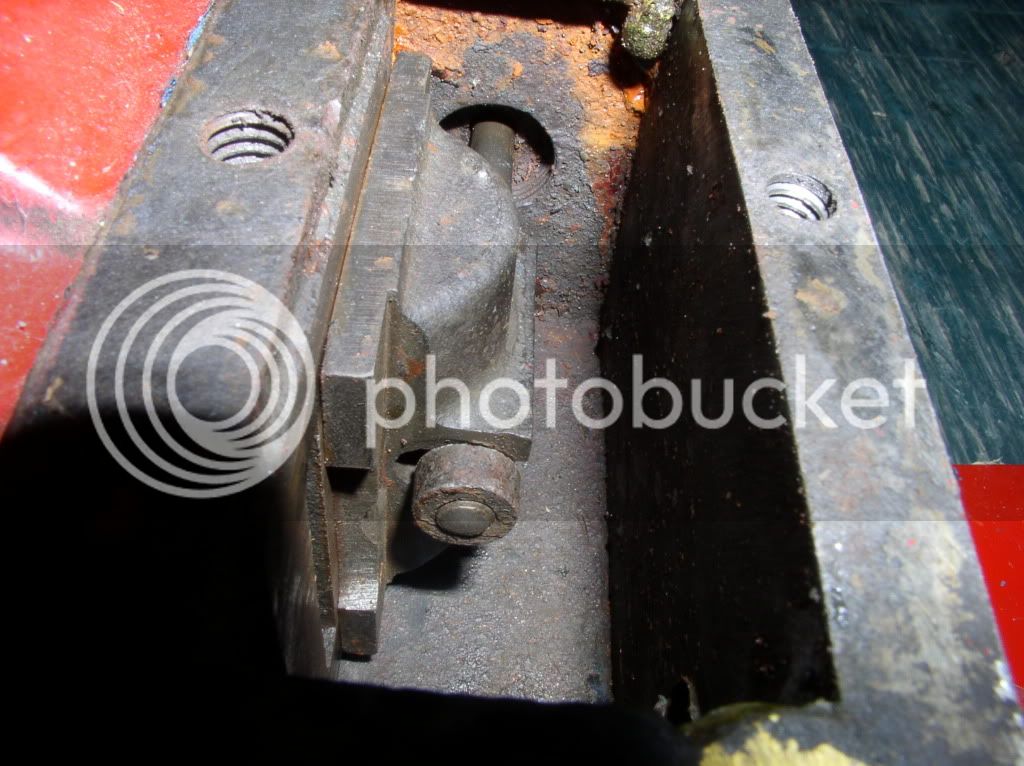
Don't know if this will help much, but here are some detail pics of the half Mason that I used on my steamroller


More on page 3 and 4
http://s397.photobucket.com/albums/pp52/steamnut1917/steam%20car%20engine/#!cpZZ4QQtppZZ20


More on page 3 and 4
http://s397.photobucket.com/albums/pp52/steamnut1917/steam%20car%20engine/#!cpZZ4QQtppZZ20
Good night everyone. I'm new to the forum. I'm on research to build a full scale replica of a Locomobile or a Stanley Steamer, and at the moment I'm stock with the engine. So far I haven't been able to obtain enough information to work with. So I turned my expectations toward a Day-Land engine; so if anyone can direct me to get a copy or casted parts to start building one it would be really appreciated. Thanks in advance. Regards. JMV.
sunworksco
Rocket Man
- Joined
- Nov 20, 2010
- Messages
- 242
- Reaction score
- 13
Nice build!
I am going to build a quarter scale 1906 Stanley 30HP race engine that was in the Rocket.
I'm hoping to cast around two dozen engines. I plan to use ceramic pistons with Viton seals.
I plan to use circular Viton discs sandwiched in between the ceramic discs.
The cylinder block will be lost wax cast in silicon bronze.
I have a friend that has the drawings that I plan to convert to a 3-D CAD drawing.
The drawings will be expensive but it will allow me to print 3-D models in ABS plastic for making RTV molds. These molds will be used for making wax models for the lost wax casting.
Similar threads
- Replies
- 30
- Views
- 4K
- Replies
- 9
- Views
- 3K


![MeshMagic 3D Free 3D Modeling Software [Download]](https://m.media-amazon.com/images/I/B1U+p8ewjGS._SL500_.png)


