Horizontal Belt Grinder

Home Model Engine Machinist Forum

Help Support Home Model Engine Machinist Forum:

This site may earn a commission from merchant affiliate links, including eBay, Amazon, and others.
Great job on building an entire machine from scratch!
A minor point... Household current, today, is 120V RMS but DC motors speed is proportional to the Average value which is 11% lower than RMS or 108V
You lose 1.5V in the bridge leaving ~106V average.
Your motor will be running faster than nominal, but not as much as the 120V/100V ratio implies.
 
Chuck--Once you begin to use that, you will wonder how you ever lived without it. A word of caution though---If you do go with a 3/4" diameter nose pulley as planned, you will find that your belts don't survive very long. They don't do well with that tight a bend radius.---Brian
 
Great job on building an entire machine from scratch!
A minor point... Household current, today, is 120V RMS but DC motors speed is proportional to the Average value which is 11% lower than RMS or 108V
You lose 1.5V in the bridge leaving ~106V average.
Your motor will be running faster than nominal, but not as much as the 120V/100V ratio implies.

Thanks for the info, Mauro, I was a little worried about over-revving it.
 
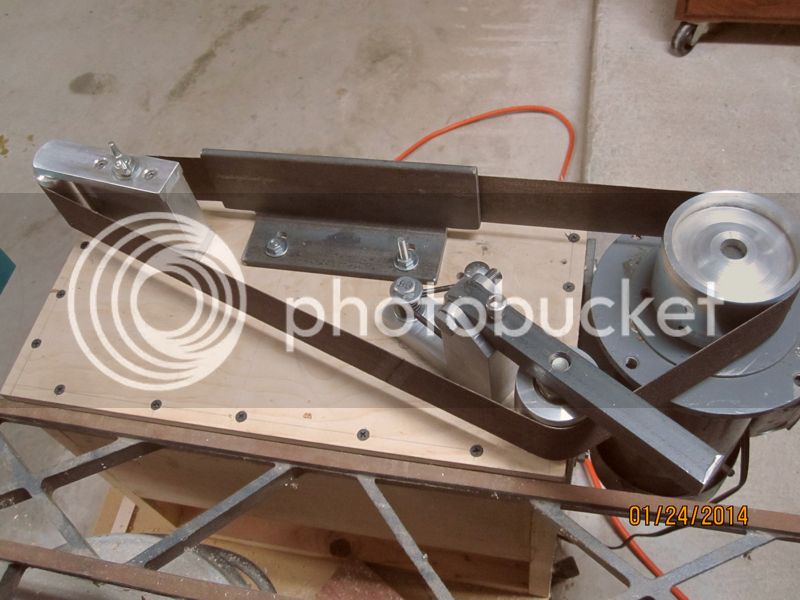
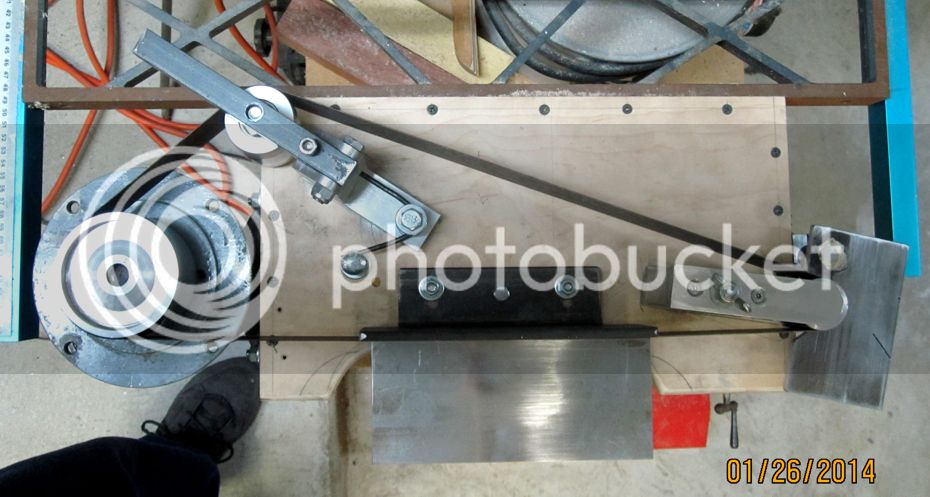
Here's today's progress report. I finished the platen for the straight section and got it installed.

IMG_3330_zps268bce4b.jpg


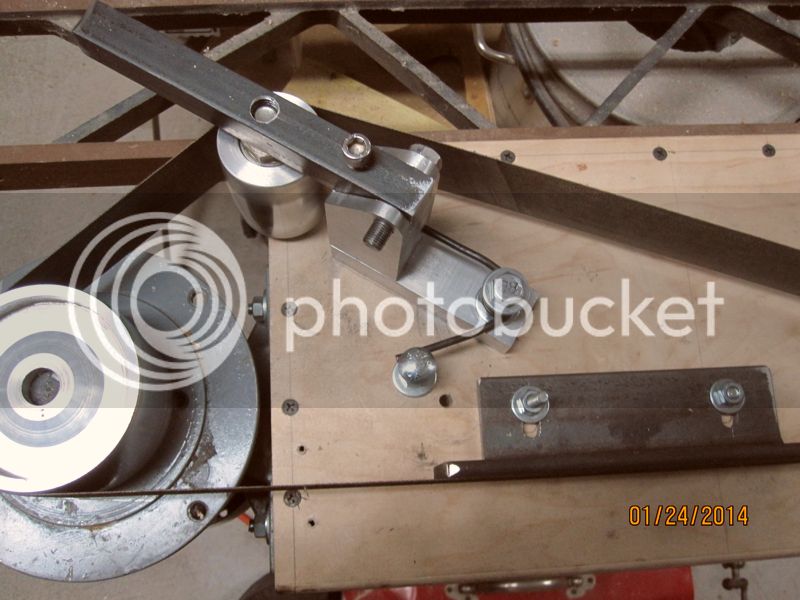
I also got the spring for the tensioner assembly installed. I made it simple for starters and can modify it later if it needs to be adjustable.

IMG_3331_zpscde2c67c.jpg


And, I got started on the grinding rest for the spindle end.

IMG_3332_zps54b30319.jpg


The horizontal rest will be mounted on an arm that swings out away from the grinder so the belt and/or spindle can easily be changed. A 3/4" shaft will provide the hinge mechanism as well as the elevation adjustment so I can use different parts of the belt as it wears.

Chuck
 
Mr. Fellows,

Just wondering what keeps the belt tracking in the center of the rollers? I have a belt sander and the top roller has a thumbscrew to make slight adjustments to the roller angle to keep the belt running centered. And I do mean slight! A smidge on the thumbscrew sends the belt careening off to one side or the other.

Maybe the convex shape of your tensioner roller keeps it tracking...?

Thanks for the posts,
-J.Andrew

Adjusting the socket head cap screw on top of the idler support bar changes the angle of the idler pulley for tracking. As you said, it doesn't take much!

Chuck
 
Great job on building an entire machine from scratch!
A minor point... Household current, today, is 120V RMS but DC motors speed is proportional to the Average value which is 11% lower than RMS or 108V
You lose 1.5V in the bridge leaving ~106V average.
Your motor will be running faster than nominal, but not as much as the 120V/100V ratio implies.

RE: 120V RMS: RMS is the equivalent DC voltage in an AC circuit, so the only loss is the drop across the diodes. The power is the same in a 120V RMS circuit as it is in a 120V DC circuit.
 
Chuck, great job. You are so creative. i wish I was half as creative! This build should be turned into an article!

another Chuck
 
Thanks, Baron, Chuck.


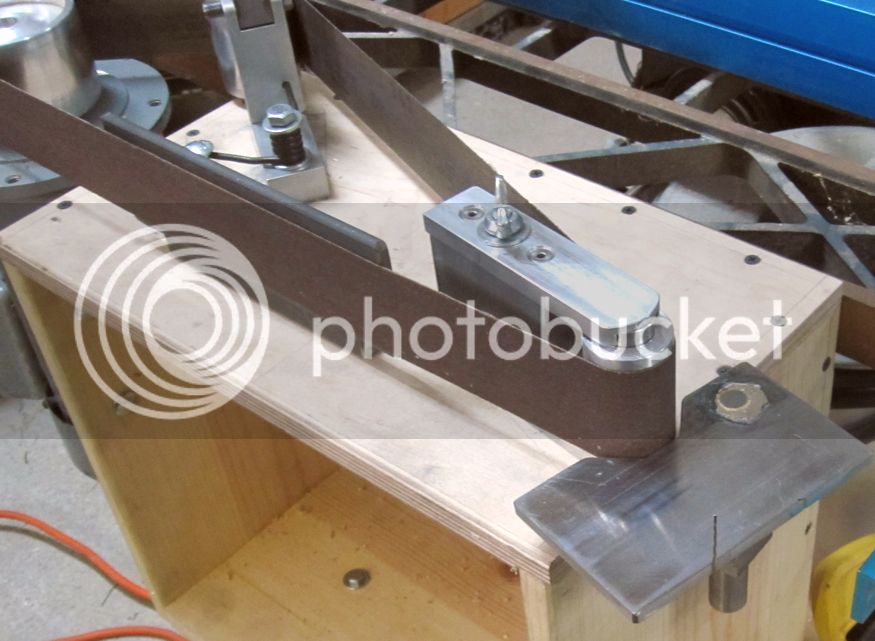
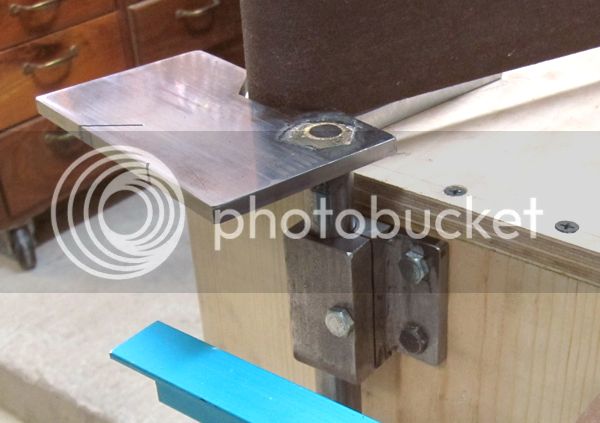
Today I finished up and mounted the grinding rest for spool end.

IMG_3333_zps47b18295.jpg


IMG_3334_zpsef8cf3c6.jpg


Some of you may notice the boo boo on the outside edge of the table... :rant: I almost cut the notch on the wrong side, but my subconscious jumped in and made me reconsider as I was cutting it. I'll probably remake it at some point, but it'll have to do for now.
On to the other grinding rest!

Chuck

Naw. Slot it and bolt a guide plate on there. Get the angle right for tool grinding.:D:D
 
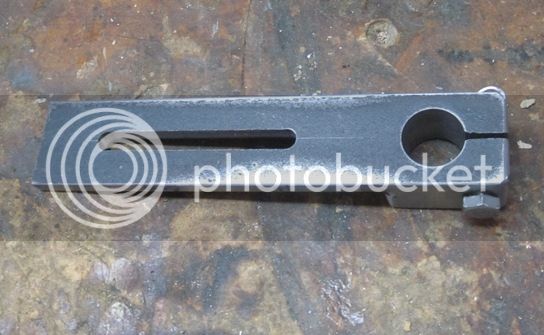
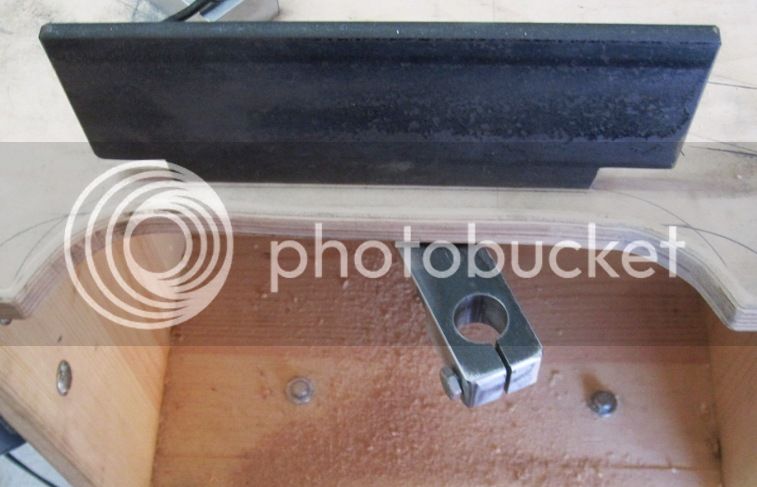
Here is the adjustable bracket for the front grinding rest. I welded a 5/8" thick block on the front of a 1/4" thick piece rather than try to make it from one solid piece.

IMG_3336_zps424e5ae0.jpg


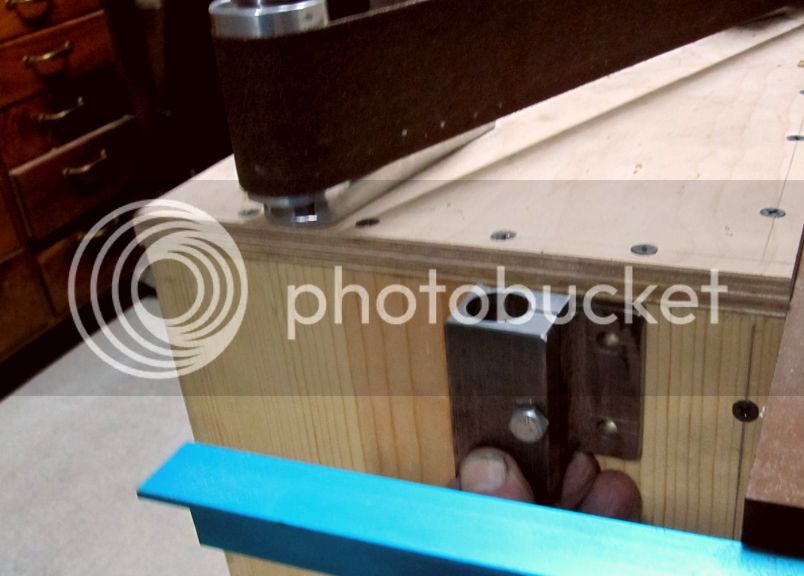
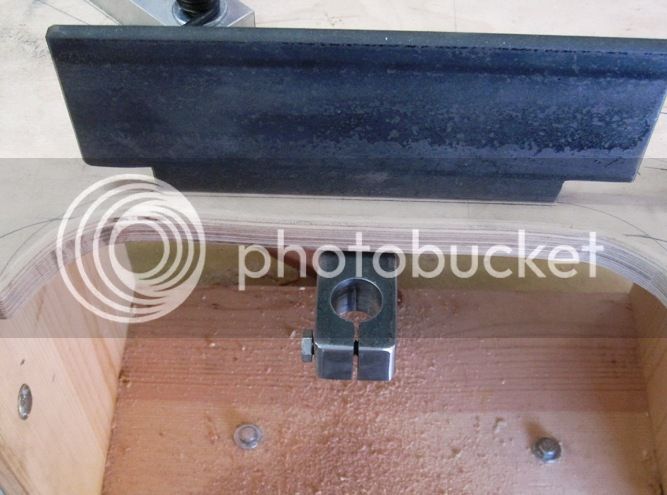
The bracket is fastened to the cabinet with a 1/4" bolt coming down from the top and a nut and washer on the bottom.

IMG_3337_zps447ff537.jpg


The slot in the bracket arm lets it move from side to side as well in and out.

IMG_3338_zps62e526e2.jpg


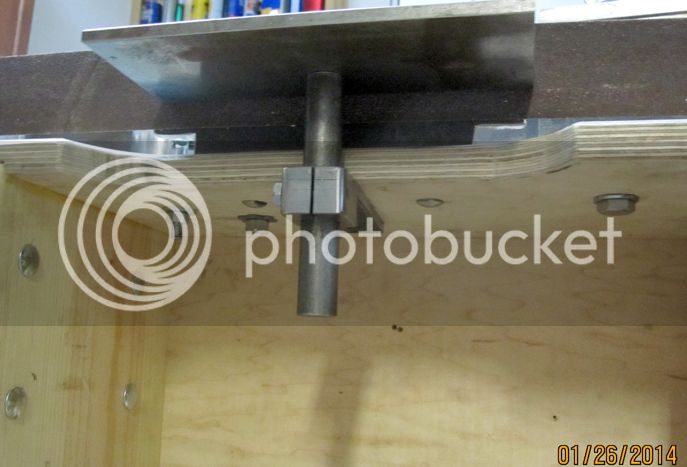
The rest itself is (tightly) press fitted onto a 3/4" round pedestal that slides up and down in the bracket.
IMG_3341_zps680282d1.jpg


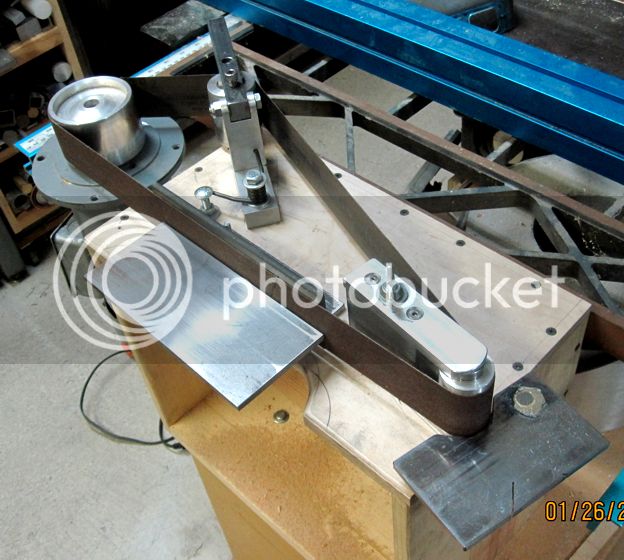
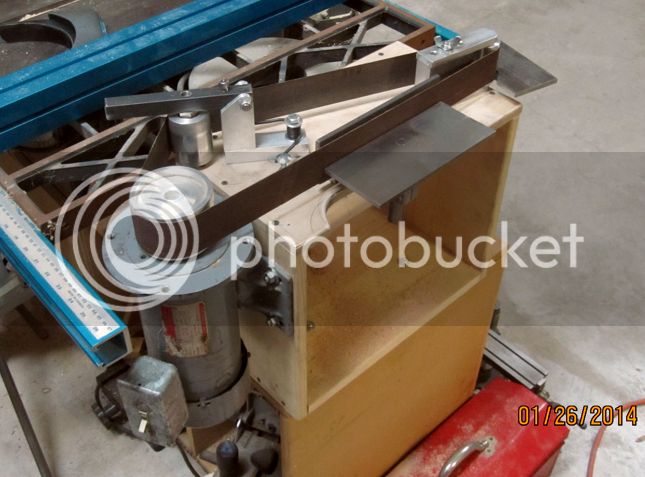
So the grinder is now functionally complete. Everything works and both grinding rests are done.

IMG_3343_zps360d4e63.jpg


IMG_3342_zpsbc46a9ee.jpg


IMG_3340_zps3d395622.jpg


I want to replace some of the plain nuts and/or bolts with handles so I don't have to reach for a wrench when I want to move something. Then I will post a video showing how everything works.

Chuck
 
Here's a video I made today of the finished grinder:

[ame]http://www.youtube.com/watch?v=tkxWFjFUy6g[/ame]

Hope you pardon the videography, it's pretty amateurish.

Chuck
 
It looks good Chuck. The ability to change rollers for inside curves is a very nice feature. You may find out that under heavy use, the spring won't be strong enough and the belt will bounce. Of course that will only happen once, and the belt then flies off the rollers. You may want to put a lock down bolt on the spring loaded swing arm. The only other thing I see is that you may want to put a fence /rest somewhere at 90 degrees to the belt travel, so that under heavy grinding the fence/rest will take a lot of the load so the part is not so difficult to hold in place while you are grinding it. I built my belt grinder many years ago for smoothing the edges of flame cut plate brackets when I was building hot rods. Mine has a 4" wide belt and a big old 2 HP motor. I wish now that I had put one of the pulleys right on the end of the motor shaft like you did. I have a v-belt drive from my motor to the drive roller, and that v-belt sucks up a lot of my available power. I made my rollers from 3" diameter solid steel stock, so there is a lot of inertia to overcome when I start it. When I turn the switch on that big old motor, all the lights in Barrie go dim until things get up to speed.:eek::eek:
 
Last edited:
It looks good Chuck. The ability to change rollers for inside curves is a very nice feature. You may find out that under heavy use, the spring won't be strong enough and the belt will bounce. Of course that will only happen once, and the belt then flies off the rollers. You may want to put a lock down bolt on the spring loaded swing arm. The only other thing I see is that you may want to put a fence /rest somewhere at 90 degrees to the belt travel, so that under heavy grinding the fence/rest will take a lot of the load so the part is not so difficult to hold in place while you are grinding it. I built my belt grinder many years ago for smoothing the edges of flame cut plate brackets when I was building hot rods. Mine has a 4" wide belt and a big old 2 HP motor. I wish now that I had put one of the pulleys right on the end of the motor shaft like you did. I have a v-belt drive from my motor to the drive roller, and that v-belt sucks up a lot of my available power. I made my rollers from 3" diameter solid steel stock, so there is a lot of inertia to overcome when I start it. When I turn the switch on that big old motor, all the lights in Barrie go dim until things get up to speed.:eek::eek:

Thanks for the tips, Brian. I had already figured I'd need a 90 degree fence to rest things against on the straight section. Haven't tried any real heavy grinding, but so far I haven't seen any slippage of the belt.

Chuck
 

Latest posts

Back
Top