Fixing an undersize bushing

Home Model Engine Machinist Forum

Help Support Home Model Engine Machinist Forum:

This site may earn a commission from merchant affiliate links, including eBay, Amazon, and others.

Brian Rupnow

Design Engineer
Project of the Month Winner
Joined
May 23, 2008
Messages
15,259
Reaction score
8,544
Location
Barrie, Ontario, Canada
As I have said before, my "Fits" go directly from "Won't go in at all" to "Falls in"!!! Today it happened again. I was making the main bearings for the Webster engine I am building
http://www.homemodelenginemachinist.com/index.php?topic=8388.0
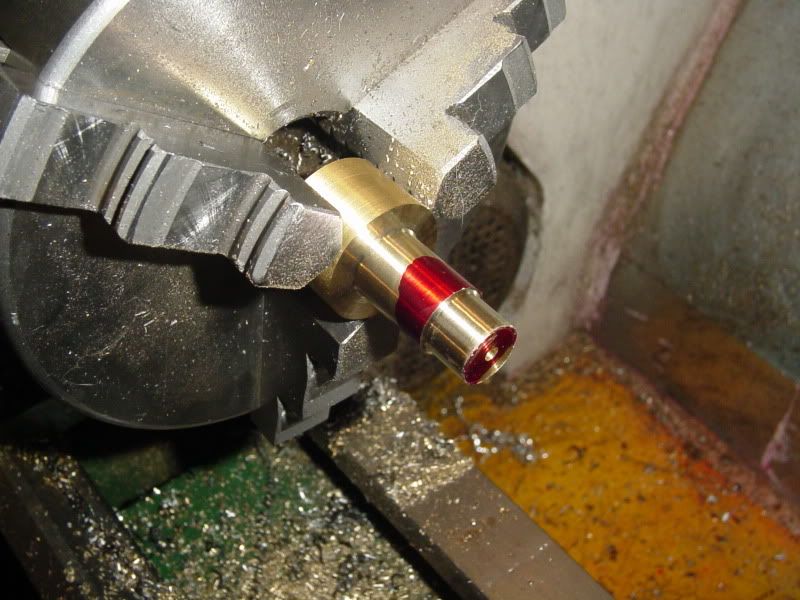
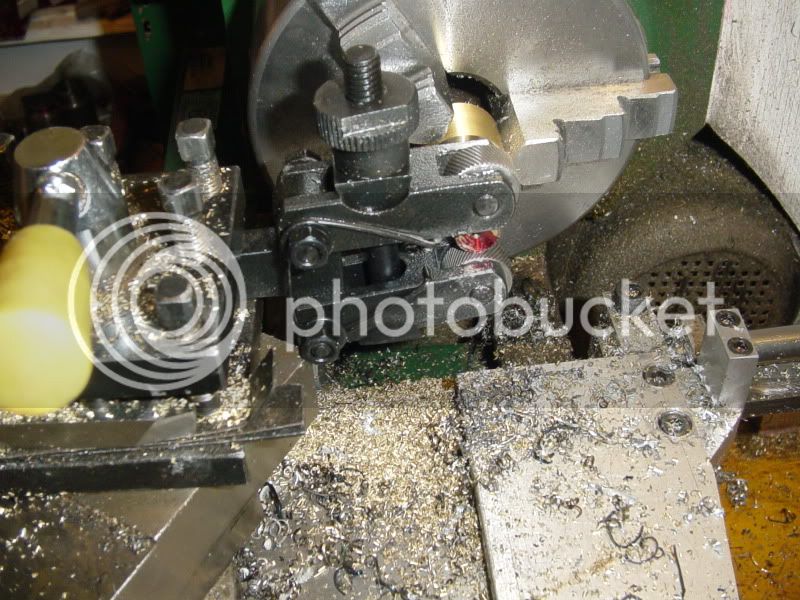
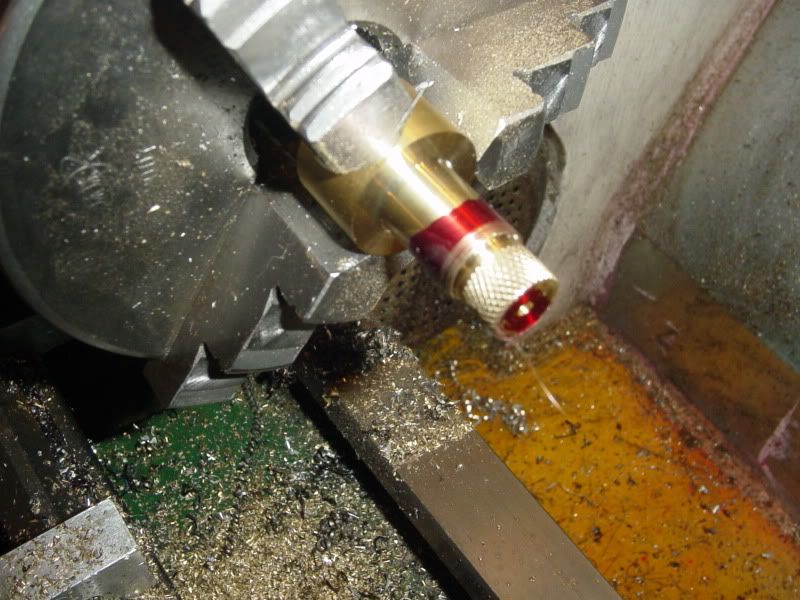
I had a piece of brass in the lathe chuck, and was turning it down to 0.500" as per plans. I stopped turning about 3 different times, and measured it with my Vernier, and the last time I checked it the diameter was 0.503". I swear to God, I only advanced the crossfeed dial .001, but it looked like it was taking a heavy cut---Oh well, it must be right!!! Put the Vernier on it and "Cowabunga!!!!!"---the damn thing was 0.490"!!! Now I have heard, at some point in the distant past, that if you knurl a shaft, the metal displaced by the knurling process will actually make the shaft "Grow" in diameter. Having nothing to lose, I grabbed my trusty knurler, and knurled the offending (offensive) piece of brass.--And what do you know---it works!!! The bushing now measures 0.504" in diameter.--I'm not going to mess with that. It, and its unknurled partner (which I got right the first time) will get pressed and loctited into the aluminum bearing stands on the engine. While I had the bushings set up in the lathe, I drilled and reamed them to 0.25". This is simply an accurate "reference" hole to line things up in the mill. I will loctite the bearings in place, leave them overnight, and then set the entire engine up in my mill, use the 0.25" hole as an alignment guide, and then drill and ream both bearings to 0.312 "in place".
 
Here we have the part, seconds after I discovered I had turned it 0.010" undersized.
MAINBEARINGS001.jpg
 
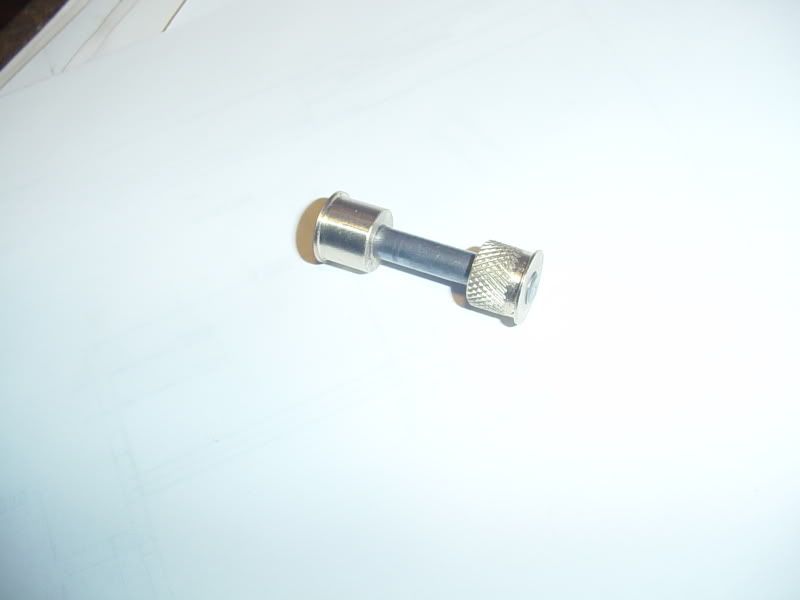
And here is the end result, ready to be Loctited in place. That short piece of 1/4" shaft is just something temporary to display the bushings on.
MAINBEARINGS007.jpg
 
Yeah Brian, the knurling trick is one well worth knowing. Also, in some cases, you can get away with a few pop marks spaced around the job.
 
Actually Tel, using a few "pop marks" was my first idea. Then I remembered hearing about the knurling trick, and wanted to try it.----Brian
 
I had a piece of brass in the lathe chuck, and was turning it down to 0.500" as per plans. I stopped turning about 3 different times, and measured it with my Vernier, and the last time I checked it the diameter was 0.503". I swear to God, I only advanced the crossfeed dial .001, but it looked like it was taking a heavy cut---Oh well, it must be right!!! Put the Vernier on it and "Cowabunga!!!!!"---the damn thing was 0.490"!!!

Hi Brian, Heat and expansion of material... ;) could well be the problem...been there ;D
John.


I'm more inclined to think "Cheap Chinese Vernier". The brass wasn't heating up enough to make that big a difference----In fact, from what i could tell it stayed pretty well at "ambient" room temperature.
 
Nice save Brian.

I have seen that solution used on some pretty big parts in my days.
It works! ;)

Rick
 
I have spent a lifetime working around machine shops and talking to machinists, because of what I do with mechanical design. Over the years I have tucked away a thousand things I've "heard about" that relate to machine shop practices, but never actually done myself. When something like todays little experience happens and I get to actually try out one of these tidbits that are tucked away in my old head, and it works, I get the biggest thrill imagineable!!! My wife thinks that makes me a bit strange, but I do get a real thrill out of it!!!
 
Please continue to post those self proven "heard about" tips Brian.
There are many of them that relate quite well to the model machinist's hobby.

Career machinists become precision robots.
"Mic the piece - dial in the cut - 'Press Play.'"

When the final "Press Play" result, doesn't give the correct answer there is
usually a way of making it work.

I have never met a perfect machinist, but I have worked with a few who's work
passed inspection 100% of the time.

Tips such as the one you talk of here are a large part of that.

Thanks for the thread! :bow:

Rick


I've come across the same problem using calipers to measure rounds.That's fine for rough sizing,but I now exclusively use a micrometer for fine measurements.
Just a personal opinion.
 
When I was a kid just starting out in engineering, if I made a mistake in designing a part, I was sent out to the machine shop to speak to the machinist who was making the part, and have it explained to me what I had done wrong. Once it became apparent to the older machinists that I wasn't about to argue with them, and would indeed listen to them and make the changes to my drawings and remember it for future design work, I had a lot of friends "Down in the Shop".-----And over the years, I learned a lot of "Really Neat Stuff" down on the shop floor.----And it paid some dividends. The young draftsmen and designers who argued with the machinists, only argued once. The next time, the machinist would go ahead and make the part wrong, and when eventually the expensive part had to be scrapped out, and massive misery would fall on the designer, the machinist always had the reasonable excuse "I worked to the drawing!!!"---If I let one slip by, and the checkers didn't catch it, I would get a call from the shop directly from a machinist to "Come on out and look at this--something don't seem quite right"---before they had the part made.--Saved my butt a few times, I can tell you!!!
 
Brian when you are turning the lead screw to move the tool 'in' isn't the backlash behind the tool? A soft metal like brass may be grabbing the tool and pulling it up to the work more than you dialed in.

As The Carpenter said, I've cut it twice and it's still too short, ;D
Kermit
 
Brian,
Thanks for passing along a neat trick to save a part. I can't count the number of times I've had just the same "surprise" when turning down to a diameter. Nice to have a possible treatment for it.

Cheers,
Phil
 
Brian thanks for sharing the trick and for the story too, I liked this thread a lot

 
In the more than once the same thing has happened to me a frequent cause has to do with the tool holder IF you are using screwed-on carbide cutters. If the screw is at all loose or if the cutter is able to move in the holder the following may occur:
Next to last pass from left to right, say. Insert is tipped anti clockwise from cutting forces
Measure part
Index tool for final cut
Start final cut from right to left. Insert moves clockwise and the tip is now closer to the centerline than it was and cuts undersize a little.
Now, this all depends on the details of your set up which I couldn't see in the pics but its worth filing away for next time if it's not the problem this time.
BTW, you are absolutely right about the machine shop and engineers. In my 30+ years of engineering I learned that the people who make your parts and those who put them together know far more about your design than you do. They are an incredibly valuable source of insight into your stupid mistakes and sub optimal designs. I always used to try to design parts so I could make them in my own shop. I figured if I could make them, a pro should be able to do it asleep. There are an infinite number of designs that will work; some are better,faster,cheaper to make.
 
Brian,

Great post and a definite win-win method, I have used it to stop someone in the machine shop getting a**e kicked a few times when a rush job was on, and it has come in very handy in my shop at times when I have taken a bit too much off (can't kick my own bum).

If you don't mind, just a slight modification to your method.

If you use a straight knurl instead of a diamond pattern you should find that it should insert a lot easier by staying more square to the hole, give a much stronger fixing, and it will remove easier if necessary, plus a correct bush will fit in the hole at a later date if needed.

A partial set medium straight knurl will expand the part by approx 0.002", a full depth knurl will allow you to get yourself out of even deeper mire, as that can be up to about 0.006" oversized.

I use it mainly on parts that need to be joined, say a crankdisc to a shaft end. 6mm reamed or fine drilled hole in disc, 6mm ground bar. Put knurl on bar at joint area and press fit together. Works every time, and if you put a bit of loctite on during assembly, all the better.

Bogs
 

Latest posts

Back
Top