You are using an out of date browser. It may not display this or other websites correctly.
You should upgrade or use an alternative browser.
You should upgrade or use an alternative browser.
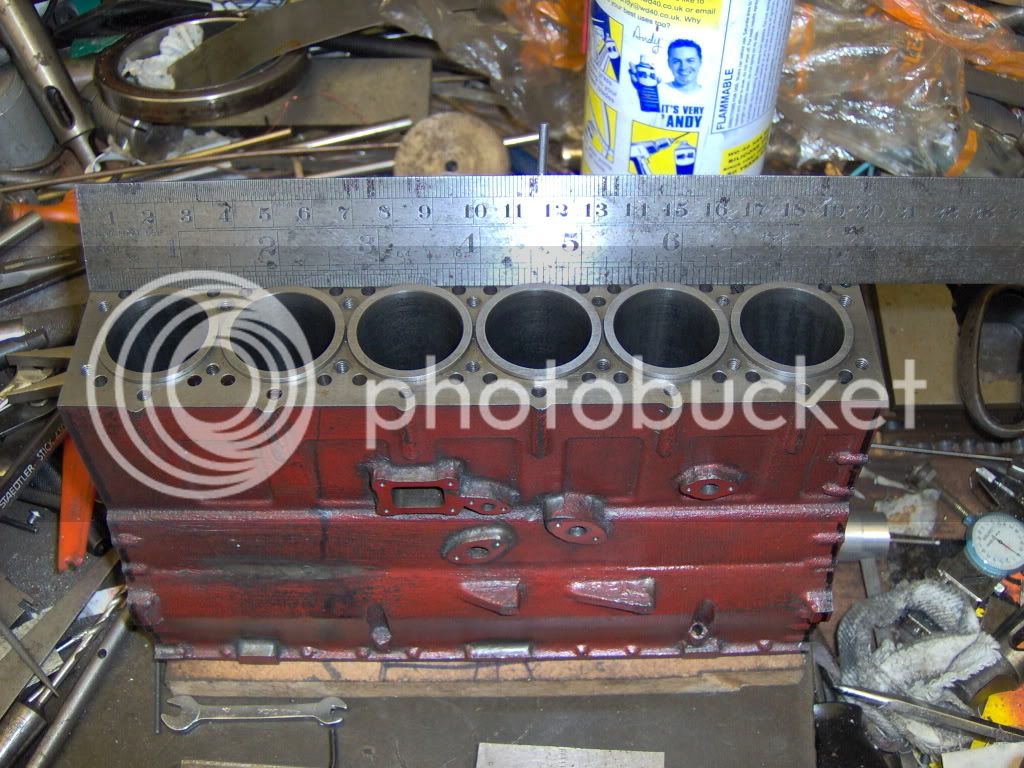
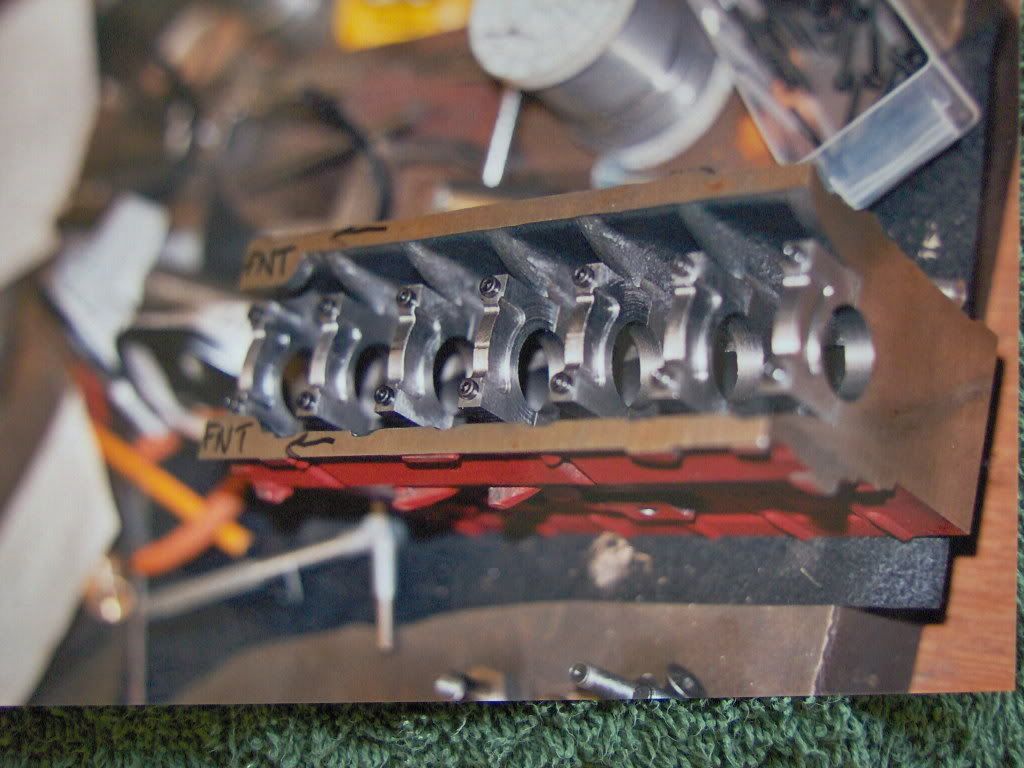
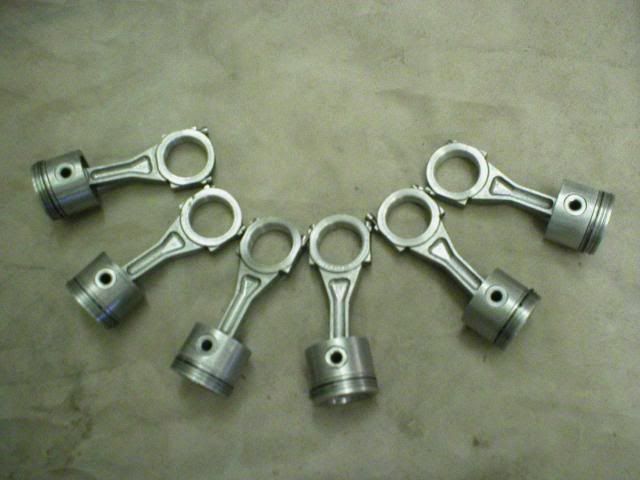
CAT 3406e Diesel engine
- Thread starter bigrigbri
- Start date

Help Support Home Model Engine Machinist Forum:
This site may earn a commission from merchant affiliate
links, including eBay, Amazon, and others.
- Joined
- Oct 20, 2010
- Messages
- 913
- Reaction score
- 132
That is beautiful, great workmanship. Have you figured out the E-injection yet. Will the injectors be E controlled? Can I guess the truck will be a 379 L ?
bigrigbri
Well-Known Member
- Joined
- Aug 20, 2011
- Messages
- 46
- Reaction score
- 4
Thanks for the reply guys.
I will be puttin it in a 379l yeah.
For the in jection system I will be going the electronic route as ful scale and will be using 6 opto tranceivers at the back of the head on a distributor type of layout at the end of the camshaft fitted stealthfully as possible.
These will control 6 seperate circuits utilizing the 555 timer configured into monostable allowing adjustments on the internal resistance and capacitance giving varying output timing widths.
This output will be controlled through power transistors to handle the inductive loads of the valve coils.
For the mechanical side of the injectors I will be using the pintle ends of small full size injectors to act as the cam driven pump as these are micro finished in accuracy and i dought that I could replicate such a feat in the home workshop.
Small motorbike injector coils will be tried with the valving that comes with them as a "suck it and see".
Huge task all the same .
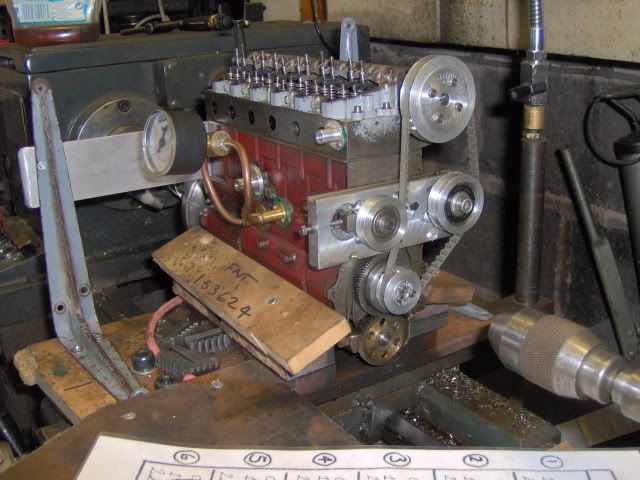
I have had the engine spinning in the lathe lashed up with the cam belt system to check for cam timing and to see oil pressure operates as should and to bed in some.
Had to squirt some model diesel fuel in there though as it spun to see poppin and black smoke!!!
Got some bore roundness issues though as the rings aint touchin fully around .
Brian
Admiral_dk
Well-Known Member
- Joined
- Jul 15, 2010
- Messages
- 165
- Reaction score
- 0
Beautifully done !!!
But I must admit that I'm a bit confused about what I think I see on the pictures.
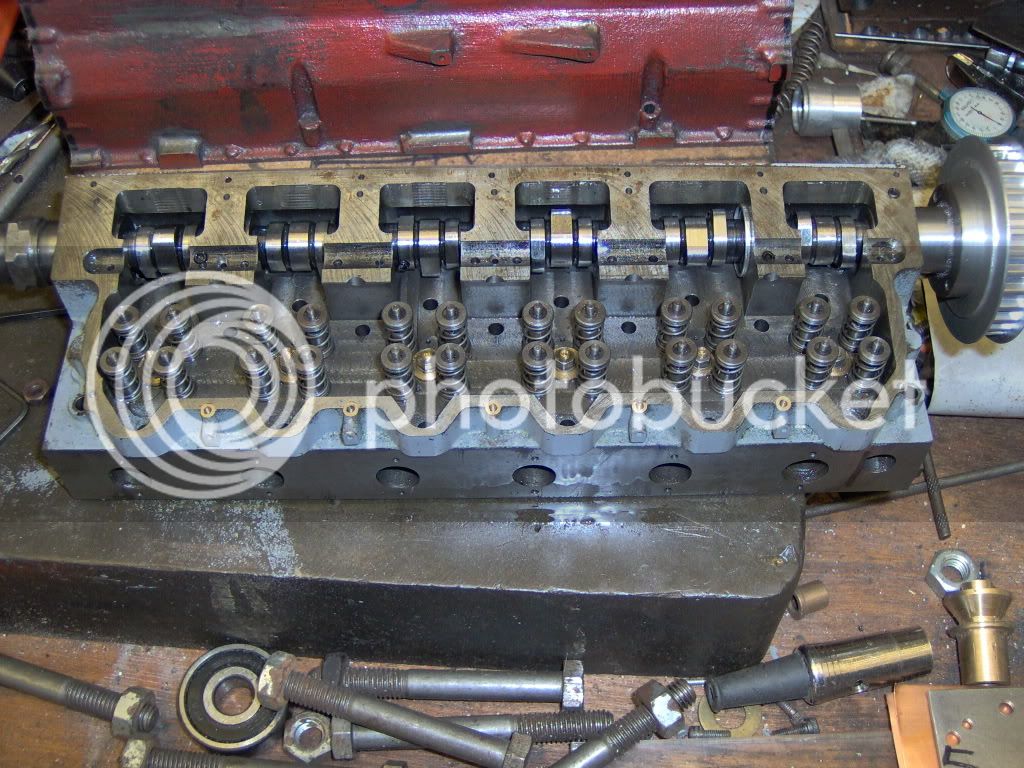
Are there three camlobes per cylinder or is that just a trick of the light ?
How does the camfollower handle two valves that aren't equally distanced from the pivot point ?
Could you show us a close up picture of the valves, cam and follower on one cylinder please ?

$39.99
$49.99
Sunnytech Low Temperature Stirling Engine Motor Steam Heat Education Model Toy Kit For mechanical skills (LT001)
stirlingtechonline

$188.98
TM NEXDYNAMI RE41157 Water Pump Compatible With/Replacement For/John Deere 6200 7400 6300 6600 6500 6400 7220 7600 7200 RE41157
VIVID MARKET CORPORATION

$45.99
Sunnytech Mini Hot Air Stirling Engine Motor Model Educational Toy Kits Electricity HA001
stirlingtechonline

$59.99
Sunnytech Hot Air Stirling Engine Motor Model Educational Toy Electricity Generator Colorful LED (SC001)
stirlingtechonline

$104.99
Sunnytech Hot Air Stirling Engine Motor Steam Heat Education Model Toy Kit M16-CF
stirlingtechonline

$94.99
$109.99
AHS Woodmaster 4400 Maintenance Kit for Outdoor Wood Boiler Treatment
Alternative Heating & Supplies

$190.00
$254.99
Genmitsu CNC 3018-PRO Router Kit GRBL Control 3 Axis Plastic Acrylic PCB PVC Wood Carving Milling Engraving Machine, XYZ Working Area 300x180x45mm
SainSmart Official

$403.09
DM14 Engine Build Kit, Metal Engine Build Model Great Metal Material for Engineer for Factory
Easoger Official

$156.90 ($1.40 / oz)
Replacement Combustion Chamber Kit, Burnham V8 and V8H, 1-6 Sec, 108136-01, 1129
Lynn Manufacturing

$15.99 ($0.05 / Count)
$18.99 ($0.06 / Count)
HongWay 300pcs 2 Inches Sanding Discs Pad Kit for Drill Sanding Grinder Rotary Tools with Backer Plate Shank and Soft Foam Buffering Pad, Sandpapers Includes 60-3000 Grit
HongWay US

$99.99
$109.99
AmTech300 - Boiler Treatment Professional Strength (Rust Inhibitor For Outdoor Wood Boilers)
Alternative Heating & Supplies

$649.00
$699.00
FoxAlien Masuter Pro CNC Router Machine, Upgraded 3-Axis Engraving All-Metal Milling Machine for Wood Acrylic MDF Nylon Carving Cutting
FoxAlien Official

$39.73
$45.00
Key Contemporary Buildings: Plans, Sections and Elevations (Key Architecture Series)
Karen Tolliver
- Joined
- Oct 20, 2010
- Messages
- 913
- Reaction score
- 132
This type of electronic injection uses a camlobe to run the pump portion of the injector, and a solenoid inside the injector to control fuel timing, start and stop duration = quantity. There is a bridge that connects two valves to one rocker arm for breathing.
A very ambitious project for sure. The full scale injector parts are not very big at all, 1/5 are real small.
You are using a Pintle type injector for a pump? would not a needle type be a better pump? just thinking out loud.
A very ambitious project for sure. The full scale injector parts are not very big at all, 1/5 are real small.
You are using a Pintle type injector for a pump? would not a needle type be a better pump? just thinking out loud.
doubleboost
Well-Known Member
- Joined
- Feb 23, 2008
- Messages
- 122
- Reaction score
- 6
This is simply stunning work
I would love to see the patterns & coire boxes
John
I would love to see the patterns & coire boxes
John
Definitely a major project. I think using pintle nozzles as fuel injection pumps might work if somehow the nozzle part of the injector can be worked out. The injection system is what I see as the biggest stumbling block to building model diesel engines. Controlling start and end of injection electronically will make it much easier as it has on the full size equipment. Lovely work. I will be most interested in seeing more of this project as it progresses.
Ernie J
Ernie J
bigrigbri
Well-Known Member
- Joined
- Aug 20, 2011
- Messages
- 46
- Reaction score
- 4
Thankyou for the overwhelming responce guys.
All the machining is done by hand with the aid of dro on the mill.
The head was machined from continous cast iron bar stock with a million holes in every where
The rocker pushes the two valves in the middle connected together with a beam which has the clearance adjuster cup incorperated into it and is secured with the adjuster screw assembly.
The engine was not cast by myself but was done locally at a place where they cast fire grates for the old UK coal lounge fires.
These guys had a small side line on model loco wheels and said that they did a good iron mix on occasions that was high phos` and this was the baby to ensure good flow into the small cavities on the pattern.
Help for the engine part of the project was allways goin to be a stumbling block.
That was till I met a guy from the CAT parts dept and he was only too eager.
The modern age of cad type drawings held on PDF file on the parts cd-rom was indispencible.
These drawings plus trips into the workshop armed with pen and paper and the digital camera proved to be a minefield of info.
As luck would have it we moved house around 6 years ago and guess who lived across the road... yeh the same guy!!!!!!!! nice one.
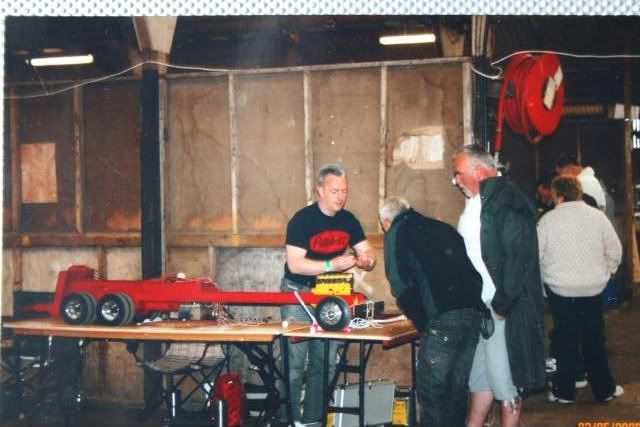
I have put the engine recently to one side and have been concentrating on the chassis and the wrecker part of the build so as to take something along to the shows to show development.
Brian.
bigrigbri
Well-Known Member
- Joined
- Aug 20, 2011
- Messages
- 46
- Reaction score
- 4
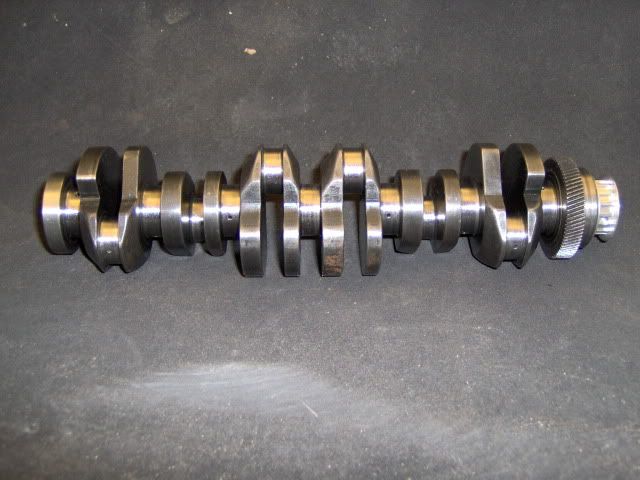
I forgot to add the bore and stroke for the engine;
1.022" bore x 1.254" stroke.
x 6 cyl =100.8 cc displacement
Heres a few pics of the air compessor in its raw state,
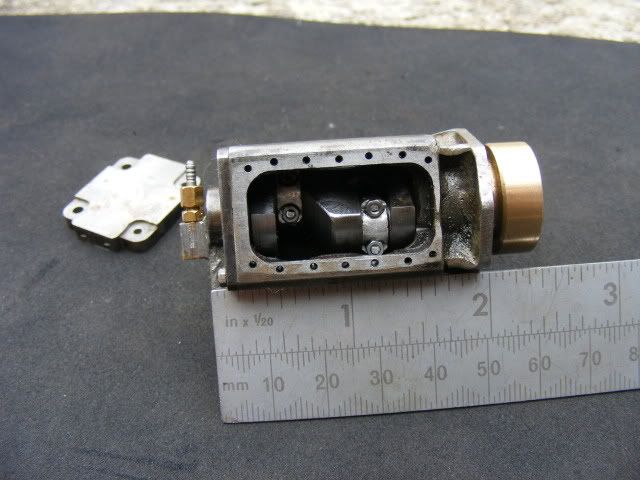
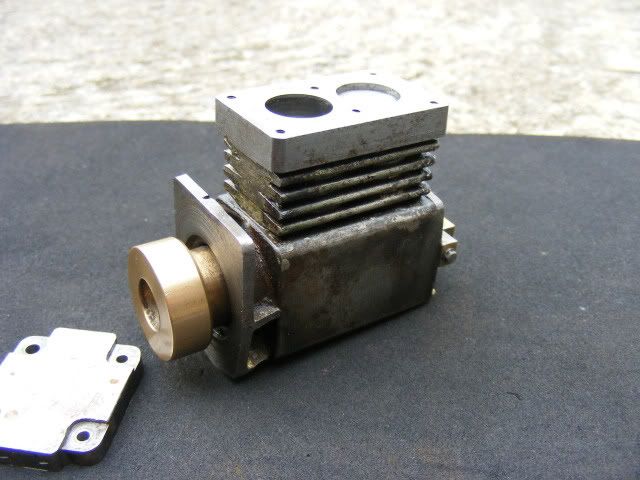
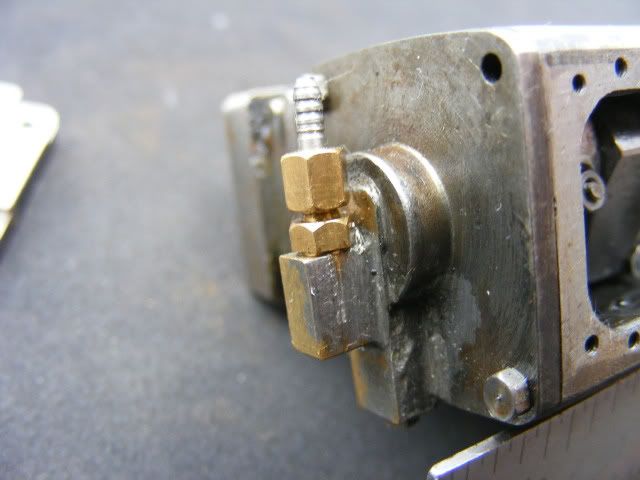
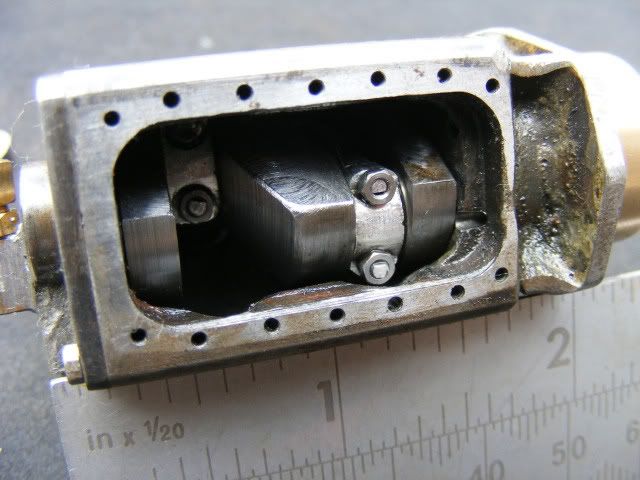
Lastly a tire/rim shot the tires were injection moulded using a mould done by myself using PU injected at a local company and the model needs 10 of them and weigh 4 million tons.
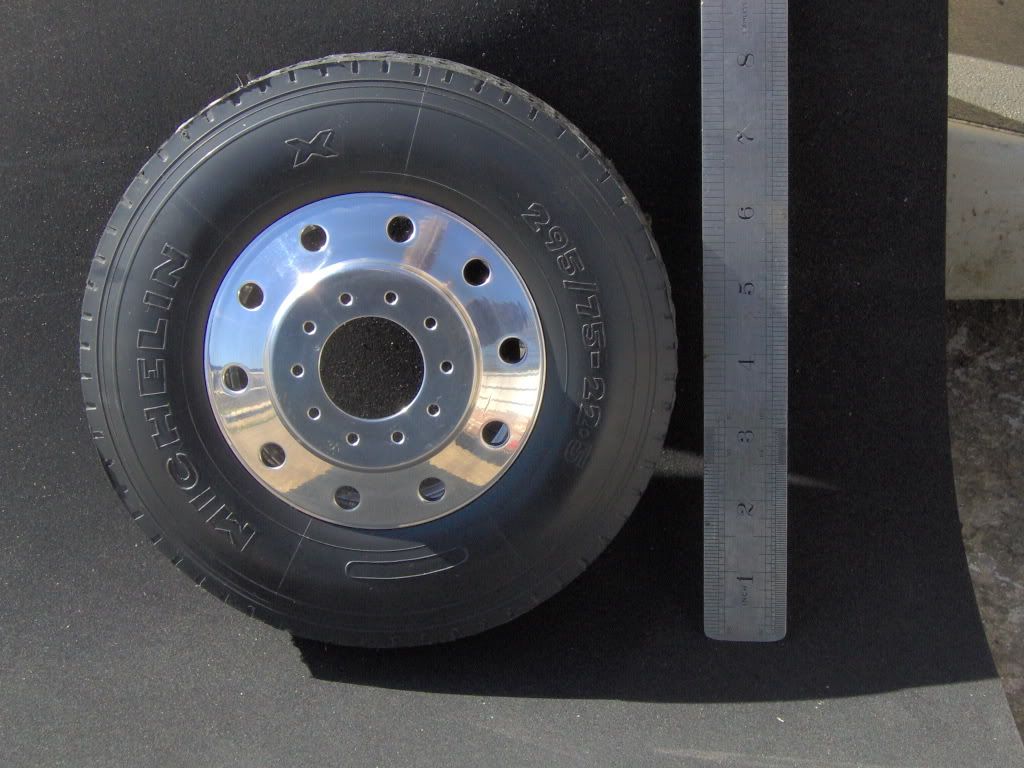
1.022" bore x 1.254" stroke.
x 6 cyl =100.8 cc displacement
Heres a few pics of the air compessor in its raw state,


Lastly a tire/rim shot the tires were injection moulded using a mould done by myself using PU injected at a local company and the model needs 10 of them and weigh 4 million tons.

Awesome work so far, and I am looking forward to seeing your build progress! How did you do the raised details on the tyre former? If you would be interested in doing a tyre making/moulding tutorial it would be great.
- Joined
- Oct 20, 2010
- Messages
- 913
- Reaction score
- 132
WHAT!! no Peterbilt LOGO in those wheels. What would the guys in Denton, Texas say, mostly likely Great Job, lets see some more!
bigrigbri
Well-Known Member
- Joined
- Aug 20, 2011
- Messages
- 46
- Reaction score
- 4
Yes I have been members on many a truck forum incuding Tow411 which is soley for 1;1 scale tow trucks and the buisiness behind it.
The rims are ALCOA replicas and when I get another minute I will post more pics of the tire mould.
As stated on my earier post I have been concentrating mainly on the rollin chassis and the wrecker part of the truck.
Each step towards gettin more details on the project only run into more brick walls due to red tape and the associated legal crud.
This is why mainly the project has been running so long.
To be fair though I have renovated 2 houses built a show quality ICE install in the beemer and built 2 go-karts as well as having a son that wants DAD to do all the playing!!!!!
Not givin in yet though its the only thing that keeps me sane.
Brian.
No worries about how long the project runs. Took me 13 years to build my boat....Length of time on a project " is what it is". Life always has it's way of getting into the "gearing" and slowing projects down.
;D
Dave
;D
Dave
Similar threads
- Replies
- 5
- Views
- 1K
- Replies
- 6
- Views
- 2K


