BAZMAK-DIARY of a NEW SIEG SC4 LATHE

Home Model Engine Machinist Forum

Help Support Home Model Engine Machinist Forum:

This site may earn a commission from merchant affiliate links, including eBay, Amazon, and others.
I have made a no dovetail assys.But i have never used a dovetail cutter
The larger ones like the shaper i machined the parts and bolted assemlies
The smaller one as the qctp i have tilted at 30o and used an end mill
While i have a few more to do i decided to make a dovetail cutter and used it
to make a holder for a boring bar.All worked out well but the dovetail cutter
did struggle in the mini mill.Took about the same time but i think i prefer the
end mill method where access allows dove 01.jpg

Dtail 01.jpg

Dtail 03.jpg

Dtail 04.JPG

Dtail 05.jpg


I must say that this method of uploading photos is much easier and quicker
than using Photo bucket. Thanks again Angie
 
I paid a visit to my local steel supplier and for a no of pieces of hrms
40x25 x75lg cut to size worked out at $12 each.By the time i have bought and fitted screws,done a lot of machining,its a no brainer.I will buy std toolholders
at $25 each and only make specials.As i said previously the 11mm bottom flg
allows a max of 8mm tool,so apart from other minor mods any tool holders
i buy may need the bottom flg reducing in the mill
I have 2 or 3 sets of brazed carbide tools that i never use because i dont like
negative rake tools on small bench lathes.They are more suitable for bigger rigid lathes,mainly roughing out with poor finish.
With the intention of of machining the bottom flg on one anyway i machined
at 5o to give a positive top rake on the tool.This did not improve/reduce the tool height
so i also took a couple of mm off the underside of the tool.I cleaned up the tool
and ground the cutting edges,Works much better,nice finish for general turning
and roughing.So i now have an armory of 10mm brazed carbide tooling and
i have placed an order for another 4 no 250-101 holders.braze 01.JPG

braze 02.JPG

braze 03.JPG
 
I downloaded plans for a ball turner and found enough steel in the scrap bin
so i decided to make one at no cost. I havent used it yet still to come
but i will make a second tool holder that can bolt in a no of positions
on the slide to give more scope for int/ext radii 01 ball turn.jpg

02 ball turn.jpg

03 ball turn.jpg
 
Nice mods! You can tell by the finishes that you've spent some time on them. Did you put the screws in at an angle on your boring bar tool post?

Does that radius cutter pivot on a bearing?
 
Yes the boring bar flats are at an angle for some reason and i wanted
the tip to cut on centre line and horizontal so i tapped the clamping
screws at the correct angle to obtain this
Finish is nothing special just std turning and milling
The ball turner turns in a plain recess,no bearing,i dont think it needs one
The two parts pivot on an M8 csk cap screw from the underside and is set and locked with a grubscrew from the top.Simple to work and make,will try and improve after its had some use
 
Some future add ons that could be handy. A screw on handle, so you have better control when turning it. Also an adjustable hard stop would maybe be nice so you could stop your rotation at a place of your choosing.
 
Am I correct in suggesting that it could possibly come from the Steve Bedair excellent site? I had a 920 variant and came across 'something similar'

It leads me to a simple question of my present Sieg C4 and would appreciate a look at your tee nuts. I'm in chaos with a shed being built and can't find anything

As for the plain bearing, I see no problem as my rotary table has no bearings and works fine.

The suggested stops are interesting as I have a set on my Quorn and also a rather intriguing pair on my Clarkson T&C. The latter goes one step further in that the base TILTS.

Meantime, kind regards as usual
Norm
 
goldstar31,

I did make a version of the Steve Bedair ball turner for my 7x12, with modifications to suit my needs. In my case, I have not modified the cross slide with T-slots, so I remove the compound and bolt on the ball turner instead.

The down side is that the 7x does not allow much room for manouvering things around and makes it kind of fiddly to turn balls. Still, It was a worthwhile project and someday I may make a different version just to see if I can.

--ShopShoe
 
Thank you, Shop Shoe.

The question followed the rather unusual situation.

I've been able to get another lathe ie the SC4 but put it in the house where it will be warm for working-- being a very old and decrepit soul who suffers cold terribly.

Not daft( yet) but merely always cold

Cheers

N
 
Hi Norm, yes the T slot crosslide on the Sc4 is handy.Just take off the compound and bolt on the ballturner.For the T nuts i just used 16mm sq
x 6mm long drilled and tapped for cap screws. The 100mm sq baseplt is
recessed for a turned spigot on the top section.20mm clear between top
and lathe centre so i can turn a max 40mm ball.Fitted a piece of s/s rule
set the tool at 20mm,touch the cross slide to the work and set the carriage
lock with the tool touchinching the end face then work inward until the tool
cuts the OD then i know the ballturner has reached the lathe centreline
Should be a doddle when i get some alum to turn. Also thought about a
flat slide with a no of drilled and tapped holes for a tool mount to bolt on
in a no of positions should enable me to turn concave.Thats the plan.Stops etc
may also play a part later
 
Thanks again.

As the mill will be 'some distance away( coughs discreetly), I thought about being able to mount a Myford fixed vertical slide on with a vice/vise when the need arose as well as a sort of permanent rear parting tool holder. These necessitate( probably) a sub-table which is where I came in.

Anyway. I'm enjoying myself and thank you for most useful comments

N
 
Due to bad weather, i havent been in the shed for a while so went out for a couple of hrs today to have a go with my ball turner.Max dia at this stage is 40mm but the only piece of stock i had was 50 dia x 30lg so i turned down to 40dia and drilled and tapped M8.Made a 20mm dia spindle with M6 and M8 grub screws and proceeded to make a donut.Works well but at this early stage
i might drill and tap to give a no of posns for the handle.May also remake or
modify tht tool holder so i can do convex and concave radii.The simple spigot
swivel wit no bearings works well with no chatter and the steel rule insert
makes it easy to set the radius.Then wind in to touch the OD swing thru 90o
touch the end of the work and lock the carriage.When i get some stock i will
make some balls with the mods included100.jpg

101.JPG
 
Just a note or two. The first is to spot how you have made the Tee nuts.
I'm trying to follow but really I'm working on the new workshop which the guys are making for me.

So in a break in proceedings, I went out and bought some 16mm square steel to drill and tap towards the proposed sub tables on my C4.

Cheers and Thanks

Norman
 
Hi Norm,the T nuts are just flat square washers,drilled and tapped
I made them from 16sq bar,drilled and tapped and parted of,but they will be just as easy from 16x6 flat cut to 16mm lg.I think the finished size to
fit the table was 15.5 sq x 5.5 thk
 
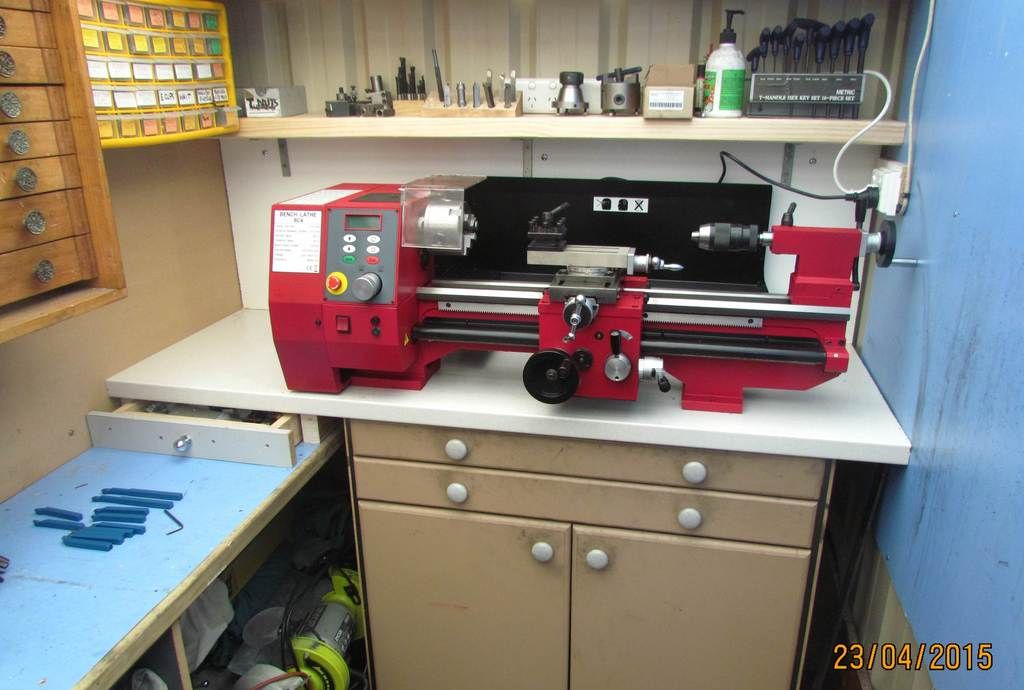
I sold my sc3 with the blown board and the restored Advance lathe,added another $600 to the proceeds and bought the new Sc4.Also bought a good quality 4" 4 jaw,negotiated the freight and was given free of charge
A 7" faceplt and clamping kit,a 16mm precision keyless chuck for the tailstock
and an 11 piece carbide set of tools.Lathe arrived from Aussie stores Melbourne in 3 working days,in a very big box.Unpacked and managed to lift in position
by myself with no lifting gear.A serious piece of kit twice the weight of the Sc 3
I had modded and repositioned the existing bench,new full width worktop
and a 3" deep drawer at the LH side. (waste no space Gus).Just fits, now need to clean down and check everything out.Will keep you posted
Your picture scented me to a web sigh that you have to log in to just see the pic's! Once you log in it just set there spinning it's little circle and never loading up the picture.
 
Hi Barry

Most useful information for which I do really appreciate.

As it stands, I now have a bigger workshop but it still requires both external and external cladding as well as completely wiring to a modern standard for the UK.
Again, I am making standards/cupboards to store my tooling.

Happily, the Mill Drill is left in place and there is now room to get to the back of the Myford Super 7B. My blokes put the old Clarkson t&C back on a temporary stand. To use the words of the Prophet-- PHEW!!!!!!!

So I now have the gardens to tackle as well but the sit on mower is now working.

So I'm sort of out of retirement after 32 years!!

Fun ain't it?

N
 
Keep going Norm,lifes a box of chocolates.If you want any additional photos posting,let me know

I'd enjoy the choc's though

I couldn't find the right studs but I have lots of the right size in studding to be cut to lengths instead.

On reflection, your suggestion really solves the tedium of three and four studs on the spindle.

Had a mate in for coffee after he had got rid of his missus to the airport for a break after breaking her leg :wall:

We were discussing the new lathe and his thoughts were to hack the Unimat ( copy) spindle etc and have an auxiliary motor to go on the saddle of the Sieg.

So I 'donated' a spare Potts spindle for one of his 2 Super7's.

seems as if we are both going back to classic lathe work- or something.

We then had a discussion on Lawrence Sparey and what he managed with just one lathe.

Makes one think

Every man should have a shed- and all that

Norm
 

Latest posts

Back
Top