I have put together some bits and bobs about anodising Aluminium, hope some of it may be useful, and have been thinking of putting all my notes and findings together for a while now, so here it is.
I will start with a disclaimer. Please note, these are my findings and may or may not be totally correct. As with everything in life there are other ways of doing it, this way works for me, may not for others .
Also, PLEASE PLEASE PLEASE be careful with the Acid, you need to use Sulphuric acid (H2SO4) and its not nice stuff and WILL burn, your eyes will not recover from a splash. Use loads of caution and read as much as you can about handling the stuff, I cant tell you what to do or how you do it, this is just my guide. Also remember your three As, AAA, Always Add Acid ..
And, the dyes, no idea what is in some of them, just take care with them. One thing I do know, if you drip or splash them onto anything, like a work surface or clothing, they are a bugger to get off
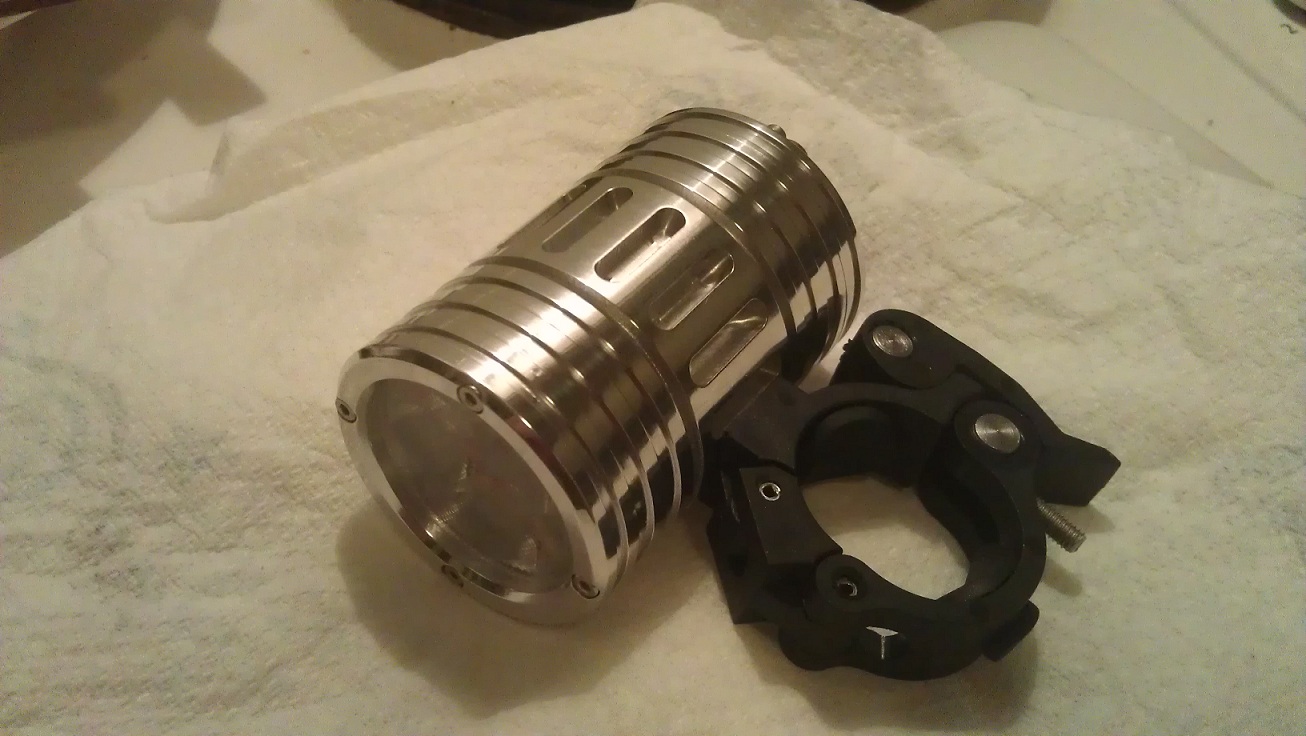
I started looking into anodising well over a year ago, I was (and still am) making parts and modifications for Air Guns (another one of my interests), some of these parts needed some protection and paint was just not good enough, so I looked into doing this.
I found quite a bit of help on the net, but as with everything I was getting conflicting reports on how this should be done, eventually things started to make sense and I managed to put a process together that worked.
Some tips and notes to start with.
Cleanliness is everything and having an organised work area.
Water, all water used throughout the process is distilled. Tap water has impurities in it and can leave marks on the parts and it will shorten the life of the dyes.
Anodising will NOT hide or cover a bad finish, even with a dye, it will enhance it
Dyes, I have seen all sorts suggested, from using food dye, clothes dye, etc. I have only used specialist anodising dyes and even some of these have given me mixed results. Proper specialist dyes are not expensive and worth getting, spending some time finding the good ones are worth the effort.
Gloves, keep them on all the time, keep em clean, these will not only protect your hands but protect the part against finger marks. Goggles, not just for the acid bath, I have not much idea what is in the dye and I do not take chances. Old clothes, the dye does not always come out and any splash of acid will leave a hole .
Bits you need.
Distilled water - lots of it. You can normally get this from car accessory shops, its battery top up water. Now most places no only sell de-ionised water, not quite the same but all the impurities have been taken out and I have used it a couple of time and it seems ok. Lucky for me I have a son that lives close by and he has a damp basement so he has a de-humidifier running, output, distilled water by the bucket load
Sulphuric acid - depending on where you live this is either easy or hard to get. All you need is basic battery acid. To make a working solution you need something like 10% acid (by volume) the rest is distilled water. Now it comes in varying strengths, as long as you know what strength it is then you can dilute it to get you final 10%, its not that hard just a bit of basic math. And dont forget the AAAs, always add acid, So add the acid to the water (gloves, goggles and lots of water on the side just in case)
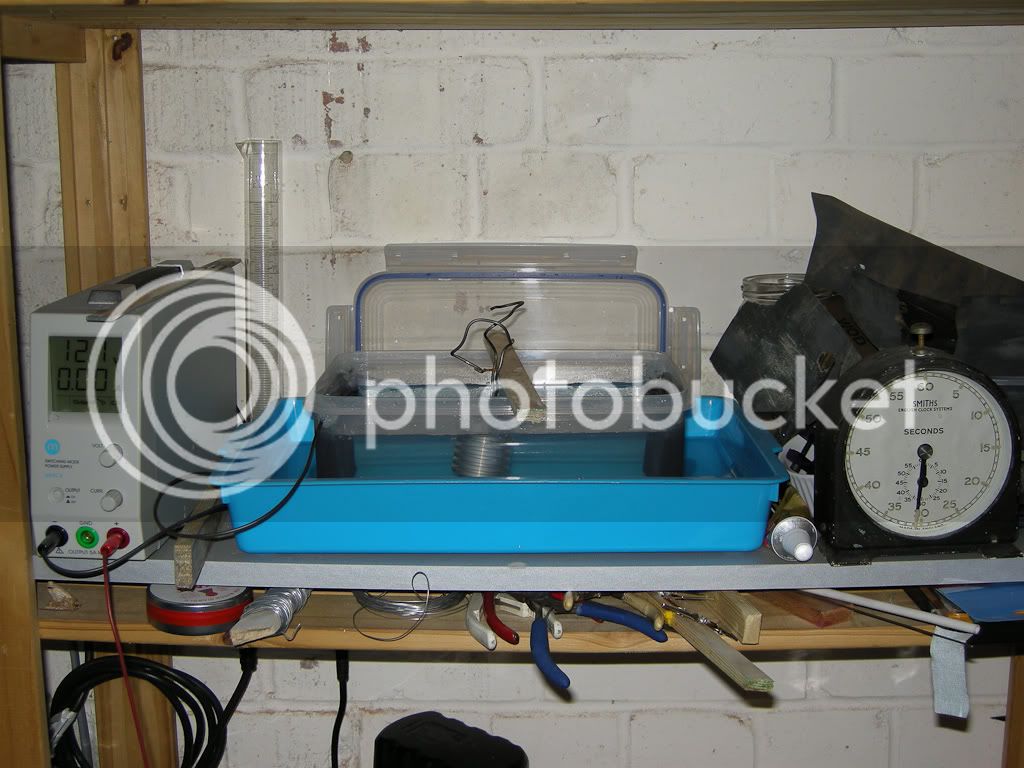
Tank You need an anodising tank, I use a lunch box, the type with a clip on lid, so I dont have to empty the thing every time, I just put the lid on and leave it on the shelf. In the tank you will need a cathode, now you do have to be careful what goes in the tank, you can use aluminium as a cathode, or I use a sheet of lead, an old bit of roofing lead. I use two bits, one at each end of the tank, I have connected a wire from one to the other and a wire off to the PSU. I drilled small holes for the wire (close to the top) and sealed the holes with silicon, so now created a permanent tank I can keep the lid on when not in use.
PSU Now, I have seen loads of discussion on what to use and what current and what voltage. I found a formula some place on how to work it out using know surface area sample of aluminium and then adjust the voltage to a specific current, that voltage then becomes your constant. I did this and with a 10% solution it was exactly 12vols, with was handy, and most say 12 volts is about the norm. The current drawn will vary depending on the size of the job. For example the engine head I did took 0.58 amp (as shown in one of the photos), so if you have a DC (MUST BE DC) PSU that will give a couple of amps then this should do for most small parts. I mess about with electronics quite a bit and just happened to have a bench PSU.
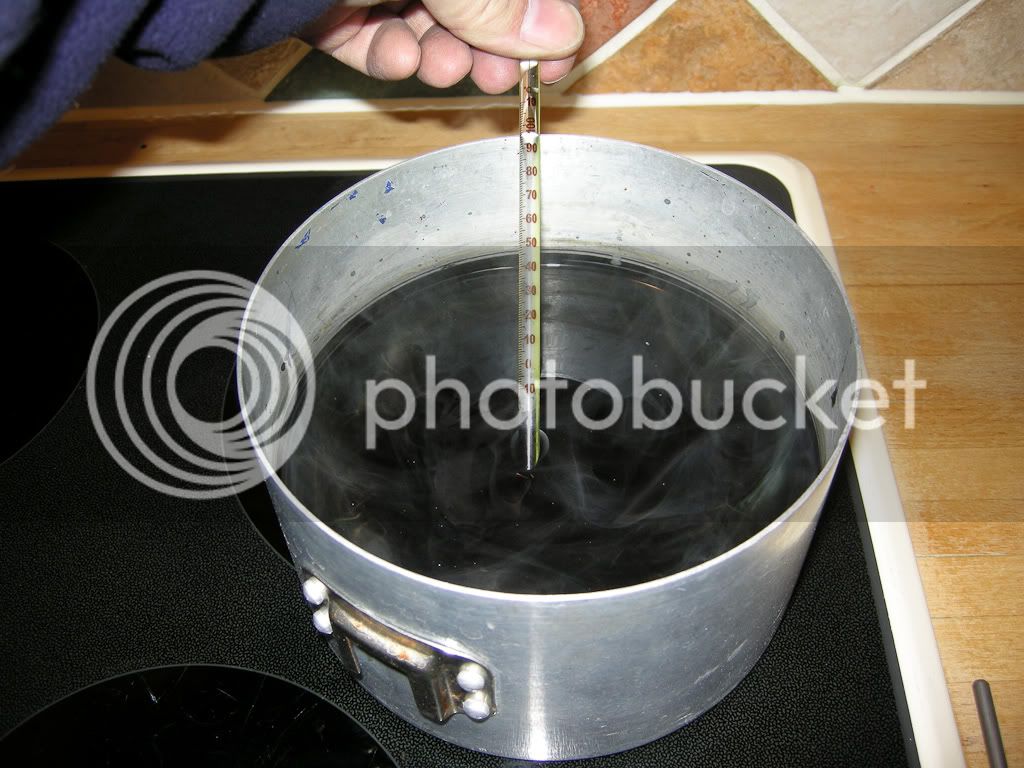
Saucepans OLD ONES, at least one, you need to boil the part at the end to seal in the dye, I use an old camping pan. You may need another for the dye (the dyes I use need to be heated to 40 to 50deg C
Wire Wire from the PSU, one to the cathode and one with a crock clip on the end to clip to the connection to the part. Other wire you will need is some form of connection from outside the acid to the part in the acid. Now, you have to be careful what you use, normal wire will just get eaten away by the acid and will be gone in seconds, the simplest stuff to use is aluminium, do NOT use the stuff sold for flower arranging and some craft work, it is anodised and anything anodised will not conduct electricity, you need bare wire. Also keep this in mind, the wire that goes in the tank will get anodised the same as the part you are anodising, so can only be used once, or you can strip off the anodising with caustic soda, but this does eventually eat the wire away. A small role of aluminium wire, even if only use once, can last you a while as you only use 6 inches or so at a time. Now there is another way, the only (as far as I know) metal that can go in the tank (and this is what the pros use) is titanium. I have some short bits of titanium wire about 3mm diameter, quite bendy and I have been using the same two bits for a while now, it does not get anodised so can be used time and time again. Well worth getting a couple of bits if you can find it. I have got some larger bits that one day I will make up some sort of clamp.
Dyes You dont have to dye it, you can leave it clear, at least it gives it a hard coat. Dyes, I have had very mixed results with a few different dyes, even commercial dyes have given me problems, no hard a fast rules and you will find people using all sorts. Now I have been using some dyes from this place, http://www.gaterosplating.co.uk/index.php, and so far been getting some cracking results.
Bits and bobs. There will be a mixture of odds and ends you will need, space to do this is one of them, I have a shelf in the garage that has everything on. Gloves, goggles and I have a few cheep jugs and trays I keep just for this process, tooth brush, thermometer and various small strips of wood I use to help hang the part in the tank. Some of this came from my old dark room days, see I knew it will all come in handy one day . Including a timer .
The process.
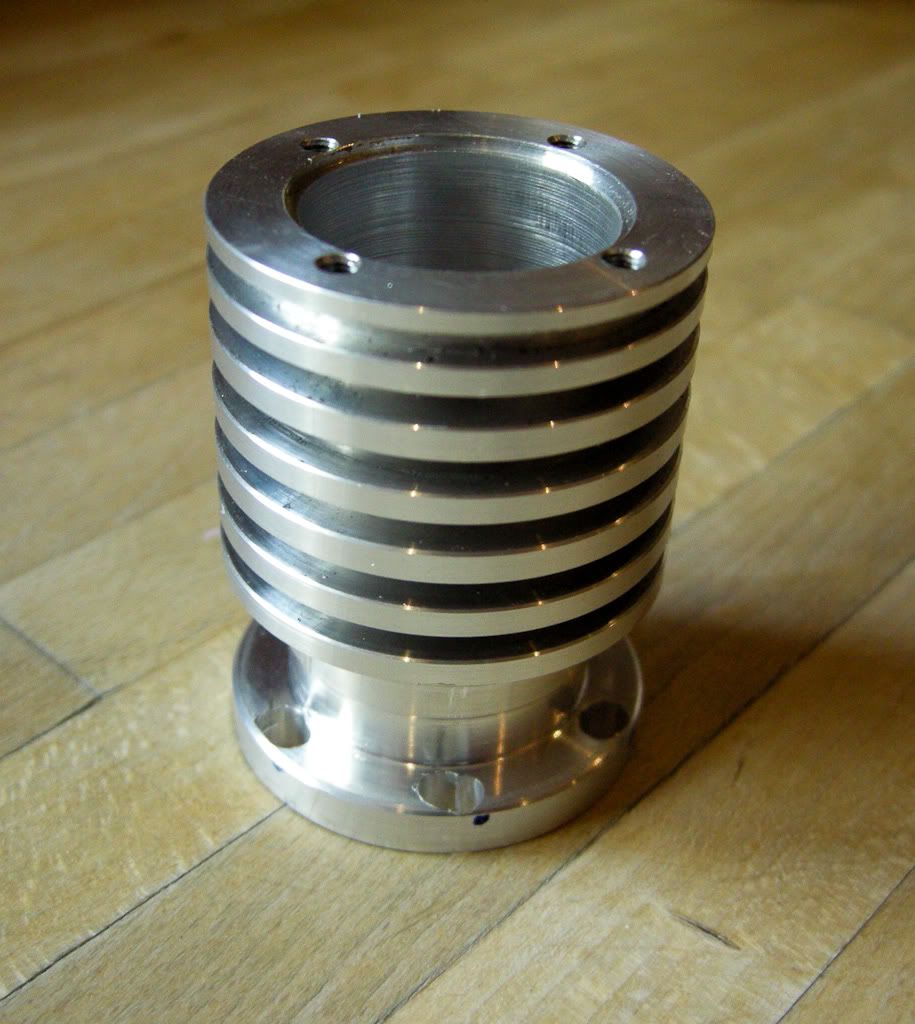
Assuming you have you part ready finished.
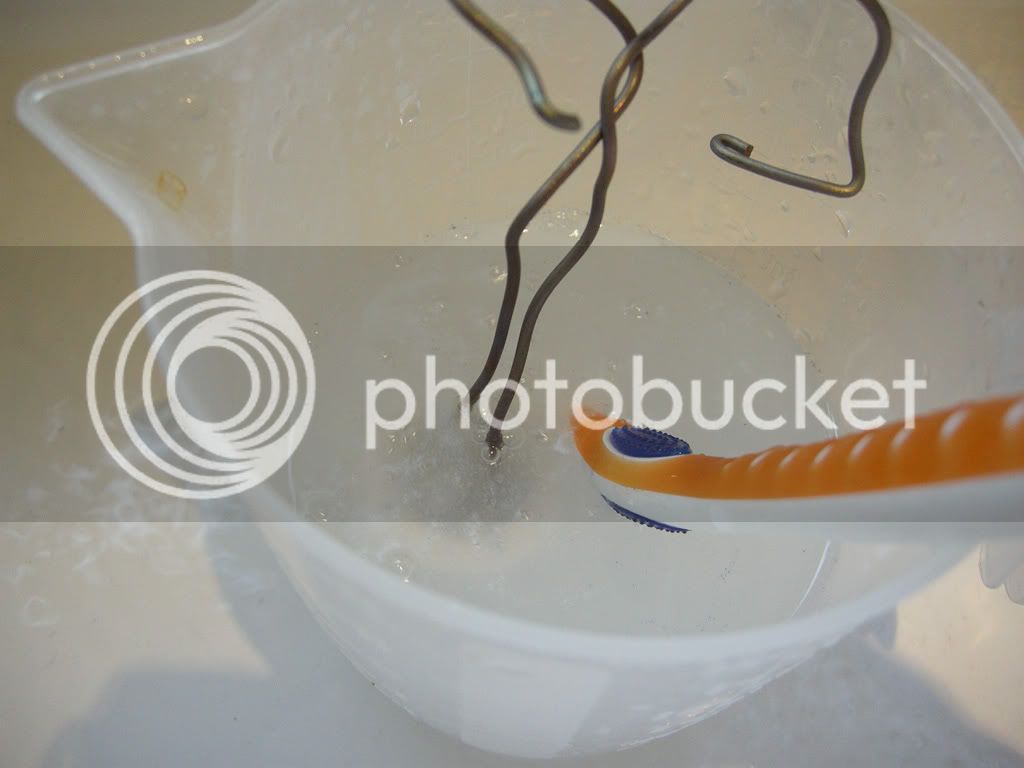
Clean it, clean the hell out of it and then clean it some more, use hot water and detergent, make sure you get every bit of dirt and grease of it. Ware gloves and I use a tooth brush to give it a good scrub. Do NOT touch the part with your hands, any grease marks will show.
Rinse it off (Distilled water) do not let it dry.
Now this next process is not always needed, but I find it gives me a good finish.
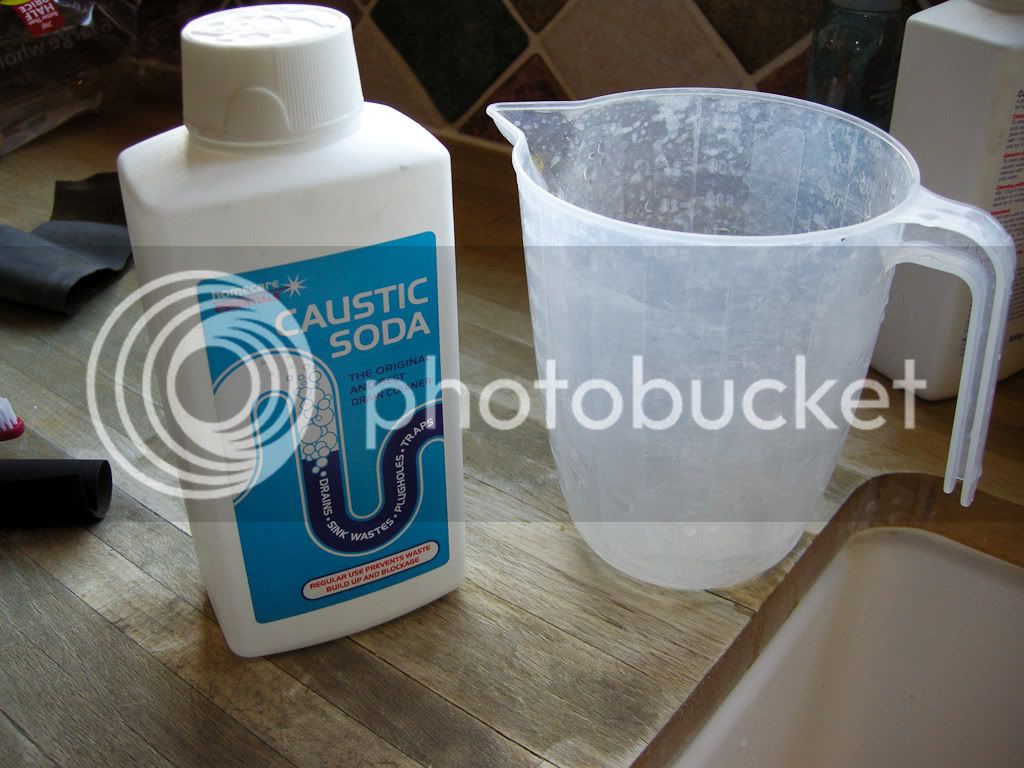
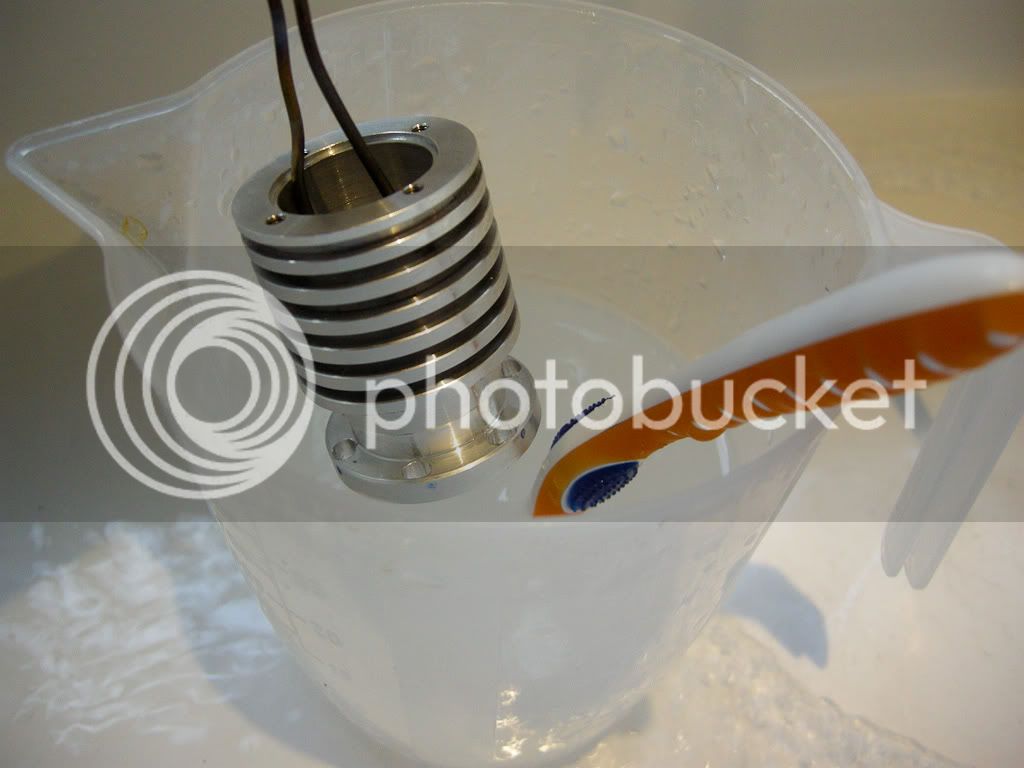
A dunk in caustic soda . Hot water (not boiling or you will end up with a face full it) mix in about an egg cup full of caustic soda to a pint of water. Drop the part in, and watch it boil, mind the fumes, this will get you coughing if you dont have enough ventilation. 30 secs to a minute I find is long enough, you just want to dull the surface a bit, any longer and it will start to etch away any detail, like any threads etc, so just be careful doing this.
Rinse it off (Distilled water) do not let it dry.
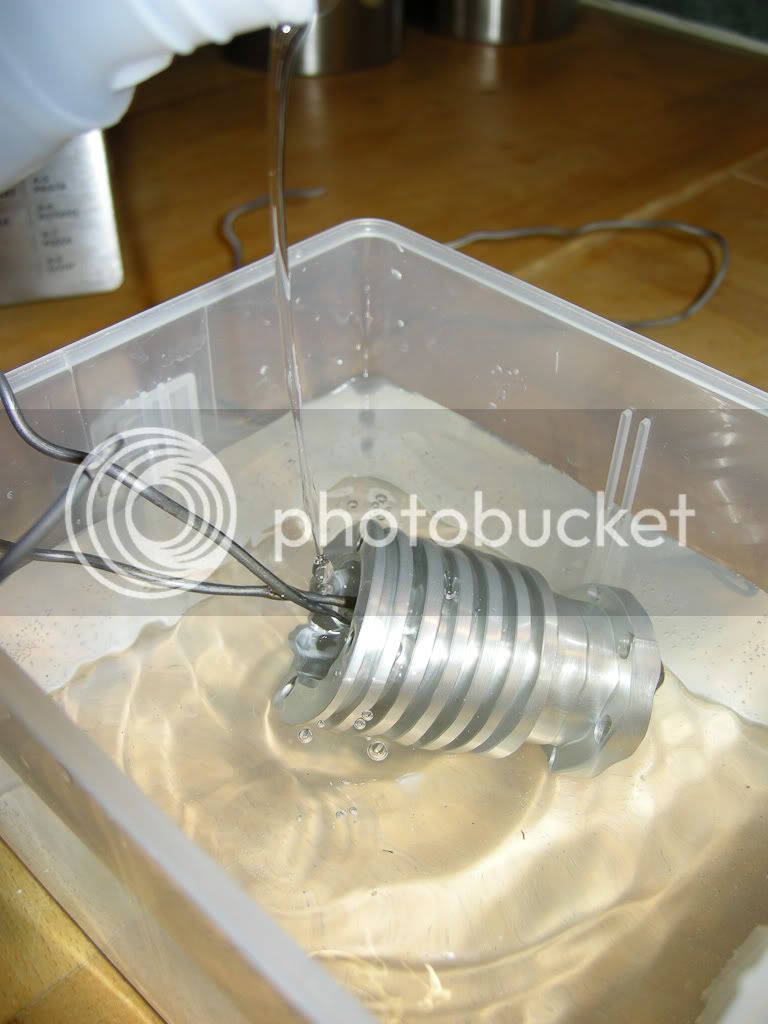
Connect the hanging wire, keep you gloves on, do not get any marks or finger prints on the part, if you do, give it another scrub before it goes in the tank. Use either the aluminium wire, fold it over and jam it into a hole, twist it round a small part. Remember, you need a good electrical connection and also note, where the wire touches it will NOT anodise, so try make the connection away from the outside of the part. Or, as I use titanium with, this is a bit tougher and you can bend and spring it into place.
Into the anodising tank hang the part so it is fully submerged into the bath and equal spaces away from the cathodes, also take into account that there will be some bubbles of gas coming off, so hang it in such a way that none will get trapped under the part, so try and keep holes and recesses facing up and angle it a bit if you can. It also an idea to give it a little shake now and then to get any forming air bubbles off.
Connect up the + (anode) to the wire and turn on the power (12v is good) and leave it cooking for an hour.
Now, a few notes on this, different grades of aluminium with give different results and can react differently in the tank. Cast aluminium, forget it, never seen anyone anodise this stuff well, there are too many other metals in it. And some grades can give off quite a flow of gas bubbles and make it very hard to get a good coating, the only way it to try with a bit of scrap and you will soon find out. The more impurities in it the harder it is to get a good finish.
Use a timer or clock and leave it there for an hour, this is my setup, I have it on a dedicated shelf. The blue tray is there for two reasons, one so I can put hot water in there to help keep the temp of the tank up a bit, it gets dam cold in my garage, also it helps in case of any spill.
When the hour is almost up time to get the dye ready, the dyes I use work best about 50 deg C, no hotter then this or the part will start to seal and will not take up any dye.
When the hour is up, disconnect the PSU and remove the part and give is a rinse off in distilled water, mind you do not drip acid anyware.
Next dunk the part into the dye.
Leave in the dye for anything from 5 to 30 mins depending on how dark you want it. There are loads of things that effect the dye take up, temperature, age of the dye, time and the depth and pore size of the anodising itself and this is controlled by the time and current and the type of aluminium. For the dyes I am using about 10 to 15 mins does the trick. One this to note though, if you are doing more than one part then try and use the same time so you can try and get the same colour depth so they match.

While it in the dye get your last process ready, this is just a pan of boiling water (distilled).
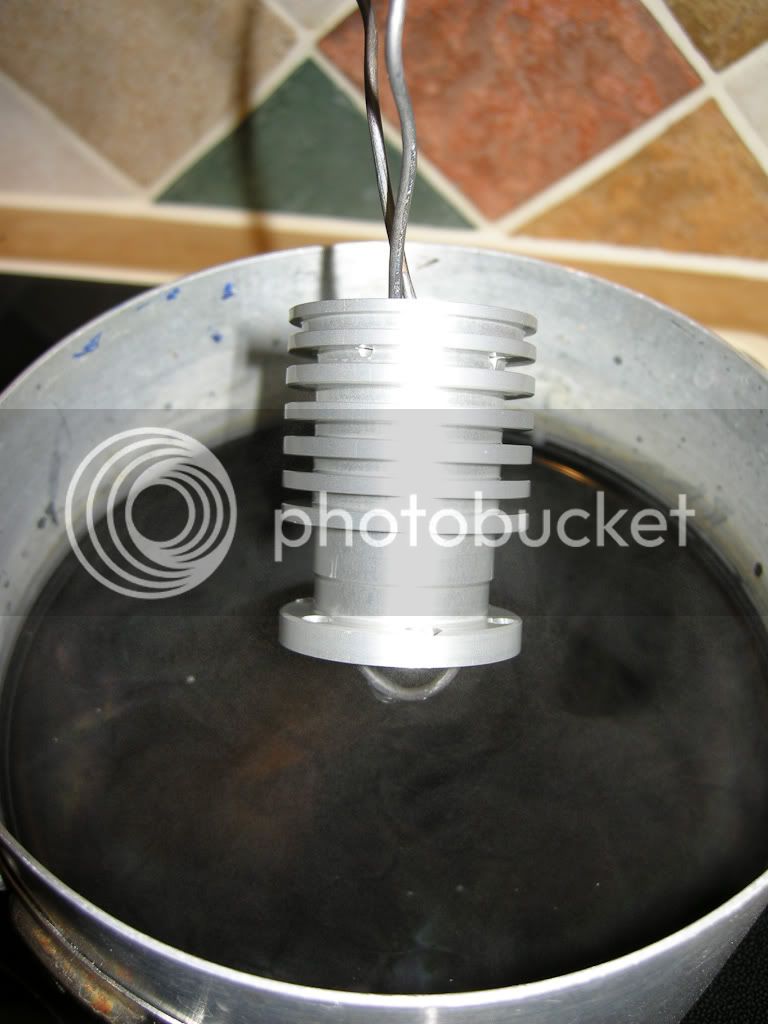
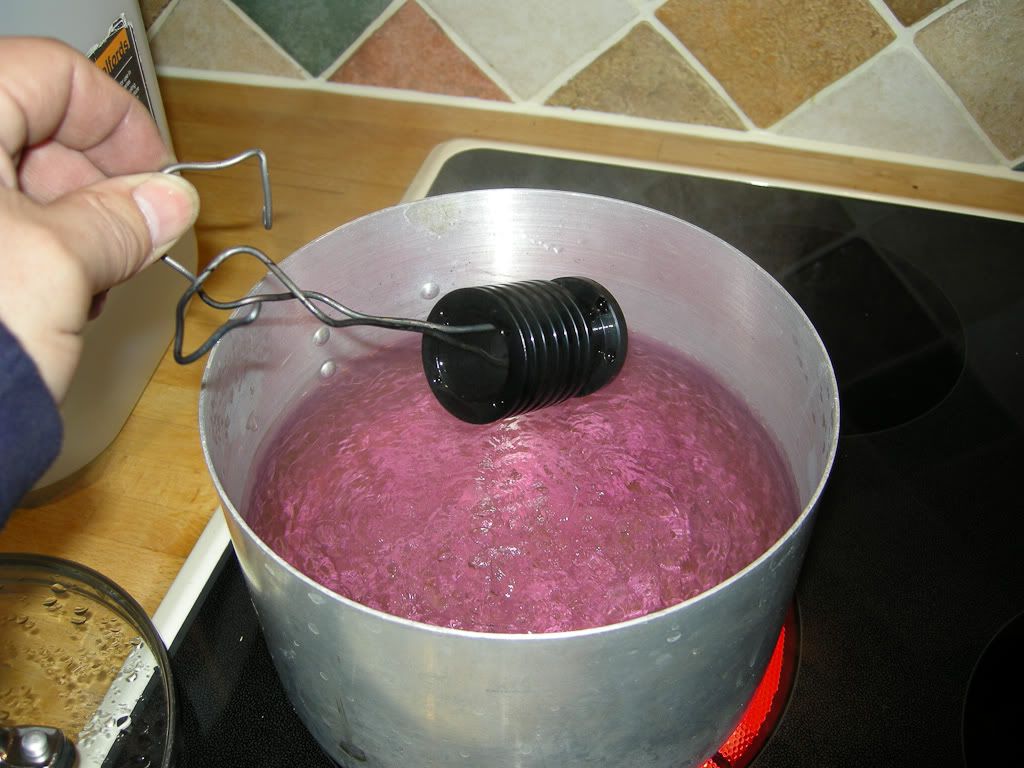
Remove the part from the dye and dunk it straight into the boiling water. Couple of things to note here, make sure the water is boiling, if its less than 98 deg C it will not seal and the dye will just wash out, also dont panic when you dunk the part as some of the dye on the surface will colour the water, dont worry about it, as you can see the water is pink before I put the part in, this was from the previous part I anodised that was pink (yes I got a pink dye, long story )
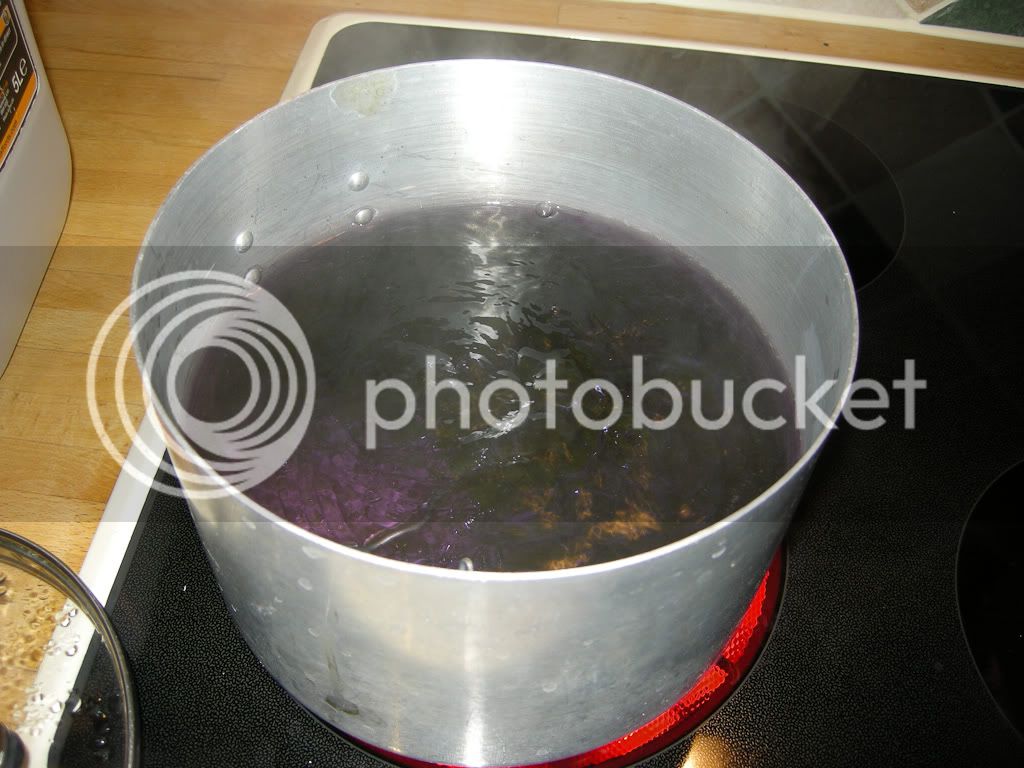
Now pop the part into the boiling water, as you can see the water has gone black now.
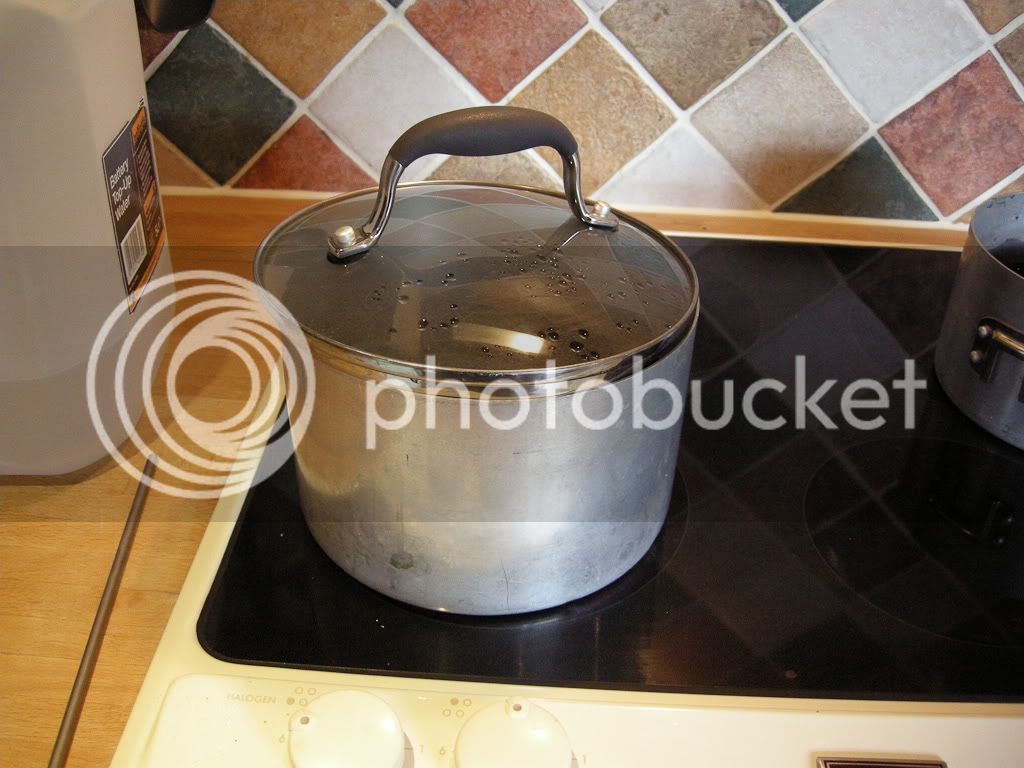
Pop the lid on and leave it to simmer for 15 mins
Take the part out and leave it to dry, remember its HOT .

Thats it, all done .
Please feel free to ask as many questions as you want and I will do my best to answer them.
Please be careful with the Acid
And please remember this process works for me, there are many varying factors and takes time to get this right, test your process first on scrap bits.
If you do mess up you can (I have done this before) strip off what you have done by dunking the part in caustic soda, this will strip off the anodising and any dye as well. So if you have parts already anodised and want to change the colour you can. Also remember dunking parts in caustic soda does eat the aluminium, so be careful of fine detail and small threads all can get eaten away if left to long.
Dave
I will start with a disclaimer. Please note, these are my findings and may or may not be totally correct. As with everything in life there are other ways of doing it, this way works for me, may not for others .
Also, PLEASE PLEASE PLEASE be careful with the Acid, you need to use Sulphuric acid (H2SO4) and its not nice stuff and WILL burn, your eyes will not recover from a splash. Use loads of caution and read as much as you can about handling the stuff, I cant tell you what to do or how you do it, this is just my guide. Also remember your three As, AAA, Always Add Acid ..
And, the dyes, no idea what is in some of them, just take care with them. One thing I do know, if you drip or splash them onto anything, like a work surface or clothing, they are a bugger to get off
I started looking into anodising well over a year ago, I was (and still am) making parts and modifications for Air Guns (another one of my interests), some of these parts needed some protection and paint was just not good enough, so I looked into doing this.
I found quite a bit of help on the net, but as with everything I was getting conflicting reports on how this should be done, eventually things started to make sense and I managed to put a process together that worked.
Some tips and notes to start with.
Cleanliness is everything and having an organised work area.
Water, all water used throughout the process is distilled. Tap water has impurities in it and can leave marks on the parts and it will shorten the life of the dyes.
Anodising will NOT hide or cover a bad finish, even with a dye, it will enhance it
Dyes, I have seen all sorts suggested, from using food dye, clothes dye, etc. I have only used specialist anodising dyes and even some of these have given me mixed results. Proper specialist dyes are not expensive and worth getting, spending some time finding the good ones are worth the effort.
Gloves, keep them on all the time, keep em clean, these will not only protect your hands but protect the part against finger marks. Goggles, not just for the acid bath, I have not much idea what is in the dye and I do not take chances. Old clothes, the dye does not always come out and any splash of acid will leave a hole .
Bits you need.
Distilled water - lots of it. You can normally get this from car accessory shops, its battery top up water. Now most places no only sell de-ionised water, not quite the same but all the impurities have been taken out and I have used it a couple of time and it seems ok. Lucky for me I have a son that lives close by and he has a damp basement so he has a de-humidifier running, output, distilled water by the bucket load
Sulphuric acid - depending on where you live this is either easy or hard to get. All you need is basic battery acid. To make a working solution you need something like 10% acid (by volume) the rest is distilled water. Now it comes in varying strengths, as long as you know what strength it is then you can dilute it to get you final 10%, its not that hard just a bit of basic math. And dont forget the AAAs, always add acid, So add the acid to the water (gloves, goggles and lots of water on the side just in case)
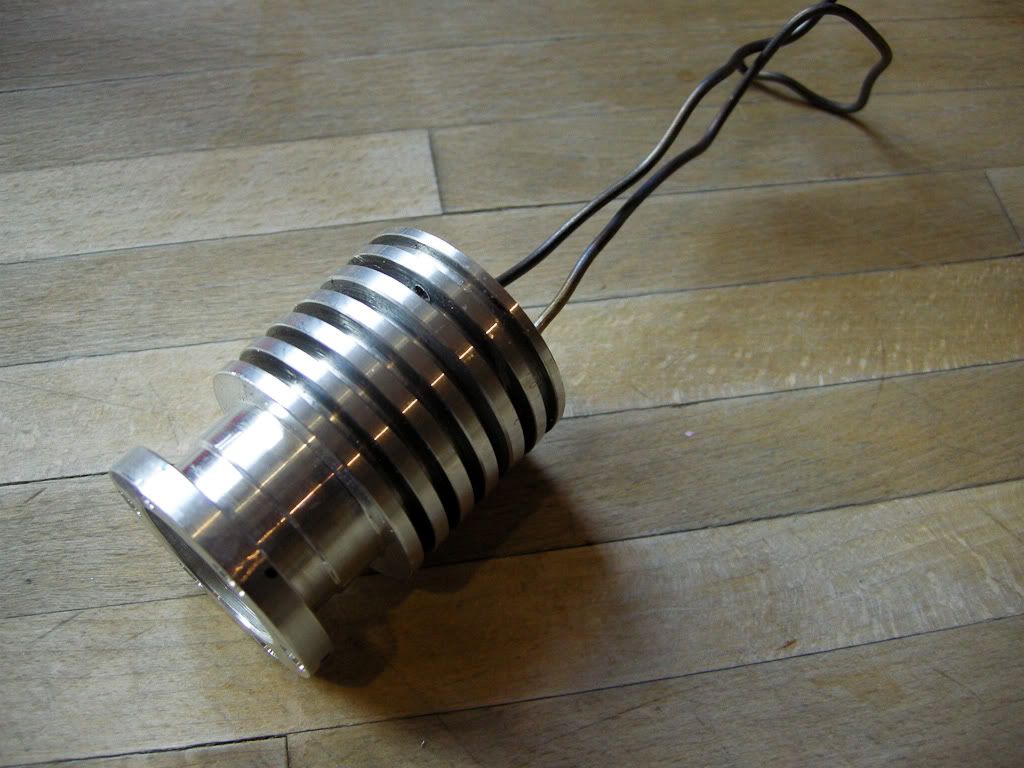
Tank You need an anodising tank, I use a lunch box, the type with a clip on lid, so I dont have to empty the thing every time, I just put the lid on and leave it on the shelf. In the tank you will need a cathode, now you do have to be careful what goes in the tank, you can use aluminium as a cathode, or I use a sheet of lead, an old bit of roofing lead. I use two bits, one at each end of the tank, I have connected a wire from one to the other and a wire off to the PSU. I drilled small holes for the wire (close to the top) and sealed the holes with silicon, so now created a permanent tank I can keep the lid on when not in use.
PSU Now, I have seen loads of discussion on what to use and what current and what voltage. I found a formula some place on how to work it out using know surface area sample of aluminium and then adjust the voltage to a specific current, that voltage then becomes your constant. I did this and with a 10% solution it was exactly 12vols, with was handy, and most say 12 volts is about the norm. The current drawn will vary depending on the size of the job. For example the engine head I did took 0.58 amp (as shown in one of the photos), so if you have a DC (MUST BE DC) PSU that will give a couple of amps then this should do for most small parts. I mess about with electronics quite a bit and just happened to have a bench PSU.
Saucepans OLD ONES, at least one, you need to boil the part at the end to seal in the dye, I use an old camping pan. You may need another for the dye (the dyes I use need to be heated to 40 to 50deg C
Wire Wire from the PSU, one to the cathode and one with a crock clip on the end to clip to the connection to the part. Other wire you will need is some form of connection from outside the acid to the part in the acid. Now, you have to be careful what you use, normal wire will just get eaten away by the acid and will be gone in seconds, the simplest stuff to use is aluminium, do NOT use the stuff sold for flower arranging and some craft work, it is anodised and anything anodised will not conduct electricity, you need bare wire. Also keep this in mind, the wire that goes in the tank will get anodised the same as the part you are anodising, so can only be used once, or you can strip off the anodising with caustic soda, but this does eventually eat the wire away. A small role of aluminium wire, even if only use once, can last you a while as you only use 6 inches or so at a time. Now there is another way, the only (as far as I know) metal that can go in the tank (and this is what the pros use) is titanium. I have some short bits of titanium wire about 3mm diameter, quite bendy and I have been using the same two bits for a while now, it does not get anodised so can be used time and time again. Well worth getting a couple of bits if you can find it. I have got some larger bits that one day I will make up some sort of clamp.
Dyes You dont have to dye it, you can leave it clear, at least it gives it a hard coat. Dyes, I have had very mixed results with a few different dyes, even commercial dyes have given me problems, no hard a fast rules and you will find people using all sorts. Now I have been using some dyes from this place, http://www.gaterosplating.co.uk/index.php, and so far been getting some cracking results.
Bits and bobs. There will be a mixture of odds and ends you will need, space to do this is one of them, I have a shelf in the garage that has everything on. Gloves, goggles and I have a few cheep jugs and trays I keep just for this process, tooth brush, thermometer and various small strips of wood I use to help hang the part in the tank. Some of this came from my old dark room days, see I knew it will all come in handy one day . Including a timer .
The process.
Assuming you have you part ready finished.
Clean it, clean the hell out of it and then clean it some more, use hot water and detergent, make sure you get every bit of dirt and grease of it. Ware gloves and I use a tooth brush to give it a good scrub. Do NOT touch the part with your hands, any grease marks will show.
Rinse it off (Distilled water) do not let it dry.
Now this next process is not always needed, but I find it gives me a good finish.
A dunk in caustic soda . Hot water (not boiling or you will end up with a face full it) mix in about an egg cup full of caustic soda to a pint of water. Drop the part in, and watch it boil, mind the fumes, this will get you coughing if you dont have enough ventilation. 30 secs to a minute I find is long enough, you just want to dull the surface a bit, any longer and it will start to etch away any detail, like any threads etc, so just be careful doing this.
Rinse it off (Distilled water) do not let it dry.
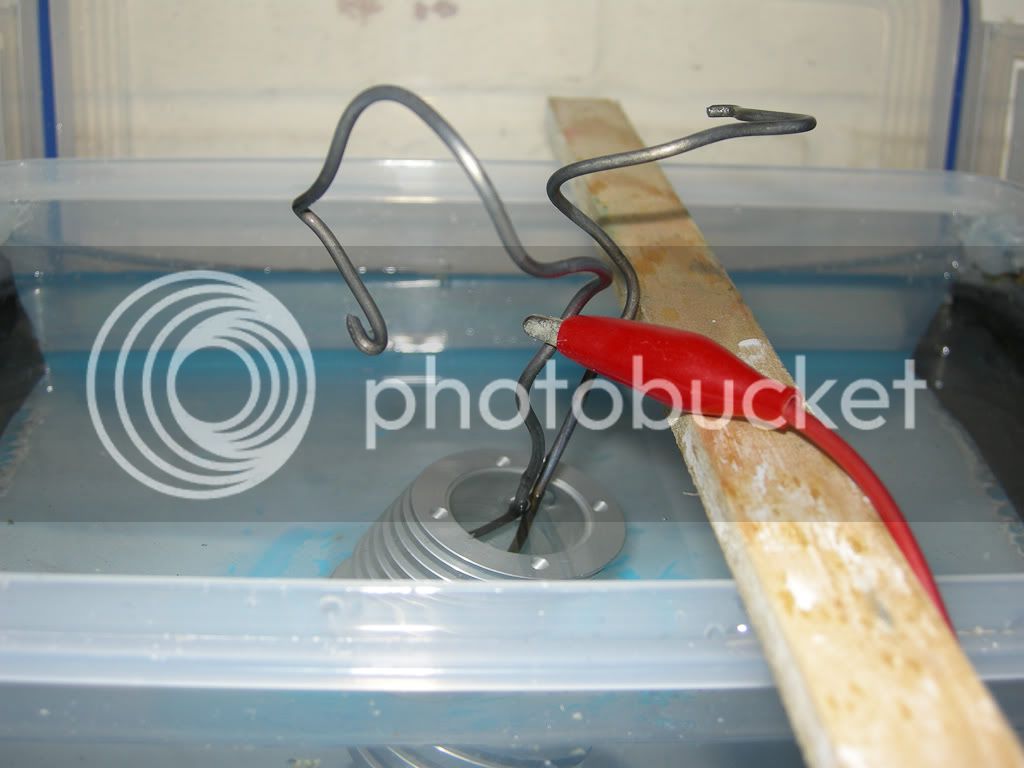
Connect the hanging wire, keep you gloves on, do not get any marks or finger prints on the part, if you do, give it another scrub before it goes in the tank. Use either the aluminium wire, fold it over and jam it into a hole, twist it round a small part. Remember, you need a good electrical connection and also note, where the wire touches it will NOT anodise, so try make the connection away from the outside of the part. Or, as I use titanium with, this is a bit tougher and you can bend and spring it into place.
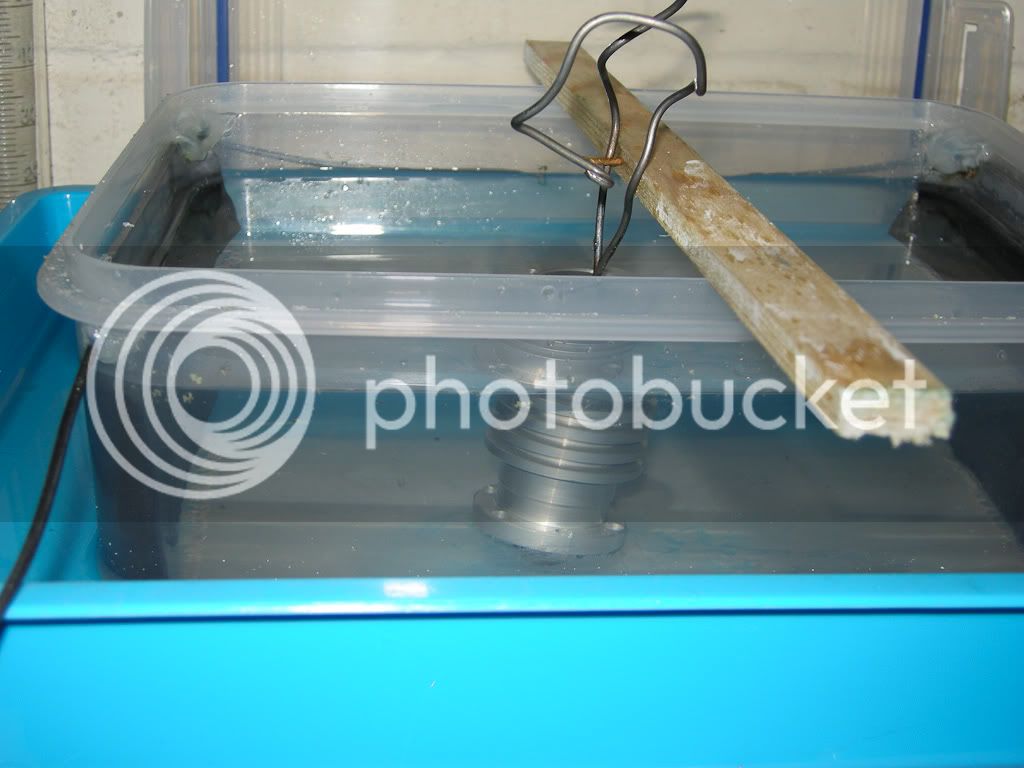
Into the anodising tank hang the part so it is fully submerged into the bath and equal spaces away from the cathodes, also take into account that there will be some bubbles of gas coming off, so hang it in such a way that none will get trapped under the part, so try and keep holes and recesses facing up and angle it a bit if you can. It also an idea to give it a little shake now and then to get any forming air bubbles off.
Connect up the + (anode) to the wire and turn on the power (12v is good) and leave it cooking for an hour.
Now, a few notes on this, different grades of aluminium with give different results and can react differently in the tank. Cast aluminium, forget it, never seen anyone anodise this stuff well, there are too many other metals in it. And some grades can give off quite a flow of gas bubbles and make it very hard to get a good coating, the only way it to try with a bit of scrap and you will soon find out. The more impurities in it the harder it is to get a good finish.
Use a timer or clock and leave it there for an hour, this is my setup, I have it on a dedicated shelf. The blue tray is there for two reasons, one so I can put hot water in there to help keep the temp of the tank up a bit, it gets dam cold in my garage, also it helps in case of any spill.
When the hour is almost up time to get the dye ready, the dyes I use work best about 50 deg C, no hotter then this or the part will start to seal and will not take up any dye.
When the hour is up, disconnect the PSU and remove the part and give is a rinse off in distilled water, mind you do not drip acid anyware.
Next dunk the part into the dye.
Leave in the dye for anything from 5 to 30 mins depending on how dark you want it. There are loads of things that effect the dye take up, temperature, age of the dye, time and the depth and pore size of the anodising itself and this is controlled by the time and current and the type of aluminium. For the dyes I am using about 10 to 15 mins does the trick. One this to note though, if you are doing more than one part then try and use the same time so you can try and get the same colour depth so they match.
While it in the dye get your last process ready, this is just a pan of boiling water (distilled).
Remove the part from the dye and dunk it straight into the boiling water. Couple of things to note here, make sure the water is boiling, if its less than 98 deg C it will not seal and the dye will just wash out, also dont panic when you dunk the part as some of the dye on the surface will colour the water, dont worry about it, as you can see the water is pink before I put the part in, this was from the previous part I anodised that was pink (yes I got a pink dye, long story )
Now pop the part into the boiling water, as you can see the water has gone black now.
Pop the lid on and leave it to simmer for 15 mins
Take the part out and leave it to dry, remember its HOT .
Thats it, all done .
Please feel free to ask as many questions as you want and I will do my best to answer them.
Please be careful with the Acid
And please remember this process works for me, there are many varying factors and takes time to get this right, test your process first on scrap bits.
If you do mess up you can (I have done this before) strip off what you have done by dunking the part in caustic soda, this will strip off the anodising and any dye as well. So if you have parts already anodised and want to change the colour you can. Also remember dunking parts in caustic soda does eat the aluminium, so be careful of fine detail and small threads all can get eaten away if left to long.
Dave


![DreamPlan Home Design and Landscaping Software Free for Windows [PC Download]](https://m.media-amazon.com/images/I/51kvZH2dVLL._SL500_.jpg)


")