Adjusting lathe to turn parallel

Home Model Engine Machinist Forum

Help Support Home Model Engine Machinist Forum:

This site may earn a commission from merchant affiliate links, including eBay, Amazon, and others.

tmuir

Well-Known Member
Joined
Oct 30, 2007
Messages
888
Reaction score
11
Hi,

I've just spent the last hour and a half trying to adjust my lathe to turn parallel.
I started with my lathe over 100mm having the outer end 0.08mm smaller and with some playing around have got it to 0.02mm over 100mm. The trouble with my lathe is it doesn't have four 'feet' just one bolt at each end of the lathe so its a matter of putting shims on either side of this bolt to adjust the twist in the bed.

My book suggests to aim at 0.002mm or better but I doubt that is achievable with this lathe.
My question is how big a problem will this cause me being out of parallel by 0.02mm over 100mm for building model steam engines and IC engines. I will never be building anything really large and probably nothing much bigger than say a Stuart turner 10V.

Am I setting myself for failure leaving it at 0.02mm?
Should I stand cursing at my machine for a bit longer to try and get the run out less?

Thanks
 
Tony,

Surely the manufacturers aren't asking you to induce a twist into the bed to cure the lack of parallelism.

Can you take a shot, or a scan or a sketch of what it is you are adjusting.

If you can't, the first thing you must do is level the bed, that is, get it level at the extremity of each end of the bed, this ensures that there is no twist in the bed. If you can, but not critical, get it level longitudinally at the same time.

Then put a rigid, smooth and straight bar into your chuck.

With a DTI mounted on the saddle, run along the face of the rod nearest to you, this should give the rough direction you should be going. Then you need to shim the headstock until it is somewhere near. When that is close, you then need to run the DTI along the top of the bar to see if the head is correct horizontally, because if that is out, it will give the same symptoms as the head being out sideways. It is a very fine balance when tuning like this. When you are somewhere near both ways, then do your cutting runs and adjust as necessary.

On my old Atlas, you didn't shim the head, but tapped a fore and aft chisel mark to kick it over as it sat in the bed. I got mine so that there was no discernable taper over 4". It took a full day to achieve, but once done it never moved again.

If you haven't got these points for adjustment, it is a matter of living with the best you can get. 0.02mm does seem a rather large amount, and if you do a precision bore of say 2" (50mm) long, you will have a fair bit of lapping to get it true.

John
 
As far as I'm aware there is no adjustments to get the headstock running parallel to the bed.
I was following the advice of 'Lathework A complete course' volume 34 of the Workshop Practice series.
It suggests raising or lowering the feet of the lathe to get it running parallel. But as my lathe doesn't have 4 feet to do this I was shimming either side of the bolt.
When I set up the lathe I got the bed as level as I could using my spirit level I had but as that is not perfectly accurate I could be out 1 or 2mm over the length of the lathe.

I just dug out the test sheet that came with my lathe and they have it down as
about 0.025mm so I've got it better than the factory but looking at all their readings I notice every one of them is either exactly half of the tolerance or very close to that which makes me wonder if they actually took the readings or just filled out the sheet.

 
Just did a bit of surfing and 0.02mm over 100mm on a 1 inch bar seems about average for these machines so I will just leave it at that for now.
What does worry me is the test sheet tells me that the tailstock centre is 0.05mm higher than the headstock and I have no adjustment for that either. So much for me reaming perfect holes.
 
Tony,

Sorry I couldn't help any more. I am expecting the same sort of problems with my new lathe. I suppose as you say, get it the best you can and live with it.

Rather than reaming bores, it is always better to bore them anyway. You can in fact true up a tailstock, but it is rather involved and requires time and accuracy.

John
 
Of course we want our machines set up as perfectly as they can possibly
be. Unfortunately there is no such thing as a perfectly set up machine...

With a whole lot of time and effort it may be possible to align a lathe to
cut perfectly straight. Three days latter changes in ambient temperature
and humidity will effect it, and change all the rules.

Industrial machines set up using laser optics for perfect alignment.
They are perfect that day! As the seasons change so does the alignment.

If it tapers -.002" over a 4" length of cut the tool is "bumped" in .0005"
every .800" to take the taper out of the cut.

It takes a little finesse. Tapping a finger tip on a wheel to move a tool .0005"
on a machine that can rip steel... But, when you mic that fit and it's perfectly
straight when you know the machine is tapering is a real ego booster! ;)

Rick
 
Yes I can live with 0.02mm over 100mm on a 25mm bar.
What I can't live with is my drill chuck being a tad over 1mm off centre. :eek:
I discovered the morse taper on my drill chuck is crap and throwing the drill way out of alignment.
I've pinched the drill chuck from my drill press for the moment and need to buy a replacement morse taper on the other drill chuck.

That would explain way drilling was giving me so much problems. :big:
 
more about the set up - what dia and are you using for the test cut and are you using the tailstock?

i'm from the school that the fundemental accuracy a lathe manufacturer has to achieve is alignment of the bed and head stock bearing bores - if adjustment is required here something is wrong - either in the lathe's manufacure or in your diagnosis. My mentor, a british tool and die maker come machinery service and restoration business owner drilled this into me and I've taken a bunch apart never finding shims...not that John is wrong, if the headstoclk is off thats what to do, but its the last thing to look at and the headstock shouldn't be off on a well made lathe. for example, 7 tenths could be explain by a bit a small particle, bruise or other error in the clamping mechanism, be exhaustive before you go to shim the headstock.

You're only 7 tenths over 4 inches, not bad, but you're right we can do better, (sorry have to convert to imperial.)

First thing, do you have a master machinist level? This'll set you back some new from Starrett but they are all over ebay. It takes a very sensitive level to level a machine so you're getting better than a thou results....don't go off shimming headstocks if all you';ve done is use a carpenters level ;D.

In practice, a taper obviously shows up more in long turnings than short. As these are tailstock supported, to get it bang on, you need to adjust the tailstock. Since the tailstock clamping method introduces some error - every time you clamp it it will be in a slightly different position as measured with a tenth's indicator - you may have reached the practical limit of setting up the lathe. When you need to get something dead on over a length, you have to play with test cuts and an indicator and tailstock adjustment on that piece of work - thats how you get parallel down better than half a thou. It's not often that tight tolerances have to be held over long distances, happens, but not frequently so this fine tuning of dialling in the tailstock is a pita but happens only occaisonally. For example, you might have a 3/4 shaft a foot long, but really it only needs to be dead on 3/4" for say 1/2" at each end - put your work into getting each end perfect, not the entire 12" dead on

So much for me reaming perfect holes

No no and no. ;D First off, on the best lathes the tailstock is high, slightly, to allow for wear (although 1mm seems a lot) Secondly, measuring error by something held in the chuck could result from several potential causes. first measure error of the tailstock bore - mount a tenths indicator on the spindle (mag base on chuck or some arm held in chuck) and indicate the tapered bore. In and out are easily adjusted for, its the high low we want to check.

Finally, the tailstock position, within reason DOES NOT MATTER for reaming. Reamers (and drills to a lesser extent) will follow the existing hole and in fact are made the lengths they are on purpose so that there is enough flexibility in the shaft so that the will follow the hole rather the be rigidly stuck at the axis of the chuck. If hole location matters, run a bore bar through before reaming to make sure the hole is straight and the reamer will pefectly follow it regardless of the tailstock be high


Just to expand a little bit. I had to redo my headstock because it came off another lathe, and it was a matter of course to realign it.
I agree with Mcyver in what he says about headstocks that are shimable. But there are occasions it needs to be done.

The other thing is, in fact you shouldn't ream from the tailstock unless you have a floating head to mount the reamer in. This allows the reamer to find its own centre when going thru a prebored or drilled hole. But we all tend to use just the tailstock chuck.
If you mount a reamer into a tailstock that is too far out, it will actually cut a tapered hole. The larger end of the taper being at the entry point.

The main reason for problems nowadays, is that unlike older types of lathes where the head and tailstock were mounted onto the bed and line reamed or bored, which then stayed together most probably for the rest of their working life, they are most probably machined in different factories now, and only come together when a final tolerance check is carried out, and if it is somewhere near, gets shipped out.

Also as Mc. says, it is no use using a carpenters level, they are just not accurate enough. In fact I use two engineers levels at the same time, one on the X and another on the Y, just to keep track of what is happening to the bed as an adjustment is made.

Some machines can be brought up to very good standards, others you have to live with.

John

 
I don't own an engineers level (another thing to add to the list to buy).
I did my test using a 130mm (or there abouts) length of 25mm mild steel bar set in my 4 jaw chuck although the 3 jaw would of probably been fine.
I didn't use the tail stock as I didn't want that to throw in added problems if it was off alignment. I shaved off about 0.075mm (3 thou) for the length of the bar sticking out the chuck (about 100mm). This was down about 4 or 5 times and every time giving me between 0.02 and 0.025 narrower at the far end of the bar.

I will just live with that for now.
My tailstock isn't out by 1mm to 1.5mm my drill chuck is due to the morse taper on it having some scratches and minor dings on it stoping it seating correctly.
As the taper is actually meant for a drill press and has the tang on it so it can be removed with a drift I will just try and buy a new one for the chuck as the tang takes away nearly 10mm of movement on my tailstock as I have to wind it out to 10mm just to get it to seat itself in the tailstock.

I'm still at the bottom of a very steep learning curve and just doing a few tests to be able to measure the tolerances on the lathe was a worth while exercise.
 
Tony,

As mentioned, engineers levels do come up occasionally on ebay. Only recently I bought a very good clinometer (does the same sort of job, just a bit more versatile) for a fraction of the original cost.
When you get yourself sorted out, it is a nice thing to have in the shop, but not at the cost of essential tooling.

John
 
John's right its not essential, i offered it in the context of before shimming headstocks you should beg borrow buy one....sounds like you're doing pretty well just via tweaking.

its a strange inside out learning curve, the more you learn the more you have to learn - for me that's the kicks of it, all cliches apply, journey not the destination etc. just keep asking, reading and working.
 
I'm just wrapped that after a figured out what was wrong with drill chuck and I managed to bore and ream a new cylinder for my next restoration effort.

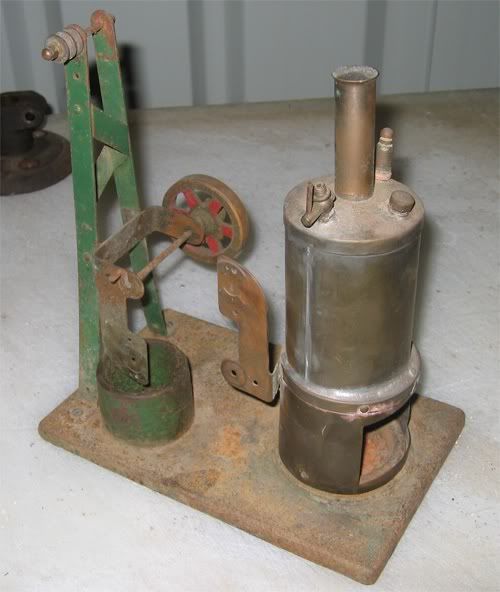
Need to turn this
my_windmill1.jpg


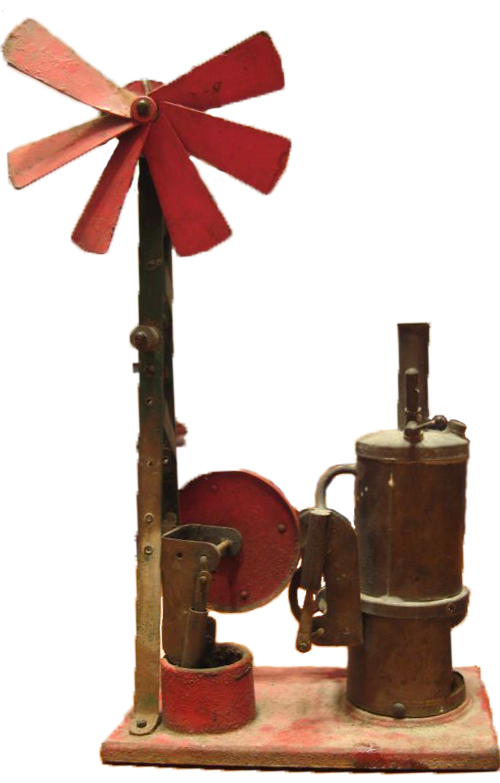
into something like this

windmill1.png


So got a few parts to make yet....
 
There are many designs of offset tail stock centers floating around the Internet that allow you to set the center over without disturbing the accuracy of the tail stock it self, set one of these up in the vertical plane and you can adjust it to perfect alignment.
 
G'day Tony, I see we're in the same neck of the woods.
If you don't mind a suggestion from a newb, forget the level.
What you need to check is wind in the bed.

A $5 laser will do that. Glue, clamp, somehow mount the laser to a piece of glass, big enough to bridge your lathe ways.
lay the laser on the bed near the headstock, pointing at a wall or target as far away as possible, mark the laser dot on the target (it will be a spot rather than a point at any reasonable distance)
Move the laser to the tailstock end, point the beam at the same spot on the target and check for *vertical* misalignment. This will show any wind in the bed.

Hope that makes sense. If not, PM me and we can maybe do this by phone or email drawing (I'm SOR)

Cheers, Lin
 
Hi Lin,

For the moment not going to worry about getting it any better as the items I'm making at the moment being just for toy steam engines have a fair amount of tolerance in them.
When I finally feel ready to make something more serious I may have to have a rethink about it again though.
 
to be honest Tony, I think you've done a more than adequate job already. I just thought that money could be better spent than on a precision level. Even given an ebay bargain, shipping to this neck of the planet takes the shine off.

I had that sort of runout on my Jet 9x20 when I measured (last spring) but the temp fluctuations the last few weeks have knocked things around.
Most of my work is in the chuck, then parted off, or on a turned mandrel so automatically true (within limits of the machine)

 
Somewhere I ran across an article on making highly sensitive spirit level bubbles.

IIRC, the trick was to take some glass tubing, slide it over a slightly bent rod with some cutting/polishing compound and rub to produce a very slight barrel-shape on the inside of the glass tubing. Fill with some spirit and go to town (mounting and graduating left as an exercise for the reader, although graduating isn't actually required for basic levelling). I've not tried it and I bet considerable experimenting may be required.

 
Shred,

I think you might run into trouble.

You can't buy the bubbles any more, you have to make and graduate your own to the correct size, which is rather tricky. Or construct a bubble making machine. I think someone on here was making one.

Bogs
 
I've got a bubble making machine!

Very helpful for kid's birthdays. Had no idea it would be useful in making precision instruments.

Cheers,

BW
 

Latest posts

Back
Top