A different carburetor thread---

Home Model Engine Machinist Forum

Help Support Home Model Engine Machinist Forum:

This site may earn a commission from merchant affiliate links, including eBay, Amazon, and others.

Brian Rupnow

Design Engineer
Project of the Month Winner
Joined
May 23, 2008
Messages
15,249
Reaction score
8,525
Location
Barrie, Ontario, Canada
Yes, I do make my own carburetors. The throttled carburetors that I make are almost an exact copy of those made by Malcolm Stride for his Bobcat and Jaguar engines, and they give remarkably good results. I make carburetors for my hit and miss engines as well, and I have varying results. In the picture you will see a carburetor that I copied from an old Upshur hit and miss engine. I got lucky and it worked very well. My problems with this style of carburetor are #1--There is simply no way that I can form a perfect taper on a #2-56 bolt, nor can I accurately make a fully threaded 2-56 needle. Problem # 2 is that the two small "tubes" that the needle pass thru are separate pieces, and even with a jig it is nearly impossible to line them up perfectly. They have to be aligned perfectly because the needle screws into one side, and the taper of the needle must fit perfectly concentric into the fuel delivery hole in the other piece. There is another way to do this as suggested by Philip Duclos, where the two separate pieces are made as one complete single piece that runs completely thru the carburetor body, thus eliminating any concentricity problems.
AWXjtj.jpg
 
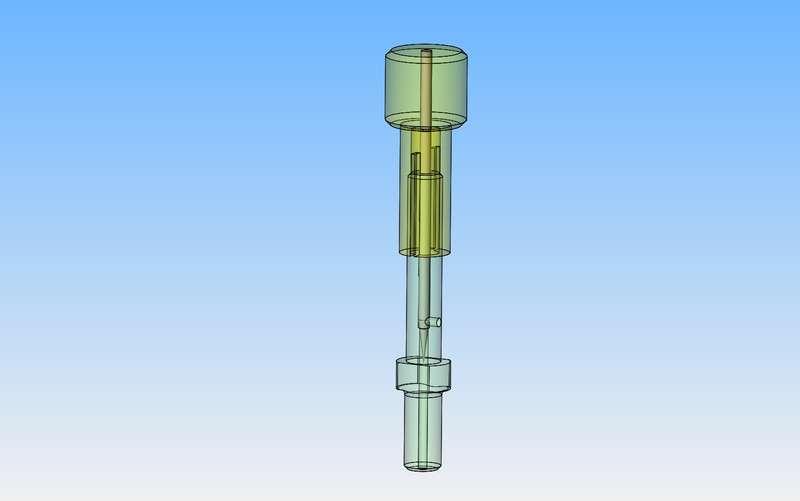
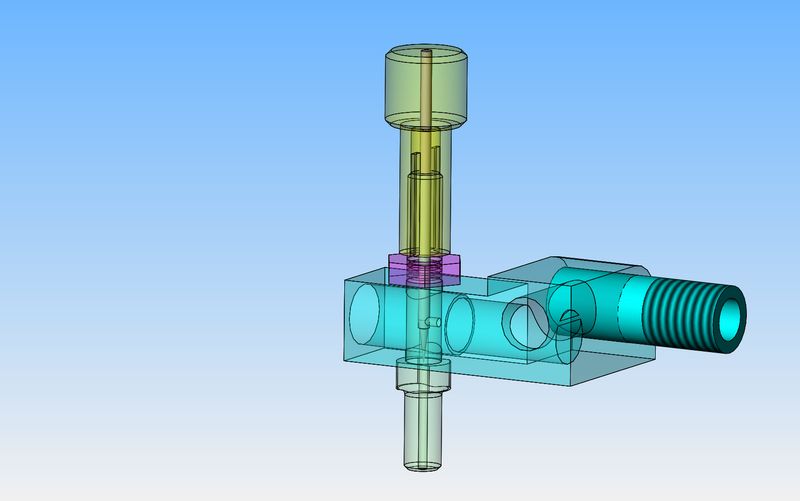
This is typical of the Philip Duclos carburetors, and you can see the one piece "fuel rail" which goes completely thru the carb body and is secured with a hex nut on one side. The small hole in the center lines up exactly with the center of the carburetor bore and faces "downstream" of the air flow. These carburetors function quite well.
lC7BGR.jpg

cor45Q.jpg
 
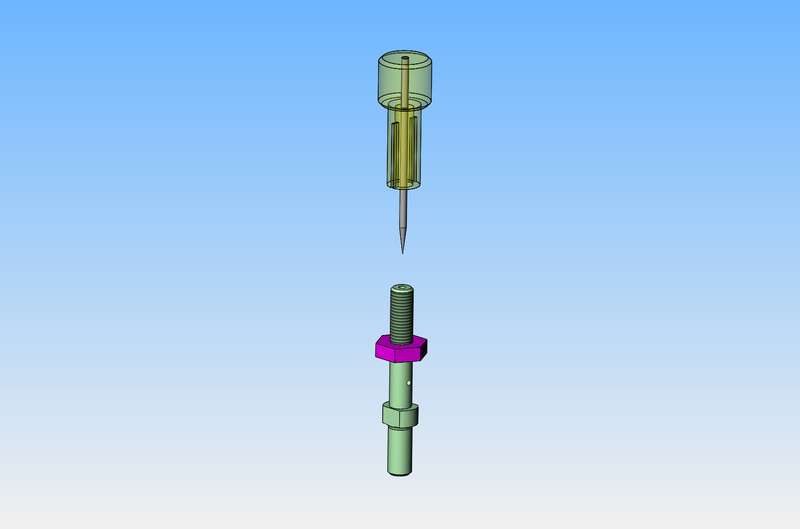
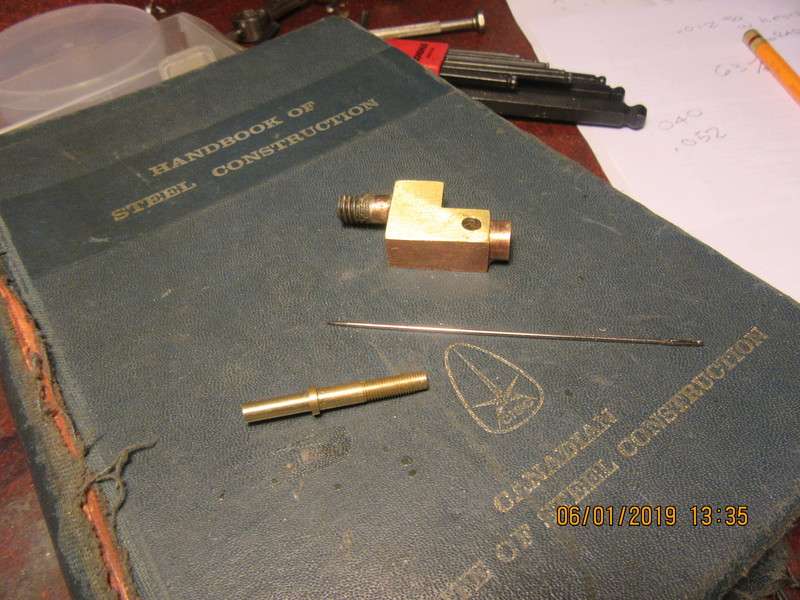
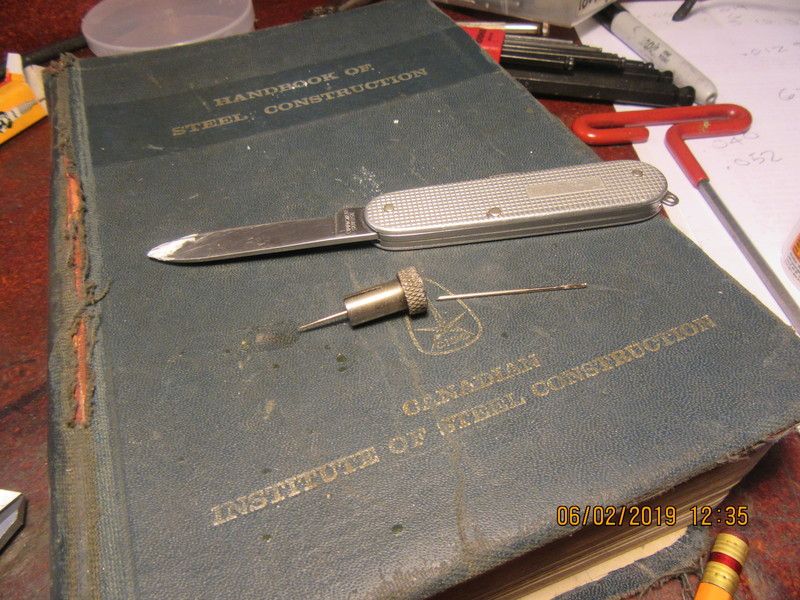
One of the truly great things about the Duclos design is that the needle is exactly that--a sewing needle. It fits thru a hole in the center of the "Top screw" and is slid down thru until it seats perfectly in the small hole in the fuel rail. The fuel rail has a threaded outside diameter and the "Top screw" is large enough to have a thread on the i.d. You assemble the fuel rail into the carburetor body, screw the "Top screw" down until it bottoms out against the carburetor body, then back it off two full turns, push the needle down until it is seated, then snip off any needle which sticks up past the Top Screw and silver solder the needle to the Top Screw at the top.---------The thread on the inside diameter of the Top screw and on the outside diameter of the fuel rail is a #10-40 thread.--a 10-32 thread would work here also, but doesn't give you the fine adjustment that a 10-40 thread does.
JUNtyL.jpg
 
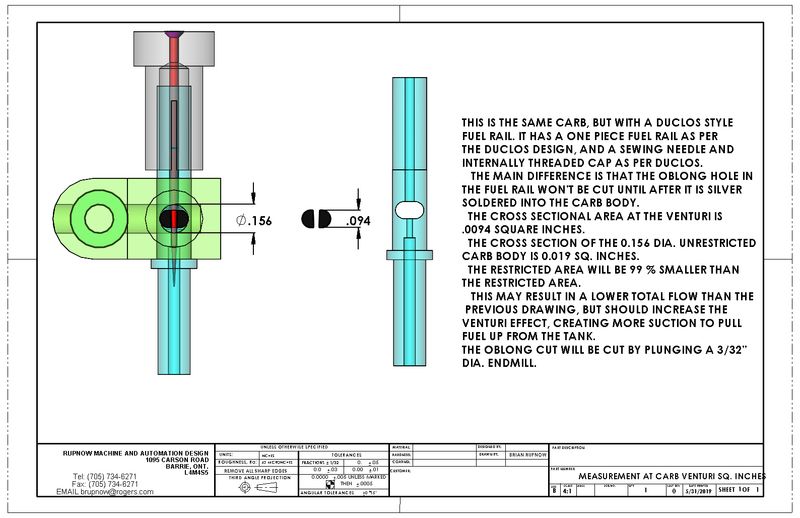
I do find that on Duclos style carburetors that they perform better if after assembly a bit of "seal all" is put around the hex nut and the fuel rail where it emerges from the carb body so the carb can't suck air thru the joint. Even a small air leak will affect the amount of venturi vacuum that the carburetor can create. Venturi is the effect that creates vacuum when an airway is suddenly reduced in size, as in "partially plugged" by the body of the fuel rail. It is this venturi effect that lets the carburetor suck fuel up from a tank which is lower than the carburetor.
 
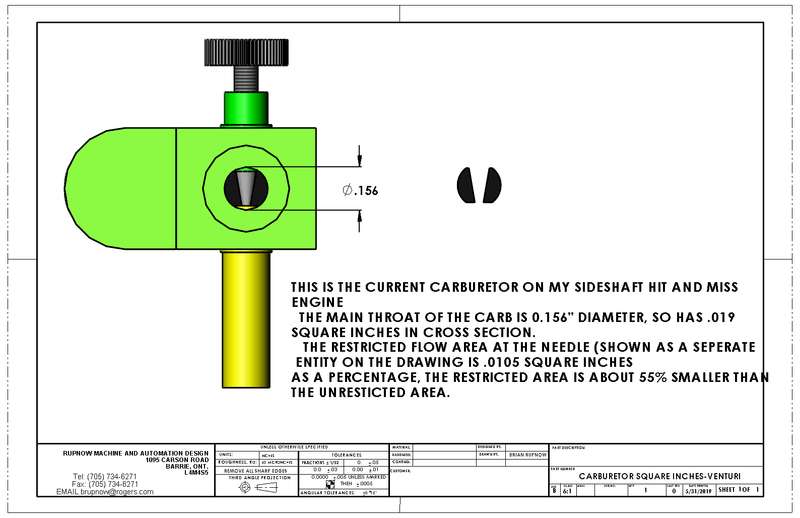
I may have to play with the size of the oblong hole mentioned in the drawing in order to get a total flow rate equal to that of the previous drawing, but I'm in "try this and see if it works" mode.
JjYL7G.jpg
 
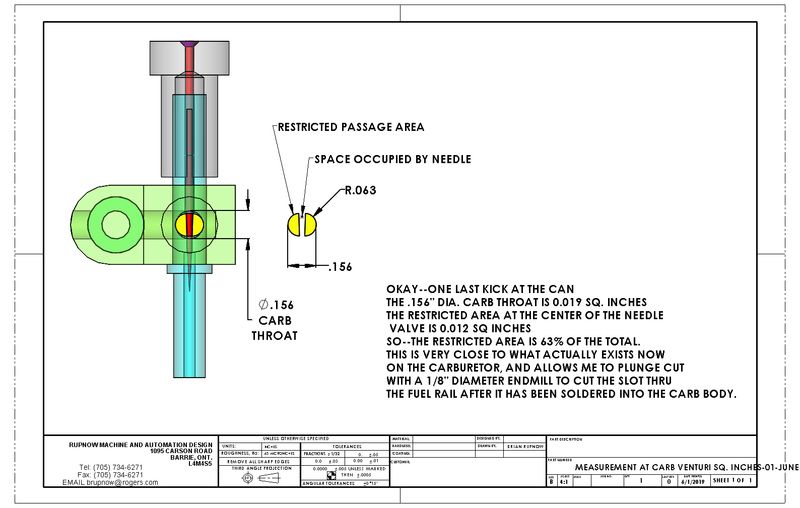
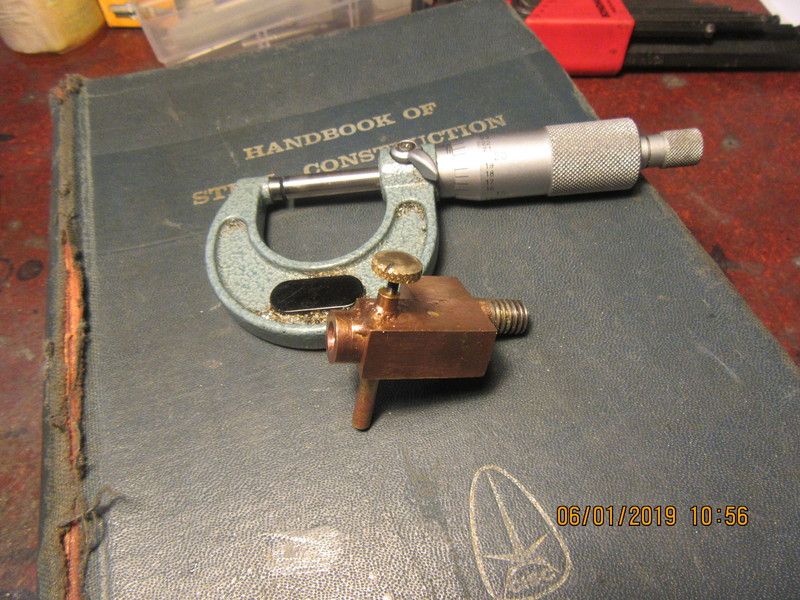
I keep redoing things until I'm happy with the results. This is (I think) the final rendition of the carb. The cross section of the carburetor at the center of the needle valve ends up very close to what is on the carb now, so the total flow thru rate thru the carb should remain the same.
--Is anybody looking at this stuff??
Gmt0CO.jpg
 
Watching with interest. Carbs have been the most problematic for me.
 
I am definitely watching. I am going through a similar exercise. I have several designs I have used and have been trying different configurations with varying success. So far a Duclos type design seems to be working best. Other designs work but the adjustment is just too touchy. My present engine is very low compression due to the design so I am having a problem getting a good mix. Either it does not run or it floods and fires too hard when it burns off the excess fuel.
 
So--Just before the dance begins--This is the carburetor which has the needle made from a #2-56 socket head capscrew with a point which is not really good. The point was ground "by eye" and is a bit wonkey.
m6hRjO.jpg
 
And here is the same carburetor with the fuel rail removed--sawing/grinding/drilling. the needle is put into my "jar of things to keep even if they don't work right."
4uWCBe.jpg
 
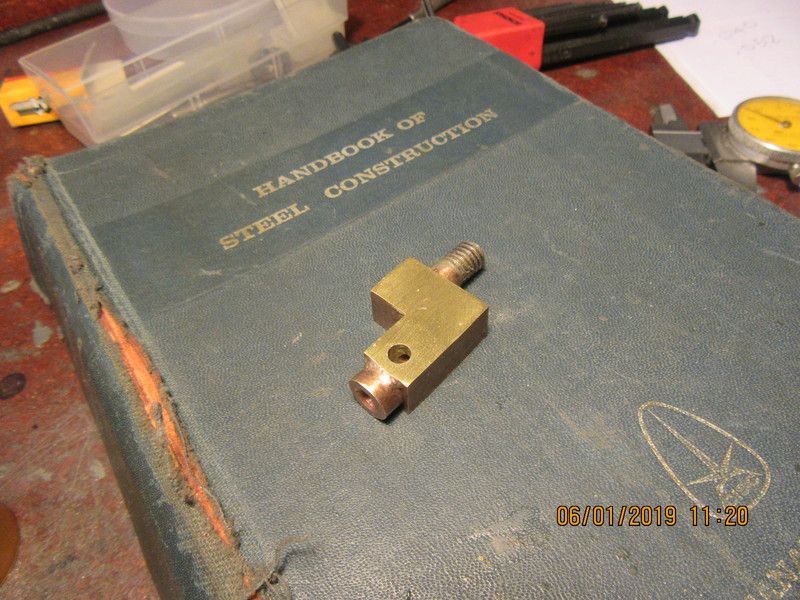
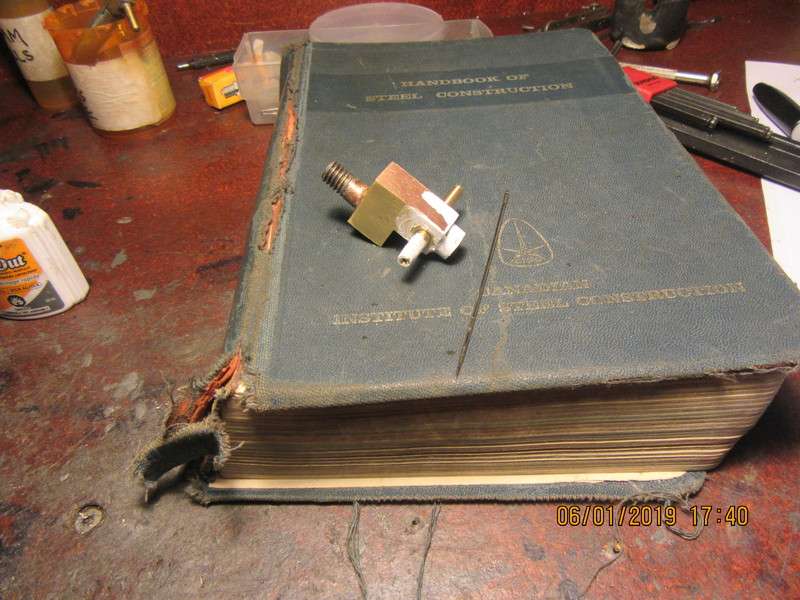
Gordon--To make a long story short, the needle valve got a bit to close to the sparkplug. I don't like being zapped, so I put an offset in the body of the carb.
 
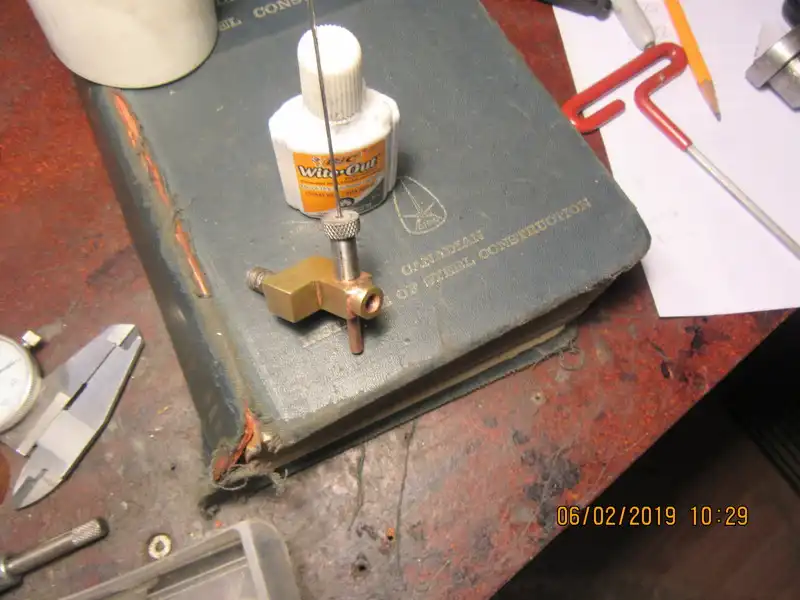
So--Here we are, ready for solder. The white stuff is typewriter "Wite-Out" correction fluid. It keeps solder from sticking where you don't want it to go. I'm making this up as I go along, and one thing has showed up---When I put the fuel rail into the carburetor body, a little light bulb went off, and I thought--Why not just solder this fuel rail on the side opposite from the threads. Use a little "seal all" on the threaded side and that way the fuel rail will be firmly anchored in place with no danger of solder getting into the threads. Of course, immediately after I thought that, I remembered that the hole milled thru the fuel rail will effectively cut the fuel rail into two pieces, and the unsoldered side will fall out. So---it's going to get silver soldered on both sides. If I get any solder migrating into the threads, I will run the die over the threads to clean them up. I have put a 0.020" x 45 degree chamfer in the hole on the carburetor body closest to the threaded side of the fuel rail, and if I have lived a good life most of the solder will be in that chamfer.
pUkLMN.jpg
 
That all went well, with very little drama. I got a little bit of silver solder in the threads, but only a very little bit and it cleaned up after running the 10-40 die over it a couple of times. I decided at the last minute to make the cap for the needle valve out of steel instead of brass. I always scrub the brass parts I've soldered with a small wire brush to get rid of that pink color that forms on the brass but I couldn't get it all. Maybe I'll mix up a new batch of citric acid and give it a half hour soak to see if that helps.
vZCk49.jpg
 
Hi Brian, Thank you for posting this thread, always learn from your posts. Regards, Earl
 
Almost there. Remember--these needle have some type of coating on them to keep them from rusting. Soak the needle in laquer thinners for about 5 minutes, then scrub it with some very fine sandpaper. If you don't do this, the solder won't stick to it.
aUTyOS.jpg
 
Almost there. Remember--these needle have some type of coating on them to keep them from rusting. Soak the needle in laquer thinners for about 5 minutes, then scrub it with some very fine sandpaper. If you don't do this, the solder won't stick to it.
aUTyOS.jpg
Are there any rules on carburetor design? Diameter of bore through the carburetor as a percentage of cylinder bore and percentage of restriction to obtain the venturi action? I have never found any rules and copying exiting designs makes for a lot of blind luck.
 

Latest posts

Back
Top