- Joined
- Mar 1, 2010
- Messages
- 866
- Reaction score
- 82
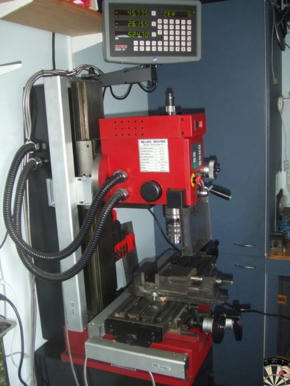
I’ve finally made the leap and retrofitted DRO’s to my X3. I went for Sino, off Ebay. The vendor (Xiao1207) is in Singapore but the parts came direct from the factory in China via Hong Kong. Once the order was placed communication was good and we had a bit of dialogue on which scales to select and the protective covers to be supplied.
They do various cover types and I went for the type D, which later turned out to be a good choice as they come with a separate back plate that is 10mm thick. The benefit being that the back plate can be fitted to your mill any way you like and then the scale just mounts to that. I went for the standard KA300 although the slim line KA500 are available.
The kit comes with a set of 4 pairs of different mounting plates and other hardware. A set of installation instructions are available so you can work out what you need before the order is dispatched.
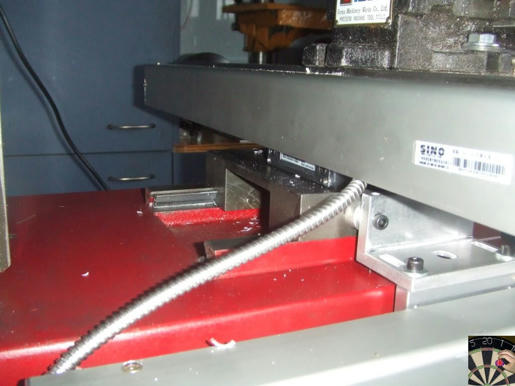
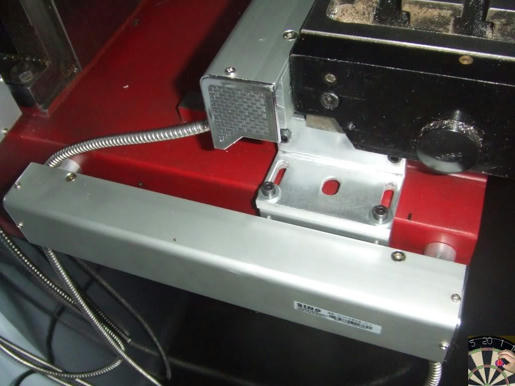
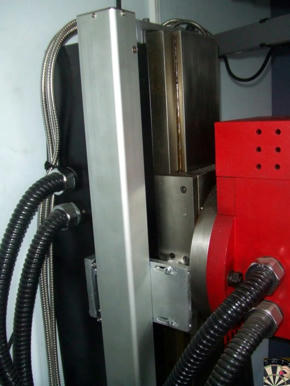
It’s up to you how you go about mounting the scales. There are many ways to skin a cat and I did my Y axis and then re-did it after I’d done the Z axis. In the end all I had to make was a bracket for the top of the column and a number of spacers out of 19mm dia ally. The rest of it just used what came with the kit apart from some longer 4mm and 5mm hex cap screws. You’ll need 4mm and 5mm taps for the mill mounting points.
Before
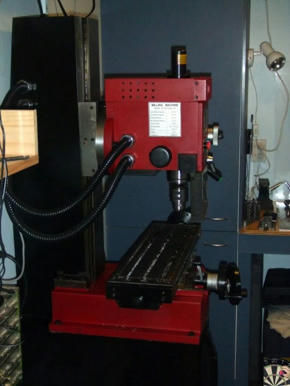
After
Sino display unit
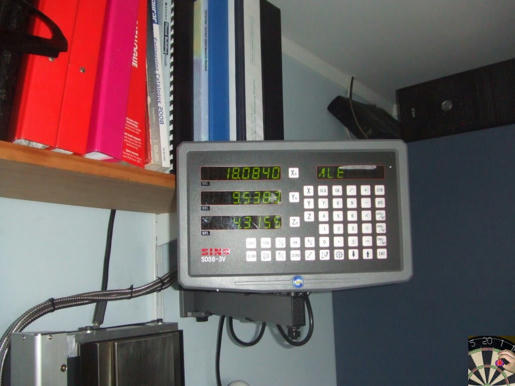
X Axis
Y Axis
Z Axis
The user manual is hopeless. I’m getting used to the Chinglish and working things out but there are some sections I have no idea what they are on about. Anybody got a local supplier who provides a better version please??
And from the installation instructions ;D
In all I'm very pleased with the the result and happy with my purchase
Pete
They do various cover types and I went for the type D, which later turned out to be a good choice as they come with a separate back plate that is 10mm thick. The benefit being that the back plate can be fitted to your mill any way you like and then the scale just mounts to that. I went for the standard KA300 although the slim line KA500 are available.
The kit comes with a set of 4 pairs of different mounting plates and other hardware. A set of installation instructions are available so you can work out what you need before the order is dispatched.
It’s up to you how you go about mounting the scales. There are many ways to skin a cat and I did my Y axis and then re-did it after I’d done the Z axis. In the end all I had to make was a bracket for the top of the column and a number of spacers out of 19mm dia ally. The rest of it just used what came with the kit apart from some longer 4mm and 5mm hex cap screws. You’ll need 4mm and 5mm taps for the mill mounting points.
Before

After

Sino display unit

X Axis

Y Axis

Z Axis

The user manual is hopeless. I’m getting used to the Chinglish and working things out but there are some sections I have no idea what they are on about. Anybody got a local supplier who provides a better version please??
And from the installation instructions ;D
As you can see from the pictures I left my cables as they were because trying to understand the instructions was "inconvenient"4.5 Rearrangement of Reading Head Cable
The cable of the reading head is arranged on the right in the factory. If it is inconvenient for use, the user may rearrange it in another direction in the following procedure:
(1) Take out four M2 “+” setscrew in the figure cover and two M3 “-” bolt on the right of the cover.
(2) M4 hexagram bolt into the adjust screw holt and please do this one by one for flab the cover board which has airproof bar at the top, when noticing the gap. Please pry the cover board along the top by the screwdriver.
(3) Loose two M3 ”-” bolt of the moor cable, remove the cable and end. Exchange the favor.
(4) Before covering the cover board, you must clean the old airproof bar and wipe the new one, if do not have the new one, you can use butter order to instead of that, but the effect is not so good, only in support.
(5) Take out of six M4 hexagram bolt, screw down the setscrew, fit on the cover board and the cover board bolt and adjust bolt.
Note: The tools usr in taking down in each step is partnership, avoiding the screw head sleeking.
In all I'm very pleased with the the result and happy with my purchase
Pete


