Valve seal

Home Model Engine Machinist Forum

Help Support Home Model Engine Machinist Forum:

This site may earn a commission from merchant affiliate links, including eBay, Amazon, and others.

Parksy

Well-Known Member
Project of the Month Winner
Joined
Dec 9, 2015
Messages
327
Reaction score
350
Gday all

I remember reading something on here a few weeks ago about running an engine can help a ever so slightly leaky valve to run in and seal. Is this true?
I have managed to achieve what I believe is a good seal on the engine I'm making, but because I've never done this before, I don't have any idea on what actually is acceptable or not.
After I lapped them, I filled the intake and exhaust ports with cutting oil and the valves didn't leak. I thought cutting oil would make an acceptable test because it wicks and flows very well.

Cheers for reading

Andy
 
Andy,
Cutting oil is probably too viscous. These model engines have much smaller combustion chambers than full-size engines, and they are more sensitive to smaller leaks. In my opinion the best way to check them is with air which has no viscosity. With the valves closed you can pressurize the combustion chamber or else pull a vacuum behind each valve. I check all my valves this way. If you feel this is too much trouble (it can be), you might try alcohol with a little dye added to it to make the leaking liquid more visible. I'd consider an alcohol leak test a necessary but not sufficient test of an acceptable valve seal. It's also been my experience that trying to determine if a valve seal is good by blowing into it using your lungs is pretty meaningless as it will only detect gross problems that are probably very visible to your eye. - Terry
 
Last edited:
A few members, including myself, run a new engine with a power drill or more substantial electric motor and pulley set up, and let the new engine fire for a while, this seems to settle the valves in better. After a short time, the new engine is able to run by itself with much better compression.

Paul.
 
Andy,
It is difficult to get valves that don't leak a little. My preference is to use a vacuum pump and gauge to check the leak down rate to judge my valve sealing quality. I use one of the inexpensive brake bleeding pumps found at Harbor Freight. If you can pump down the pressure to 25" of Hg you have a pretty good seal, but it is the rate at which the pressure increases again to atmospheric pressure that tells you just how good a seal you have. It is possible to get a valve seal good enough to hold 25" of Hg for a relatively long time. I use SAE 120 gear oil to temporarily seal the valve stems so as to isolate valve seat sealing from stem sealing performance. They are both important.
Jeff
 
On all of my engines, I use steel valves and brass valve seats. I find that although it is almost impossible to get perfectly sealing valves by machining and lapping alone, if you can get the engine to fire at all the force created by combustion in the cylinder will force the valves into the seats so hard that it actually "cold forms" the seats for a near perfect seal. I use Viton rings on my pistons, and they seal 100% right from the beginning, so I know that the sealing of the rings is not improving. However, the compression of any of my engines increase dramatically after the engine has ran for 10 or 12 minutes. On many of my new builds I hook up the ignition and the fuel to the carburetor, and then drive the engine with an electric motor at about 600 rpm, and do my absolute best to see that the engine is actually firing as it runs. This can be clearly heard as the engine is being driven. Keep in mind, if the valve to seal fit is too far out of tolerance, no amount of running and firing is going to fix it. However, if it is very close to being a perfect seal as machined, the engine firing is going to make it even better.---Brian
 
Thank you all for your comments. I've machined the valves out of 316 stainless and made the valve cages out of LG2 bronze.

I ran the camshaft with a Dremel to run the valve train in and after 5 minutes of doing this, it has made a large difference to the valve sealing. When turning the crank, there is a bigger "bounce". Out of the 16 valves, I found one slightly leaking. But it's improving. I'll somehow set the Dremel up so I can run it for an hour without having to hold it and see what happens. Exciting times.
http://youtu.be/lT4v_F-eoXg
Apologies for the bad quality. But it should give the idea on what I did.
 
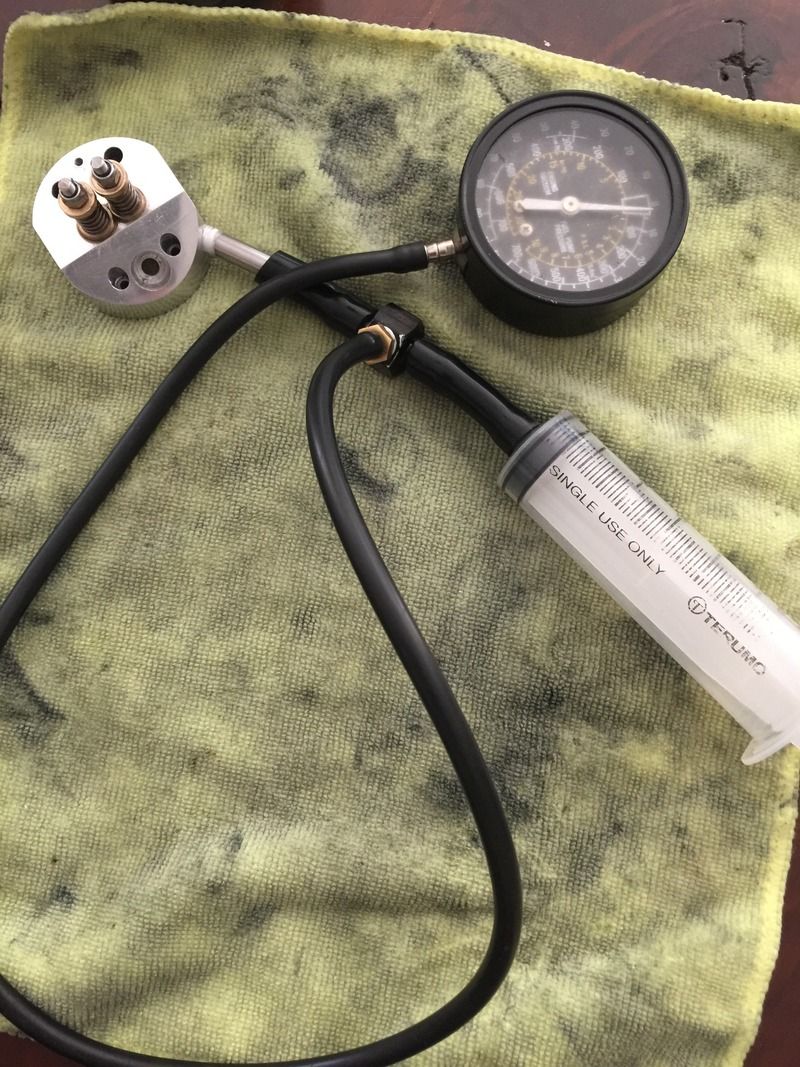
Ok well I decided to stop guessing and do things properly by using a gauge and syringe to test the valves. I just don't know if they should hold vacuum or leak slightly over time. At the moment, the first valve I tested will reach about 20 in-hg and after about 30 seconds, drops to about 4 in-hg and sits there.

Can anyone provide any guidance on this. Thank you
 
Alright, gave it another lap and a clean(apparently cleaning makes a huge difference) and this has improved things. 20in-hg and after 30 seconds dropped to 15in-hg.
 
Thanks Steve. This makes me very pleased.

I did find one valve that didn't leak at all. Im aiming for a gradual loss over 30 seconds, I think I will be happy with this.
 
Can you post a sketch of how you're pulling the vacuum? You don't want to make the mistake of pulling it (if using valve cages) from the rear of the cage with the valve in place. If you're pulling the vacuum from an intake or exhaust port in the head with the valve cage (or seat) installed then your numbers are great. If you're pulling the vacuum with the hose pushed onto the rear of the cage with your actual valve installed, then your numbers are questionable since you are also checking the leak between the valve stem and the valve guide. I check all my cages this way but I use a test valve with a groove milled along the stem through which the vacuum can be pulled. My experience has been that the seat is the difficult part to make and not the valve, and even when I lap I don't typically use the valve itself, but a dedicated lap which is nothing more than a spare valve with a handle left on it. I know it may sound counterintuitive, but it's worked for me on the 90 valves on four engines I've done so far. - Terry
 
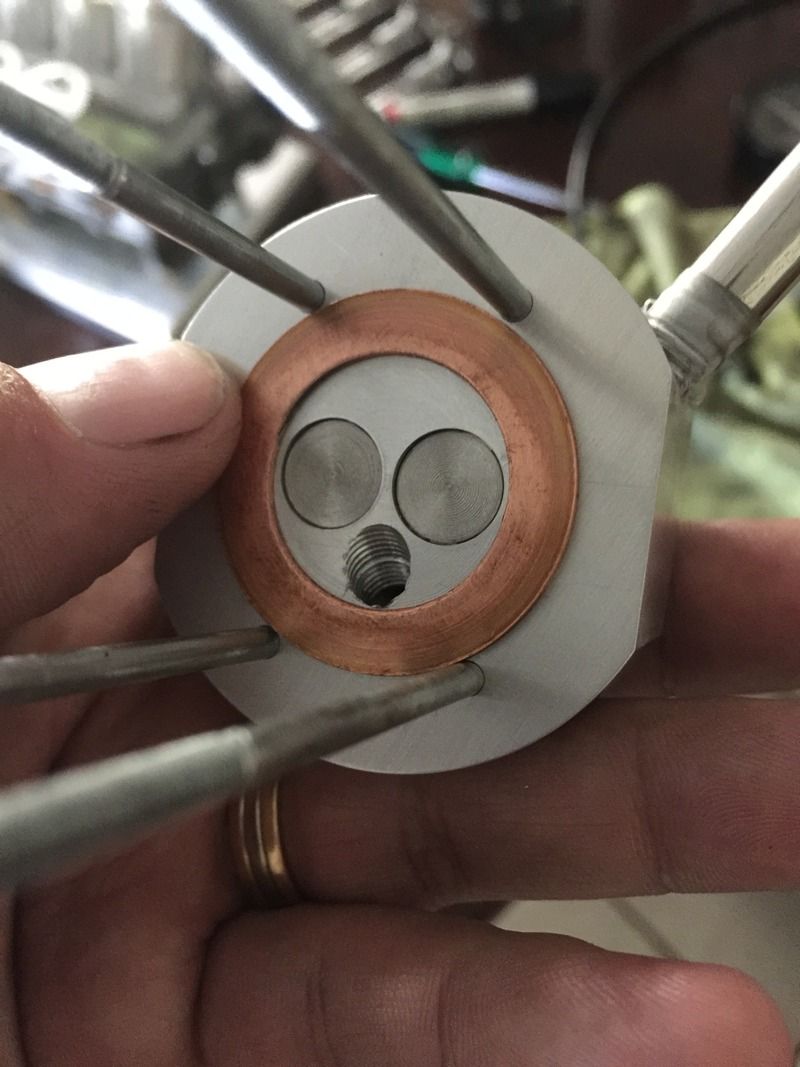
Thanks for your replies. Here's a pic of the setup. I've tested it directly from the intake/exhaust ports from the head with valve springs installed. Does having the springs installed give false readings, or is all ok?
 
That's the best way 'cause the valve is in it's natural environment. The down side
is that you are also checking the valve stems for leakage. Unless I mis-understand
your port configuration.

Lookin' nice!!

Pete
 
You should be good to go. It looks like you are testing both the valve seal and the leak past the valve stem in parallel which means that your numbers for the seat are even better. I typically don't vacuum test with the springs in place when I test the way you have shown. I just put the valve in place, hold it against the seat with my finger, and I cap the the rear of the cage with a silicone cap to seal that leak. The final test I did on my eighteen cylinder heads with the sparkplug and springs installed was to build a fixture for the head so I could pressurize it and watch the leakdown. I found problems with my plugs leaking but once that was solved the leakdown times were compatible with the vacuum checks.
Nice job. By doing this test ahead of tme you'll have one less thing to worry about during start-up. - Terry
 
Thank you guys, I appreciate your comments. And now feeling positive about it. Valve sealing was my main concern and I'm impressed with myself that the stem doesn't seem to create any loss of vacuum. I did purposely make the stem and cage quite long, my belief being that is will last longer and seal better.

Happy days.
 
I bought a Mityvac with integral gauge & the kit included some useful end fitting do-dads. But I like your hypo cylinder idea with a gauge. I use those for fuel filling bladder tanks in RC. Never thought to re-purpose it that way.

Anyway, glad you got some good valve seal readings. Good luck on the home stretch.
 
Cheers Petertha.

I have one final question(I hope). Seeing as I've pulled it all apart(which takes quite a while to do actually), but the area underneath the head (combustion chamber??) is flat on my heads. There is no recess or dome shape to it. Will this create ignition issues?

While its apart, it would be simple to remove some material to open up the glow end of the plug. But if it's not really necessary then I would rather leave it as I need as much compression as possible.

Cheers
 
Mostly comparative speculation on my part. But judging by commercial RC glow engines & other home builds, I've seen other examples of 'flattish' combustion chambers & they run just fine. As long as nothing goes clunk through rotation (meaning valves) :) Compression ratio, plug type (heat), nitro% & oil type/content are the knobs & levers of glow engines.

3-4-2016 0001.jpg


3-4-2016 0000.jpg
 
I kind of missed how your cylinder lip was mated to the head. But most glow engines have either the OD of the liner (lip) mate to a matching recess within head. Or the ID of liner mates to a boss protrusion of the head. This is partly for gas seal & partly for heat dissipation. If either of those don't work effectively, it can lead to running issues at some point. Where this can show itself is the engine runs for a bit and then goes sour (thermal expansion is changing the fits).
 
Back
Top