bezalel2000
Well-Known Member
- Joined
- May 8, 2011
- Messages
- 316
- Reaction score
- 7
If you are reading this you are probably interested in making some foundry patterns - out of wood.
Pine is a good inexpensive choice but has some interesting characteristics when it comes to turning.
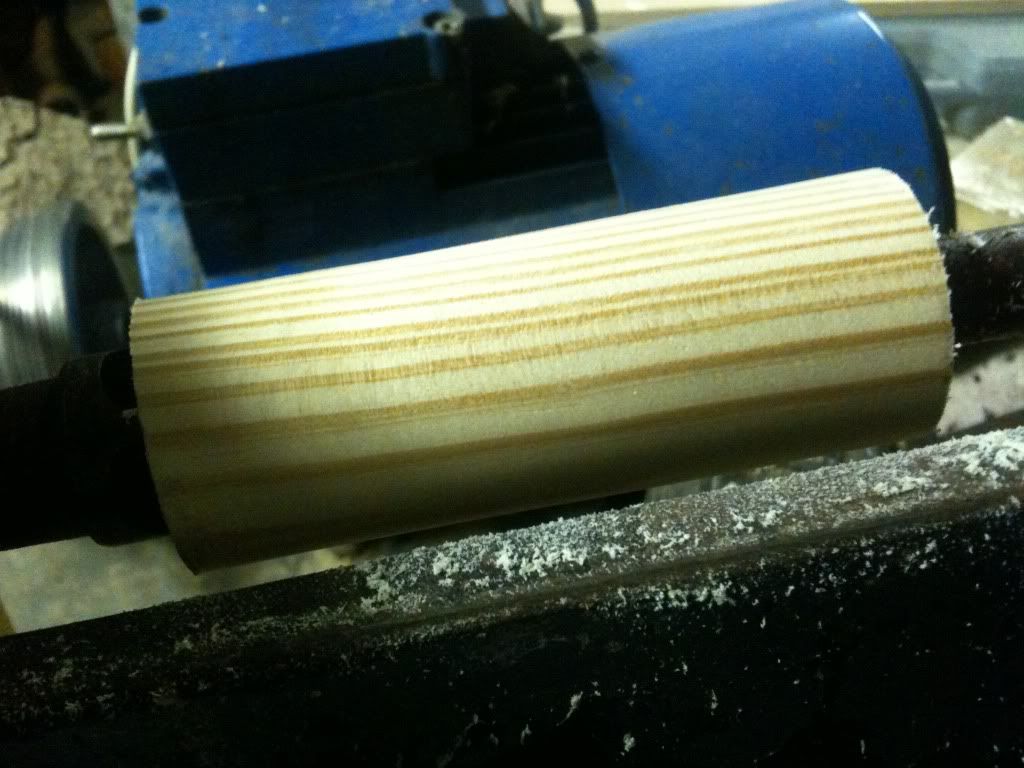
Seasoned Pine (read : old stuff not still damp after being cut down environmentally friendly harvested ) is easy to work and when turning it leaves nice glossy surface. After which the use of sandpaper is detrimental the the finish. Even 2000 grit will dull the finish.
Many if not most metal machinists who have turned pine in a lathe, based on there experience, are likely to claim the above to be somewhat of a fairytale.
Since many patterns call for cylindrical sections it is worth knowing how to cut the material effectively in order to get the fairytale results described above.

HOW TO:
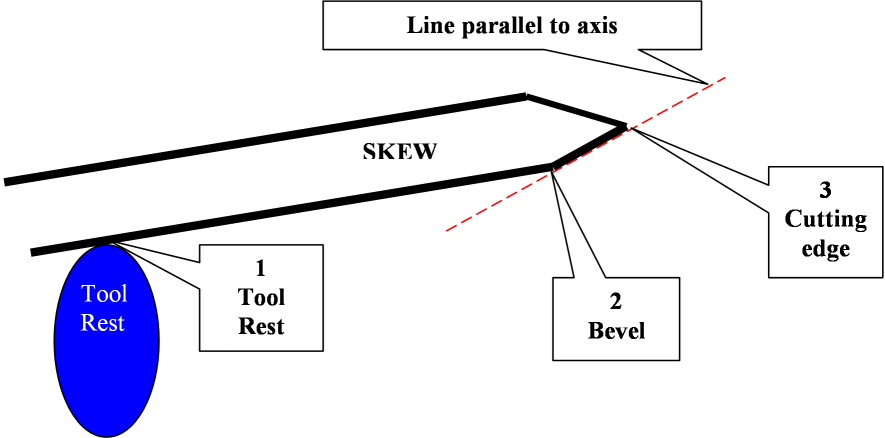
a. use a honed woodturners skew 1,
When it comes to a wood skew there is no such thing as too sharp, but if the skew won't dry shave the hair off your forearm it is probably ready for re-honing,
My own Skew is one of those from a $10 set of Cinese turning chisels and has served it's purpose well for many years. An expensive HSS skew is the ideal tool for the turner that doesn't know how to use it. Turners from all the centuries before HSS was invented a testiment to that. When a skew is used to slice the wood fibers off the job, very little heat is generated. Unlike that which occurs when scraping the wood from the job. It is this heat from the friction that softens the cutting edge and dulls it. Most of the friction heat generated in a skew should occur back from the cutting edge where the tool is thick enough to dissipate the heat as we will see later.
b. use a freehand tool rest,
c. Use 3 points of contact (forget about cutting at center height you are now working with wood)
1) 1st contact point. Rest the shaft of the skew on the tool rest with the handle close to the tool rest.
2) 2nd contact point. While the skew shaft pivots on the tool rest, raise the handle of the skew until the shaft connects with the job. Having established two contact point for the skew shaft, draw the skew back towards you until the start of the bevel (the heal of the bevel) just touches the circumference of the job. This should be somewhere between top dead center of the job and centre height. The cutting edge should still be just out of contact with the job.
3) 3rd contact point. While maintaining the first two contact points, slowly draw back the skew a little further and at the same time, rotate the skew to lower the cutting edge into contact with the job.
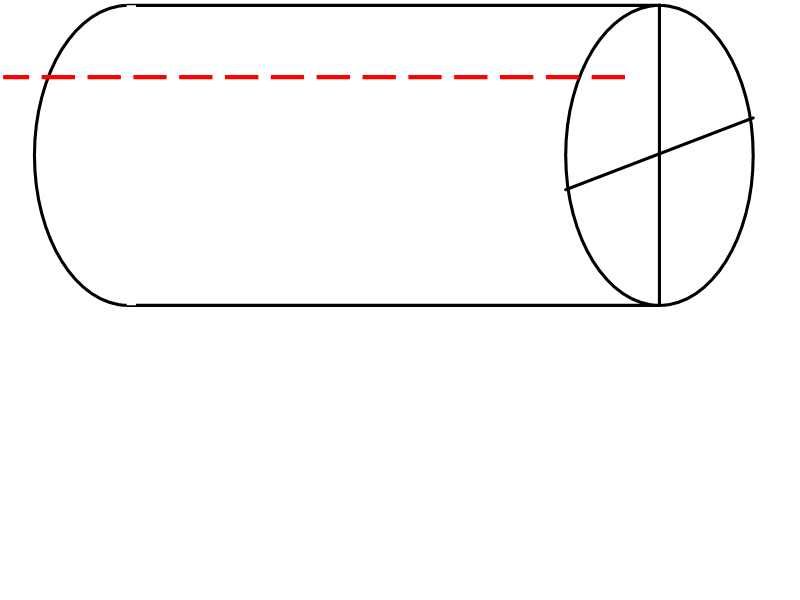
The RED line is where the Skew bevel should be travelling along the job as it cuts


d. Place the tool rest close to the Job and a little above centre height and parallel to the axis ( setting up the 3 points of cantact is best initially practiced with the lathe switched off until the the technique is well controlled and second nature a skew point Dig In does nasty things to the confidence of the novice as well as the workshop wall cladding) :-[
e. Perform the cut
Slide the skew along the job and the tool rest at the same rate. If the job is not rotating this action should result in a thin shaving taken parallel to the axis.
Practice getting a consistent 2mm wide shaving along the axis of the job. When you are able to do this repeatably Turn on the lathe a couple of hundred RPM is plenty. When the job rotates the result of the same practiced movement is a shaving being removed from the circumference of the job in one continuous helix.
The cutting edge is slicing the wood fibers and the heal of the bevel is polishing the wood as you go.
The depth of cut can be varied using the heal of the bevel as pivot point to control anything from quite deep to as little as a few thou.
f. Safety
Three safety points to note:
1. the point of the skew is not to get anywhere near the circumference of the job.
2. Always maintain 3 point of contact.
3. establish the 3 points of contact in correct sequence.
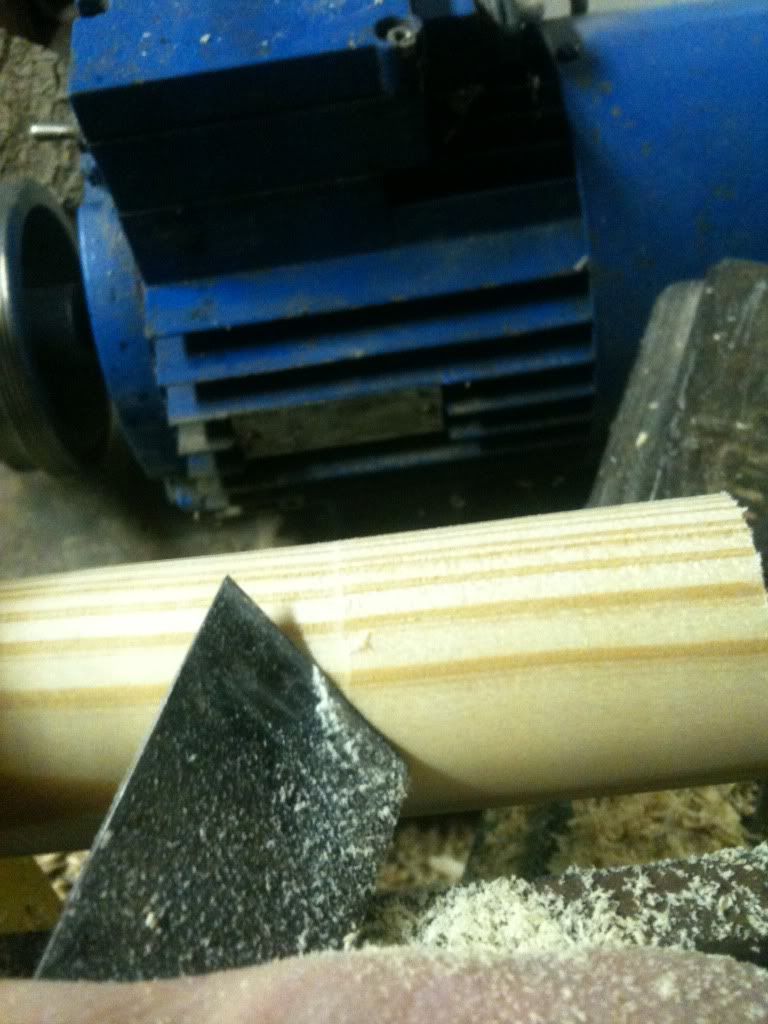
This image below, shows a 1" diameter cylinder, receiving about a 10thou finishing cut with the skew.
The pale coloured section of wood on the left of the skew is the reflection of the overhead workshop light

I hope this will be helpfull when you come to building your own patterns.
Pine is a good inexpensive choice but has some interesting characteristics when it comes to turning.
Seasoned Pine (read : old stuff not still damp after being cut down environmentally friendly harvested ) is easy to work and when turning it leaves nice glossy surface. After which the use of sandpaper is detrimental the the finish. Even 2000 grit will dull the finish.
Many if not most metal machinists who have turned pine in a lathe, based on there experience, are likely to claim the above to be somewhat of a fairytale.
Since many patterns call for cylindrical sections it is worth knowing how to cut the material effectively in order to get the fairytale results described above.

HOW TO:
a. use a honed woodturners skew 1,
When it comes to a wood skew there is no such thing as too sharp, but if the skew won't dry shave the hair off your forearm it is probably ready for re-honing,
My own Skew is one of those from a $10 set of Cinese turning chisels and has served it's purpose well for many years. An expensive HSS skew is the ideal tool for the turner that doesn't know how to use it. Turners from all the centuries before HSS was invented a testiment to that. When a skew is used to slice the wood fibers off the job, very little heat is generated. Unlike that which occurs when scraping the wood from the job. It is this heat from the friction that softens the cutting edge and dulls it. Most of the friction heat generated in a skew should occur back from the cutting edge where the tool is thick enough to dissipate the heat as we will see later.
b. use a freehand tool rest,
c. Use 3 points of contact (forget about cutting at center height you are now working with wood)
1) 1st contact point. Rest the shaft of the skew on the tool rest with the handle close to the tool rest.
2) 2nd contact point. While the skew shaft pivots on the tool rest, raise the handle of the skew until the shaft connects with the job. Having established two contact point for the skew shaft, draw the skew back towards you until the start of the bevel (the heal of the bevel) just touches the circumference of the job. This should be somewhere between top dead center of the job and centre height. The cutting edge should still be just out of contact with the job.
3) 3rd contact point. While maintaining the first two contact points, slowly draw back the skew a little further and at the same time, rotate the skew to lower the cutting edge into contact with the job.
The RED line is where the Skew bevel should be travelling along the job as it cuts


d. Place the tool rest close to the Job and a little above centre height and parallel to the axis ( setting up the 3 points of cantact is best initially practiced with the lathe switched off until the the technique is well controlled and second nature a skew point Dig In does nasty things to the confidence of the novice as well as the workshop wall cladding) :-[
e. Perform the cut
Slide the skew along the job and the tool rest at the same rate. If the job is not rotating this action should result in a thin shaving taken parallel to the axis.
Practice getting a consistent 2mm wide shaving along the axis of the job. When you are able to do this repeatably Turn on the lathe a couple of hundred RPM is plenty. When the job rotates the result of the same practiced movement is a shaving being removed from the circumference of the job in one continuous helix.
The cutting edge is slicing the wood fibers and the heal of the bevel is polishing the wood as you go.
The depth of cut can be varied using the heal of the bevel as pivot point to control anything from quite deep to as little as a few thou.
f. Safety
Three safety points to note:
1. the point of the skew is not to get anywhere near the circumference of the job.
2. Always maintain 3 point of contact.
3. establish the 3 points of contact in correct sequence.
This image below, shows a 1" diameter cylinder, receiving about a 10thou finishing cut with the skew.
The pale coloured section of wood on the left of the skew is the reflection of the overhead workshop light

I hope this will be helpfull when you come to building your own patterns.


