T head engine by Brian

Home Model Engine Machinist Forum

Help Support Home Model Engine Machinist Forum:

This site may earn a commission from merchant affiliate links, including eBay, Amazon, and others.
Brian:
You should consider using the Sprague clutch type starter. Or at least a curved slot in the hub.
It is likely that the engine needs / wants to spin faster than the starter to run. Your direct connection starter will be holding it back. The clutch will allow it to speed ahead of the starter once it starts. Or with a curved slot it will kick the starter out when it runs.
All of my engines run much faster than my starter drill and will not respond to being forced to a specific rpm.
Another alternative is a friction cone type starter like model airplanes use. Simple to make.
P.S. a faster motor direct connected will also not help for the reverse reasons (forcing the engine to run faster than it wants).
 
The valve timing was initially set using measurements from the top of the cylinder down to the top of the piston, taken from my 3D model when the crankshaft was positioned at the correct number of degrees before top or bottom dead center. I will certainly check the valve timing again with a degree wheel just to be absolutely sure of it.
 
Okay Kiddies---It's showtime. Yesterday I had worked my way right into a snit trying to get this engine to run. I was almost at the point of making a new piston with a viton ring to get more compression. I decided that before changing anything, I would bring the engine in from my big garage and use a degree wheel to set the valve timing exactly "on spec" and to reset the ignition timing to about 12 degrees before top dead center.--I discovered that the grub screws in the gear which drives the exhaust valve had backed off and the exhaust valve timing was way out of whack. So, in the end, I really didn't change anything. The engine runs very well, and after playing with it a bit as "final tuning" I will reinstall the gear covers and clean everything up. If you would like to build this engine, I sell a complete plan set of engineering drawings, including detail drawings and assembly drawings for $25 Canadian funds, paid to Paypal to [email protected] Thank you to everybody who followed the build, and thank you for your posts and the information you have given me.---Brian Rupnow
 
Just like every one I have built. Right down to the end and it will not run until you discover one minor adjustment that you missed and then everything is good. Congratulations on a job well done.
 
I decided that before changing anything, I would bring the engine in from my big garage and use a degree wheel to set the valve timing exactly "on spec" and to reset the ignition timing to about 12 degrees before top dead center.--I discovered that the grub screws in the gear which drives the exhaust valve had backed off and the exhaust valve timing was way out of whack. So, in the end, I really didn't change anything.

Translation: I thought I was wrong but that was a mistake.

Congratulations, Brian. Good to see it running.
 
If I'm bored next week, I may make a cooling fan for it. This won't be anything new, it will be very similar to the cooling fan I made for my vertical engine. These fans put out a lot more wind than you would think. When the engine is running at 1000 rpm, the fan is turning at about 5600 rpm.
d1N1Xh.jpg
 
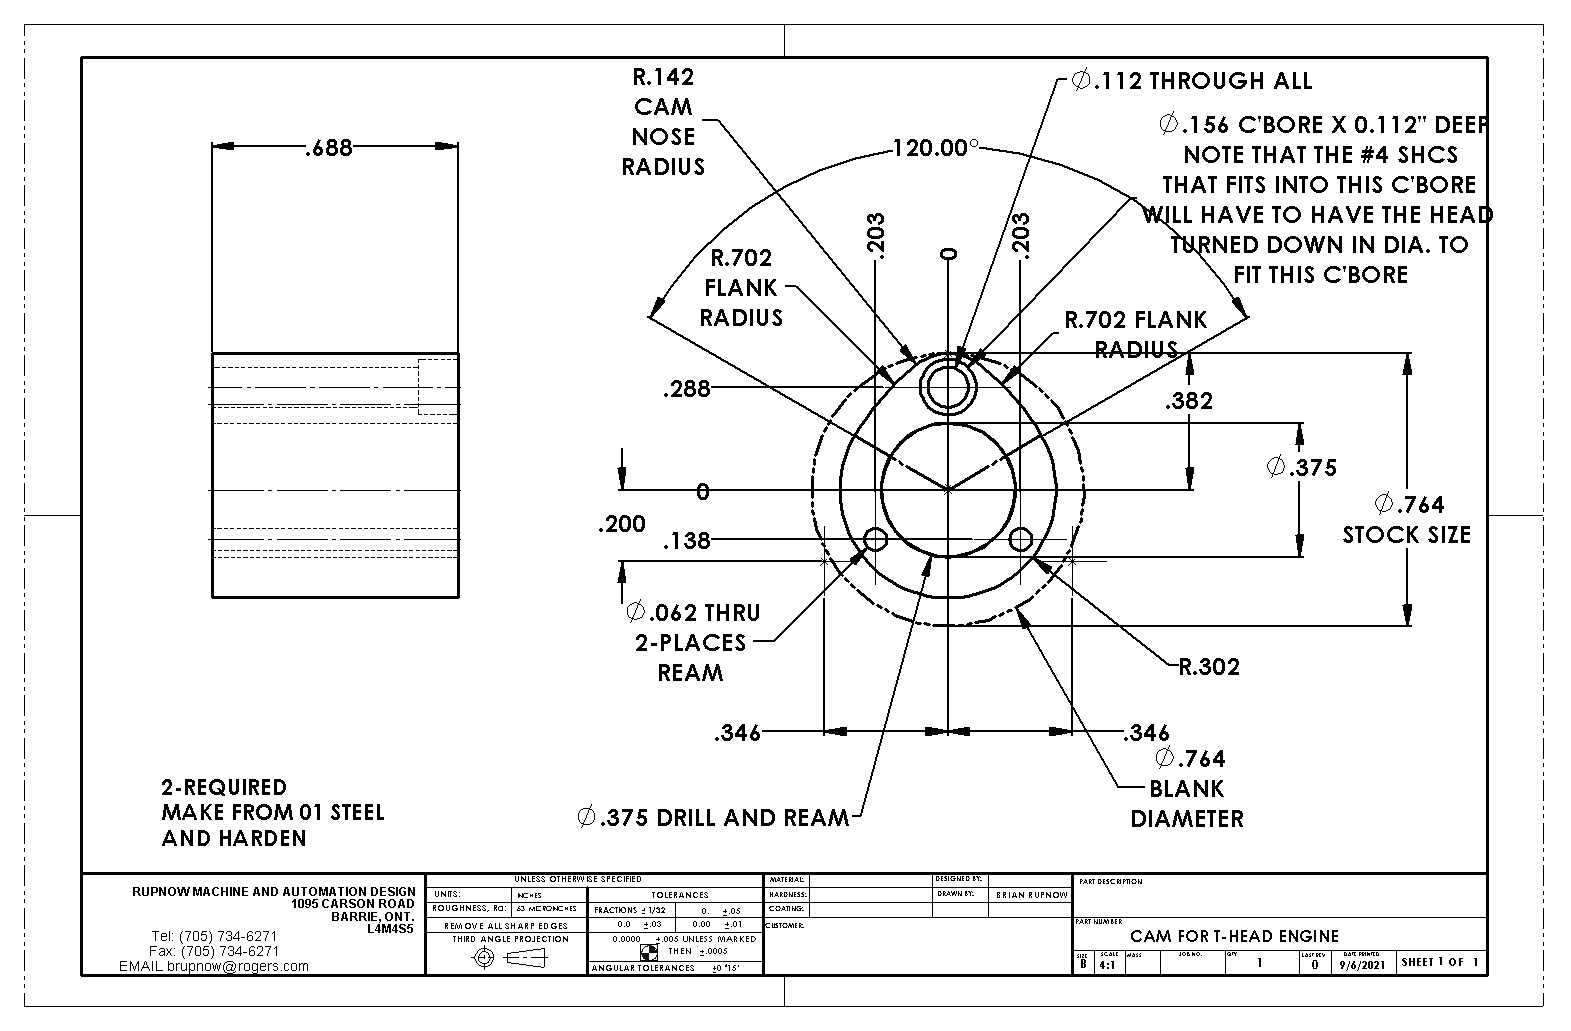
Thank you guys. Here is the true story of the cam and valve timing that I use for all of my gasoline engines. This cam is longer than the most cams are, but the profile is exactly the same. I use the same profile for both intake and exhaust valves. I use this profile for flathead, T-head, overhead valve and overhead cam engines. It works fine for all of them. You can see on the drawing that only 120 degrees of this cam has any effect on the lifter or pushrod. Since there is a 2:1 ratio between the camshaft and crankshaft, that means that this cam actually has 240 degrees of influence on the engine. I set my exhaust valve to begin opening 40 degrees before the piston reaches bottom dead center on the power stroke. Due to the cam profile, the exhaust valve will begin closing 20 degrees after top dead center on the intake stroke. The intake valve begins to open 15 degrees before top dead center on the exhaust stroke, remains open throughout the entire intake stroke, and closes 45 degrees after bottom dead center on the compression stroke. The ignition timing is set to spark 12 degrees before top dead center on the power stroke.
jIrfhJ.jpg
 
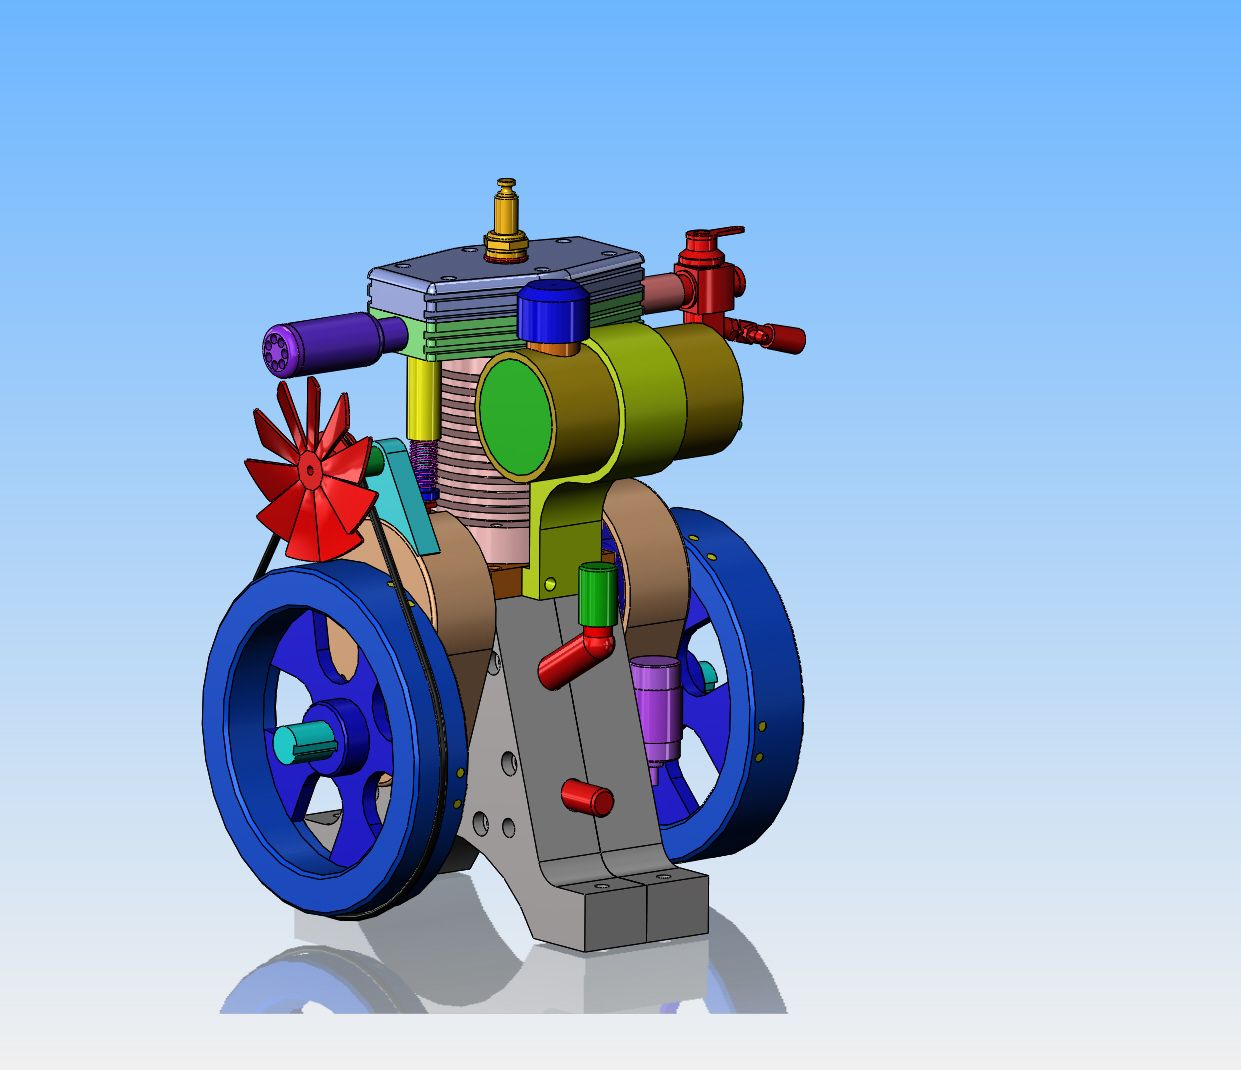
Tomorrow I am going to try something new. In the attached model, you can see that there is a blue fan shaft support plate setting on top of an existing gear guard. There is no good way to bolt this onto the gear guard. I have modelled a completely new gear guard which has the fan shaft support integrated into it, but I don't have material to make it that way. Tomorrow I am going to buy some "alumiweld" brazing rod and attempt to weld that blue piece to the existing gear guard. I can buy two rods for $10 at Canadian Tire. If I fail, I'm only out $10. It would probably take about $15 worth of material to make a new one piece gear guard combined with fan shaft support. I've been wanting to try this method of welding aluminum, but haven't had any real reason to until now. I will let you know what happens.---Brian
d1N1Xh.jpg
 
Brian,

I gotta like this one. It runs nicely and I'm sure it will sound better when the gear covers are back. Congratulations on mastering the cast iron rings: Your skill set just continues to improve and your engines incorporate more interesting features as you go.

I'm always watching your projects of all types.

Thank You for posting.

--ShopShoe
 
You can see on the drawing that only 120 degrees of this cam has any effect on the lifter or pushrod. Since there is a 2:1 ratio between the camshaft and crankshaft, that means that this cam actually has 240 degrees of influence on the engine.

One key bit that I find helpful to add to that last statement: 240 degrees of influence throughout all four cycles, i.e., across 720° of crank revolution. I say this only because I have to do a lot of thinking and re-thinking and thinking yet again to keep all of this straight. A particular place where this becomes especially confusing for me is when plans call for something like 40° BTDC for setting a cam - is that 40° on the crankshaft, or on the camshaft? And if it is 40° on one, what is it on the other? Half the time I multiply the wrong way and wind up with a mess ... :)

Tomorrow I am going to buy some "alumiweld" brazing rod and attempt to weld that blue piece to the existing gear guard. I can buy two rods for $10 at Canadian Tire. If I fail, I'm only out $10. It would probably take about $15 worth of material to make a new one piece gear guard combined with fan shaft support. I've been wanting to try this method of welding aluminum ...

I seem to recall that you got a TIG welder a year or so ago. Does it have AC, or DC only? If AC ... might be the perfect time to work on TIG welding aluminum. Or not - I have to confess that I upgraded to an AC/DC TIG welder a couple of years ago so that I could add aluminum to my repertoire, but thus far the little bit of experimenting I have done has mostly shown me how far I have yet to go!
 
Okay Kiddies---It's showtime. Yesterday I had worked my way right into a snit trying to get this engine to run. I was almost at the point of making a new piston with a viton ring to get more compression. I decided that before changing anything, I would bring the engine in from my big garage and use a degree wheel to set the valve timing exactly "on spec" and to reset the ignition timing to about 12 degrees before top dead center.--I discovered that the grub screws in the gear which drives the exhaust valve had backed off and the exhaust valve timing was way out of whack. So, in the end, I really didn't change anything. The engine runs very well, and after playing with it a bit as "final tuning" I will reinstall the gear covers and clean everything up. If you would like to build this engine, I sell a complete plan set of engineering drawings, including detail drawings and assembly drawings for $25 Canadian funds, paid to Paypal to [email protected] Thank you to everybody who followed the build, and thank you for your posts and the information you have given me.---Brian Rupnow

Congratulations on another successful engine Brian. A great runner!

John W
 
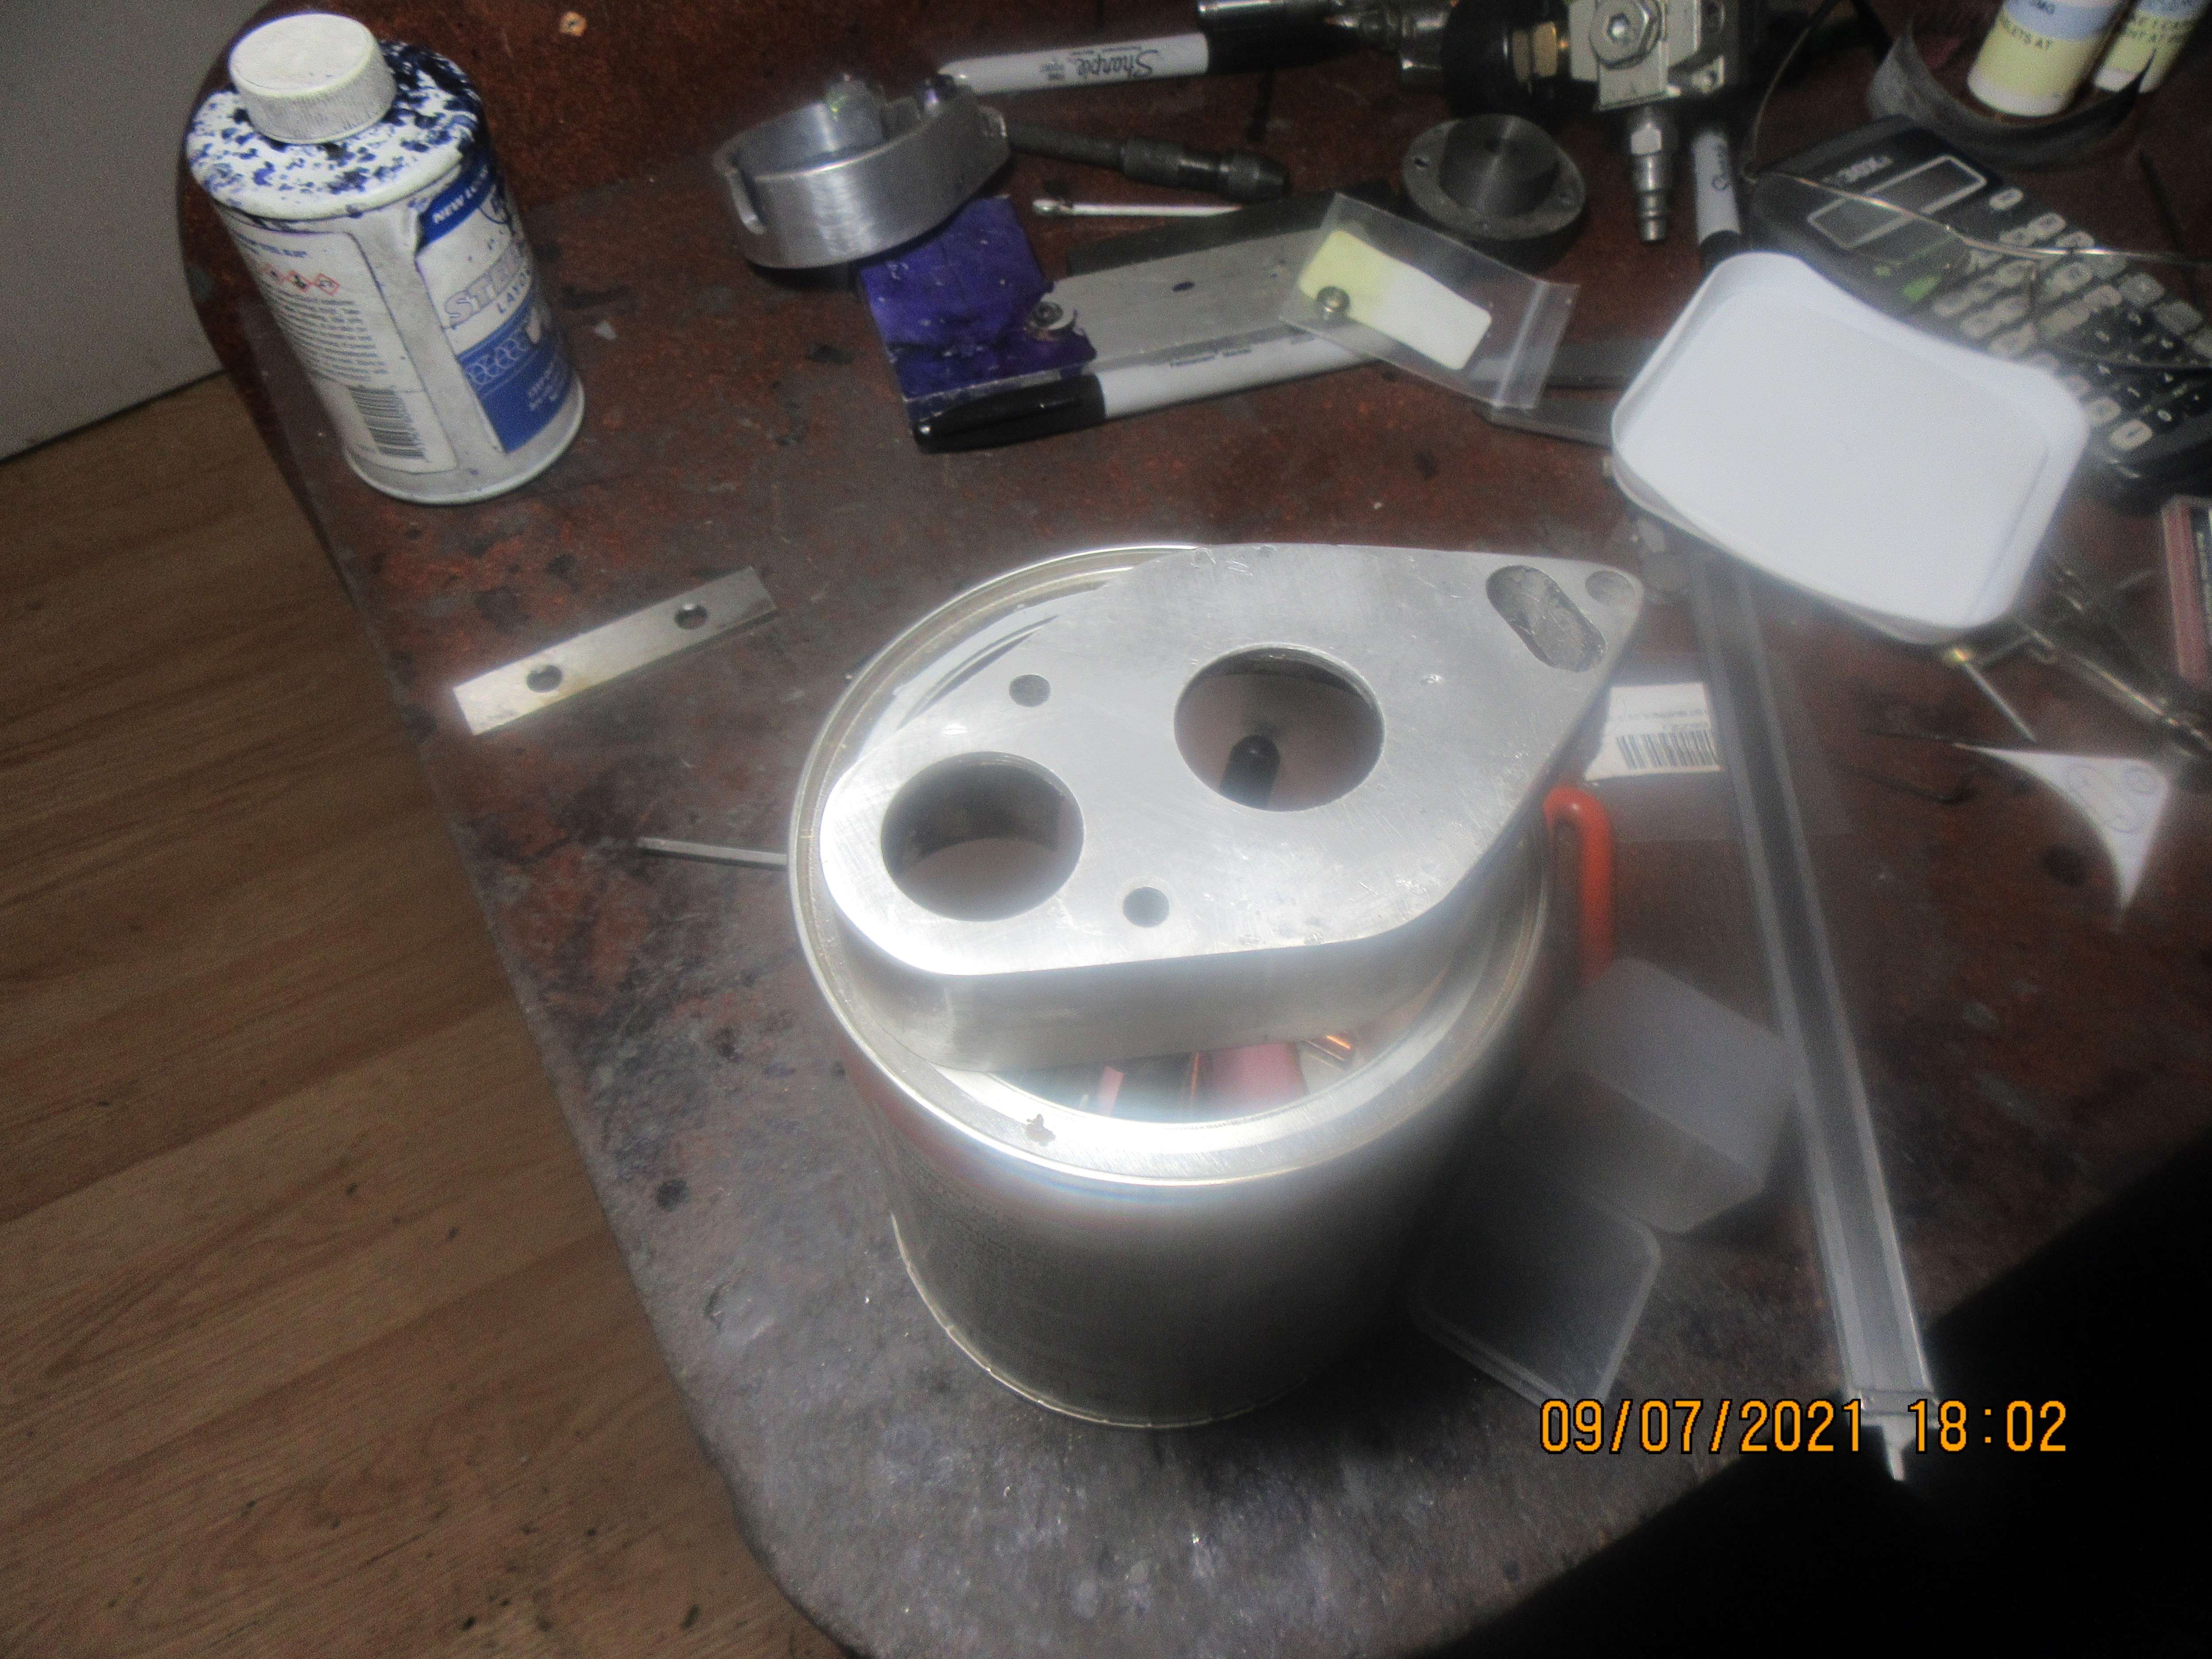
This is one of the gear guards with the new fan shaft support tab setting in place beside it. I chickened out on using the 'alumiweld' brazing rods and instead went to my welding supply shop and bought some 3/32" aluminum rod to use with my tig welder. I will practice a bit on some scrap aluminum pieces, and then weld the two pieces in the picture together. Tig welding with aluminum is a skill I have to develop, and I might as well start now. I will post the end results of this tig welding.
5fSapD.jpg
 
The trick, for TIG welding aluminum is:
CLEAN CLEAN and CLEAN again. Brush it with a stainless wire brush (never steel), wipe it with Acetone, let it flash and weld it immediately after cleaning.
Way more picky than steel in that regard. The throttle pedal is key.
 
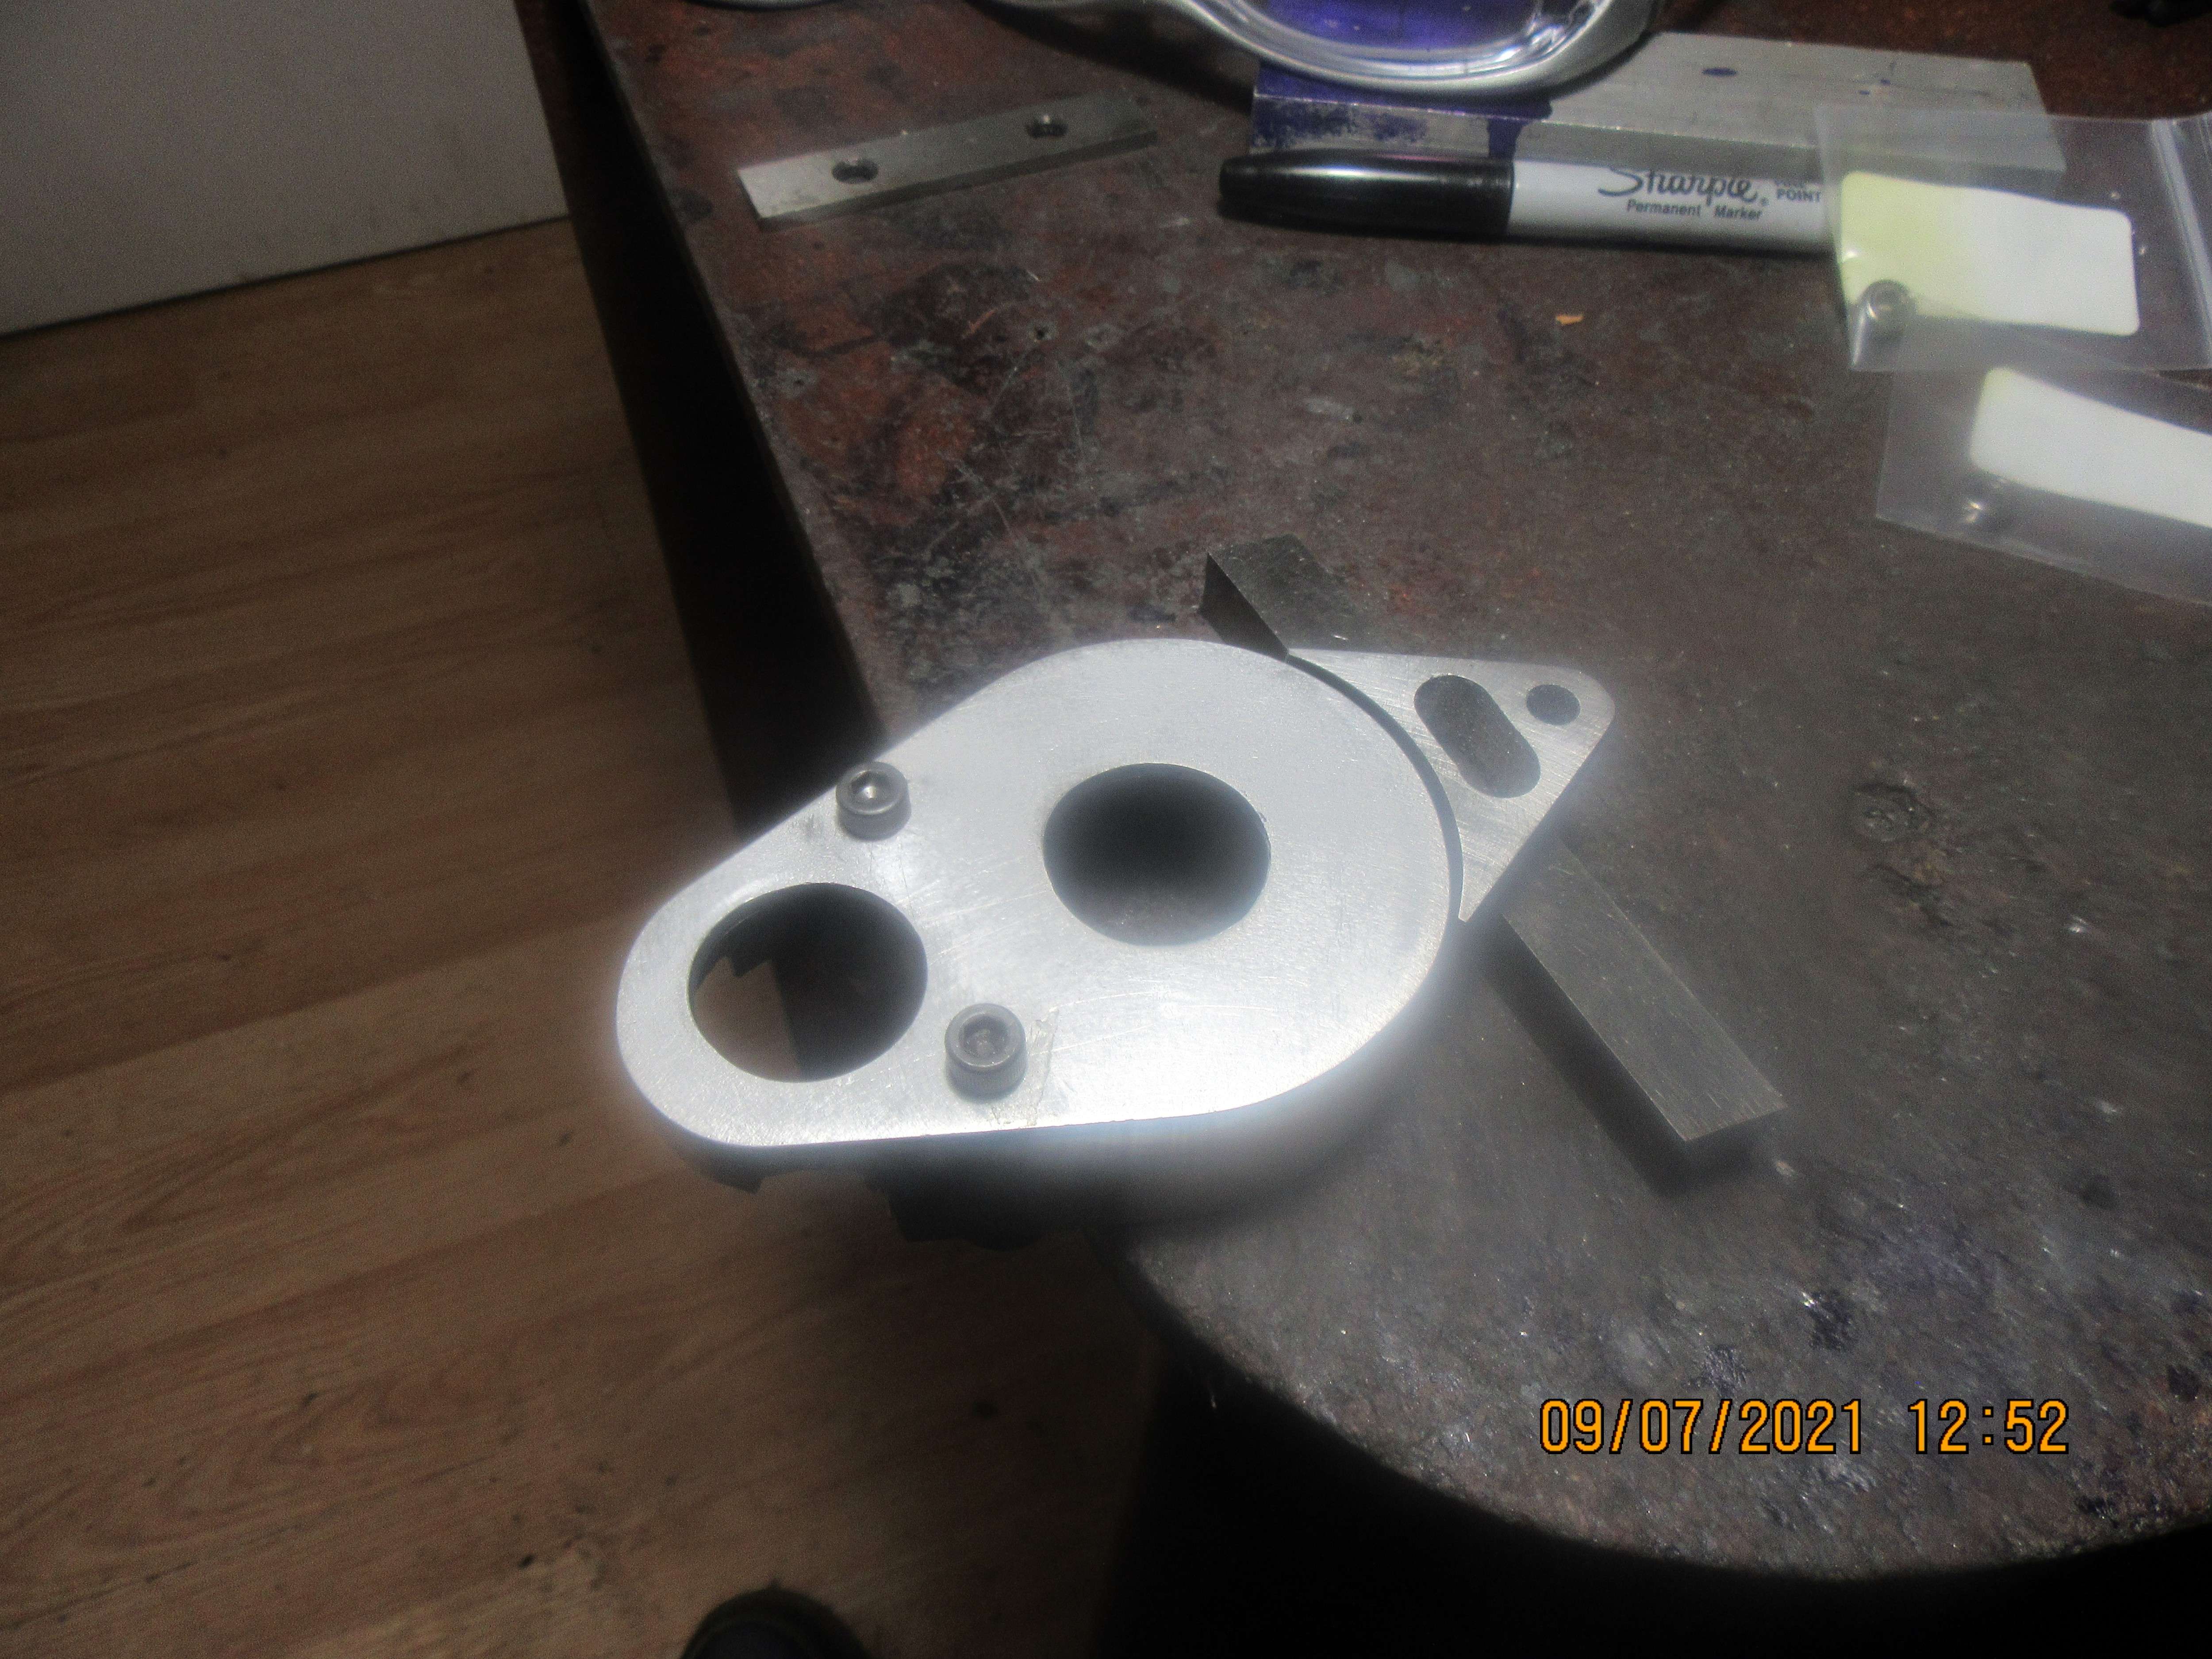
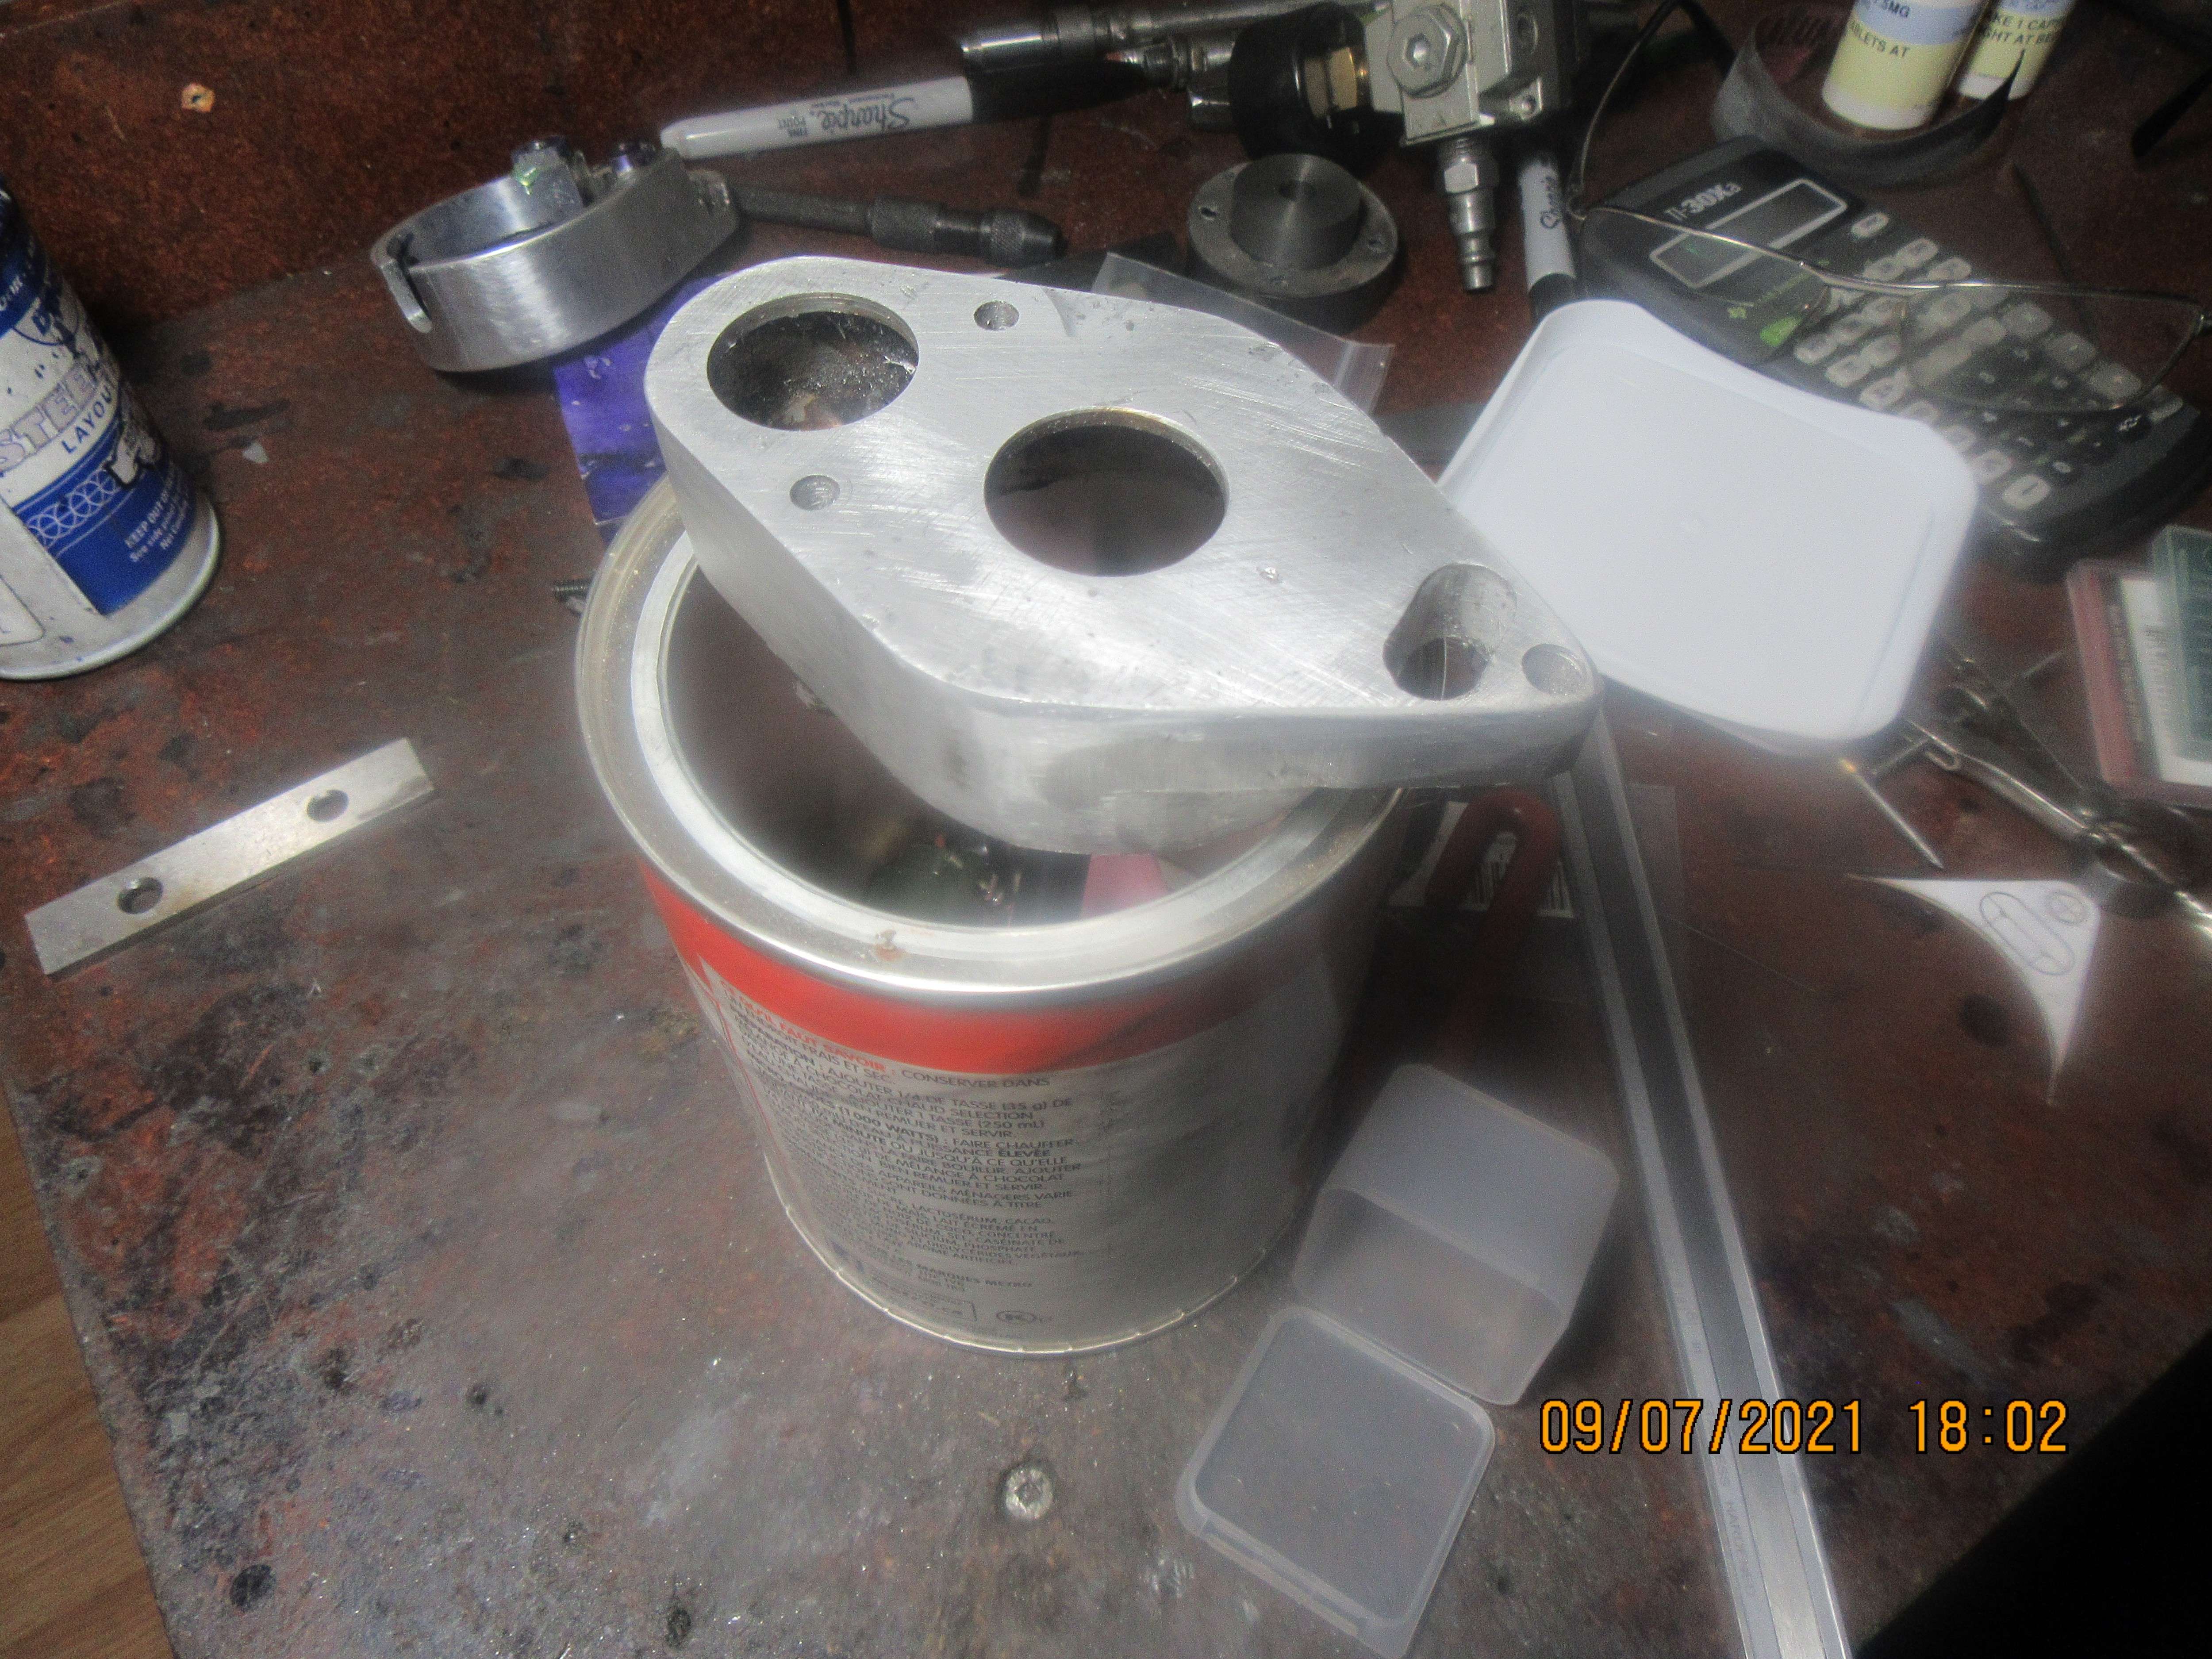
Well, there we have it. My first tig weld on aluminum. Aluminum is definitely a different kind of thing to weld than mild steel. One of the biggest problems was that the people who sell this welder in Canada are a bunch of morons. They sell the welders in Canada but don't have any kind of technical help. I called Toronto and asked for a tech help guy, and they shuffled me around from person to person, and finally I got a guy who moaned and groaned like he was in hard labour birthing an elephant, and after about ten minutes I said "Tell me the truth. You've never welded anything in your life, have you." He reluctantly told me that no, he wasn't a welder but he had read a lot of manuals. I hung up and called the company in Orillia that sell these machines, and got a bit of help from them. I had first tried to weld with the frequency control button off, because I didn't know any better. Once I had it turned on, things got marginally better. What I found was, that my welds were majorly ugly.---Like really ugly!! I kept at it until I could see that I was getting penetration on both pieces, and since the welds were so ugly, I laid down a lot more weld than I needed to, so that when I ground 90% of it off the part wouldn't have craters in it. It really doesn't look too bad. The good thing here is that this part will be pretty well hidden behind the fan and the flywheel, so if it's not exactly a work of art it won't matter that much. There must be an awful lot of practice involved between what I did today and those guys on Youtube who are tig welding aluminum and "stacking dimes".
qLU7Mb.jpg

jWlJmT.jpg
 
The trick, for TIG welding aluminum is:
CLEAN CLEAN and CLEAN again. Brush it with a stainless wire brush (never steel), wipe it with Acetone, let it flash and weld it immediately after cleaning.
Way more picky than steel in that regard. The throttle pedal is key.
Agree completely. Been TIG welding aluminum since 1971 (qualifications for airframe welding cert in Uncle Sam’s canoe club) and clean is the name of the game! Aluminum oxide melts at a much higher temperature (and therefore later) than the aluminum substrate, and that’s where most folks get into trouble. While they wait for the surface puddle to form, the aluminum is already at the melting point and falling away.

Vigorous scrubbing with a DEDICATED and CLEAN stainless steel brush is the only way to ensure clean surfaces, follow with acetone, and immediately begin welding as soon as the acetone evaporates. Newer TIG machines with a decent pedal and the right cup and tungsten really make the weld easier than the old 60 cycle rectifier machines did waaay back when. Set your balance a bit more on the cleaning side, get at least 1 second of pre-flow on your argon (post flow on aluminum isn’t as critical, but at least a second is best), increase the frequency to better than 120, and set pulse if you’re slow on your filler routine.

Good luck, and there’s no substitute for burning a ton of rod in practice!

John W
 
don't forget to chamfer before welding , and imho the best electrode to use is 2% lanthanated .
 
Most interesting!
Brian, as the original Chicken, and have mastered using zinc and aluminium rods for 'soldering' aluminium, I understand your reluctance to try the Alumiweld, but I reckon it is easier than TIG. But, I do not have a TIG welder and have never tried it. Simple stick welding (steel)is the limit of my welding skill. I have employed a dozen or more Aluminium MIG Welders on contracts (decades ago).. though they would not let me strike an arc! - sensible!
So CONGRATULATIONS on tackling TIG welding of Aluminium and succeeding.
K2 (The original Ken Chicken!)
 

Latest posts

Back
Top