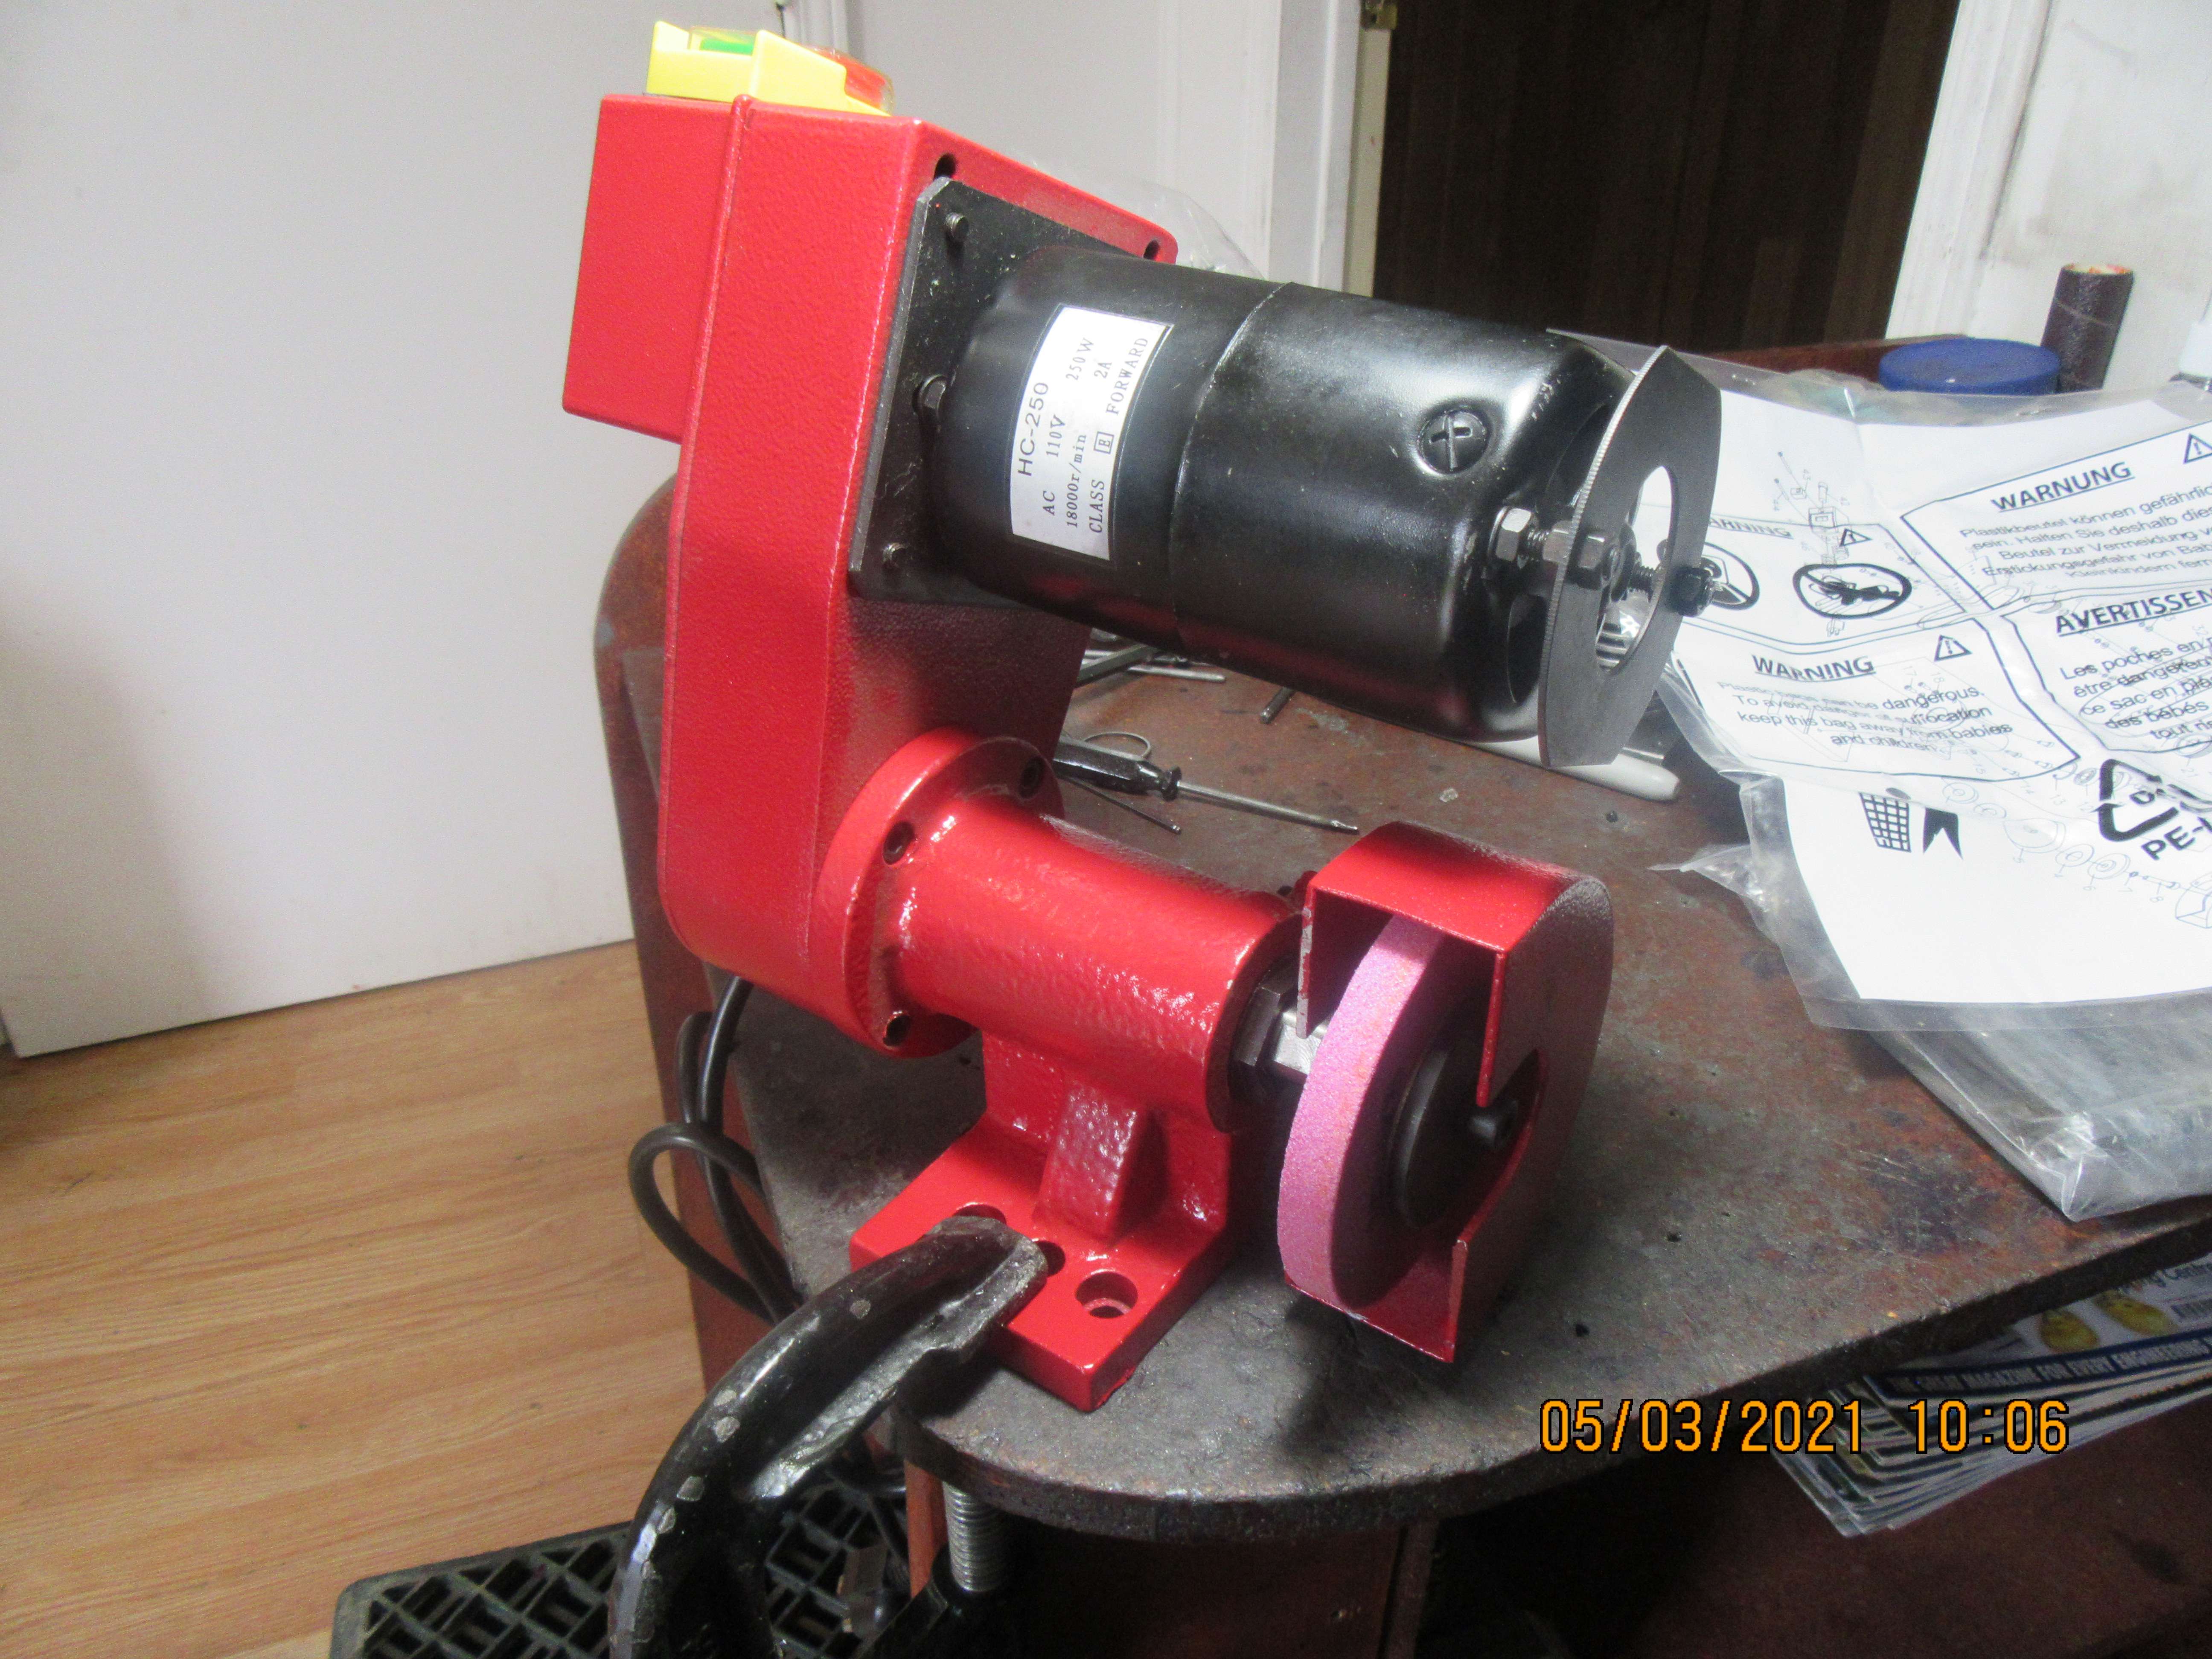
I have ordered a toolpost grinder from Little Machine Shop that doesn't really mount to the toolpost. It mounts to the cross-slide. Somewhere in all of my searching for toolpost grinders I seen where someone had mounted a protractor base which sets between the cross-slide and the grinder so the grinder could be set at any desired angle. Of course now I can't find it. Does anybody have a link to that?---Brian
You are using an out of date browser. It may not display this or other websites correctly.
You should upgrade or use an alternative browser.
You should upgrade or use an alternative browser.
Protractor base for grinder mounted on cross-slide
- Thread starter Brian Rupnow
- Start date

Help Support Home Model Engine Machinist Forum:
This site may earn a commission from merchant affiliate
links, including eBay, Amazon, and others.
If grinder is off when dressing the stone it will be true.
Some types work you till the grinder
The protractor base is not helpful.
Dave
Some types work you till the grinder
The protractor base is not helpful.
Dave
I have ordered a toolpost grinder from Little Machine Shop that doesn't really mount to the toolpost. It mounts to the cross-slide. Somewhere in all of my searching for toolpost grinders I seen where someone had mounted a protractor base which sets between the cross-slide and the grinder so the grinder could be set at any desired angle. Of course now I can't find it. Does anybody have a link to that?---Brian
Chris on another forum found it for me. Thank you Chris!!
https://www.micro-machine-shop.com/tool_post_grinder.htm
https://www.micro-machine-shop.com/tool_post_grinder.htm
Brian: there is something like thisI have ordered a toolpost grinder from Little Machine Shop that doesn't really mount to the toolpost. It mounts to the cross-slide. Somewhere in all of my searching for toolpost grinders I seen where someone had mounted a protractor base which sets between the cross-slide and the grinder so the grinder could be set at any desired angle. Of course now I can't find it. Does anybody have a link to that?---Brian
Universal Grinding Fixture https://www.homemadetools.net/forum/universal-grinding-fixture-58728
Thank you Courierdog---lots of interesting stuff there.---Brian
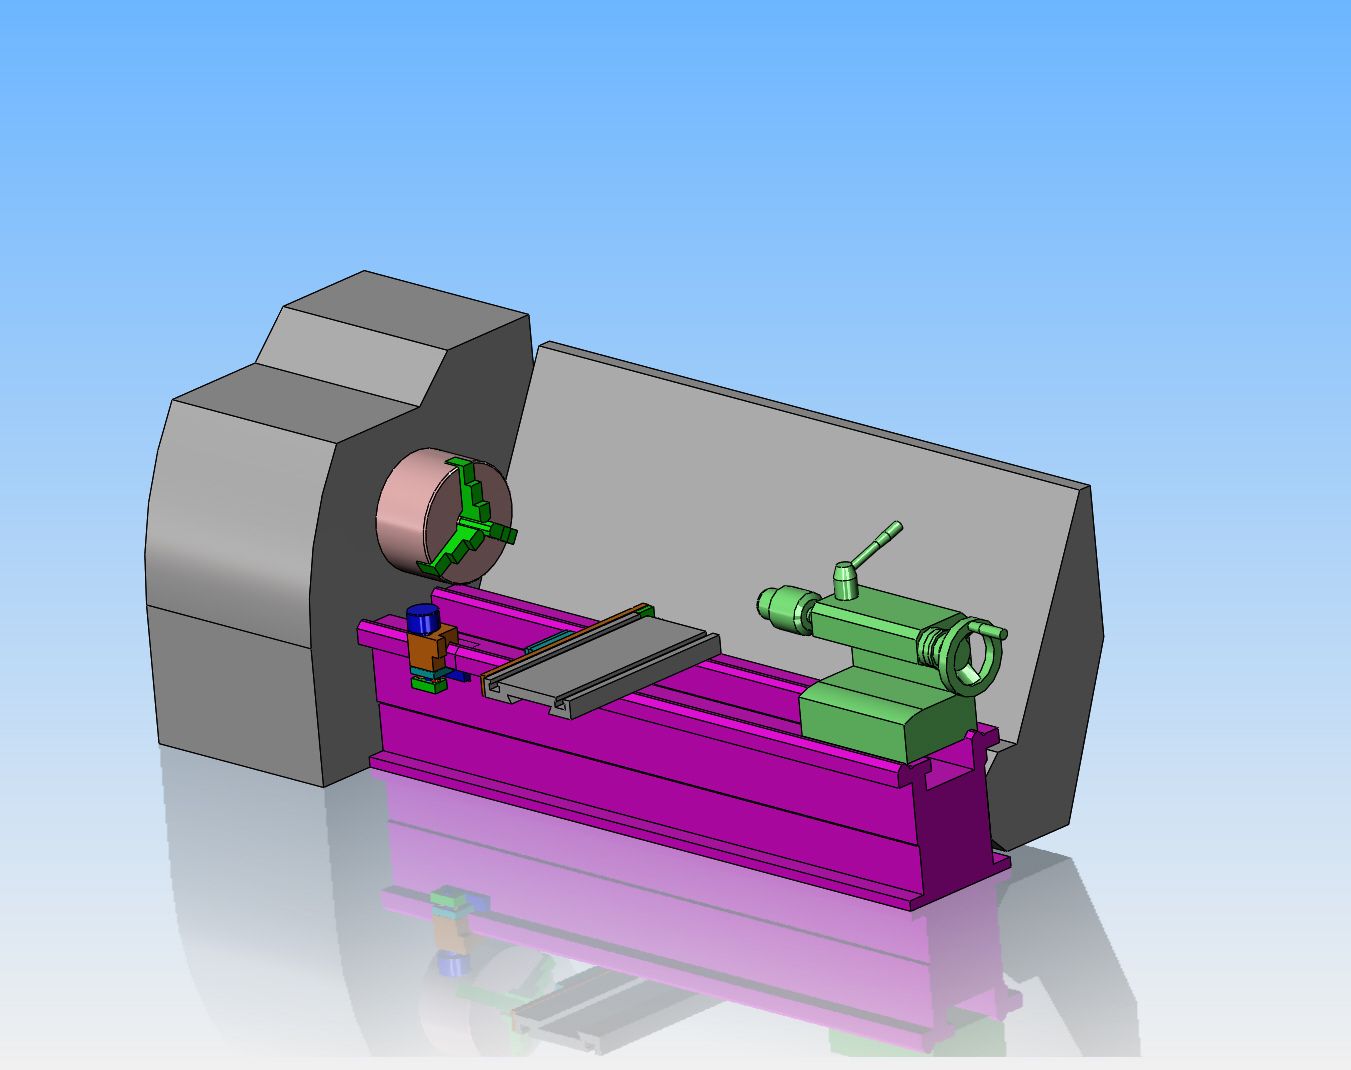
I am rapidly losing faith about getting a small heat treat oven, however my toolpost grinder (which doesn't actually fit on a toolpost, but instead bolts to the cross slide) just arrived as I was posting this. I have created a 3D model of my lathe, and will also create a model of the grinder, and then see what is involved with making a new, very shallow topslide that can fit between the grinder and the cross-slide so that the grinder can also be "set over" to grind a taper.


$519.19
$699.00
FoxAlien Masuter Pro CNC Router Machine, Upgraded 3-Axis Engraving All-Metal Milling Machine for Wood Acrylic MDF Nylon Carving Cutting
FoxAlien Official

$190.00
$254.99
Genmitsu CNC 3018-PRO Router Kit GRBL Control 3 Axis Plastic Acrylic PCB PVC Wood Carving Milling Engraving Machine, XYZ Working Area 300x180x45mm
SainSmart Official

$45.99
Sunnytech Mini Hot Air Stirling Engine Motor Model Educational Toy Kits Electricity HA001
stirlingtechonline

$39.99
$49.99
Sunnytech Low Temperature Stirling Engine Motor Steam Heat Education Model Toy Kit For mechanical skills (LT001)
stirlingtechonline

$59.99
Sunnytech Hot Air Stirling Engine Motor Model Educational Toy Electricity Generator Colorful LED (SC001)
stirlingtechonline
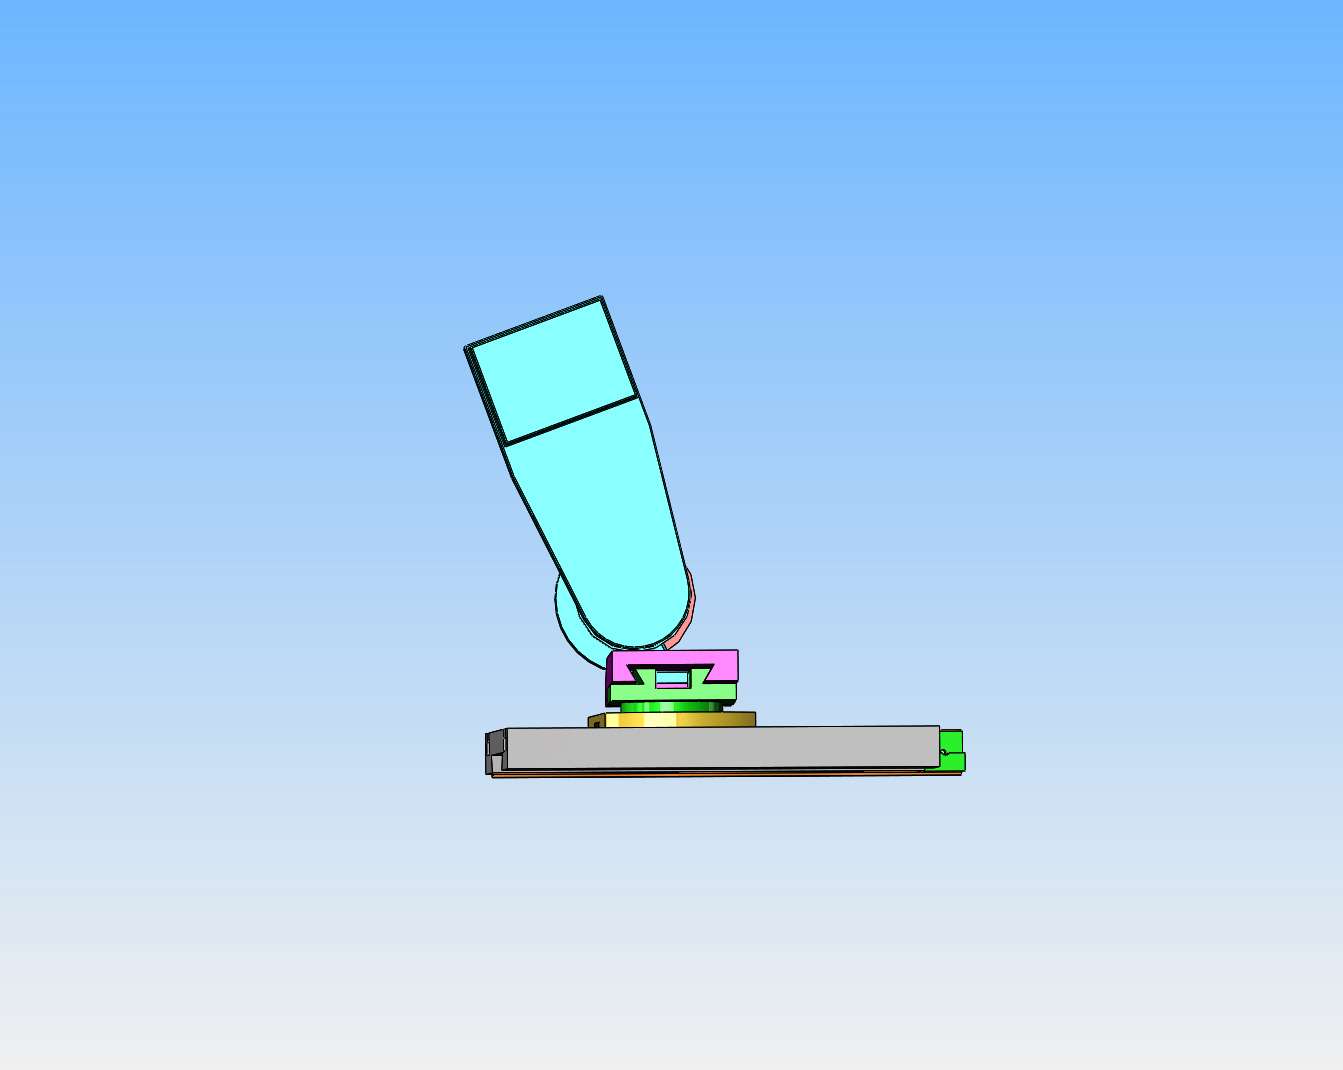
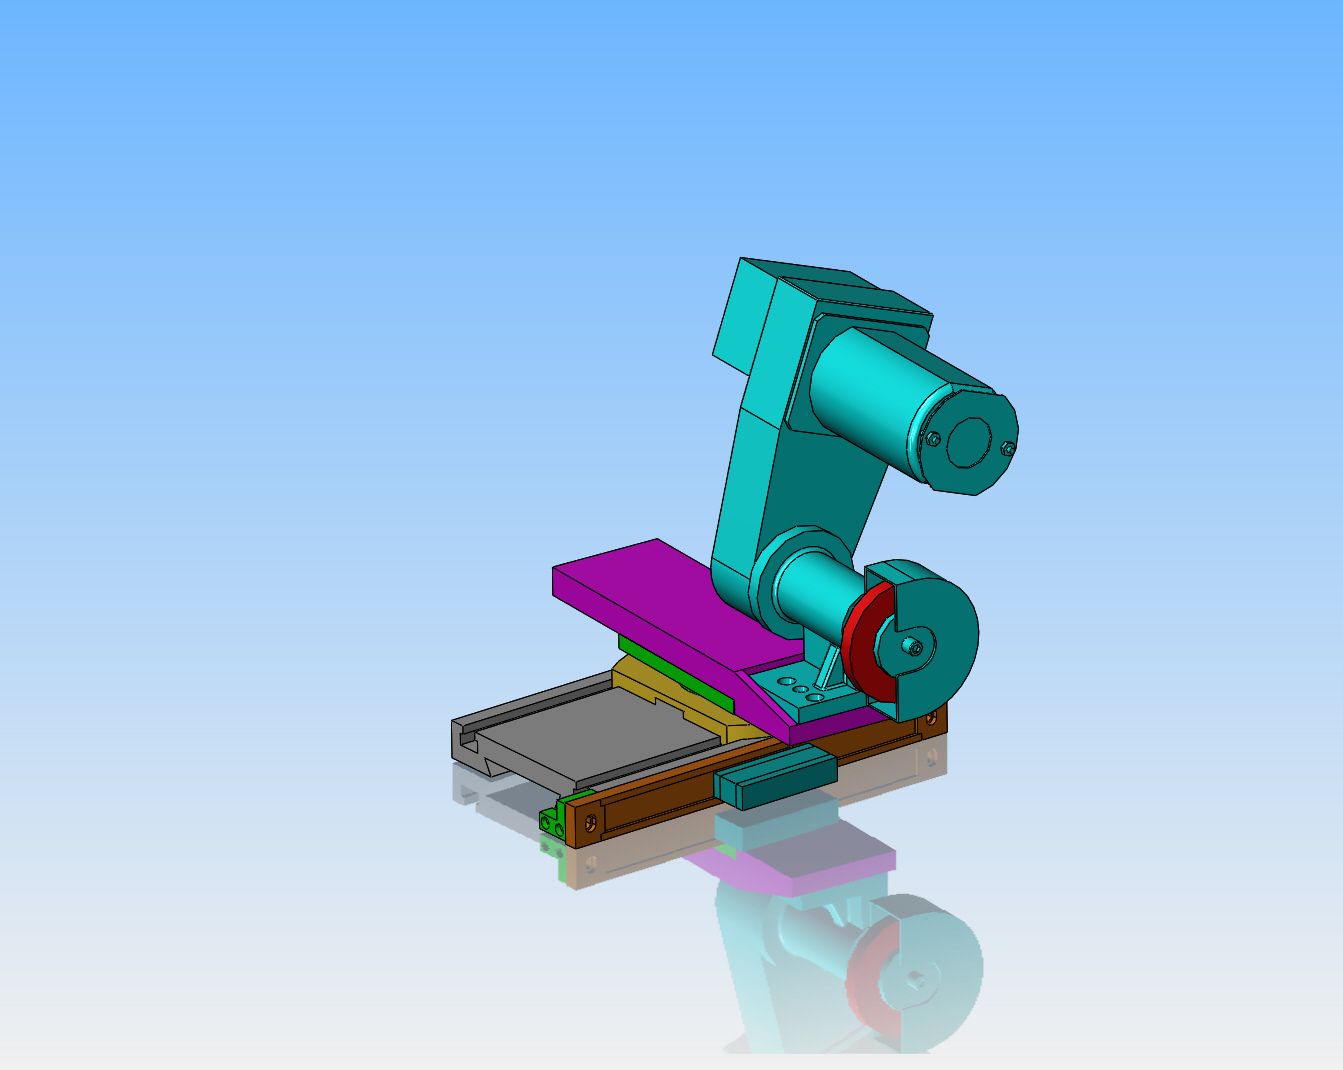
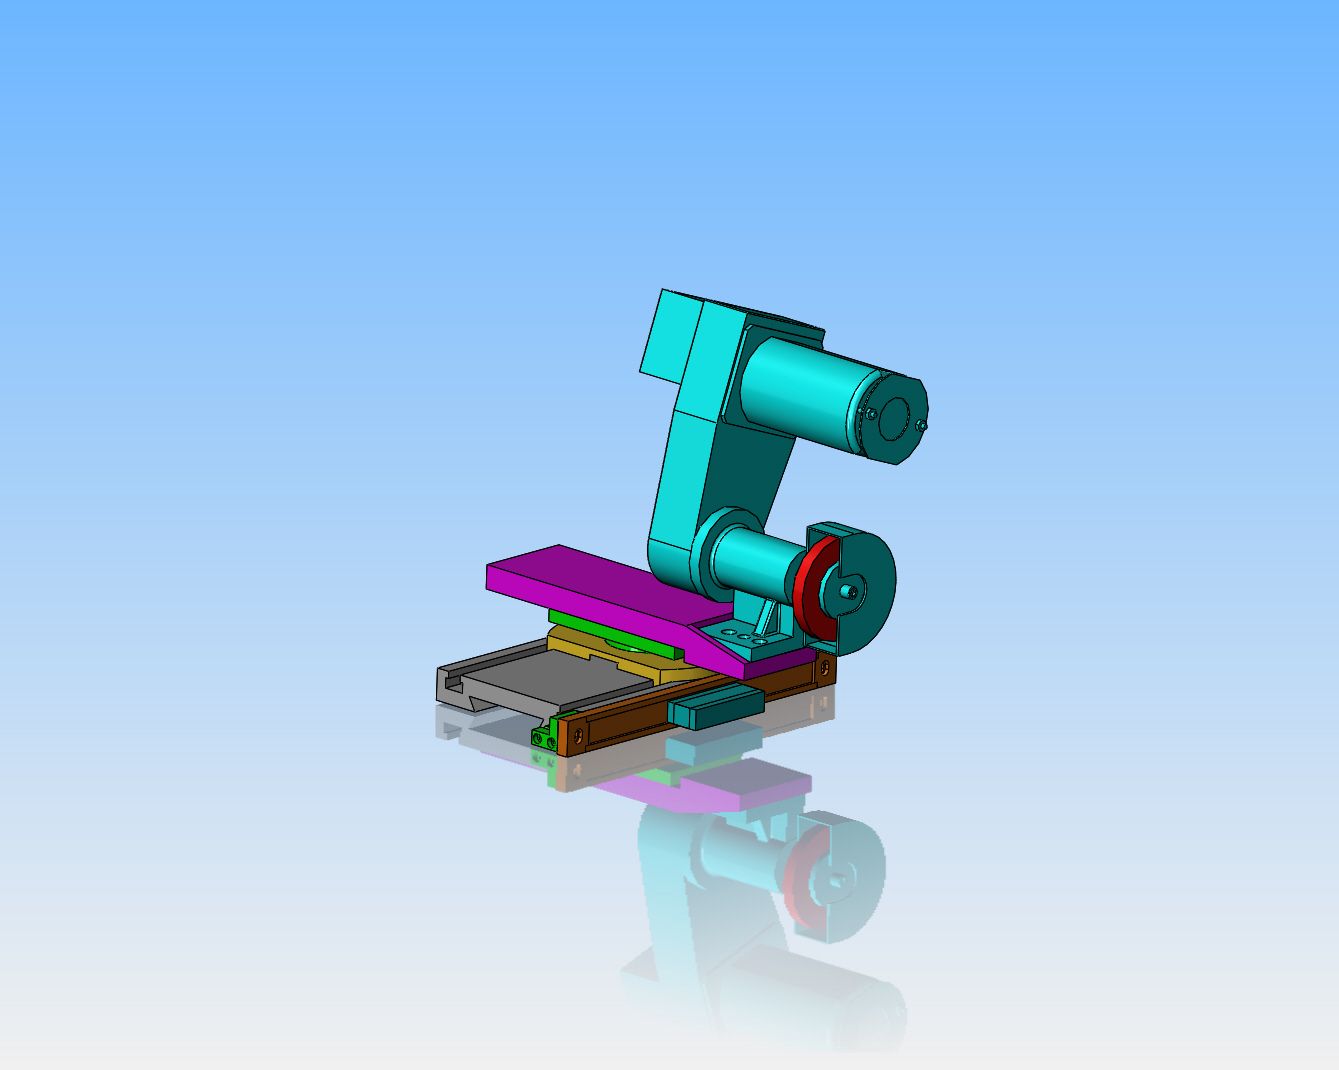
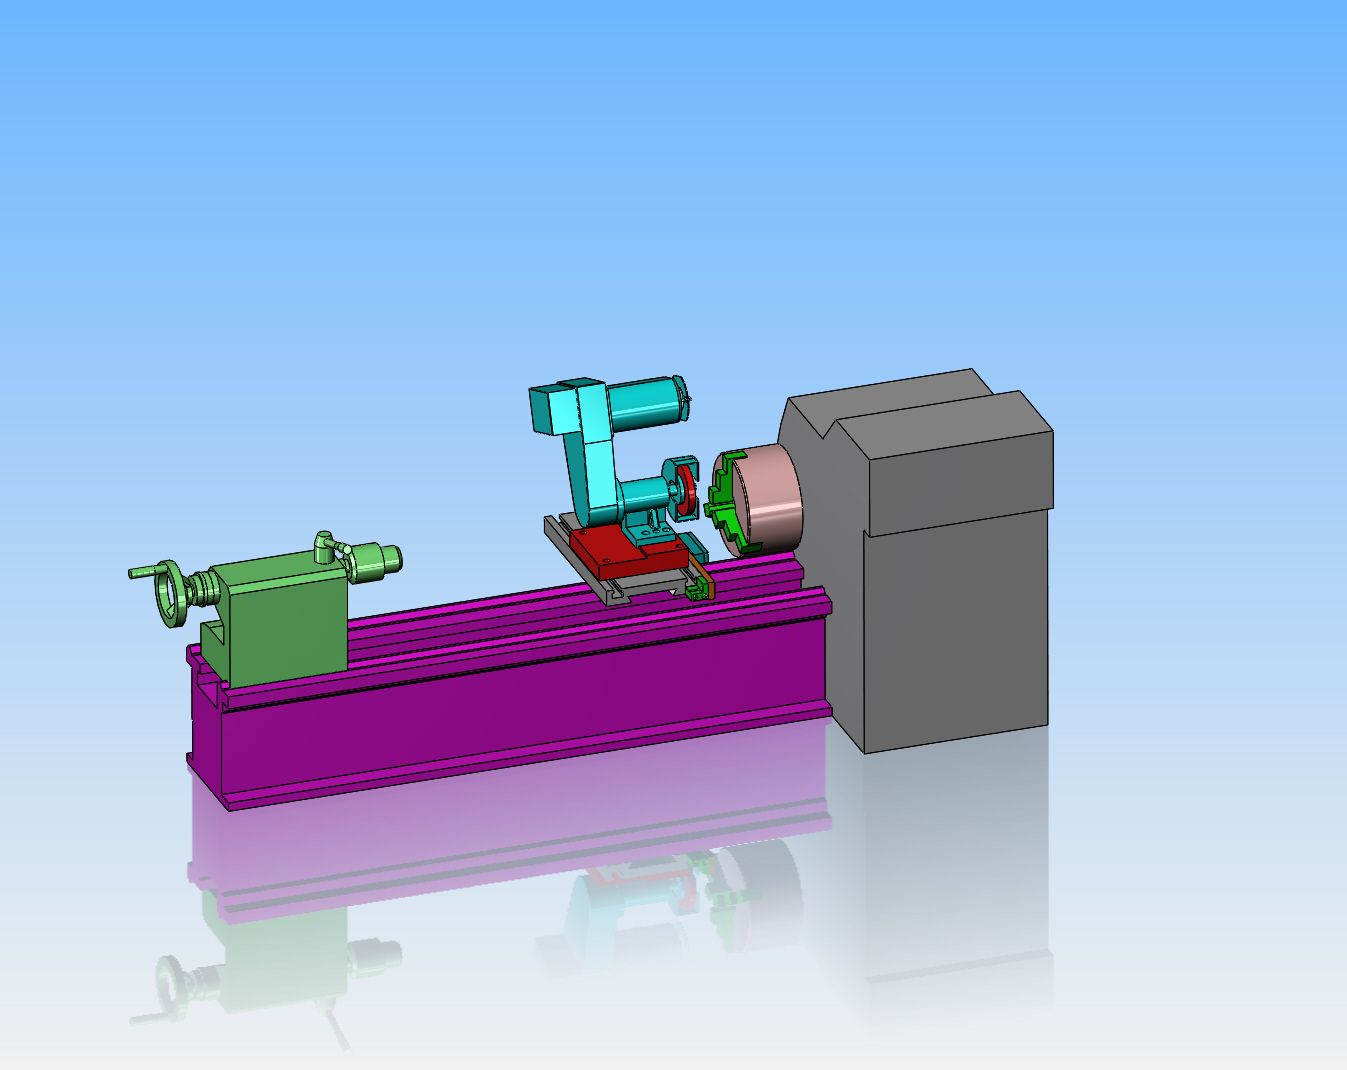
Here we have a 3D model of my lathe with a 3D model of the new grinder from Little Machine Shop. There is about 1 1/4" vertical clearance between the underside of the grinder base and the top of my cross slide when the center of the lathe chuck is horizontal with the centerline of the grinder.
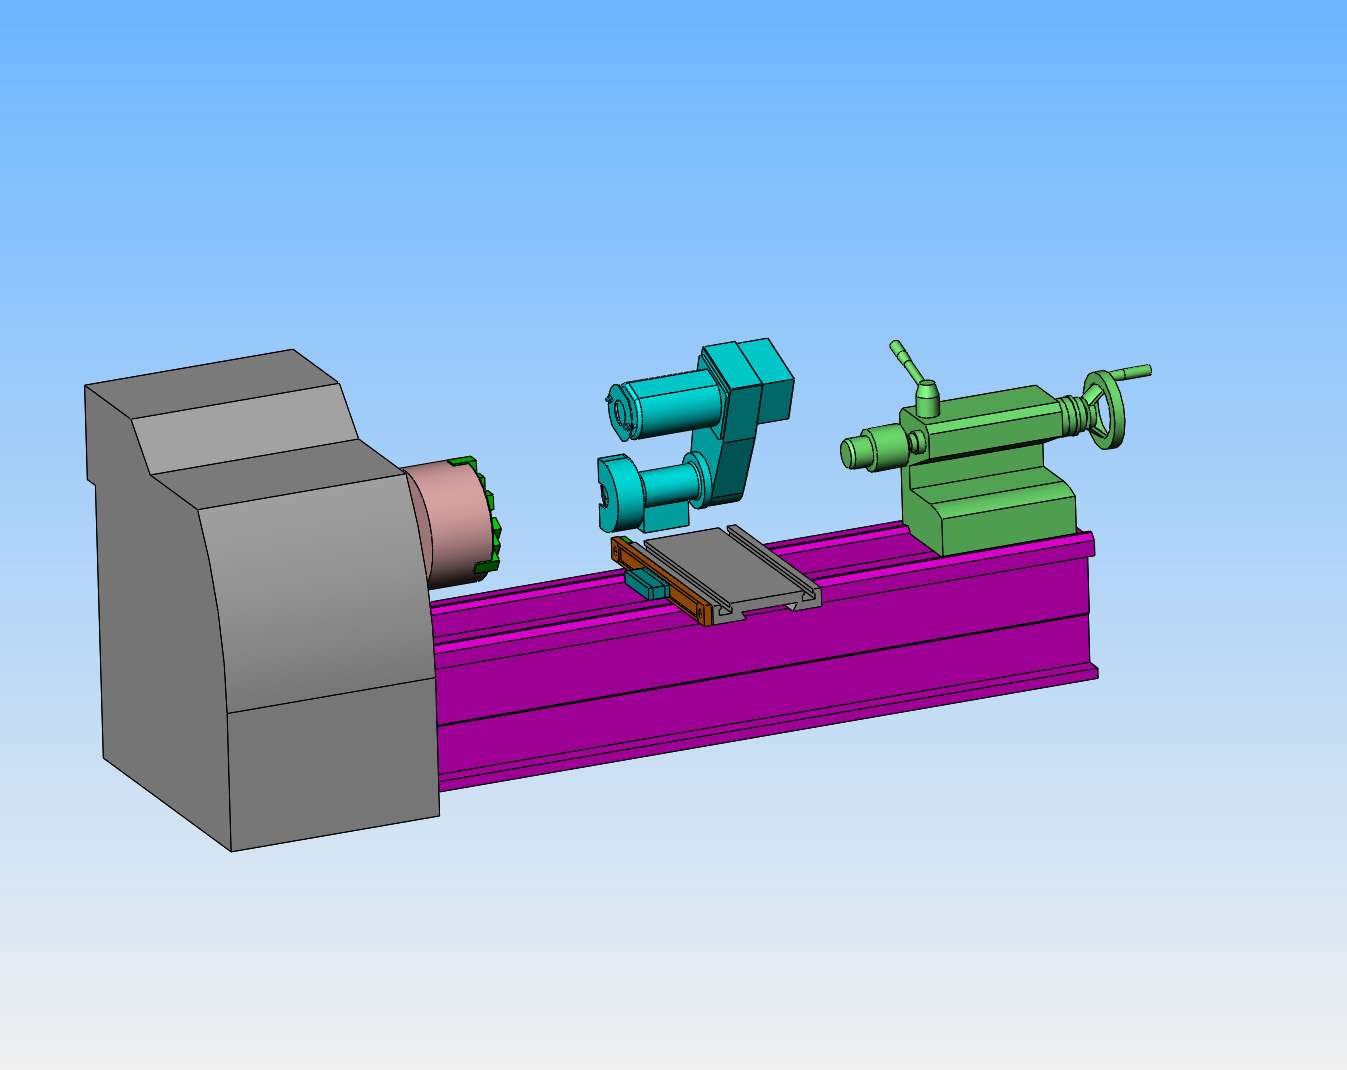
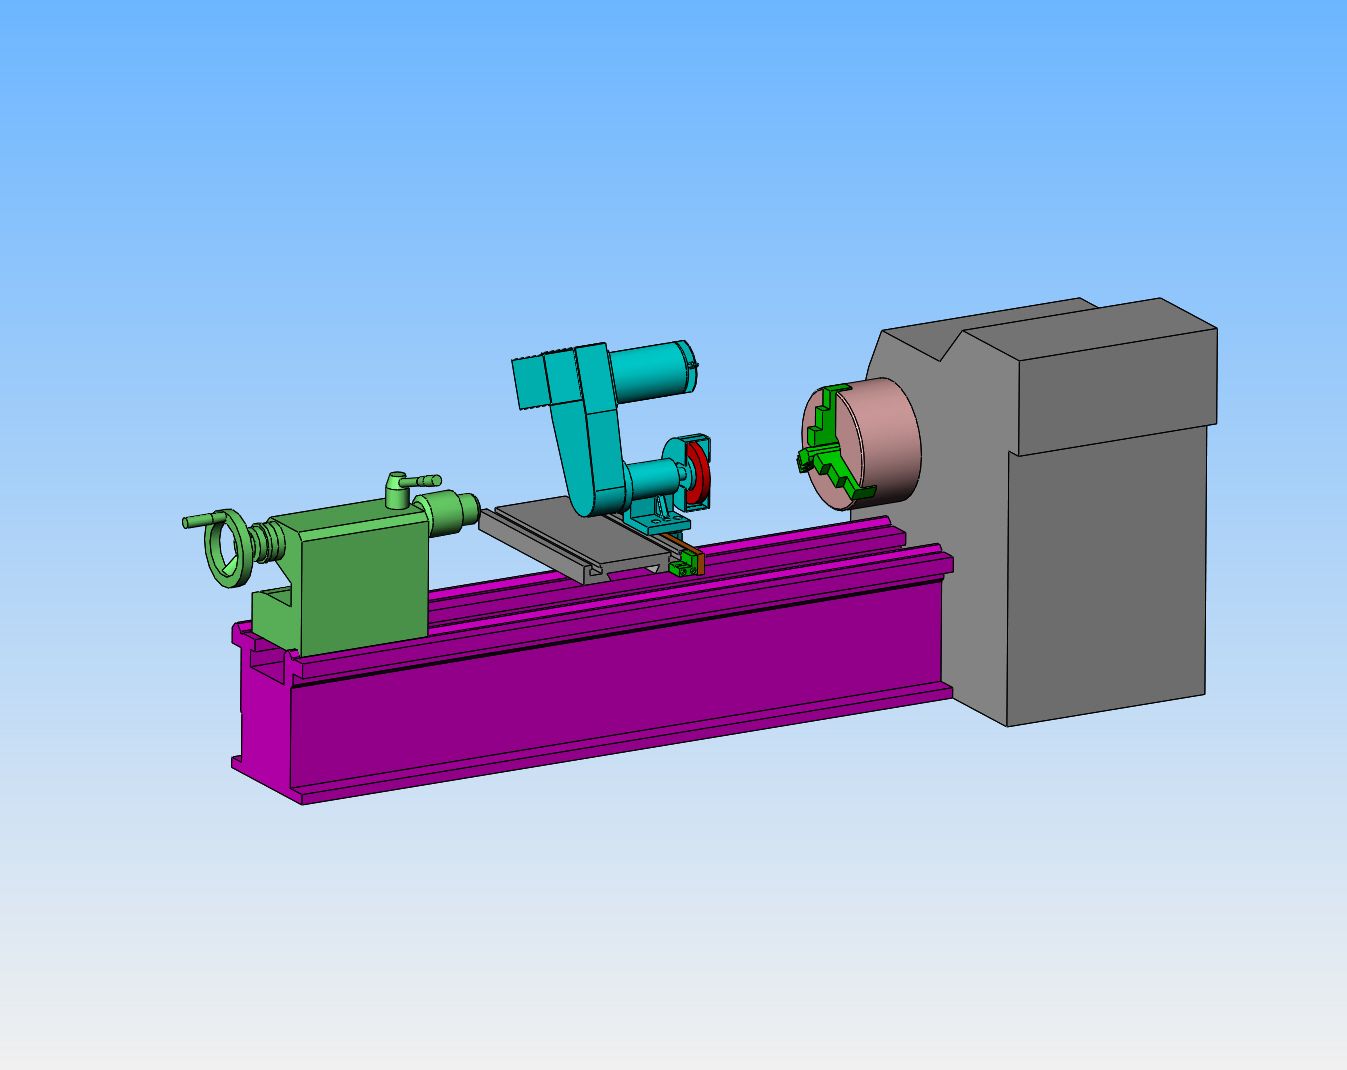


It appears that I could make a new protractor topslide that would allow me to grind a taper with the toolpost grinder from Little Machine Shop. It wouldn't be easy, but it's doable. It would require making at least 3 new major pieces and cantilevering most of the grinder out towards the headstock side of the cross-slide, but it would allow me to grind at least 2 1/2" of taper. Remember, my DRO for my Y axis is attached to the headstock side of the cross-slide, and I have to get out far enough to clear it.


goldstar31
Well-Known Member
Maybe the U Tube of the Potts Milling Spindle might prompt firther thoughts.
Actually, it also covers grinding too.
I have a similar version but without the grinder. Might I suggest that you Google the Englisg web site lathes Co.UK to see the variations.
Whilst you are on thesite, it is probably worth also looking at the entry for the Stent tool and cutter grinder becaise its column also holds a motorised spindle fitted to graduated base.
My 'Potts' version seems has a 1" diameter facility to take- or seems to take either the Quorn, or the Stent or even the older again Kennet spindle.
Again, I am sort of tumbling my half sighted way through the 'varieties' of the My Potts
Hope this might be intersting in increasing the versatility of your new purchae
Regards
Norman
Dave, If you need to do a plunge grind at an angle, the wheel has to be turned. You would have to angle the grinder at some point.If grinder is off when dressing the stone it will be true.
Some types work you till the grinder
The protractor base is not helpful.
Dave
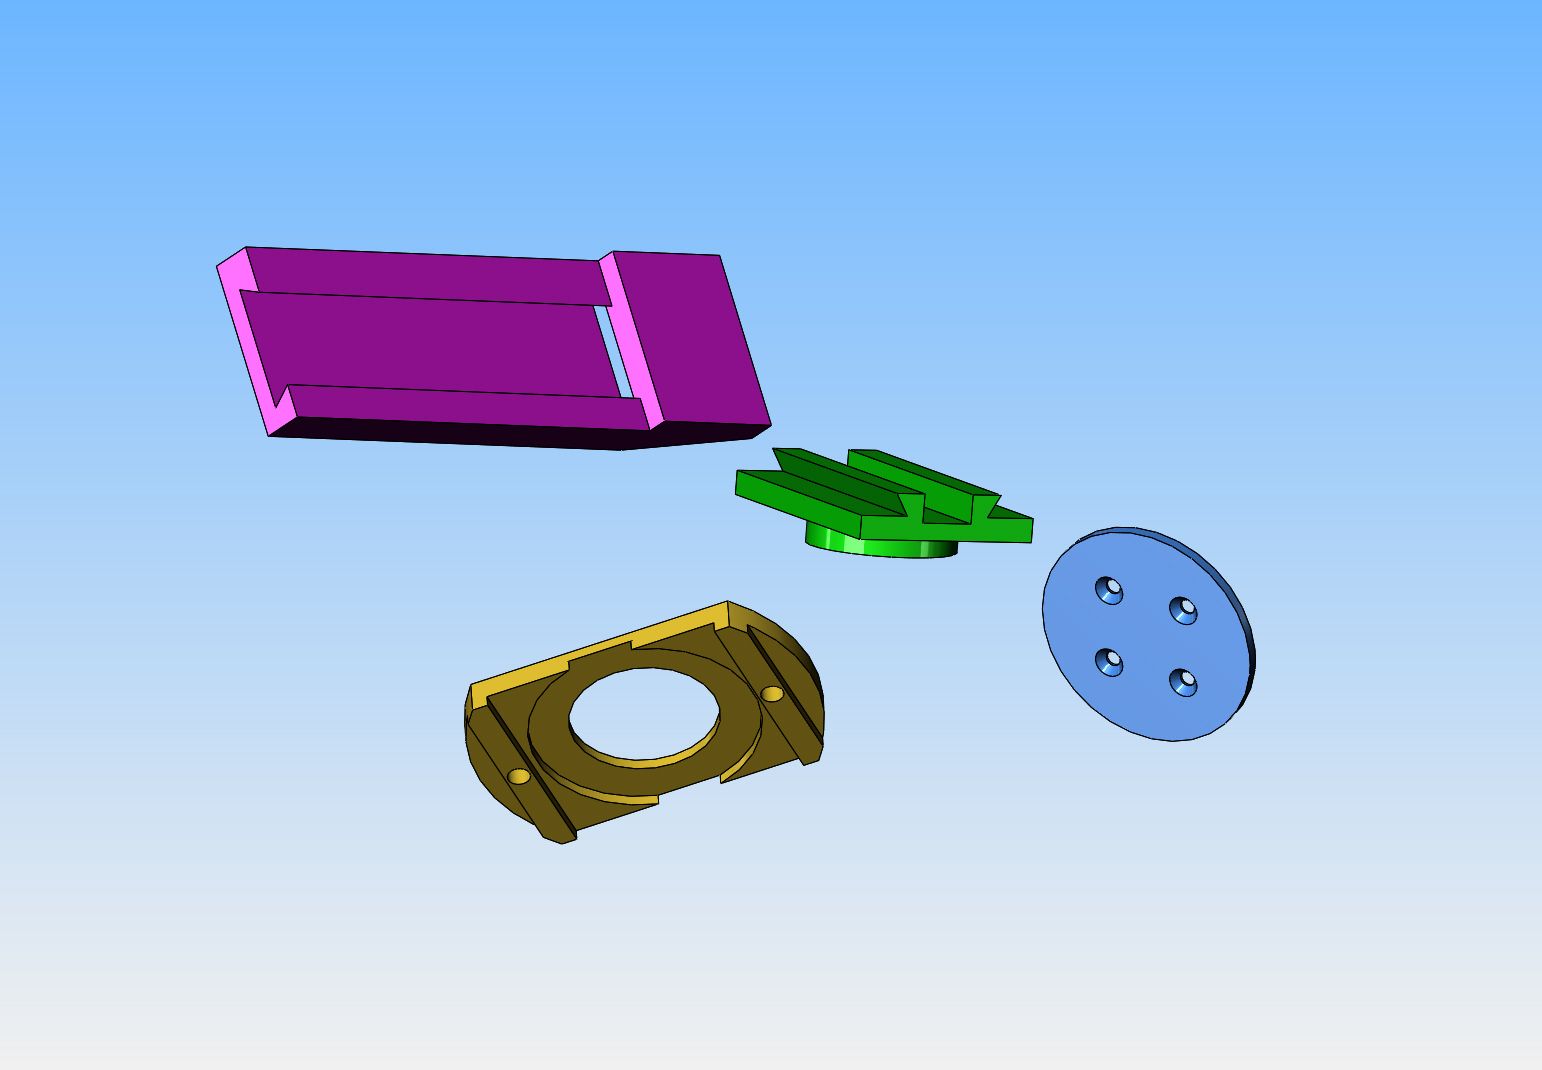
In the model, the grey bottom part can only move parallel or 90 degrees to the lathe axis. The yellow part above it can only move along the slots in the grey part . The green part is located by the yellow part and can rotate thru 360 degrees. The pink part which the grinder bolts to can move longitudinally along the green part, and is located by dovetails. I haven't shown the endplate nor hand crank that fit on the opposite end of the pink part.
These parts aren't terribly complex to machine. I've never machined a dovetail before. I could certainly buy a dovetail cutting tool and teach myself how to use it. I haven't included the gib strip , endplate, nor adjusting handle here, but they are all simple shapes. This is just a "what if" exercise for now. Right now if I use the new toolpost grinder in my compression ring making exercise, it can just bolt squarely to the grey cross-slide.

Now that I have designed a way in which the Little Machine Shop Toolpost Grinder can be mounted to my lathe so that that it can be used to turn tapers, it's time to get back to reality. The reality is that I don't really need this ability to turn tapers right now, even if it is a nice design exercise. I only need the toolpost grinder to travel in the X or Y axis. To do this I only need one adapter plate, and the nice thing is that I don't even have to remove my topslide or quick change toolpost to do it. The adapter is made from 1 1/4" thick aluminum plate which picks up the bolt pattern of the grinder and the two keyed slots in my current cross-slide.

A good days work, well done!! The toolpost grinder is attached to an approximate 1 3/16" thick aluminum plate. The aluminum plate has four bolts that go through zero clearance holes in the plate and through the topslide to two long custom crafted tee nuts. I am very fortunate to have tee slots in my cross slide. That piece of round bar in the lathe chuck is 1 1/4" diameter. ---The nice part of all this is that I don't even have to remove my topslide and quick change toolpost!!!
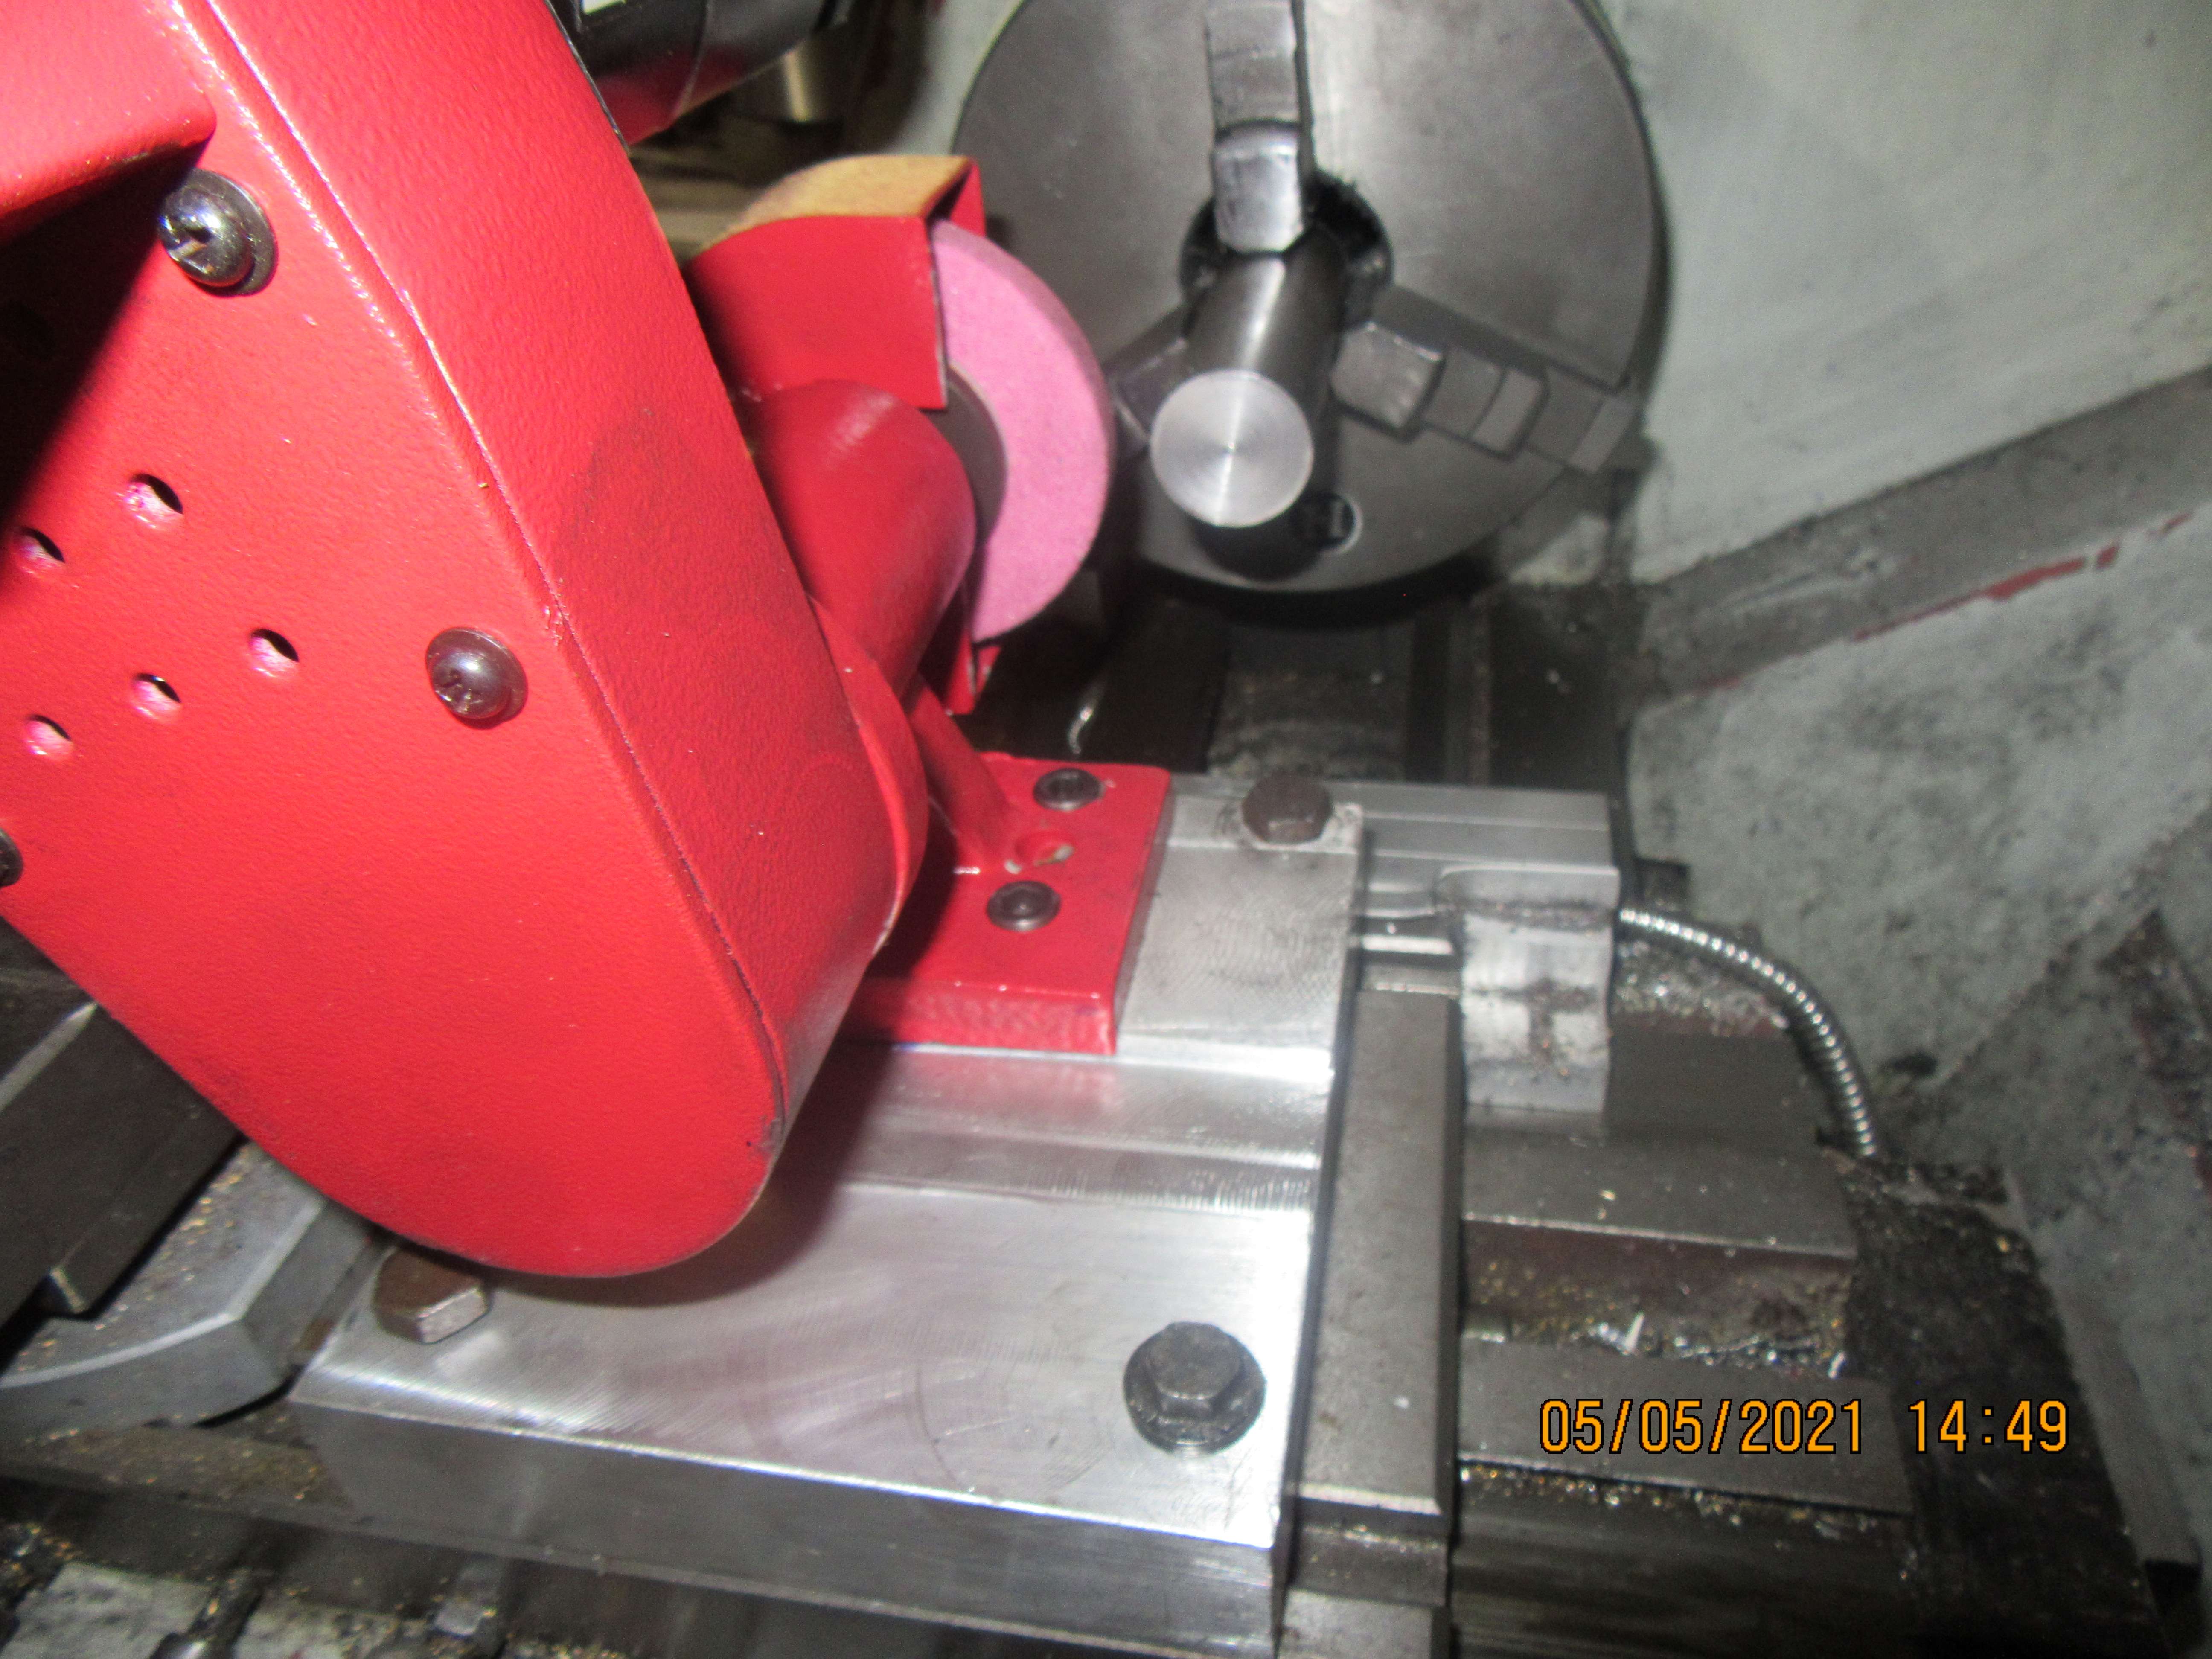
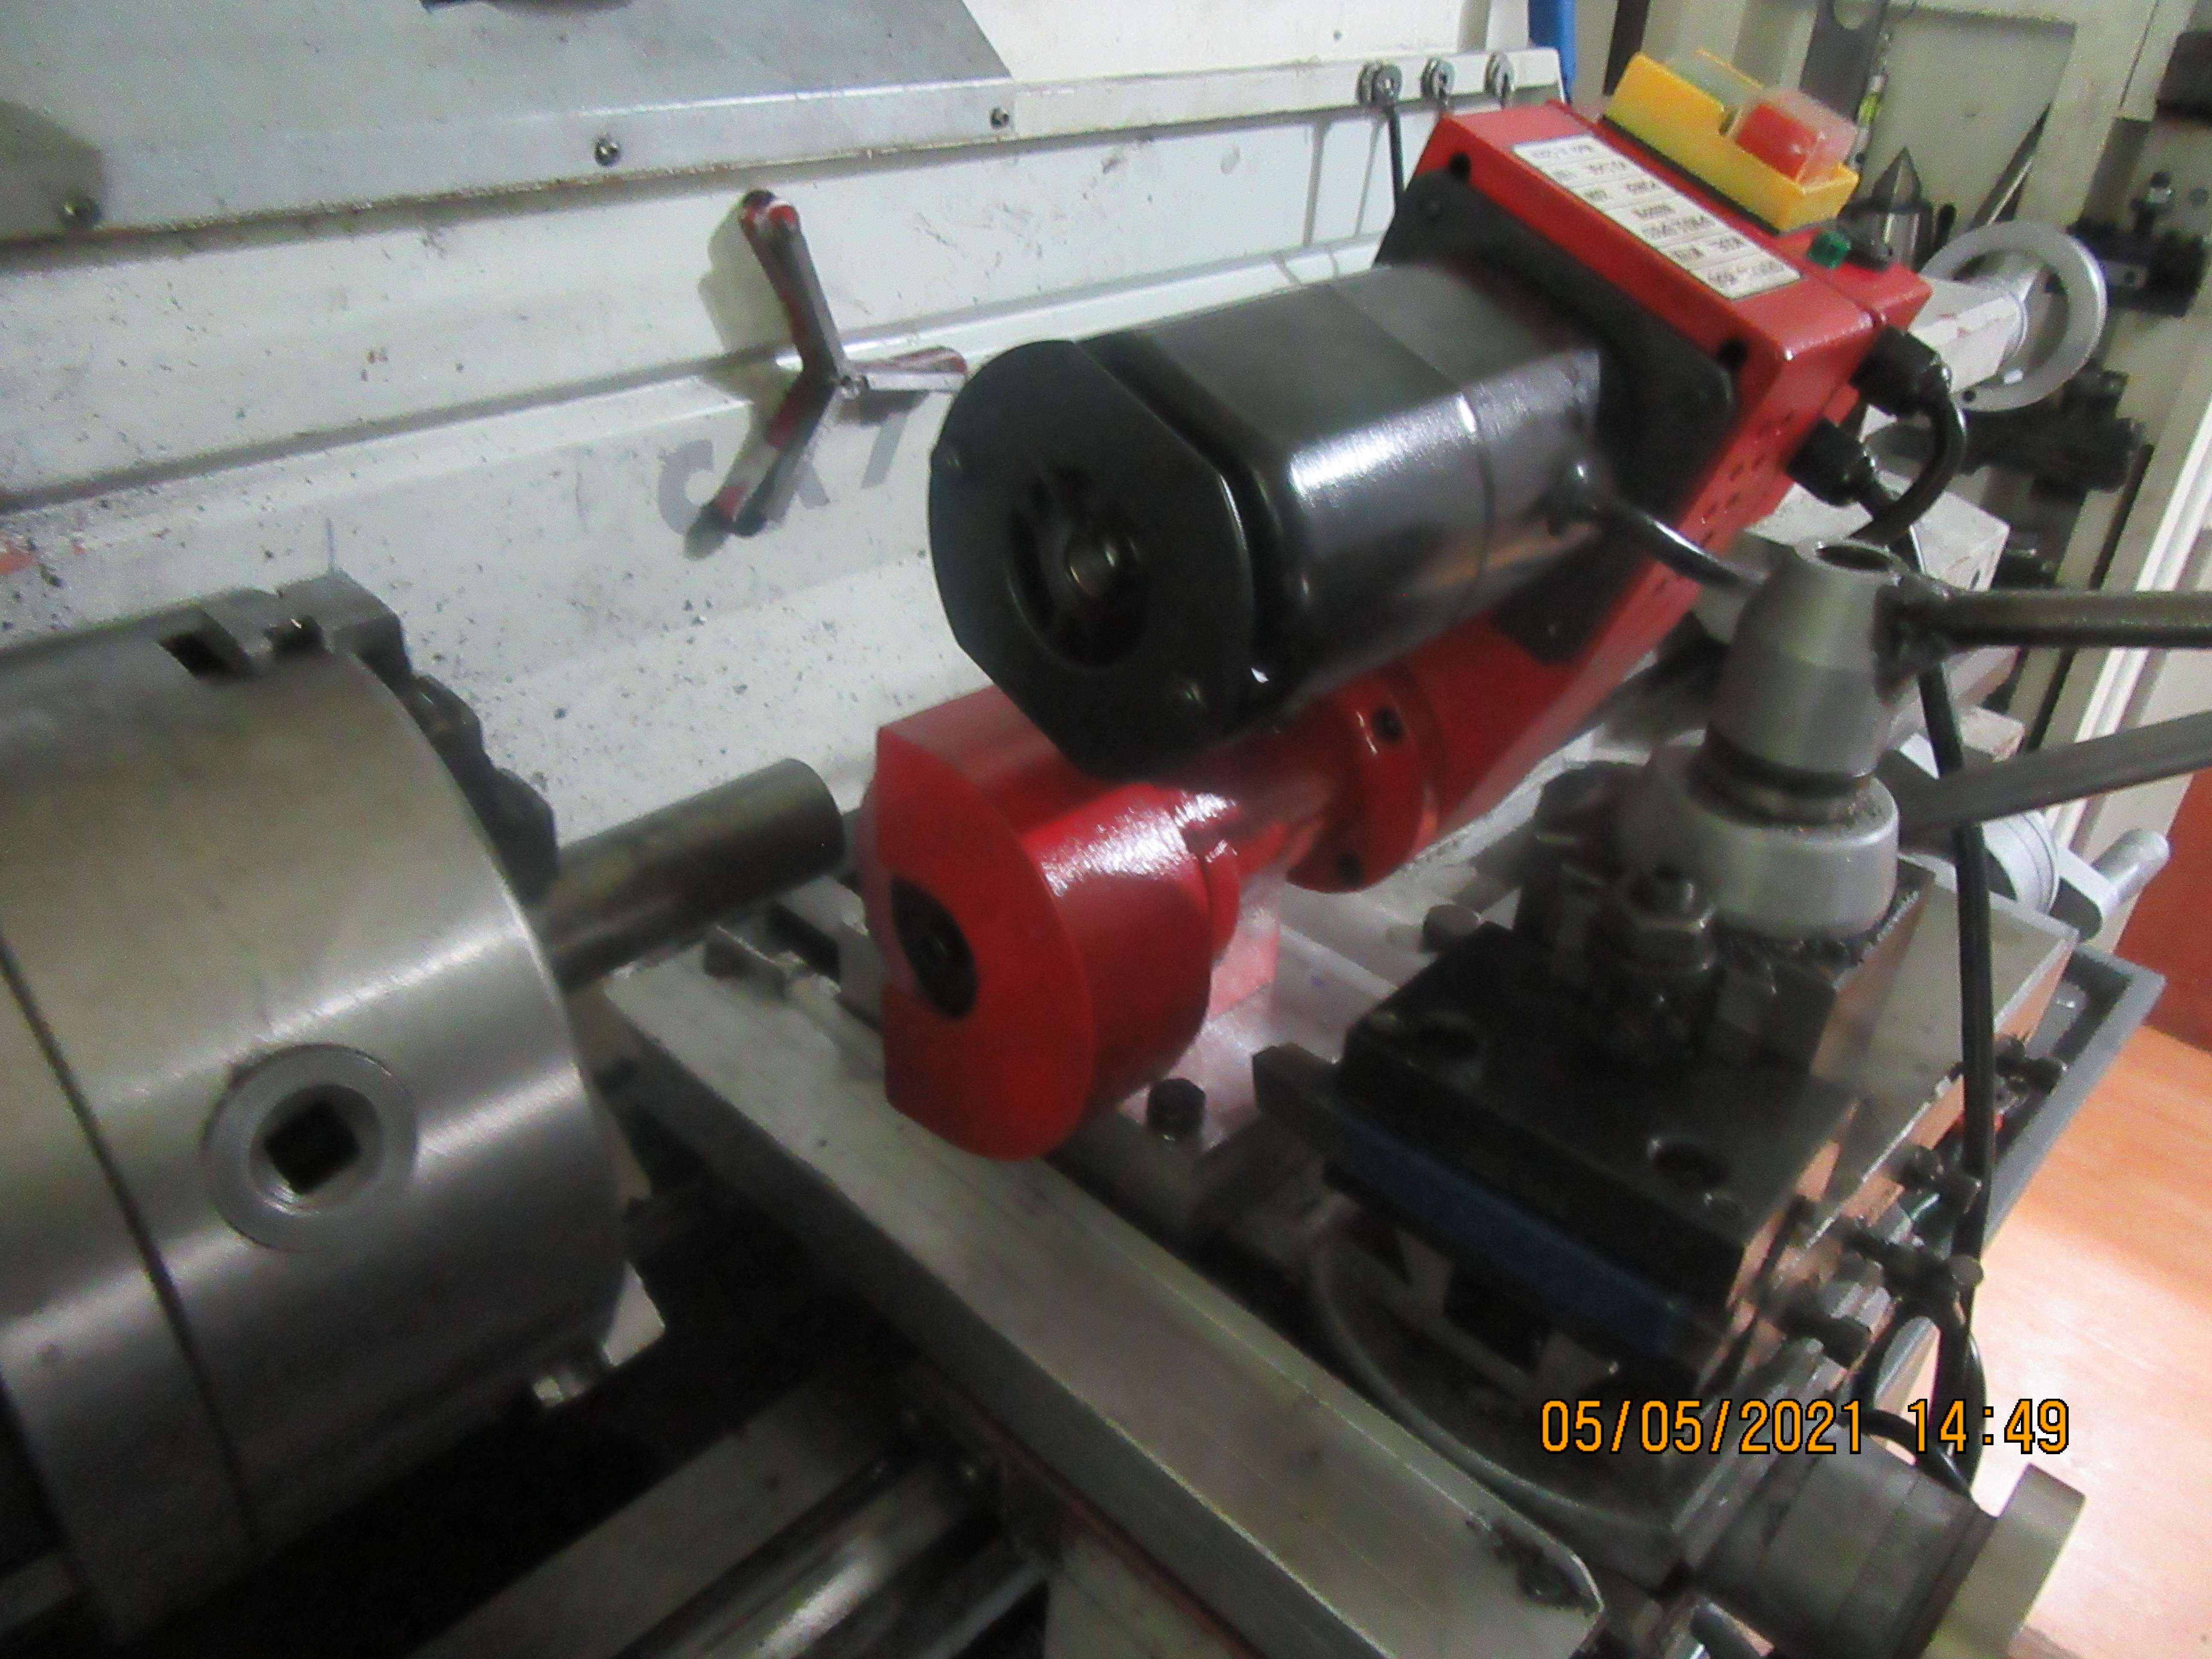
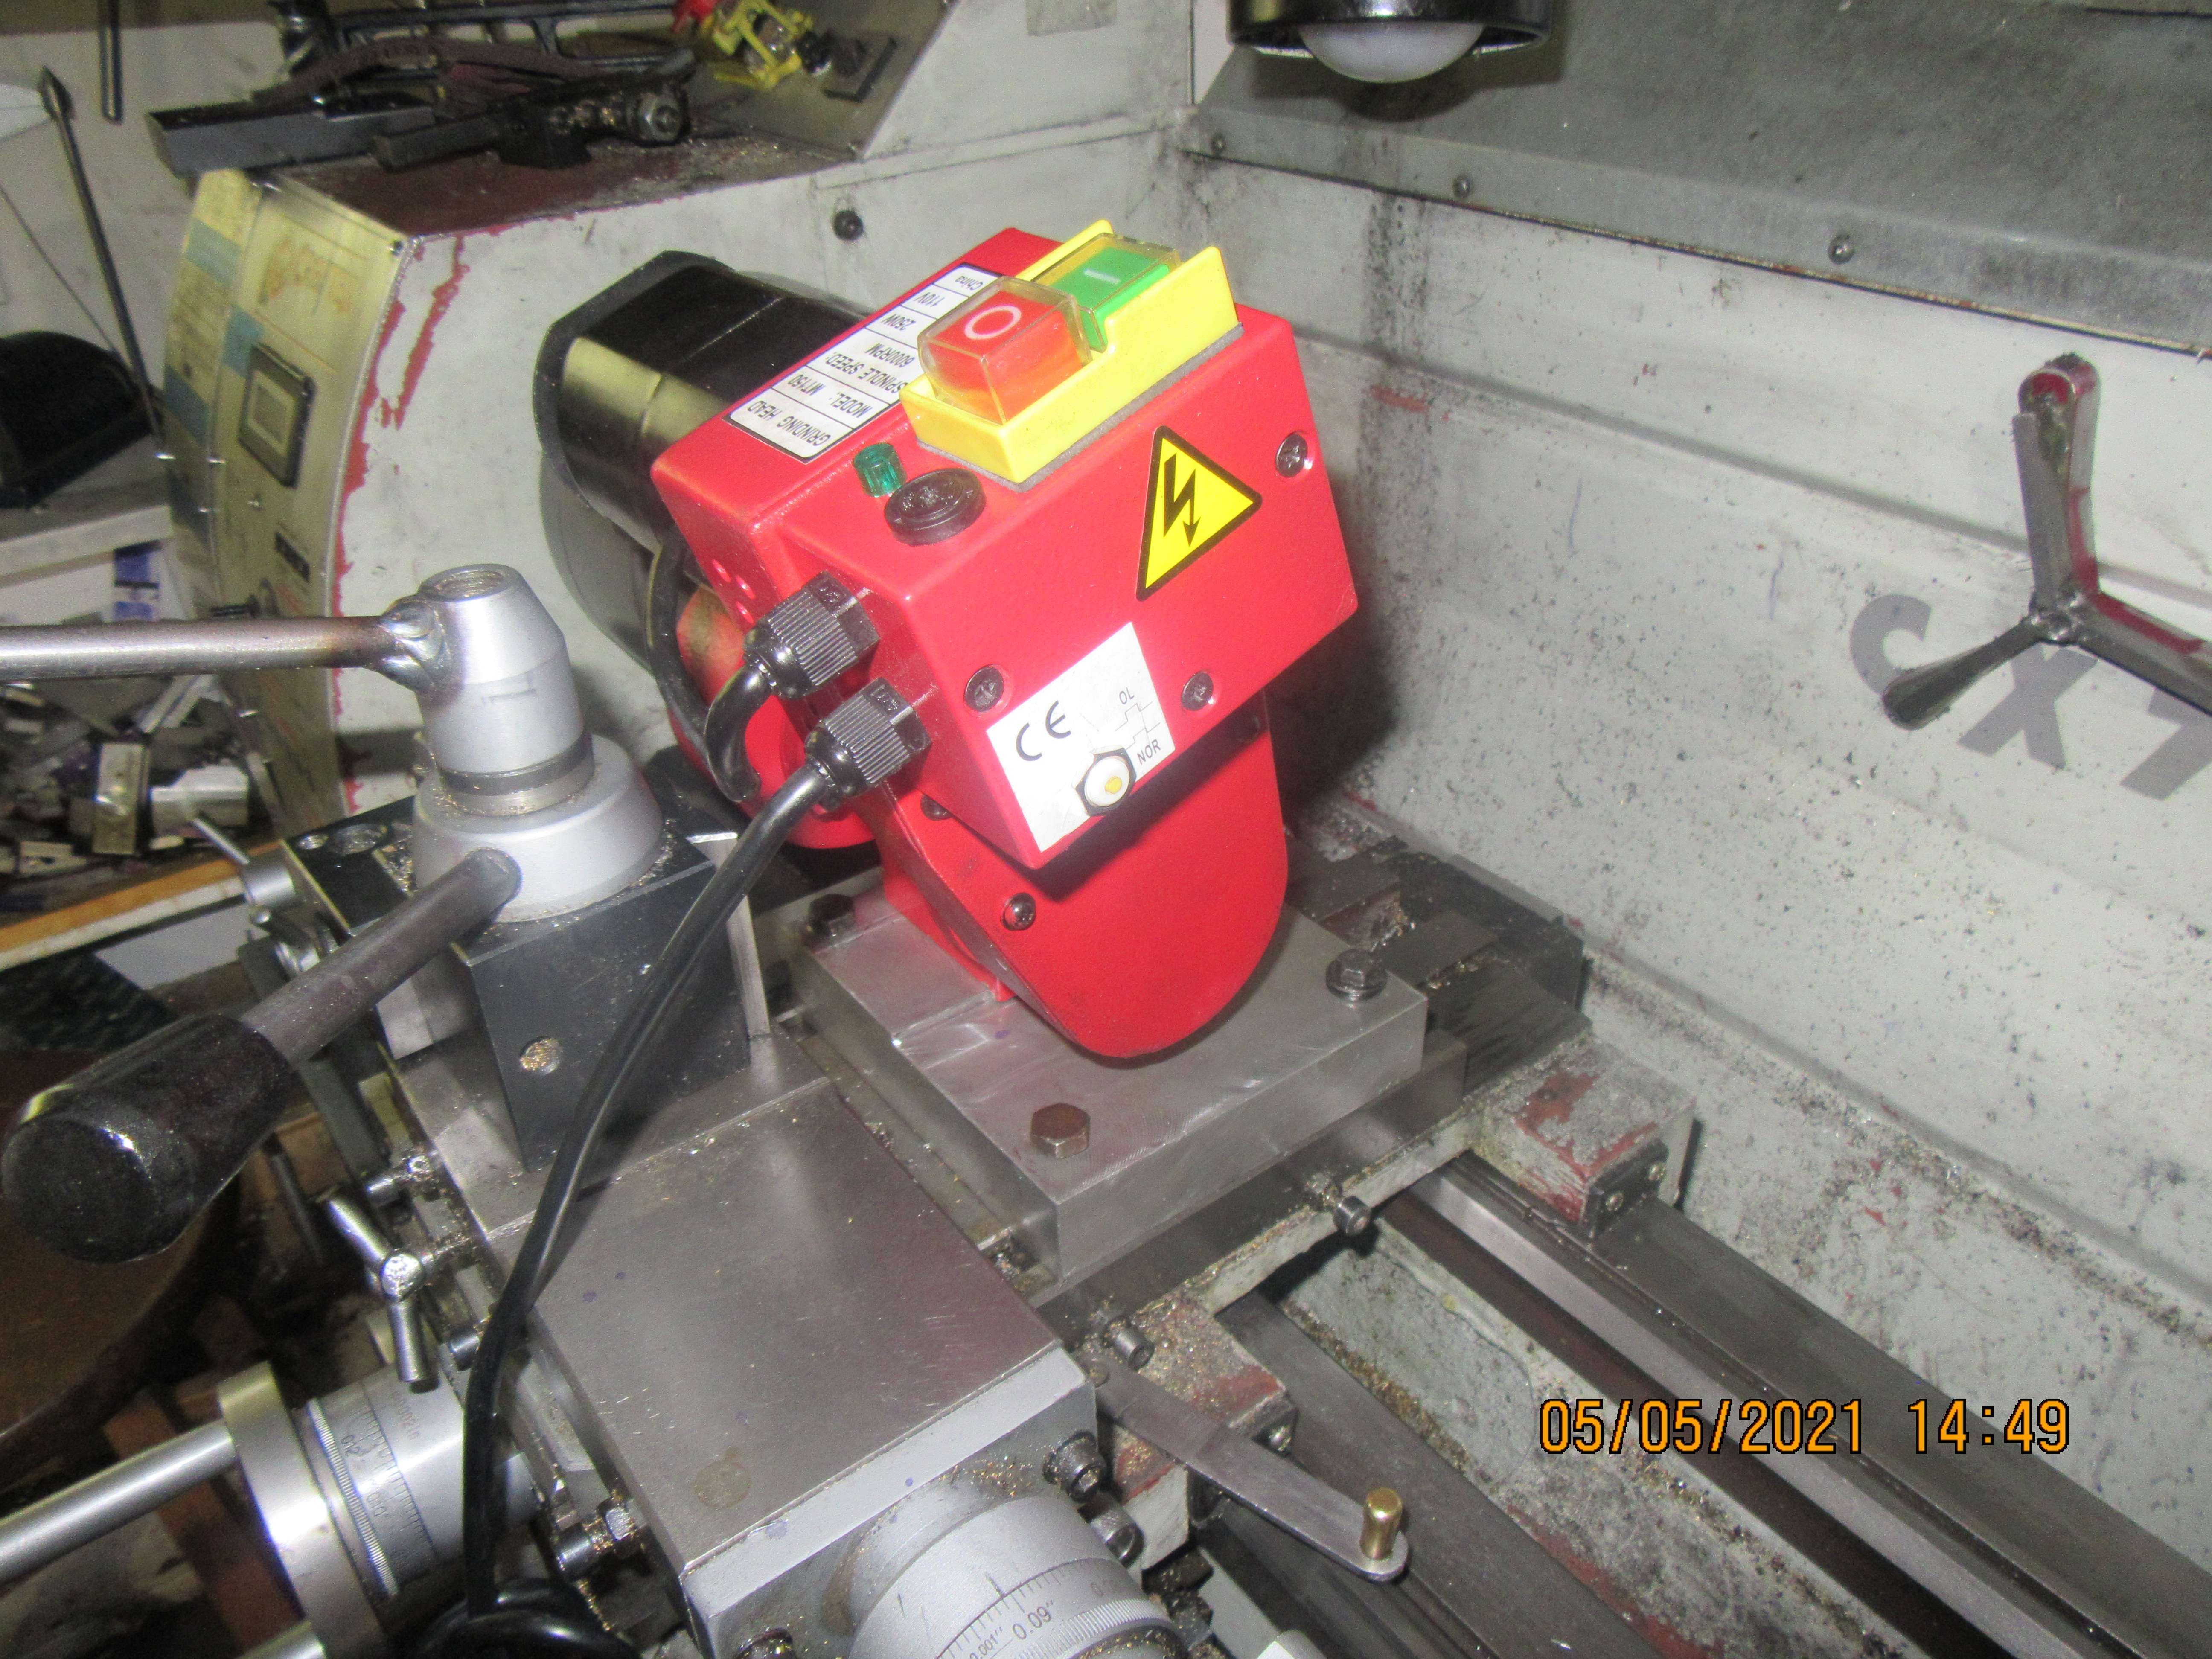


Today, I got a free moment away from the heat treat oven, so I decided it must be time to dress the wheel on my toolpost grinder. According to what I have read, the depth of cut should not exceed 0.001", and you should begin cuts in the center of the grinding wheel and work towards the outside. The grinding wheel was brand new, so I didn't really know how out of round it might be. I put a sheet of printer paper between the grinding wheel and the diamond (with power to the grinder off) and advanced the cross slide until it pinched the paper. A sheet of paper is roughly 0.004" thick, so this gave me a starting point reference. I kept advancing in 0.001" increments with the grinder turned on, and kept moving the grinder mounted on the lathe cross slide from right to left and back, advancing the cross slide 0.001" each time. You can't really see dust coming off the wheel, but every 0.005" I would stop and check the wheel. Sure enough, the outside diameter of the wheel was not concentric with the grinder shaft. The wheel changed color wherever the diamond contacted it, and ultimately I advanced the cross slide about 0.015" before the wheel cleaned up all the way around. So, dressing a grinding wheel with a diamond in a dedicated holder isn't really a big deal. It's just one more thing I haven't done before, and really, there is nothing to it.---Brian
Brian, You are talking about dressing the wheel, then you are talking about depth of cut. Are you saying calling that the amount that you are advancing the diamond into the wheel? I have never heard of the practice of plunge dressing from the center, then to the sides.
Dress from one side the other, very light cuts of the wheel cause the grains of abrasive in the wheel to smooth over. Just like when you use fresh sandpaper then it dulls. Grinding wheels can very, greatly, in composition, bonding material, hardness, grit, ect, just like what has been discussed with pedestal grinders, just more so.
When you dress, you do not want to pass the diamond back and forth across the face of the wheel for a grinding pass. When you are truing the wheel, you obviously will have to. After you have dressed your wheel, take a piece of paper and push it into the face of the wheel, while it is running. This will clean the loose dust and very small particles from the face.
Similar threads
- Replies
- 148
- Views
- 25K
- Replies
- 30
- Views
- 6K


