You are using an out of date browser. It may not display this or other websites correctly.
You should upgrade or use an alternative browser.
You should upgrade or use an alternative browser.
Photographs taken while building several Aderyn Steam Motors.
- Thread starter Tony Bird
- Start date

Help Support Home Model Engine Machinist Forum:
This site may earn a commission from merchant affiliate
links, including eBay, Amazon, and others.
Tony Bird
Senior Member
Hi Dennis,
Quite right. You will notice that that the face of this shellac chuck is well away from the chuck holding it. This is so a blow torch can be used to warm it up if the shellac has got a little thick before he work piece is centred. there is a bit of a knack to it, a bit like throwing a pot but once mastered success nearly every time. The trick is to have the shellac just mastic, the lathe speed doesn't matter much.
Regards Tony.
Tony Bird
Senior Member
Hi,
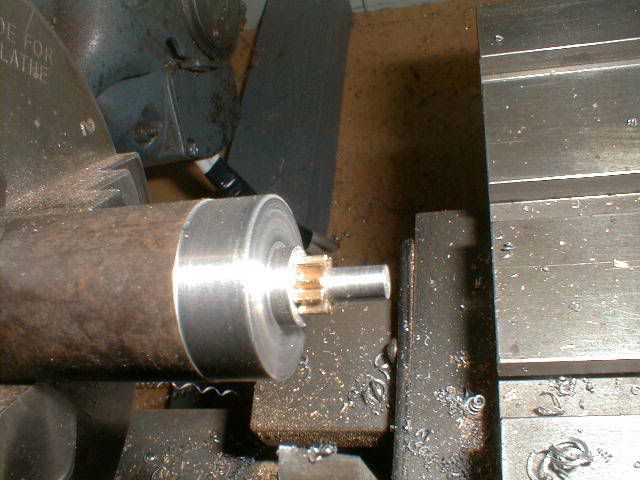
Pinnion fitted to Axle.
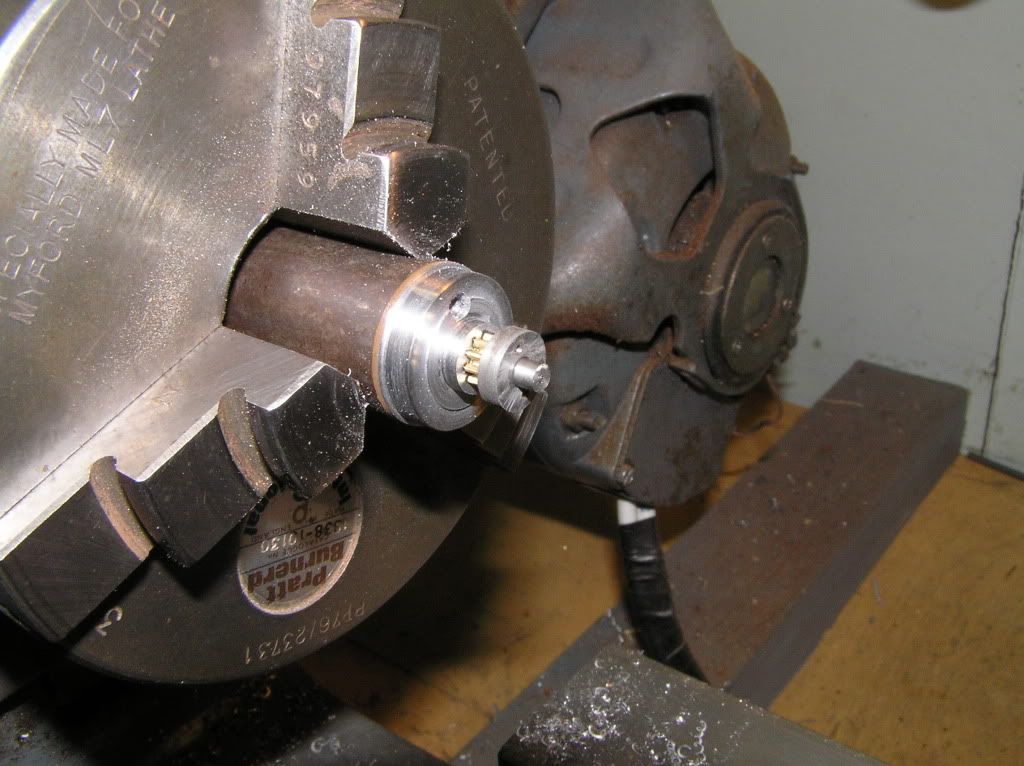
Bearing fitted to Axle.
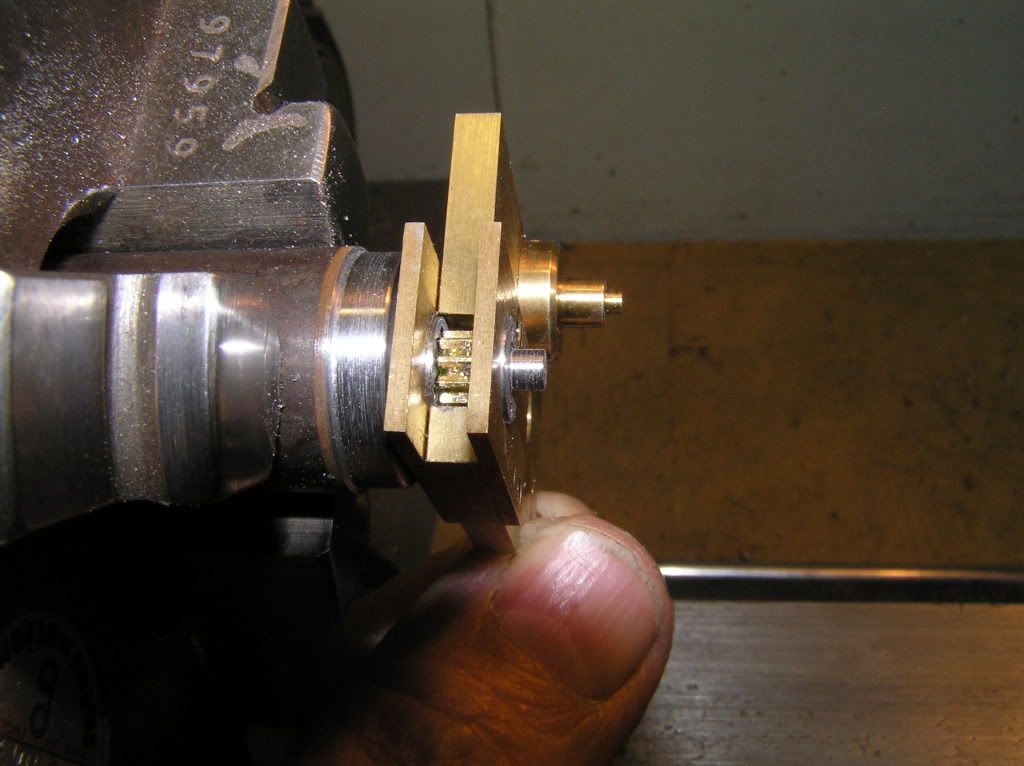
Checking Clearances.
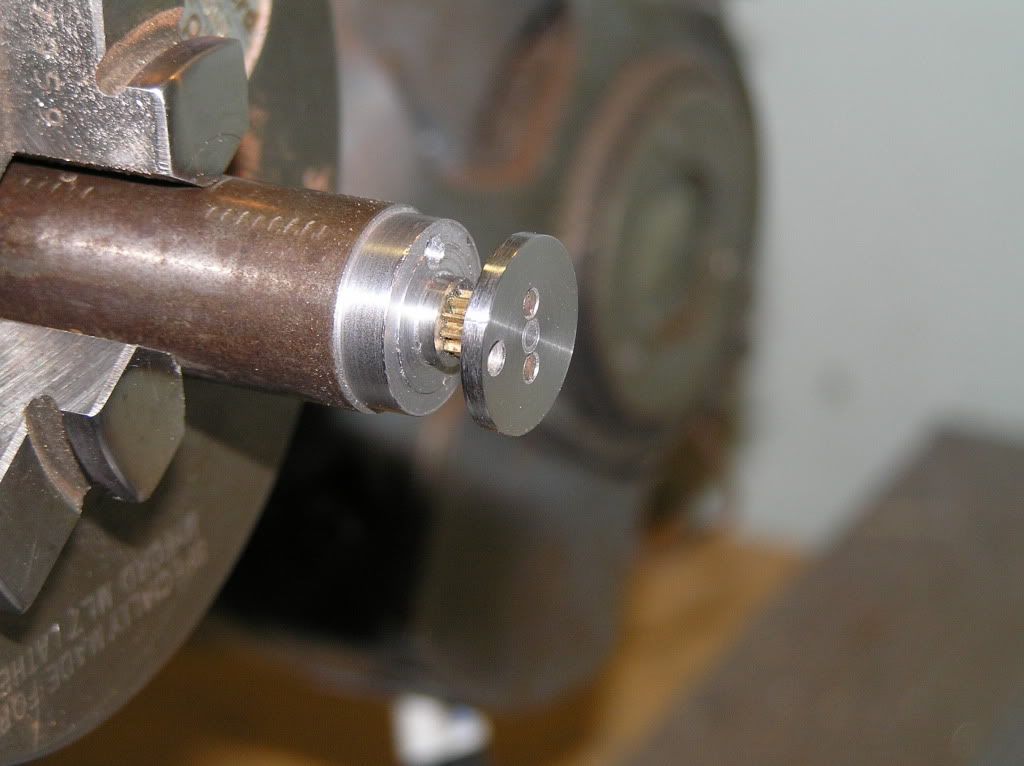
Crank Disc fitted.
Sawing Axle.
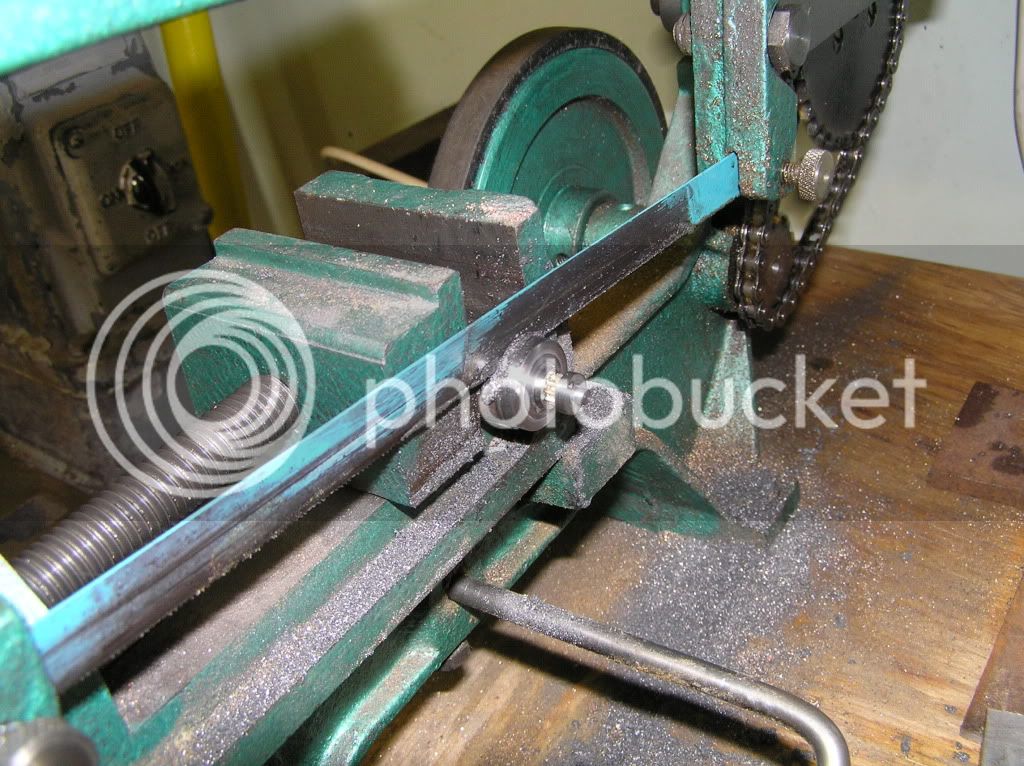
More to come.
Regards Tony.
Pinnion fitted to Axle.

Bearing fitted to Axle.

Checking Clearances.

Crank Disc fitted.

Sawing Axle.

More to come.
Regards Tony.
Tony Bird
Senior Member
Hello Again,
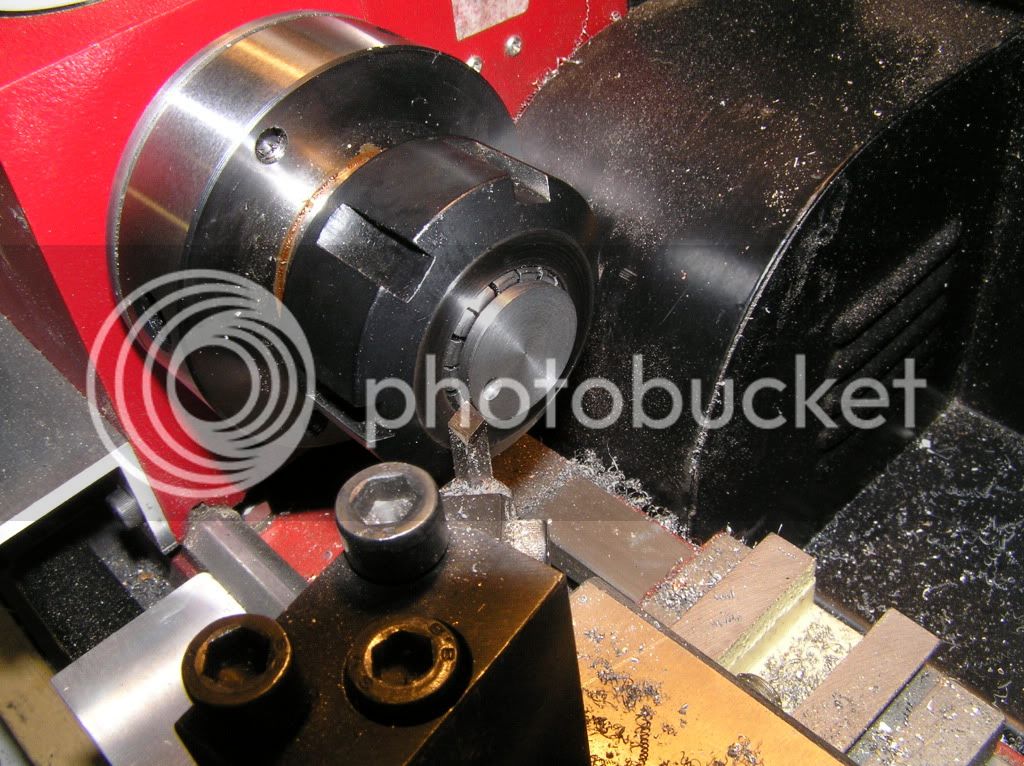
Facing Axle.
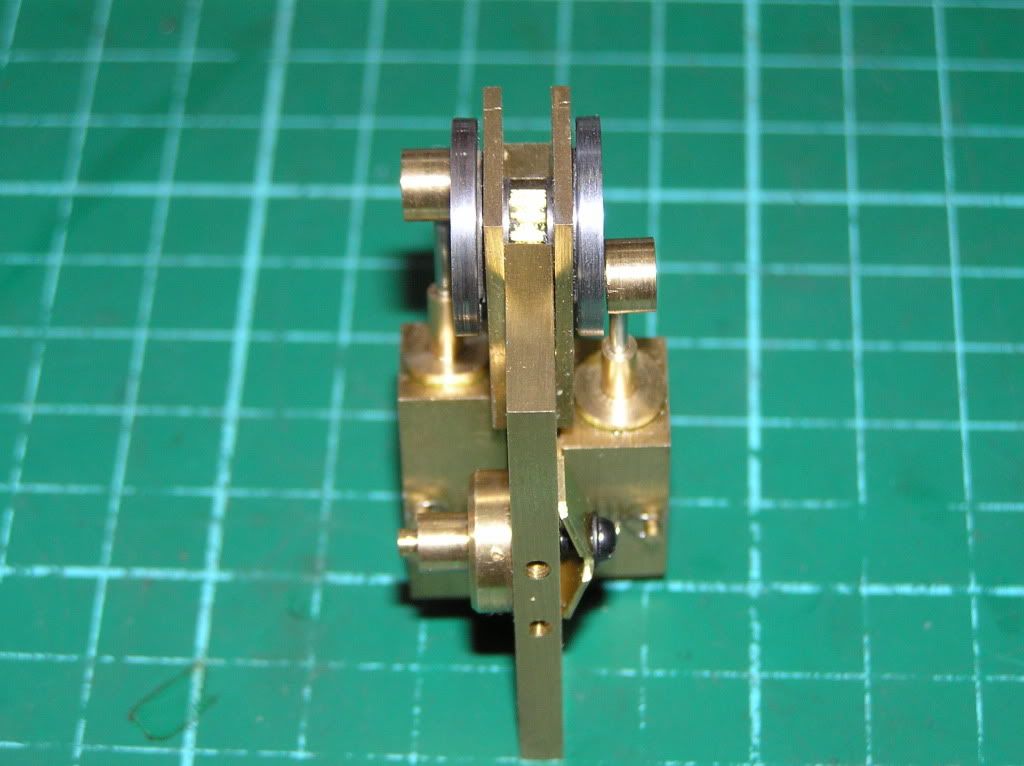
Checking Clearances.
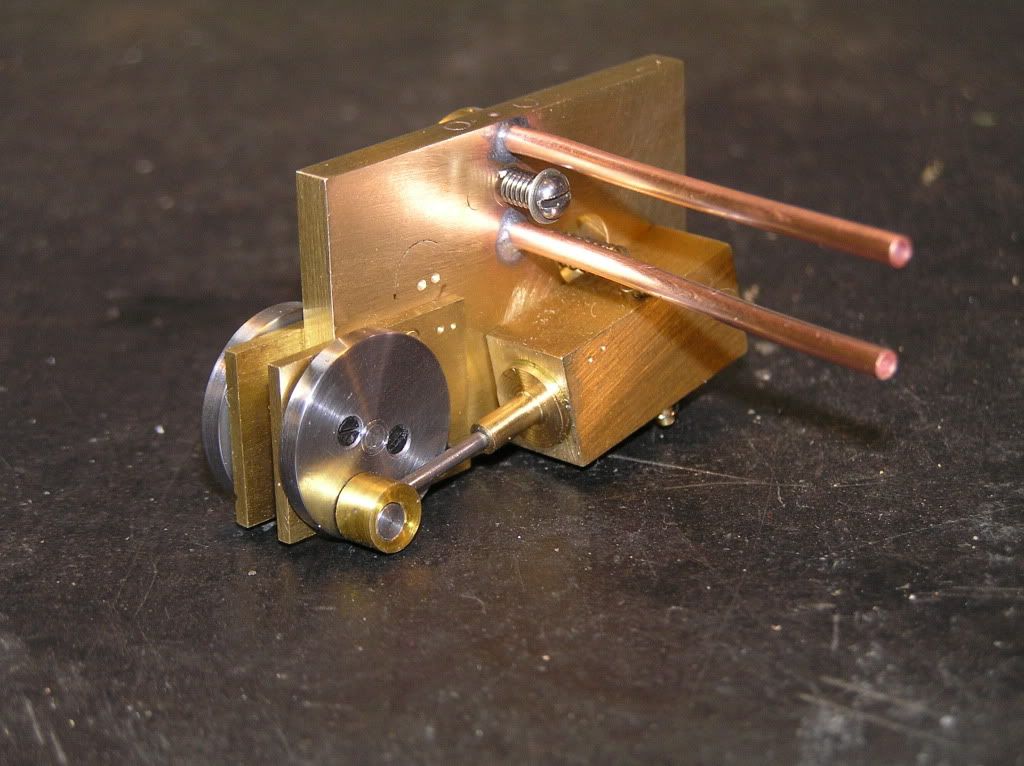
Finished ASM.
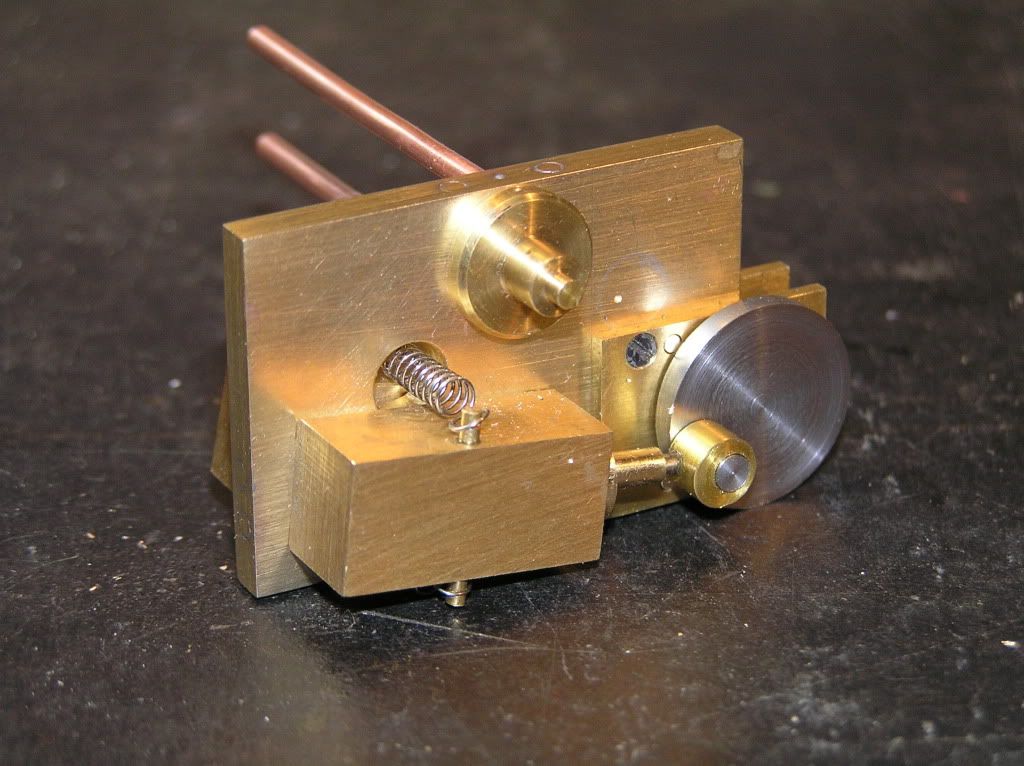
ASM running.
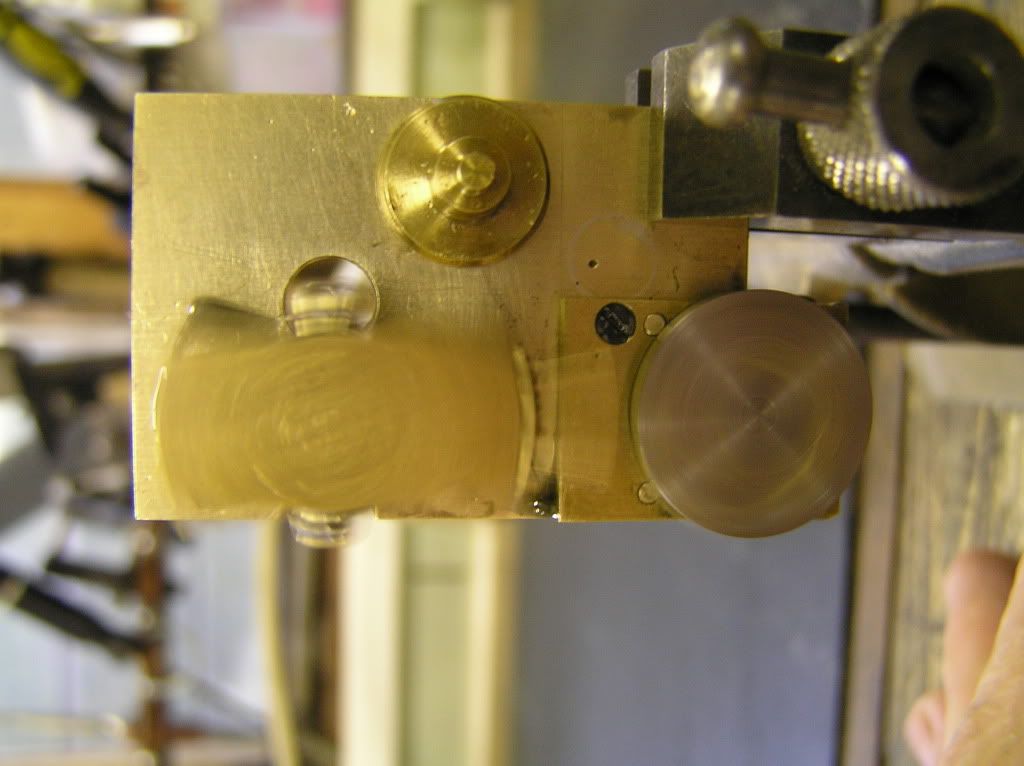
Well that's the end of the construction photographs I have. I will and some bits from a previous post to complete the narrative along with some conclusions. Might take a day or so.
Regards Tony.
Facing Axle.

Checking Clearances.

Finished ASM.


ASM running.

Well that's the end of the construction photographs I have. I will and some bits from a previous post to complete the narrative along with some conclusions. Might take a day or so.
Regards Tony.
- Joined
- Dec 2, 2010
- Messages
- 21
- Reaction score
- 0
Lots of great info in this post. I saw you used a jewelers saw to make a cut while the part was chucked in the lathe. Do you cut off the part with the lathe rotating? Also, where do you get shellac of the form and type suitable for making you shellac chucks. Is this dry shallac flakes? These chucks appear to be the answer to several challenges I have had holding and facing several identical small coin shaped parts.
thanks for the postings.
Paul
thanks for the postings.
Paul
Tony Bird
Senior Member
Hi Paul,
No the lathe isn't rotating using its motor while the piercing saw is being used. There is a small shoulder on the work piece that the saw blade is using as a guide while the chuck is rotated by hand.
I think that shellac flakes dropped on to a hot chuck should work OK. I use a shellac stick that can be obtained from Horological supply stores, they will also usually supply a good range of sizes of piecing saw blades suitable for metal. The shellac I use came from www.cousinsuk.com I think the sticks cost about £9 each but they last a long time even with the amount of use I give them.
Regards Tony.

$190.00
$254.99
Genmitsu CNC 3018-PRO Router Kit GRBL Control 3 Axis Plastic Acrylic PCB PVC Wood Carving Milling Engraving Machine, XYZ Working Area 300x180x45mm
SainSmart Official

$188.98
TM NEXDYNAMI RE41157 Water Pump Compatible With/Replacement For/John Deere 6200 7400 6300 6600 6500 6400 7220 7600 7200 RE41157
VIVID MARKET CORPORATION

$94.99
$109.99
AHS Woodmaster 4400 Maintenance Kit for Outdoor Wood Boiler Treatment
Alternative Heating & Supplies

$99.99
$109.99
AmTech300 - Boiler Treatment Professional Strength (Rust Inhibitor For Outdoor Wood Boilers)
Alternative Heating & Supplies

$59.99
Sunnytech Hot Air Stirling Engine Motor Model Educational Toy Electricity Generator Colorful LED (SC001)
stirlingtechonline

$99.99
AHS Outdoor Wood Boiler Yearly Maintenance Kit with Water Treatment - ProTech 300 & Test Kit
Alternative Heating & Supplies

$519.19
$699.00
FoxAlien Masuter Pro CNC Router Machine, Upgraded 3-Axis Engraving All-Metal Milling Machine for Wood Acrylic MDF Nylon Carving Cutting
FoxAlien Official

$45.99
Sunnytech Mini Hot Air Stirling Engine Motor Model Educational Toy Kits Electricity HA001
stirlingtechonline

$156.90 ($1.40 / oz)
Replacement Combustion Chamber Kit, Burnham V8 and V8H, 1-6 Sec, 108136-01, 1129
Lynn Manufacturing

$39.99
$49.99
Sunnytech Low Temperature Stirling Engine Motor Steam Heat Education Model Toy Kit For mechanical skills (LT001)
stirlingtechonline

$403.09
DM14 Engine Build Kit, Metal Engine Build Model Great Metal Material for Engineer for Factory
Easoger Official
Tony Bird
Senior Member
Hi,
Got a date wrong so this series of postings will be finished earlier than I thought.
With the photographs that I took while making the ASM used up I thought it might be a good idea to show what happen to the 4 motors and a lot of extra bits made. Most of the next lot of photographs have already been used in another posting in this group but might finish this postings off for those who haven't seen them.
Mostly I make steam models of locomotives or boats, so the engines have to develop enough power to move them. They get used a lot so they have to be reliable and not wear too quickly. Most of my steam locomotives are made to 16mm to the foot scale and run on '0' gauge track. I wanted to make a model of a very small locomotive that had inside cylinders and valve gear. Models using more or less accurate represention of the original cylinders and valve gear have been made and work but are on the fragile side. As mostly they cannot be seen when in use and wondered at only when shown, the idea of a sort of steam version of an electric motor was born.
The design. I have made and designed many steam engines of different sizes, a lot of them of the oscillating verity. The inside frames of a '0' gauge locomotive are 24mm apart which allows a engine width of 23mm a 0.50mm clearance either side. The engine needed to be self starting and reversable, so would have a very small swept volume and not be very powerful at slow revolutions much like an electric motor. So gearing would be a good idea, higher engine revolutions and more control. Most of the locomotives to be modelled had an axle centre distance of 60mm, so these were the parameters for the engine 23mm wide less than 60mm long height not too much of a problem.
Tony Bird
Senior Member
To be added to previous posting. My computer skills are not that good. I'm sure that when I get to the bottom of the box there is away of typing and seeing what you have typed. To continue.
So that's why the ASM was made and the design considerations. First a prototype with no drive pinion.
Then with a gear drive in a test chassis. Not a thing of great beauty.
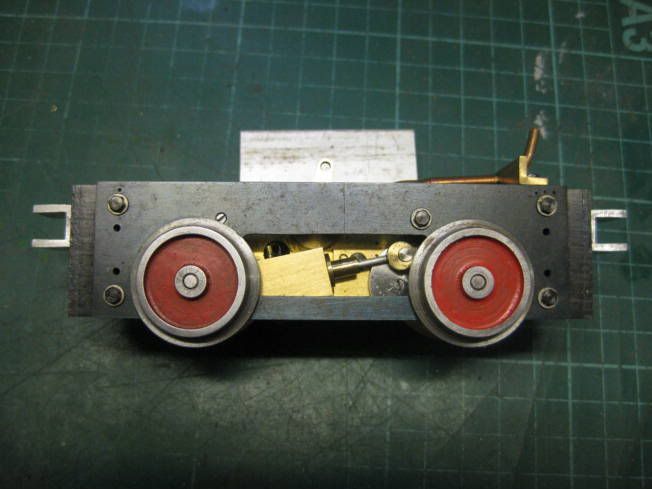
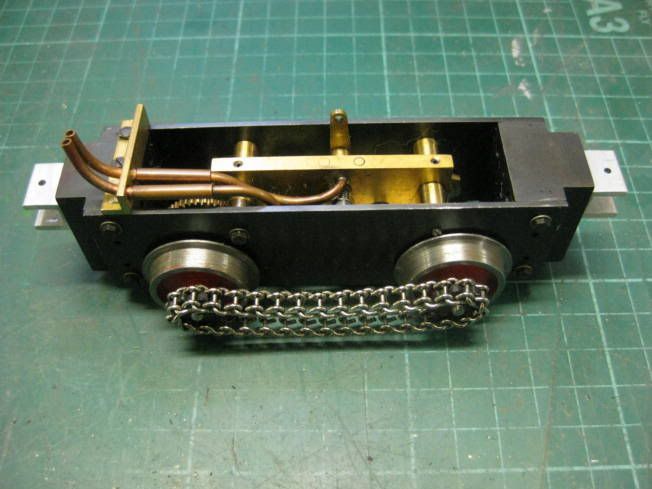
See next posting.
So that's why the ASM was made and the design considerations. First a prototype with no drive pinion.

Then with a gear drive in a test chassis. Not a thing of great beauty.


See next posting.
Hi Tony
Shellac chuck! I have some shellac left over from an attempt at changing by myself the pads of my clarinet keys, what a mess I did. Not so easy to master, I'm quite impressed by your skill with this stuff. I sometime use an hot melt glue gun as a third hand to settle pieces in the vice but not reliable enough to use when the lathe is running!
I copied your ASM motor as soon as I have seen the picture in another thread here, I did one and it worked well upon a blow of air with my lungs (not tested with steam yet). If I had known, I would have done better to wait for your tutorial; it is so much to learn in, even for a simple wobbler engine!
The question now is what to do with it! It is entirely designed for a locomotive with cylinders hidden between the frames as in many British loco; it remains for me to find the right model, in plain gauge 0.
Reading your posts is a great pleasure.
Cheers
Zephyrin


Tony Bird
Senior Member
Next an ASM with a modified port block was fitted to a model designed by Dave Watkins and known as 'Idris'. As designed it had a pair of oscillating cylinders as a direct drive to its leading axle. I have made a number of them and they work very well as designed. Fitted with a ASM they work much the same but will go slower around sharp curves due to the gearing.
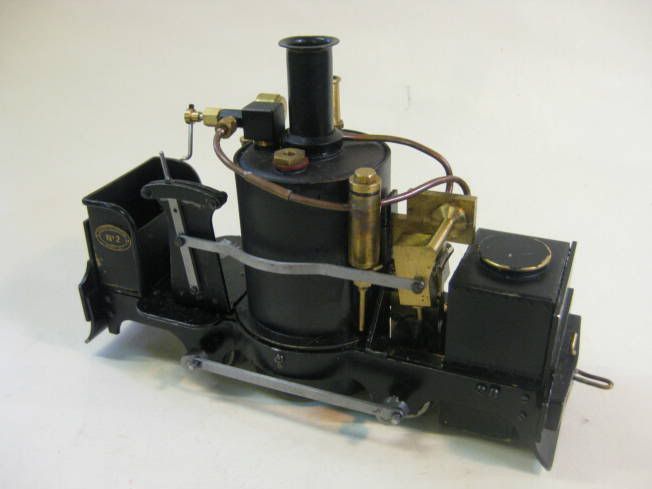
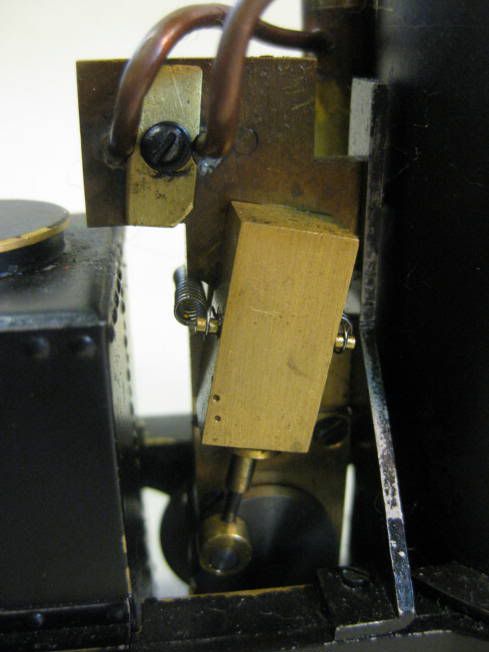
The latest ASM was fitted to the chassis of the locomotive I wanted to model an 18" gauge 0-4-0.
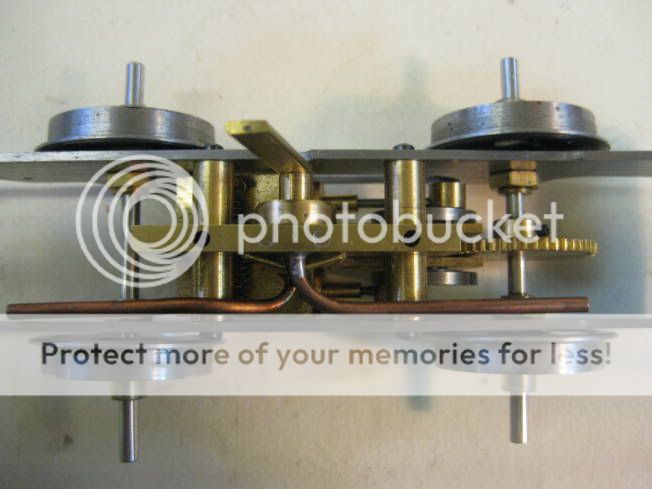
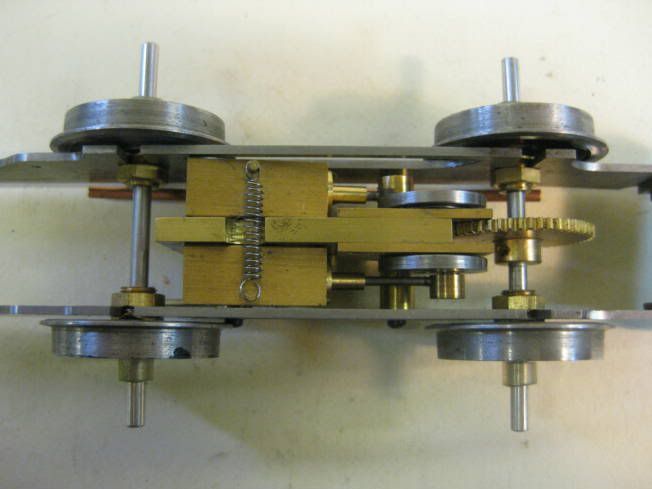
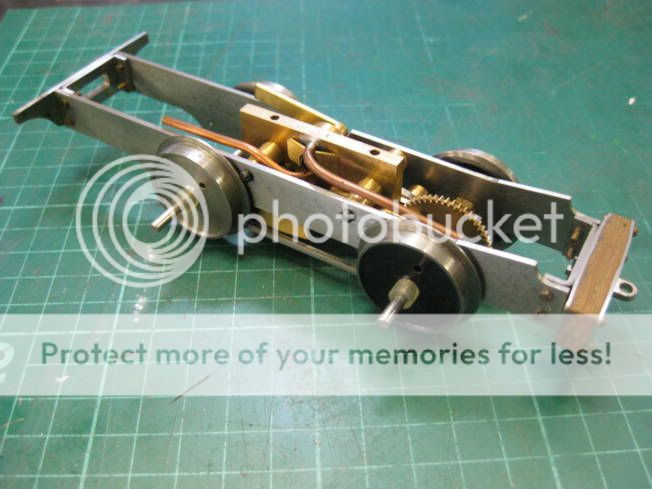


The latest ASM was fitted to the chassis of the locomotive I wanted to model an 18" gauge 0-4-0.


Tony Bird said:Hi Dave,
Shellac chucks and Gravers.....OK so what do you do for a day job Tony?I retired from the retail trade five years ago. So the answer would be making models, not very profitable but the best job I have had so far.
The answer which I expect you have guessed is that after leaving secondary school at the age of fifteen I became an Indentured Apprentice in the watch, clock, instrument and jewellery trade. The workshop did repairs to all aspects of horology from 5 ligne Jaegers-le-Coultres to turret clocks and everything in between, including gramophones, musical boxes, cine cameras even clock work model toys. Some of the work was of national importance, thermographs for the local brewery! When I finished my time I went to work for the Buren Watch Company in Switzerland for a bit. On returning to the UK I became self employed which I remained for the rest of my working life. Finding repairing watches a bit boring I specialised in the repair of old clocks. This I did for many years before studying Gemology and gradually moving into the retail sector.
Regards Tony.
FBHI.
YUP figured FBHI....... ;D
I've been tooling up to build a clock. I've also been reading up on the BHI distance learning site...though I clearly lack your experience or credentials, I plan on having fun anyway...
Great build Tony! Keep it coming...
Tony Bird
Senior Member
Continue again. Having got so far it was time to experiment in making practical small boilers and gas burners. This wasn't as hard as I thought it would be, then the project stalled I couldn't find anywhere to fit a gas tank of a reasonable size. I will probably fit into a similar prototype that has space for a gas tank as well. Though I use flexible connections when testing models I don't like the idea of using them when demonstrating them at exhibitions. Conclusions? The ASM certainly works and is powerful enough, it has to be fairly well made to do so. A gauge 1 version would be better the extra 12mm width allowing large re cylinders and bearings. The next photograph is of the ASM R+D box.
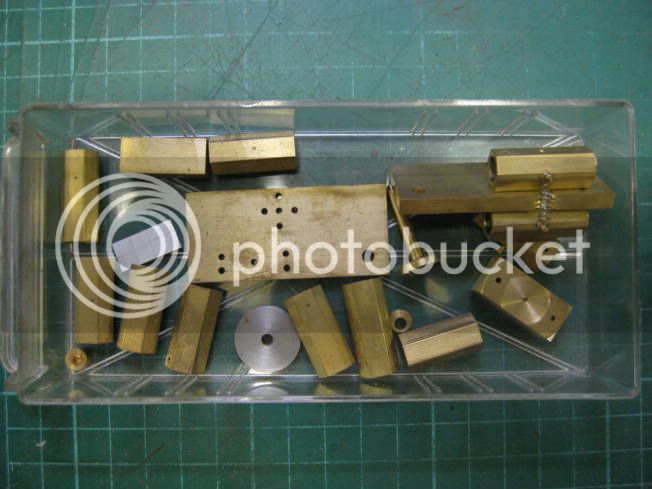
Photographs of an ASM. Well that's the end of this posting. Any questions please ask. Off to the shed to play.
Regards Tony.
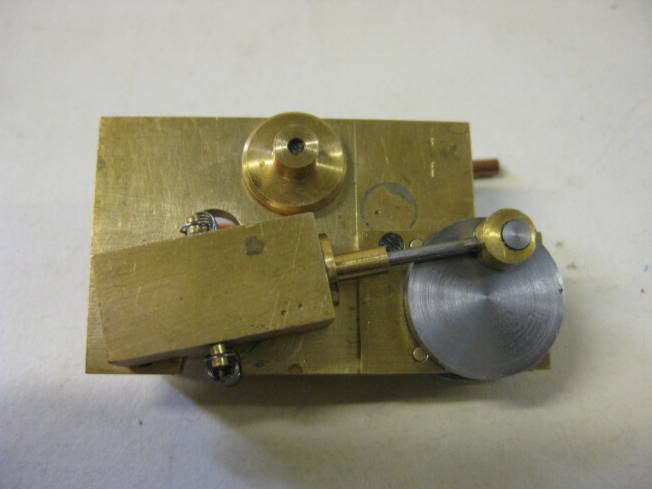
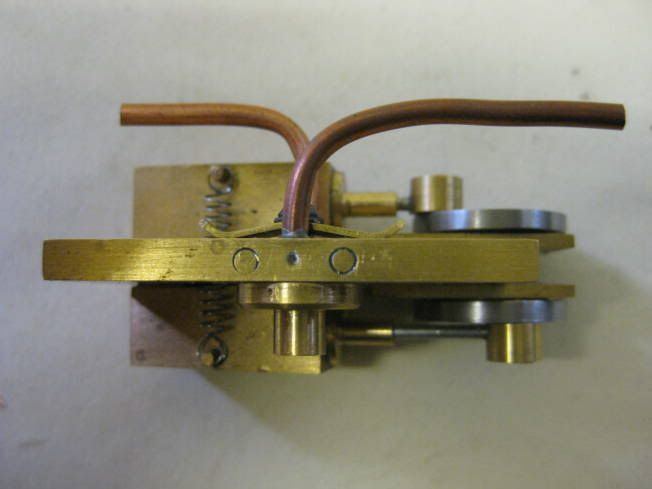
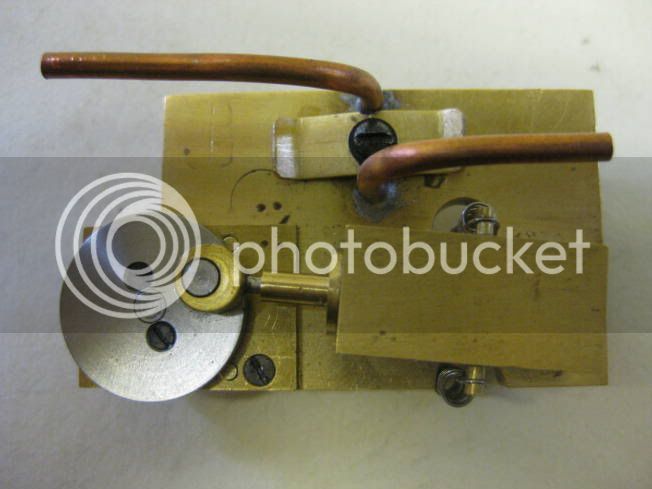
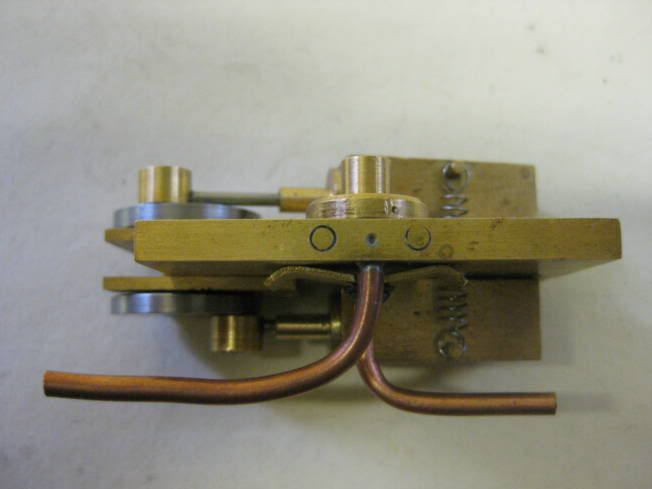

Photographs of an ASM. Well that's the end of this posting. Any questions please ask. Off to the shed to play.
Regards Tony.


Tony Bird
Senior Member
Hi Zephyrin,
Looks good! An ASM can also be used in locomotives with inside frames with outside false cylinders and valve gear. Not much point in fitting it if the locomotive has outside frames. Look forward to see what you decide to do with your engine. In what part of France do you live? We visit Paris fairly often.
Regards Tony.
hi Tony
"locomotives with inside frames with outside false cylinders and valve gear"
false cylinders, do you mean non working cylinders?
Never!
Well, in "model engineering" I'm mostly interested in the engineering part and not that much in the model side of our hobby.
I have several unfinished but working models for this reason, adding lamps, bells, door knobs and so on, even painting, interest in the project vanishes.
I'm living in a green suburb not that far from Paris, hence a real chat in the real life can be organized. send PM when you will be planing to visit Paris.
Zephyrin
Truly an excellent build thread, Tony. The kind of thing I've been accustomed to seeing on our other place. ;D
You really help us out with all the pictures.
I don't mean to tell you what to do, just a suggestion; You can put posts like this in the "Work in Progress" section. This section (Finished Projects) doesn't seem to get as much traffic as the former and there is a lot in a post like this that folks who go mostly to the WiP section would love to see.
Thanks for sharing your excellent tips and techniques.
Dean
Tony Bird
Senior Member
Hi Dean,
I did wonder about which section to use with this thread. As the ASM's were made a few years ago so were finished, so I thought this would be the place. The photographs used were cobbled together from a talk I gave on using shellac chucks at my model club and some photographs I took to remind me how certain parts were made. This is why the machining of some parts isn't shown. When I start on a new project I will do as you suggest and use 'Work in Progress'. This might not be for a bit as I am trying to complete some part built projects I have.
Regards Tony.
Similar threads
- Replies
- 1
- Views
- 1K
- Replies
- 3
- Views
- 2K
- Replies
- 7
- Views
- 3K


