My Cup Runneth Over

Home Model Engine Machinist Forum

Help Support Home Model Engine Machinist Forum:

This site may earn a commission from merchant affiliate links, including eBay, Amazon, and others.

tel

Well-Known Member
Joined
Feb 8, 2008
Messages
3,293
Reaction score
45
... or The Oily Boid Get The Woim

Had to make a pair of oil cups for the current project this morning, so I thought, since the average engine builder will be called upon to do this several dozen times, that a brief 'how to' might be in order.

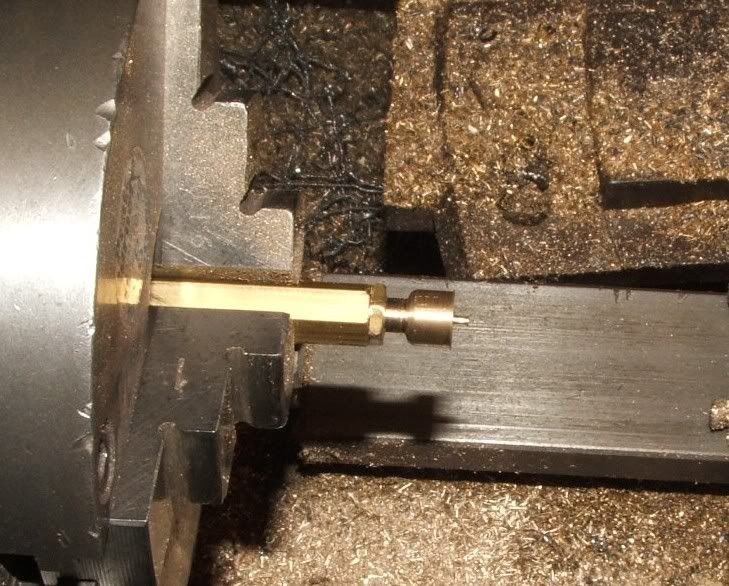
First chuck a bit of hex (5/16" in this case) and turn down the end and tread for a suitable mounting size (4BA here)
oilcup1.jpg


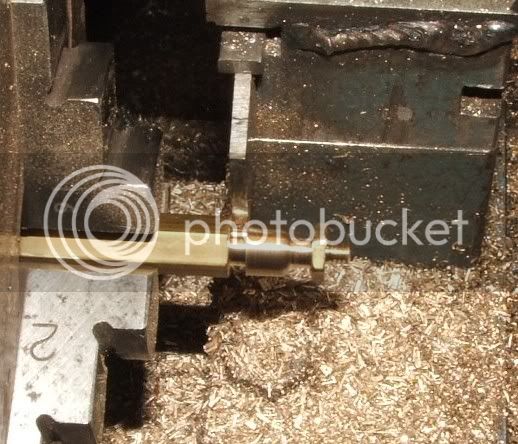
Next, leaving 1/16" of the hex unsullied, plunge in the parting tool to form the waist
oilcup2.jpg


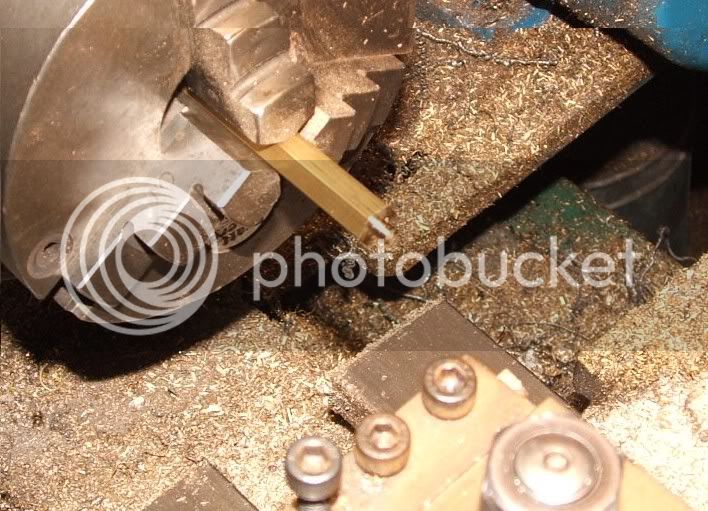
Then turn the hex away for a length long enough for the oiler body + the width of the parting tool
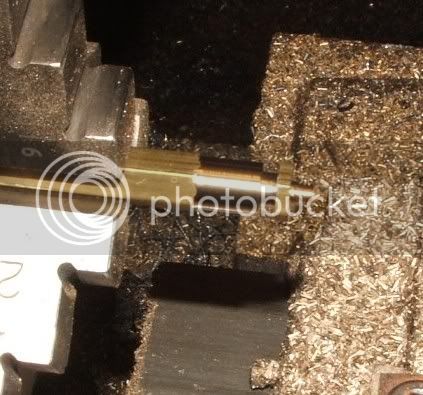
oilcup3.jpg


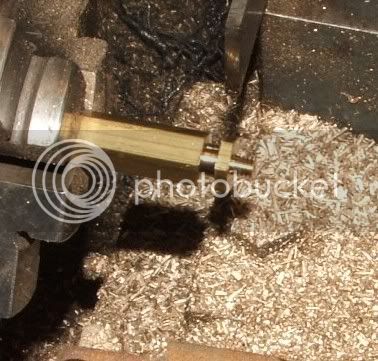
Shape up the bottom of the cup a bit with a file
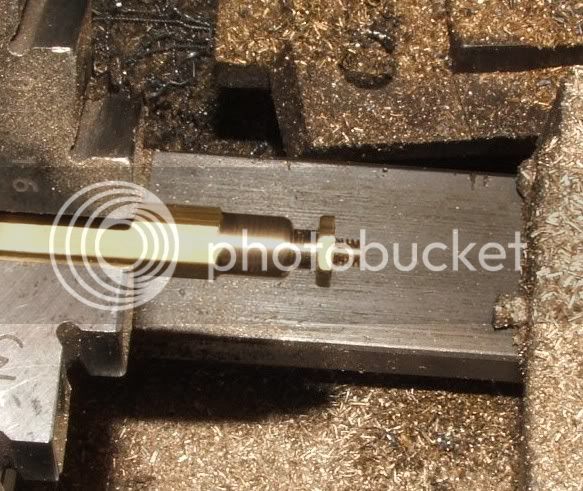
oilcup4.jpg


... and part off to length

oilcup5.jpg


Ditto repeato for the second cup, or as many as you want to make, then drill and tap the remaining stub of material to suit the threads you made on the ends
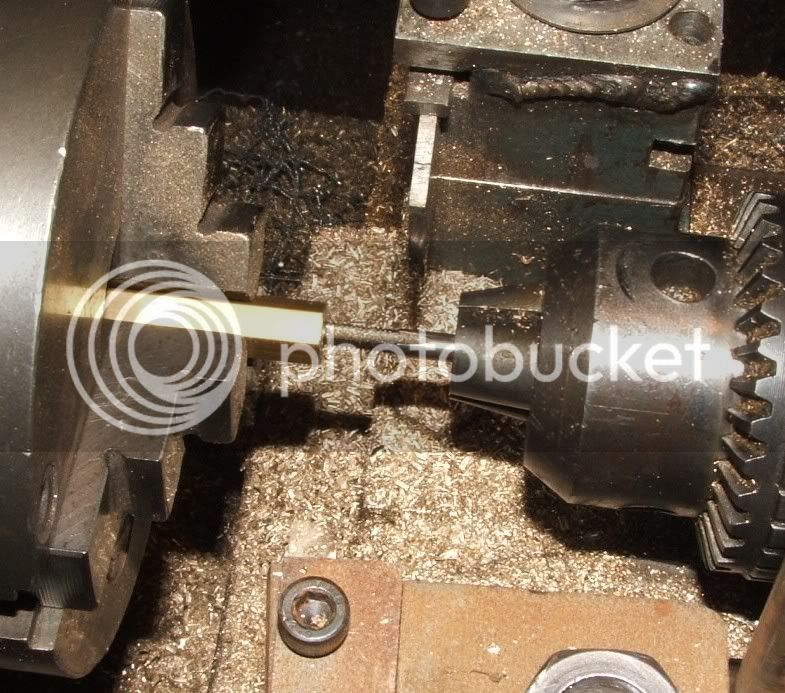
oilcup6.jpg


Screw in one of the bodies .....

oilcup7.jpg


... centre - deeply with a small centre drill, then drill right thru with a smallish drill (1.2mm here)
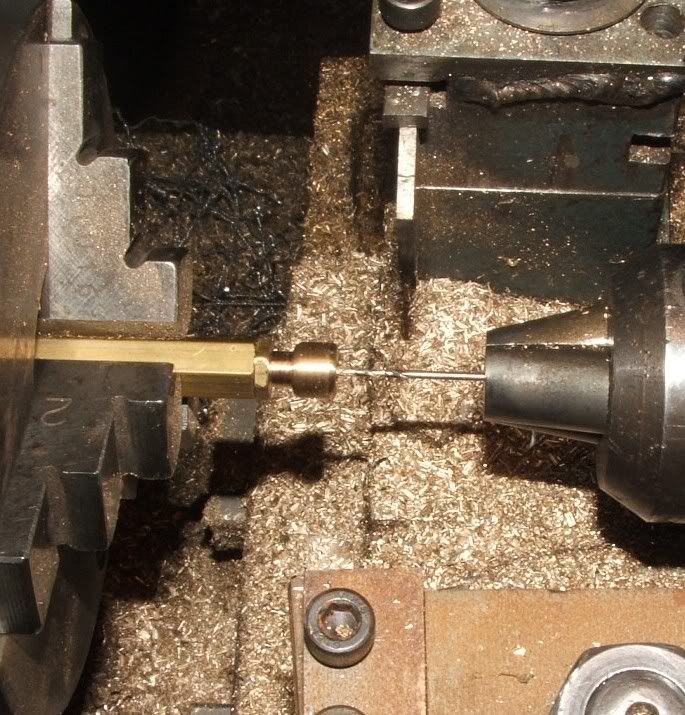
oilcup8.jpg


Now open 'em out as large and deep as your nerves will allow
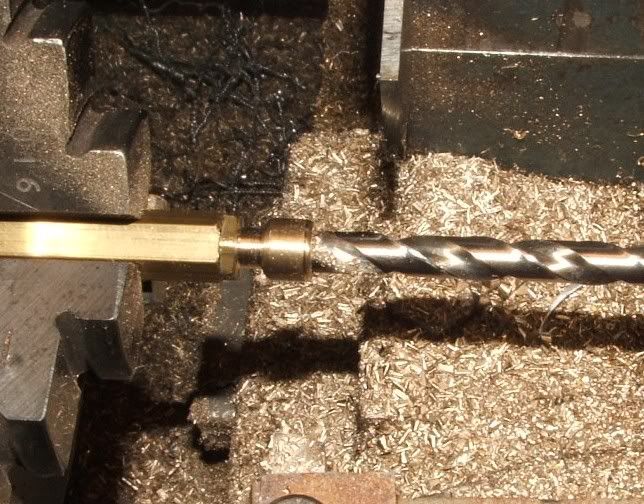
oilcup9.jpg


Clean 'em up a bit, and you should have a pair of oil cups.
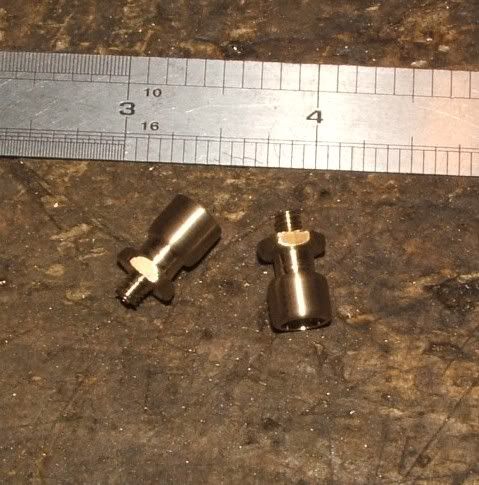
oilcup92.jpg
 
Thanks for that.
I always enjoy photo shoots of how to make items.
 
Diymania said:
Nice looking oil cups!

Whats with that hidious looking weld on your tool post :eek:, overtightned/tool caught and cracked ? ???

Mate thats NOT hideous...its a functional running repair/modification..... he is out in the Aussie outback ya'll know... sorry.. no hes not hes actually almost urban.... damned city-ites (Bathurst ones that is)....
 
Diymania said:
Nice looking oil cups!

Whats with that hidious looking weld on your tool post :eek:, overtightned/tool caught and cracked ? ???

Artie nearly got it - it was a cheap and cheerful conversion of one of my 'ome made rear tool post heads to take a different parting tool to what I had been using. You know, one of those temporary jobs that settle in and seem to stay forever (bit like my brother-in-law, now I think of it). Like my rough, temporary tailstock die holder that has been on service for 28 years now.

And if it's any consolation Artie, I'm well out of Bathurst, getting on toward the Abercrombie country, where the men all 'ave 6 fingers and the kangaroos are nervous.
 
Disappointed! When I read the title, I thought one of our lady members had returned. ;D
 
very nice i really like the pics of how things are done. it really helps newbie like me.
some of us dont have many brains left but we can still learn new things just need to be shown how.
and I thank all of u for posting the how too's on doing things
so a BIG THANK U to all of u members
 
Good job Tell! :)

Step- by- step with pictures that I can easily follow, and learn from.

Thanks. :bow:

-MB
 
I also appreciate the how-to's.

Even though I have this forum to use for reference, I paste many of the photos and written info into Microsoft Onenote. This program is wonderful for categorizing various pieces of information I run across here and on other sites. This one gets its own tab.

-Trout
 
Nice tell I like the idea of the threaded work holder I have just used a collet for the second side but that is nice for those without collets.
Tin
 
Great article. I love to see these how to's. Thank you for posting this and I hope you and others post a lot more, you help us (old)newbies learn a lot and give us a lot of ideas. Thanks again.
 
A hex nut matching the thread of the oiler with a kerf through one flat, will also hold threaded work securely in a three jaw
 
Hi Tel

Thanks a lot for sharing that idea...Its very helpful and I really like the pics of how things are done!!
Best regards
Paolo
 
Cheers Tel, that'll come in handy.

Looking back through some pics of full-size hengines, I found quite a few with almost identical cups although most had 'lids' to keep the cr@p out. Found this pic of one engine with the common glass cups, seems it'd be easy to make a small version with some gauge glass....

cups.jpg
 
Yeah Paul, glass ones are easy enough to make, just a bit of a fiddle in the smaller sizes. They look good tho'
 
Any idea what the sections with the holes between the cups and the hex part is for Tel?
 
Those are drip oilers mate, the little 'ole at the bottom is so you can see tne drip rate.
 

Latest posts

Back
Top