Model Engine Carburetion & Fuel Systems

Home Model Engine Machinist Forum

Help Support Home Model Engine Machinist Forum:

This site may earn a commission from merchant affiliate links, including eBay, Amazon, and others.

cfellows

Well-Known Member
Project of the Month Winner
Joined
Aug 25, 2007
Messages
3,890
Reaction score
715
The past couple of days I've been experimenting with carburetion on my vertical single 4 stroke. In this video I've mounted the carburetor on the fuel tank and connected it to the engine with a relative thick urethane tube.

[ame]https://www.youtube.com/watch?v=C8AYDaoRpHU[/ame]

I've discovered that the carburetor doesn't do a very good job of vaporizing the fuel. A lot of liquid fuel, probably in the form of spray or droplets gets into the fuel/air mix. I'm guessing that most model engine carburetors perform equally poorly demonstrating the problems with trying to scale down full size carburetors.

On the plus side, this video shows that the carburetor mounted on the fuel tank can be located remotely from the engine and the farther below the intake the better. This seems to reduce the amount of liquid fuel that finds it's way to the engine. It also makes the engine run smoother at low speeds.

It seems to me the solution to good, low speed performance is to get the fuel in as fine a vapor as possible. The vapor fuel tank does a pretty good job of that, but is too sensitive to external temperatures as well as fuel level and, for me at least, it's difficult to get a rich enough mixture. It might be interesting to see if I can find an ultrasonic transducer like those used in portable humidifiers.

Another option I'm working on is a carburetor inside the gas tank such that the excess liquid fuel would be reabsorbed by the fuel in the tank. The idea would be to create a vapor of fine fuel fog in the space above the fuel level and draw off the vapor into a mixer much like the vapor fuel tank.

Anybody got any other ideas for producing a fine fuel vapor with minimal liquid fuel in the mix?

Chuck
 
Very interesting to watch. Do you think possibly some of the liquid fuel you are seeing in the tube is vapour condensing on it's way to the engine or is it all liquid coming through the carby?

The only other thing I guess is how much the engine revved up when it was running out of fuel. I've only experienced this with 2 stroke engines running a rich mixture. As they run out of fuel they lean out and rev up substantially before they quit altogether. For your 4 cycle to do this, I assume it must be running overly rich as well?

Anyhow, great video and idea, I'll be following along to see if you can make any improvements.
 
I'd also say that its fuel droplets settling out on the inside of the tube. Not such an issue with our engines but on say an aero engine actually in use you will get a certain amount of throttle lag.

My Firefly glow engine has the carb on the engine but a remote needle valve that can be mounted anywhere along the fuel line. The idea being it keeps your fingers away from the prop when making adjustments and also having a disc to take a servo linkage the mixture can be adjusted a little in flight

IMAG2858.jpg


IMAG0758.jpg
 
Hi Chuck,
One of the problems I see with the remote carb is the wetting of the inside of the tube because of the reduced velocity in the overall distance. With the longer intake tract there's more surface area for the fuel to turn into droplets instead of staying in a gaseous state.
One of the biggest factors in making small carbs is the venturi size. I and just about everyone else seems to make them too large for the operational speed of the engine. It's surprising how small they can be and still allow the engine to perform satisfactorily.
Needle thread pitch. I used to make my needle shafts with the thread directly on the shaft. With pitches like 48-60 and small shaft sizes like .125 and smaller making accurate taps can be troublesome. I now try to make a cap on the end of my needle valve and thread the end of the tube it fits into. This allows a larger diameter match-up between the valve and the carb with finer thread pitches and therefore making it easier to machine a good tap.
gbritnell
 
I wondered if the fuel on the tube wall was condensation. I've observed that the when I first start the engine, the liquid fuel doesn't appear uniformly on the tube walls, but rather seems to emerge from the carburetor and travel up the tube as the engine runs. This makes me think it's not condensation.

I tried using a length of tubing with a larger diameter, packing the ends with smaller tubing so it would fit and be air-tight. This seemed to reduce the amount of liquid fuel on the tubing walls and it took longer to travel up the tube. Engine performance was about the same as with smaller tubing.

I'm trying to achieve a consistent, low speed idle. Without a load, the engine tends to 8-stroke at low RPM... that is, it fires every other firing cycle or every 4th revolution. This is a pretty common occurrence with all my engines and seems to be worse as the carburetor is mounted closer to the engine.

George, I've been making my carburetors with venturi's as small as 1/8". The carburetor in the video has a 5/32 hole through the center and the needle valve jet tube protrudes about .020" into the opening. The throttle screw extends into the venturi, closing against the jet tube.

I obviously want to keep things as simple as possible to preserve the appearance of the engines. I also like the idea of being able to mount the fuel tank well away and/or below the engine intake. I am going to try a propane fuel system to see if it improves low speed idle.

Chuck
 
Hi Chuck If you used copper pipe would it help to vapourize the fuel when it gets hot also if you had some gauze in the line would it help to break up the fuel droplets.
Vince
 
Vince, all good questions, but I don't know the answers, unfortunately.

So, I've decided to put together some bits to let me use propane fuel, at least for a benchmark. But first, here's how my day ended...

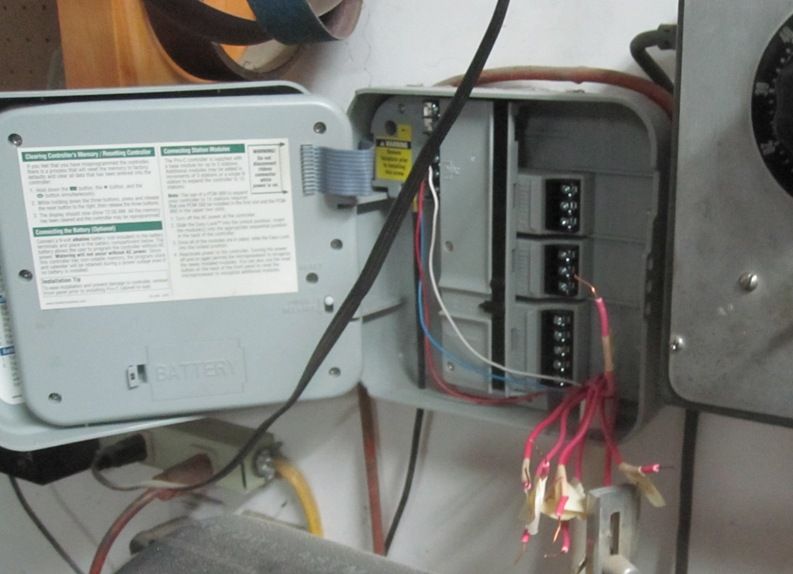
First we discovered that the lawn irrigation controller had stopped working.

IMG_3887_zpsad959b60.jpg


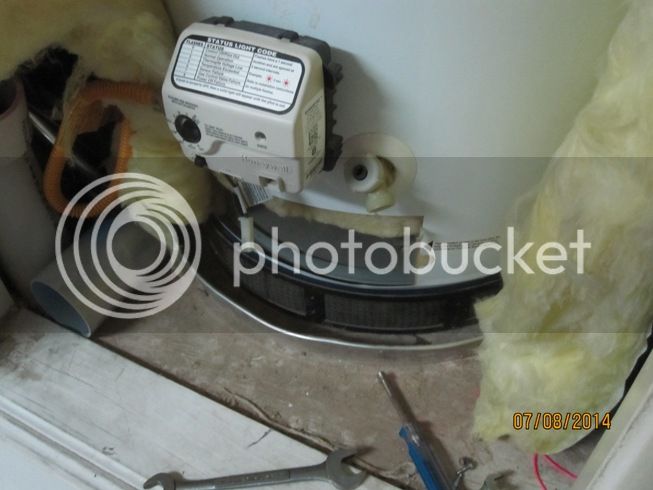
After some diagnostics, I've decided the circuit board is toast so I'm replacing the whole box. Then we discovered the water heater wasn't working.

IMG_3888_zps20e20445.jpg


It's gas and when I checked, the pilot light was out. I could get it to reignite, but it wouldn't stay lit... obviously the thermocouple had died. I went to Lowes where I bought it 3 years ago and they didn't stock the replacement part. In fact, in today's throw-away-world, the main burner, the pilot light assembly with electronic igniter tip, and the thermocouple are all replaced as a single unit. Luckily it's still under warranty so I'll go pick up a replacement assembly tomorrow.

Anyway, back to propane. I ordered a pressure regulator that attaches direction to a standard propane bottle.

http://www.ebay.com/itm/270388811753?_trksid=p2059210.m2749.l2649&ssPageName=STRK:MEBIDX:IT

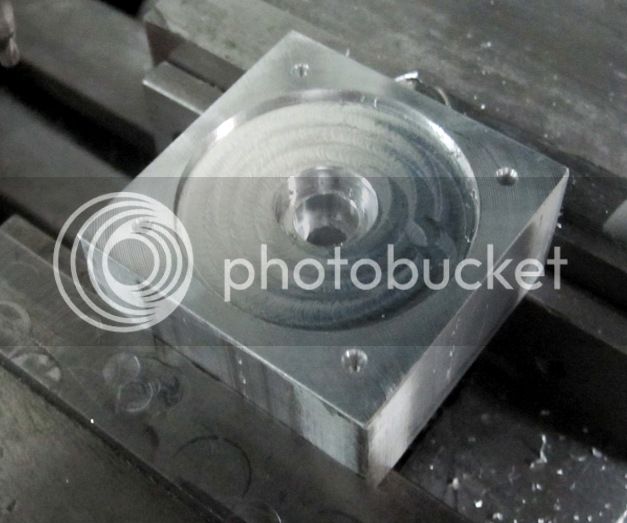
Kind of pricey, but it looks like it will come in handy for all sorts of things. I also started on the demand valve / mixer which was presented as a build article in Model Engine Builder, Issue #24.

IMG_3886_zpsd1f54a45.jpg


While this work could have been done in the lathe, it was a perfect candidate for my CNC mill. It's made from a 1.75" square aluminum block, 0.85" thick. The big depression is 1.5" diameter x 0.050" deep. The next pocket is 0.5" diameter by 0.15" deep, followed by 0.332" diameter by 0.356" deep and finally, 0.221" diameter x 0.775" deep. I used a 2 flute, 1/4" end mill for the first 2 pockets and a 1/8" end mill for the last two. The innards for this demand valve are replacement parts for a Tecumseh carburetor, readily available on Ebay and other internet outlets.

Chuck
 
(Off topic) cfellows, Im sure you could DIY the irrigation controller with an Arduino (or what ever flavor micro you prefer) to save a little bit of money. It would be a nice mental exercise, but the hard part would be interfacing the signals.

I also have that same controller on my water heater. Guess I should go buy a spare thermocouple just in case.
 
Chris/Chuck - nothing to do with fueling engines ... rather the hot water tank controller. I too have the same controller.

The pilot has gone out a couple times the last few years and both times it turned out to be the safety in series with the thermocouple. A gentle press in to reset and we were back in business. I too almost went down the new T/C path until I actually traced on the circuit. (BTW - neither the instructions or the manual refer to this reset ... guess that's where the $150/hr tech comes in :eek:

You've probably already figured this out but I'd have been the fool if I hadn't shared.
Cheers
Charlie
 
Hi Chuck, I watched your video of the engine running and find it interesting.
You didn't mention what you are using for fuel?
Different fuels have a different reed vapor pressure rating or the ability to turn from liquid to vapor. Very crude analogy but the jist of it.

What would happen if you were to run a copper coil around the exhaust pipe several turns and then introduce the fuel to the engine?
The exhaust heat would help turn the liquid fuel to vapor before entering into the engine. Much like the 4 strokers did with smoke oil. More heat, better vaporization.
 
Hi Chuck,

Your mention of the ultrasonic transducer reminds me that the use of a fog generator like those used in terrariums was mentioned some time ago in this context (possibly by you) but I can't recall if anything was done with it. It does sound like a good idea.

Jim
 
It might be interesting to see if I can find an ultrasonic transducer like those used in portable humidifiers.

HCSR04, 2-400cm ultrasonic rangefinder module with theoretical 3mm accuracy (however being ultrasound, ambient temperature and pressure will impact this, as will the measurements on the device reading the sensor). Seen them as low as £4 for 5 modules or £1 to £2 each online. Then of course you need something to read the sensor, arduino uno clones are also cheap on ebay and will do the trick.

This what you're after?
 
alot of carburated engines have an exhaust cross over in the intake. I wonder if you could use the exhaust to help vaporize the fuel in some way?
 
After numerous calls to Whirlpool technical support and a lot of troubleshooting on my part, turns out the water heater gas shut-off valve assembly was bad. And, there wasn't one to be had locally, so they shipped me a new one which I installed and now it's working again, but we were without hot water for 3 days.

I bought a Rainbird irrigation controller for $64. It was a breeze to install and is much simpler to use than my old one which was made by Hunter. So, for the moment, all the household chores are sorted. Maybe now I can get back to work on the propane demand valve and mixer although I'm still waiting for the propane pressure regulator to arrive.

Chuck
 
Houses get jealous, and want attention too.


Sent from my iPad using Model Engines
 
The idea of using commonly found, cheap barbeque propane as a fuel for model engines should be explored and developed.

Thanks Chuck.


Frank
 
[FONT=&quot]Hi Chuck,[/FONT]
[FONT=&quot]You have come up with another interesting thread. My guess is that propane isn’t going to cure the slow speed operation 8 cycling effect you are seeing. From my experience, this is a common malady of slow running (300-600 RPM) carbureted model engines. I think what you are experiencing is poor cylinder fill of the fuel charge. The minimal opening of the throttle reduces the effective compression ratio, which is usually low to begin with, making the lean fuel charge very difficult to ignite. I believe what happens when a minimal fuel charge misfires is that the engine then scavenges normally during the exhaust stroke, but not completely. Some of the misfired fuel charge remains. The next intake stroke introduces another minimal fuel charge, but the added residual fuel of the previous misfired charge provides enough added fuel to ignite. This charge speeds up the engine slightly due to its excessive energy relative to the throttle setting. The next minimal fuel charge again misfires and the process is repeated with the engine galloping along at about 8 cycles. With the simple carburetors we have, the fix is to open the throttle just a little to get a more easily ignited fuel charge. This can be done by adding a little load to the engine, shorter intake stroke, added flywheel rim mass, or by retarding the ignition timing all of which require opening the throttle slightly. One other thing that sometimes improves difficult combustion is to open the spark plug gap considerably. I use Rimfire Viper spark plugs and have found that removing the horizontal portion of the ground strap gives a .030”+ gap which has often improved running in my slow speed engines. [/FONT]

[FONT=&quot]I use propane in most of my engines, but I use it for odor and ease of operation reasons. I have found that usually if an engine runs well on gasoline it will run well on propane and vice versa. Both are susceptible to the 8 cycling galloping effect. I have found the fix for that can sometimes be any of the above suggestions, but is usually all of the above.
[/FONT]

[FONT=&quot]I will be following your efforts to learn more.
[/FONT]

[FONT=&quot]Jeff [/FONT]
 
Thanks, Jeff, I think you might be onto something. I have found that opening the throttle a little will cause it to start firing properly and also slow down a bit, which always confused me...

Chuck
 
Do you have a choked carburettor - where the carb is restricted, to help draw air, part way into the jet tube, to break up and reduce the amount of fuel - to atomise the spray - like in a conventional carburettor.

It may pay to actually make a 2 carb set up - a properly set up IDLE SPEED only carb, and a second one that cuts in to provide full power.

There is also a way of metering fuel, that it's simple friction / turbulence flow control, of a loose screw, in a thread, and the fuel has to go through the thread path - it's a simple fuel control - the amount of looseness in the threads and the amount of turns the fuel has to go through.

This is a great way to meter a small single speed carburettor.
 

Latest posts

Back
Top