How to combat crabbing

Home Model Engine Machinist Forum

Help Support Home Model Engine Machinist Forum:

This site may earn a commission from merchant affiliate links, including eBay, Amazon, and others.
Joined
Dec 26, 2008
Messages
3,693
Reaction score
678
Location
Crewe, Cheshire, UK
I take delivery of one of these mills tomorrow

http://www.arceurotrade.co.uk/Catal...per-X2-Plus-Mill/SIEG-Super-X2P-HiTorque-Mill

This one has a very rigid cast iron column designed by Arc Euro and sold by LMS in the US, rather than the wobbly tilting one available everywhere else.

Now most people do the CNC conversion of the Z axis on this type of machine by mounting the leadscrew on one side of the head, which if not careful could lead to 'crabbing', that is tilting slightly because of the pull/push being on one side rather than in the middle.
No problems setting everything up, but has anyone done or know of a conversion of one of these "heavy duty" machines where the leadscrew is in the middle of the head rather than to one side, or do I have to work it out myself? I would prefer NOT to have the leadscrew sticking up in the air as they do with the gas struts they do for taking the weight of the head on manual machines.

John
 
Yes I have done the conversion of the X2 with the z in the center of the head. I used the plans from hossmachine. The plans are free to download. Just google him and he pops right up. The man is the king of bench top mills lol.
 
Neoinnj,
Unfortunately, that conversion isn't on the same heavy duty column that I mentioned, plus, they have the leadscrew sticking up in the air, which I am trying to avoid.
If there is no other way, then I will most probably have to follow that lead.
I will have to wait for the mill tomorrow and see what can be achieved when I get my grubby claws on it.

No rush, I was just hoping.

John
 
You will not be disappointed I had one for about six months just finished fit Dro to all 3 axsi quite pleased only had to drill 2 Five mm holes ,the lot comes off in 5 minutes and it doesn't look as if it's done a tour of Iraq happy chipping

image.jpg
 
You will not be disappointed I had one for about six months just finished fit Dro to all 3 axsi quite pleased only had to drill 2 Five mm holes ,the lot comes off in 5 minutes and it doesn't look as if it's done a tour of Iraq happy chipping

I notice you covered the "head" the track must be covered also
to be 100% trouble free:fan:
 
Sorry, but unfortunately I am fitting CNC rather than DRO's. This is going to be a plaything to get used to producing the mechanics and using CNC.

For my main mill I use a manual 836 (mini bridgeport) fitted with 3 axis glass scale DRO's plus power feeds all round and my lathe with 4 axis glass scale DRO's. Just about to fit 2 axis high res anti vibration detection glass scale DRO's to my surface grinder. So I am rather familiar to how they work and fit.
I played around with those scale types many years ago and gave them up as a bad job, just too unreliable in general use, especially if you use any type of lube or coolant around them. The amount of money I spent on them would have bought me a good quality set of glass scales.

John
 
For any interested antipodean readers, the SX2P is sold in Australia by Ausee.

John,
With my old school X2, my plan was always to remove the Z-axis rack but also the hand wheel and shaft and pinion etc, then run the leadscrew down thru the head. It is similar to the hoss version but closer to the column now the rack is gone.... but also now that the handwheel and pinion are gone, the screw would pass right thru the head, fixed bearing at top and at the base and the nut fixed inside the head. This way the leadscrew is not telescoping up and will less likely be a hazard for low flying birds and planes.
 
Last edited:
That sounds like a good solution Simon. I am a great believer in what isn't there can't go wrong, and because the rack will be made redundant by the conversion it will (or might) give the room for things to work how I wanted it to.

Many thanks, definitely an avenue to explore.

John
 
Theclockworks where did you buy your DRO
I have the same DROs but all of them sometimes add 2-3mm
without moving table i am desperate because i can not rely on dimension.
Maybe i do something wrong ?.
Thank you
 
I have the same type and have just replaced the one on my mill that was playing up when I got it. The new one read perfectly for 4-6 weeks and now jumps huge amounts at times. Once it started doing it, it got worse really fast. I have no covers on mine at all so I hope it's just dirty. I'll clean it up and see what happens but I agree, I can't trust the thing now.
 
It is usually one of two things from my experience with that scale type of readout.
The first is dirt or moisture ingression and the other is flat batteries.
If it is flat batteries, you are better off going for the SR type rather than the LR.

John
 
Theclockworks where did you buy your DRO
I have the same DROs but all of them sometimes add 2-3mm
without moving table i am desperate because i can not rely on dimension.
Maybe i do something wrong ?.
Thank you

I have that type of scale on my Taig lathe and love them. THE problem is because they are cheap people
usually make bad instalation. They simply don't take time to measure that the max deflextion is .001 the total lengh. The fact that the scale are narower
then a Sino, Acutrack and other well known DRO makes it worst. anything longer then 6inch need a support in the middle to make sure
that it does not flex simply do this test set your scale to 0 then apply some pressure on your scale and look at the reading
I would sugest them anytime
smiley.gif
 
Theclockworks where did you buy your DRO
I have the same DROs but all of them sometimes add 2-3mm
without moving table i am desperate because i can not rely on dimension.
Maybe i do something wrong ?.
Thank you

Hi had them from Ark-Euro in the UK reason being they didn't brake the bank these are spot on ,are you sure it's the DRO's and you are not getting creep I've noticed on mine unless you have the gib strips adjusted correctly it will merrily feed on it's own if you don't keep an eye on it try next time you're doing a biggish cut
 
Back to the original post.
Had a good look at the new mill today, and with a little work, no machining of original pieces, except for a few tapped holes, I should easily be able to get a good quality 16mm ballscrew right in the middle, between the dovetails and head, so alleviating any chance of crabbing.
So get a few angular contact ball bearings for the ballscrew shaft ends, root about my shop for some ali gauge plate to make the support plates from, three good steppers, a bit of electronics and some good quality ball screws from China and I reckon I can make the whole lot for about £1,200 to £1,3000 (about 2,000 bucks) including the brand new heavy duty X2 mill. Then just make up a cheapo computer from bits and pieces I have knocking about, with a touch screen monitor, and I should be on the road to learning a new skill.
I might come over as being a bit flippant about all this, but when you have the chap who designed and made the protos for both of the Seig CNC mills as a very good friend, not much can go wrong, hopefully.

John
 
Been running the center ball screw with zero issues.....with about 70 pounds hanging off it. Pardon its shape its in the middle of a cleaning tear down

image.jpg
 
Thanks for that Neoinnj, but as I have noticed, your are driving the ballnut around the screw, so the screw rises and lowers in mid air. I am hoping to not have that system, but if needs must, I might have to go that way. I will find out for definite when I take the head off the column.
I am looking at doing it the 'normal' way of driving the screw. That way, the screw is down in the bowels of the machine to keep it safe and tidy.

John
 
Having had a very good look around my Super X2, and with the help of John Stevenson, the problem about having the ballscrew going down the middle of the head without sticking up in the air has been solved. It really is a very easy mod with little machining required.
I can't release the details just yet as we are working out a schedule for maybe going into production, but all will be revealed when I start to mod mine in a couple of months, as all my ballscrews are coming from China, and it is their New Year now until early March, so they won't even process the order until then.

John
 
Yes it is very easy, do I get a cut for giving you the idea? Joking. :D
I'm really surprised no one has done it this way yet, not that I have seen anyway.
Only reason I haven't done it yet is because it is the only mill I have and I'm not ready to relinquish manual operation for CNC just yet.
Eventually, when I have more space for machines, I'd like to get an Rf45 clone and then go silly modding the X2.
 
Simon,
Having used an RF for many years, and although they can cope with extraordinary jobs, with the plethora of other machines about, I would steer clear of it. Get something with a square column. In the 1980's, they were about the only thing that most people could afford, plus nothing else was available for the same sorts of costs, but things have changed a lot in the last 20 years.
They are just a modified drill, and everything associated with them. They really do tax the senses when it comes to keeping things in line when changing cutter height, it is very difficult to keep things in register. You will spend more time modding that than you would doing your smaller machine, just to make it semi useable.
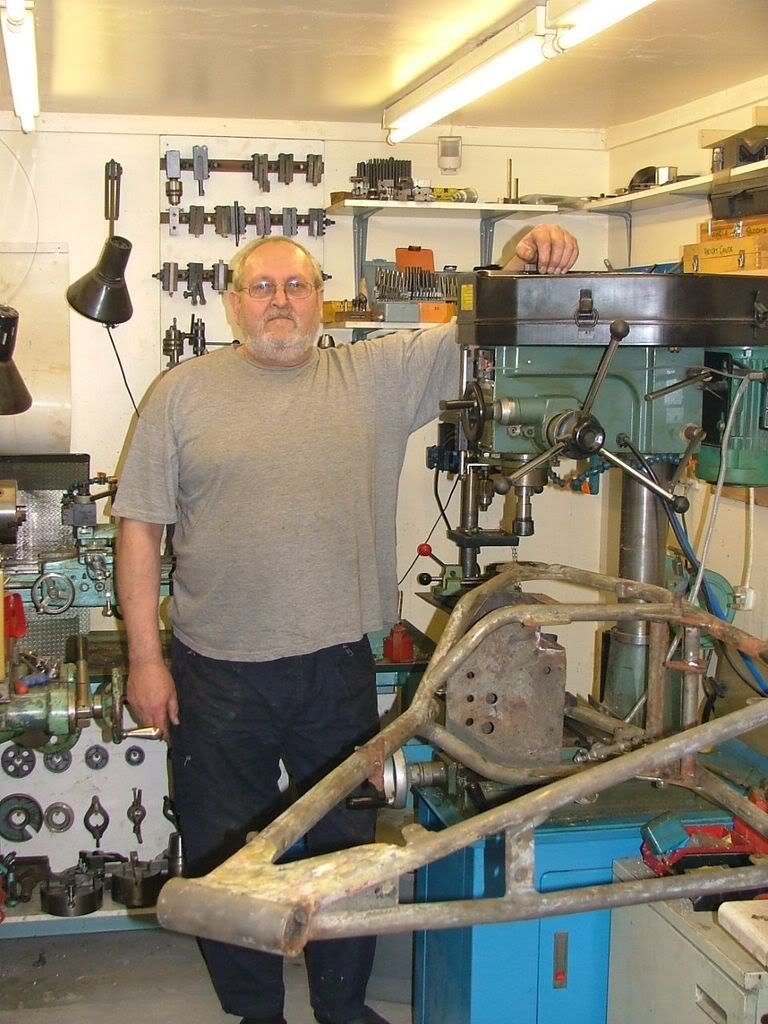
This was mine, with a 7ft chopper frame on there. Versatile, yes, but a real PITA to use. You had to think three steps ahead when machining something.

Eyeingupthejob-1.jpg


Uncle John pushing his 1987 RF25 to the limits.


John
 
Back
Top