Help Question

Home Model Engine Machinist Forum

Help Support Home Model Engine Machinist Forum:

This site may earn a commission from merchant affiliate links, including eBay, Amazon, and others.

benjames

Ben James
Joined
Dec 12, 2013
Messages
35
Reaction score
0
Hello,

Sorry to be a pain but I have a problem setting up my lathe!

I have cleaned all the red gunk off of it and took the chuck off to clean it as I was advised here: http://www.mini-lathe.com/Mini_lathe/Start/start.htm
I cannot put the chuck together again in a way that the chuck jaws line up and have been trying for about three hours and am starting to get really frustrated. Thought I would have a tea break and ask for advice on best way of lining chuck jaws up.

PICTURE OF CHUCK JAWS OUT OF LINE
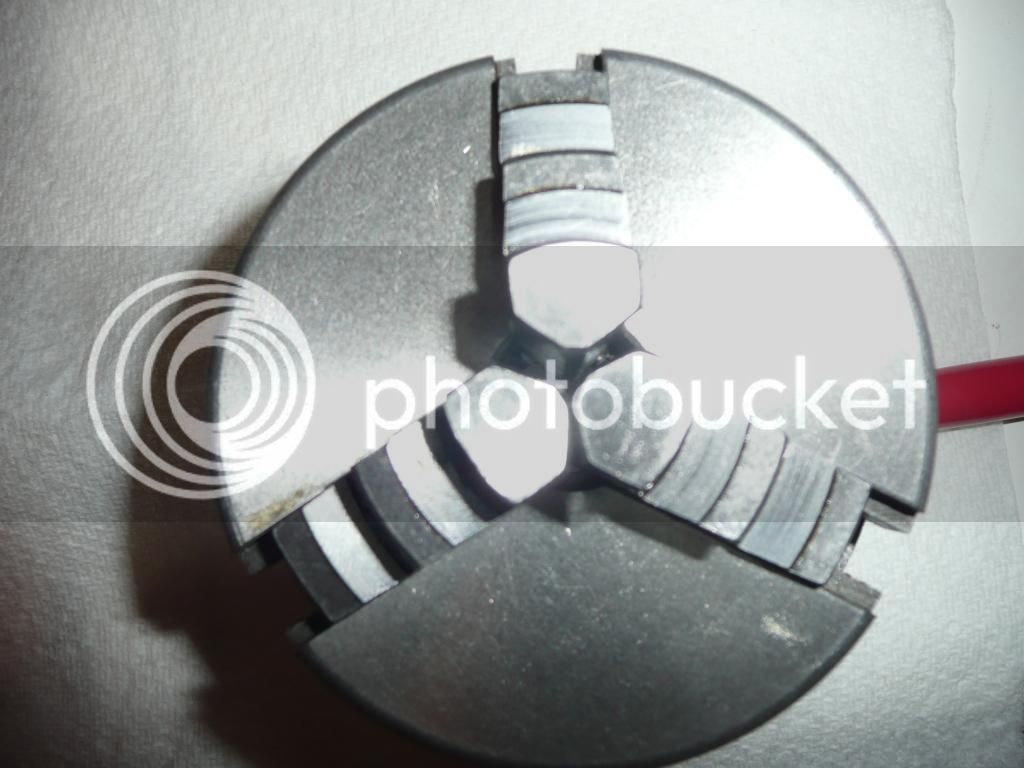
3jawchucknotinalignment_zpse7c99186.jpg


Also, I am unsure of how to attach my 4-jaw chuck as the hex screws that were supplied with it are too long to slide into the holes from behind. I am assuming I take the screw pieces out from the 3 jaw chuck and use those? But then there are only three screws and I have four holes.

THE HOLS ON EACH CHUCK:
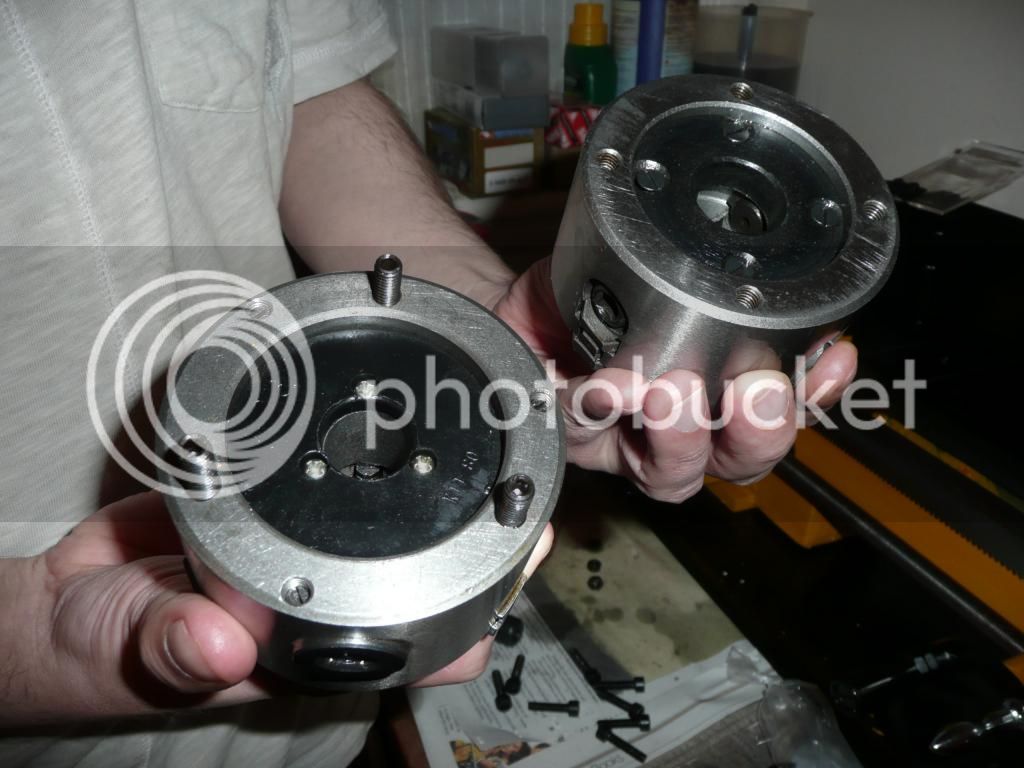
thetwochucks_zpsafbcc400.jpg


SCREW TOO LONG TO FIT THROUGH BACK OF CHUCK HOLDER PLATE:
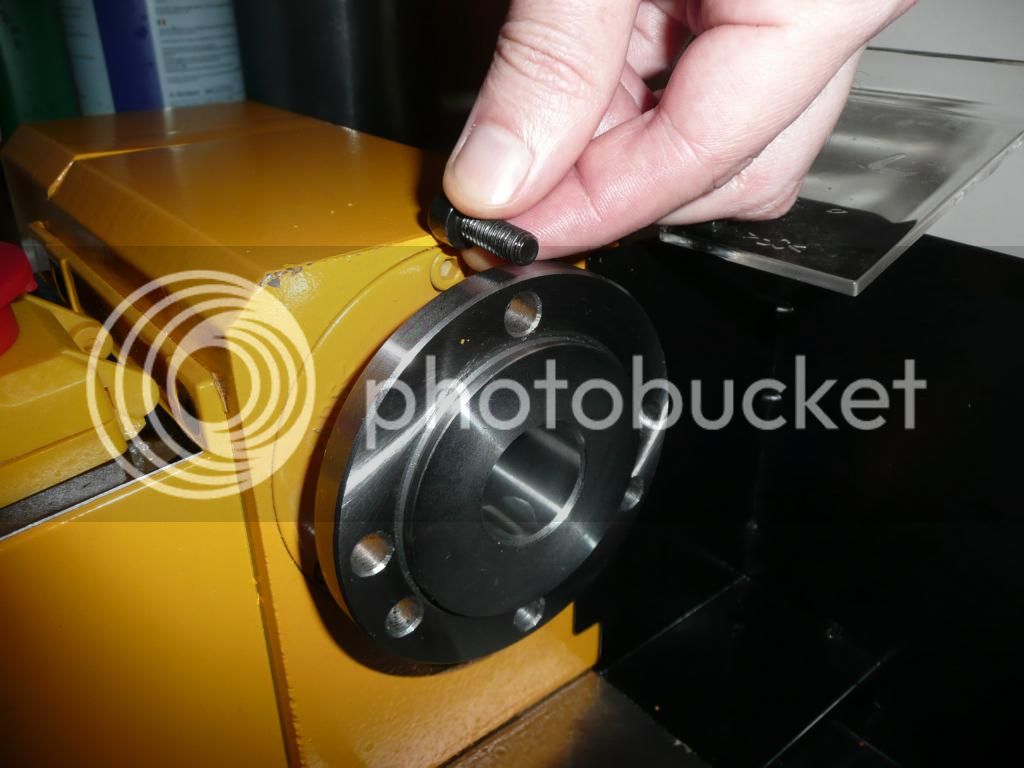
screwtoolong_zpsad67a3ec.jpg


PICTURE OF HEX SCRE PROVIDED WITH 4-JAW CHUCK
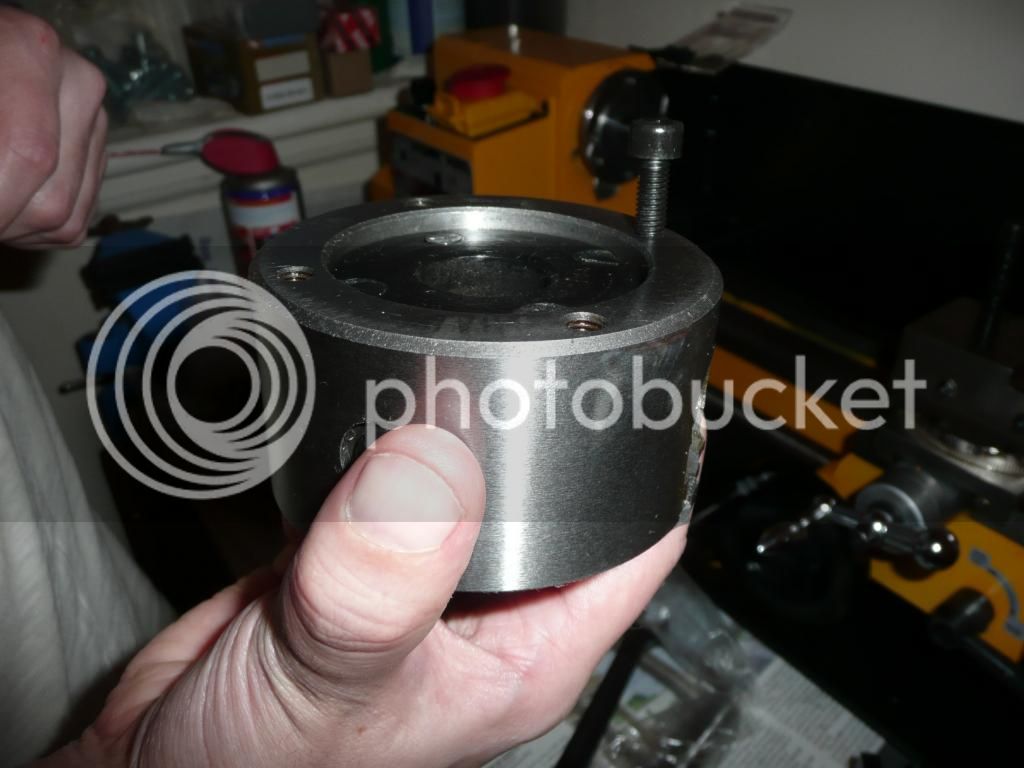
4jawchuckback_zpsdcd28b6f.jpg


I am thinking that maybe they sent me the wrong 4-jaw chuck as the 4JC mentioned at the back of the manual has a different part number than the 4JC that I was sent.

MAYBE THEY SENT ME THE WRONG 4 JAW CHUCK?
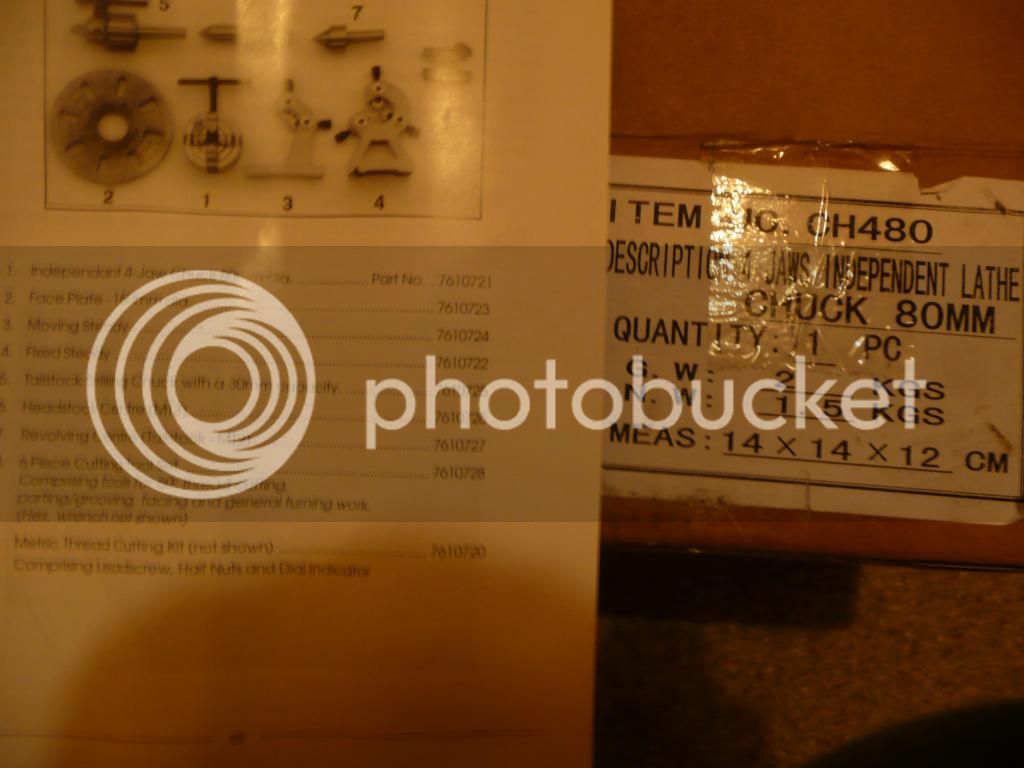
4jawchuckbox_zps3d59a90d.jpg


The wrong 4JC isn't too bad apart from the fact that I have screwed up my 3JC and cant seem to rectify it.

Does anyone have any suggestions on how to put the 3JC together again so that the 3 jaws align properly?

What do people think on the 4JC problem - my thinking is to get 4 more of these screws with no head (name anyone?) and wait the few days for them to arrive in the post and forget the hex screws .

Thanks for any help guys.

Ben.
:(
 
The jaws and the slots have a number on them. Put jaw #1 into slot #1 and tighten until the jaw starts to move. Then do the same with jaw and slot# 2 and then jaw and slot #3. The screws are socket head cap screws and should be available a places which sell industrial hardware. Perhaps even available at larger hardware stores.
 
Gordon beat me

Three jaw chucks have numbered jaws and numbered slots. Take all the jaws out and check for numbers 1 to 3 on the jaw some place. Then check the chuck for numbers 1 to 3.
With no jaws in the chuck rotate the scroll so the start of the scroll is just about to enter slot #1, slide jaw #1 in and engage it by rotating the scroll to the next jaw #2 insert jaw #2 rotate the scroll to the last jaw and engage #3
Now the jaws should center up.

Be advised that 3 jaw chucks do not have 0 run out. By there very nature they have .002 to .003" of runout and if you get a crap chuck there could be more runout than that.

4 jaw chuck problem.

Take one of the socket head cap screws and one of the nuts from the 3 jaw to Ace hardware store (scratch Ace not in the UK) and get 4 threaded studs that match the diameter and threads. Also get 4 nuts that will fit the studs.

Thread the studs into the 4 jaw and mount it to the spindle just as you would the 3 jaw.

Hope this helps.

Dave
 
Last edited:
You're having the same problem I had the first time I removed the jaws from a 3 jaw chuck. The jaws should be numbered and fit into corresponding slots in the chuck. Sometimes they aren't numbered (mine weren't) so you have to try all combos. Just remember, as you look at the face, #3 goes in the 6 o'clock slot, #2 goes in the 10 o'clock slot and #1 goes in the 2 o'clock slot. Use a marker to keep track - there's only 3 possibilities.

The way I've always installed the jaws is to put #3 in first and while pushing it in turn the chuck key backward until the jaw clicks in place. Without easing on the tension on #3, push #2 in under pressure while rotating the chuck key backwards until it clicks. Now with #2 and #3 under tension, push #1 in under tension, while rotating the key backwards until it clicks in. Now with all 3 jaws under tension start turning the key to close the jaws. I could have done it 20 times in the time it took me to type this!

I've heard about the issue of mounting the chuck on the small import lathes before. You could just use shorter screws, or shorten the ones you have.

I wouldn't put too much stock in part numbers since they seem to change a bit. From what I can see, the 4 jaw you have is the typical 80 mm (3") chuck.

I hope this helps. After you fool around with this stuff a bit, it will be a lot easier to work with.

Cheers,
Phil

Two guys chimed in while I was typing this...I type slowly!
 
that sorted it out. Thanks guys!!!!

Should have checked for numbers really! oops!

Ben
Thm:
 
Ben,
Note that Dave and I do this in opposite ways. That's an Atlantic - Pacific thing:D

Don't let anyone tell you there's only one way to do something:p

Cheers,
Phil
 
I would also recommend some thread locker (Locktite or similar) for the socket head set screws when you put them in the chuck. Screw in one of the new screws into the 4 jaw and adjust its depth untill there are 1 or 2 threads of the screw sicking out of the nut when the chuck is installed. Take the nut off, remove the chuck and measure the amount of screw sticking out of the chuck. Install the other 3 screws to that depth, with a dab of thread locker on them. Remove the first screw, apply thread locker and reinstall to the same depth. This will avoid having the set screw come off with the nut causing the same problem you noticed with the cap screw.

Chuck
 
Ok here we go
Does anyone have any suggestions on how to put the 3JC together again so that the 3 jaws align properly?
take your chuck apartplace the scrowl plate with the gear pointing on your work bench )away from you)
then take your jaw and place them on the scrowl plate til they are PERFECTY centered and mark them 1,2,3 with a marker
then put your chuck body with the bottom flat on your bench and mark the slot 1,2,3 so they will match the location of your jaws.
Put evrything back together and stark turning your scrowl plate and instal 1,2,3 in that order matching the numberon your chuck
in ONE revolution of your scrowl plate.
IF THIS DOES NOT WORK DONT FREAK OUT
remove thejaws again laying them on the bench as you did before but this time go 2,3,1 so (2 will be in slot 1) (3 in slot 2) ( 1in slot 3)
when instaling them and if that does not work remove them again re install them (3 in slot 1) ( 1in slot 2) (2in slot3)

good luck
 
As you have 'won', might I suggest that you pay a visit to someone like Screwfix and buy a plastic box full of assorted nuts, bolts and washers? True, they are not the best but they have the advantage of being useful to hold things, to be cut up, modified and generally played with- and cheap enough to scrap!

Probably, you'd benefit from buying a few lengths of studding which will cut to length to suit your jobs. I have paper tubes of varying sizes and make up tee nuts and extensions and obviously have taps and dies and a couple of chunks of metal to pepper with holes and threads. It isn't the elegant way- but it works.

Cheers

Norman

As a sort of follow on- I'd make sure that when the scroll body is separated from the backplate that you ensure that there are two line up marks for re-assembly, mine have an 0 on each and your chuck jaws and chuck body have something like 4 numbers ie 4, 7, 8 3 and the number of each jaw on the inside and outside jaws. I keep my external jaws in tobacco tins for each chuck. It helps!
 
Last edited:
Just goes to show that what we do without even thinking about it is not necessarily intuitive to the beginner. Next time he takes the jaws out of the chuck he will just automatically put them back in in sequence.
 

Latest posts

Back
Top