Help cutting thin cooling fins

Home Model Engine Machinist Forum

Help Support Home Model Engine Machinist Forum:

This site may earn a commission from merchant affiliate links, including eBay, Amazon, and others.

ninefinger

Well-Known Member
Joined
Apr 7, 2010
Messages
304
Reaction score
102
Location
Ottawa, ON, Canada
Hi all,

Now that I built myself a carriage stop to help with fin spacing I decided to have a go at cutting some fins of the same spacing and depth as called for in my engine build. They are rather thin and closely spaced (0.3mm thick, 0.6mm gap) which translates to ~ 0.012" thick fins and a groove of ~0.024" with a depth of 1.5mm (0.060"). I've broken a number of home ground grooving tools that were between 0.5 and 0.6mm thick (made from HSS). Is there a trick I am missing in cutting the grooves or am I just thick in the head? There seems to come a point where chatter starts just as I'm getting to my desired depth and then trying to finish the cut can ruin the tool.
The material is 4140 steel ~ 1" diameter (25mm).

Suggestions on cutter shape / geometry and material is welcome as well as technique, surface speeds, etc.
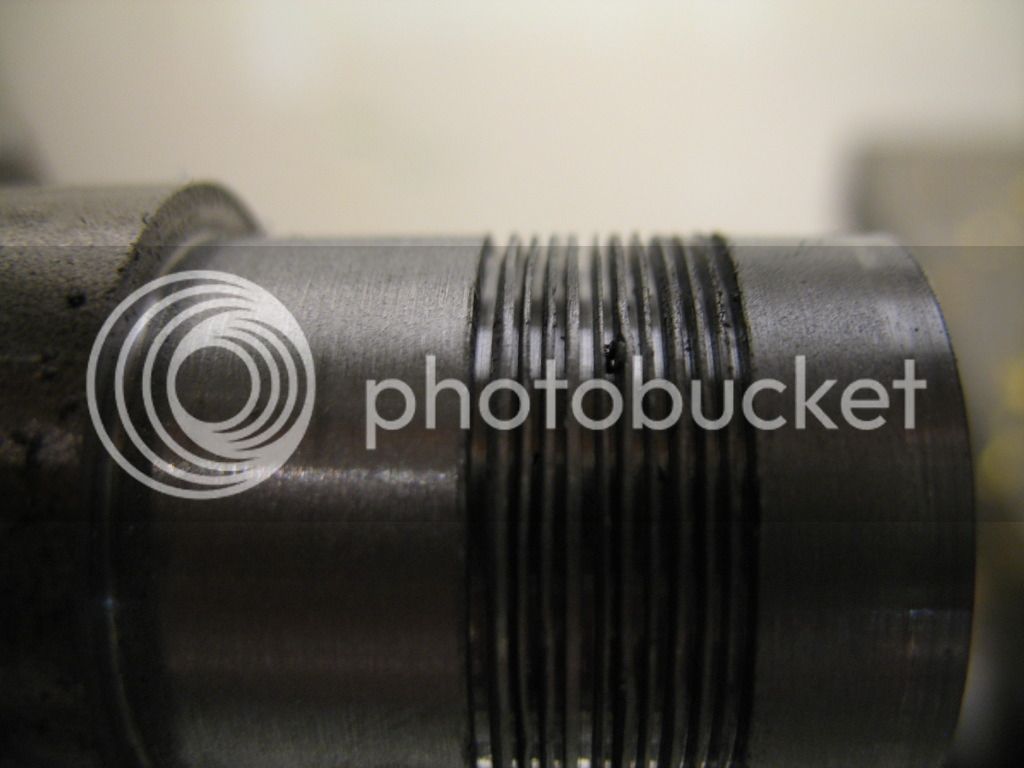
Here is a picture of some practice fins cut but not to proper depth...at least the spacing is working right (if you ignore the right most groove)!
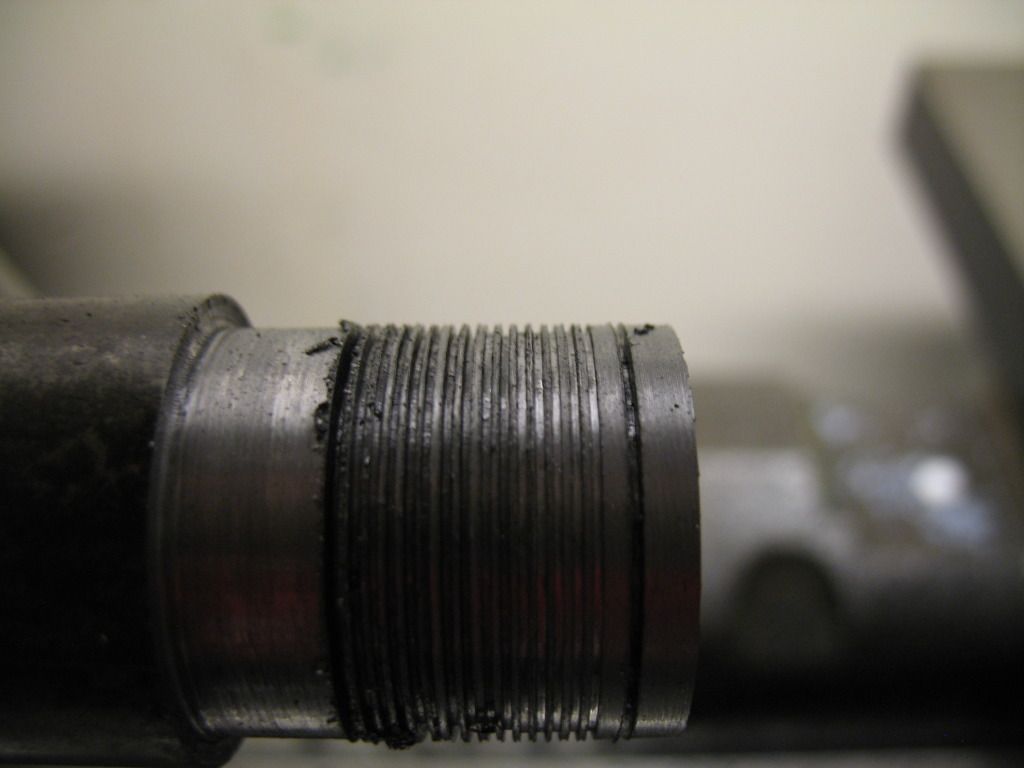
fin-cutter005.jpg


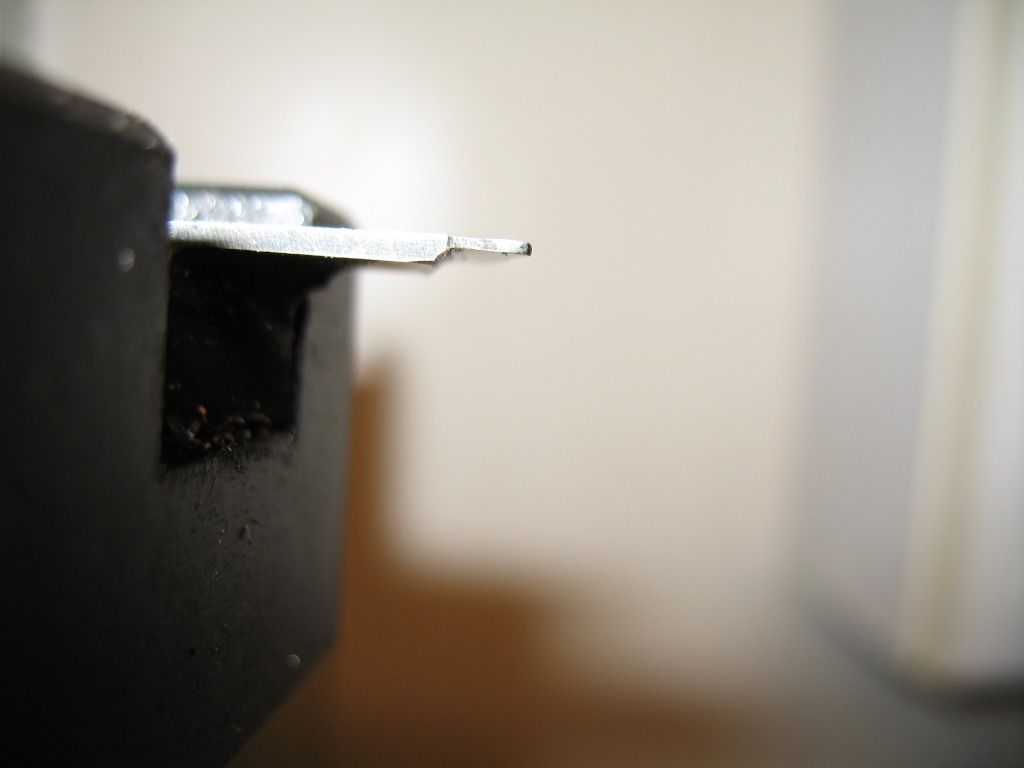
and a couple of shots of the cutter - now with a rounded tip due to breakage - it was sharp before...
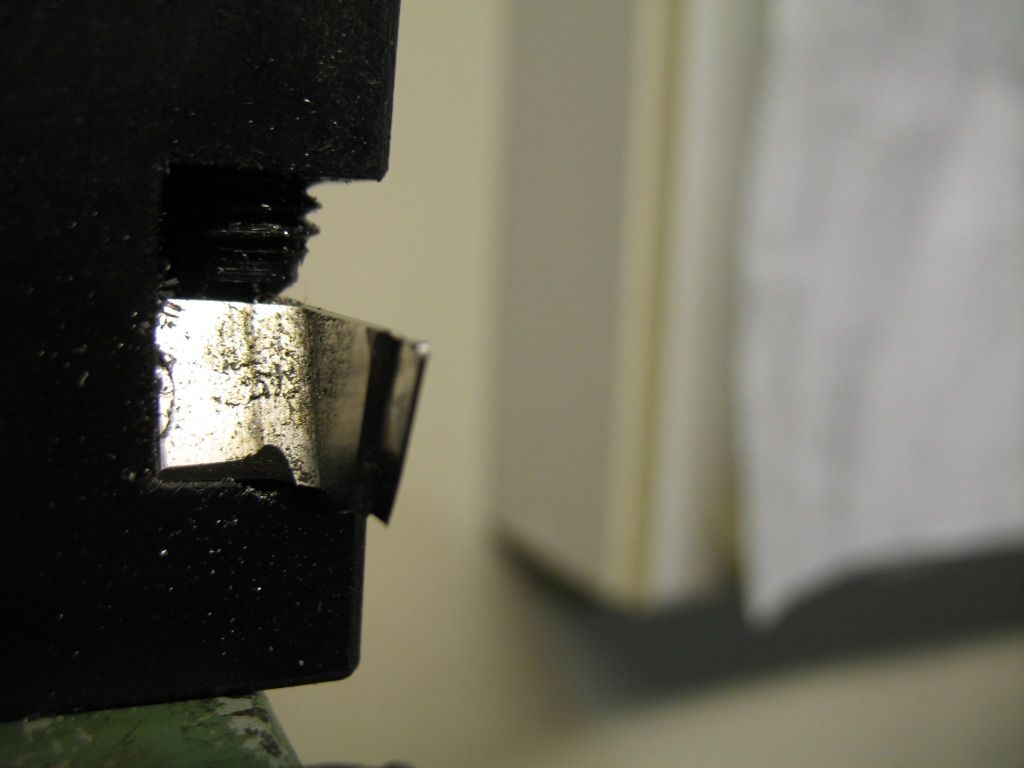
fin-cutter004.jpg

fin-cutter001.jpg


Mike
 
You might want to take a look at a tool called thinbit. I used it to cut the fins on my Liney radial. The tool holder is pricey but you can get carbide incerts for most any thickness. I used .015 for the fins and it worked great. I tried to grind my own but never havd any luck.

This is the holder I have
http://www.thinbit.com/products/groove_n_turn/index.html

Dave
 
Thanks for that link Dave. Looking at the specs I see that they are for maximum 3 times groove width for depth of cut. So that means my groove depth of 0.060 is within their range. But if I need to ask for a quote then I probably can't (don't want to) afford them.
I think I will try grinding my tool bit a few more times and keep it closer to the main body to help with rigidity. I probably had too much front rake too (they use 15 degrees). The other helpful thing in that link is a feeds and speeds chart. They have HSS tips and show a feed of 0.0007 to 0.0015 IPR and SFM of 20-115. I was probably turning too fast so I'll try slowing things down a touch and see how that goes.

Mike
 
If you a going to cut .060 deep why did you grind a tool that looks like its ground back 1/2 inch? Begin with a tool thats as ridgid as it can be. Say a 5/16 HSS bit size, grind the bit so protrudtion is about .080, that gives you some room to dress as its used. you want the height of the cutter to be full height of the bit, theres no reason to grind away good supporting metal. Grind your rake last, after the width and depth are done.

Or look on ebay buy a micro 100 brazed carbide bit for around $20 and make you fins.
 
Does it need to be 4140 steel?
That is pretty tough alloy steel for hobby machine tools.

If 1018 or 12L14 steel could be used for the application,
90% of your problem would be gone.

Rick
 
MachineTom - the bit is ground back that way cause I bought it as a pre-ground parting tool that was ~0.100" thick. All I have for grinding is my 8" bench grinder so getting to the correct thickness is a bit difficult, especially if I want to control the heat and not get it to turn red.

If you have a source for micro 100 brazed carbide (0.024" thick) I'm all ears :D

Rick,
Well the drawings called up 4140 and that's what I bought. I may change materials if I have no success with the 4140. How does 12L14 hold up in an model engine with aluminum pistons? I did initially think the 4140 was overkill but I was reluctant to venture away from the specs on the drawings. I'm quite sure that its not needed for strength - but does 4140 wear better than 12L14 or 1018?

Mike
 
For what it's worth, when cutting the fins for my Gnome I applied a constant drip of neat cutting fluid to the groove. I found that a hobby shop glue tip for CA adhesive fit the spout on the "oil can" perfectly and would go deep into the groove.
Mind you - the grooves are 0.04" wide with some almost 0.5". I used a 0.04" wide HSS parting tool with a hollow ground top surface. The cylinders are from 12L14 but the engine isn't finished so I can't comment on longevity from personal experience.

Keep at it - you'll figure out what works for you and your kit!
Cheers
Charlie
 
Ninefinger- The front clearance under your toolbit looks too much. More metal under the edge will be stronger and dissipate the heat better. Yes grinding thin bits like that is tough on a bench grinder. I've had some luck with a cut-off disk Dremel tool, to carve out a thin grooving bit. (The 'Diamond Life' disks from Harbor Fright are good.) Less heat buildup and ability to work small detail. The 4140 is tough steel, but with a slower speed and cutting oil or water-soluble coolant should be able to do it. Try supporting the end of the work with tailstock center, may help with chatter, of course work close to chuck. If you're going to buy new material , I'd go for 12L14, it finishes real nice.

Davyboy
 
Once you have a suitable thin tool, the main thing before use is to ensure that it's perpendicular to the work.

Actually a piece of thin hacksaw blade can make an excellent grooving tool.
 
Factories would normally use ganged cutters and cut all fins at one go. They will also be self supporting and prevent flexing. These could be made up from suitable slitting saws and spacers.
 
When I got my holder I think it was $95-100. The bits were about $12.00 I use the holder to turn as well. They make alot of cutters for most any job.
 
OK,

MachineTom - checked out the e-bay listing and as usual they don't ship to Canada...
I did go out and buy some C12L14 to try and it sure does cut nice - almost as easy as aluminum! I then reground my toolbit to have almost no front rake and much less overhang. Then I tried cutting some more test fins in the C12L14.

fin-cutter002.jpg


fin-cutter003.jpg


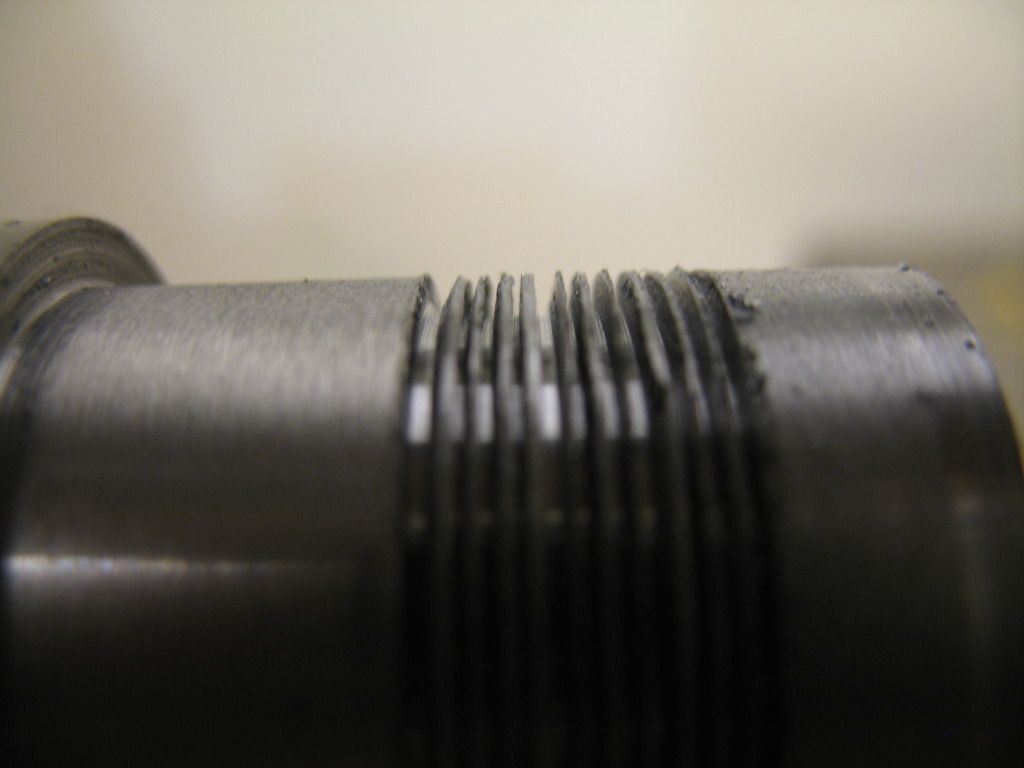
I now know what I'm dealing with. I'd read of it before and now I'm experiencing it. The fins are bending away when swarf gets caught between the tool and the fin. You can actually see a small bit of swarf in the first picture where it wedged the fin over. I realized this was happening and I tried my hardest to go with a super slow in-feed to prevent it (ie really small chips) but I still screwed up on a couple of fins...plus going really slowly I'm sure heats up the cutter and dulls it more quickly.

So I'm going to try the following in the next few days (hopefully):
  1. Make a tool holder to hold hacksaw blades / box cutter blades as grooving tools. I want to do this so I have repeatability - if I grind it myself and break it after a few cylinders it will be very hard to get the same thickness again by hand grinding. Also, I want to try and experiment with a slightly narrower groove and thicker fin - I have blades that are 24 thou and 20 thou so I can interchange and play.
  2. I may try moving the cutter to the back and flipping it upside down. This will let gravity help with removing the chips.
  3. If I make a holder I can also try making a gang cutter to do all at once and avoid the fins bending as the cutter will be supporting the fins..

Thanks to all for your suggestions so far - I'll keep plugging away at this and try not to get to discouraged or distracted. And just maybe after I get it working with the C12L14 I'll try the 4140 I have already hacked into little pieces to see if I can salvage them for their originally planned purpose...

Mike
 
Here is a trick I use once u cut a fin to depth wind some solder in the groove this will reduce flex and chatter. Then when you done with that grove remove the solder and put it in the one u just cut.

Dave H
 
Dave H,

I like that idea but it seems a bit tedious to do one fin at a time. What I'm thinking is maybe cutting every second groove (lets call them even # grooves) and then pack them with something that can be washed / dissolved out. The go back and cut the odd # grooves. The key is what material to pack with that is easily removed but won't come flying out at me on the lathe while cutting the remaining fins? I will try the solder and see -maybe a quick touch of the free end with a soldering iron will fix it in place (and watch my winding direction so it wants to self wind, not unwind!)

Mike
 
How about this idea, I've used this a few times in broaching hard material. Grind a cutter to about .015 thickness, cut the fins, this will leave a larger standing fin, then run again with the .024, that would straddle the first groove, the chips would be less and the opening would provide clearance for swarf.
 
Wow - almost 8 years!

Being the originator of this thread I'm going to be the one to bring it back from the grave.
I finally succeeded in cutting the fins on all 9 cylinders in a repeatable, controlled manner that has a nice looking final product.
Here is the recipe I finally used. Machined the cylinder to net shape on the lathe and then transferred the part to the mill for the fins. Had the rotary table setup with the axis pointing up, parallel to the spindle.
Using a slitting saw I cut the fins 1 at a time, rotating the part using the rotary table.
Now, my mill is cnc so the job was automated to spin the table and progressively increment to the next fin, but could just as easily been done manually.
Pics of the family and an individual to give a closer look and for scale a standard pencil.
Also done out of 12L14 steel as the 4140 is much tougher to cut and resulted in threads that looked terible.

Not shown is the bucket of scrap parts and tools that preceded this...

Mike
Image00001.jpg
Image00003.jpg
 
That is amazing. Love your work.

Cheers,

Andrew in Melbourne
 
Wow - almost 8 years!

Being the originator of this thread I'm going to be the one to bring it back from the grave.
I finally succeeded in cutting the fins on all 9 cylinders in a repeatable, controlled manner that has a nice looking final product.
Here is the recipe I finally used. Machined the cylinder to net shape on the lathe and then transferred the part to the mill for the fins. Had the rotary table setup with the axis pointing up, parallel to the spindle.
Using a slitting saw I cut the fins 1 at a time, rotating the part using the rotary table.
Now, my mill is cnc so the job was automated to spin the table and progressively increment to the next fin, but could just as easily been done manually.
Pics of the family and an individual to give a closer look and for scale a standard pencil.
Also done out of 12L14 steel as the 4140 is much tougher to cut and resulted in threads that looked terible.

Not shown is the bucket of scrap parts and tools that preceded this...

Mike
View attachment 113651 View attachment 113652
Good lord that is beautiful......what a master craftsman you are.
 

Latest posts

Back
Top