Design and build side-shaft hit and miss engine from bar stock

Home Model Engine Machinist Forum

Help Support Home Model Engine Machinist Forum:

This site may earn a commission from merchant affiliate links, including eBay, Amazon, and others.
I'm almost ready to try and start this critter!!! Tomorrow morning I will install the one way valve in the gas line below the carburetor. I have just finished setting the valve timing. It doesn't need much more than a new spark-plug and a new set of points. It doesn't need the fancy brass top on the water reservoir to run. I can rig a temporary gas tank. I will try to start the engine as a conventional 4 cycle engine first. Once I have accomplished that, I will play with setting up the hit and miss action.
 
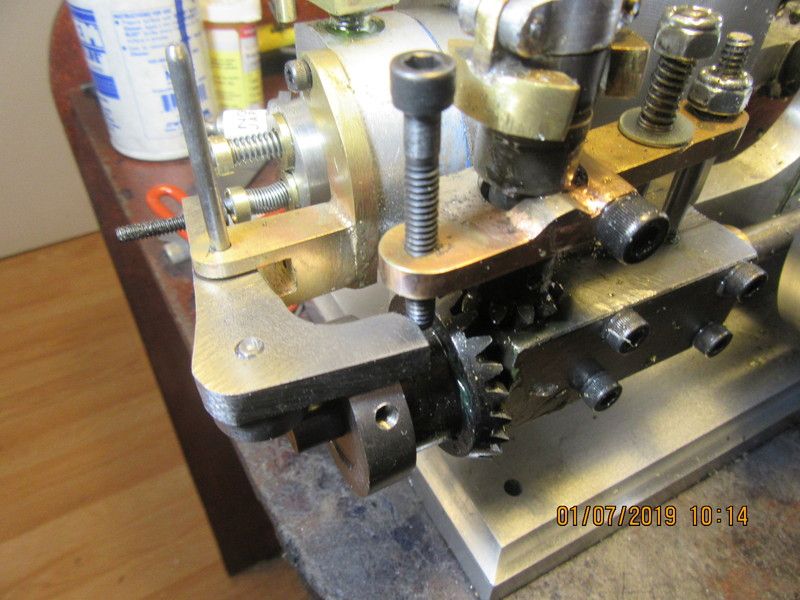
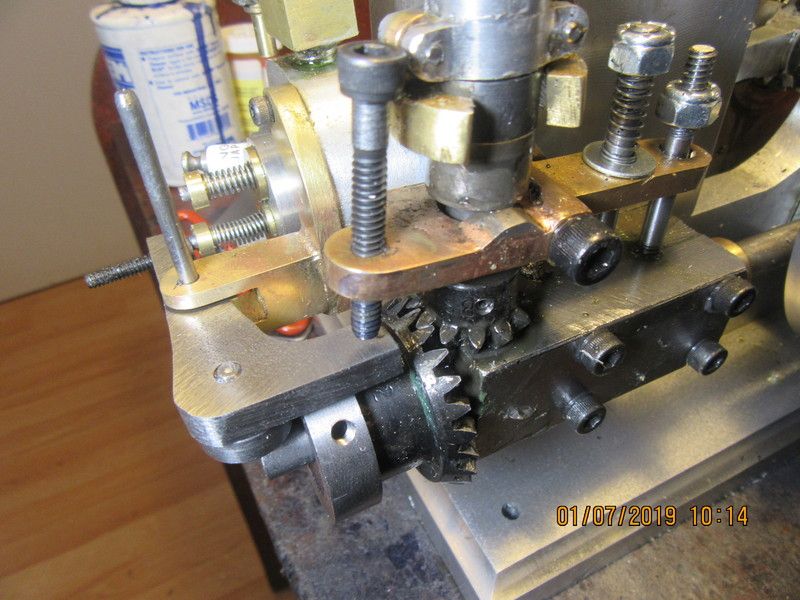
And for those of you who were wondering about the "latching" and "unlatching" of the governor lockout dog, here are two very interesting pictures. The actual "lockout rod" is in fact, a #10 socket head capscrew (temporary, for now) screwed thru the governor arm. The first picture shows the governor engaged. The brass governor arm has tipped down under the influence of the counterweights flying out from centrifugal force. The #10 shcs screwed thru the governor arm prevents the rocker arm from releasing pressure on the exhaust valve, holding it open. This is the "miss" cycle. The second picture shows what is going on during the "hit" cycle. The governor has slowed down, and the governor arm with the shcs thru it has tipped up. The rocker arm is now free to let the exhaust valve close, and the engine will now fire.
zUQs1F.jpg

XKXUkO.jpg
 
The one way fuel flow valve I had saved wasn't going to fit my carburetor set-up, so I hade a new one this morning and Loctited it onto the existing carb fuel inlet. I will probably leave a flex line on there to connect with the gas tank pipe (once the gas tank is made). For now, the flex line can attach to a temporary tank until I am satisfied that the engine is going to run.
Z5uN9l.jpg
 
This was three steps forward and one step back day. I finished up and installed the one way fuel valve in the morning. In the afternoon I had to go out and buy a piece of brass to replace the one I screwed up. (top for the water reservoir). Then I went to my automotive supply house and bought a new sparkplug, points and condenser for the engine. Then I went to a tooling shop and bought an assortment of new center drills. (the old ones I bought 11 years ago were all dull.) Then I came home, installed the new sparkplug, went to install the new points, and found they had given me the wrong ones. Had very high winds here this afternoon and every ten minutes the electricity went out. Finally about 4:30 I decided to call it a day.
 
The new points and condenser are installed and the engine is timed, both ignition and valve timing. The new brass top for the water reservoir has had a "step" machined all the way around it so it can set down 1/8" down into the top of the reservoir and be 1/4" proud of it on the top side. (This time it is only 3/8" material, not 1/2" and this time I used a collet to hold my 1/2" endmill to do the job.) I still have to profile the exposed sides to match the reservoir sides and put the hole in the center to get water into it. I may have to machine a small "keeper" to restrain the hot wire running to the points so it doesn't rub on the flywheel. Something I have noticed is that the sideshaft gears add a lot of stiffness to the rotation of the engine. Without the sideshaft in place, a flip of them big flywheels will make them spin till the cows come home. With the sideshaft in place, not so much at all. I hope that running the engine for half an hour under it's own power will loosen things up a lot more.
 
Hah!!! Got it right this time. That brass top looks good setting on top of the water reservoir. Of course it's on there with a goodly amount of J.B. Weld, so I can't do anymore on the engine today. Maybe tomorrow I will try and start it.
fl9ToR.jpg
 
No--I don't finish any more, just clean-up. I don't paint anything. Aluminum and brass hold there surface finish fine without doing much of anything to them, and the few steel parts have enough oil on them that I've never had them rust.
 
This will be my fourth hit and miss engine. I started with the Kerzel about 10 years ago. Then I moved up a step and built Philip Duclos' "Odds and Ends" engine. Then I built a somewhat modified version of Philip Duclos' "Whatzit" engine. This will be my first self designed hit and miss engine. I have borrowed the "Side-shaft" concept from a build by Craig Deshong, and the face cam is used on the model "Silver Angel" and on many full size "Stovepipe Domestic" engines.
 
I don't think I paid enough attention to the hit or miss concept until I started following this build. I think I have some idea of how the governor runs it for a little a while and then when it starts to slow down it lets the engine start again.

The only ones I've seen in real life have been at shows, and I totally missed the springs and weights in one wheel to serve the purpose of the centrifugal governor you have.
 
I remember seeing a couple of them when I was a kid in the early 1950's. The problem with them in Canada is that people would fill them with water and use them and then forget to drain the water. In the fall the water would freeze solid and break the casting around the water reservoir. My uncle had one on a small buzz saw. It had a bad crack in the water jacket but he plugged it (mostly) with some shop rags and had a water hose running into it replacing water that ran out thru the crack. This was back at a time when there was no hydro electricity in my part of Ontario, and every night when I come home from school my job was to fill the woodbox and pump two pails of water and bring them into the house and set them on the counter for my mother. Father and I went to see some-one he knew from the army, (They were all WW2 veterans), and that guy had a hit and miss engine running his well pump with a crank driven off one of the flywheels. I was pretty darned impressed by that.
 
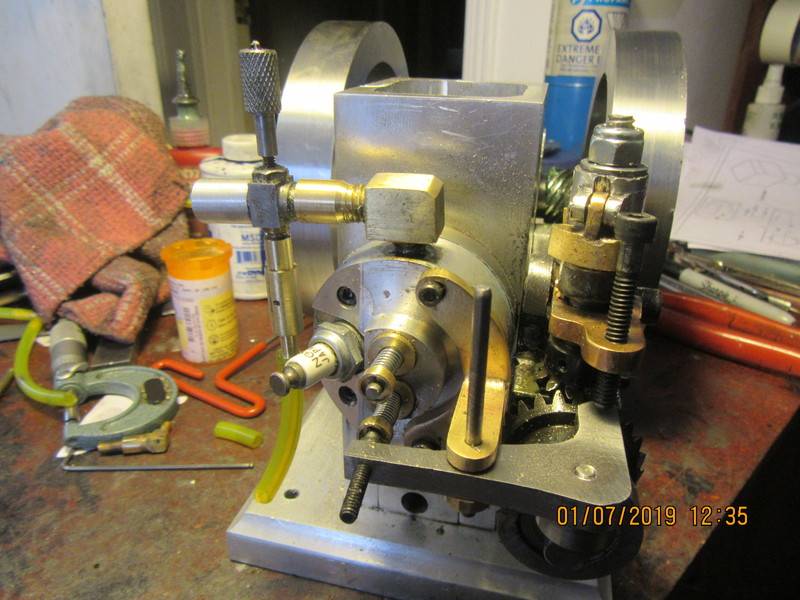
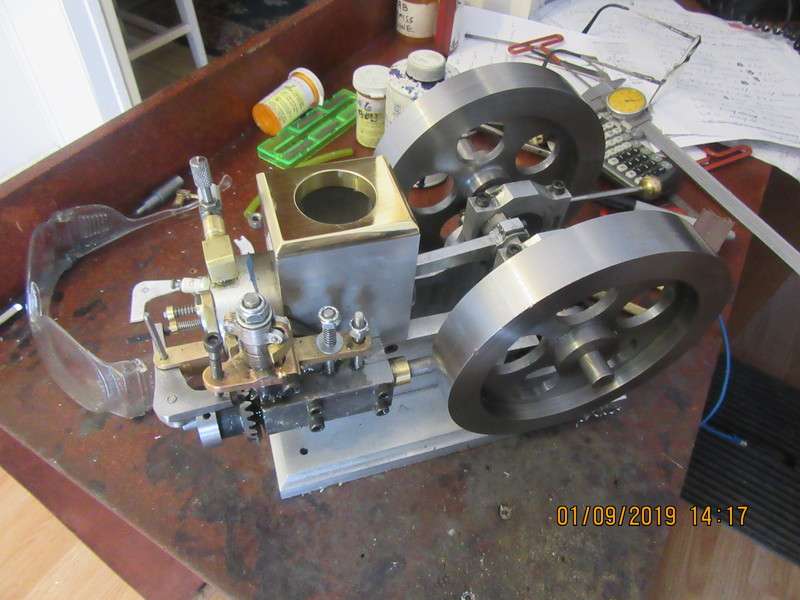
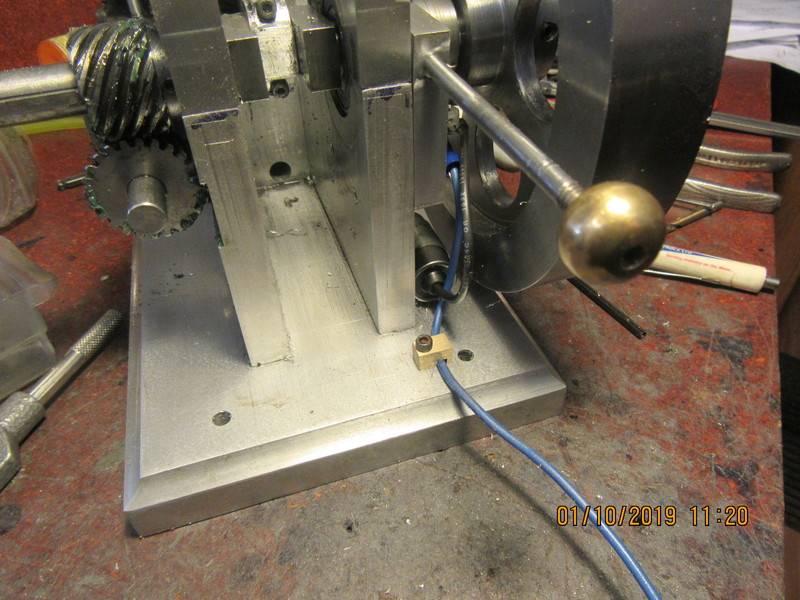
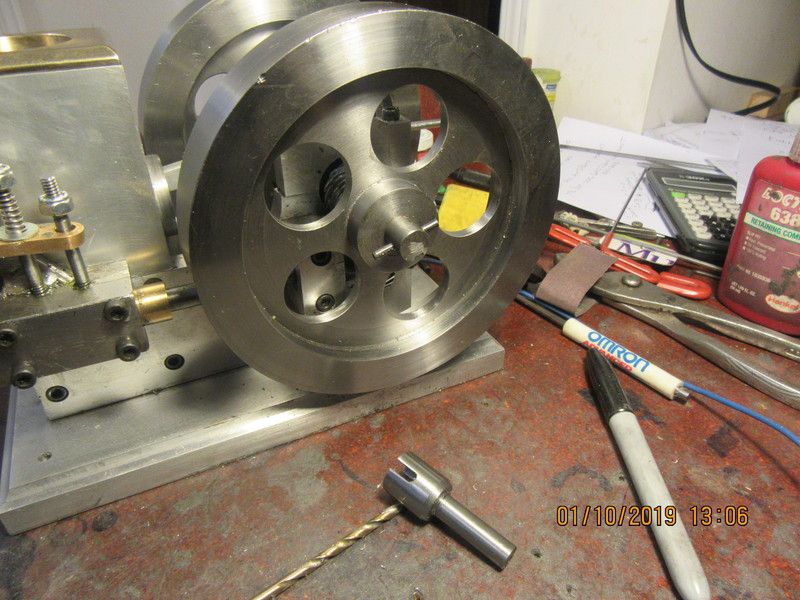
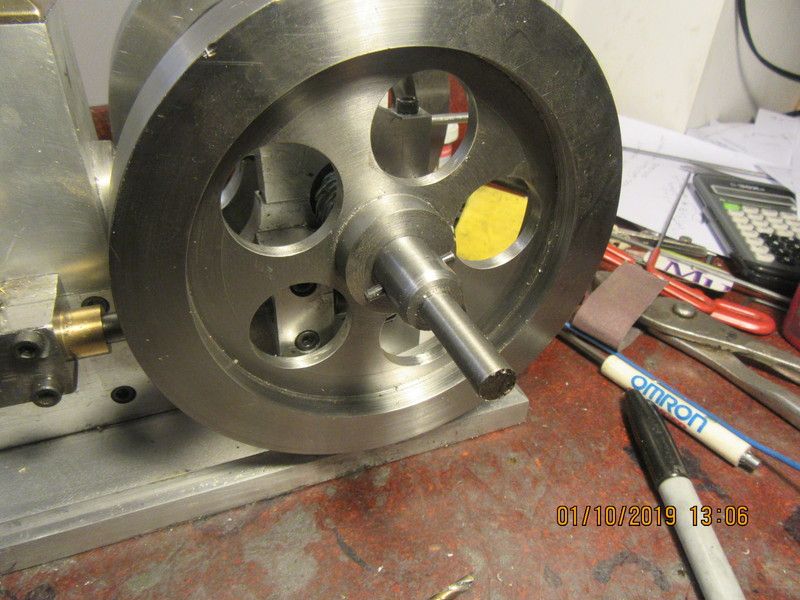
Today was "finishing up day". I made a small wire clamp up from brass and drilled and tapped the base for it to keep the "hot wire" away from the rotating flywheel. I cross-drilled the end of the crankshaft and tapped in a hardened 1/8" split pin for the starter spud to engage with, built the starter spud (you can see it laying in the foreground) and a final shot of the starter spud in place on the end of the crankshaft. It fits into my variable speed electric drill and becomes my "engine starter".
PR0bEM.jpg

5wWqaM.jpg

hdmDjQ.jpg
 
Brian
You have done a beautiful and inspiring build with the side shafter. I have enjoy seeing how you cope with every thing along the was. Very nice!
Congratulation on the completion.
Nelson
 
And now we're in "troubleshoot" mode. Engine is finished except for gas tank. I have a temporary fuel tank rigged, and two fire extinguishers right beside me. Engine turns over freely, but doesn't have a lot of compression. That's okay, non of my engines had much compression until they fired half a dozen times, which "seats" the valves better than any lapping can. If choked by finger over the carburetor inlet while turning it with the drill, I can see fuel rushing up thru the transparent gas line. I'm getting fuel up to the carburetor okay. If sparkplug is unscrewed and lain on the cylinder head, I've got lots of spark and visually it is coming at the correct time in the sequence of piston movement. Valve timing is spot on, with exhaust valve popping open just as the piston begins to move up on exhaust stroke, and closing just as piston reaches the top dead center. There is very little lead or lag on the valve timing in this engine. It opens and closes within 180 degrees of crankshaft movement. Governor is not hooked up right now. I have to get the engine running first, then I start to play with the governor. I squirted dawn dish-soap around cylinder head to cylinder connection and ran the engine with my electric drill. No bubbling anywhere, so head gasket is not leaking. I have very, very little fuel, and I think I just toasted my electric drill (it's been going funny for a while now). Next step is to run up to my hardware store and buy a new drill and a can of Coleman fuel.
 
Another thing to check is adequate clearance between the rocker arm and the end of the exhaust valve. There should be .005" to .008" of clearance when the valve is not "up" on the cam. If the exhaust valve is not being allowed to close completely, all the compression leaks away thru the exhaust port. I think perhaps the spring on my atmospheric inlet valve is too strong. I judge this by "feel", by pushing on the end of the exhaust valve stem. It is a delicate balance. The spring has to be strong enough to close the valve but weak enough to be pulled open by the vacuum created when the piston is travelling towards bottom dead center on the intake stroke.
 
I have had engines start up and run first time I tried them. I have had engines which made me pull hair out of my already bald head. This engine has a leaky intake valve. How can I tell?--If I spin the flywheels when the piston is going into the compression stroke, it just turns as if there was no cylinder head on it. If I hold my finger over the carburetor inlet and do the same thing, the flywheels bounce back. If I hold my finger over the carburetor throat and turn the engine thru what would normally be the intake stroke, then move my finger off the carb throat, it will pop like a champagne cork. This tells me that the exhaust valve is sealing okay.
 
Damn--I just entered a big post and it disappeared. I pulled the cylinder head off this morning and relapped the intake valve and that solved my compression issues. I kept on clipping one coil at a time off the intake valve spring until I could see the intake valve bobbing open and closed as the motor was turned over by the drill. The engine runs quite happily along with the drill, firing as I expect it to but when I pull the drill away the engine slows down and stops after about 15 seconds. I seem to be having a gas starvation issue. I may have to try it without that ball check valve in the fuel line to see if that has anything to do with the fuel issue.
 
My butt is kicked for today. I pulled the home made carb off and put a Traxxas 4033 carb on to see what would happen, and removed the one way check valve from the gas line. Same thing happened. Engine would start if I held my finger over the air intake on the carburetor, but not well enough to stay running on it's own. I advanced the ignition timing a few degrees to see if that would make any difference, but no real notable difference was seen. Even with the leaky intake valve fixed, I'm not getting the compression I would expect to have. So--Weak compression with very poor ability to pull gas into the carburetor--My piston may not be sealing in the cylinder as well as I would have liked. Tomorrow I will make a different piston with an o-ring on it and see what difference that makes.
 

Latest posts

Back
Top