Centering in a 4 jaw chuck

Home Model Engine Machinist Forum

Help Support Home Model Engine Machinist Forum:

This site may earn a commission from merchant affiliate links, including eBay, Amazon, and others.

Brian Rupnow

Design Engineer
Project of the Month Winner
Joined
May 23, 2008
Messages
15,250
Reaction score
8,532
Location
Barrie, Ontario, Canada
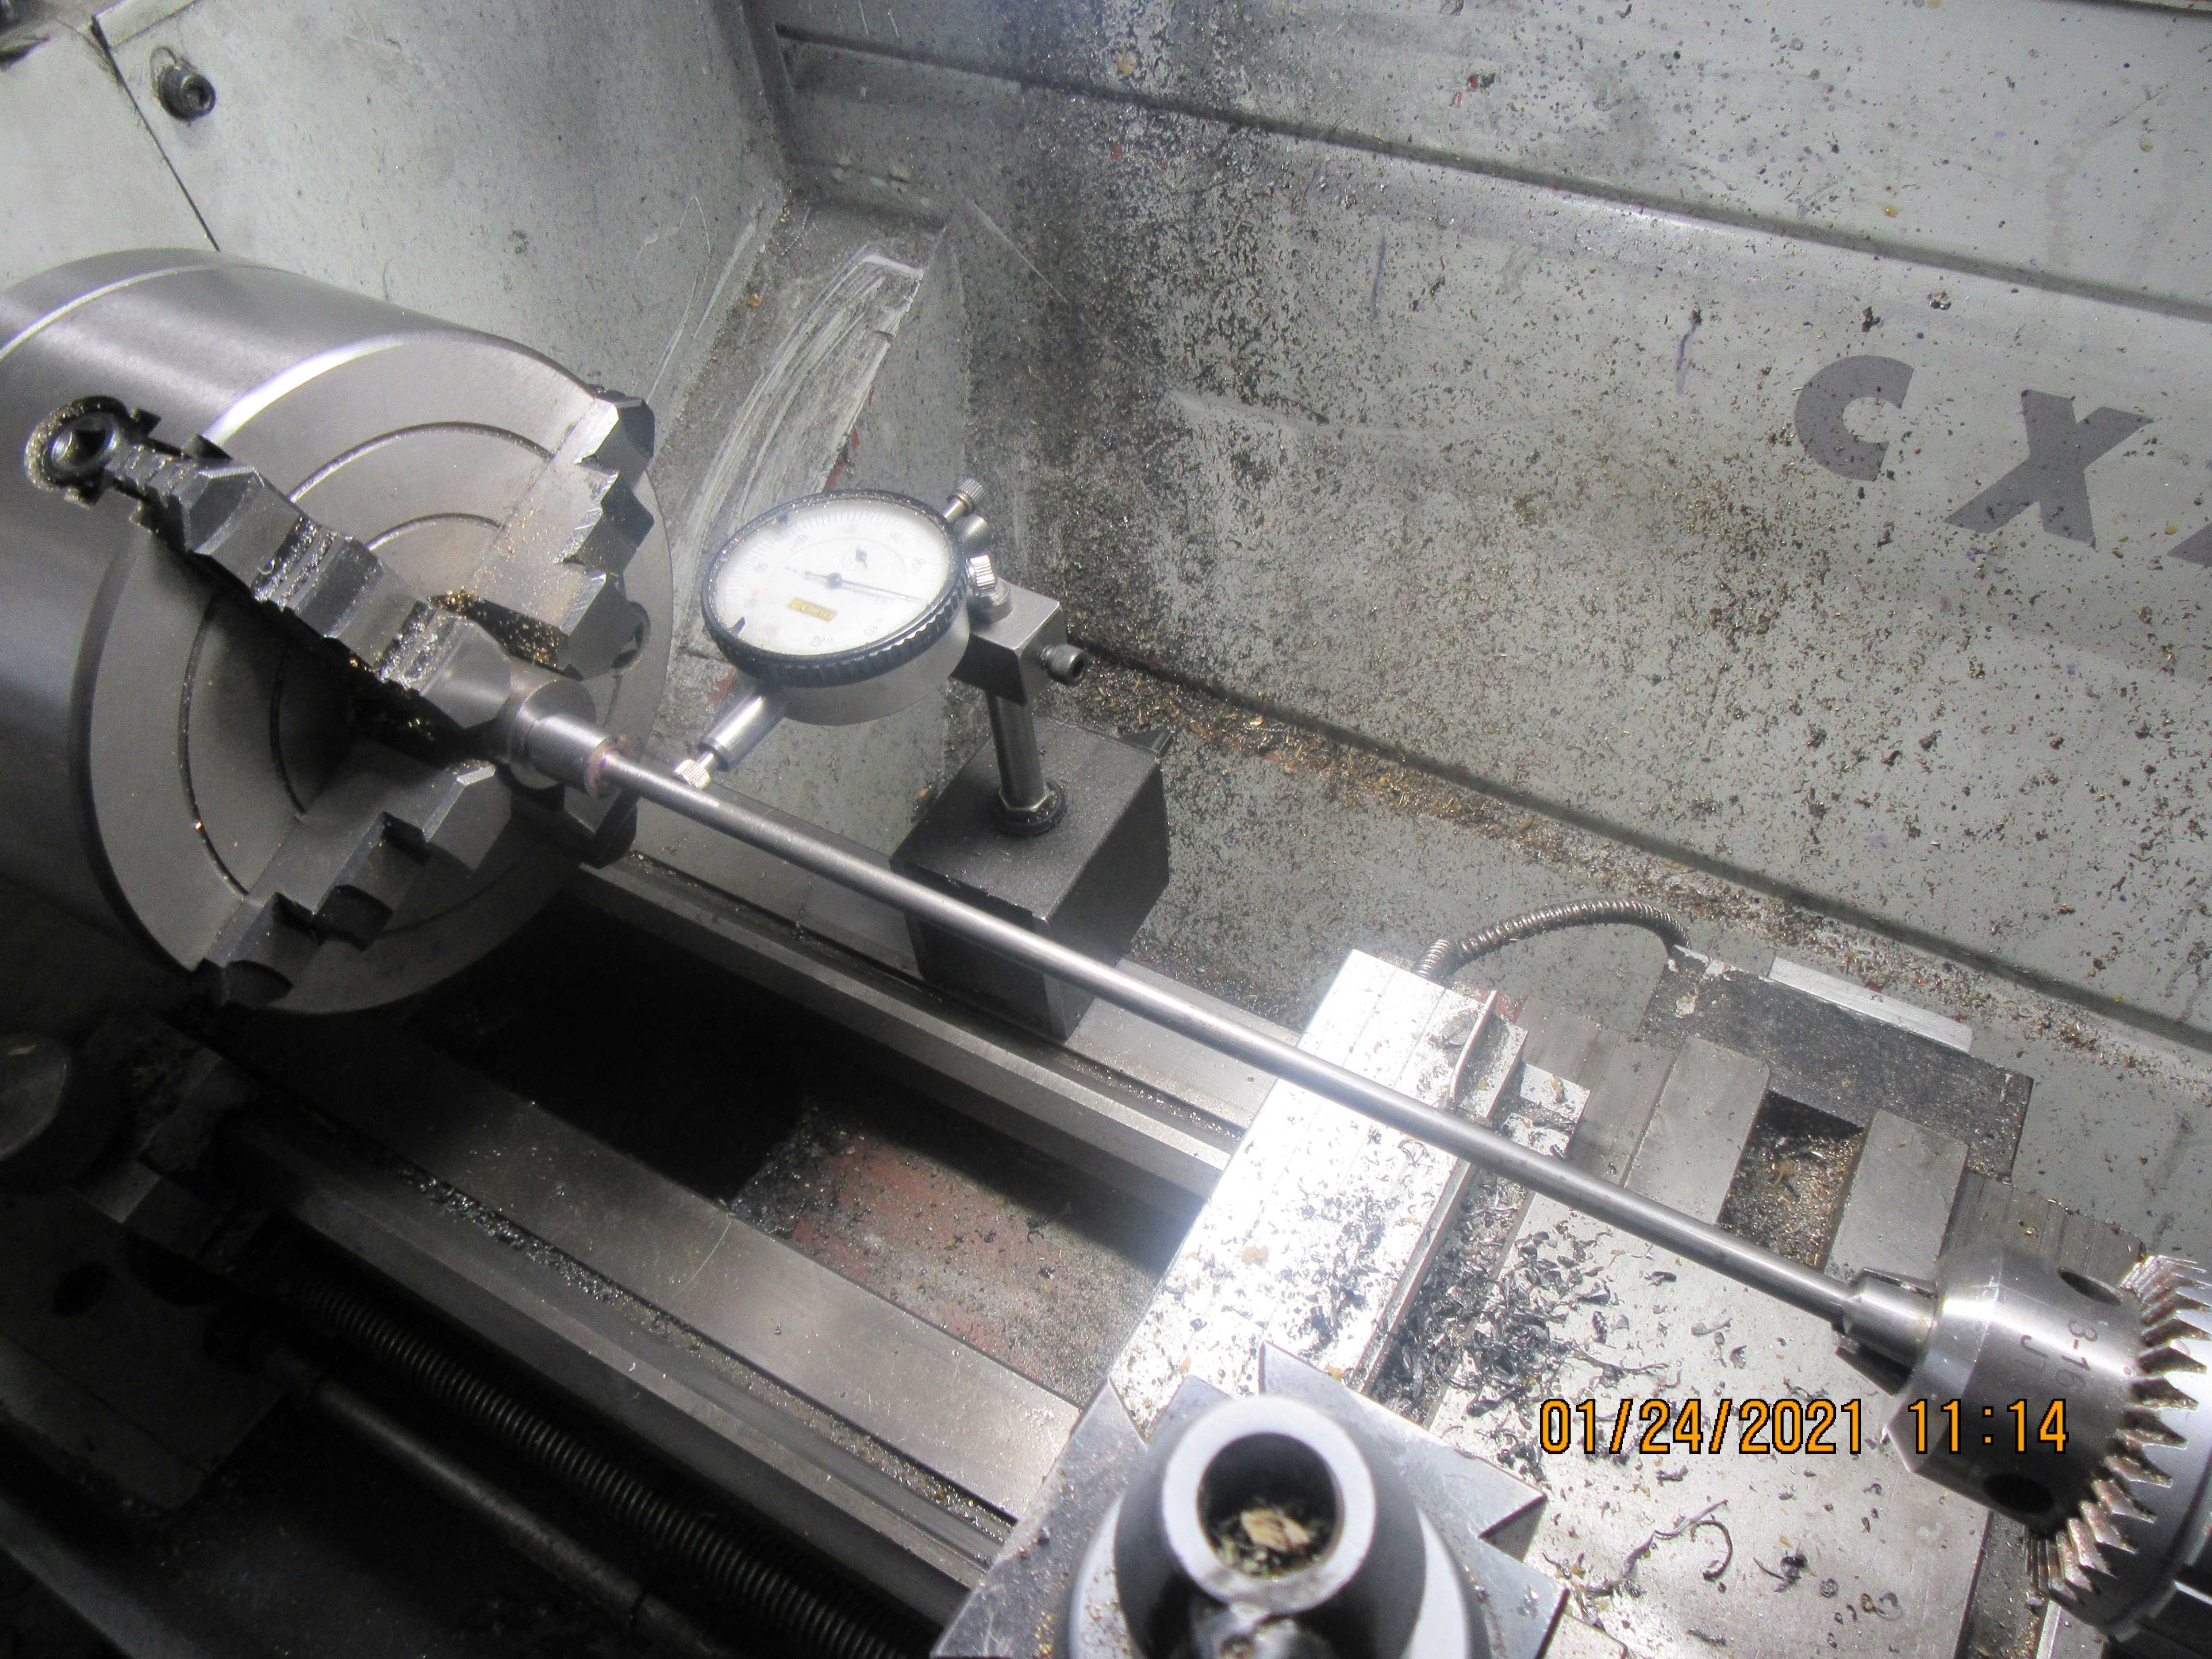
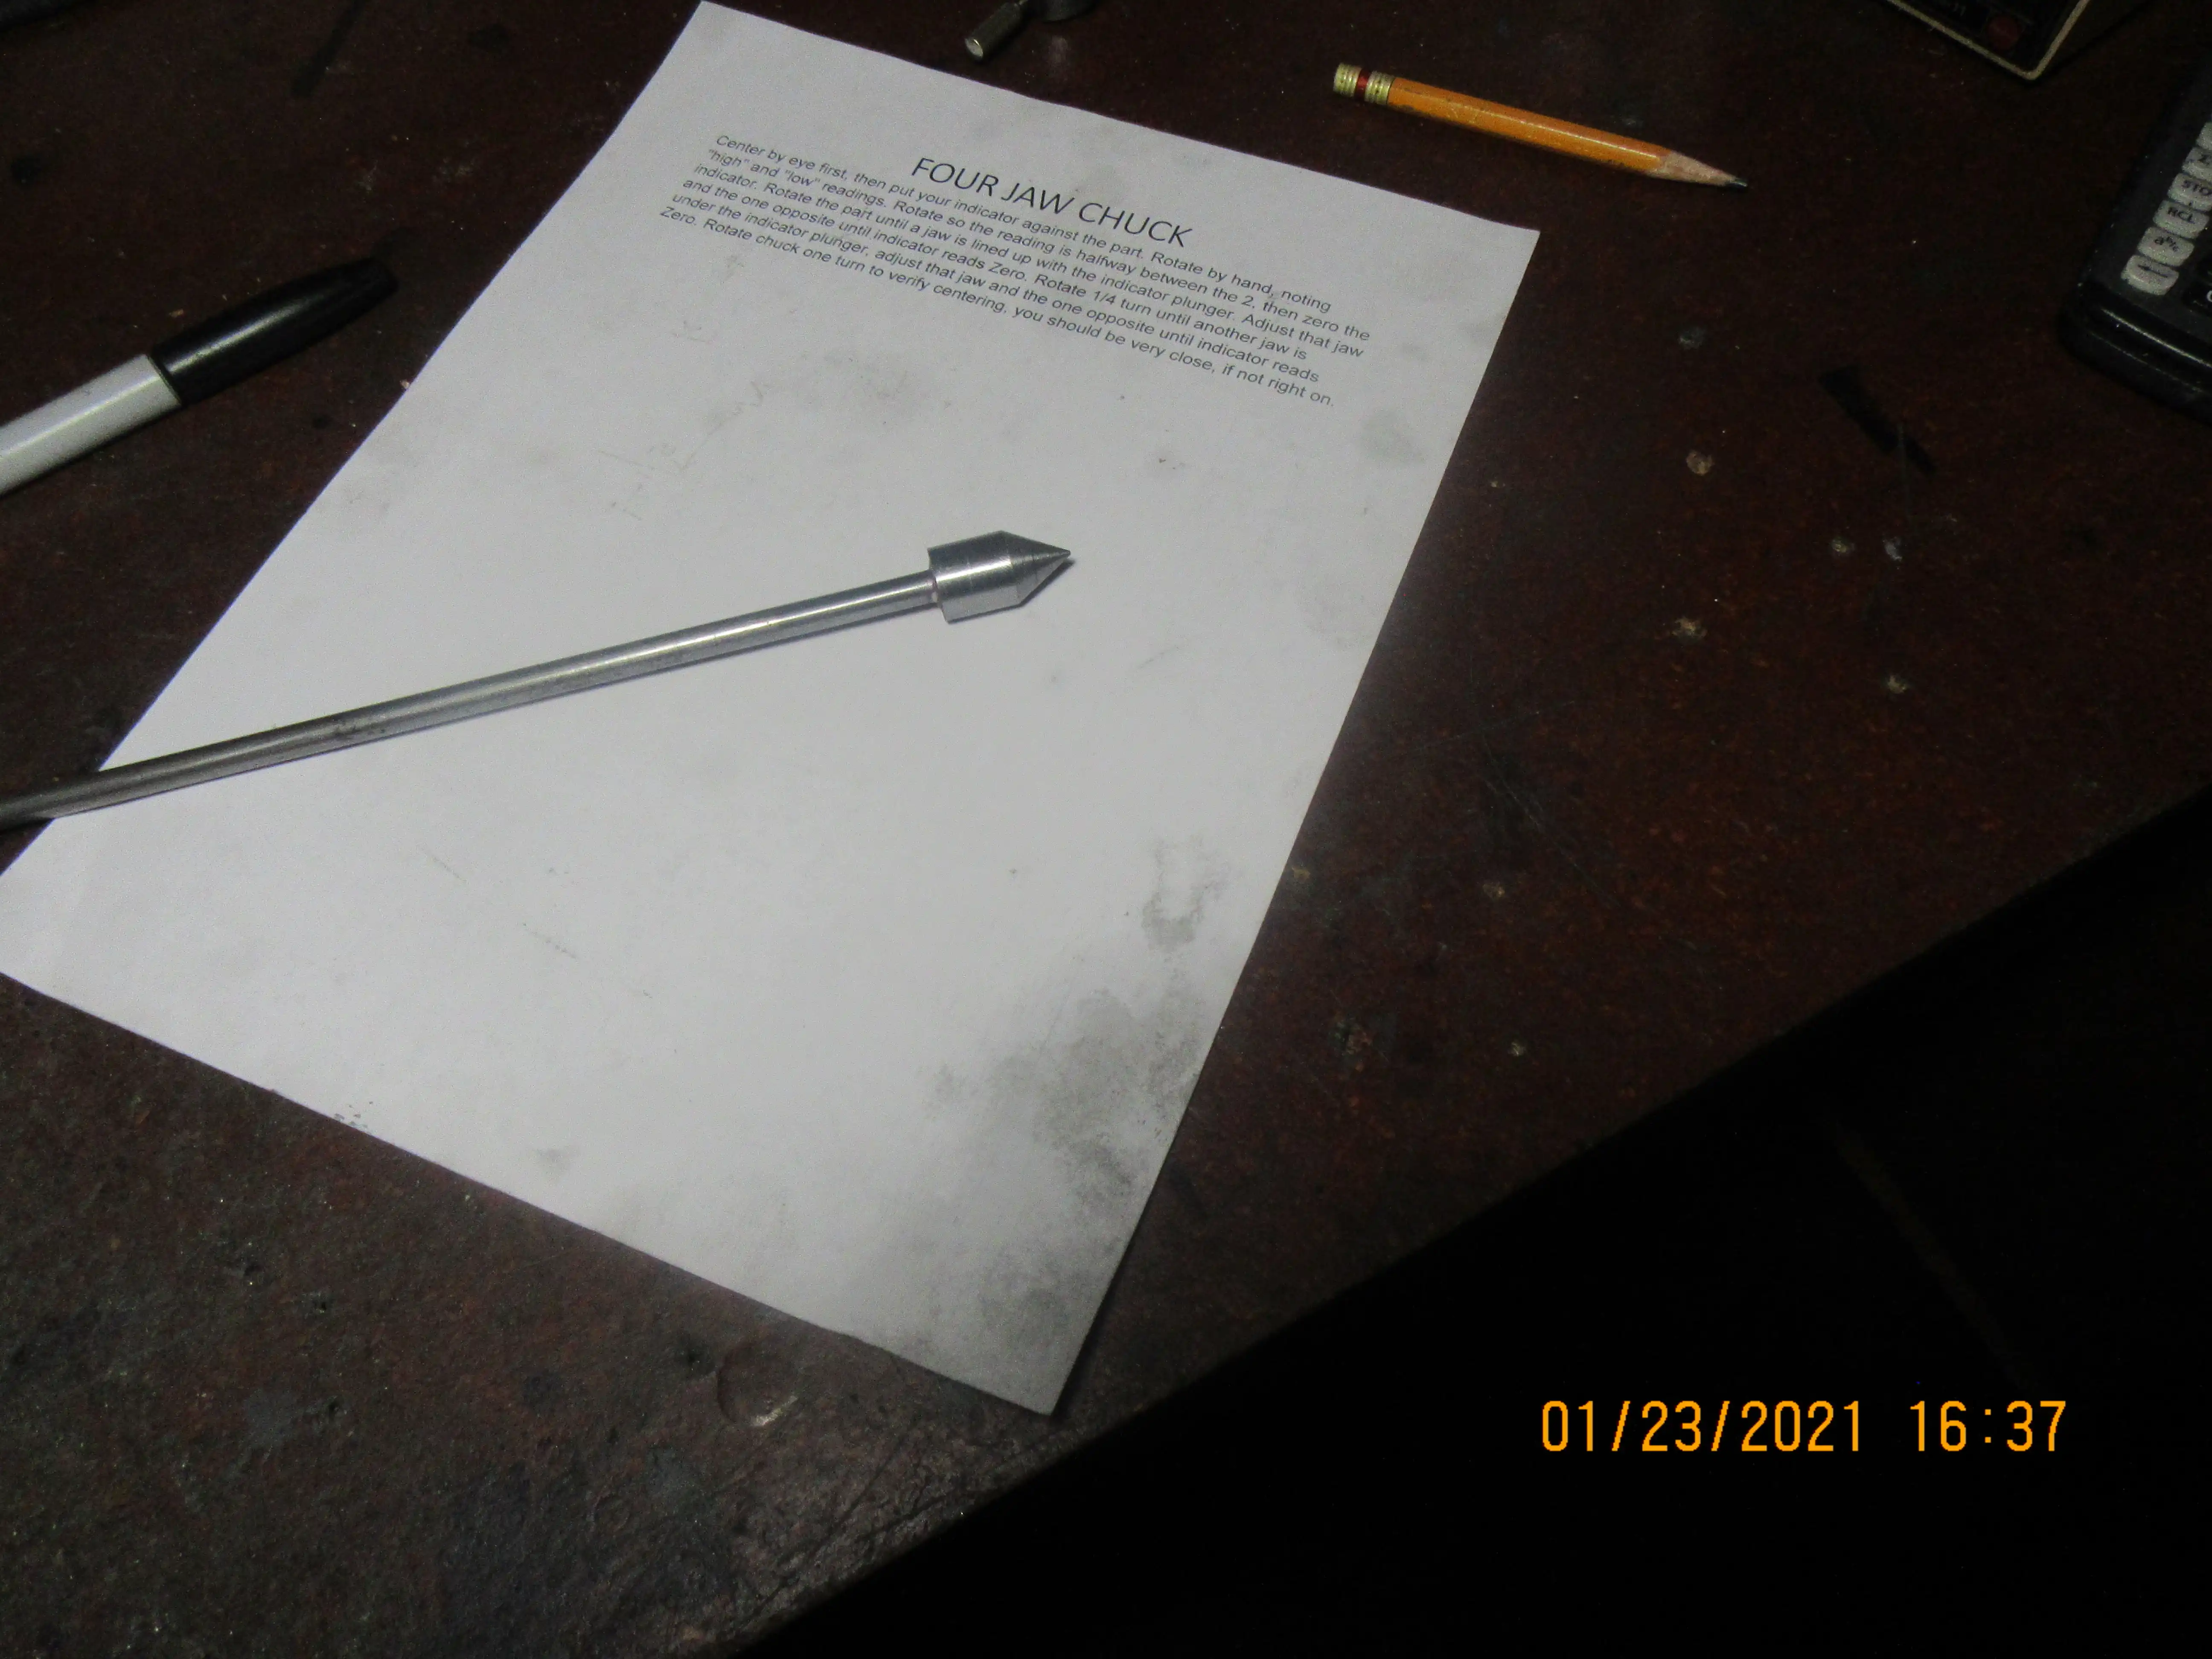
Ever since I started using a four jaw chuck, about 12 years ago, I have used a 1/4" diameter rod x 15" long with a point turned on one end. The pointed end is placed into a "center punch mark" on the piece I want to center in the four jaw chuck, and the other end is held in a tailstock mounted chuck. Then a dial indicator is brought in to bear on the 1/4" rod just clear of the part in the chuck, and the chuck is turned by hand and adjusted ---and adjusted---and adjusted---until the dial indicator reads "0" for a full 360 degrees of rotation. This method has served me well, but about 3 months ago I wanted to center a piece which had a 3/8" hole that I wanted to bore out to marginally oversize. I didn't want to use a larger diameter rod, because the larger in diameter the rod is, the less willing it is to flex. I thought about it for a while and then come up with this modification to my 1/4" diameter rod. This works great, the rod can still deflect easily, and I can center accurately on holes up to 9/16" diameter. Note that in order to do this, you can't use the typical pointed end on a dial indicator. It has to be unscrewed and replaced by a larger, flat "anvil" on the end
FmIp44.jpg

aiBdnM.jpg
 
Last edited:
Brian I made points for 1/4",3/8", 1/2", 5/8" and 3/4". These are used on my mill or lathe in R-8 holders for the mill and MT holders on the lathe. They come in handy on the mill to center a work piece using what ever R-8 holder I use for machining. On the lathe the points are used to center the work with a 4 jaw chuck. The other end of the 6 points is spot drilled first ,then center drilled . The point goes against the work and the other end in the live center.
For those who area bit frustrated when centering in a 4 jaw, a very complete article is posted on the Little Machine Shop website. Basically I run the tail stock with the live, or a dead center. Then adjust #1 & #3 jaw to the live center. Then the #2 & #4 jaws are done the same way.
This gets you very close to centering the work piece. For accuracy I place the point between the tail stock center and the indentation on the work. Install an indicator on the tool post. Center the indicator point on the rod . Zero #1 ,rotate chuck to #3, find the difference and divide it half. Rotate the chuck to this # and indicator is set at zero. Turn the chuck til #1 is up, adjust the jaws with two wrenches til zero is found. Rotate the chuck to #3, if all goes well #3 and #1 will read zero.
Repeat for #2 & #4.
Using the TS center to get close eliminates wild readings on the indicator , you will get within .020 most of the time. Then centering the work is much easier and faster. Most of the time I can center a work piece in 2 minutes or less. Often under a minute. One more tip, if possible after laying out the center , install in vice and spot drill a small indentation instead of center punching. This more accurate if circumstances allow.
mike
 
I just centered a piece in my 4 jaw using the method described by JDunmyer---It was an absolute treat. Much quicker than anything I have tried before.

Center by eye first, then put your indicator against the part. Rotate by hand, noting "high" and "low" readings. Rotate so the reading is halfway between the two, then zero the indicator. Rotate the part until a jaw is lined up with the indicator plunger. Adjust that jaw and the one opposite until indicator reads Zero. Rotate 1/4 turn until another jaw is under the indicator plunger, adjust that jaw and the one opposite until indicator reads Zero. Rotate chuck one turn to verify centering, you should be very close, if not right on.
dOnK3p.jpg
 
Last edited:
As a slight addition I may add that I have learned to use two opposite chuck keys. The way this works quicker is that you can bring the part to center and tighten up in one go, and the same again for the next two opposing jaws. With one chuck key I always have to bring the part to center lightly for each jaw, and then tighten up each jaw in maybe two rounds.
 
As a slight addition I may add that I have learned to use two opposite chuck keys. The way this works quicker is that you can bring the part to center and tighten up in one go, and the same again for the next two opposing jaws. With one chuck key I always have to bring the part to center lightly for each jaw, and then tighten up each jaw in maybe two rounds.

I agree with the above and would also suggest TWO dial gauges- at right angles to each other.
Years ago, I made up a pair of spring loaded wobblers to the design of George H Thomas from his book
RThe Model Engineers Workshop Manual published by tee for about £30.
I have no doubt that other people have alternatives to mine or have similar arrangements
 
Hi Guys,

I use the same method as Brian Rupnow, except that my 6 mm rod has a centre drilled in the opposite end to the point and I use a ball bearing in the hole to centre work with a hole already in it.

Works for me !
 
djswain1--That might work for centering round stock, but 99% of the time I am turning irregular shaped pieces or pieces with with offsets.
 
djswain1--That might work for centering round stock, but 99% of the time I am turning irregular shaped pieces or pieces with with offsets.
Yes, not for every scenario but good for anything with a circular hole that is smaller than the large diameter on the end of the taper on the dead centre, and with anything that has a centre, decent centre punch mark etc. and uses tooling most already have to hand.
As with anything we do in the workshop there are often many different ways to achieve the end result.
IRegards, Dave.
 
Last edited:
The dreaded four jaw chuck.

Some shops looking for machinist will test you use four jaw chuck.
I learned the 4 jaw be for I could get a driver's license.

A few tips
What most will over look is the chuck jaw has spring about. 005" and large chuck have more.
So as you tighten the chuck you watch for spring. If you mark jaw 1 and 3 this will help keep track of jaws you tightening.

Dave

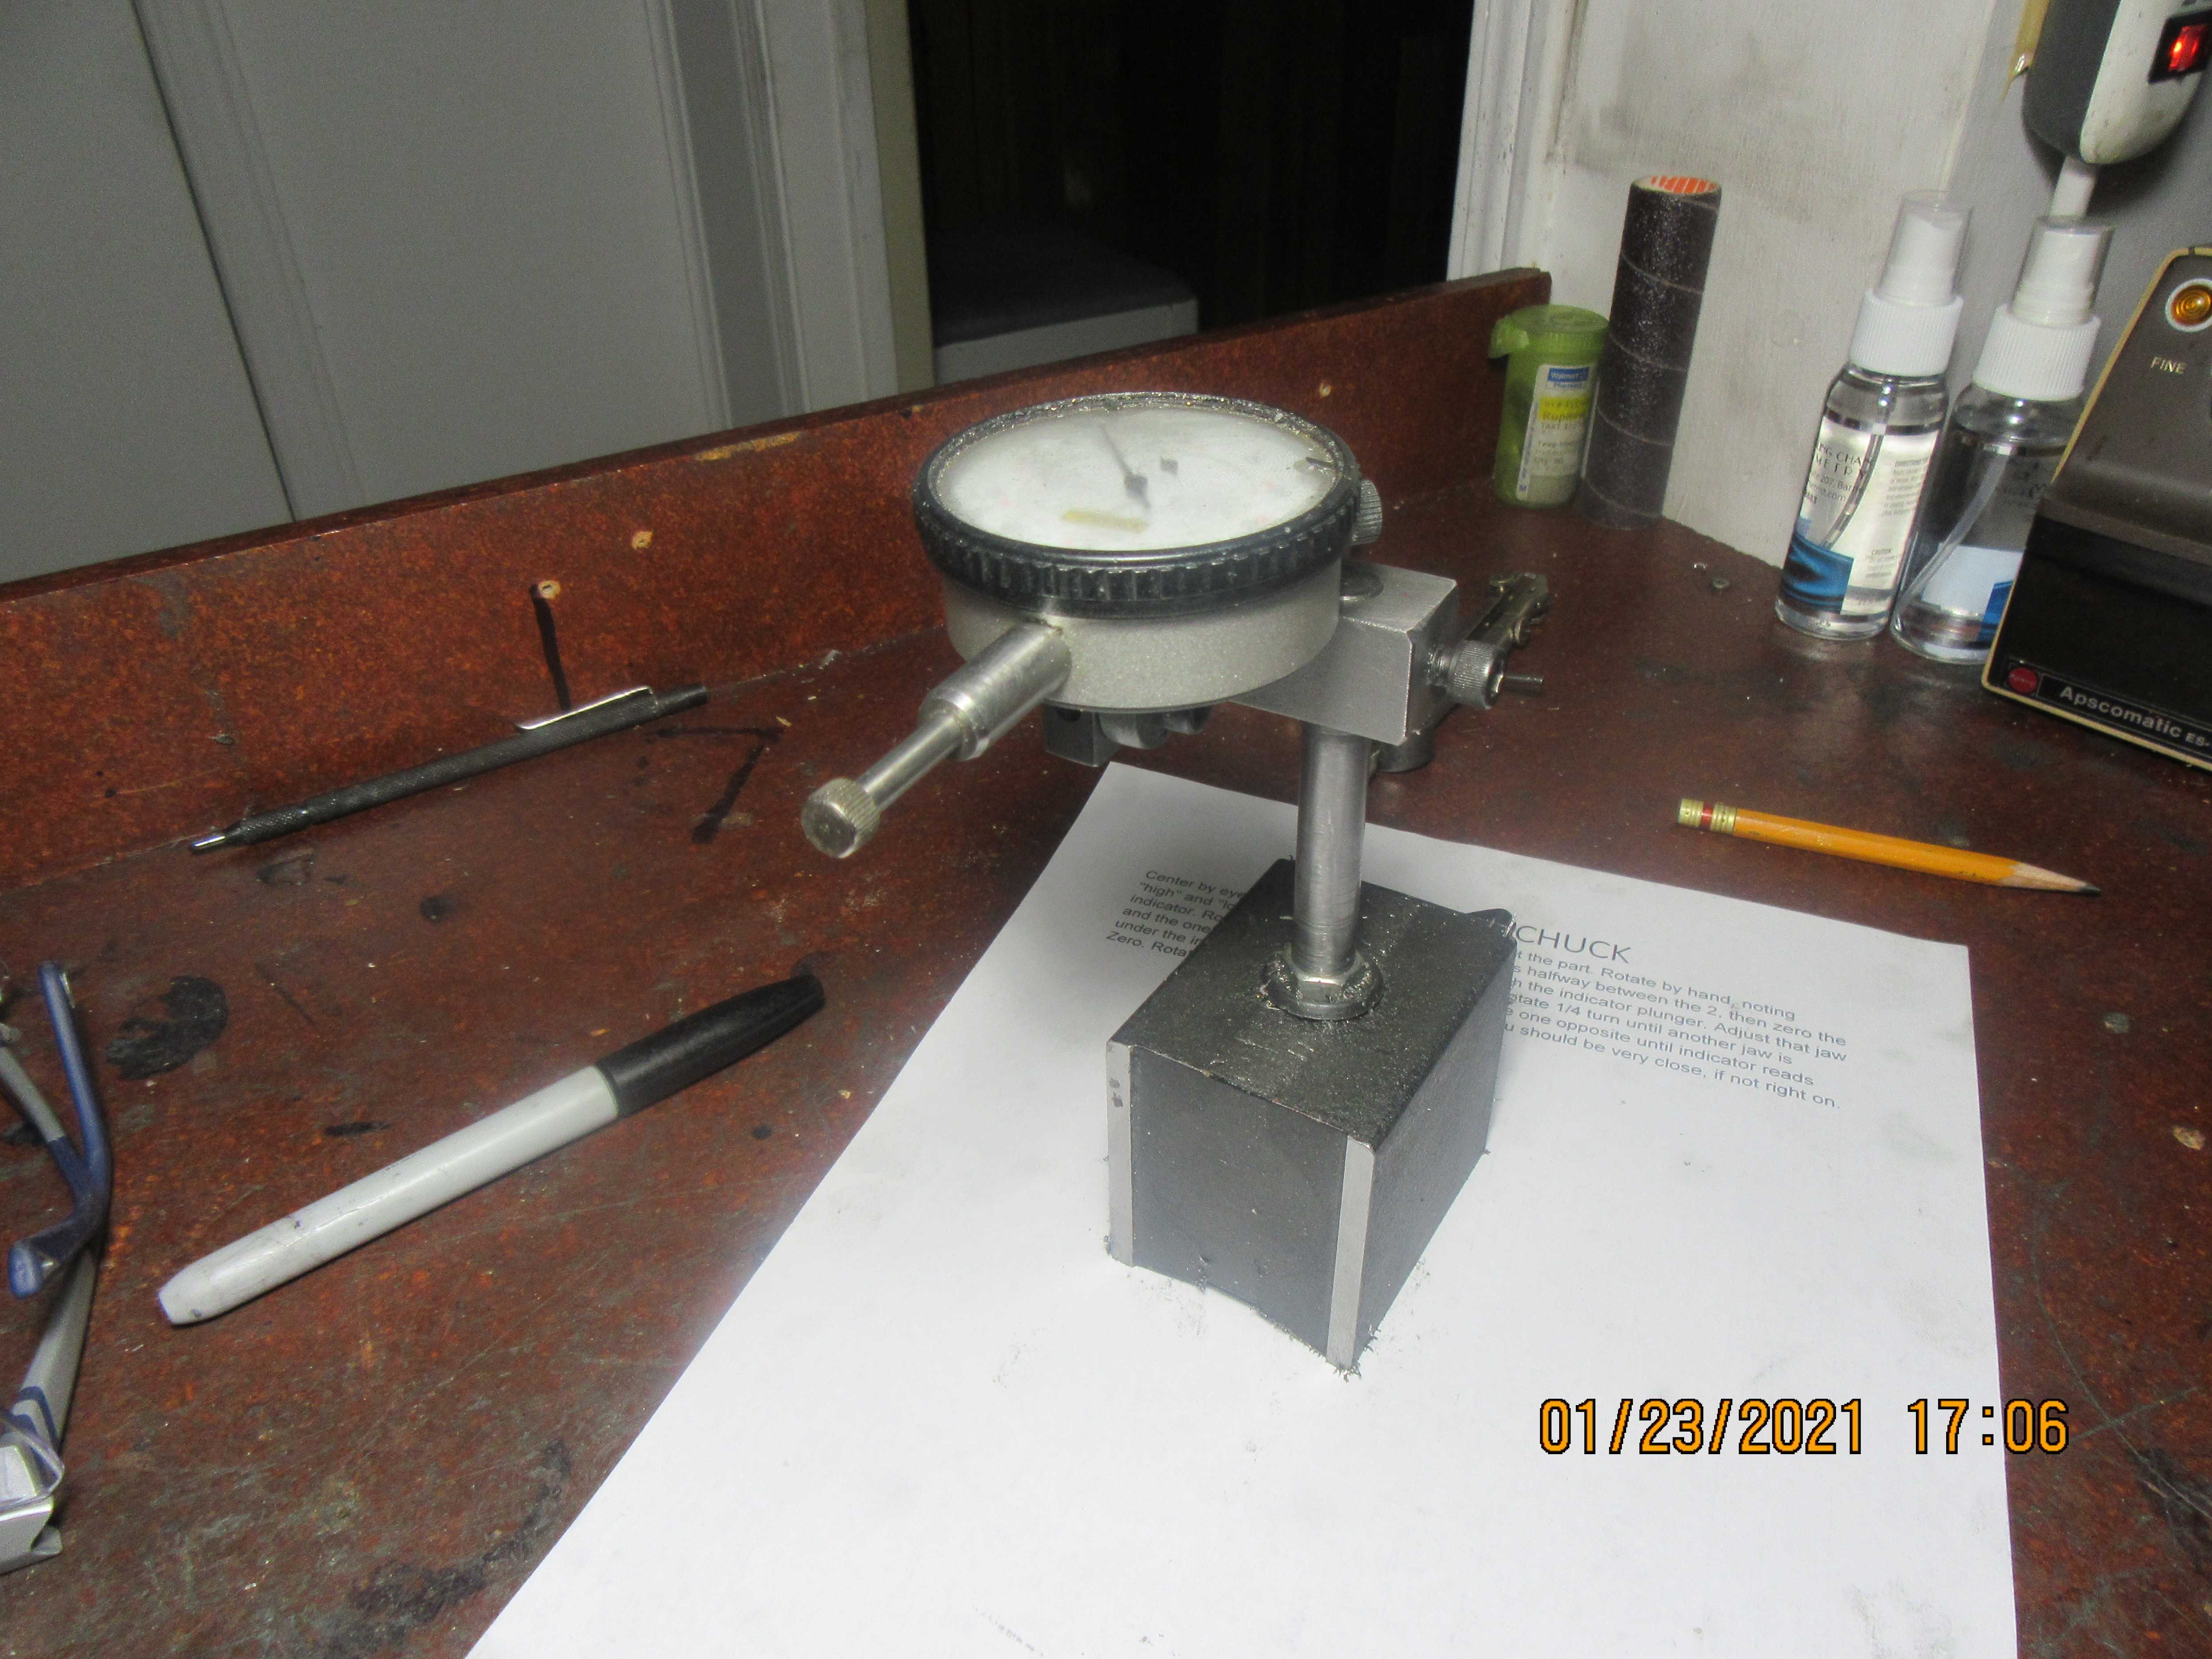
Ever since I started using a four jaw chuck, about 12 years ago, I have used a 1/4" diameter rod x 15" long with a point turned on one end. The pointed end is placed into a "center punch mark" on the piece I want to center in the four jaw chuck, and the other end is held in a tailstock mounted chuck. Then a dial indicator is brought in to bear on the 1/4" rod just clear of the part in the chuck, and the chuck is turned by hand and adjusted ---and adjusted---and adjusted---until the dial indicator reads "0" for a full 360 degrees of rotation. This method has served me well, but about 3 months ago I wanted to center a piece which had a 3/8" hole that I wanted to bore out to marginally oversize. I didn't want to use a larger diameter rod, because the larger in diameter the rod is, the less willing it is to flex. I thought about it for a while and then come up with this modification to my 1/4" diameter rod. This works great, the rod can still deflect easily, and I can center accurately on holes up to 9/16" diameter. Note that in order to do this, you can't use the typical pointed end on a dial indicator. It has to be unscrewed and replaced by a larger, flat "anvil" on the end
FmIp44.jpg

aiBdnM.jpg
 
The other week I had to centre a piece of rectangular bar in the 4-jaw chuck. A friend of mine suggested the following idea, which was a lot easier than using a DTI in the normal manner, and having to remember the cross slide dial settings.
So, I rigged up a Last Word clock in the tailstock so that the pointer was touching one side of the rectangular rod. Then back off the tailstock, rotate the chuck 180 degrees, bring the tailstock back up again and take a reading of the other side. Adjust the 4-jaw as necessary. Repeat this for the other pair of sides.
 
Often watch him with his tips. Well worth watching all his Videos. - like an apprenticeship! One of the few I can't criticise. - There are quite a lot of Good guys, but as many who I reckon "get it wrong". (I don't post videos etc. as I class myself as a "Rank Amateur"! "Rank" being something bad you can detect a mile-off, "Amateur" is someone who wasn't good enough to make money from whatever he does!).
K2
 
Ken, I more than simply agree with your sentiments and following a discussion on grinding realised that there was a risk that I for one was mixing in an aura that certainly would be unacceptable in the health and safety Regulations in the UK. In my instance I was becoming involved with contributors who had scant regard for perhaps one of the most dangerous of activities namely grinding.
So thank you for wisely raising the dangers of of our hobby.
Digressing somewhat, I was subject to long somewhat worrying aspects in English Law when one unwittingly enters the word of being an expert and consequently subject to Tort and therefore damages
 
Thanks Norman. It's a rare thing to receive a compliment like your's. We (by that I include myself) 'trained and experienced folk' oft forget that younger and less experienced folk are learning from our words in these chat lines. It is hard when passionate (and especially in discussion with experts) to remember that the stuff we leave out is often the fundamental necessities of safety and reliable and accurate working that we take for granted with whatever level of expertise we have. (That was a horrible complicated sentence! I must be an Engineer, or Doctor, or even a Lawyer!). The other thing, in videos and explanations, we deliberately leave out the guards and safety devices that would interfere with the camera shot, DTI location, or whatever.
So we make it difficult for the lesser experienced and untrained to learn about such things as Safe practice, etc.
Cheers!
K2
 

Latest posts

Back
Top