A Stothert & Pitt beam engine.

Home Model Engine Machinist Forum

Help Support Home Model Engine Machinist Forum:

This site may earn a commission from merchant affiliate links, including eBay, Amazon, and others.
I was not suggesting moving the ctrs of the engine but placing the cylinder bore off ctr of teh piece of solid rod this would keep all dimensions the same.

Cylinder flanges are 38mm dia it is the "waist" in the middle that is 28mm dia and the valve chest is a piece of rectangular stock with a 14mm radius curve cut out of it to fit over the 28mm dia. But 57 does seem rather large

Quick sketch to show how the cylinder needs to be off ctr of the stock (green circle) otherwise the corners of the valve chest won't fit.

SnP.JPG
 
Last edited:
Hi Jenny,

What a small world we live in and I also have a complete kit from Cotswold for the Stothert and Pitt Beam engine, which I managed to purchase from Jo, who may be on this site but is certainly on the Model Engine Maker site.

I have studied the drawings, all 99 of them and also have reprints of the Anthony Mount build log which I shall be using as a reference as well as monitoring your progress as you post your log.

I have just started to build a Clarkson Tandem Compound engine from castings via Blackgates and the drawings are really basic when compared to the Heritage drawings and a lot of calculations are required just to get the basics in order, and a log will follow s soon as I have something to report.

Looking forward to seeing more of your build,

Mike
 
In an earlier post I said I was building one, well I still am, I've had a lot of long term distractions but will start again soon, all the materials for the next project a Farm Boy hit’n miss is on the bench making me feel guilty!
I think your idea of machining the steam chest and cylinder as one piece is a good idea but will make it a lot more complicated. I had to buy a bigger torch to silver solder them together.
I will be following your posts with interest.
 
You could just machine the valve face as part of the cylinder to save having to do any soldering and retain the separate valve chest. This will make it easier to mill the ports and lap the port face which is hard to do down in the bottom of a cavity. If you want to make the most of the metal then saw enough off the side to make the valve chest from first.
 
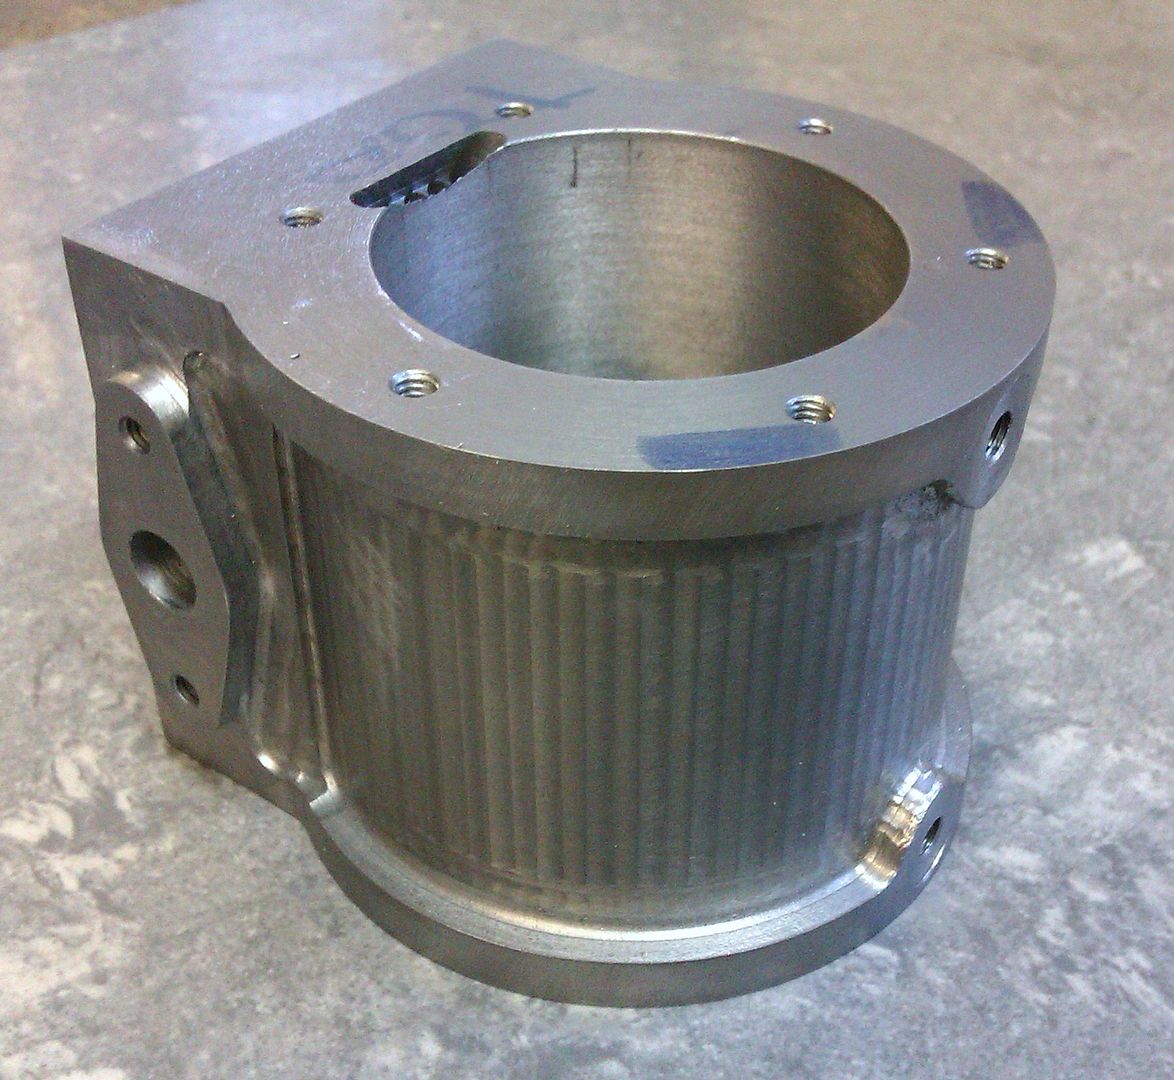
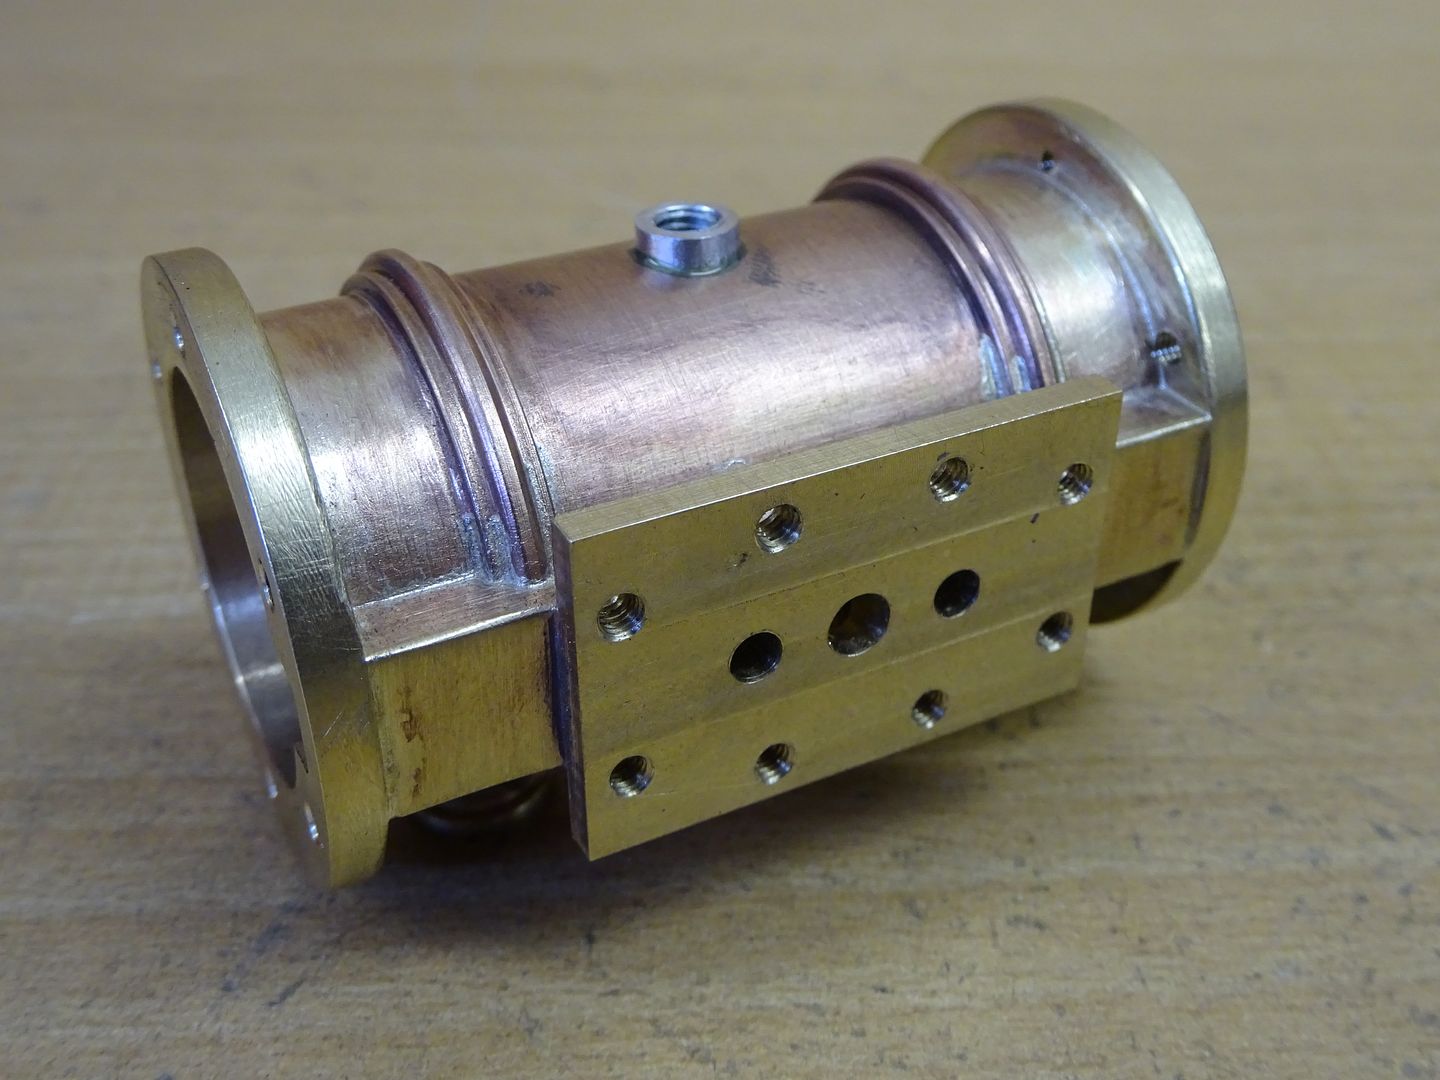
A lot will depend on whether you follow the AM drawings which show a much simplified cylinder or if you decide to make things closer to the original engine which will require quite a few undercuts and the exhaust stub to be dealt with. If the latter then a built up cylinder may be the better option though it is possible to do complex ones from solid depending what tooling you have available.

This is a solid one
IMAG3348_zpsa819cca6.jpg


And this built up is probably the closest I have done to your full size engine with the valve chest mounting onto a flange rather than the simplified solid block.

DSC01740_zpsbu9ntmdo.jpg
 
Hi Jenny,

What a small world we live in and I also have a complete kit from Cotswold for the Stothert and Pitt Beam engine, which I managed to purchase from Jo, who may be on this site but is certainly on the Model Engine Maker site.

I have studied the drawings, all 99 of them and also have reprints of the Anthony Mount build log which I shall be using as a reference as well as monitoring your progress as you post your log.

I have just started to build a Clarkson Tandem Compound engine from castings via Blackgates and the drawings are really basic when compared to the Heritage drawings and a lot of calculations are required just to get the basics in order, and a log will follow s soon as I have something to report.

Looking forward to seeing more of your build,

Mike
Thanks Mike,

I ammazed by how many people have come out of the woodwork who either have built, are building, or will build one of these. A friend of mine (Vic Frances) has a piece of bronze about the same size as the one Cotswld provided, so I decided to build this one the way the plans are drawn. But I will have the spare raw material to play with carving in the steam chest.

Today i finally started the actual work on the project. I'll ost some images when i begin to actually assemble something.

Jenny
 
CD493DC4-D545-48A9-A30C-4ADA7D2136A3.jpeg
[
CD493DC4-D545-48A9-A30C-4ADA7D2136A3.jpeg
AB0C9D8D-C35D-4C69-A7B1-E5324CD67352.jpeg
90FD0AD8-DB55-4A2C-8417-5F0BA7BF8888.jpeg


Today I finished the cylinder and valve assemblies.

So far I have completed the beam, entablature, stanchions, a working ball governor, all the “pillow blocks” (bearing housings?), and of coutse the base along with its forty some precisely located holes.

All I have left is the the eccentric, crank shaft, flywheel and all the connecting rod/ valve actuating rods and ends.

Your build pictures were a huge help, they saved me a lot of head scratching when it came to set up strategie on more than one occasion

THANK YOU!
 
Looking great so far.

Thank you!

I have replaced a lot of the aluminium parts with bronze or stainless steel, just to improve it aesthetically.

Also I have been taking them all down to an 800 grit finish. When I am ready for final fitting and assembling the model I intend to give them all a good going over with my buffing wheel and a stick of jewellers rouge.

Forgive any misalignment of parts in the photos as all of the fasteners are still loose.

Thanks again,
Jen
 
Hello Jenny. Nice Work, I'm sure you will be very pleased with the end result. I enjoyed building mine and was satisfied with the completed model. Wish I felt the same enthusiasm for my current project.
 
Thank you for the kind words. My enthusiasm comes from finally being able to see the finish line. For a while I was wondering if I would ever get it done.

This is my first steam engine so I had no idea what to expect regarding the length of time it would take me.

I think working in 1/12 scale makes everything a little more difficult. Going forward I think I will work in a larger scale.


The one thing I am really proud of is that mine will have a working ball governor instead of the nonfunctional one called for in the plans. It was tricky to make one that will work and still keep scale. I have to admit that the ball weights are a bit larger than scale to allow them enough mass to actuate the valve.

I’ll post some more when I am thru assembling the engine,

Thanks again,
Jen
 
Hi Jennifer,

Those parts look familiar :) I trust you will be ditching those screws for studs and nuts on final assembly!?
I could not bring myself to use the supplied cast one piece 'dummy' fly ball gov that came with the kit. I used the supplied plans and made one that at least 'flys'.
It will be interesting to see how you integrate it to operate the valve.
I am enjoying the de ja voo so far... Keep the pics coming!

Paul
 
Hi Paul,

What I did was made a governor that sits atop a needle type valve. As the arms move out the attached needle extends downward thereby restricting the steam flow.

I cannibalised the valve, pulley, and gears from a different governor, and combined them with the ball and arms from yet another. I had to investment cast an adaptor to mate the two and shortened the needle valve to fit the shorter overall length. I’ll add a pic below.

The whole assembly fits perfectly in the space under the entablature.

The hard part will be Engineering the drive belt from where the Cotswold original pillowblock is to where my governors pulley will sit. I’ll figure it out when I get to that part of the assembly. I am pretty sure I can just put another pulley on the inside facing end of the shaft in the pillowblock that will line up with the governors pulley.

It will mean a bit of a deviation from the original plans, but they already are quite a departure from the actual engine in Bath that I do not think it will matter.

I will have to play with the pulley size on the engine once I get it running to find the right ratio to develop enough centrifugal force to operate the valve.

The only thing I need to do is figure out the plumbing. The steam input will come up thru the base, so no problem there. The steam outlet on the valve is about one centimetre above the base. So I will need to figure out a neat way to route it to the steam chest.

Personally I like the cap screws on the cylinder head and most likely will keep them. I do have M2 allthread and nuts I could use but I think I will take artistic licence and not use it.

0CEA7348-07FC-4D49-A7EA-F80FFE4F6D26.jpeg

I’ll post more images when I begin final fitting and assembly

Jenny
 
I am not sure if any of you guys are still using this forum but here goes: i just started building one of these kits that i purchased from Cotswold Heritage. it is practically a scratch built model. they provide a few castings, but 95% of the kit is just sawn metal bits. the beauty is the highly detailed full size drawings that come with it. about 105 pages with 98 drawings.
i do not have much to show yet, but give me a month or so and i will post some picures.
have any of you built one since this thread began some years ago?

Jenny
How are you doing on your build of the of the Stothert and Pitt engine?
Nelson
 
Hi Nelson,

I am about a week away from assembling the engine. For the last few months I have been busy making all of the parts. I have about a dozen of the small bits to make. Mostly linkages and fittings. At that point it will just be fitting and polishing all the parts.
So I should have a finished model by the end of February.

Jenny
 

Latest posts

Back
Top