A Ringbom engine

Home Model Engine Machinist Forum

Help Support Home Model Engine Machinist Forum:

This site may earn a commission from merchant affiliate links, including eBay, Amazon, and others.

DavesWimshurst

DavesWimshurst
Joined
Dec 7, 2008
Messages
102
Reaction score
3
A couple of years ago I built a Ringbom engine. It is a variation of the Stirling which uses the internal pressure variations to move the displacer piston. The oversized piston rod provides enough piston area to lift a light weight displacer piston.

A quick video


Dave
 
Dave

Great running little engine, also looks great. You can definitly be proud of that one. :bow: :bow:

Cheers

Don

 
Nice work! :bow:

I've never built a Ringbom, although I thought about it a bit during my last Stirling phase. Yours will be the one I copy. ;D
 
A little more info that I wrote in response to a question on another site.

I followed Dr Senft's procedures in his book "Miniature Ringbom Engines".
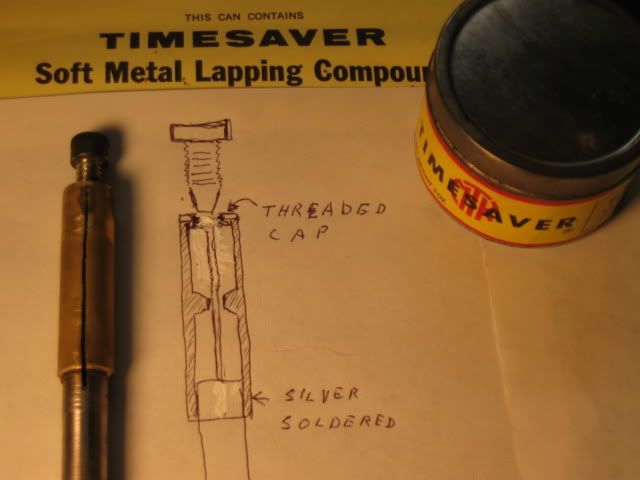
There are two critical fits involved, the power piston and cylinder and the displacer rod and bushing. The power cylinder is brass and the final finish was by lapping using a non embedding compound (Timesaver brand) and homemade expanding lap:

IMG_0457.jpg


The piston is graphite as used for EDM machining, it was turned to a very close fit. The displacer bushing is also graphite bored to size and the outside grooved for epoxy to hold it in its housing. The piston rod is stainless steel drilled to make a thin walled tube, I believe there is a piece of scrap where the drill came out the side from not clearing the drill often enough. :bang:
The outside is turned and polished to a very close fit in its graphite bushing. In fact if it runs for more than about five minutes the rod has heated enough to expand and stick stopping the engine. After cooling it's fine again. It's a great little engine to take to our weekly "Techie dinner". The restaurant is used to us by now! :lol:

Some time I'll get my act together enough to do a project, I've only had my camera for a few months and am still not used to having it in the shop on a daily basis, maybe I need :poke:

Dave
 
DavesWimshurst said:
The piston is graphite as used for EDM machining, it was turned to a very close fit. The displacer bushing is also graphite bored to size and the outside grooved for epoxy to hold it in its housing.

:bow:
Nice! I've wondered about using POCO 3 electrode graphite for years, but never tried it, thinking that it'd be too abrasive.
It sure wears carbide tooling out. :-\
 
Vernon,
The graphite rod I used was purchased from McMaster Carr several years ago. The grade and source are unknown to me but I believe the closest current listing is called high temperature conductive graphite. Whatever it really was I didn't struggle too much with the machining. I used high speed steel honed sharp for the final passes. Dr Senft mentions in his book various sources of graphite such as used by welders to block off holes. Some were found to be too abrasive to use.
He does however recommend EDM grade graphite. There may be some grades engineered to last longer in EDM applications that won't make good pistons. If I had some available I would probably try it and see.
I hope I didn't confuse the issue more.
Dave
 
Thanks for the info!
At work, we do a LOT of EDM, and I do all of the electrode work, creation of new electrodes, and constant redressing of the old ones. Mostly it's a pushbutton job now, I've set up multiple fixtures so I can load up a machine with several hours work, and go on to something more exciting.
My point is, that it takes a while for carbide tooling (2-flute indexable ball mill, 3 flute conical ball-nose endmills, etc.) to wear out, but it does happen regularly, in around 30 hours of runtime.

What size of graphite lump do you want? ;D
 

Latest posts

Back
Top