A few extras from Blogs workshop

Home Model Engine Machinist Forum

Help Support Home Model Engine Machinist Forum:

This site may earn a commission from merchant affiliate links, including eBay, Amazon, and others.
Joined
Dec 26, 2008
Messages
3,693
Reaction score
678
Location
Crewe, Cheshire, UK
This is just a few pictures and text to show how easy some things are to make or purchase at very low cost that make your machining a lot easier.

As you know, I use interchangeable tooling between my lathe and other machinery.

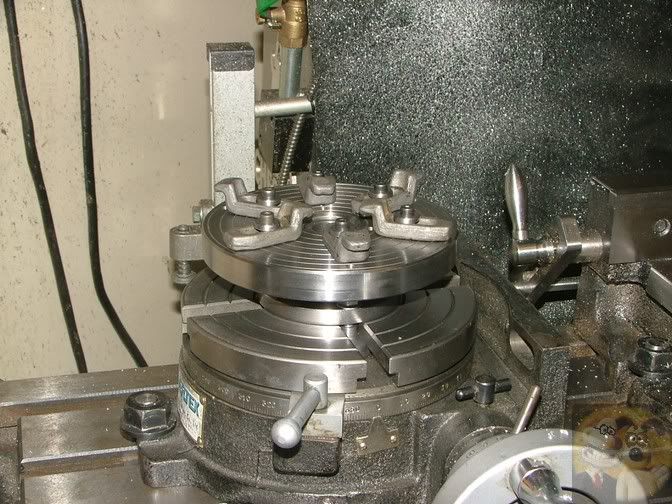
This is where I bought a cheap Myford backplate (about 15 pounds), Mounted it up onto my RT and drilled (using mill) and tapped (using a battery operated drill) a load of 6mm holes in it, then refitted to the lathe to face it off and put the aligning rings on.
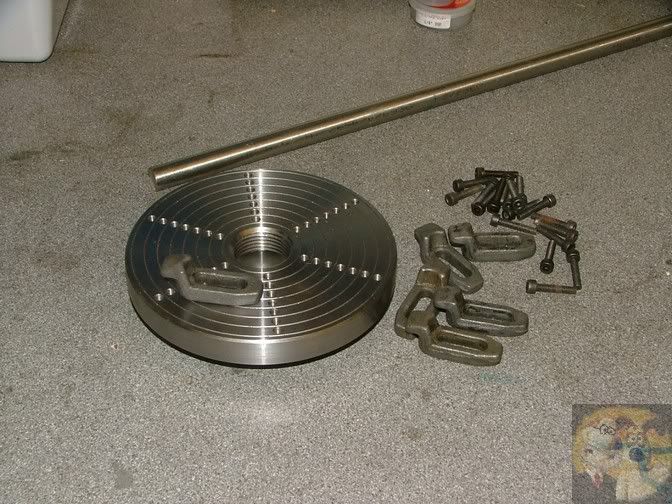
clamp01.jpg


Bought a few swan neck clamps (they fit both ways up so can clamp both thick and thin material) and made some top hat spacers for them so that they would fit the 6mm holes I had drilled in the faceplate.
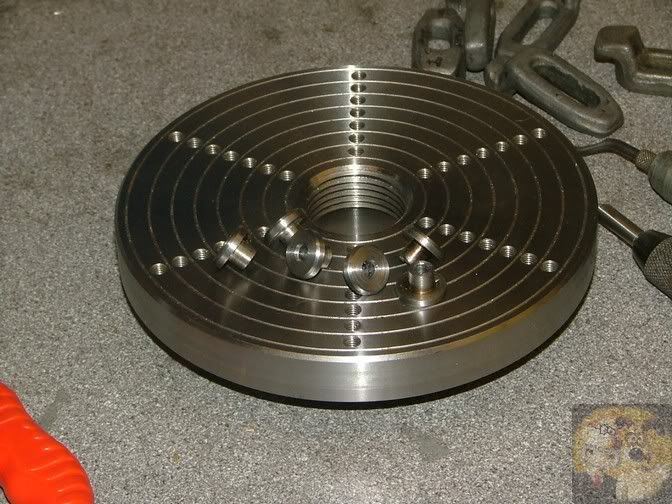
clamp02.jpg


Full Monty mounted up onto the RT, ready to clamp almost anything down to it, in almost any position.
clamp03.jpg


+++++++++++++++++++++++++++++++++++++++++++++++++++++++

How often have you needed to cut a load of fins, all the same thickness and distance apart.
I now do most of that on my mill or RT, as it is much easier.

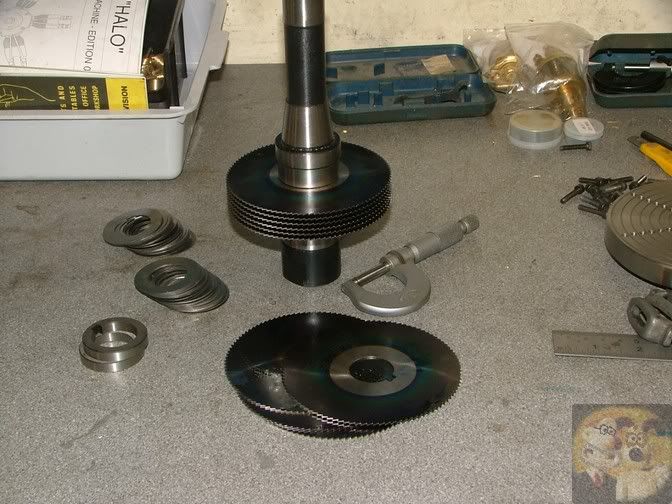
Over the years, I have amassed large quantities of slitting saws, mainly from large tool suppliers who are getting rid of old stock at ridiculous prices.
So then it is easy to buy cheap precision spacers to go between the saws.
Slitpack01.jpg


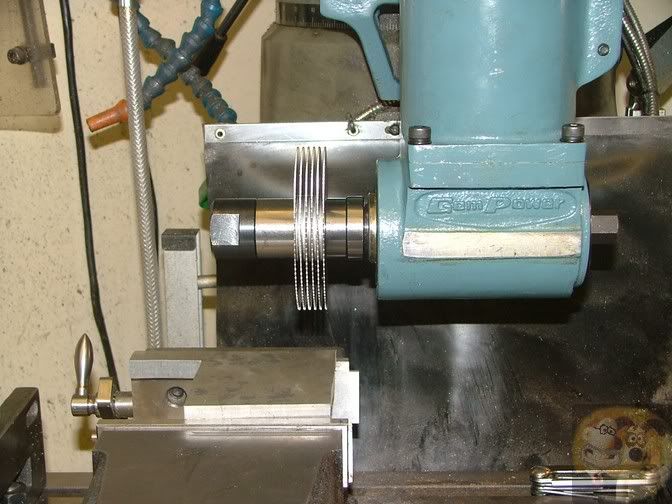
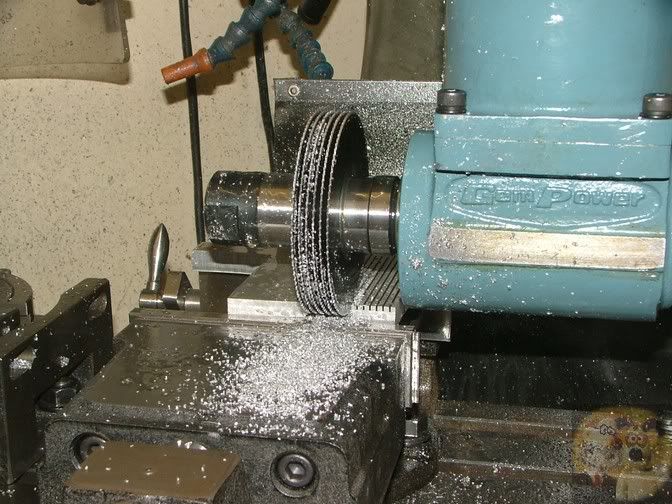
If you take things steady, a round or square cylinder can easily be mounted onto your RT, and just by turning, all fins can be cut in one go.
Or if you want to cut fins along say a head or crankcase, this would be the way to do it.
Slitpack02.jpg


Slitpack05.jpg


To make wider gaps or fins, you can gang up the spacers or cutters to whatever you need.
+++++++++++++++++++++++++++++++++++++++++++++++++++++++
If ever you are going to do tapered turning on a lathe, where the piece part is held between centres, then you must invest in a couple of these.
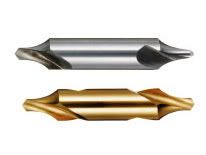
Center-Drill.jpg


Unless you have ball nosed centres, your centres will never sit correctly into the ends of your piece part. You have to visualise this, these cut a curved sided centre hole, allowing your normal straight nosed centres to be supported all the way around, which they won't do if normal centre holes are used, they will be at the wrong angle.

If you want any more, just let me know.

John
 
Thanks for those tips, John.
I liked the one about the slitting saws and spacers. How do you prevent the wobble on the saws (not a bad arbor, just wonky saws that are British made - Wolferson e.g.)

Dave
The Emerald Isle
 
.


If ever you are going to do tapered turning on a lathe, where the piece part is held between centres, then you must invest in a couple of these.

Center-Drill.jpg


Unless you have ball nosed centres, your centres will never sit correctly into the ends of your piece part. You have to visualise this, these cut a curved sided centre hole, allowing your normal straight nosed centres to be supported all the way around, which they won't do if normal centre holes are used, they will be at the wrong angle.

John

For those on the other side of the pond these are also called Radius type center drills. I would like to find a distributor that carries them in a set of 5 sizes like some do with the standard type.
I did find one in the 1/4" size for about $8 US, but shipping was more than the tool!


Chuck
 
I purchased mine many years ago from MSC when they were having a clear out, both 1/4", and both still good as new.

Unlike normal centre drills, which when run straight have full contact with the angled sides, radius ones only touch on a ring around the inside of the centre hole, so I have found that just the one size will cope with all size centres up to 3MT, never had to use any larger.

This now seems a reasonable place to buy them in the UK

http://www.drill-service.co.uk/Tools.asp?Tool=040020180000

Dave,

I don't have any what you call 'wonky' saws, if you mean side to side movement on the tips of the cutting edges, but ALL my saws go in and out on the edges because or the way that they are ground, even if I regrind them myself.
As you can imagine, when they cut say 60 teeth, the first tooth ground will be to exact size, the ones at the end will be using a worn grinding wheel, so wouldn't be cut as deep. That is why you always touch on for depth setting with the saw turning, so it always sets up on the tooth that is sticking out the furthest.

All I can suggest for yours, if they are twisted slightly, is to get them surface ground on their supposedly flat faces, but not using a mag chuck, but double sided tape. Using a mag chuck will pull them flat, and after grinding, they will return to their original wonky shape. You stand a chance of getting it right if double sided tape is used.

I don't have any trouble with sideways deflection, I think mainly because I take things very steady and slow when using thin slitting saws, it is when you start to push them a little that they start not to follow the line.

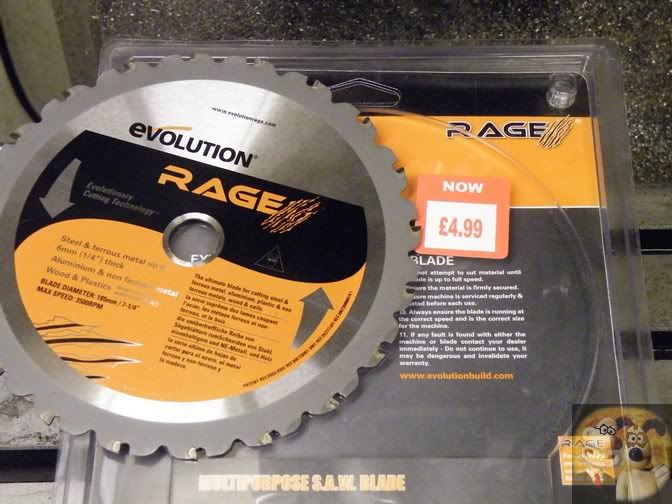
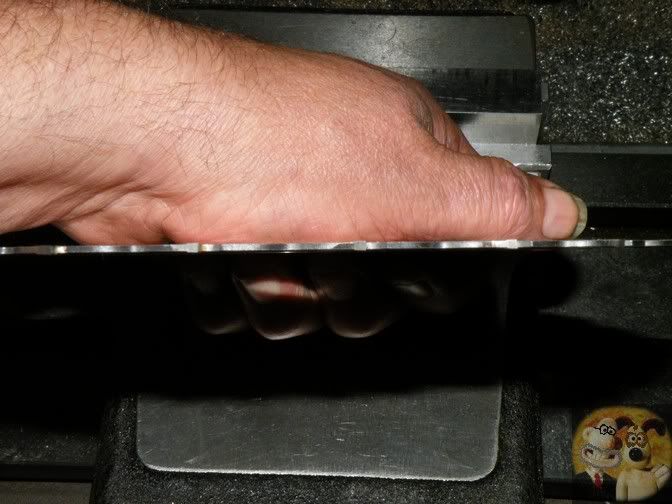
If you are just using them for cutting lumps off, then I would suggest you pick up a small 'Rage' saw blade and use one of those. Fairly thin and very rigid, but care must be taken not to feed too fast as you will fall foul of the Rage design.

Rage3.jpg


Rage2.jpg


Rageslit3.jpg


Hope this helps

John
 
I take it that you believe drilled and tapped holes in the face plate are as good as T-Slots? It does make me question their value in sat a rotary table. I like drilled and tapped because they are easy for the tools I have at the moment. I'm just wondering if they are a good idea
 
It is like everything we do, is it strong enough to hold the parts in situ while it is being machined?

"question their value in sat a rotary table"

I don't understand what you mean.

T-slots are fine for a lot of work, unfortunately at times they are a little coarse for what needs to be done, you just can't get enough hold down points to secure a smallish part correctly, this is where small clamps come into their own, and yes, for the type of work they are doing, they are plenty strong enough.

If it is a 10 pound lump of irregular shaped cast iron, then no, but something weighing a lot less and a lot less bulk, then yes.
I wouldn't use it to run up to 2K rpm on a lathe, but up to 2 or 3 rpm on an RT I would.

Common sense must prevail, and if that is missing, this shouldn't be a game that should be played in.


John
 
Of course, John is right. For what it worth, I once converted a 918 lathe( with a Myford nose) to take the other Myford bits by adding nothing more than a steel subtable on the saddle, tapping for the 3 holding down bolts and another part with 2 tapped holes to take the vertical slide.

It's not unique or anything, EVERY model engineer had a 'steel' lump or TWO steel lumps peppered with assorted drilled and sometimes tapped holes. One of these lumps was expendable and thrown out when too many 'perforations' were created.

Sadly, many of today's workers either don't or won't find out- how it was done.

I'll get me coat:hDe:

Norman
 
You are quite right Norman, no need to put your coat on just yet.

Holding plates, jig plates, sacrificial plates all come under one heading, HOW TO GET THE JOB DONE!!

If it achieves what you are aiming for and does it safely, then it is correct.

Talking of safety, a few years ago, near where I live, a very experienced motor cycle engineer, who machined parts daily, mounted up a lump of steel on his lathe faceplate and correctly balanced it. He switched the machine on and the part came loose and flew off, straight into the centre of his chest, he was dead before he hit the floor.

There was great debate on this during the next few weeks and we all came to the same conclusions, he had become complacent, caused by his experiences of always doing things right, but this time, he hadn't selected the correct speed for the job, it was way too fast, and also by not checking and double and even triple checking his mounting, it caused an avoidable death.
I said death, not accident, because accidents don't happen, they are caused, they don't just occur by themselves.

That is the sermon for today, if you are going to do something in your shop, like I have shown, make sure it is safe to do so first.


John
 
Tapped faceplates worked well enough that Hardinge made several styles of them. This is a photo of a 9 ilnch diameter one copied from eBay just so I did not have to take a photo of mine. I also have a 7 inch diameter Hardrige that has a set of Tee slots plus 16 tapped holes. Each has their uses and like any other tool must be used for the correct reasons and within their limitations.
Gail in NM

Hardinge faceplate.jpg
 
Here is something that might appeal to a few of you. This is aimed at steel and above only, not for soft materials.

Diamond impregnated tools are not a modern day thing, I was using them in the early 80's, and they were about long before that, mainly for precision sharpening of tungsten and HSS tool bits.

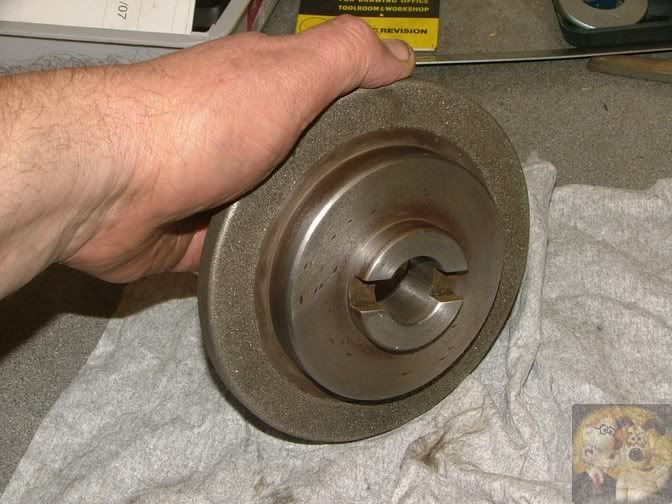
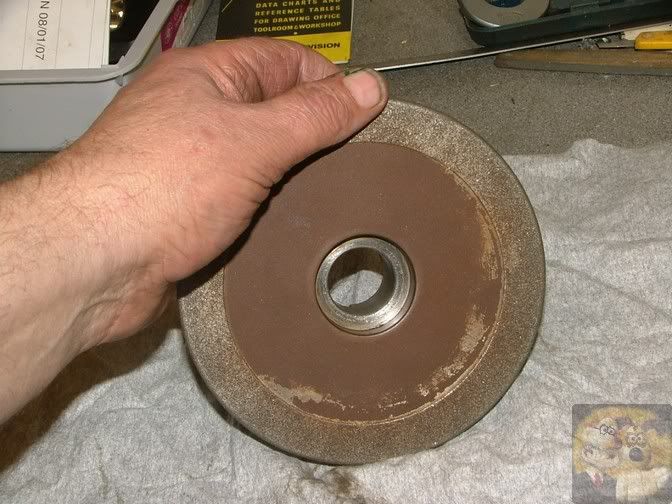
I picked up one of these, a diamond impregnated lapping disk that was mounted onto a machine similar to an offhand grinder, just single ended with water cooling and a 'wobble' table that allowed side to side movement of the tool bit. A machine really of no use in a model workshop, but this plate gave me a good idea.

rufcut2.jpg


rufcut1.jpg


What if I could mount it horizontally onto my mill, could it be used to smooth off undulations or machine marks on jobs I had done, or could it make the surface as smooth as if it was done on a surface grinder?

Only one way to find out.

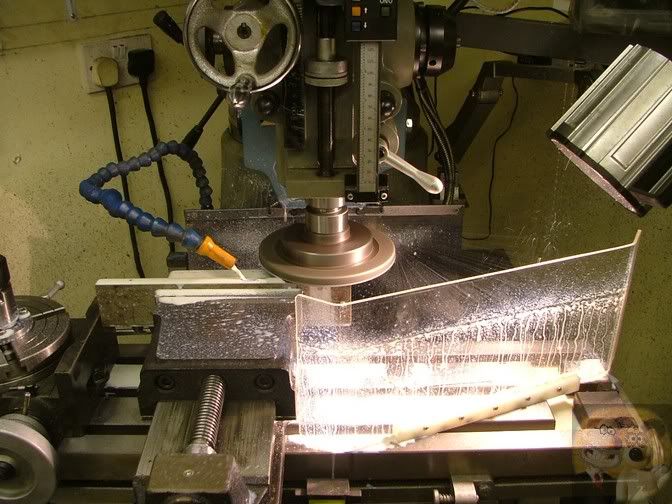
Get it mounted up onto an R8 mandrel and try it.

millgrind1.jpg


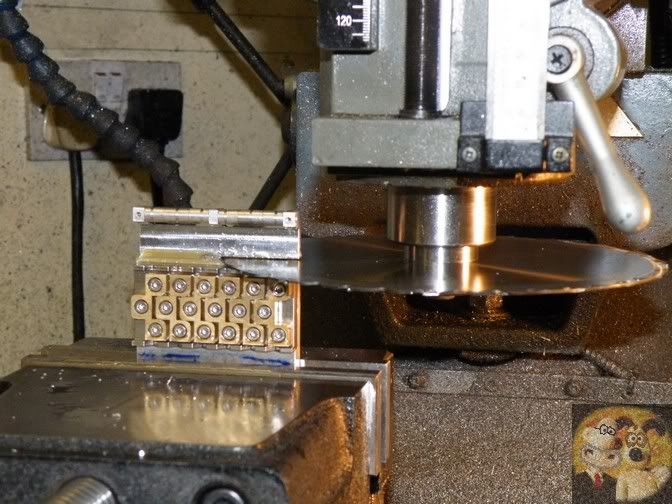
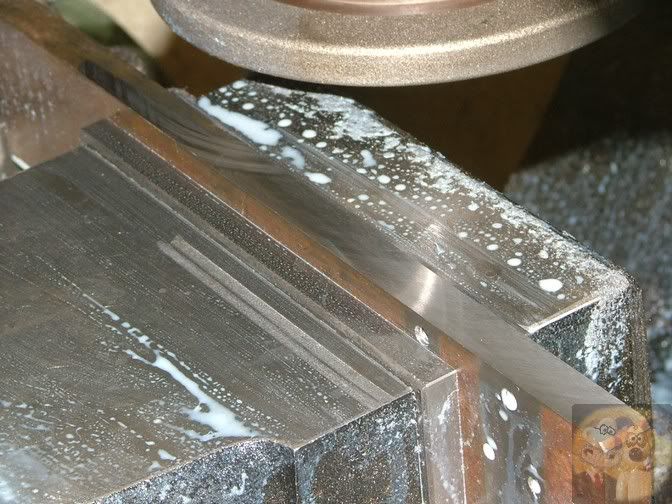
With flood coolant (one of the few times I have used it) and a 2 thou cut, it made this piece of rock hard steel come out with a mirror finish.

millgrind2.jpg


I have come up with an easier way of doing this, but need to find the parts I bought to do it so I can take some piccies if anyone is interested.

John
 
No intention to steal what is an important venture. Might I add a little to the tee slot and hole drilling practice?

I've always been interested in this Martin Cleeve way of doing things. If you have chunks of metal and a way of joining them, thing.

Cleeve hadn't a mill- only half a lathe. He was no stranger to peppering lumps of metal but he used to fabricate Tee slots. O ne of his party pieces was a tee slotted thing to fit onto a lathe saddle. It appeared in Engineering in Miniature and Blackgates Engineering sold bits to make it. However, he also made several tee slotted lathe faceplates by bolting 'quadrants' of metal to an existing faceplate.

Of course, apart from holding bits of metal for machining on the faceplate but it holds bolt on lathe tools and such to sweep face stuff on the saddle,

I'll get me coat

Thanks, John.

Norman
 
Just pointing back to my last post about a large diamond lap.

I have bought a 6" backing plate

http://richontools.com/index.php?ma...description=1&keyword=backing+plate&x=12&y=16

And a couple of the six inch lapping plates from there as well

http://richontools.com/index.php?main_page=index&cPath=1_9

These are held together with small magnets inserted into the backing plate and used in much the same way as above.

I also have designed a water dipped lapping machine that uses the same items to resharpen the indexable tips that we all seem to use. Trial results look very promising, with as many as four resharpens before the tip is discarded. Just got to get the tank sealed and the electrics safe, and the time to do it all.

John
 
John May I humbly ask- because I have a small collection of diamond wheels. Not for 'surface grinding' but came from spectacle lens grinding stuff.

What speed did you use, please? I assume that yours are 6" but I can still do Pi. I think.

Regards and thanks

Norman
 
Norman,

I actually run mine at a very slow speed, approx 60 RPM, purely because I don't want to overheat anything.

The outside edges on the faces of these plates can reach a fair surface speed.

I also have a full set of the bonded rubber ones that can cope with curved surfaces as well, and they can be run a little faster, but not much. I use them with a battery drill or air powered screwdriver. Great for removing and blending corrosion divots out of curved faces in hard materials.

John
 
From what I guess, it is very like doing surface plates by hand.

Actually I have a rubber abrasive wheel- and far too many bits of steel that have corroded- when my roof blew off.

So my thanks for most interesting information and help.

Norman
 
John
Going back to the wonky slitting saws... I solved the problem by using larger diameter backing plates so that less of the blade was unsupported. I just wondered whether I was the only one with wobbly saws 32 thou or so; thicker ones no problem.
I'll have to look into the Rage saw thing.

Dave
The Emerald Isle
 
Dave, glad you got your wobbly bits sorted, could have been painful, the only problem with your solution is you are restricting the depth of cut.

As I said about the rage blades, you have to be careful of their design.

If you look at the blade layout, between each tooth is a sticky up bit that prevents the blade digging in too deep so making sure that the tooth load isn't exceeded. As you know, they are designed for hand powered feed in a chop saw motion, and those extra bits push the blade off the job if you push down too hard, hence when in use, they bounce your hand up and down.
When you power them through a job as I do on the mill, you must make sure that the feed isn't too fast otherwise it will just jam up on those lift pieces.
Other than that, they cut almost any of the materials we use with ease, especially steels and cast iron, and they are cheap enough to throw away when they get too blunt. They are designed to cut so many hundreds of feet of different materials before they become too blunt and so unusable.

John
 
Here are a couple more not generally seen R8 items that I have picked up over the last few years

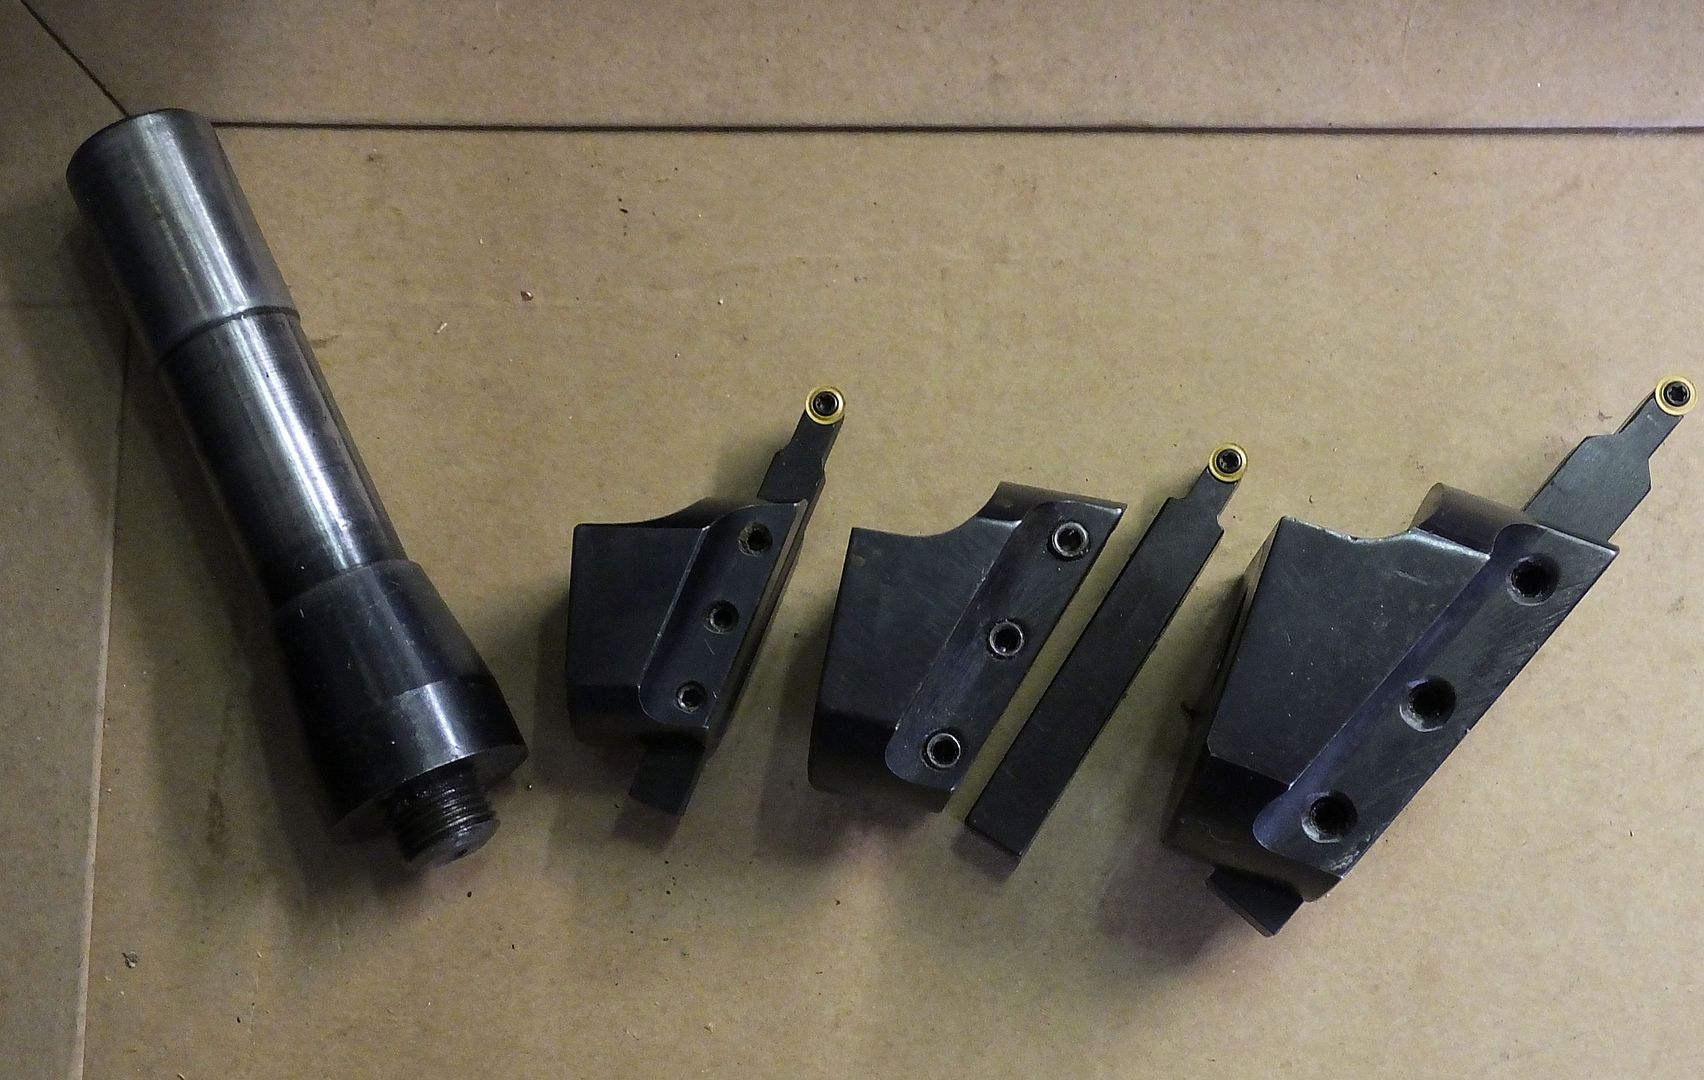
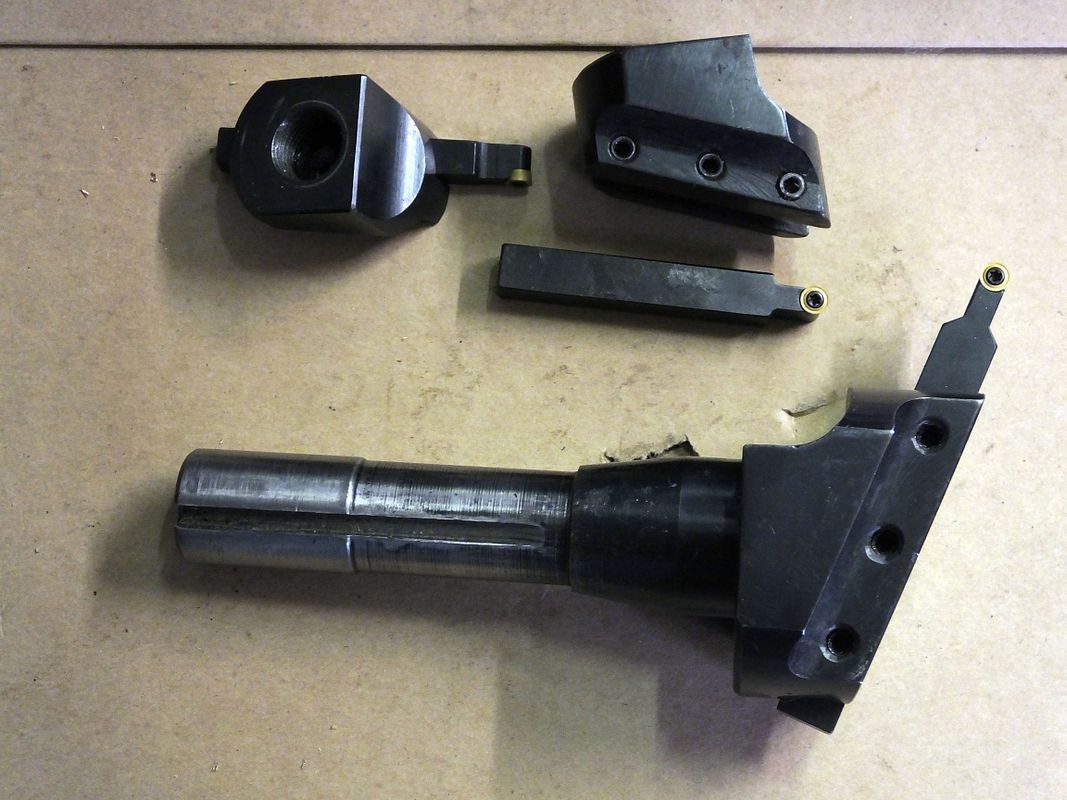
This first one is a flycutter with interchangeable heads. I haven't seen them advertised for a long time, but with the correct type of equipment, I am sure a set could be knocked up fairly easily. It takes only seconds to change the head size while still mounted up in the quill.

DSCF6170_zpsna3yihby.jpg


DSCF6172_zps3r61secf.jpg


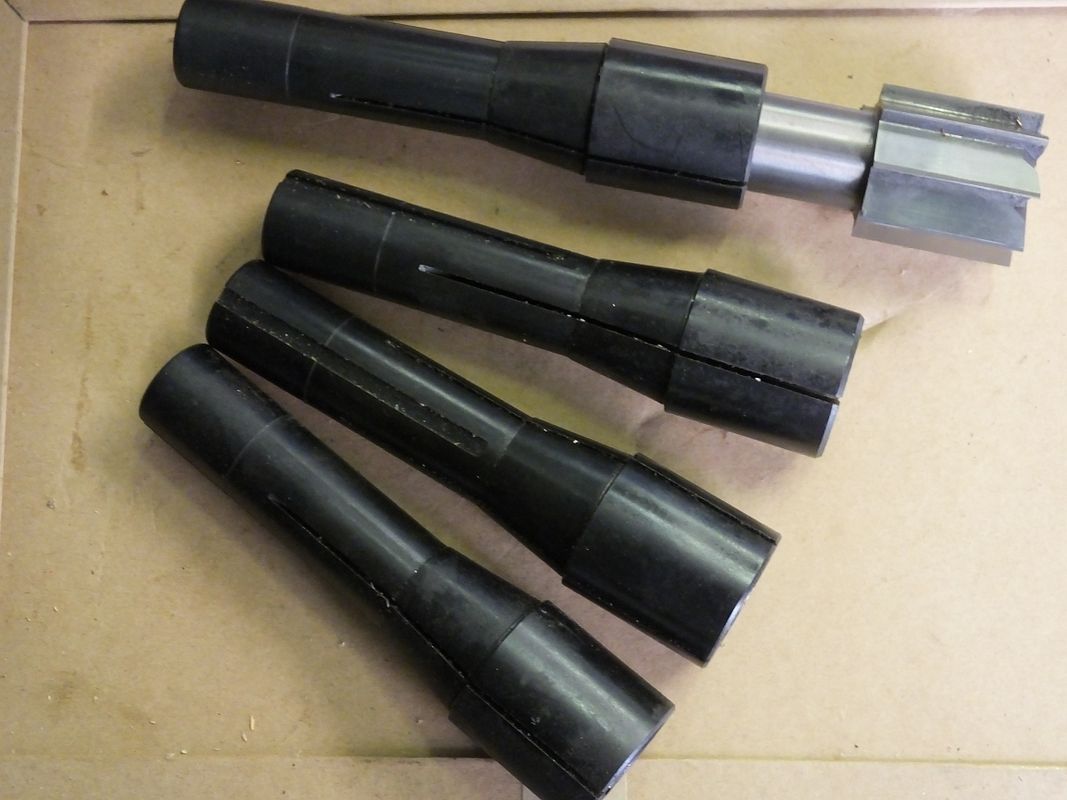
It was because of the need to make my own tooling that I made an R8 holder so that if needs be, I could machine up the end of a blank end R8 mandrel.
http://www.homemodelenginemachinist.com/showthread.php?t=24125

Over the years I have been given many milling cutters from industry (mainly solid tungsten) that were just too large to fit my normal spindle collets, max sizes of 7/8" or 22mm.
These items solved all that, they allow larger cutters (up to 1 1/4" shank) to be held OUTSIDE of the quill. Not ideal, but as long as cuts are kept within reasonable limits, they work absolutely great.

This cutter, because it could not be held by any other means, would normally only be good enough to be thrown away. Now it is one of my main metal munchers for removing large quantities of the hard stuff.

DSCF6175_zpsf3hq2lsi.jpg


John
 
Last edited:

Latest posts

Back
Top